 Skip to content
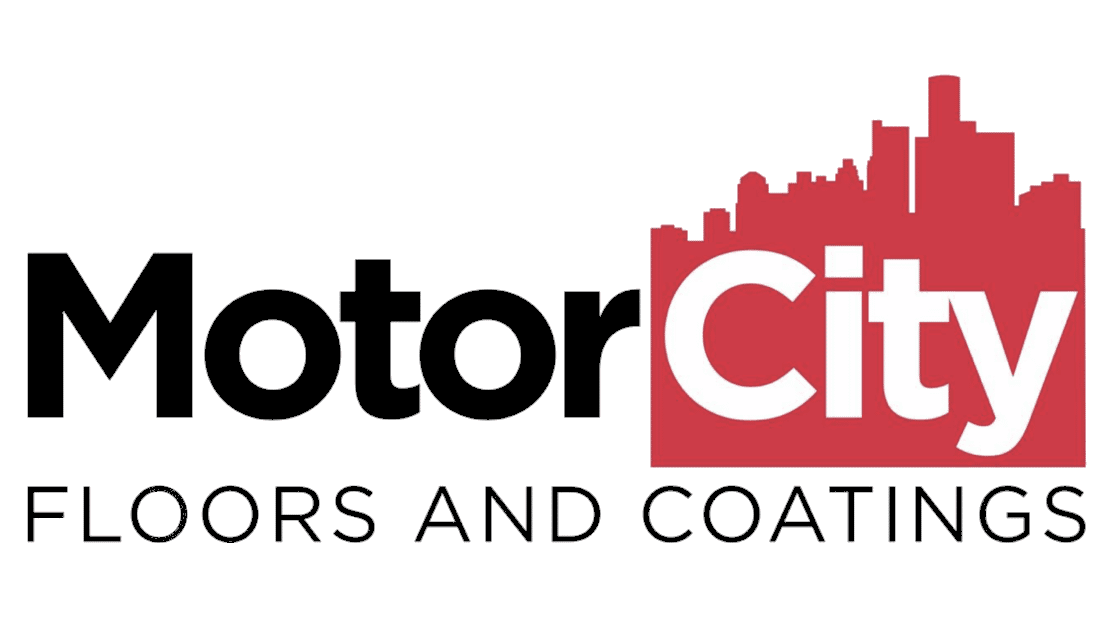
Polyurea Garage Floor Coatings in Ann Arbor, MI
QUESTIONS? NEED A QUOTE?
Upgrading Garage Floor Coating in Ann Arbor with Polyurea-Polyaspartic Coatings
On this page, we document 12 projects of garage floor coating in Ann Arbor, MI. Our dual-coating systems have converted worn concrete slabs into durable, attractive garage floors. Ann Arbor is a Washtenaw County city with a varied housing stock—from historic neighborhoods near the university to established residential streets with decades-old homes.
Many of the properties where we apply our polyurea-polyaspartic floor coating systems had accumulated the wear and tear of the harsh climate of Michigan. As you will see in these 12 case studies, our garage floor coating specialists work with concrete slabs in a wide variety of conditions: some needed only standard surface preparation. Others required significant remediation—oil extraction, moisture barrier application, and crack and pitting repair—before the polyurea and polyaspartic coats could go down. We describe the process and results, and include the before-and-after photos for each job.
Ann Arbor Garage Floor Coating Case Studies
These 12 case studies carefully document the condition of the concrete slab, the challenges we encountered, and the steps our crew took to prepare and restore the concrete slab before applying the dual-layer system. Each project reflects a variety of conditions to be addressed, and show the consistent quality standards MotorCity Floors and Coatings applies to every installation.
Quality Garage Floor Coatings
Winter road salt, freeze-thaw cycles, automotive fluids, and daily vehicle traffic degrade unprotected garage concrete over time. The damage typically appears as oil staining, cracking, and surface pitting.
Several of our jobs of garage floor coating in Ann Arbor involved concrete with persistent oil contamination penetrating deep into the slab—a condition that grinding alone cannot resolve. Polyurea-polyaspartic systems provide reliable protection against these conditions and deliver an appearance that bare concrete or epoxy products cannot match.
NEW Garage Floor Coating
on Brackley Drive
Brackley Drive — Ann Arbor, MI
Project Overview
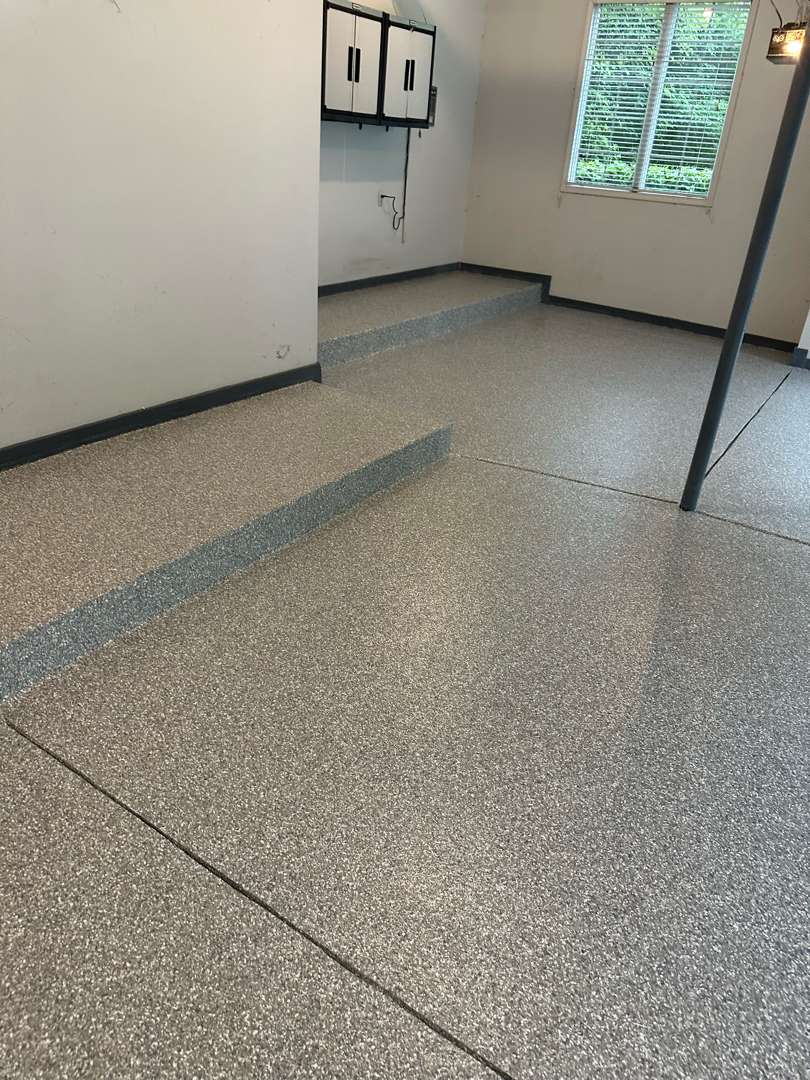
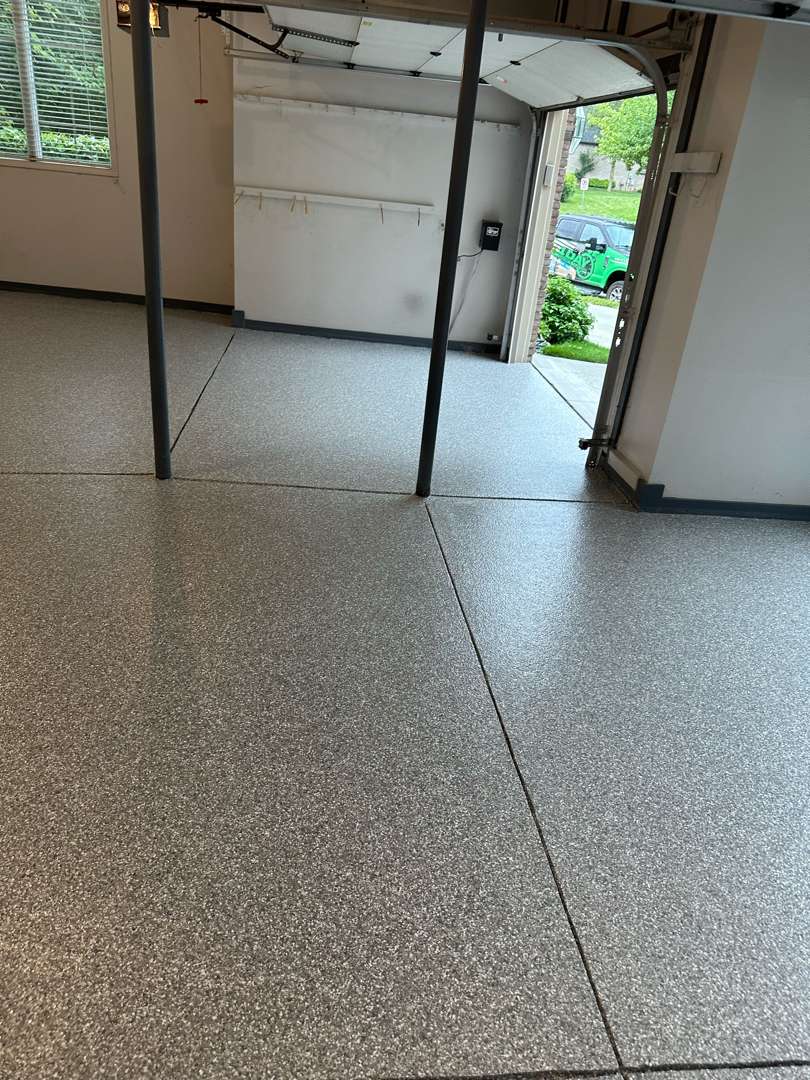
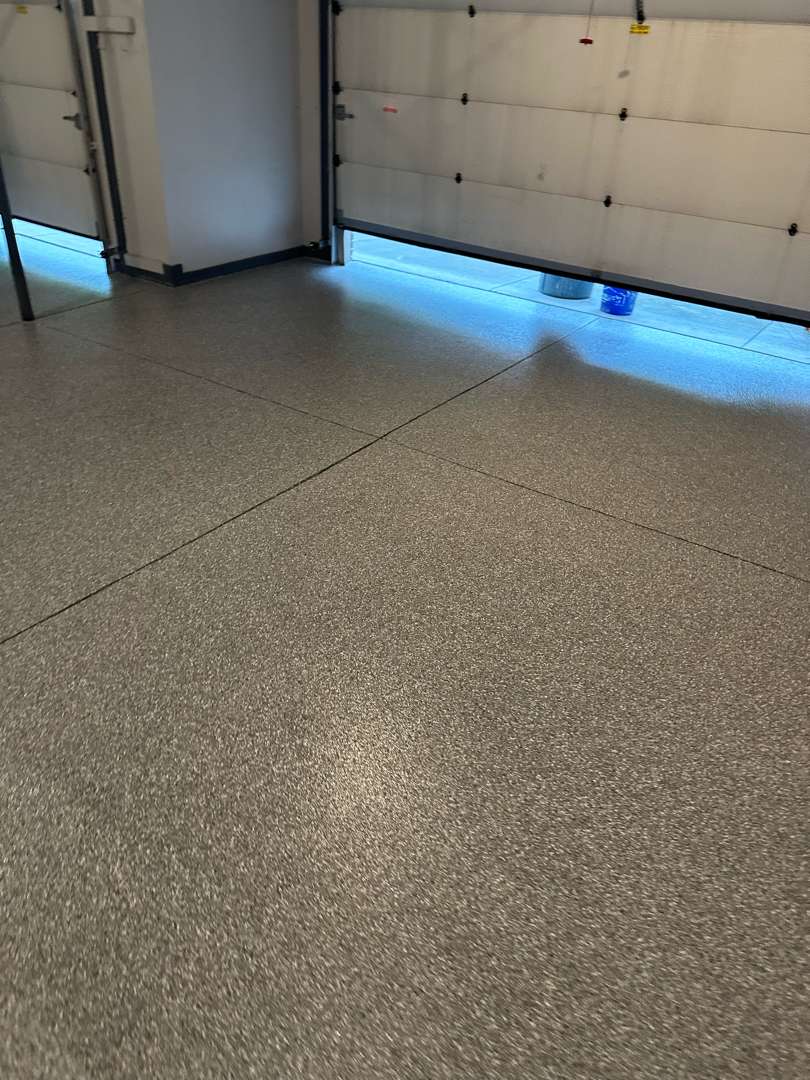
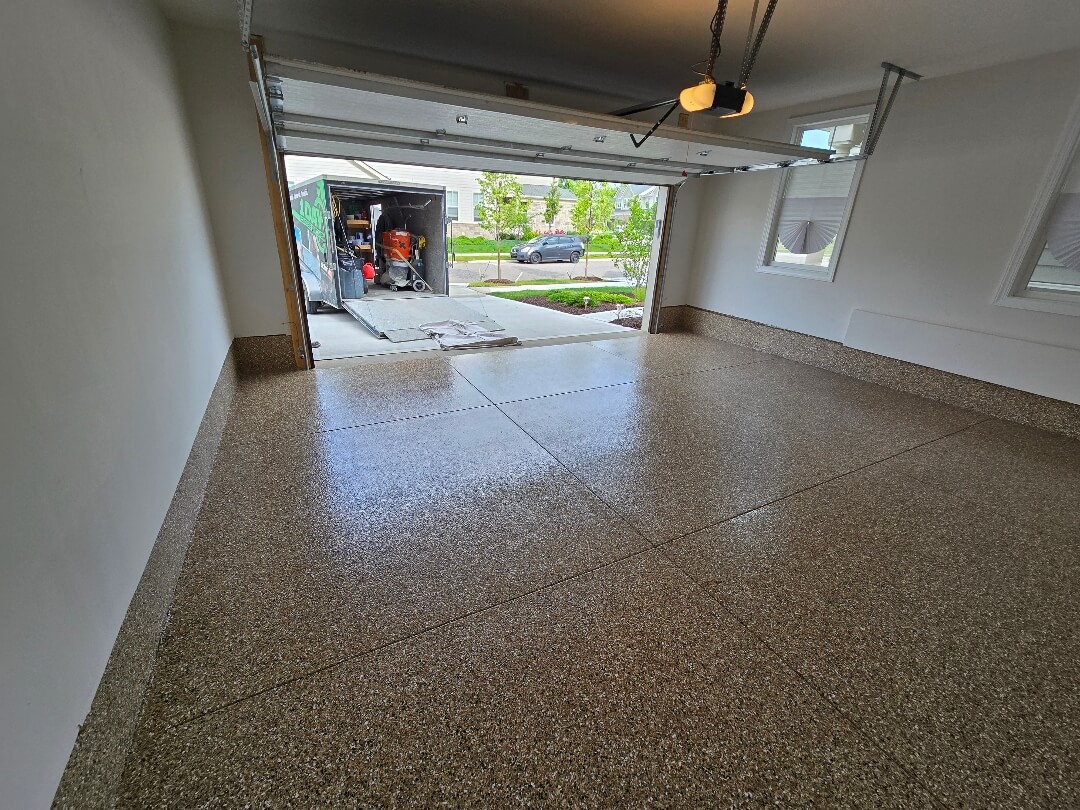
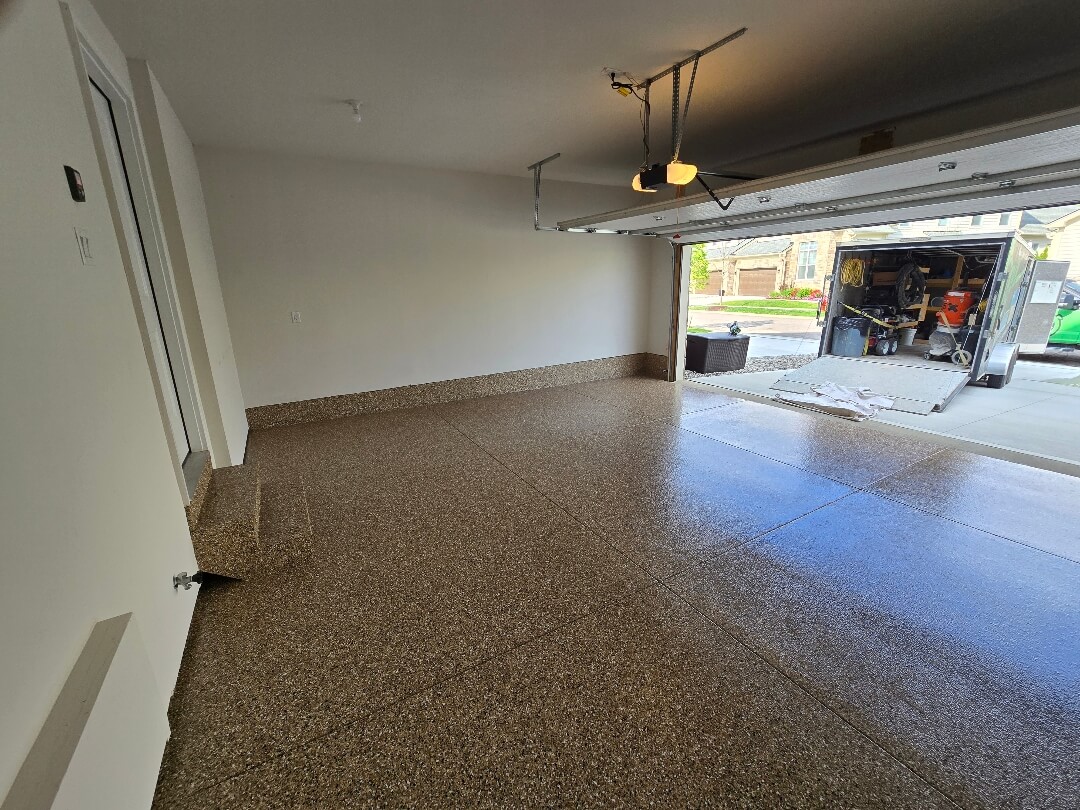
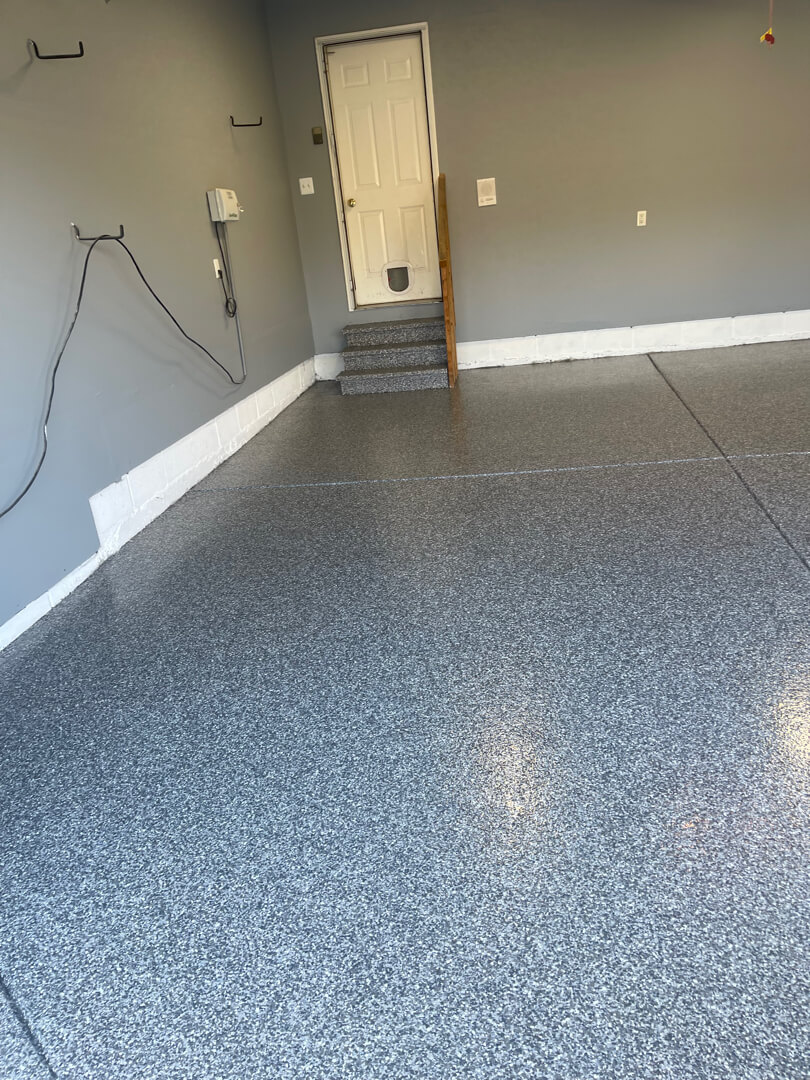
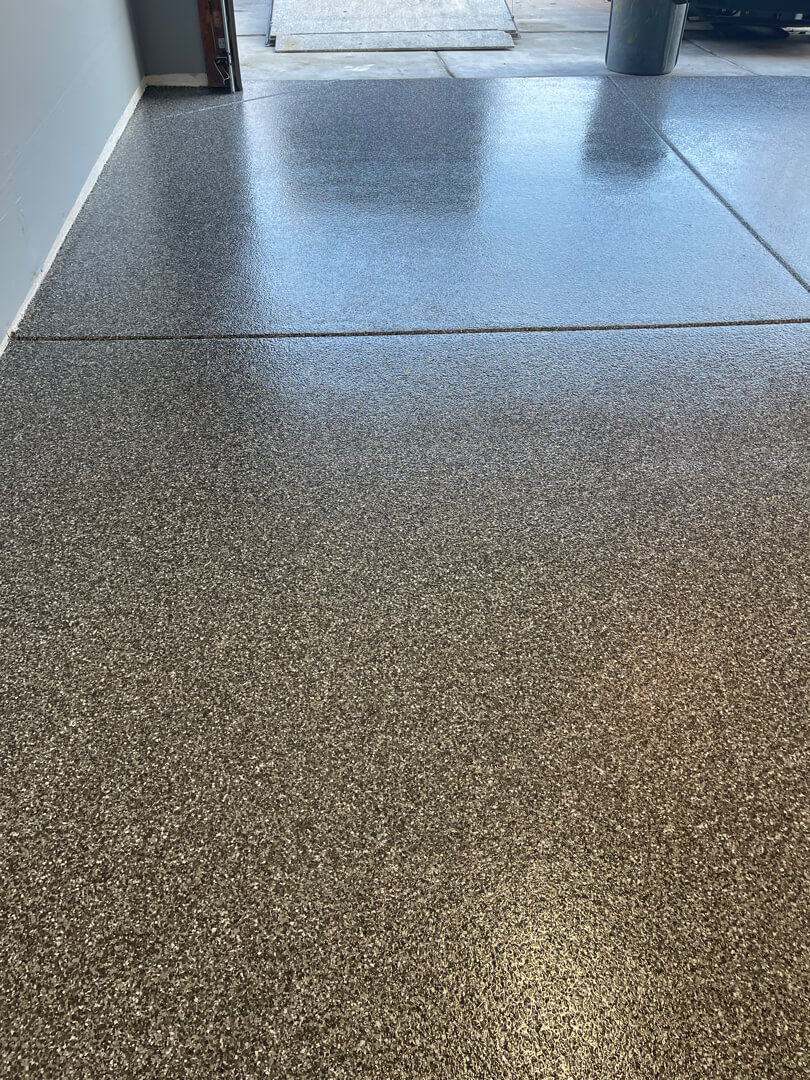
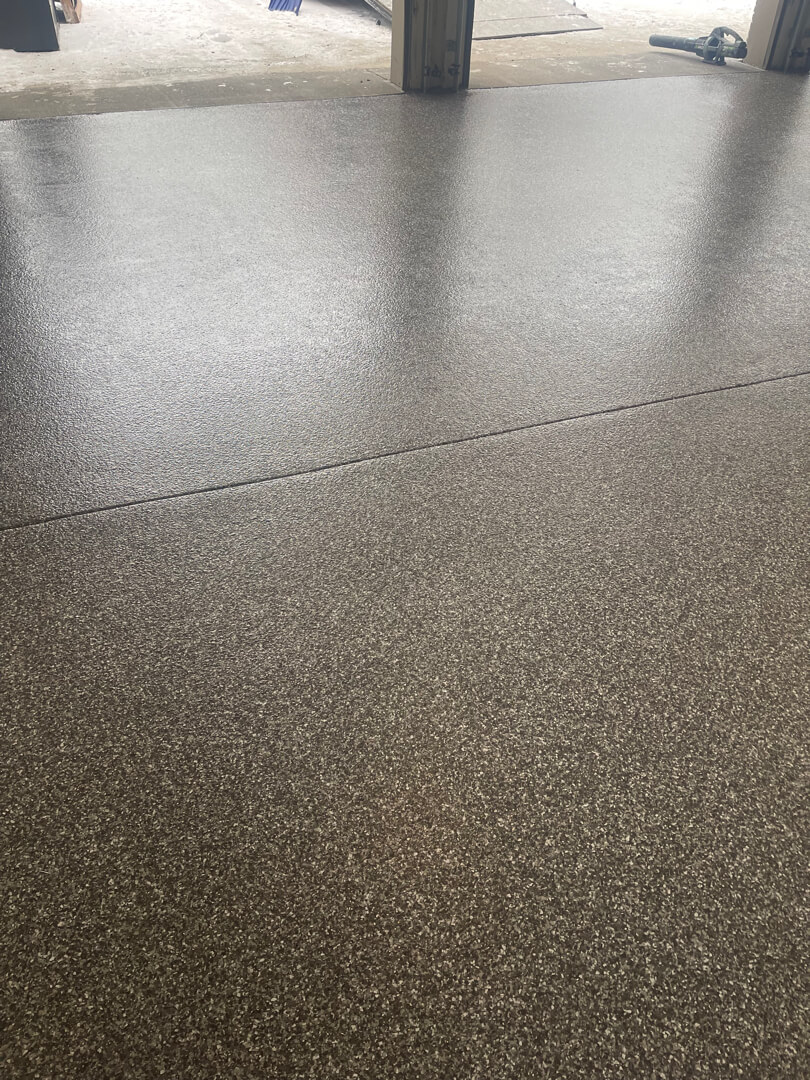
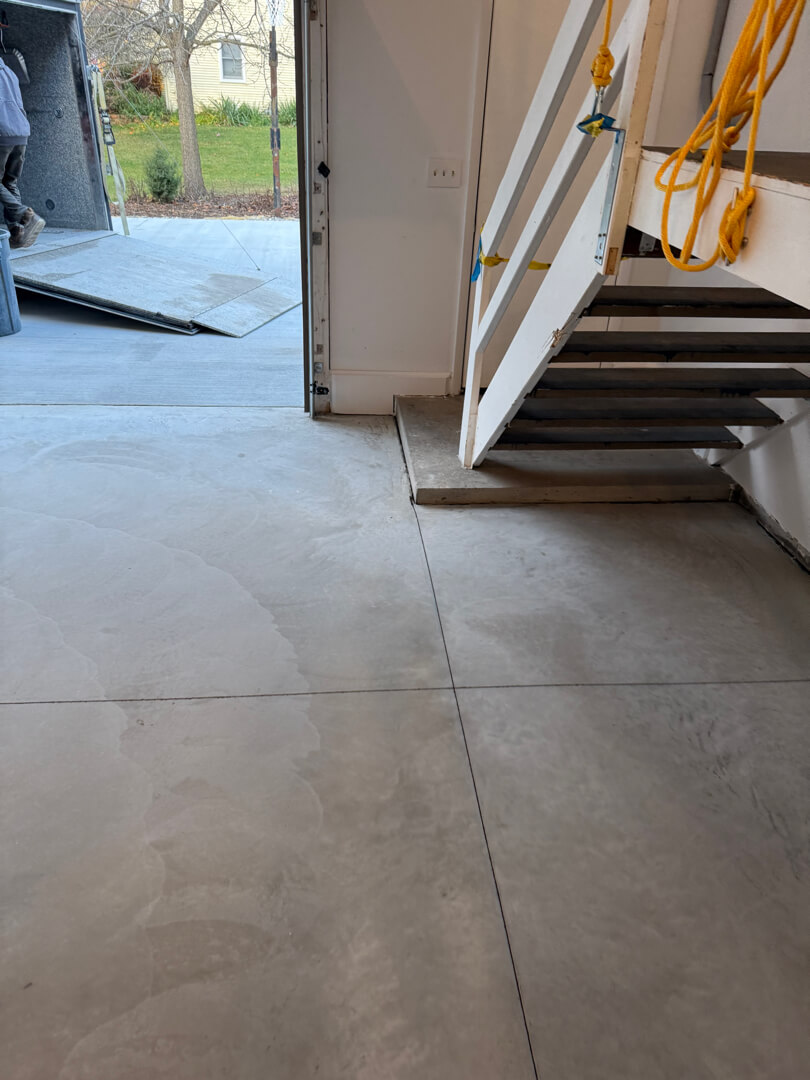
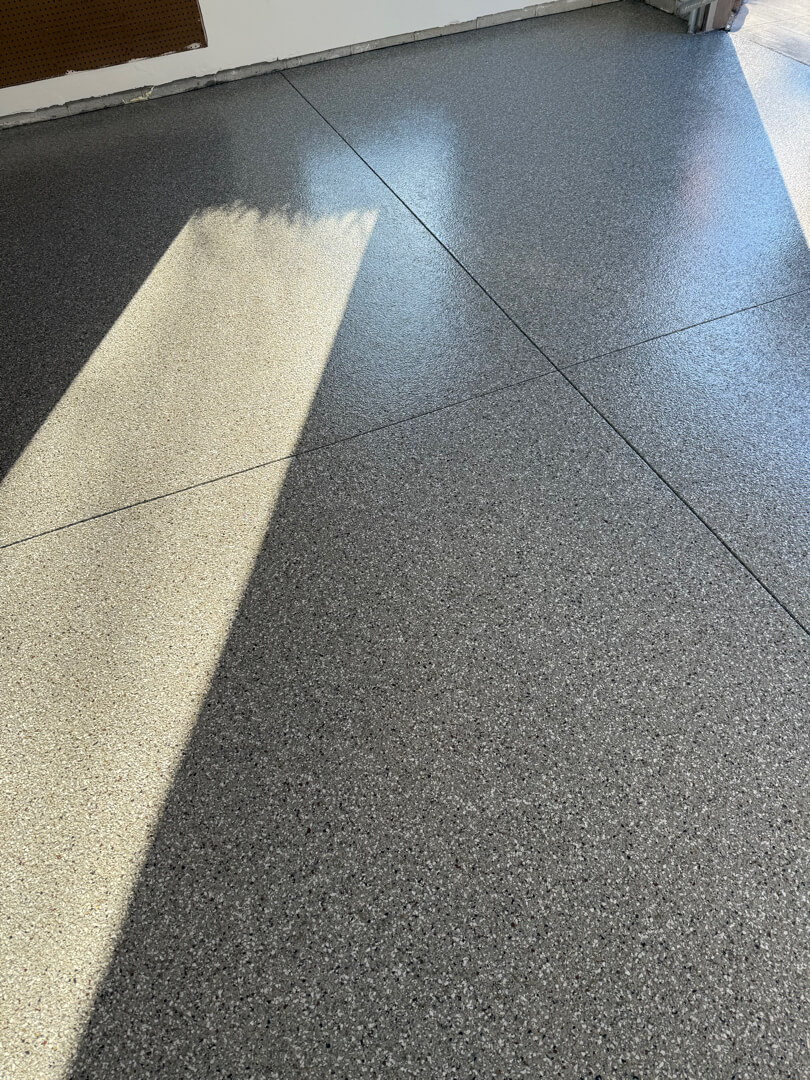
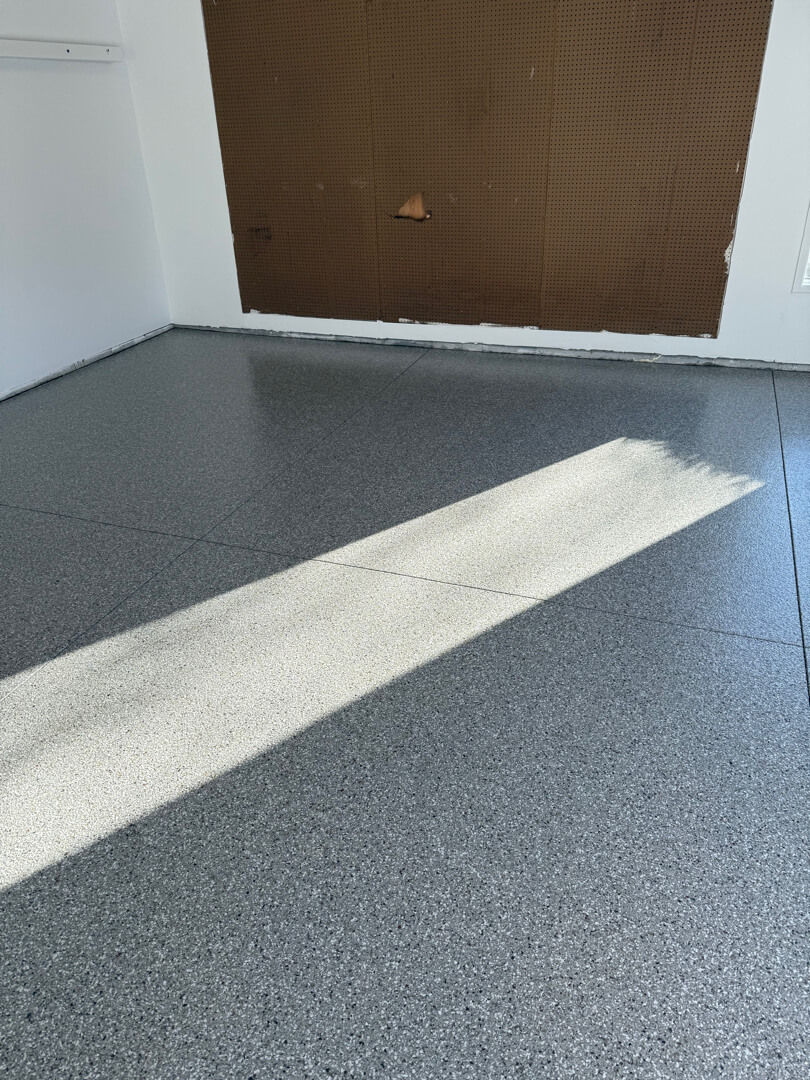
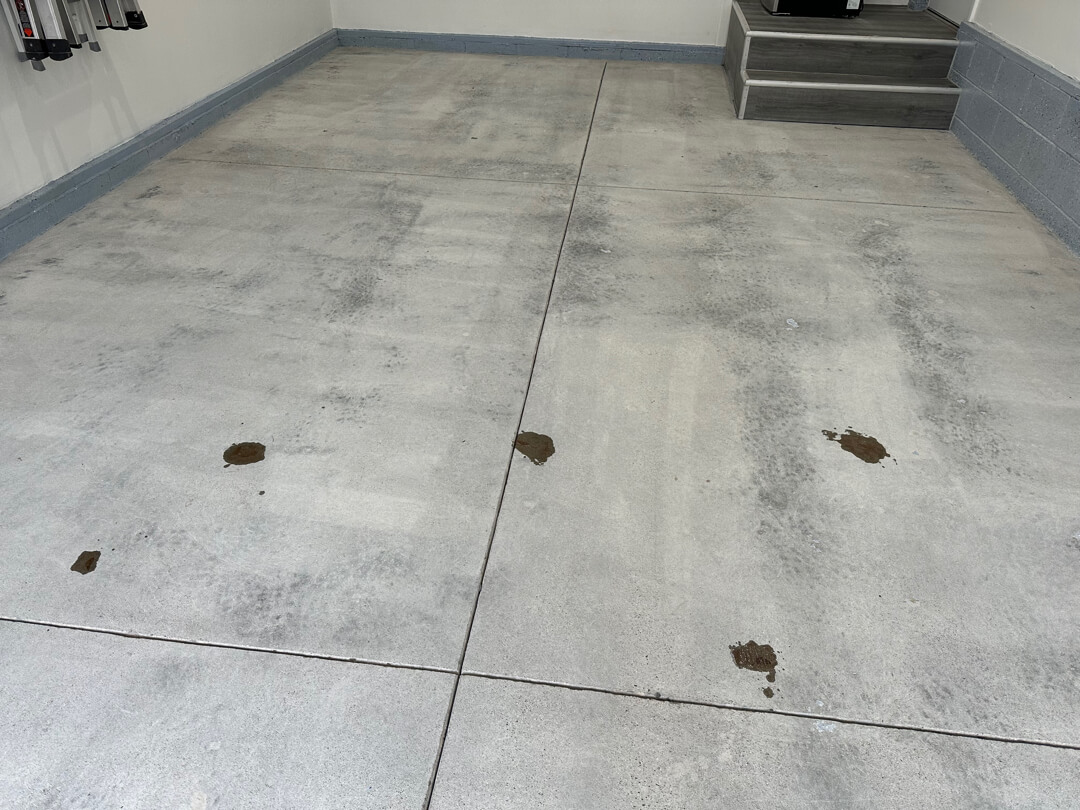
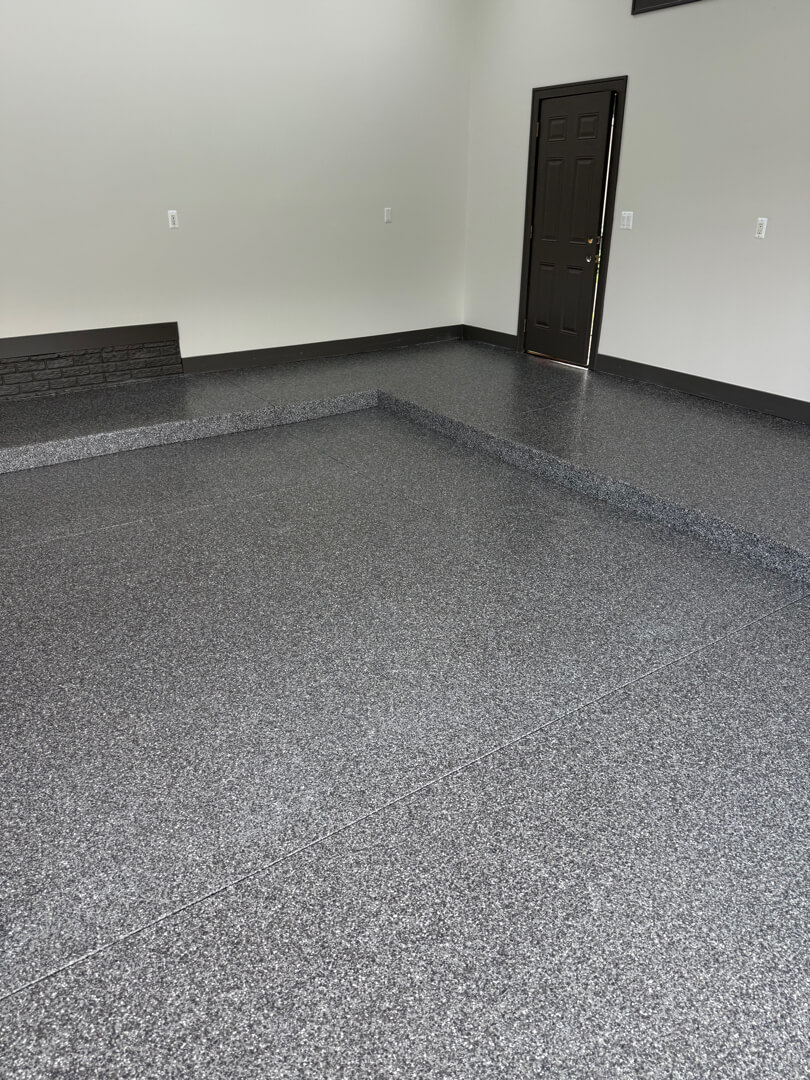
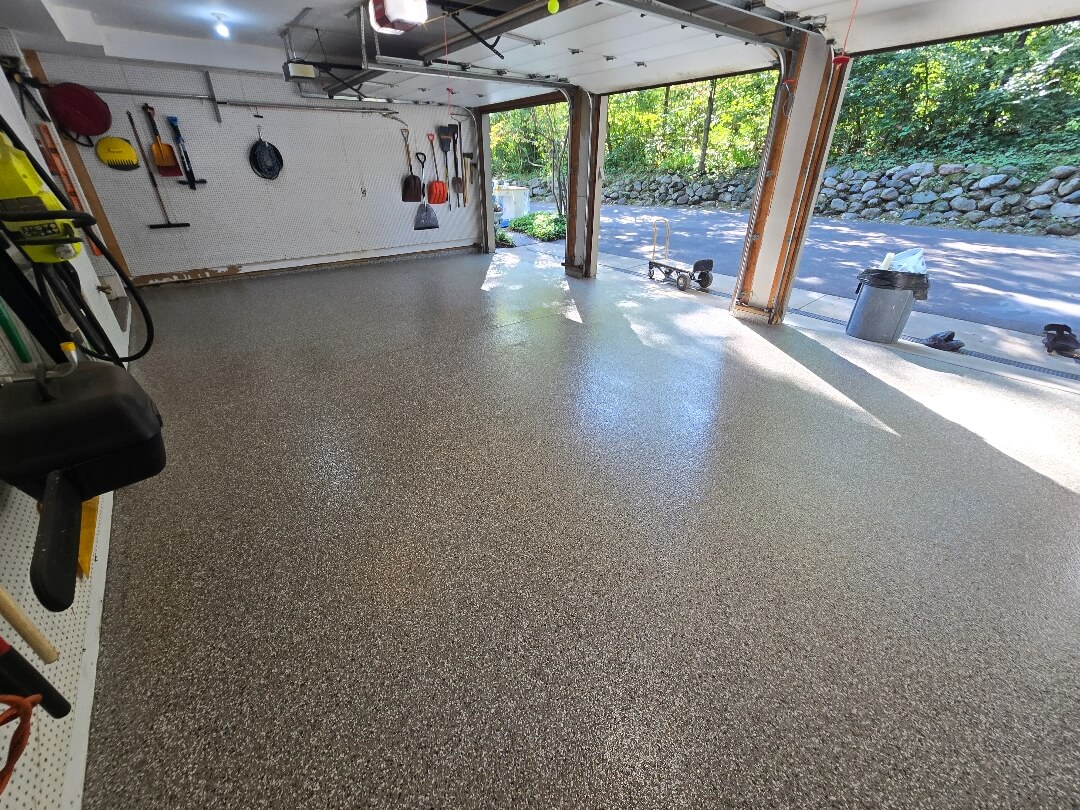
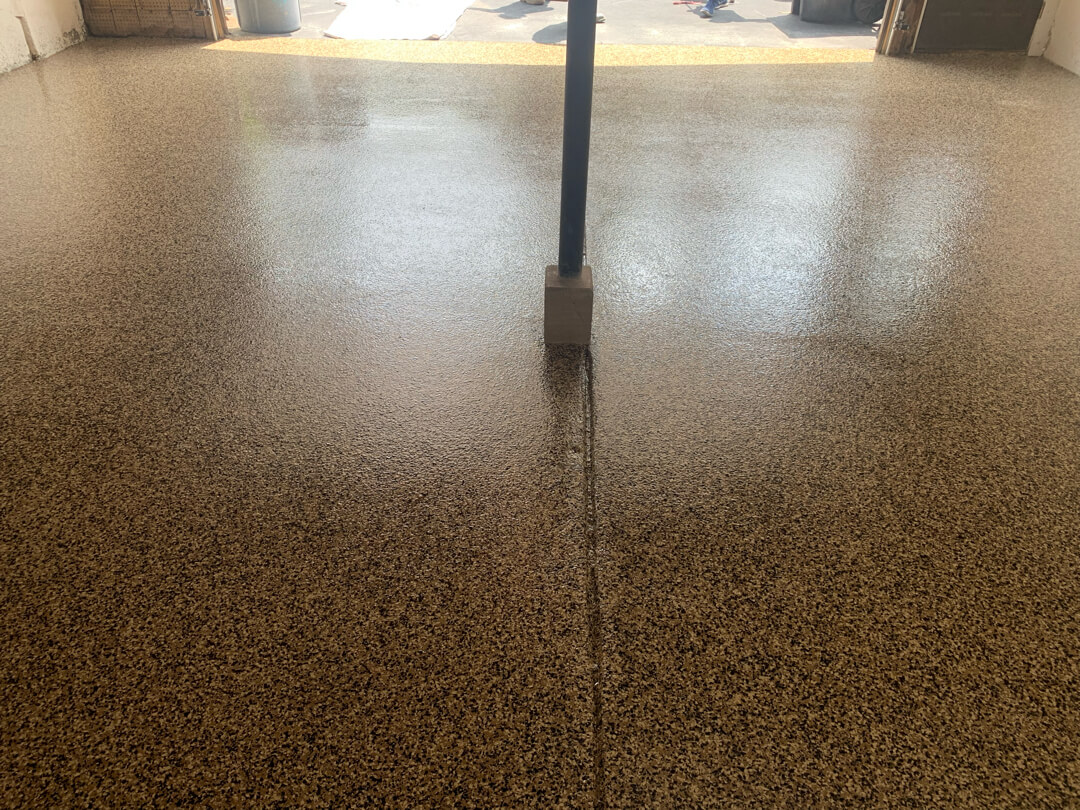
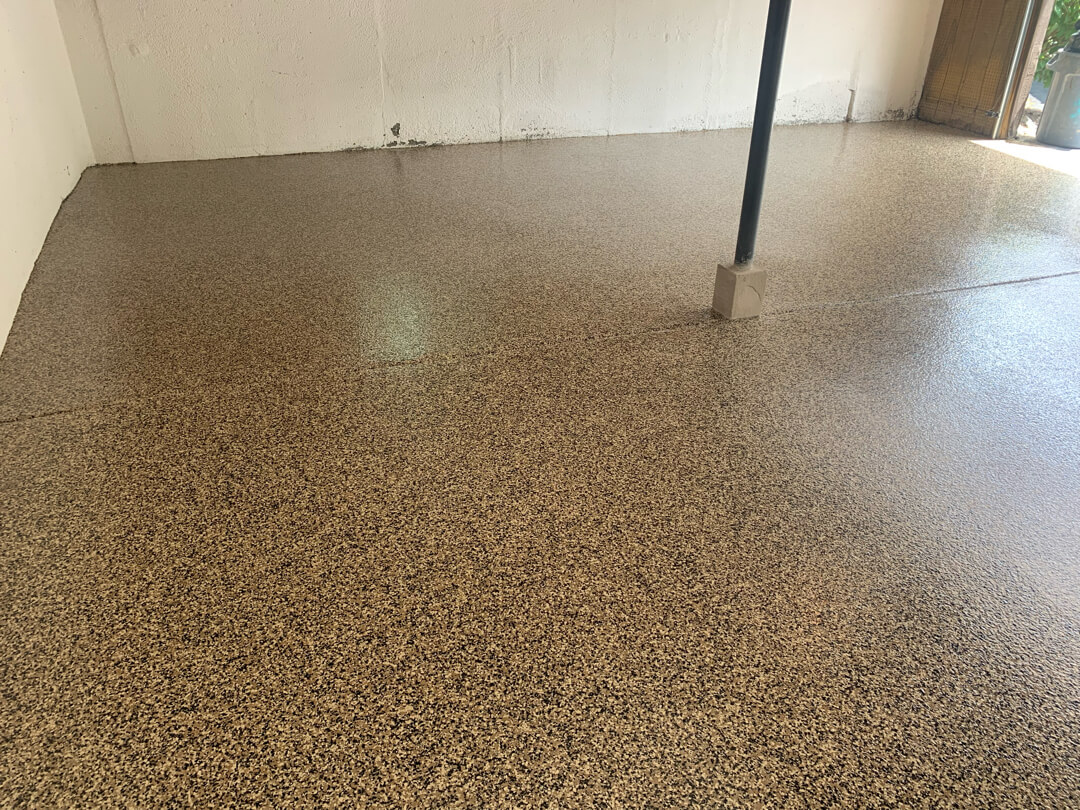
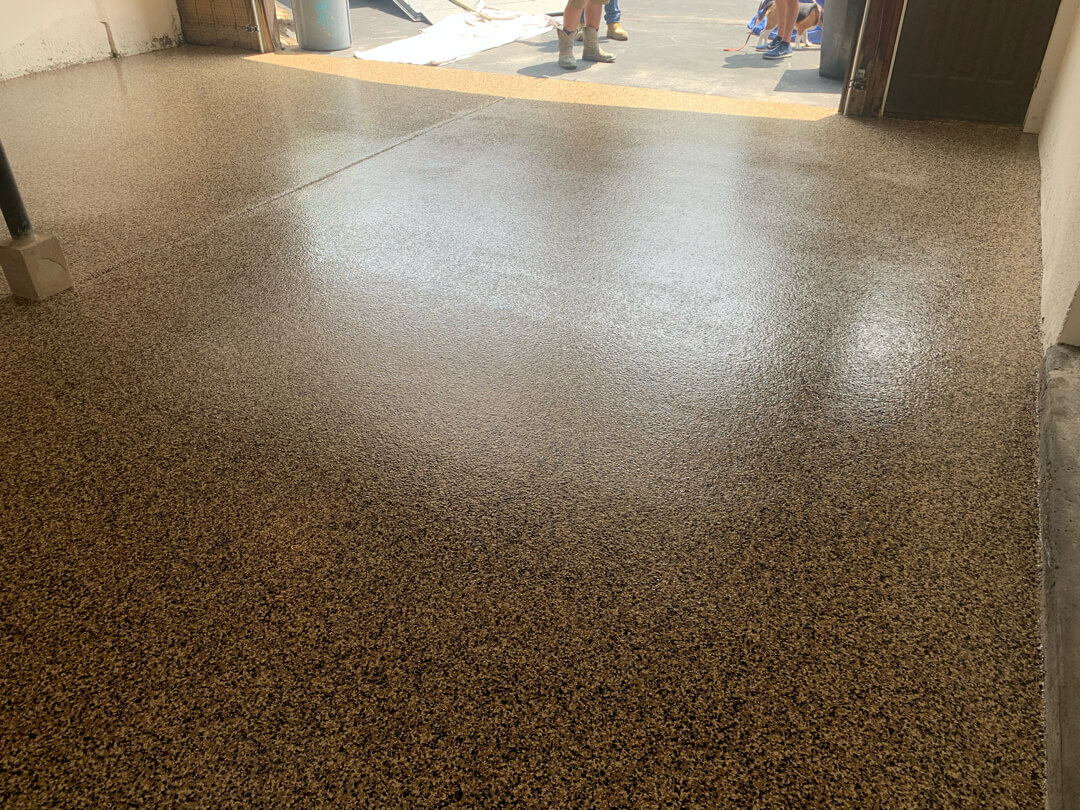
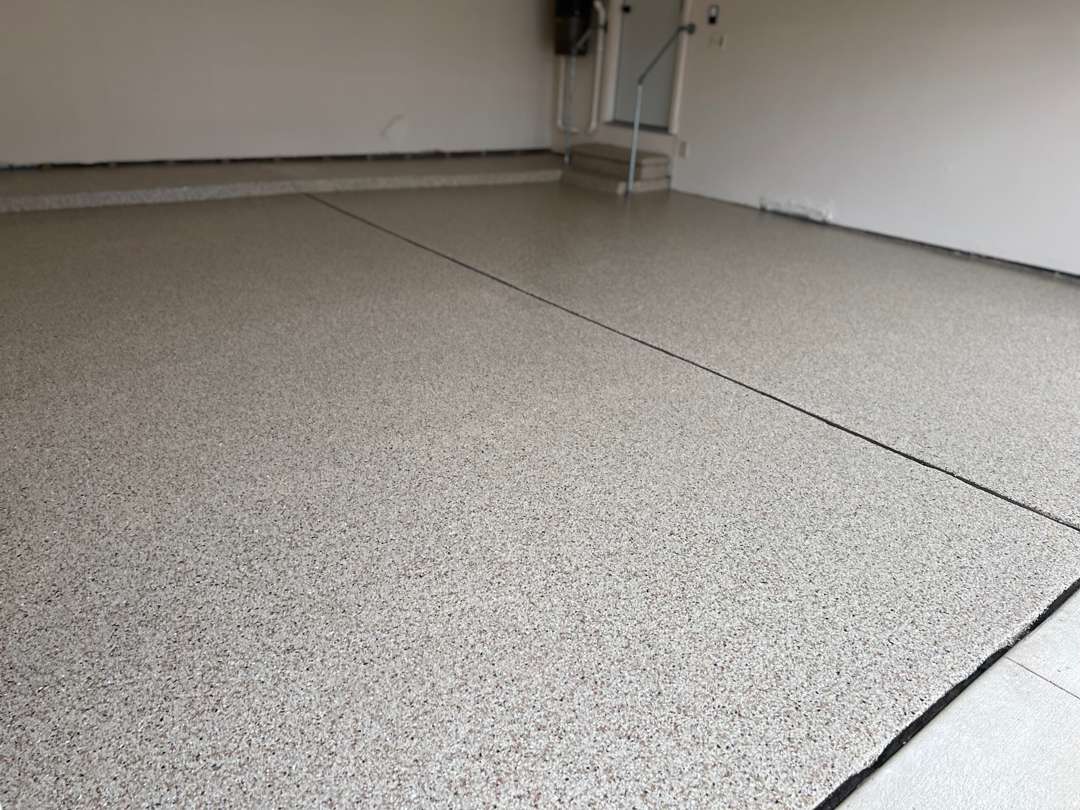
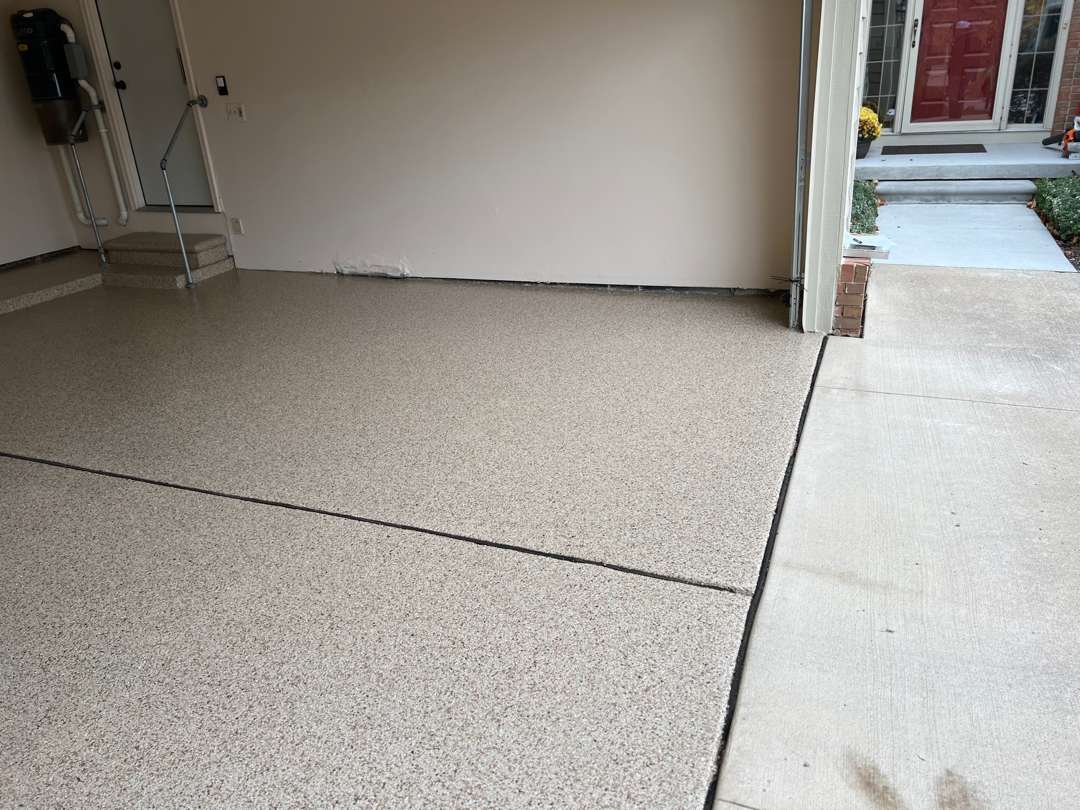
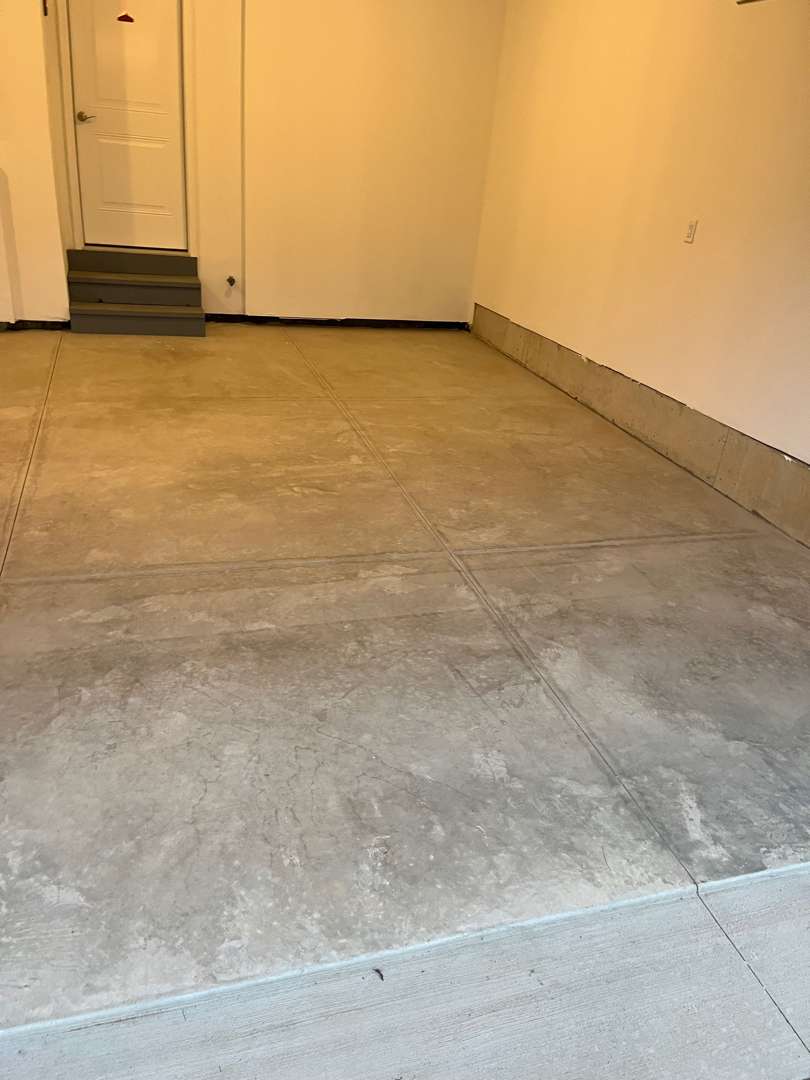
MotorCity Floors and Coatings installed the MC-3.7 coating system at a garage on Brackley Drive, Ann Arbor. The project covered 371 square feet of floor, two steps, and 39 linear feet of 20-inch verticals. Importantly, the concrete required no crack repair — the slab was sound throughout. Our crew applied Sandstone flakes at H-4 density with a 16-grit traction additive.
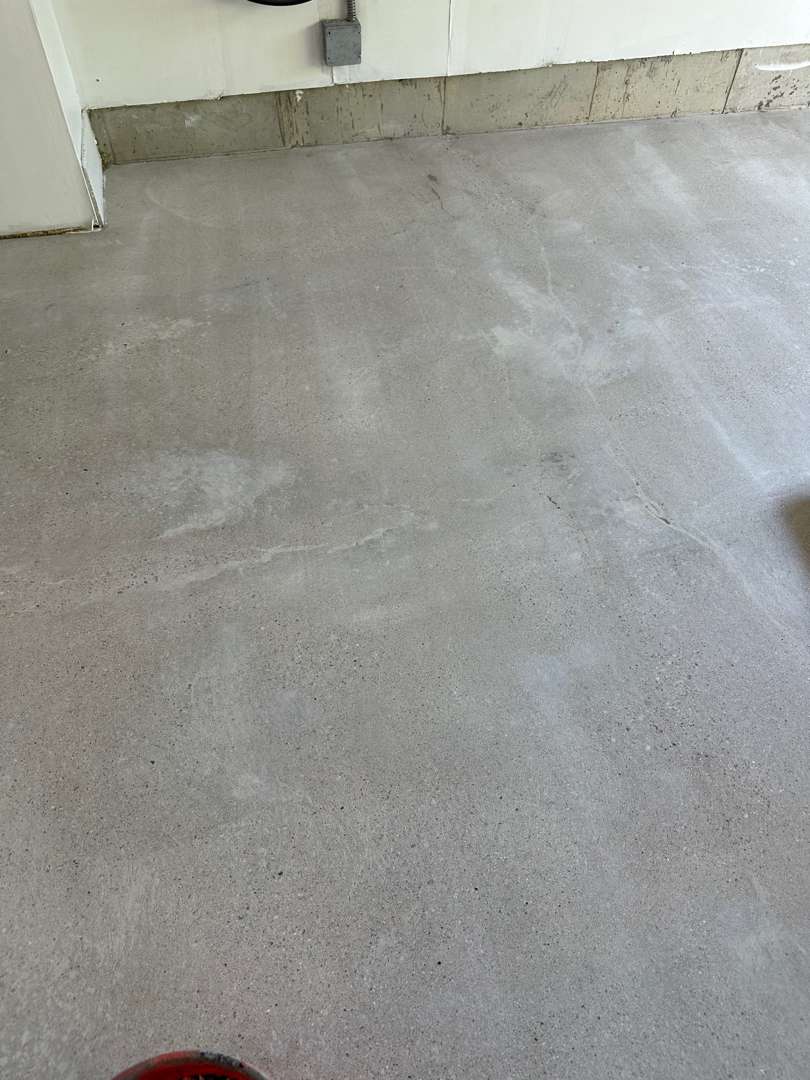
Initial Substrate Condition
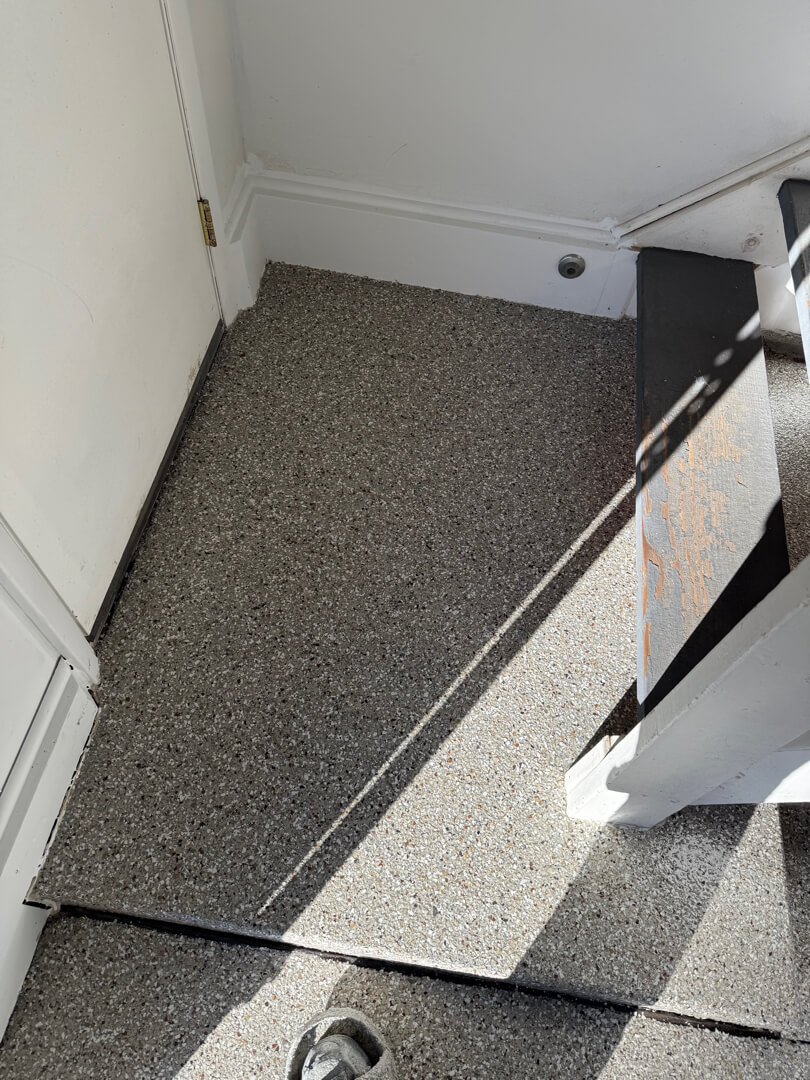
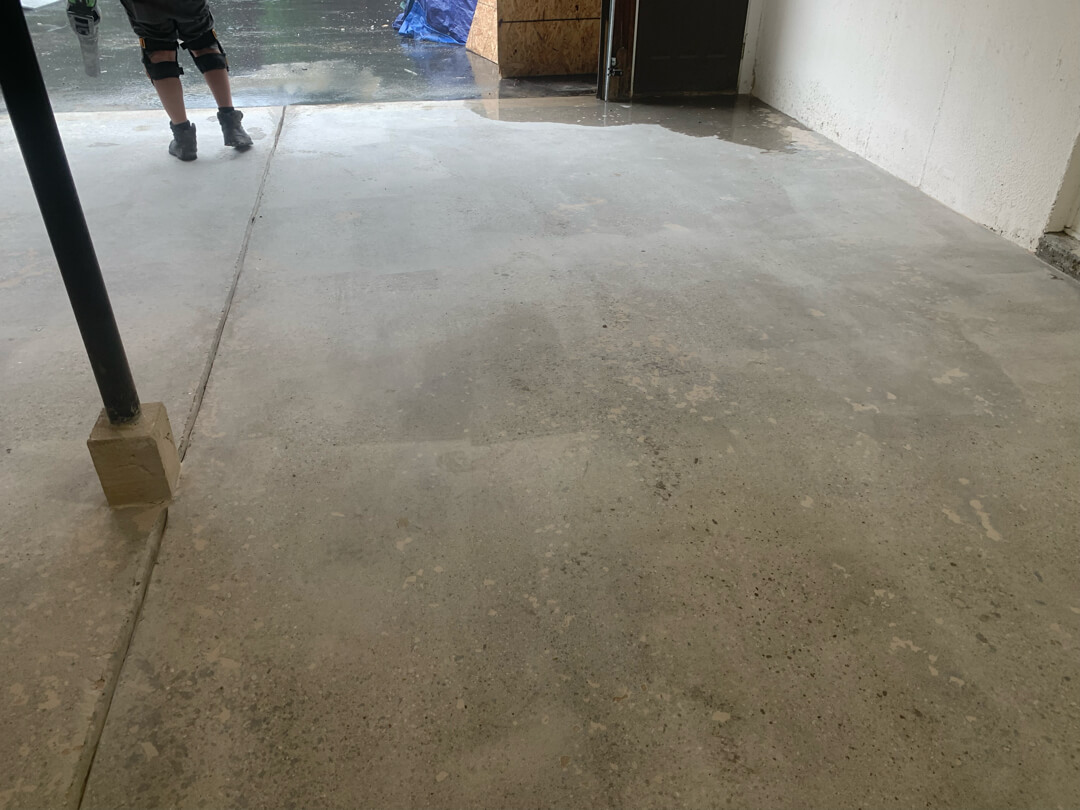
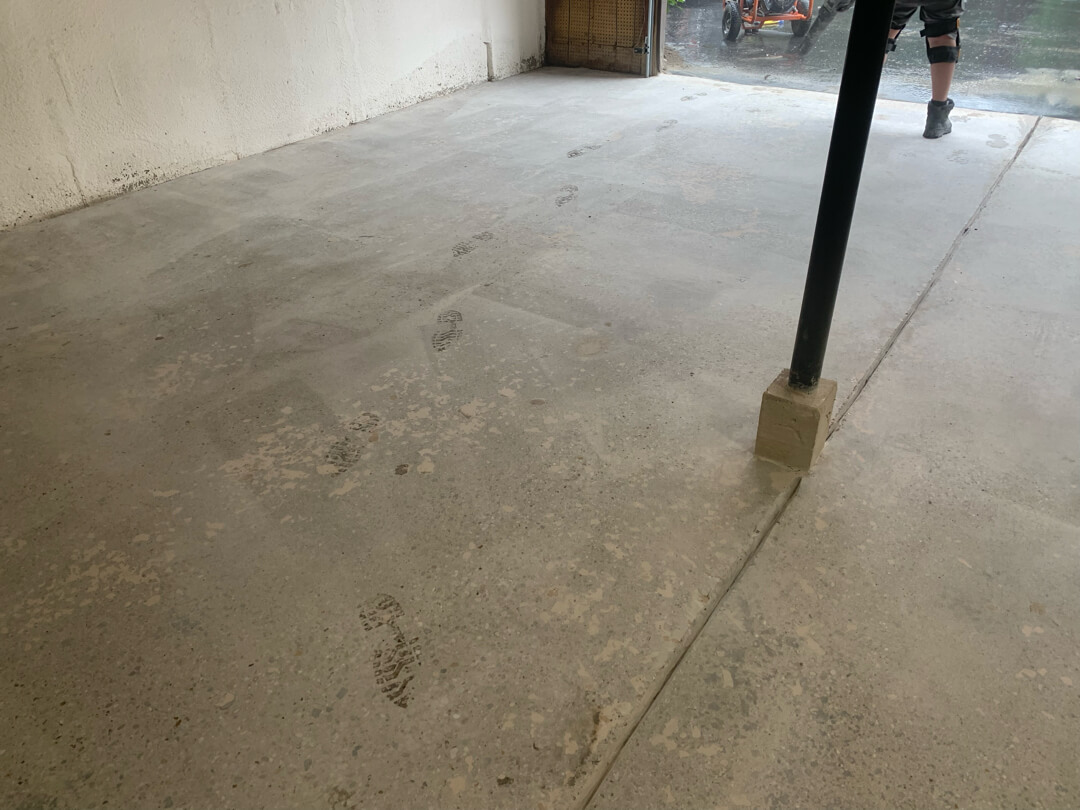
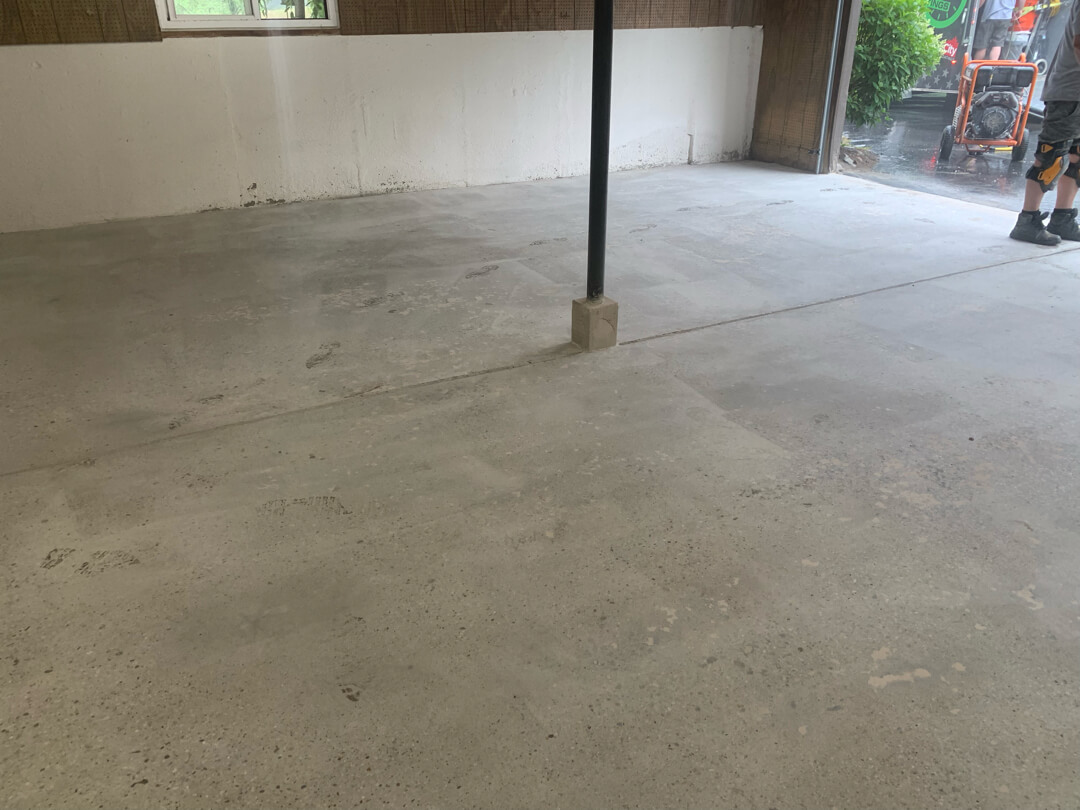
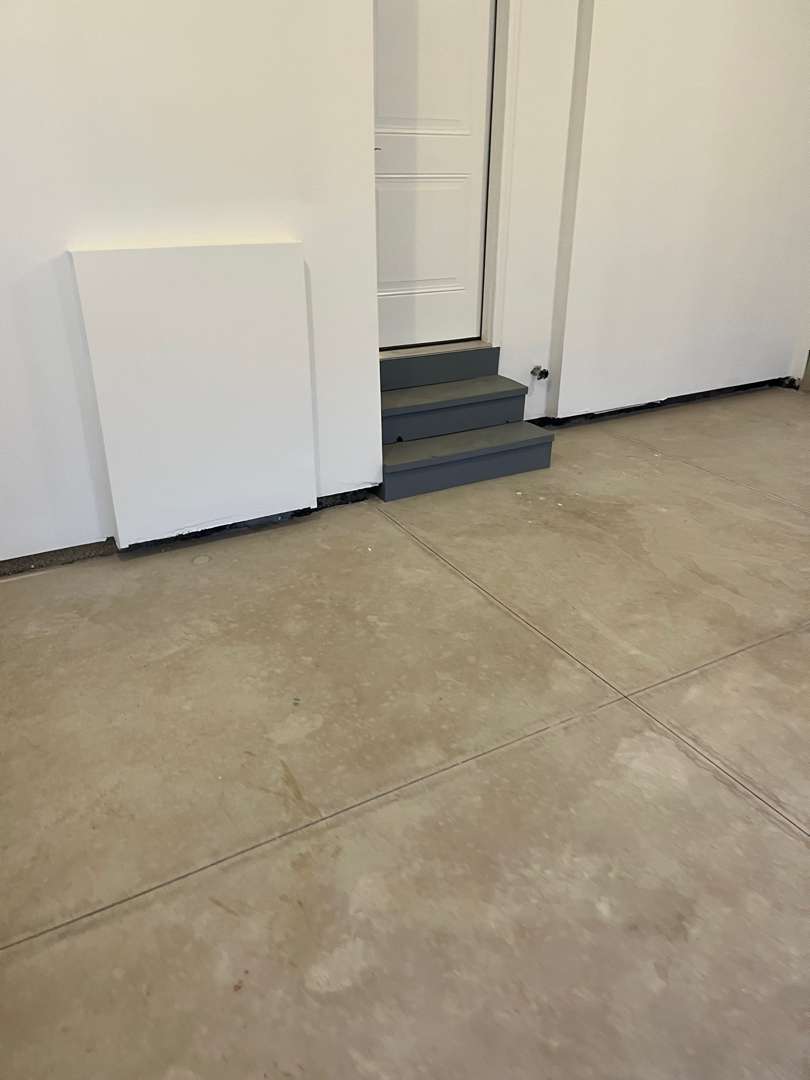
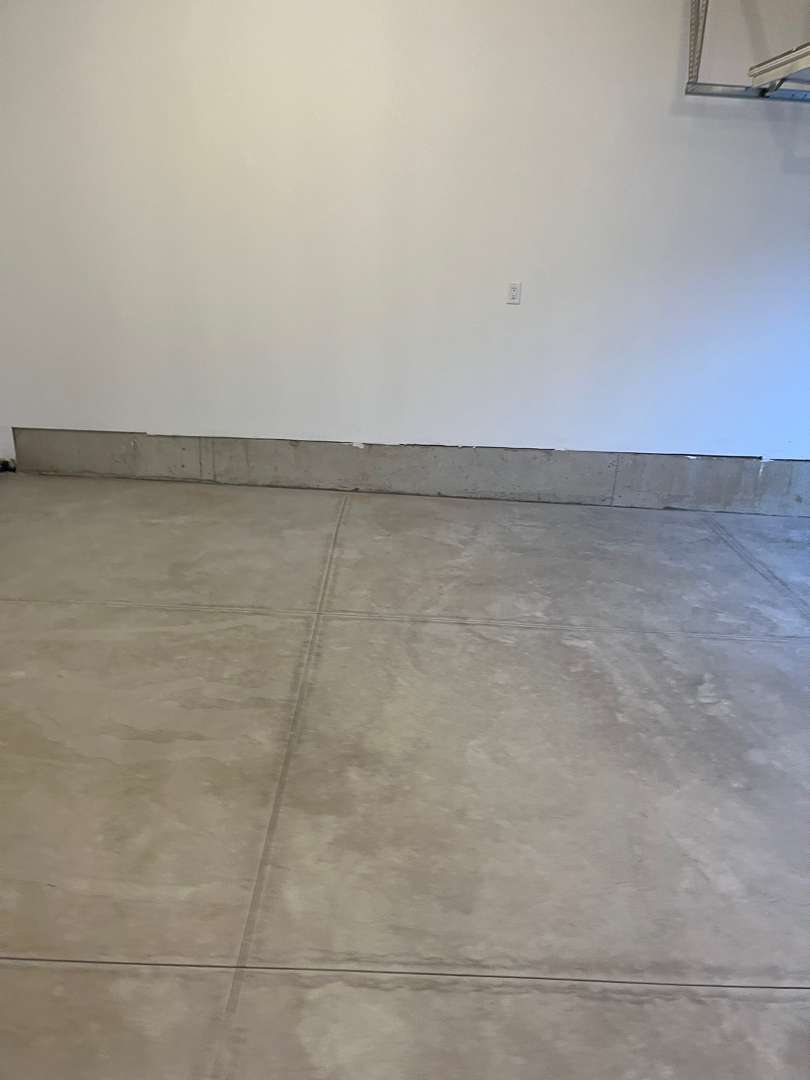
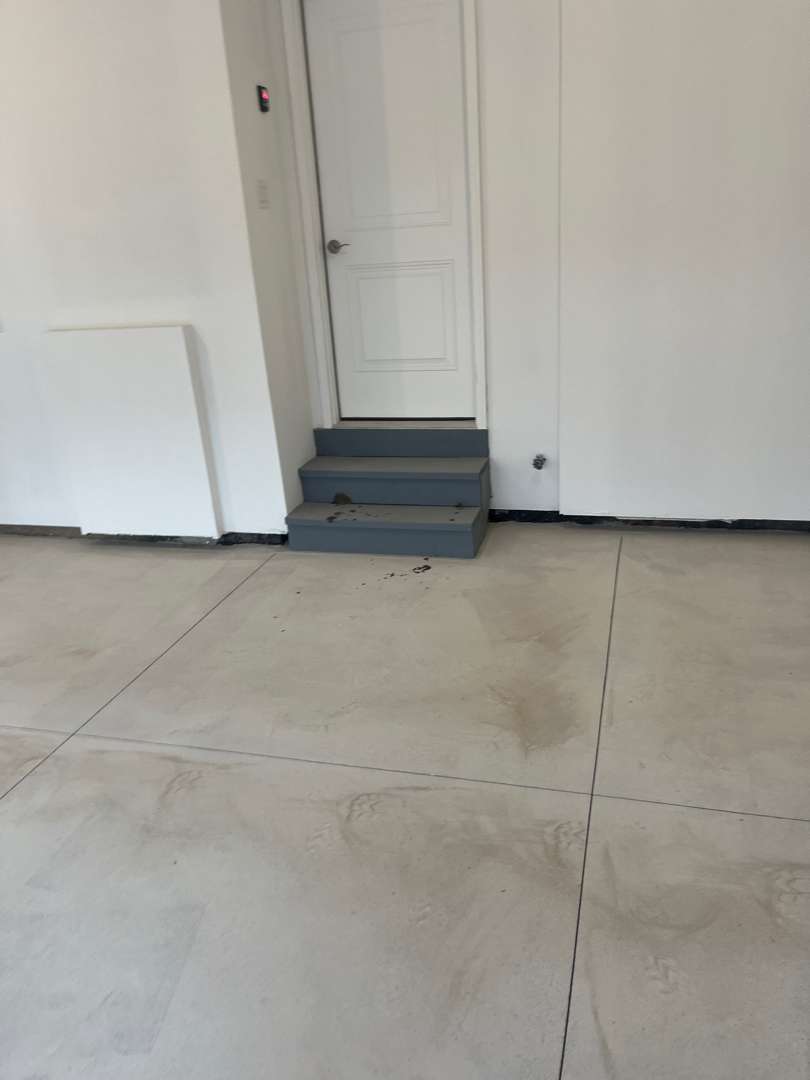
The slab was in good structural condition with no cracking or spalling. Light staining from normal vehicle use appeared near the center of the floor. The vertical surfaces showed raw, unpainted concrete along the perimeter. The two entry steps were bare concrete with no previous coating.
Surface Preparation
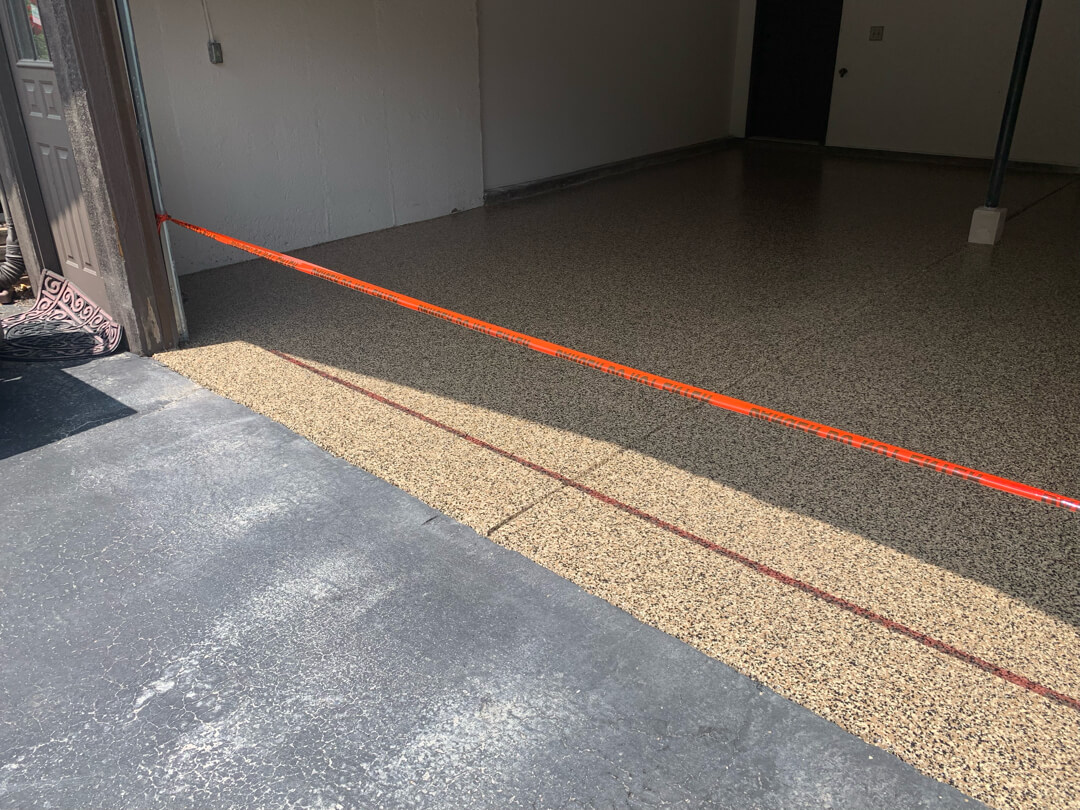
Our crew diamond-ground the slab to open the pore structure of the concrete. The grinding removed surface laitance and any contamination from vehicle use. Our crew ran grinders with dust extraction across the full 371 square feet. Our crew ground up to the threshold at the garage door and stopped there. This boundary kept the coating inside the garage with a clean finished edge.
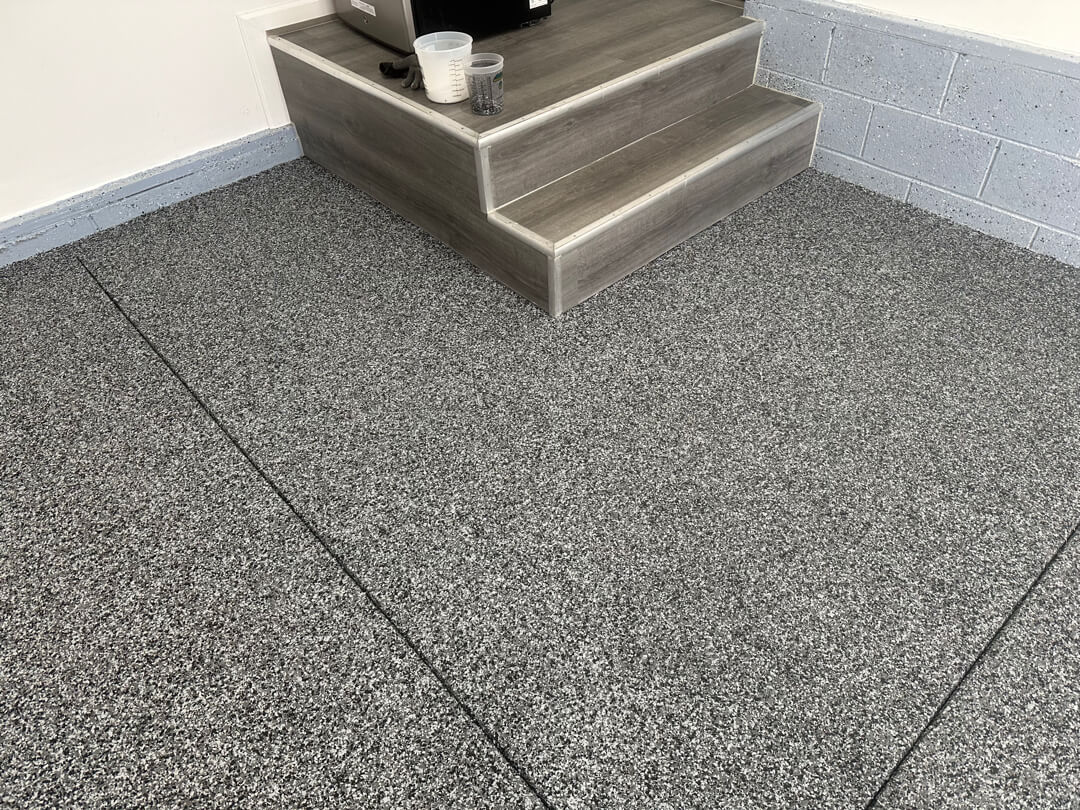
The two steps received the same grinding treatment as the main floor. Our crew hand-ground the step nosings and risers for full surface coverage. The vertical surfaces along the perimeter received grinding for mechanical adhesion.
Substrate Assessment: No Repairs Required
Verticals and Steps
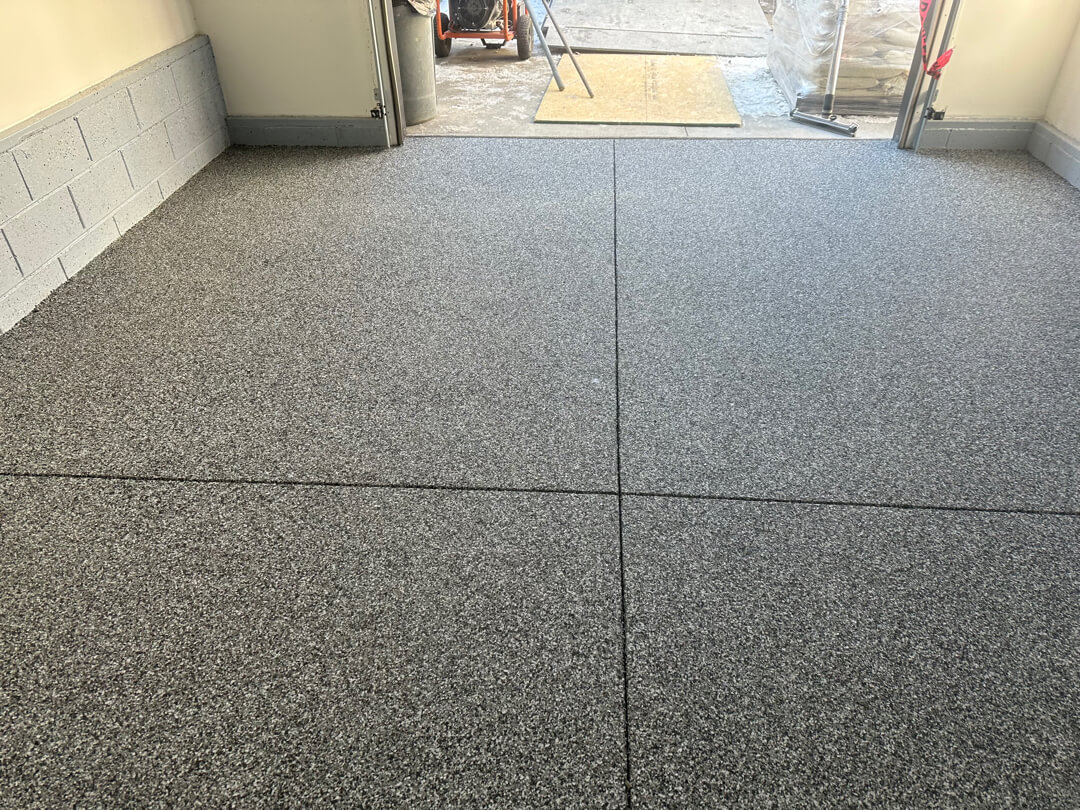
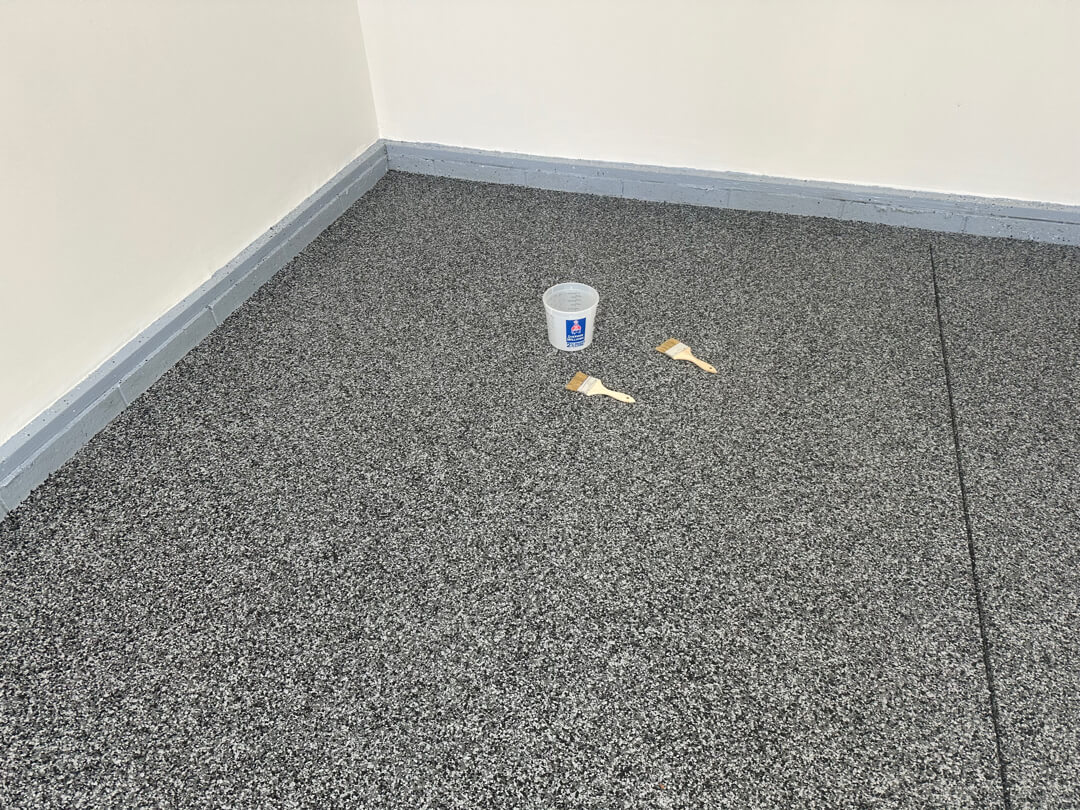
MC-3.7 Coating System Application
Completed Installation
Testimonials - Voices of Our Clients
James Blaschak
Brett Moon
NEW Garage Floor Coating
on Cedar Ridge Drive
Cedar Ridge Drive — Ann Arbor, MI
Project Overview
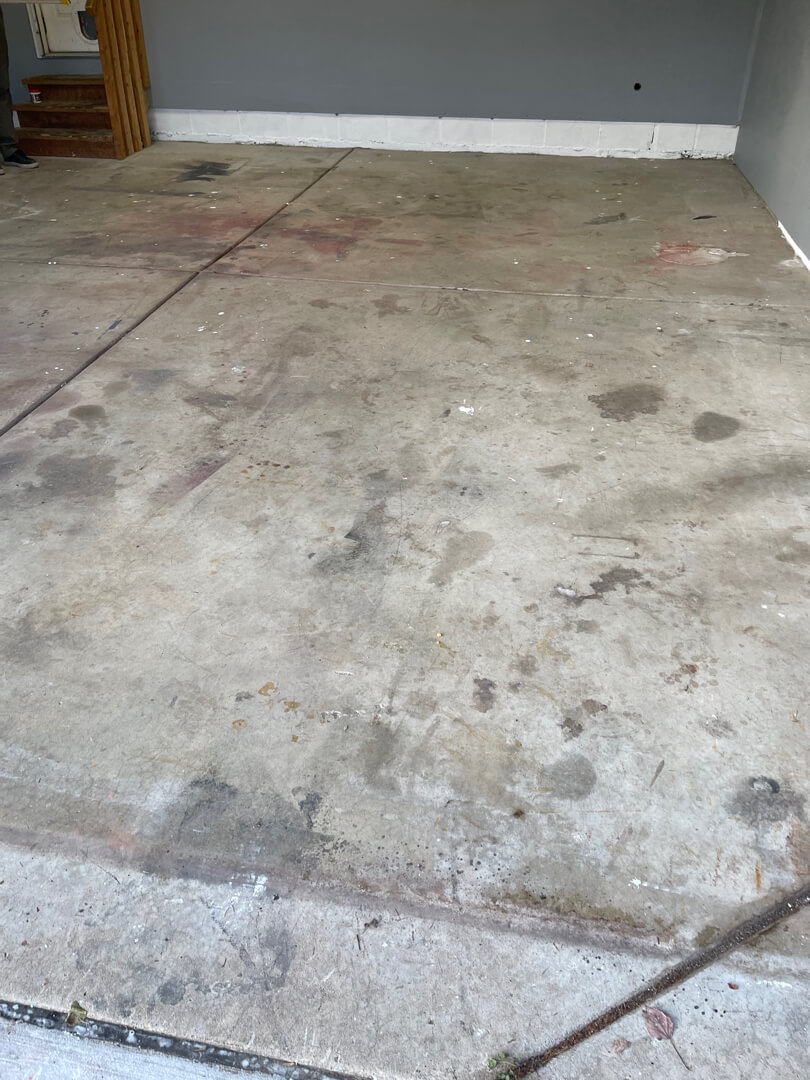
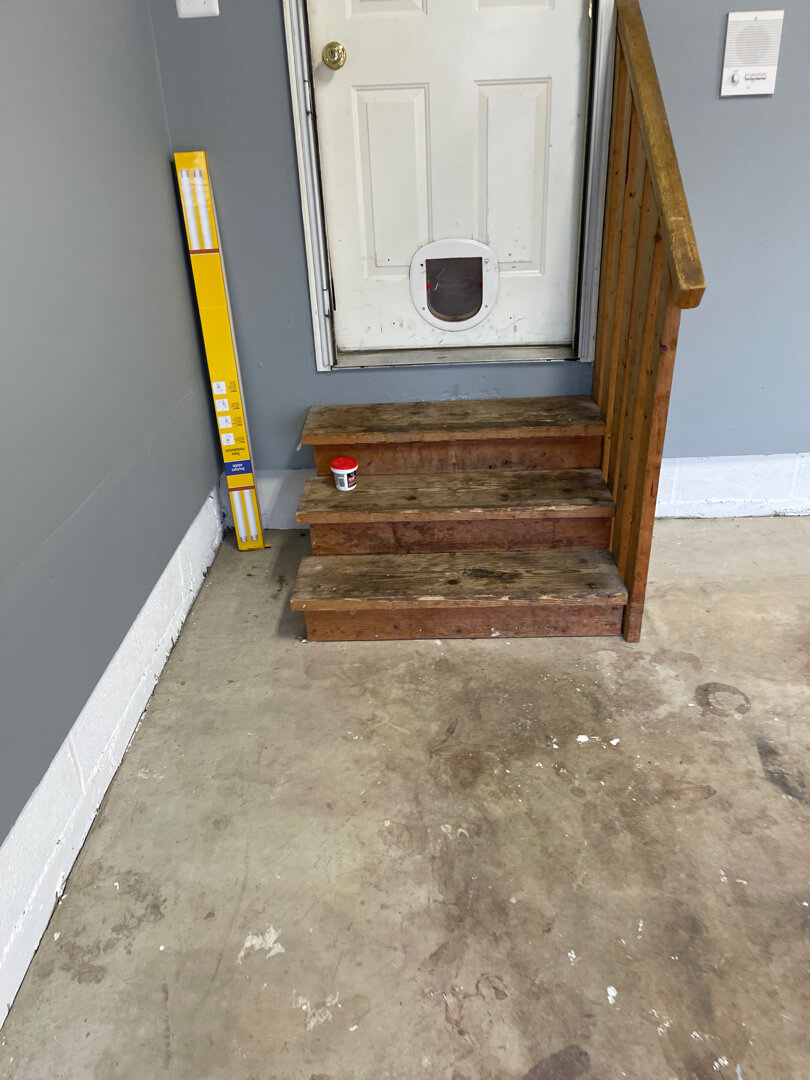
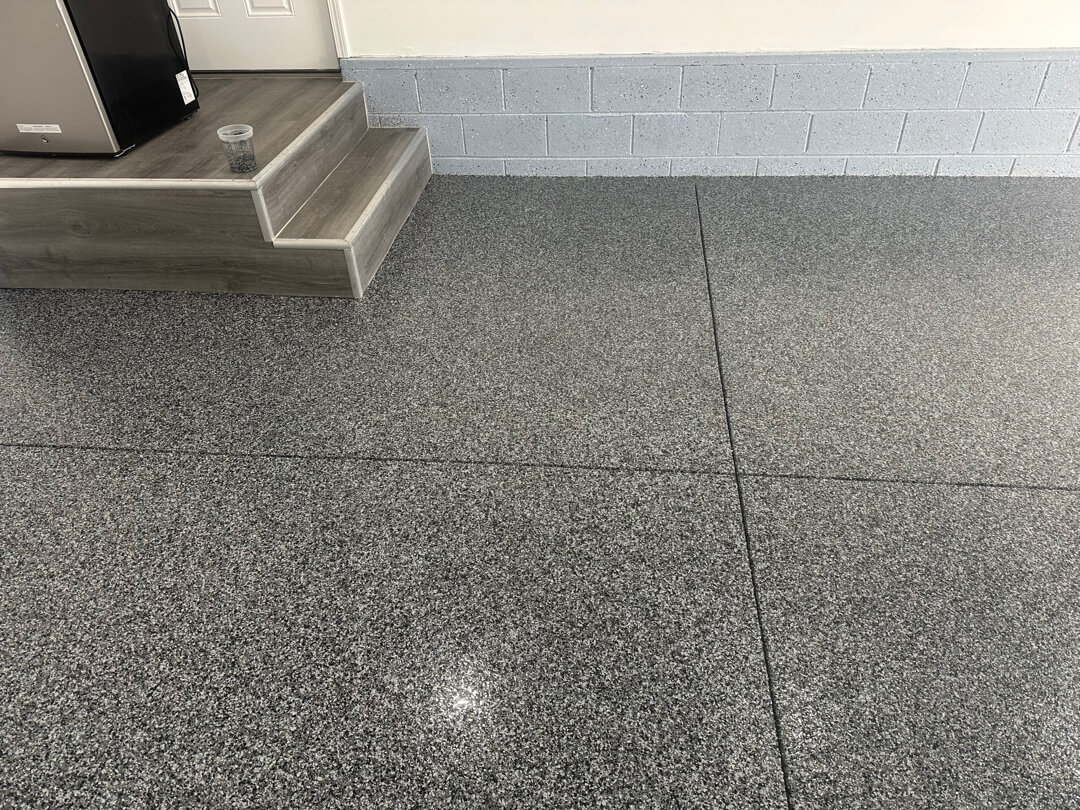
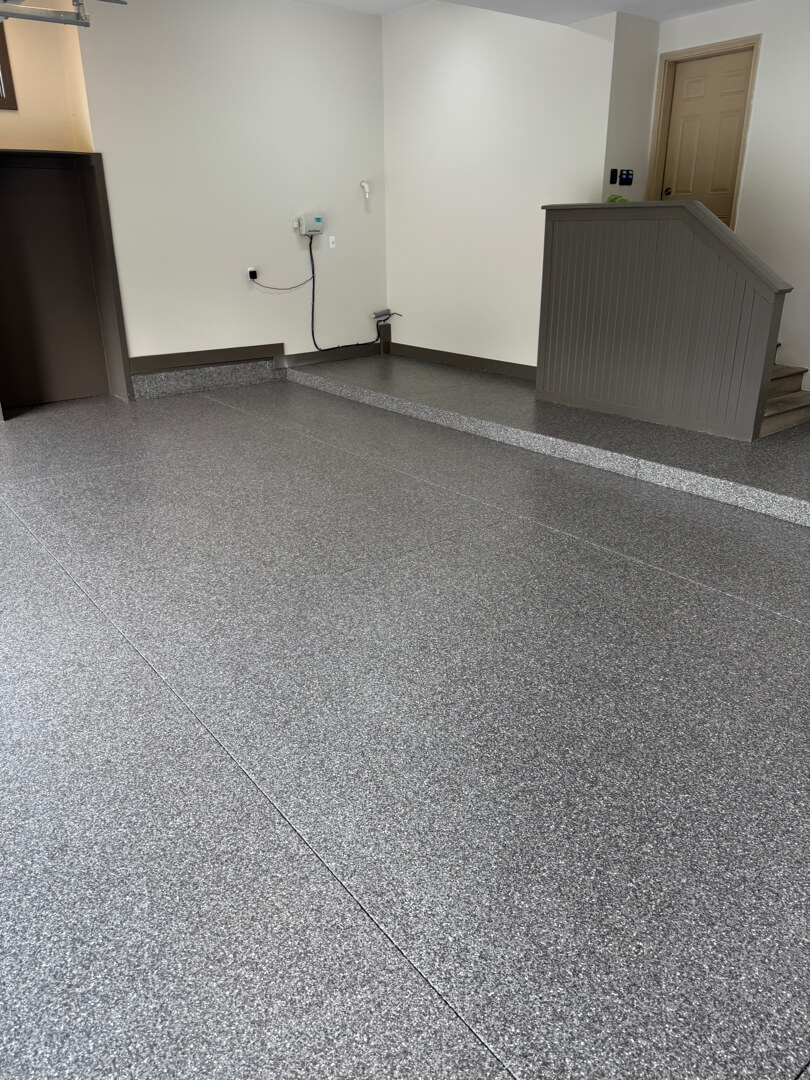
The Cedar Ridge Dr. garage floor carried years of mixed contamination. Paint spills, vehicle fluids, and surface debris covered the full 400 square feet. MotorCity Floors and Coatings installed the MC3.8 system in Silver Creek. The scope included the main floor, three wooden entry steps, and light concrete repairs.
Initial Substrate Condition
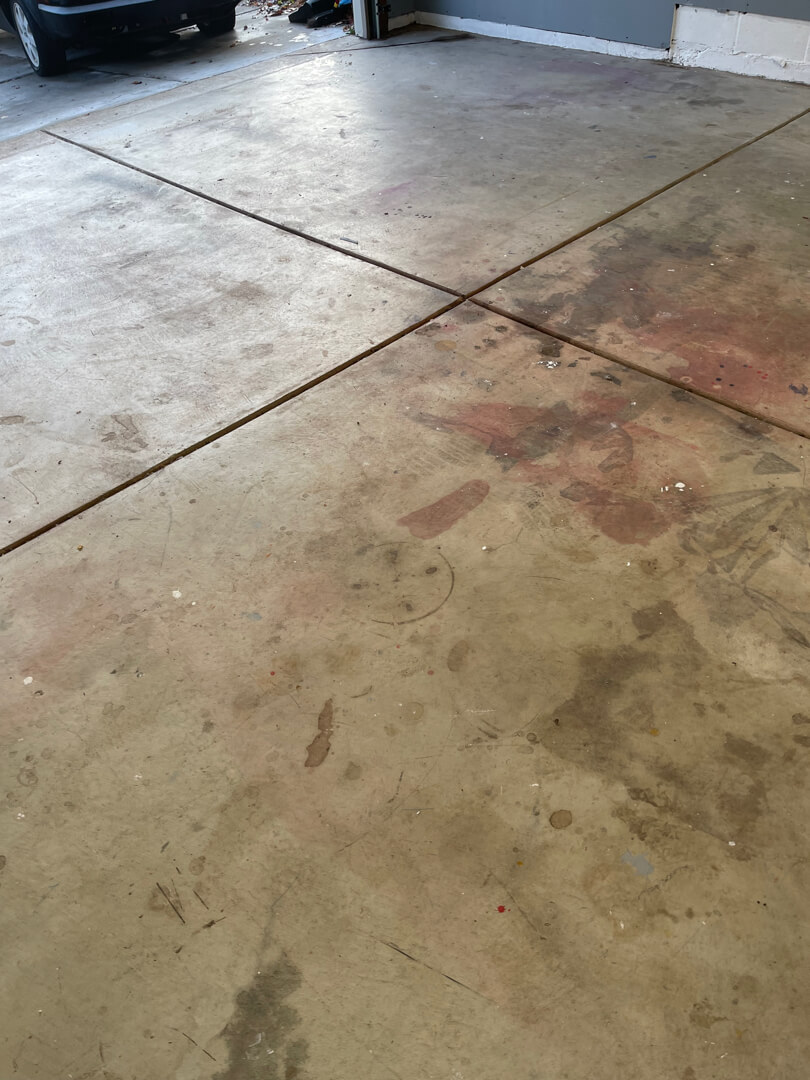
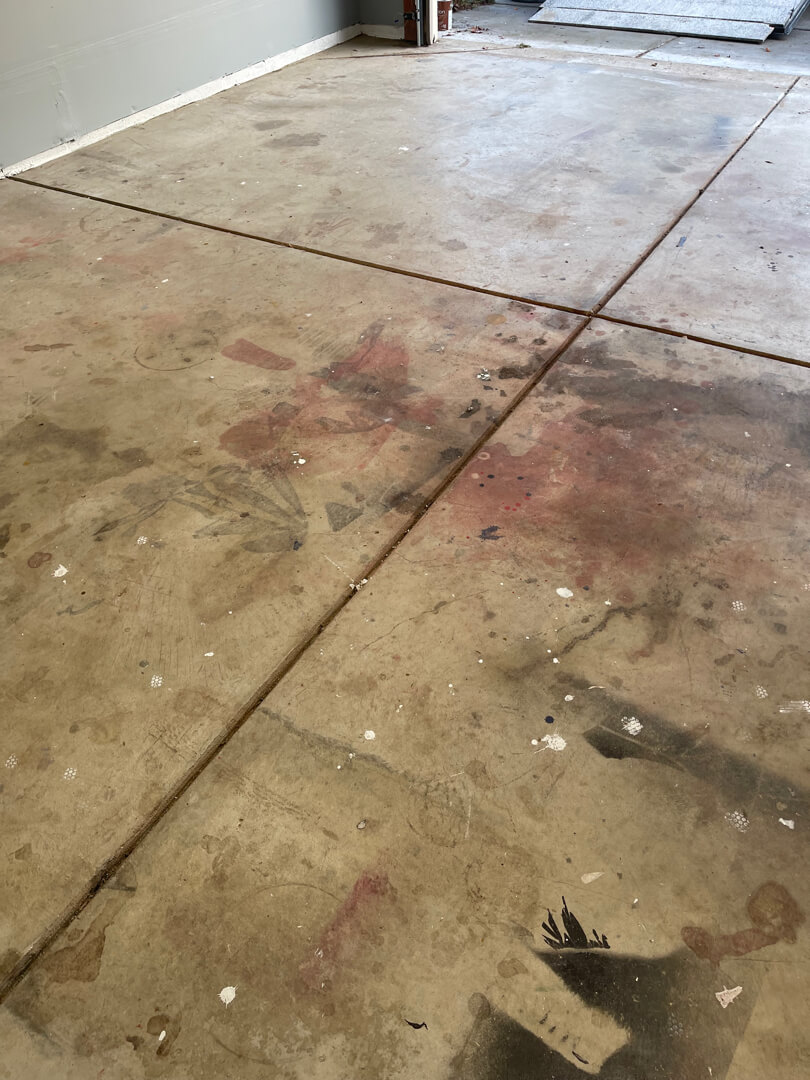
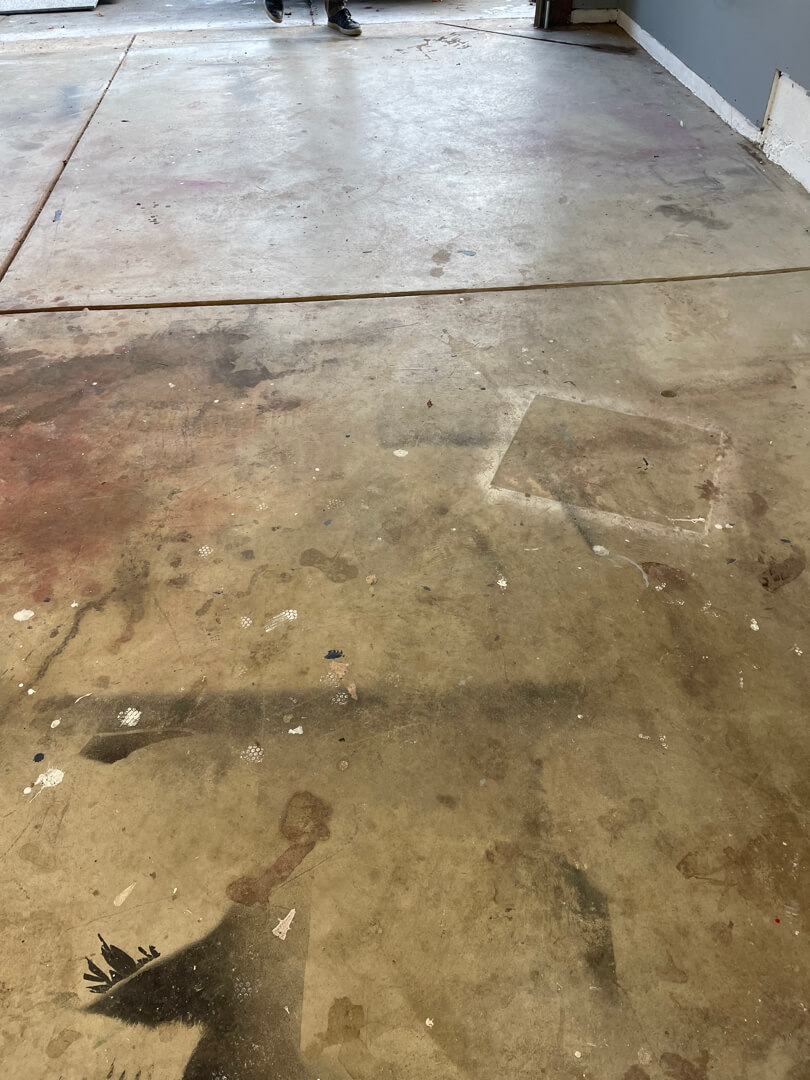
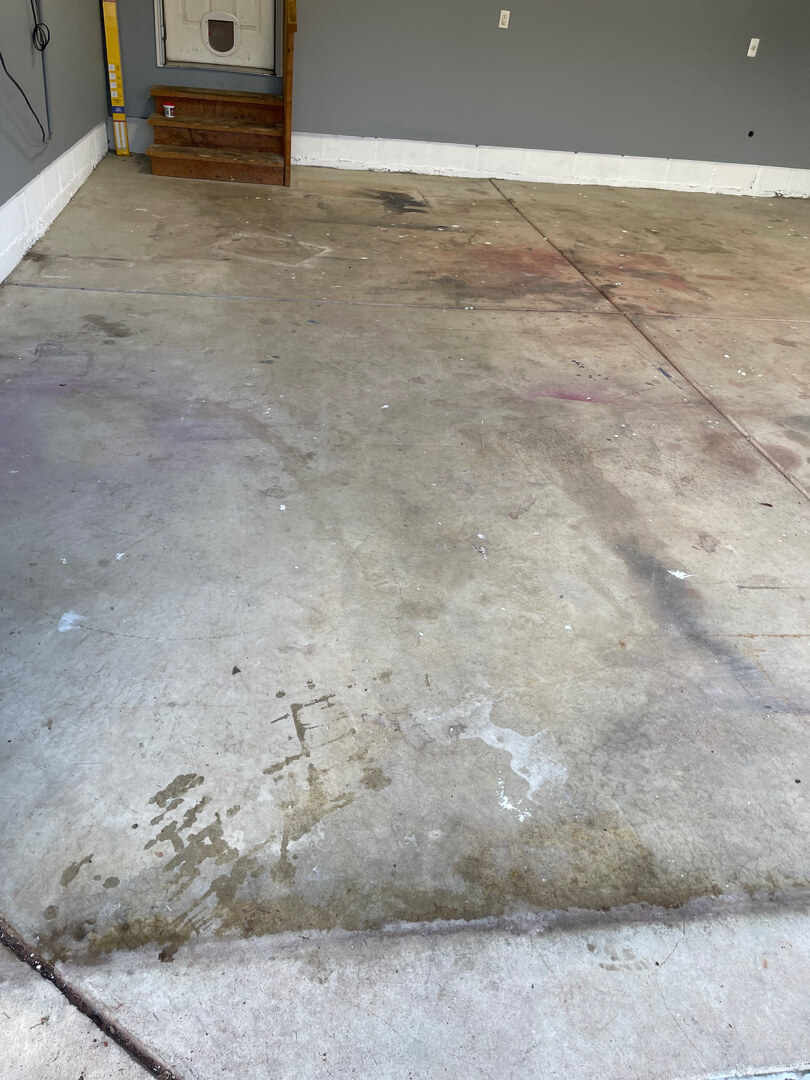
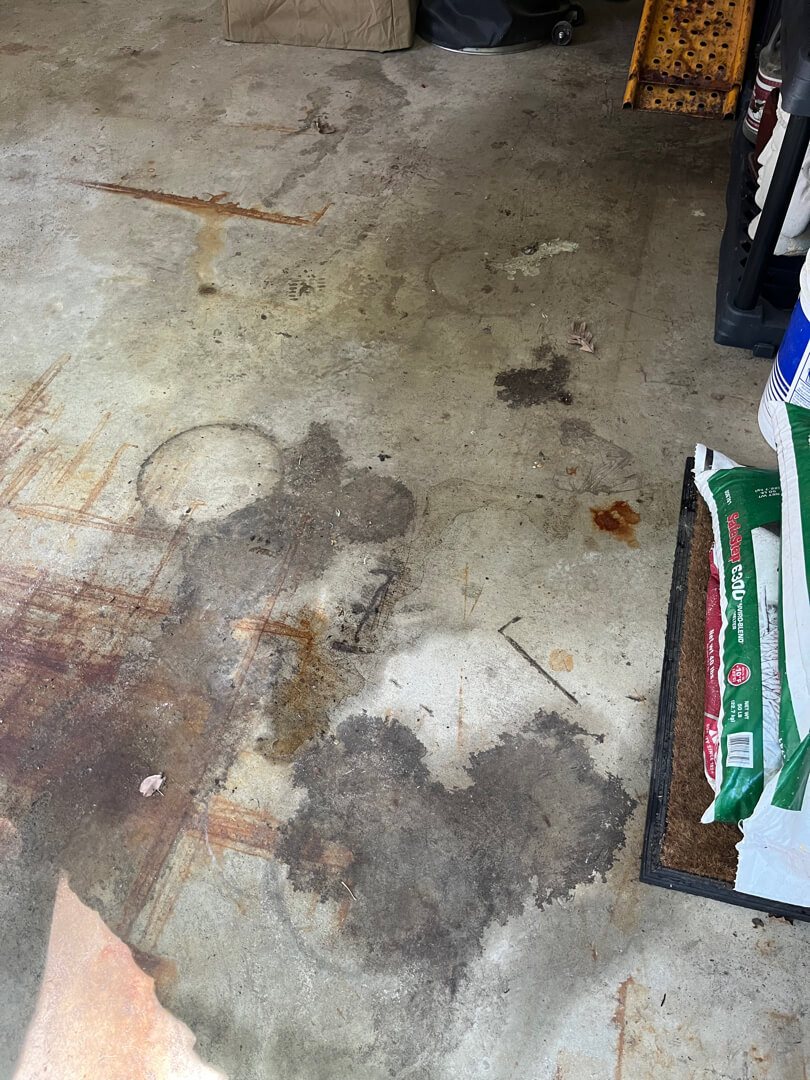
This slab had the most varied surface contamination of any project in this series. Paint spills in multiple colors covered large zones around the joint intersections. Oil staining overlapped with paint residue across the center of the floor. Scratch marks and dried adhesive added further layers of surface debris.
The contamination extended across all four slab panels. No single zone of the floor had clean, unaffected concrete. The wooden entry steps showed heavy weathering and surface grime.
Surface Preparation
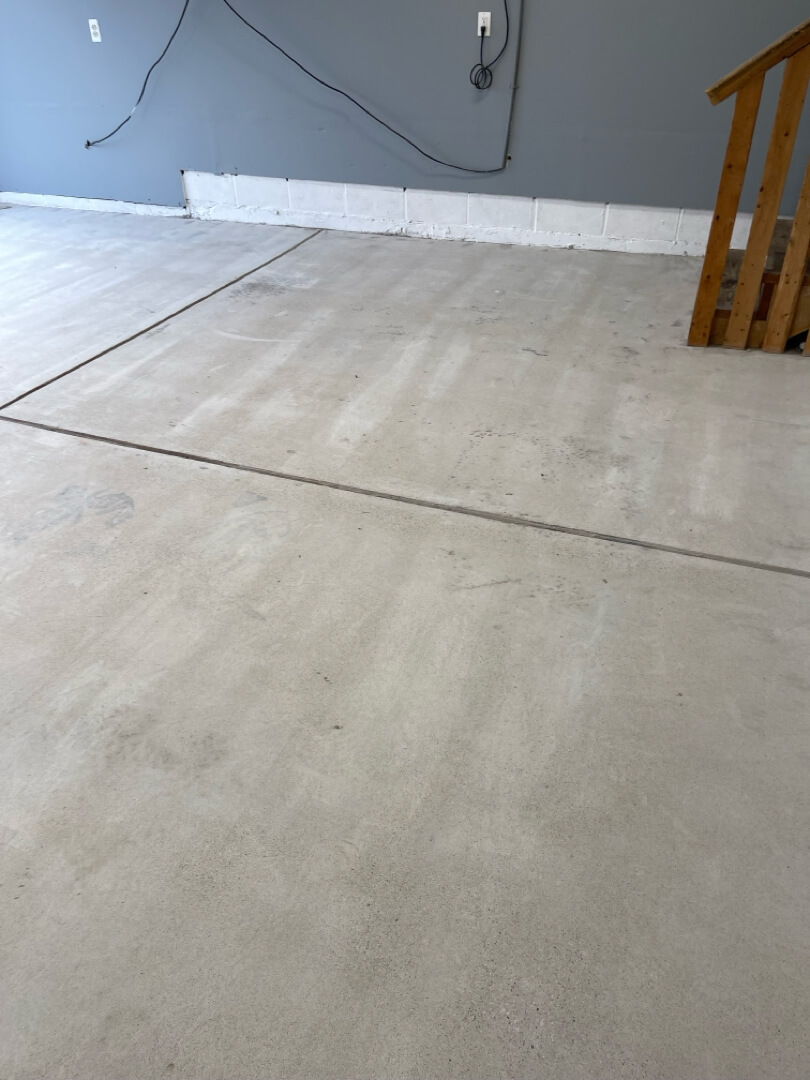
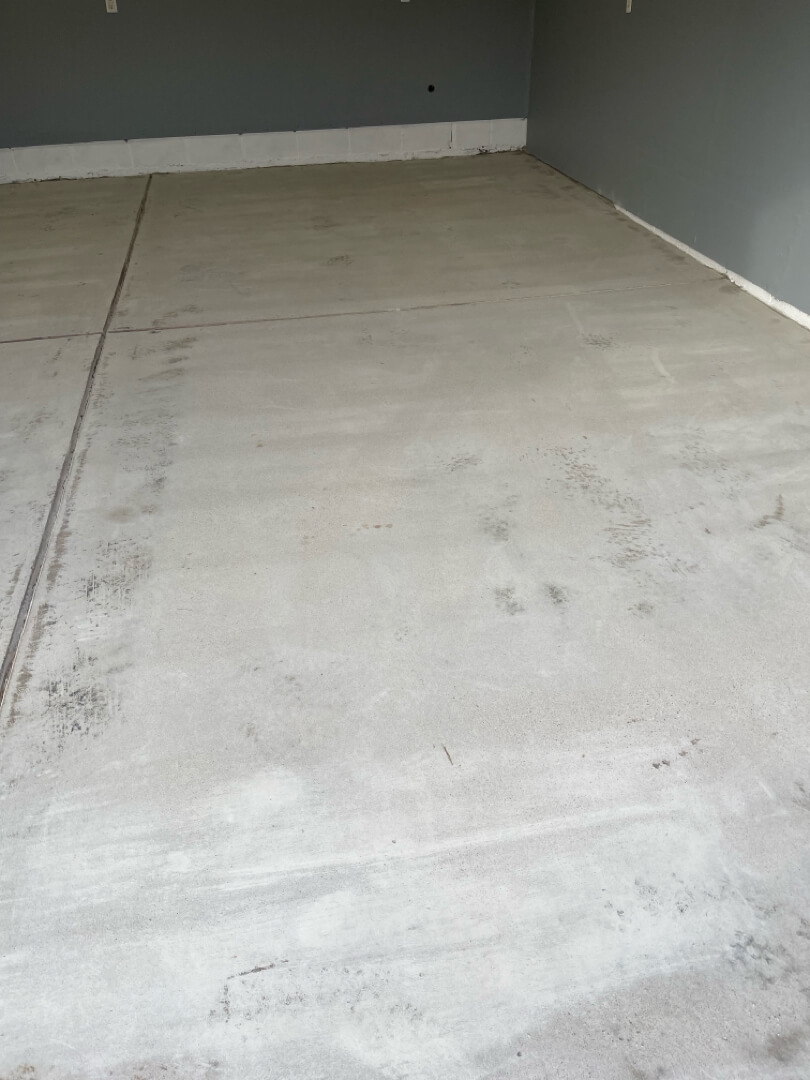
Our crew ground the 400-square-foot slab to clear all contamination. The grinding removed paint, oil residue, and surface debris in one systematic pass. Our team vacuumed the floor between passes to prevent cross-contamination. After grinding, the concrete showed a clean, open profile ready for repair.
Crack and Joint Repair with MR-50
Grinding revealed cracks at the control joints and along the step base. Our crew applied MR-50 repair primer directly into each crack. MR-50 penetrates open cracks and bonds to the concrete from inside the void.
Crack repair method selection: flexible filler vs. MR-50 →
The team worked MR-50 into the joint at the step base to seal water entry points. Treated cracks received filler after the MR-50 cured to complete each repair.
Wooden Step Preparation and Coating
The three entry steps were wood construction, not concrete. Wood requires different prep than concrete before a polyurea-polyaspartic system. Our crew cleaned and abraded each tread and riser surface by hand. Our team applied the MC3.8 base coat and Silver Creek flakes to each step. The steps match the floor color and carry the same 16-grit top coat for grip.
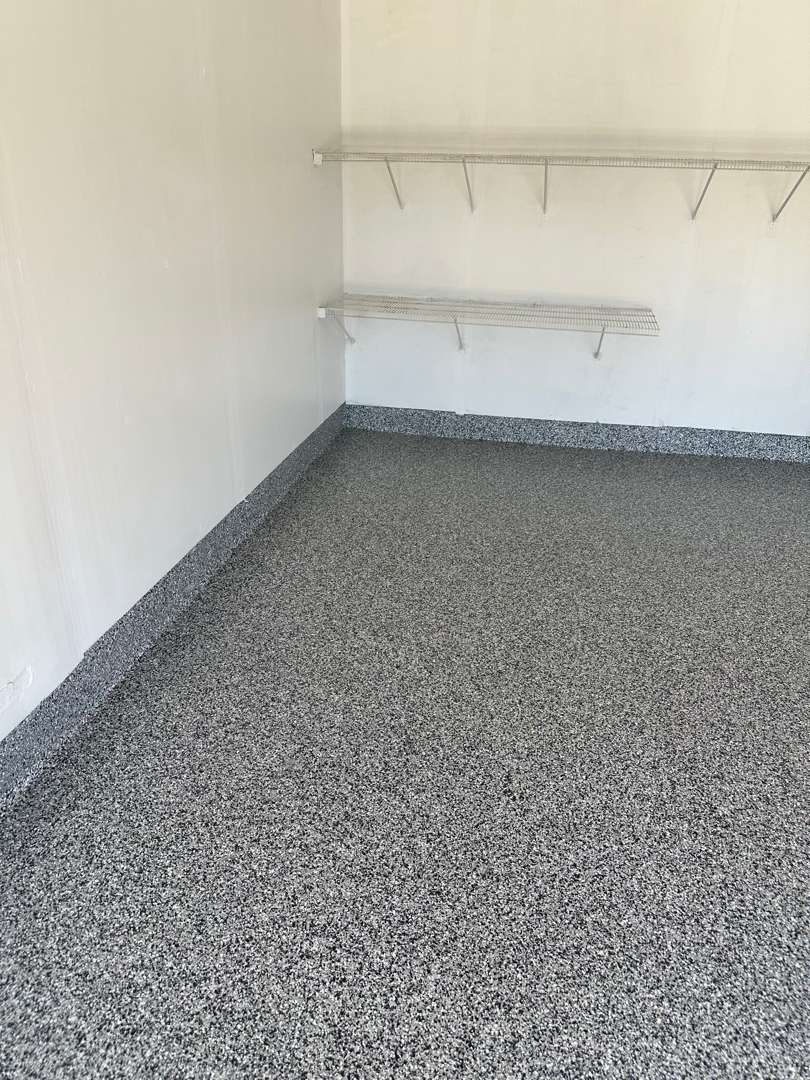
MC3.8 Coating System Application
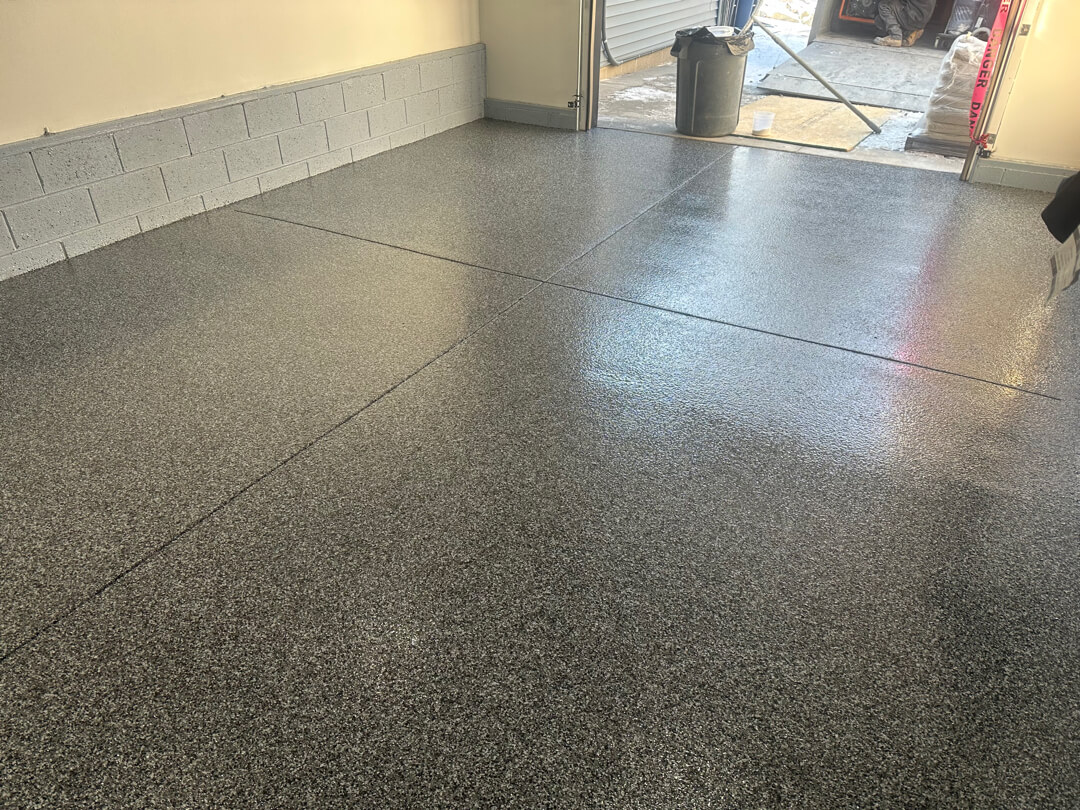
Our crew rolled the polyurea base coat across the 400-square-foot slab. Our team broadcast Silver Creek flakes into the wet base coat in full coverage. Against the gray-painted walls of this garage, Silver Creek reads distinctly dark. The charcoal and white chip contrast stands out sharply in this interior. Our crew applied the polyaspartic top coat with 16-grit traction additive throughout.
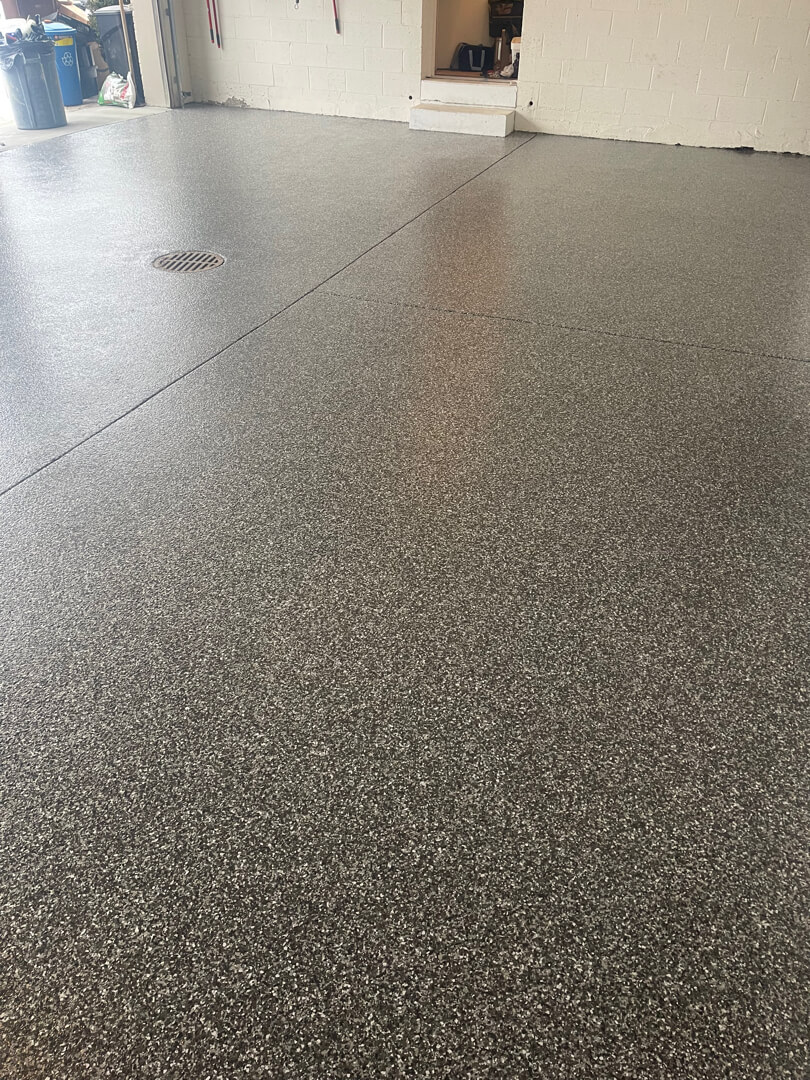
Completed Installation
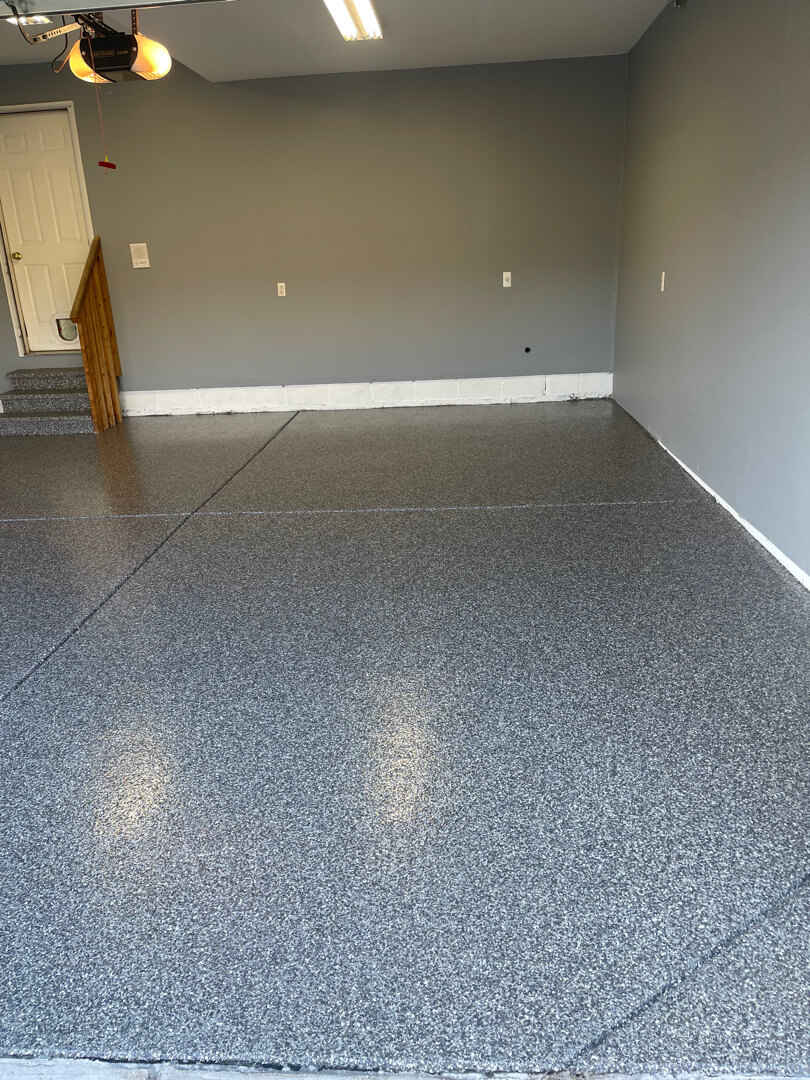

No paint, oil, or surface debris carries through beneath the finished coating. The MC3.8 system encapsulates all repaired cracks and treated joints. The wooden steps integrate seamlessly with the floor in Silver Creek color. The gray wall color amplifies the contrast of the dark Silver Creek surface.
Technical Specifications
Location | Ann Arbor, MI |
Floor Area | 400 square feet |
Steps | 3 wooden steps (treads and risers coated) |
Wall Verticals | None |
Prior Surface | Bare concrete — paint spills, oil, mixed contamination |
Crack Repair | MR-50 repair primer applied to cracks and joints |
Coating System | MC3.8 polyurea-polyaspartic |
Flake Color | Silver Creek |
Traction Additive | 16-grit |
Testimonials - Voices of Our Clients
Brian Colella
Ann Balarezo
NEW Garage Floor Coating
on Country Club Road
Country Club Road — Ann Arbor, MI
Project Overview
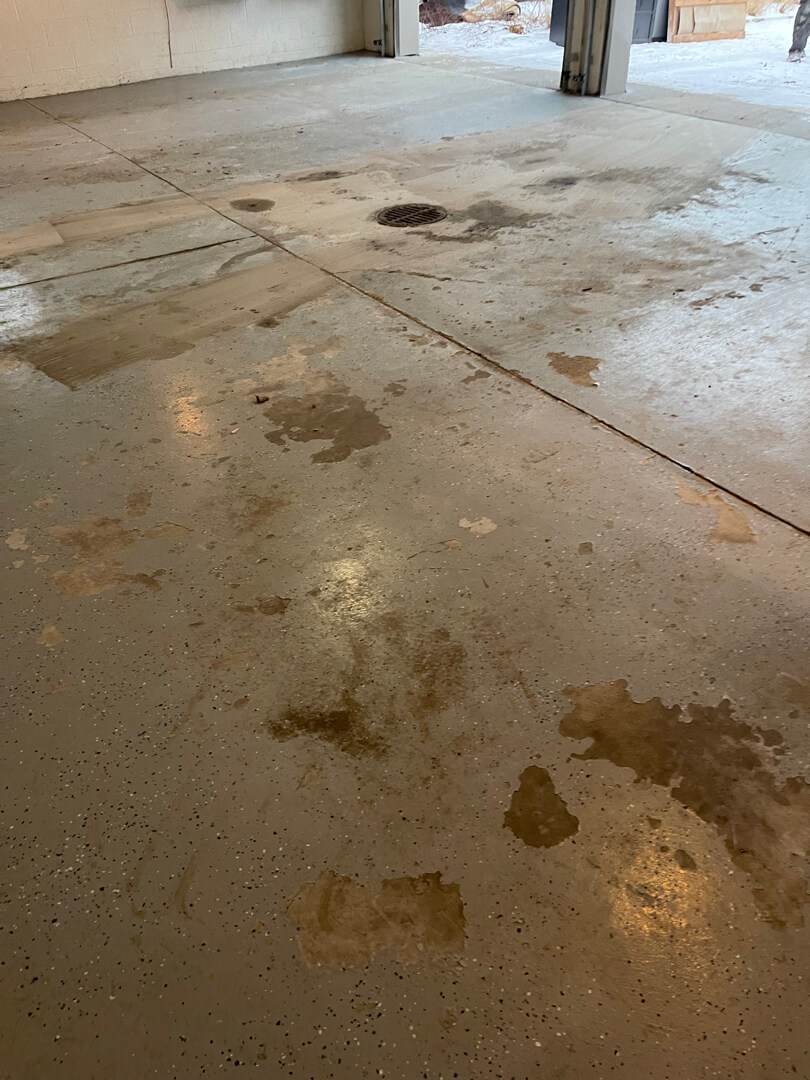
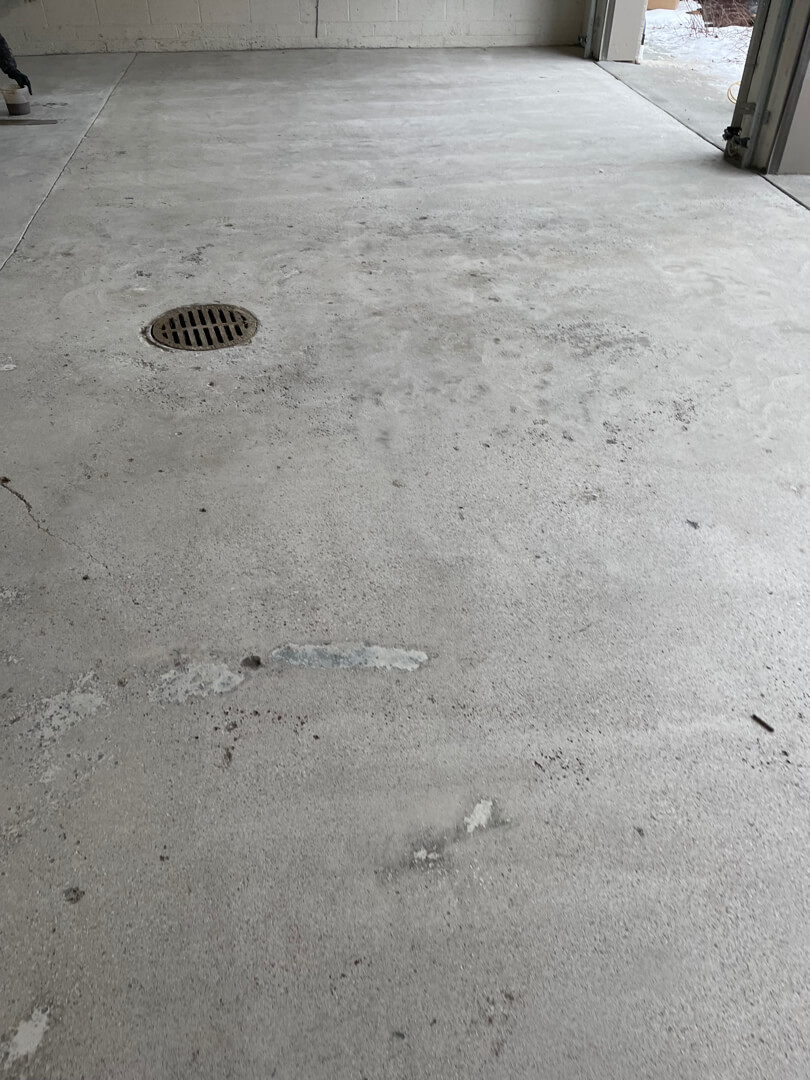
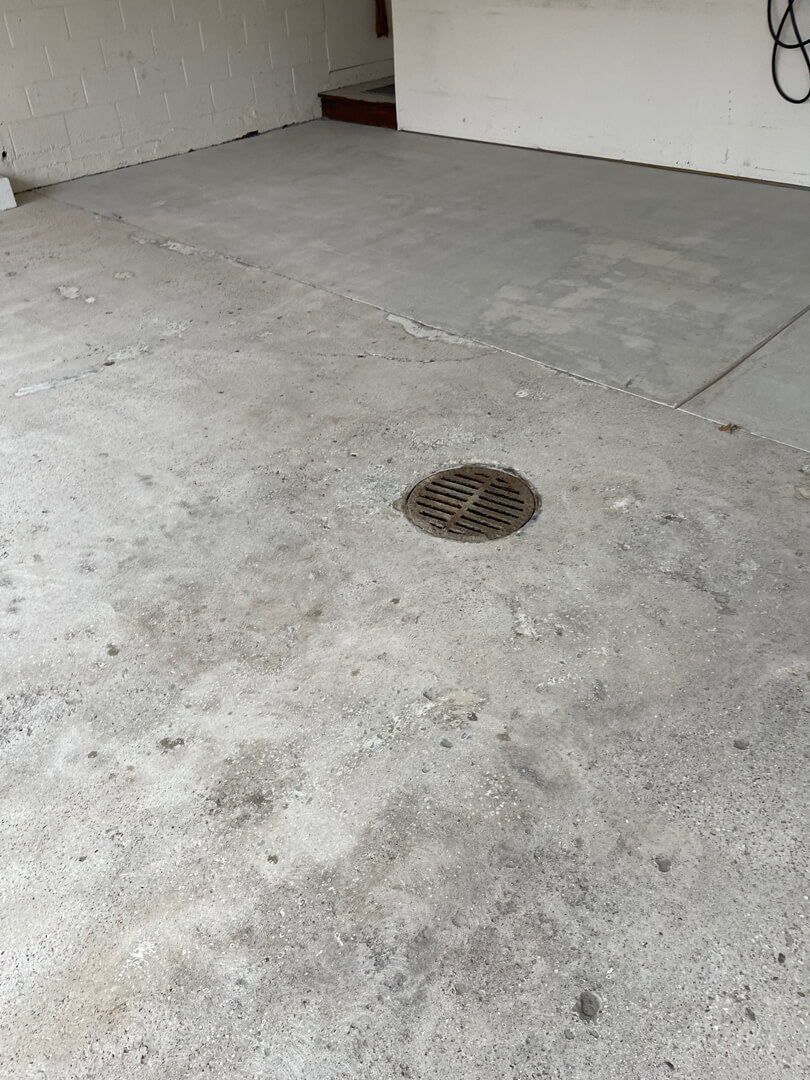
This 707-square-foot garage on Country Club Rd had a deteriorated epoxy floor. MotorCity Floors and Coatings stripped the old coating and addressed pitting and cracks below. The project also required working around a center-slab floor drain. Our crew finished with the MC3.8 system in Silver Creek with 16-grit traction
Condition of the Existing Epoxy
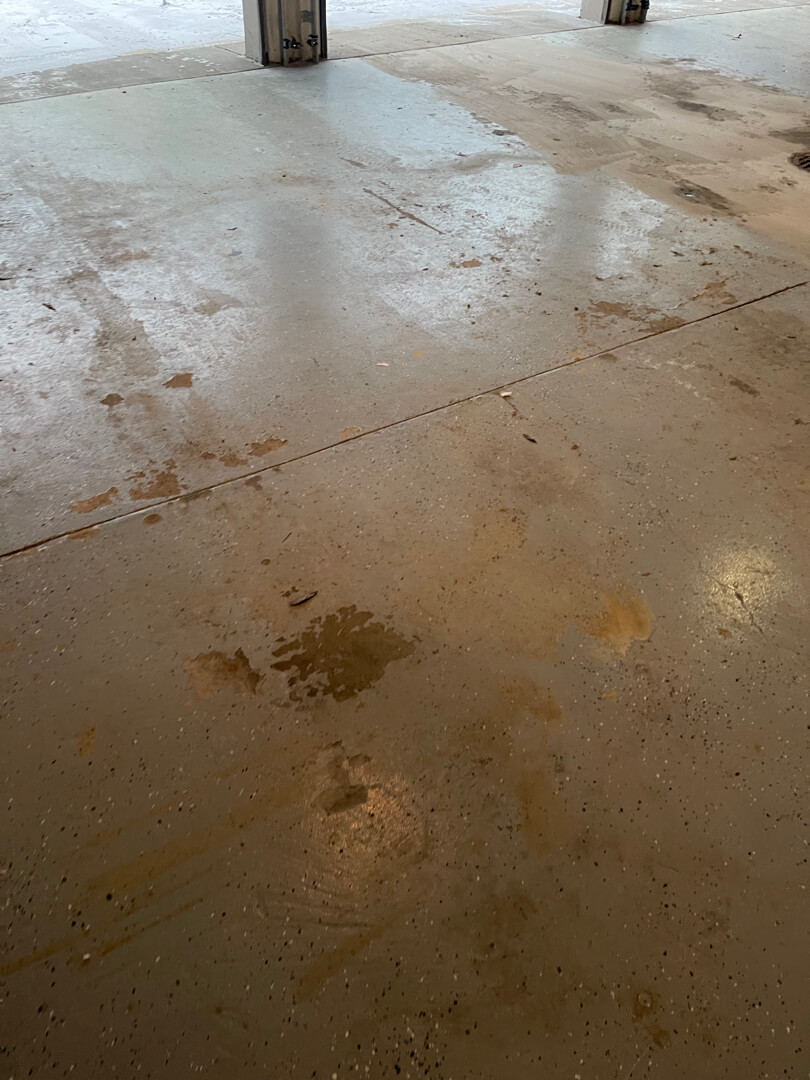
The existing epoxy coating showed advanced wear across both parking bays. Vehicle fluid had saturated the tire tracks and stained through to the concrete. The coating surface had lost adhesion near the control joints. Seasonal freeze-thaw cycles had accelerated cracking along the joint lines.
Oil pooling had concentrated near the floor drain in the center of the slab. The drain area showed the heaviest surface staining of any zone in the garage. Contamination around the drain penetrated below the existing epoxy.
Epoxy Removal and Diamond Grinding
Pitting and Crack Repair
MC3.8 Coating System Application
Completed Installation

Testimonials - Voices of Our Clients
Ben Bershad
Paul Wilson
Technical Specifications
Location | Ann Arbor, MI |
Floor Area | 707 square feet |
Verticals | None |
Steps | None |
Prior Surface | Failing epoxy coating — fully stripped |
Concrete Repairs | Pitting (Mender epoxy flooding) and crack filling |
Floor Drain | Present — worked around and preserved |
Coating System | MC3.8 polyurea-polyaspartic |
Flake Color | Silver Creek |
Traction Additive | 16-grit |
NEW Garage Floor Coating
on Hensley Drive
Hensley Drive — Ann Arbor, MI
Project Overview
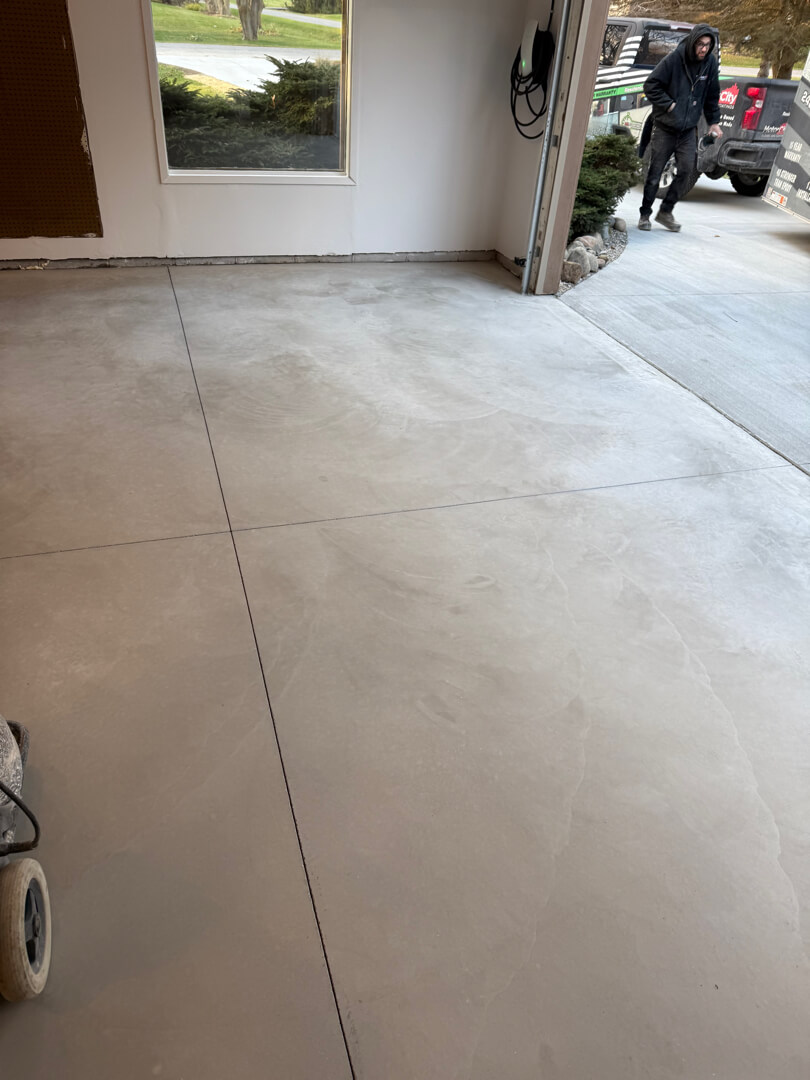

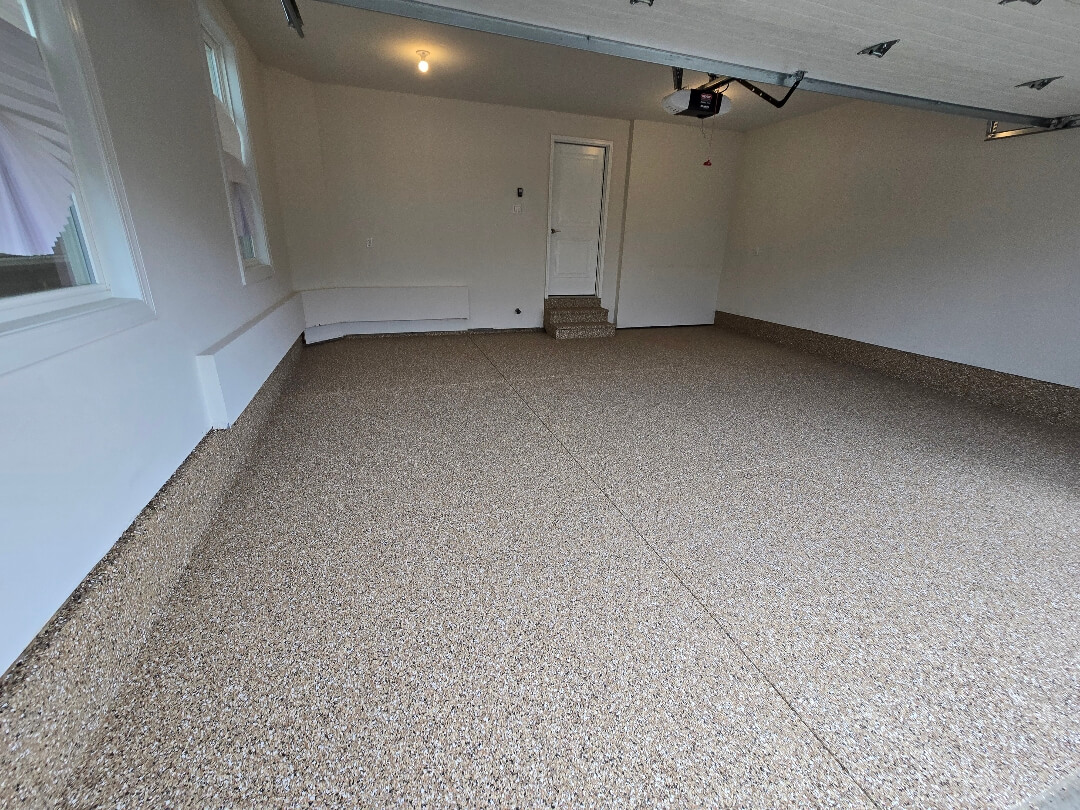
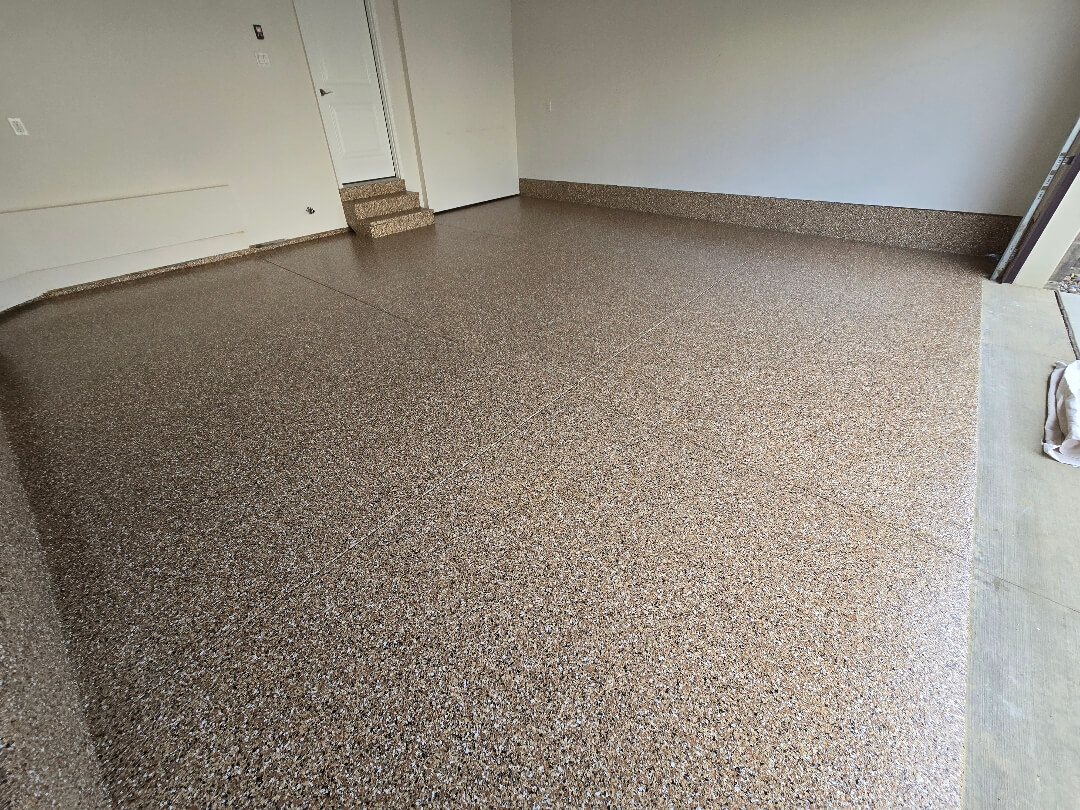
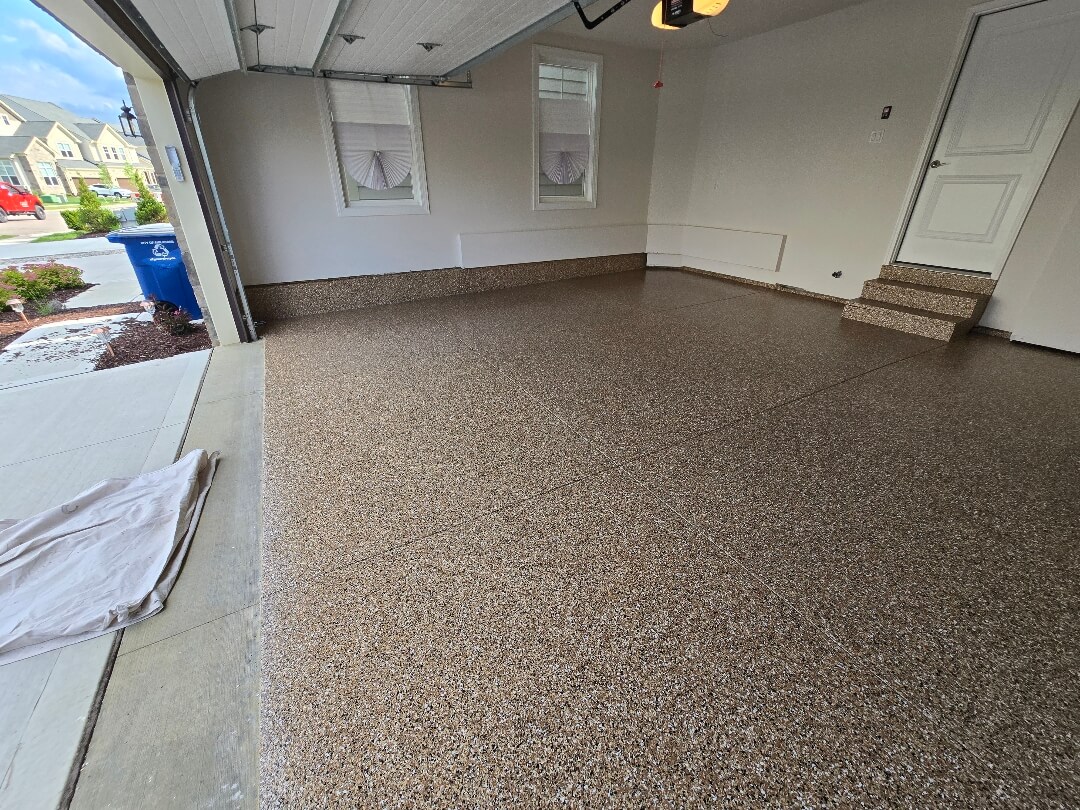
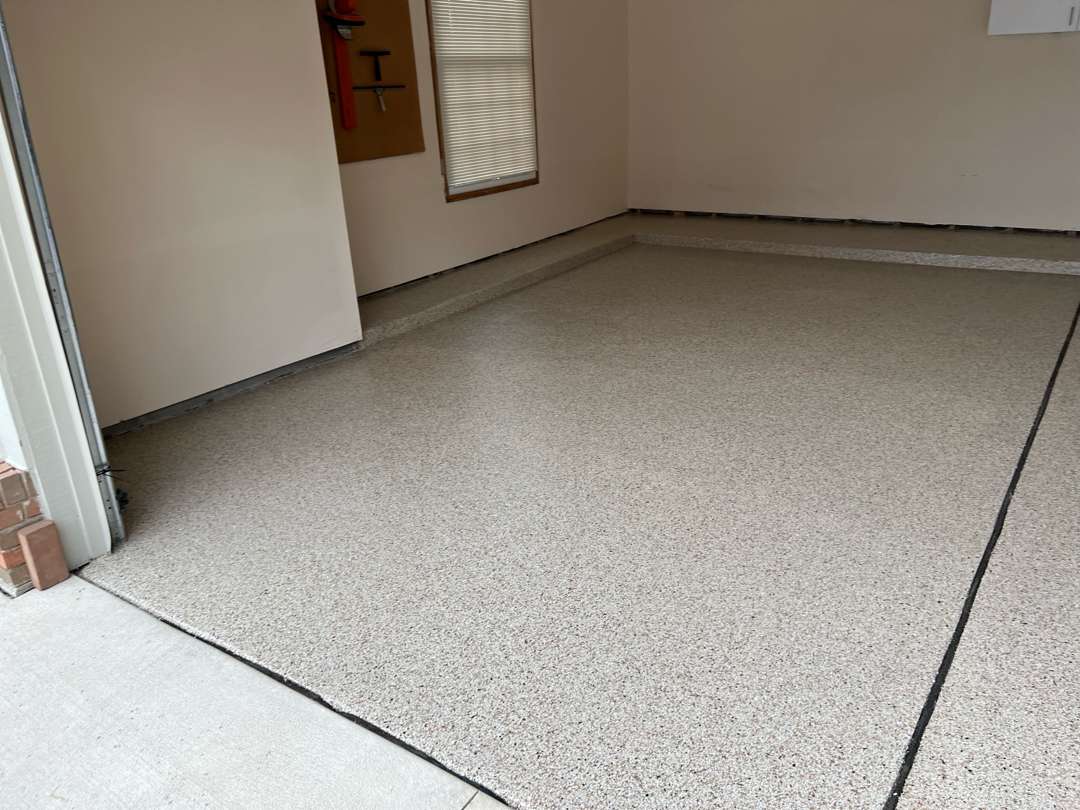
This Hensley Dr. garage had freshly poured concrete ready for its first coating. MotorCity Floors and Coatings installed the MC3.8 system on 594 square feet. The scope included the main floor, 7 linear feet of step risers, and step treads. Our crew used Pebble Beach flakes with 16-grit traction in the top coat.
Surface Preparation on New Concrete
New concrete requires grinding before any coating can bond to it. Concrete curing compounds and surface laitance block direct adhesion. Our crew ground the full 594 square feet to open the slab surface. Grinding removed the curing layer and created a mechanical profile for bonding. Our team vacuumed the ground surface before any material touched the floor.
Step Risers and Treads
The entry steps connect the garage floor to the house interior. Our crew ground the step risers and treads by hand for full surface coverage.
Our team applied Pebble Beach base coat to the risers before coating the floor. Each tread received the same flake broadcast and top coat as the main surface. The result ties the steps into the floor with a continuous finish.
MC3.8 Coating System Application
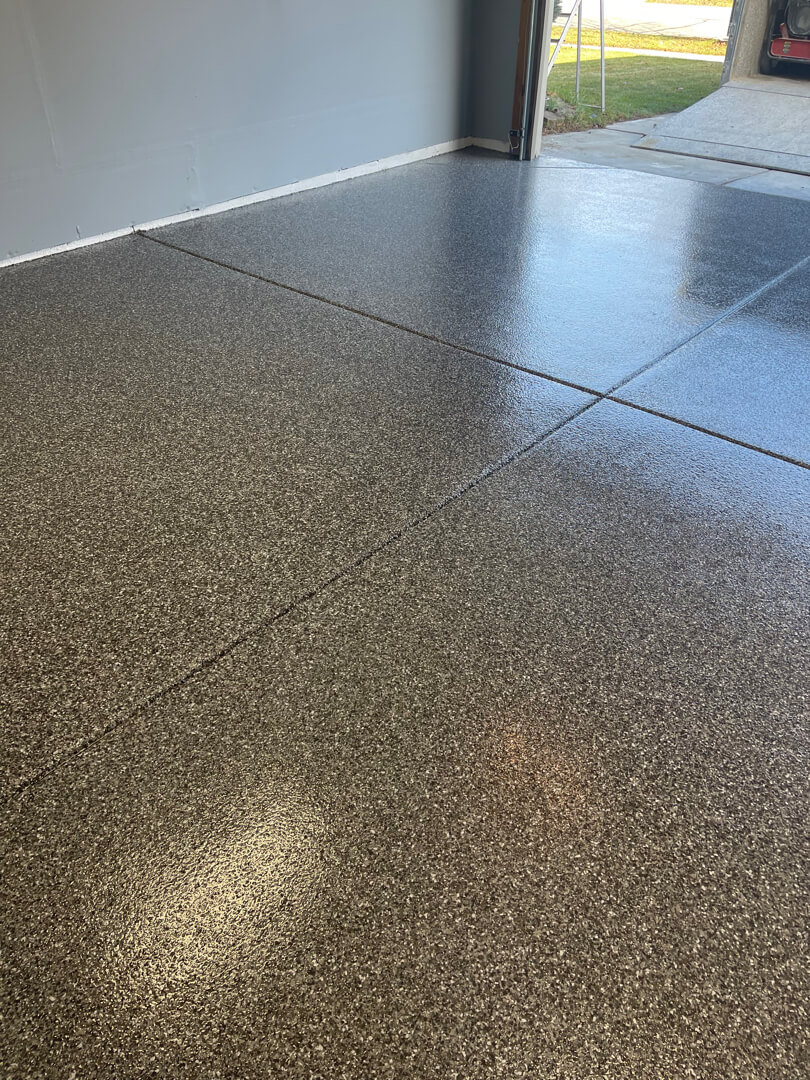
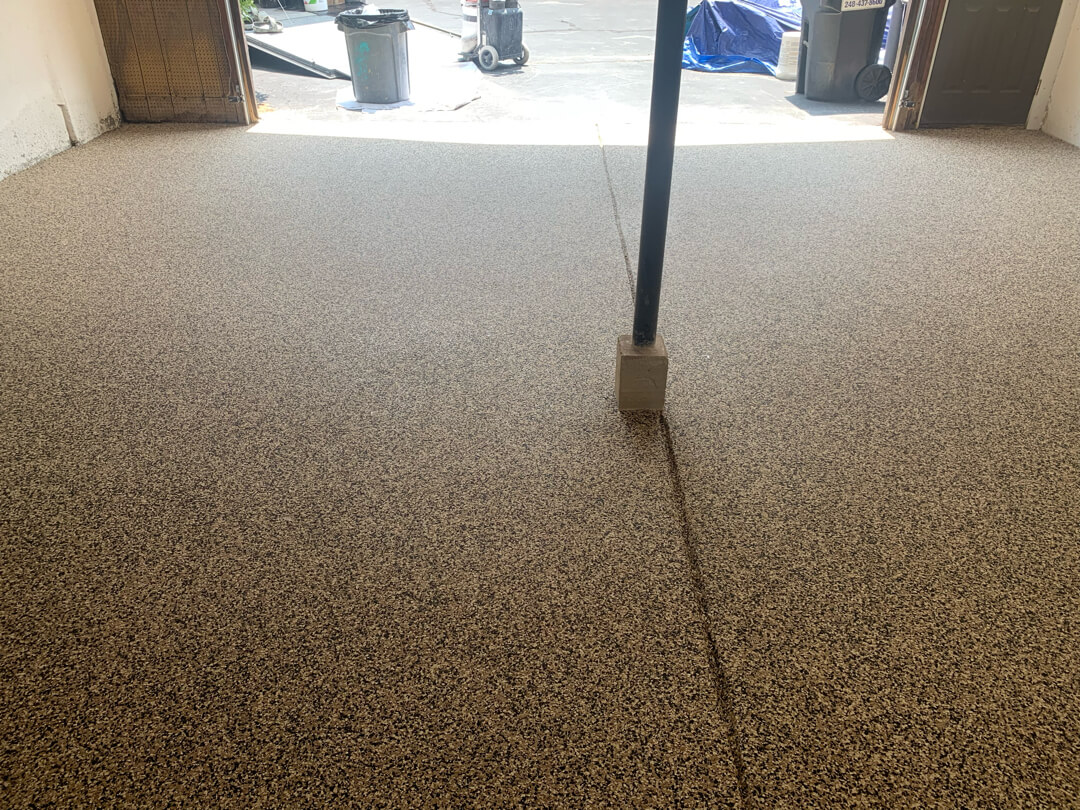
Our crew rolled the polyurea base coat across the prepared slab in full. Our team broadcast Pebble Beach flakes into the wet base coat by hand. Pebble Beach combines warm tans, soft greys, and off-white chips. The tone suits garages with white or light-painted walls, as seen here. Our crew finished with a polyaspartic top coat carrying 16-grit traction additive.
Completed Installation


Starting with new concrete gave this floor a clean base from the first day. No residue, prior coatings, or staining required removal before work began. Pebble Beach reads warmer and lighter than darker blends like Silver Creek. The 16-grit texture provides reliable grip without roughening the visual finish. The MC3.8 system seals the new slab against vehicle fluids and surface wear.
Technical Specifications
Location | Ann Arbor, MI |
Floor Area | 594 square feet |
Concrete Condition | New pour — no prior coating |
Step Risers | 7 linear feet (coated) |
Wall Verticals | None |
Prior Surface Removal | None required |
Concrete Repairs | None required |
Coating System | MC3.8 polyurea-polyaspartic |
Flake Color | Pebble Beach |
Traction Additive | 16-grit |
Testimonials - Voices of Our Clients
Ben Bershad
Paul Wilson
NEW Garage Floor Coating
on Kimberley Road
Kimberley Rd — Ann Arbor, MI
Project Overview

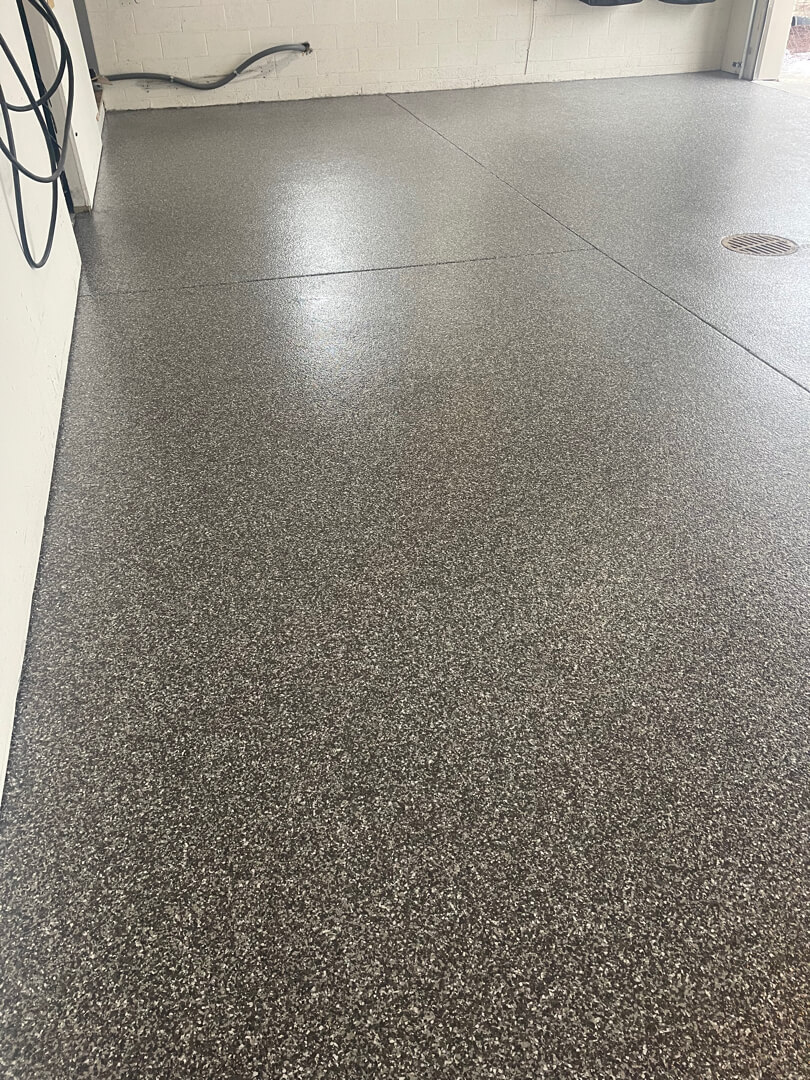
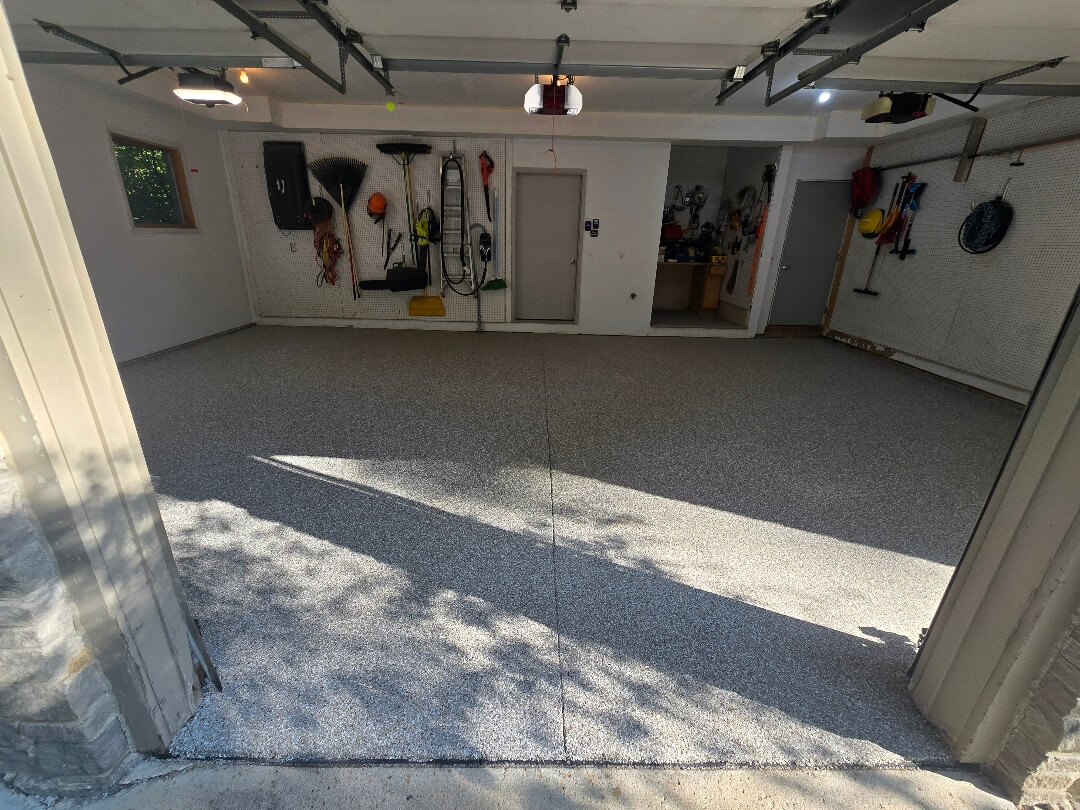
This Kimberley Rd garage had a failing epoxy coating in need of full replacement. MotorCity Floors and Coatings stripped the old epoxy and installed the MC3.8 system. The project covered 386 square feet with no verticals, steps, or concrete repairs. Our crew finished with Glacier flakes and a 36-grit traction additive.
Condition of the Existing Epoxy
Fluid deposits along the vehicle tracks had stained through the epoxy. The surface had lost its bond in several areas near the control joints. Heavy use had worn the old coating unevenly across both parking bays.
Epoxy Removal and Surface Preparation
Our crew stripped the old epoxy using diamond grinding equipment. The grinder cut through the coating and exposed raw concrete below. Grinding also cleared the contamination that had soaked through the epoxy.
Why failing epoxy must be completely removed before recoating →
Our team made multiple passes across the 386 square feet to ensure full removal.
The concrete beneath the epoxy was structurally sound with no pitting or spalling. Our crew inspected the stripped slab and confirmed no repairs were needed. The clean, open surface was ready for MC3.8 base coat application.
MC3.8 Coating System Application
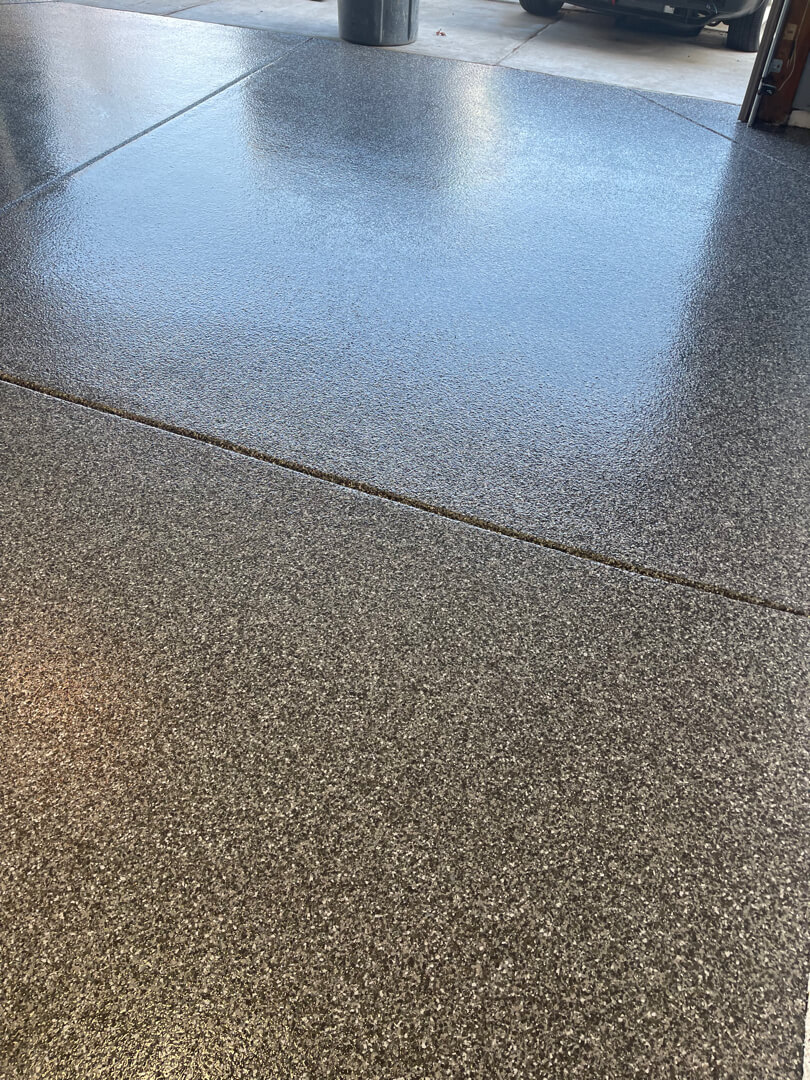
Our crew rolled the polyurea base coat across the prepared slab. Our team broadcast Glacier flakes into the base coat while it remained wet. Glacier is a cool, light-grey blend with white and silver tones. The color pairs well with the painted block wall perimeter of this garage.
Our crew back-rolled the flake layer to press chips into the base coat evenly. Our team then applied the polyaspartic top coat across the full surface. A 36-grit traction additive went into the top coat for grip underfoot. 36-grit is a coarser profile than 16-grit, giving more pronounced texture.
Completed Installation


Glacier gives this floor a clean, neutral tone that brightens the interior. The full-broadcast flake pattern conceals the control joints visually. The 36-grit surface provides firm footing even in wet or icy conditions. No staining, tire tracks, or wear marks from the old coating carry through.
Testimonials - Voices of Our Clients
Victor Trecha
C P Holt
Technical Specifications
Location | Ann Arbor, MI |
Floor Area | 386 square feet |
Verticals | None |
Steps | None |
Prior Surface | Failing epoxy coating — fully stripped |
Coating System | MC3.8 polyurea-polyaspartic |
Flake Color | Glacier |
Traction Additive | 36-grit |
Concrete Repairs | None required |
NEW Garage Floor Coating
on Oak Ravine Court
Oak Ravine Ct — Ann Arbor, MI
Project Overview

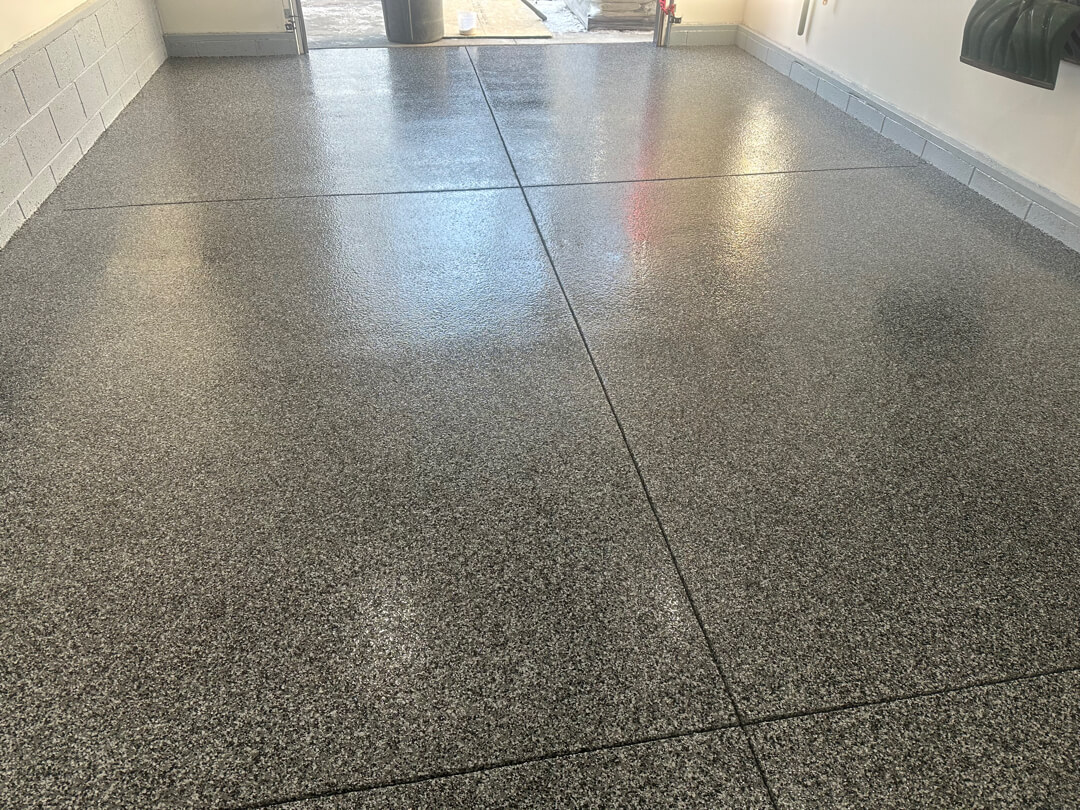
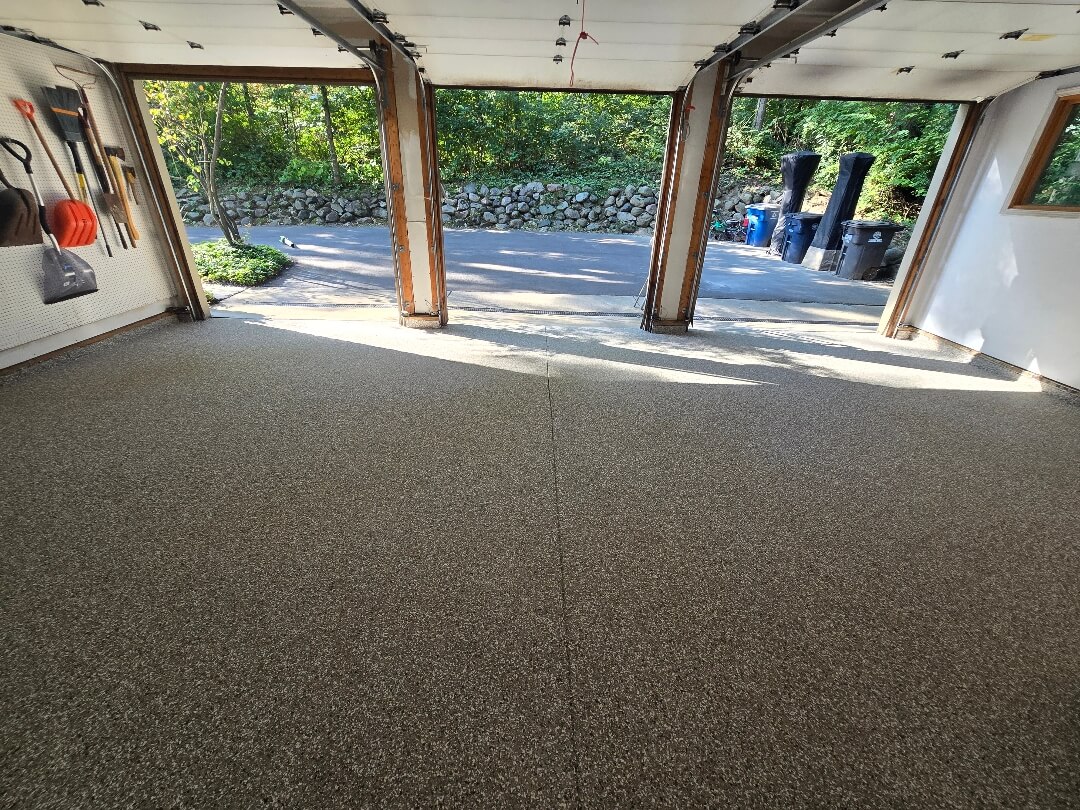
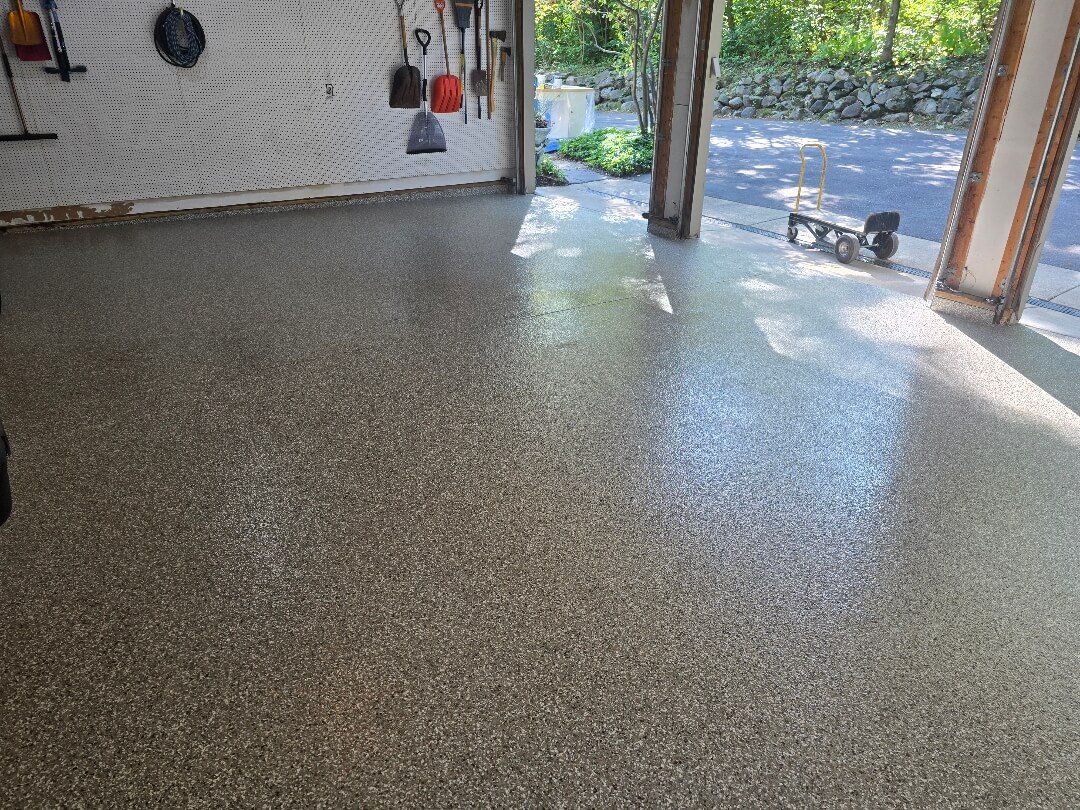
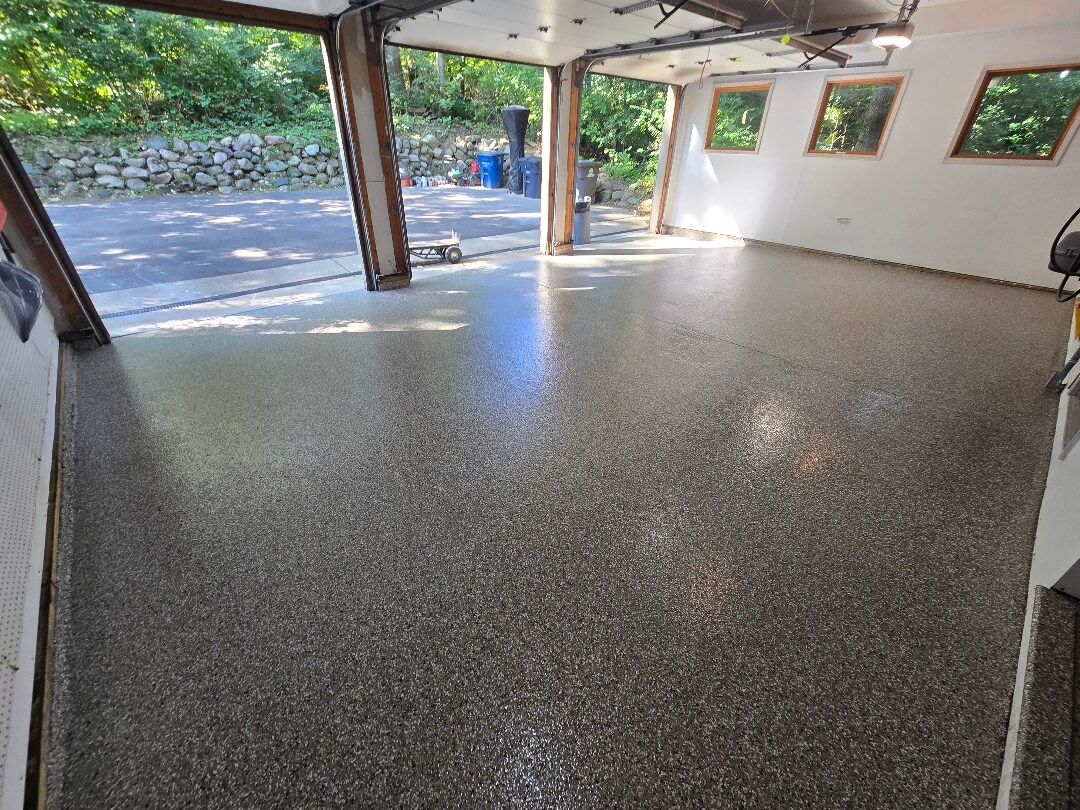
MotorCity Floors and Coatings coated a 17-year-old garage on Oak Ravine Ct in Ann Arbor. The floor measured 1,110 square feet with 58 linear feet of block wall verticals. Our crew installed the MC-4.9 system with Silver Creek flakes and 16-grit traction. Moisture testing confirmed no moisture barrier was necessary before coating.
Initial Substrate Condition
Surface discoloration varied in depth across the slab. The concrete showed no spalling or structural deterioration. Some areas near the raised platform edge showed heavier staining.
Moisture Testing Protocol
Our crew tested moisture levels before grinding and again after. We used a calibrated moisture reader at multiple points across the slab. The highest reading recorded was 3.8. Readings below 4.0 allow direct coating without a moisture barrier. No barrier was necessary on this project.
Surface Preparation
Our crew diamond-ground the full 1,110 square feet to open the surface. Grinding removed the laitance layer and surface contaminants. Our team vacuumed thoroughly after each pass. The block wall verticals required hand-held grinding along the perimeter.
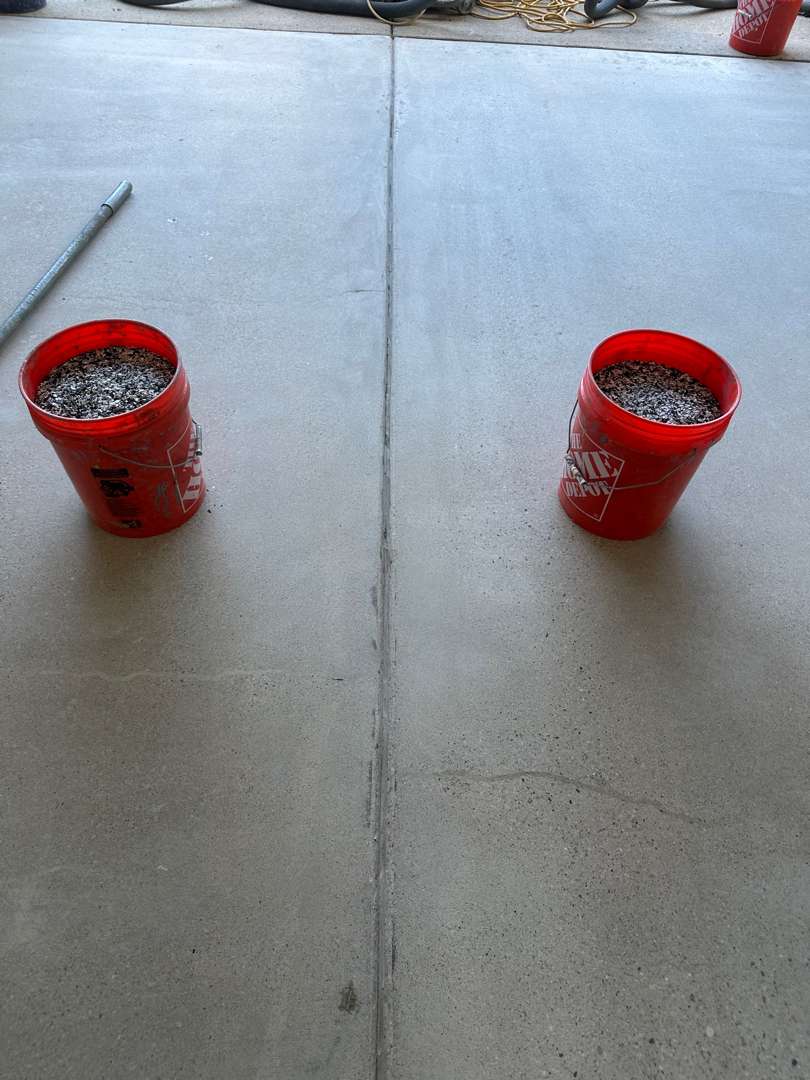
Crack and Joint Repair

Our crew filled the control joint cracks before coating. Our team used a semi-rigid filler suited to the polyurea system above. The filler accommodates minor movement without cracking the coating.
Surface Flooding
Our crew flooded low areas of the slab to level the surface. This step eliminated minor low spots from years of wear. Our team spread and leveled the material across affected zones. The flooded areas cured fully before base coat application.
Block Wall Vertical Preparation
The 58 linear feet of block wall required separate prep and coating. Our crew hand-ground each vertical surface to create mechanical adhesion. Block masonry is porous, so our team applied a dedicated vertical primer.
Why block wall verticals require a primer that poured concrete verticals do not →
Our crew then coated the verticals with the same MC-4.9 system. The finished verticals tie the floor and wall into one continuous surface.
MC-4.9 Coating System Application
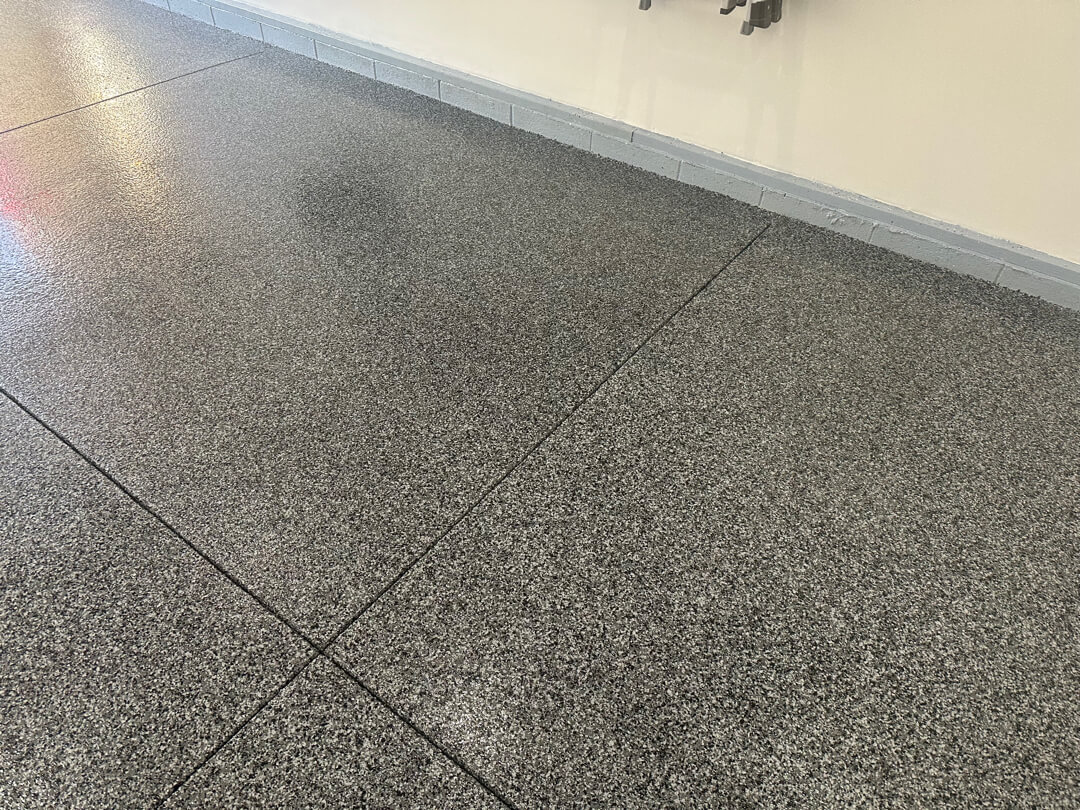
Our crew rolled the polyurea base coat across the prepared slab. Our team broadcast Silver Creek flakes at H-6 density into the wet base. H-6 density delivers a tight, full-coverage flake pattern across the floor. Our crew then applied the polyaspartic top coat with 16-grit traction additive.
Completed Installation

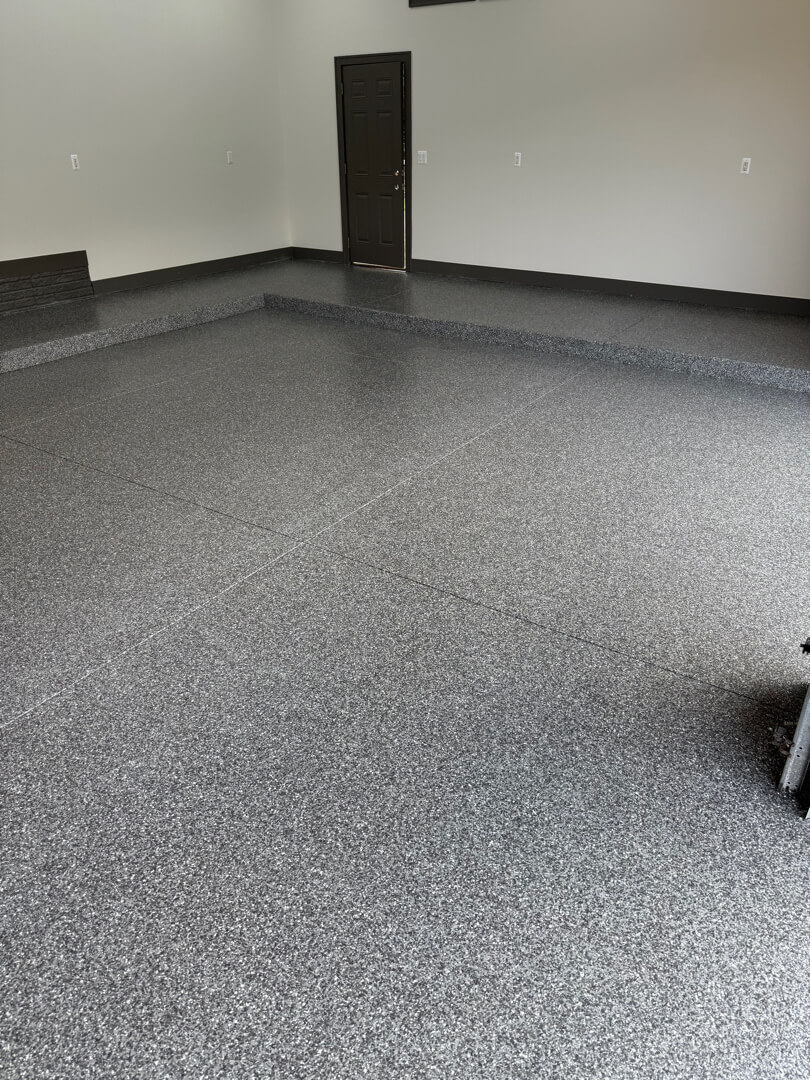
Silver Creek delivers a charcoal-and-white tone that reads clean in any light. The H-6 broadcast fills the surface with dense flake coverage. The 16-grit additive provides traction without altering the finished appearance. The MC-4.9 top coat resists abrasion, UV degradation, and chemical exposure.
Testimonials - Voices of Our Clients
Sara Menzies
Paul Falis
Technical Specifications
Location | Ann Arbor, MI |
Floor Area | 1,110 square feet |
Vertical Coverage | 58 linear feet of block wall |
Coating System | MC-4.9 polyurea-polyaspartic |
Flake Color | Silver Creek |
Broadcast Density | H-6 |
Traction Additive | 16-grit |
Moisture Barrier | Not required (max reading: 3.8) |
Steps | None |
NEW Garage Floor Coating
on Overridge Drive
Overridge Drive — Ann Arbor, MI
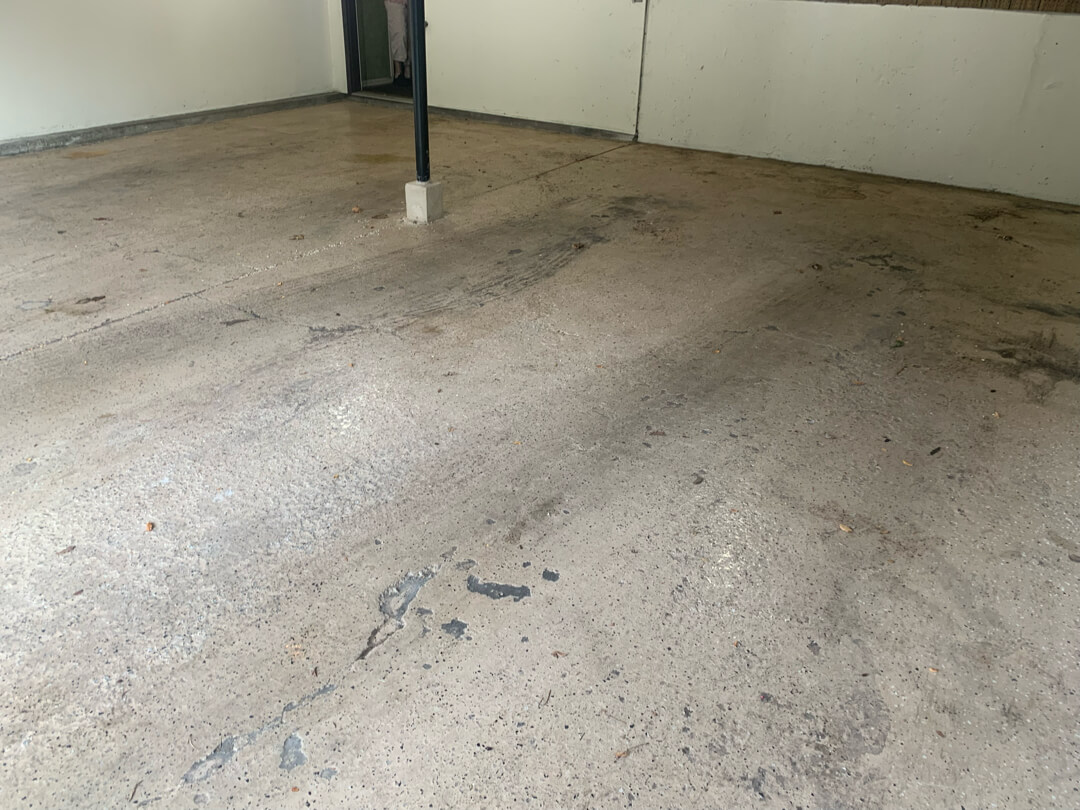
Project Overview
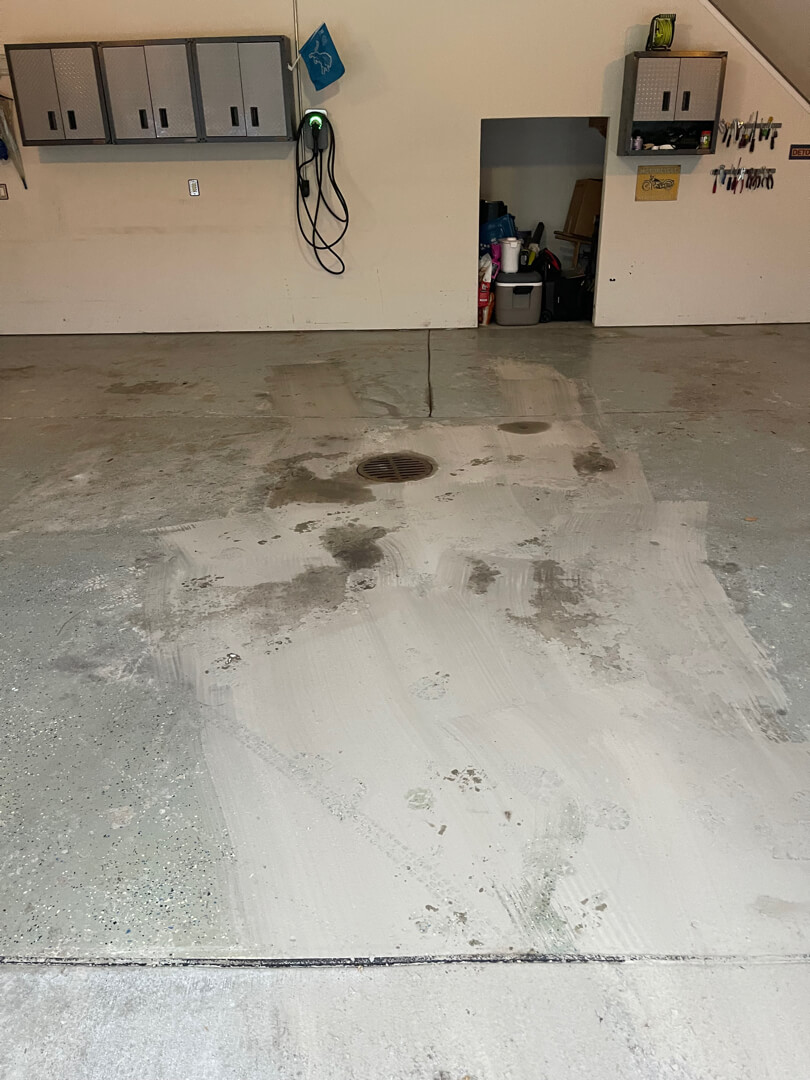
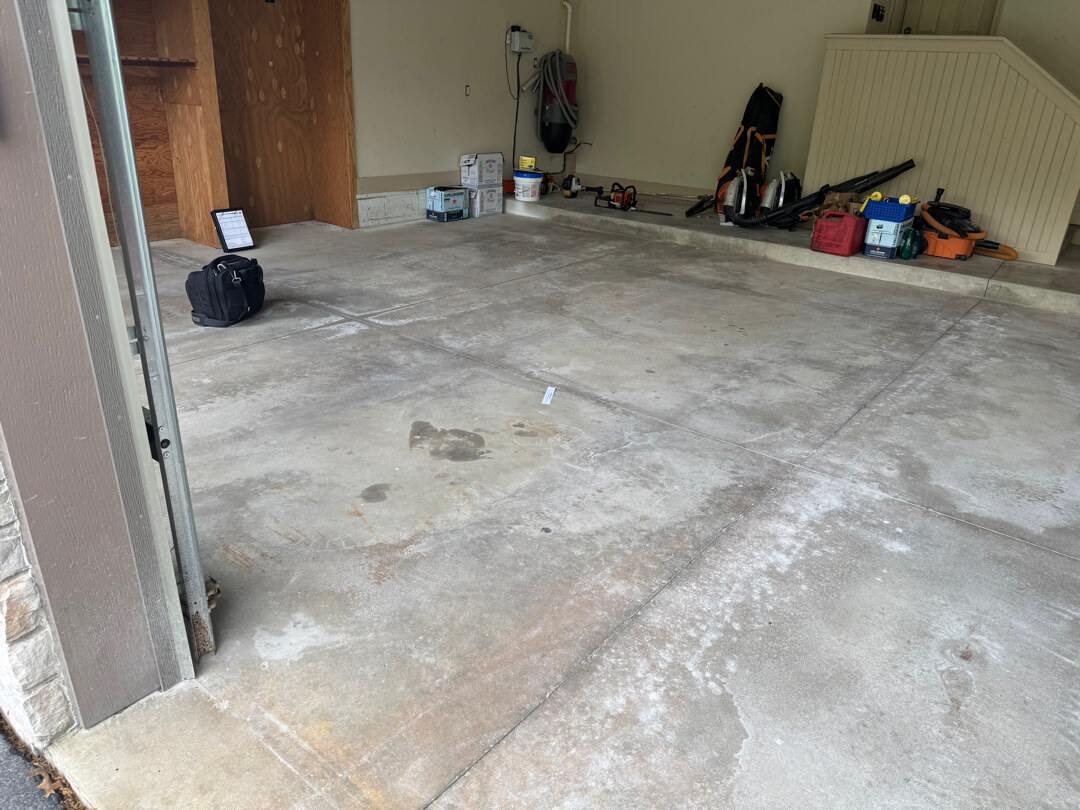
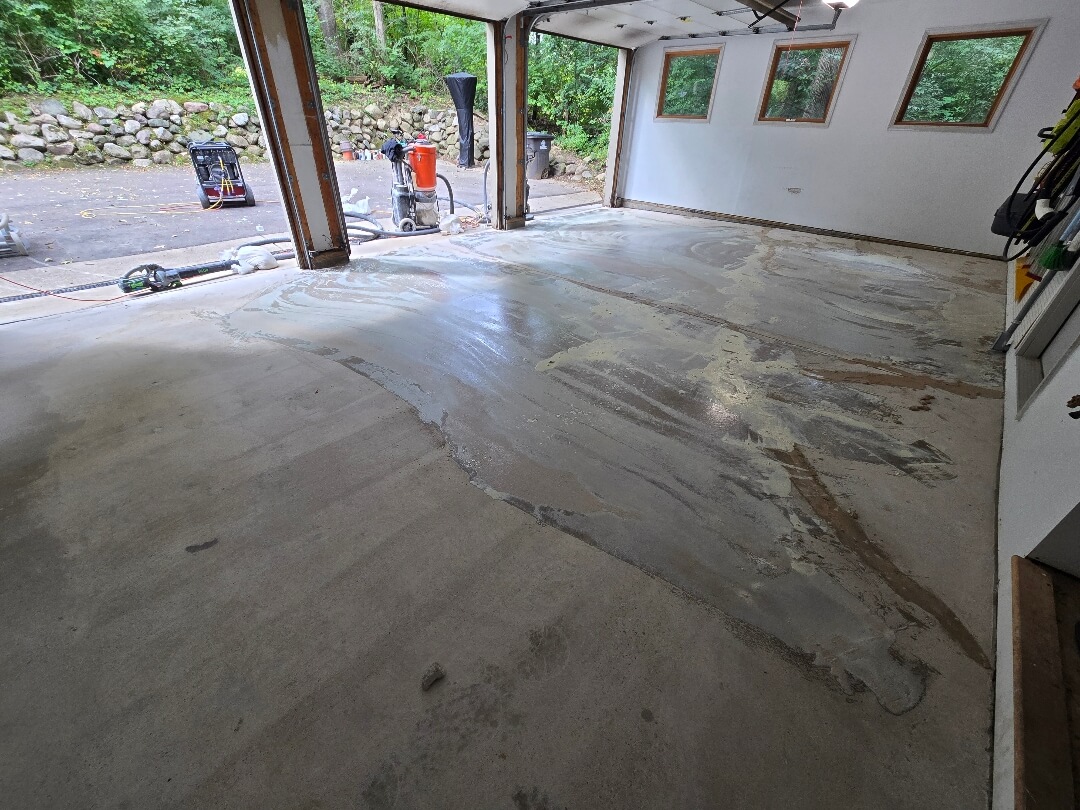
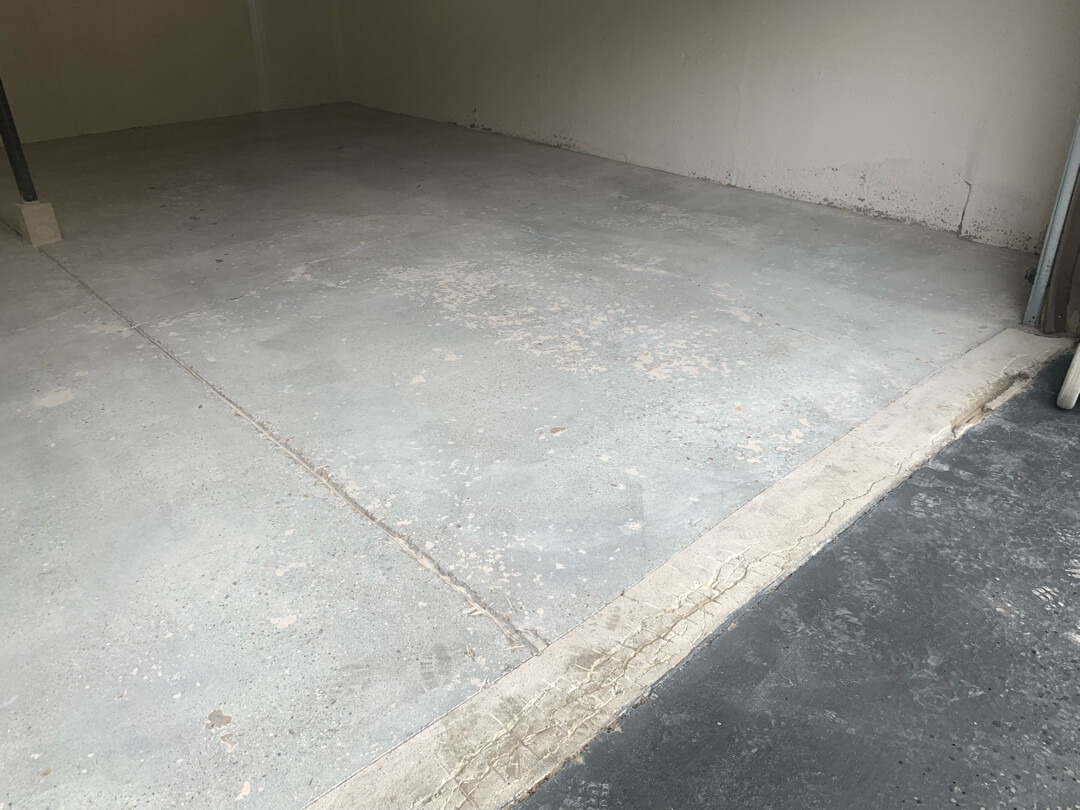
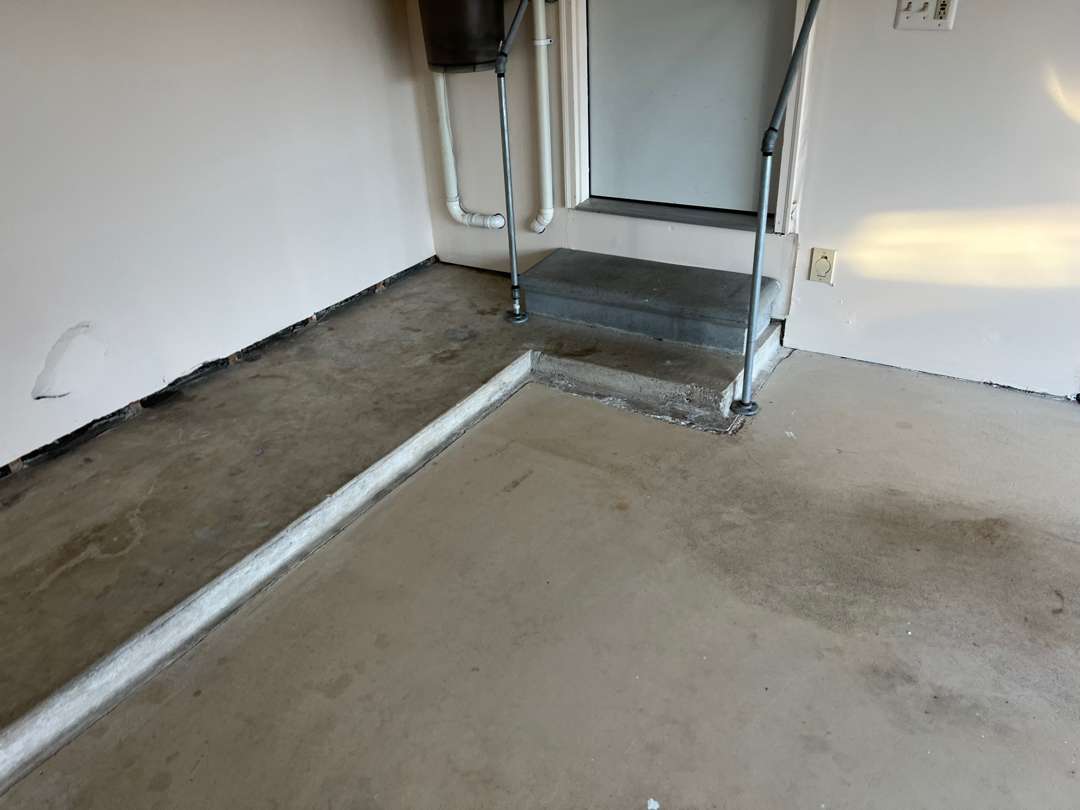
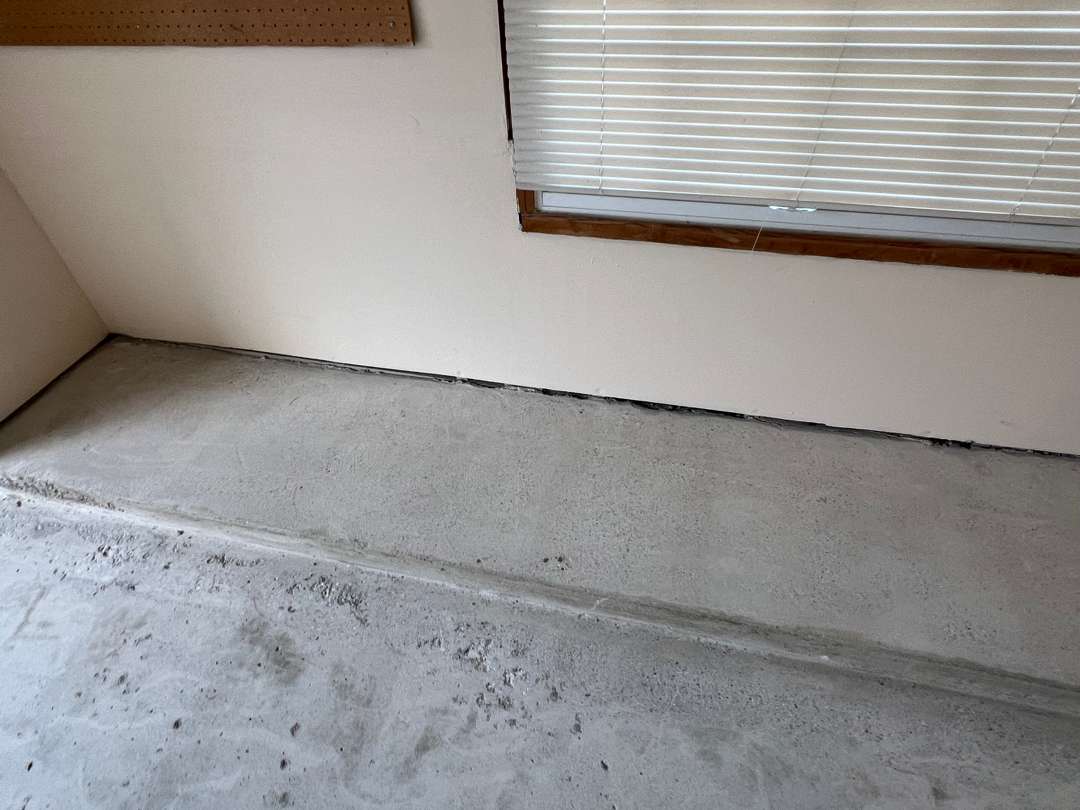
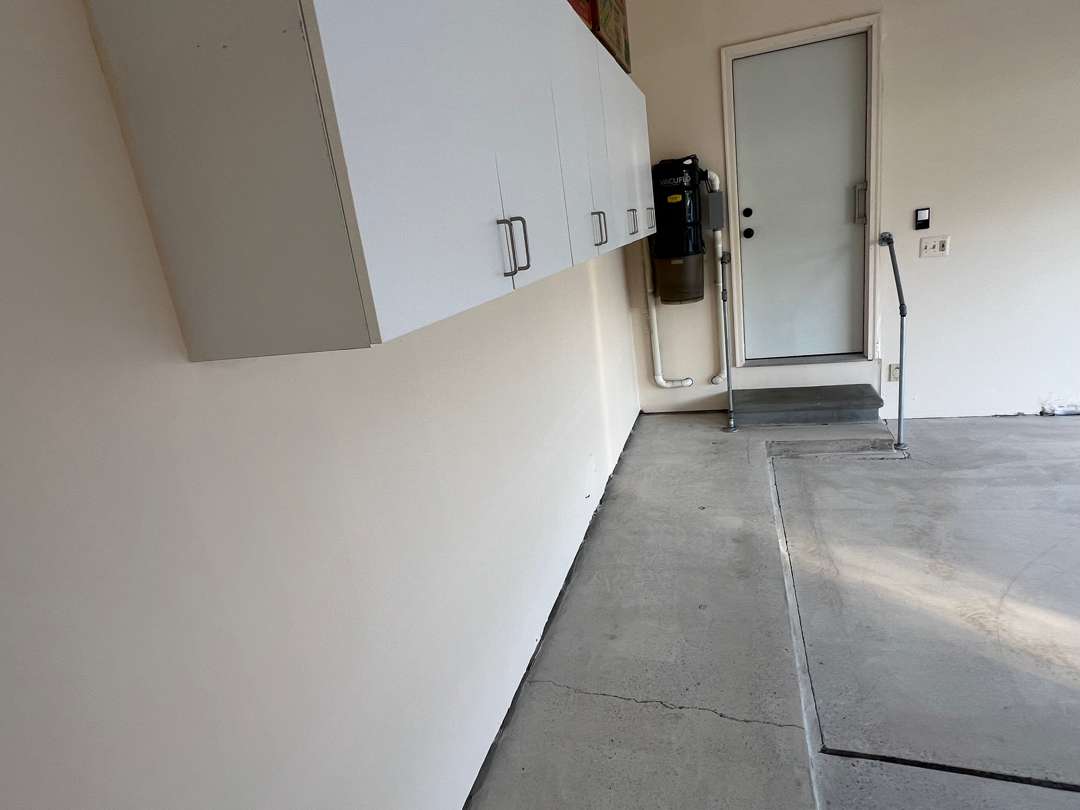
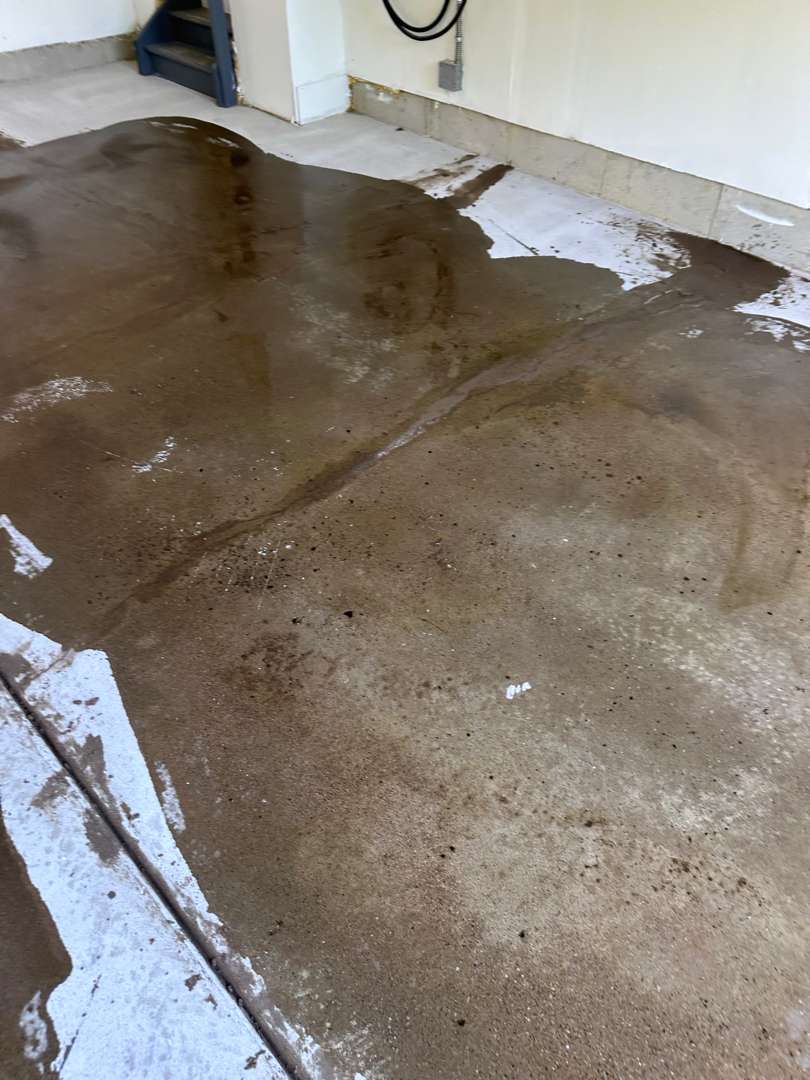
The homeowners on Overridge Dr. contacted MotorCity Floors and Coatings for their garage. The attached 540-square-foot garage had accumulated years of vehicle use and neglect. A connected 21-square-foot workroom featured a wood floor with its own boundary condition.
Our crew identified three primary challenges before work began: oil saturation, surface damage, and elevated moisture.
The homeowners selected the Pebble Beach color in the MC4 coating system.
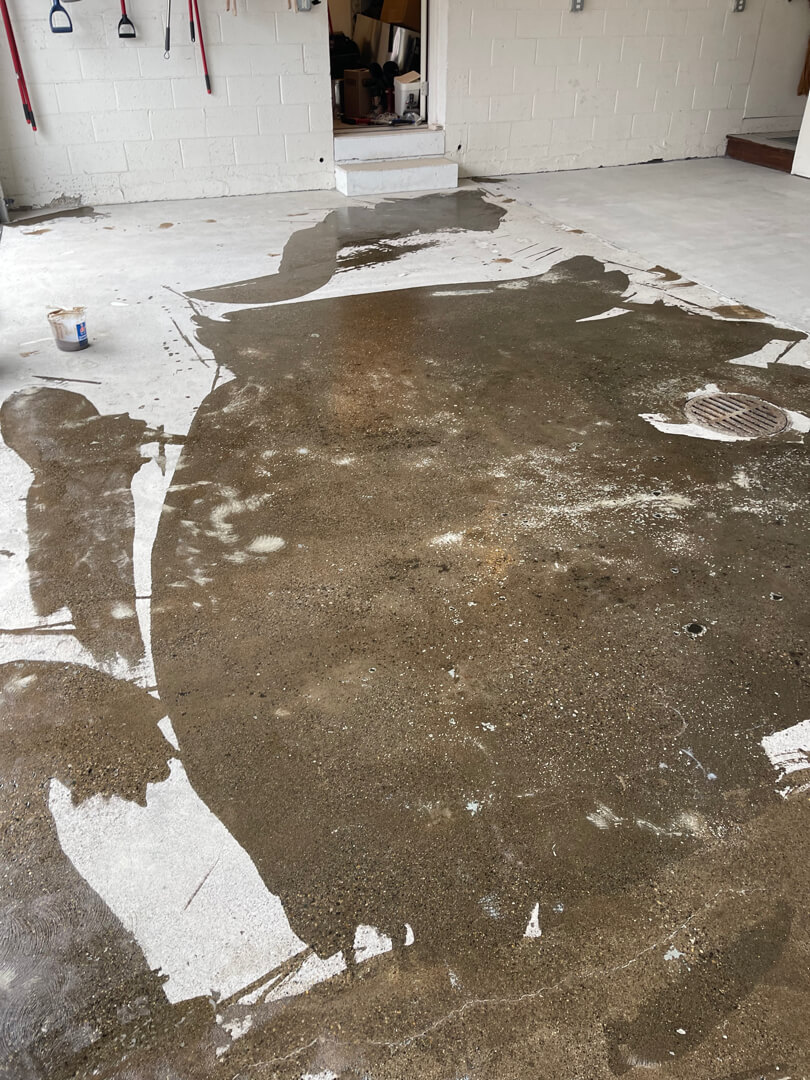
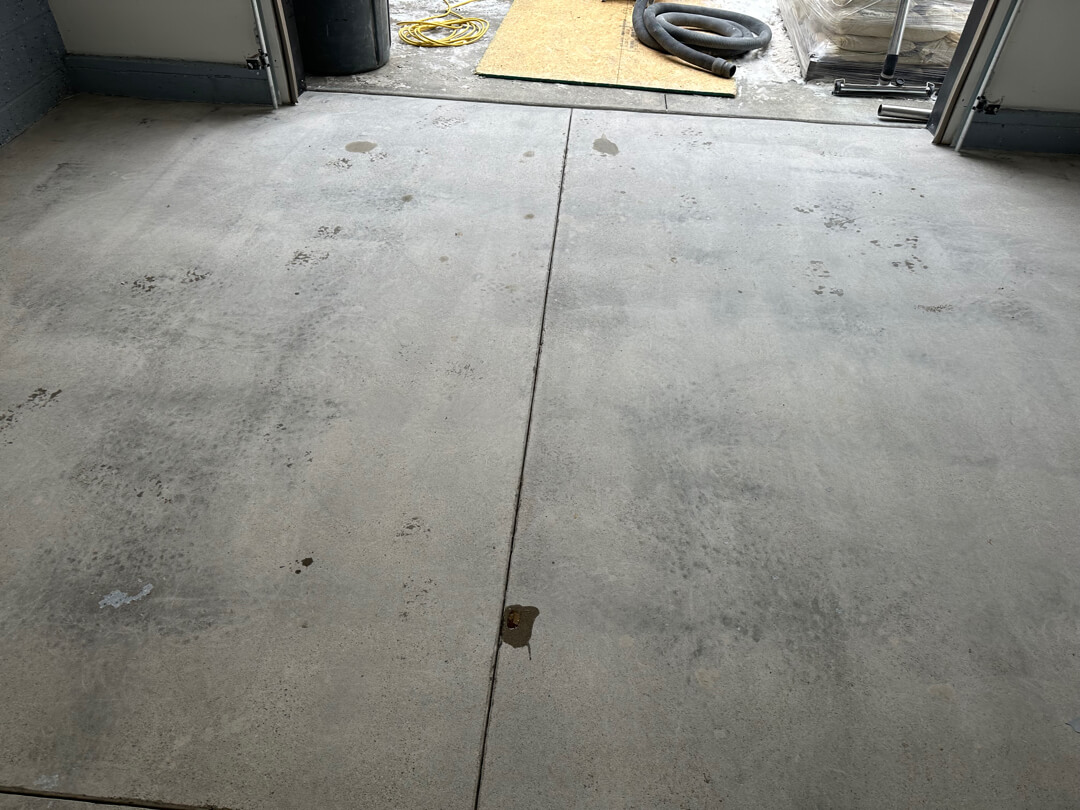
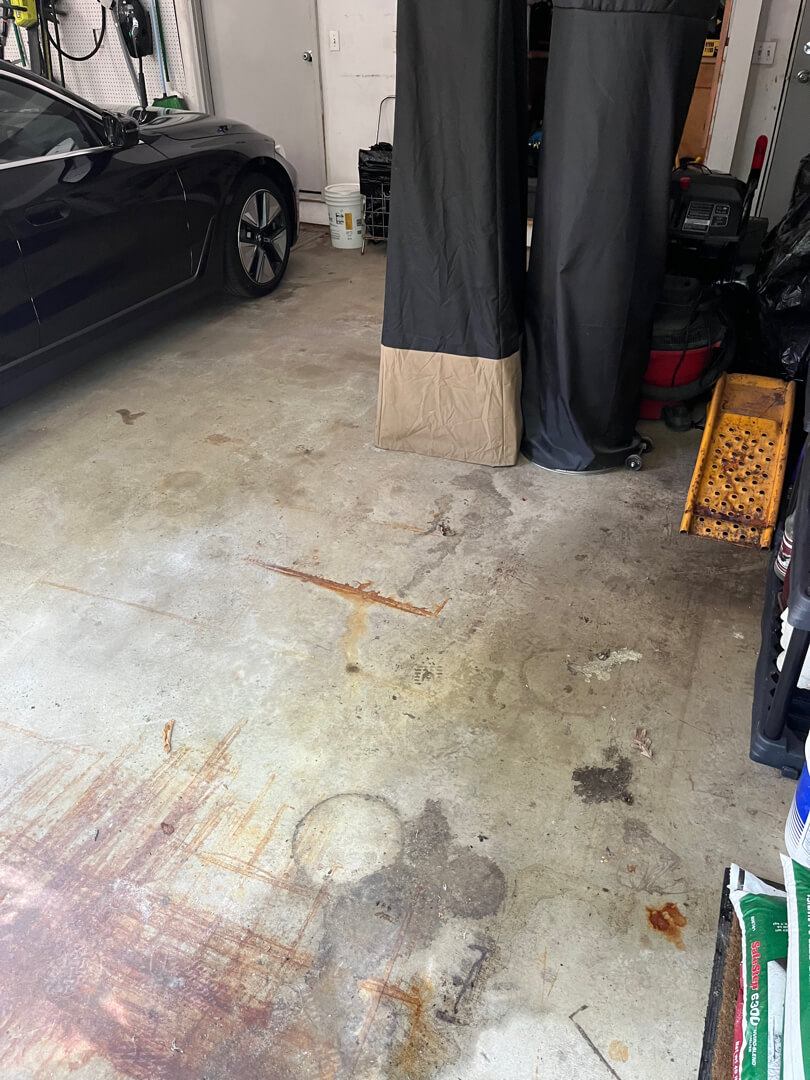
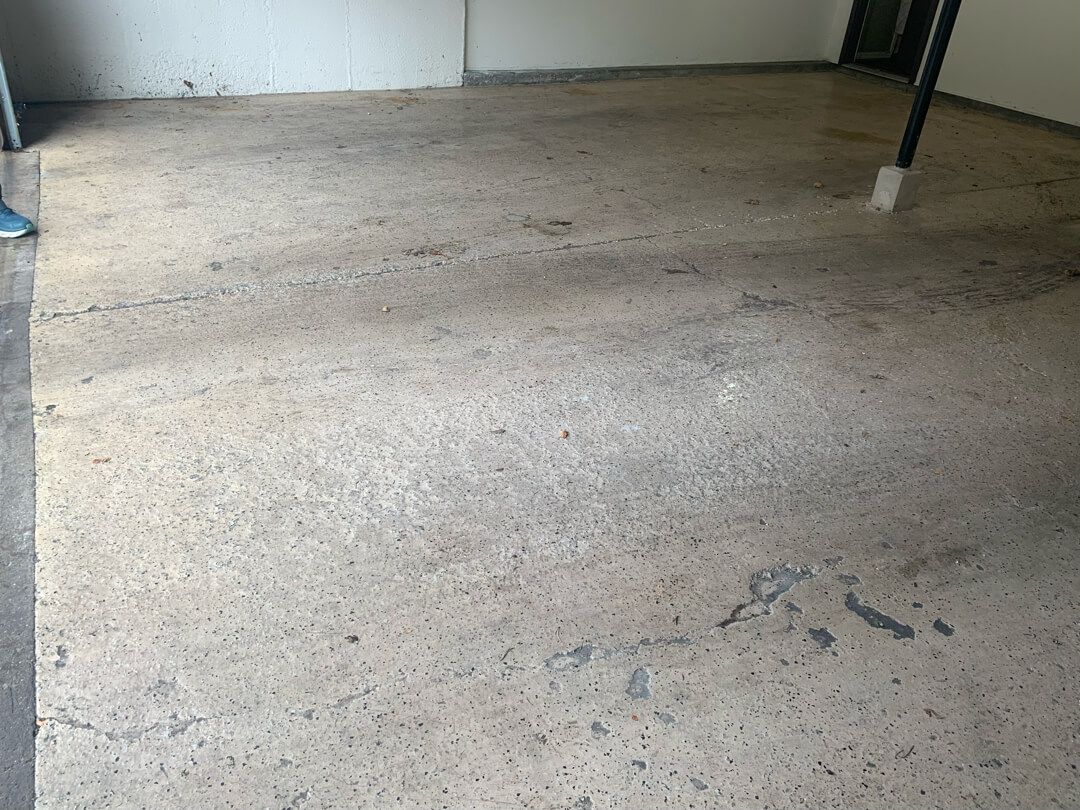
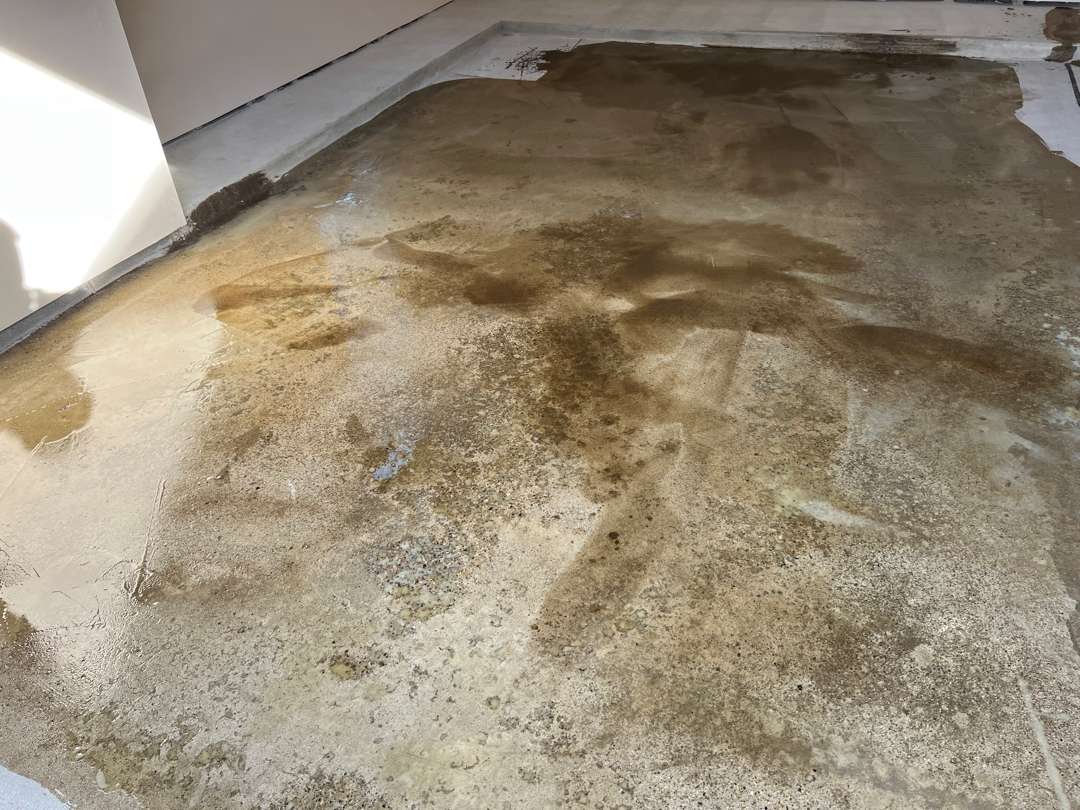
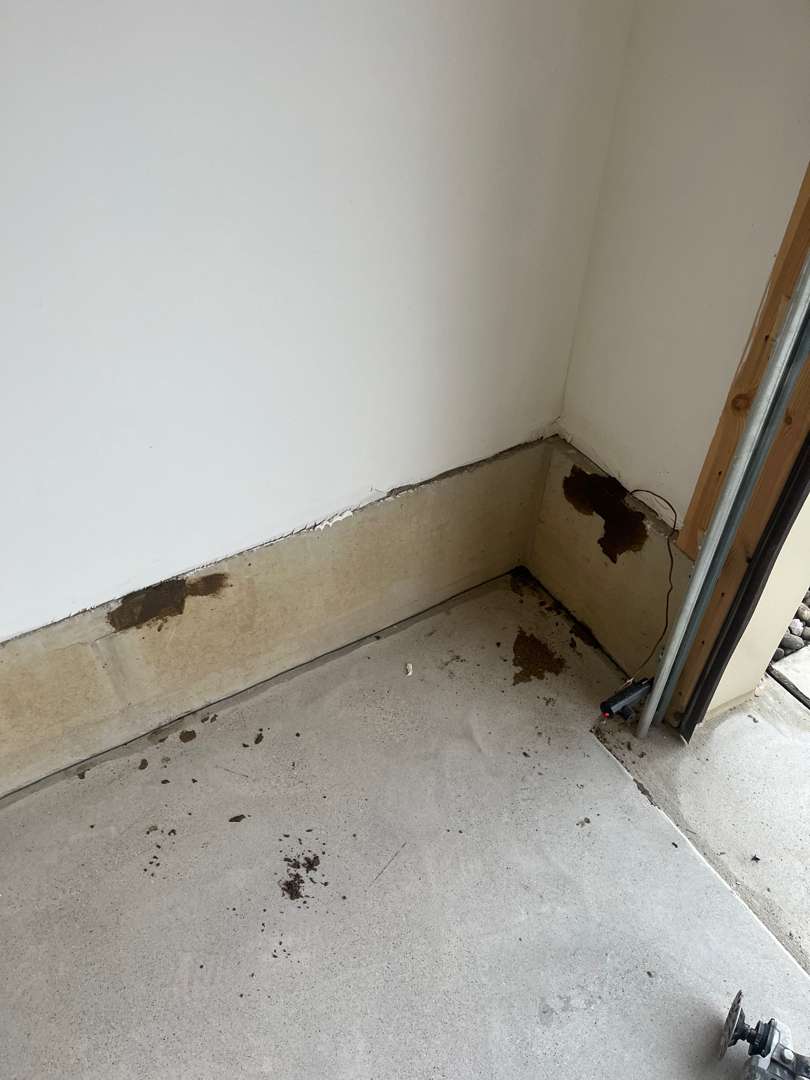
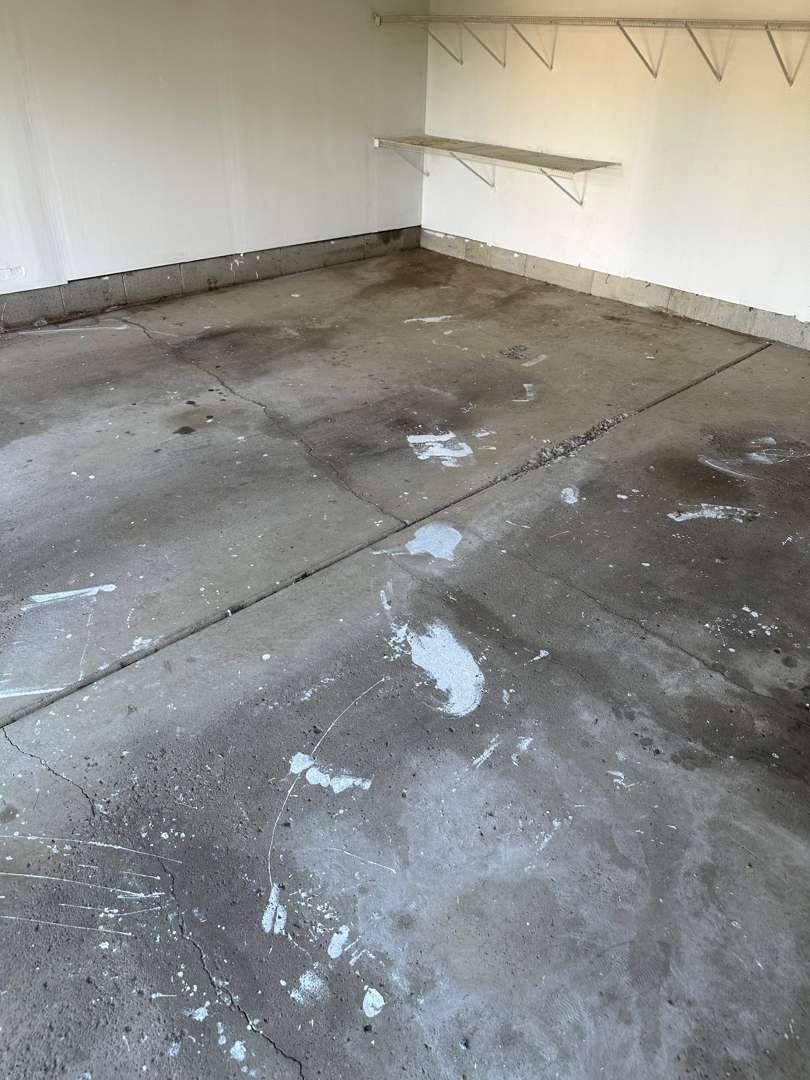
Initial Substrate Condition
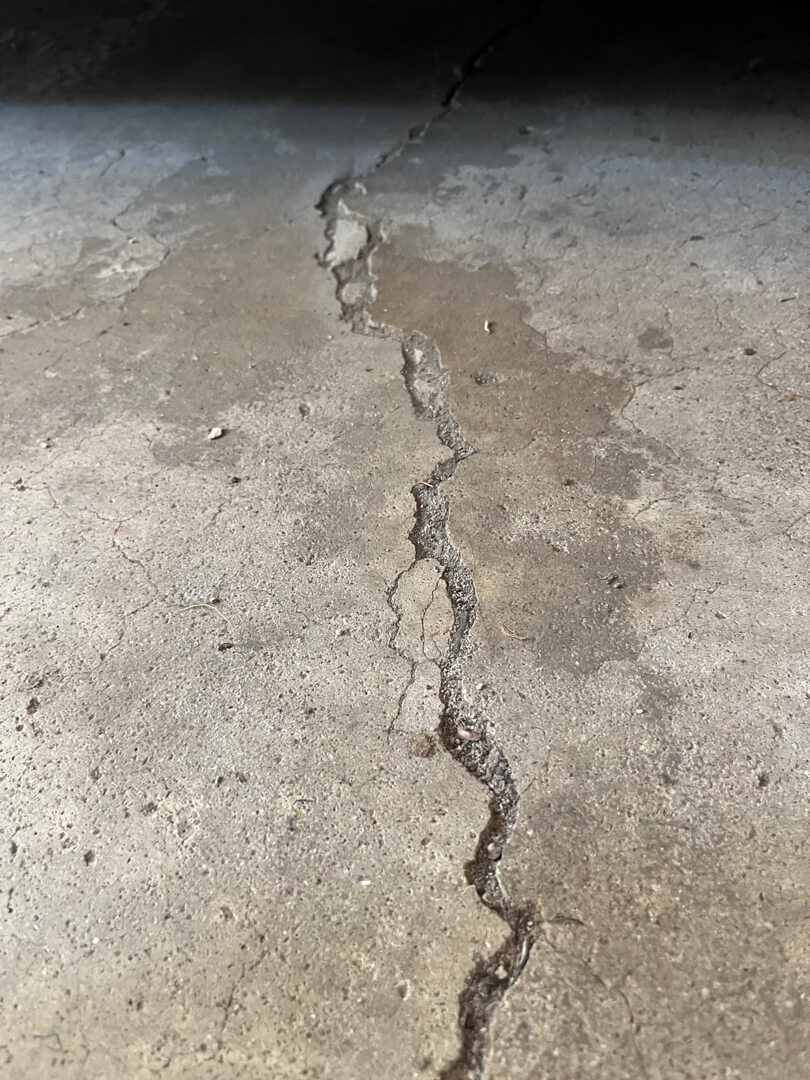
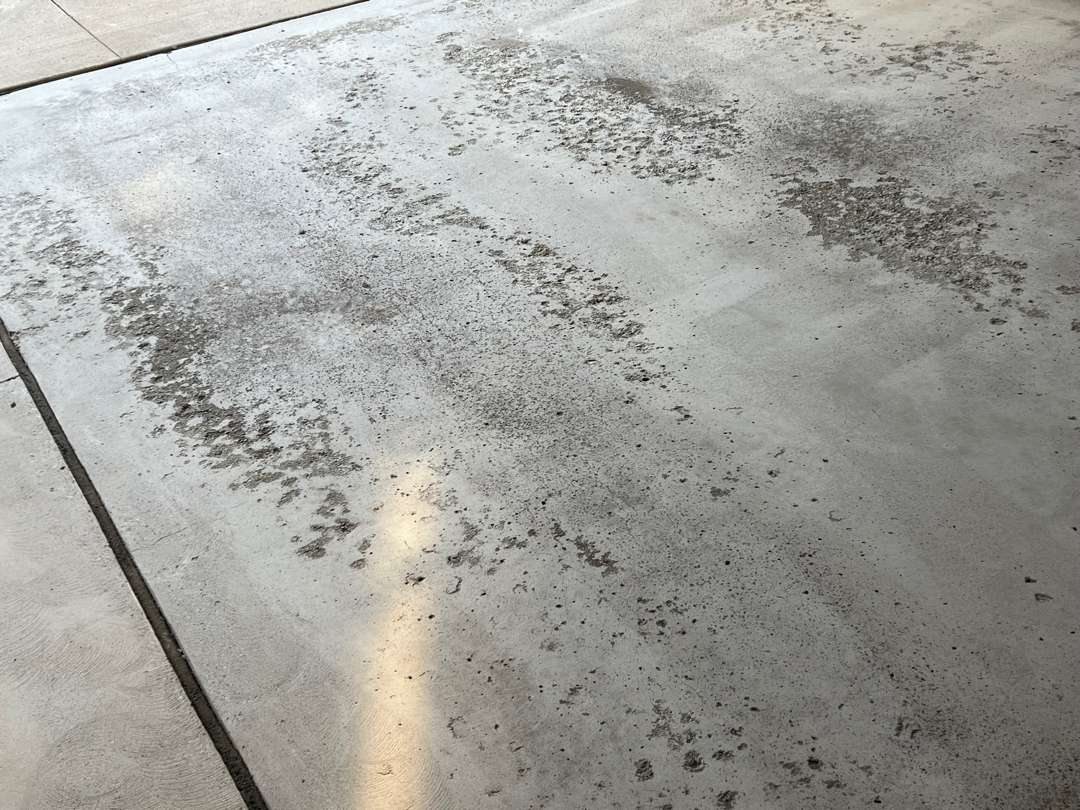
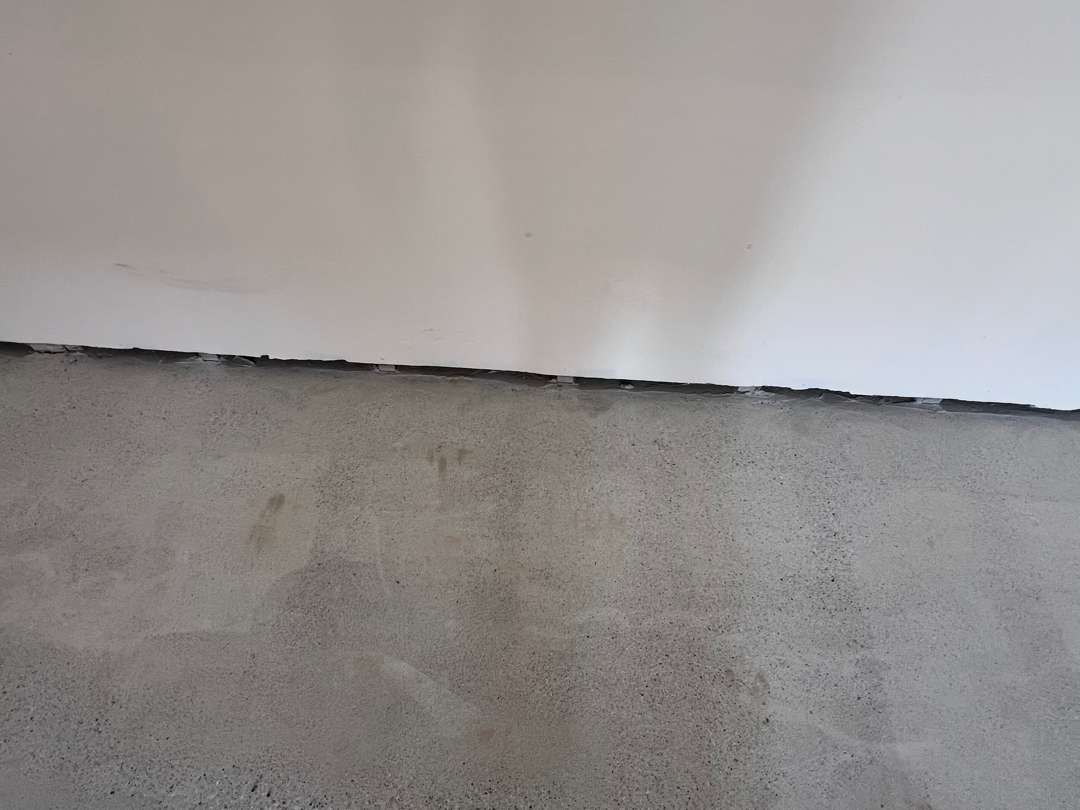
Our crew conducted a thorough inspection of the full slab before planning the work sequence. The concrete showed crack patterns running in multiple directions across the floor. Surface pitting appeared throughout the slab, concentrated near the garage door opening.
Freeze-thaw cycles had opened and widened the surface voids over time. Oil contamination covered several distinct zones under each parking position. The dark saturation indicated petroleum had penetrated well below the concrete surface. Moisture readings near the perimeter walls exceeded acceptable levels for direct coating. That finding placed a moisture barrier in the required scope of work.
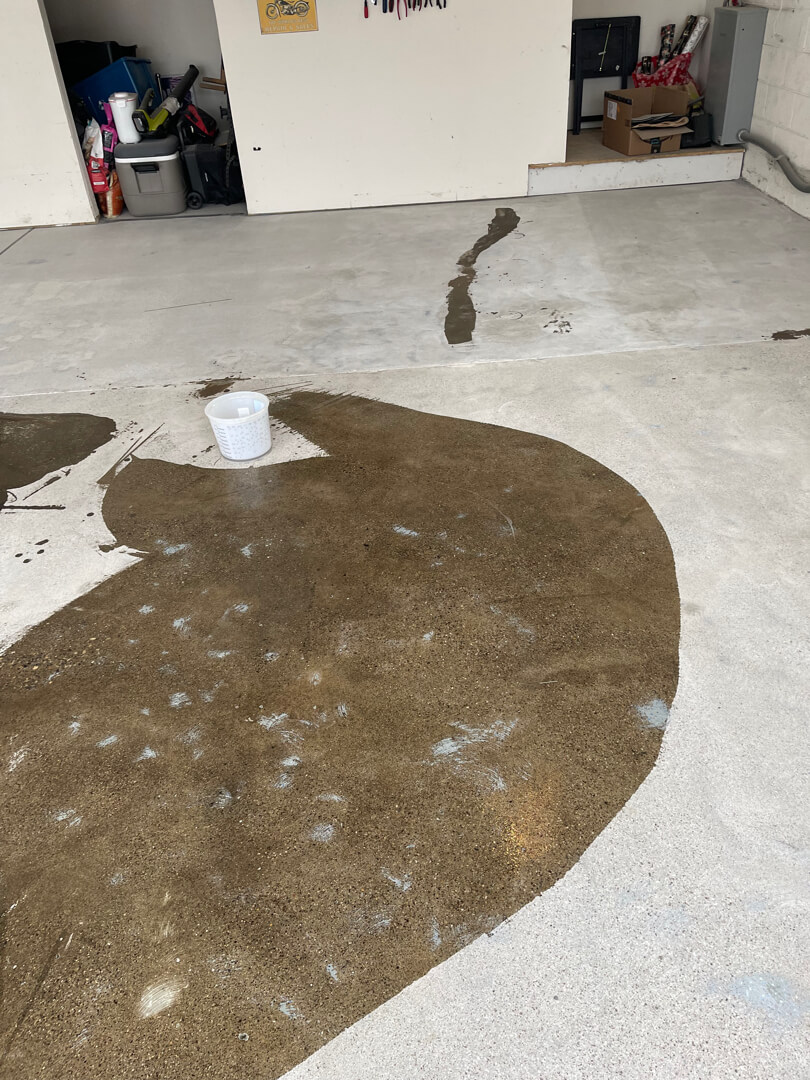
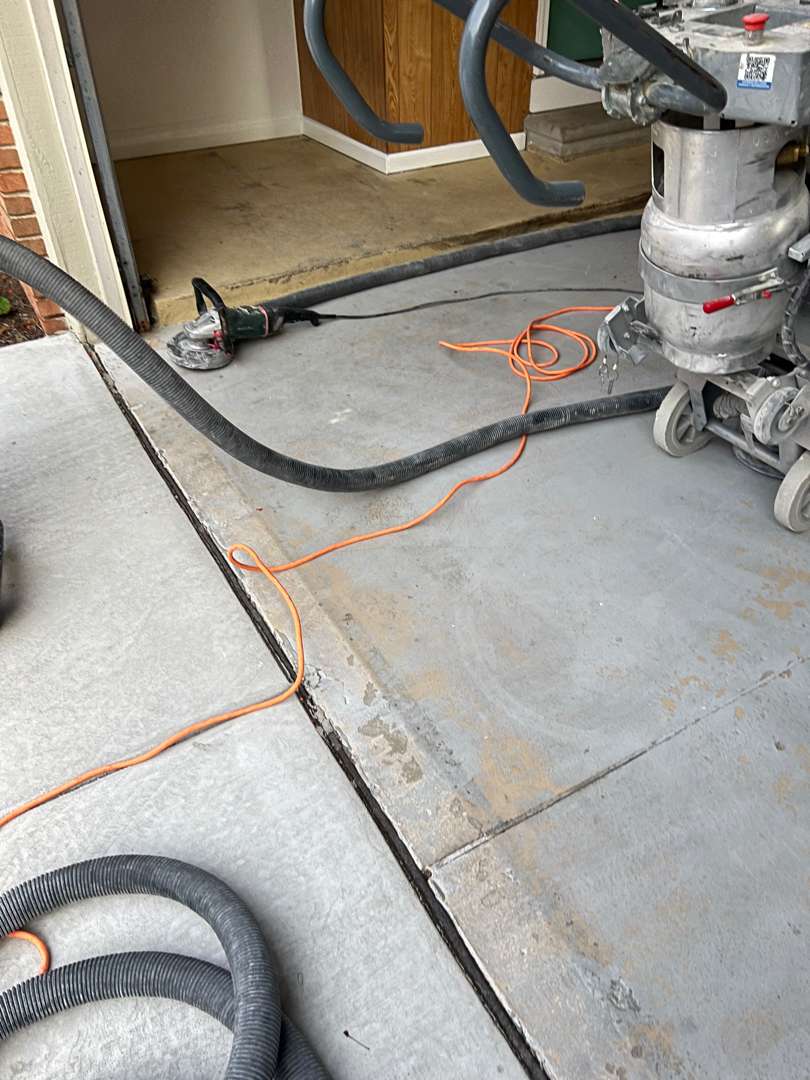
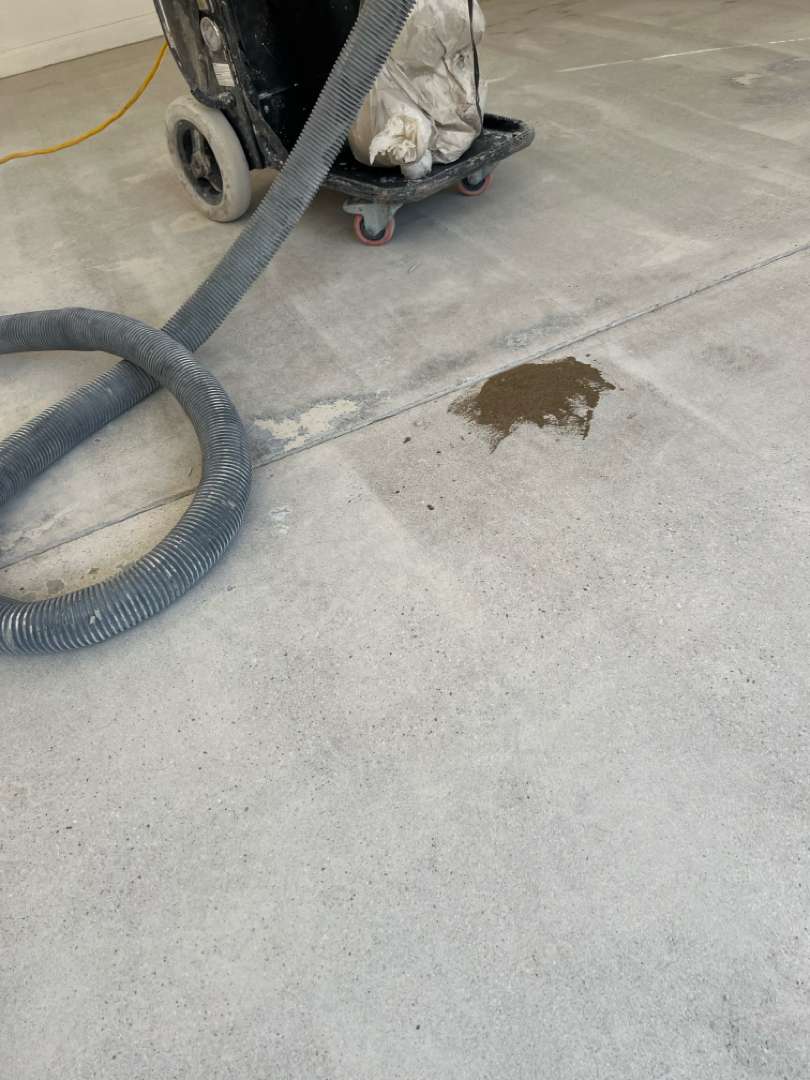
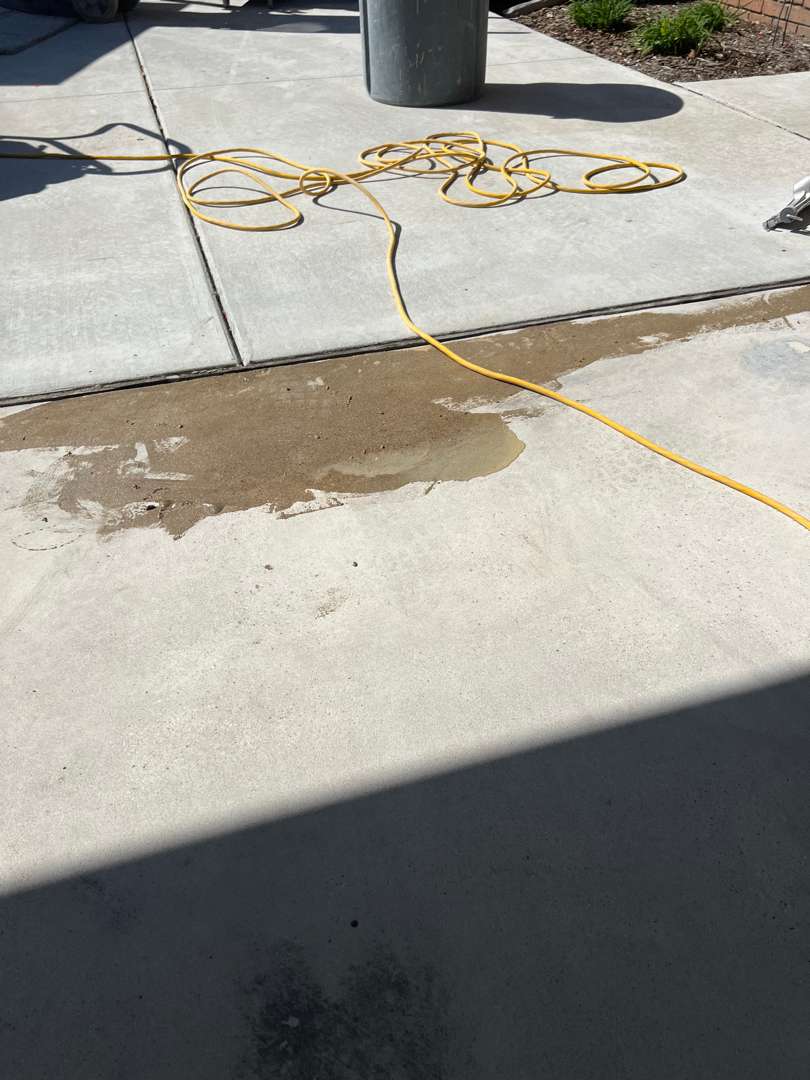
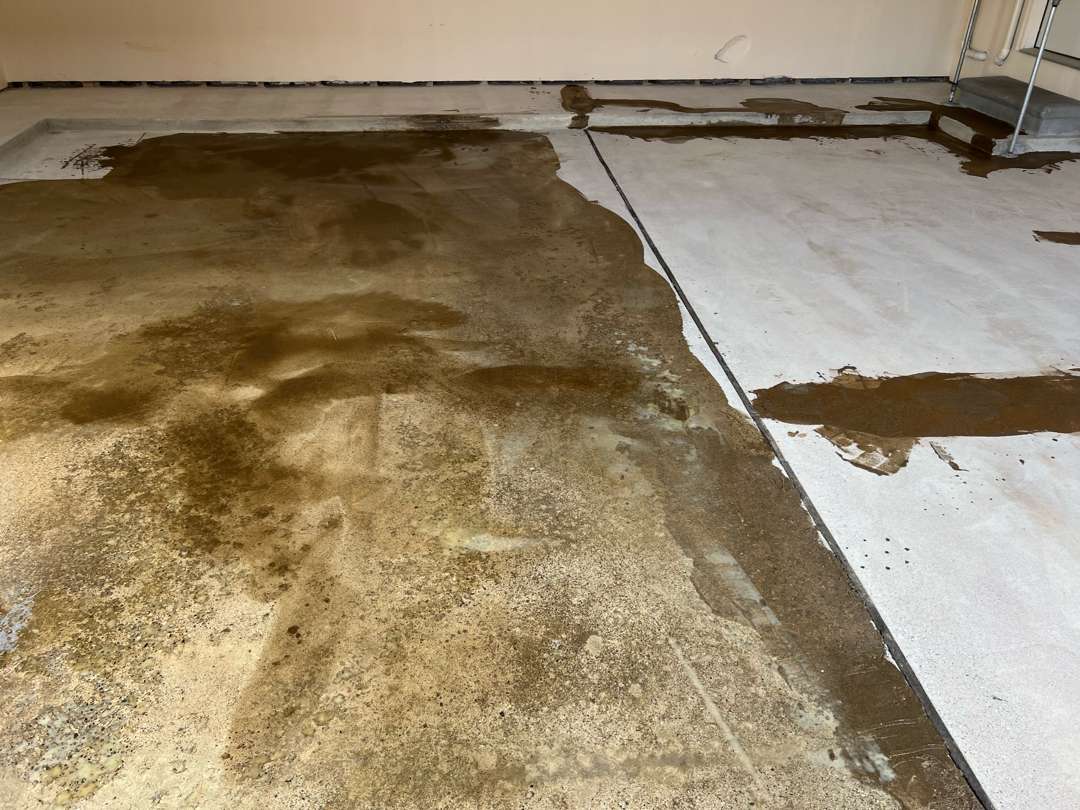
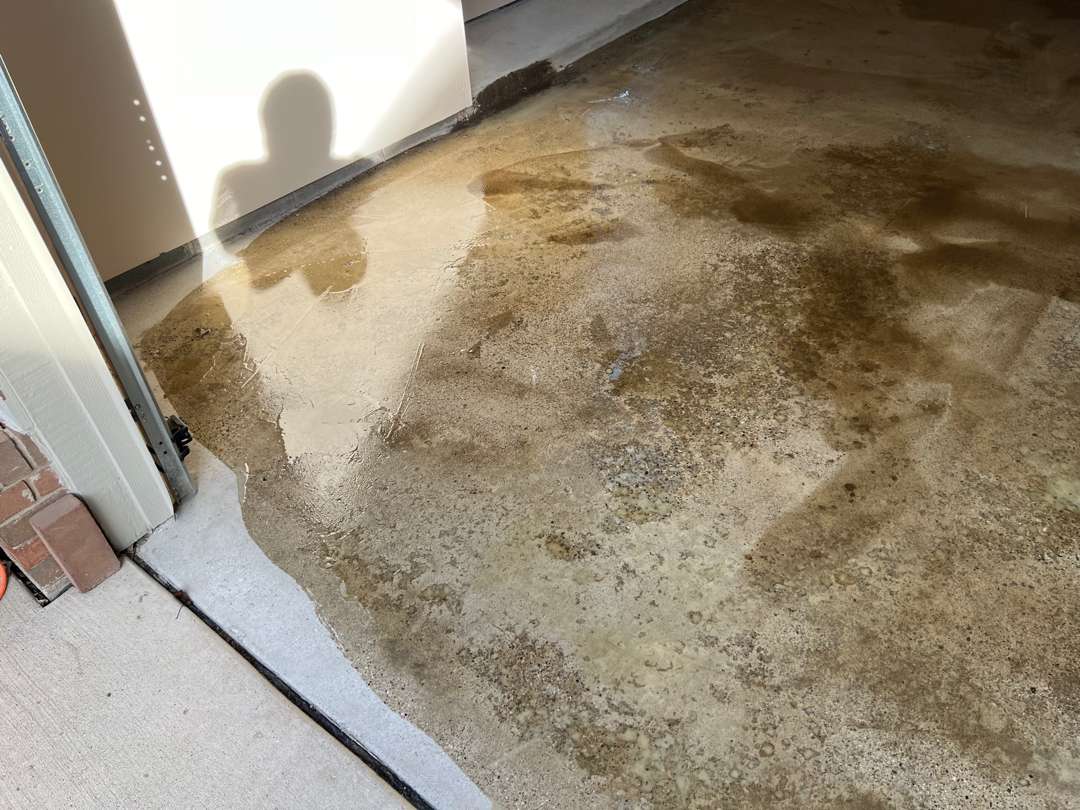
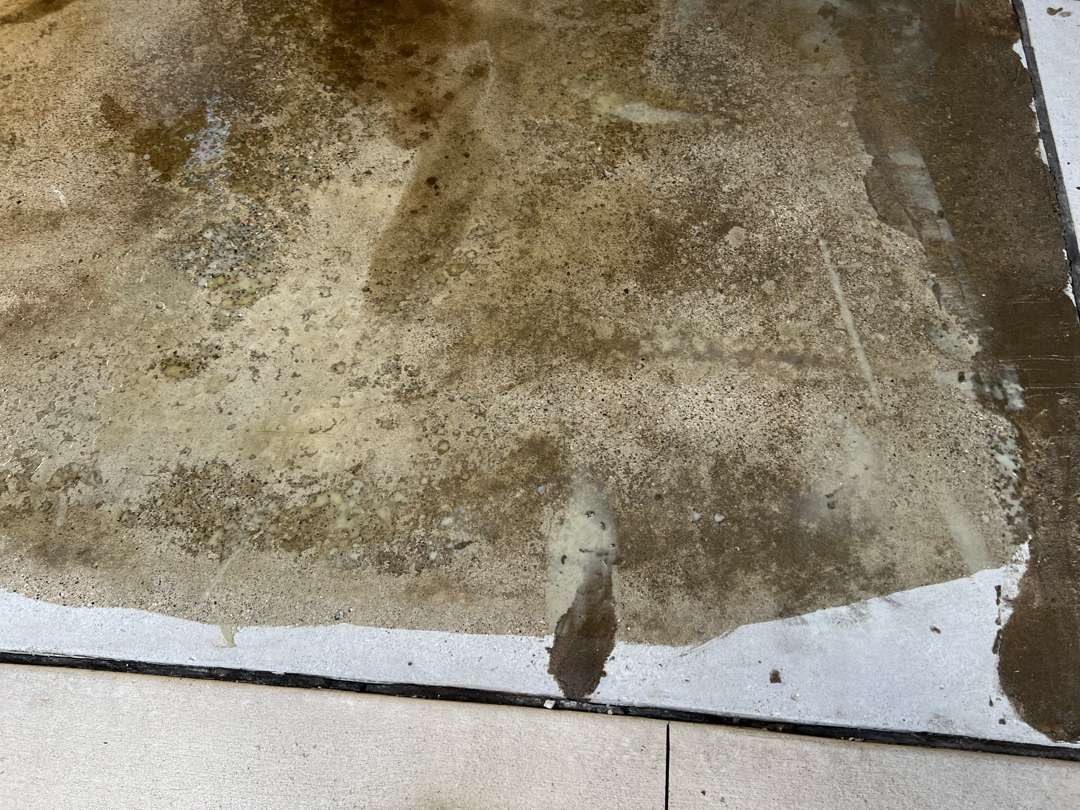
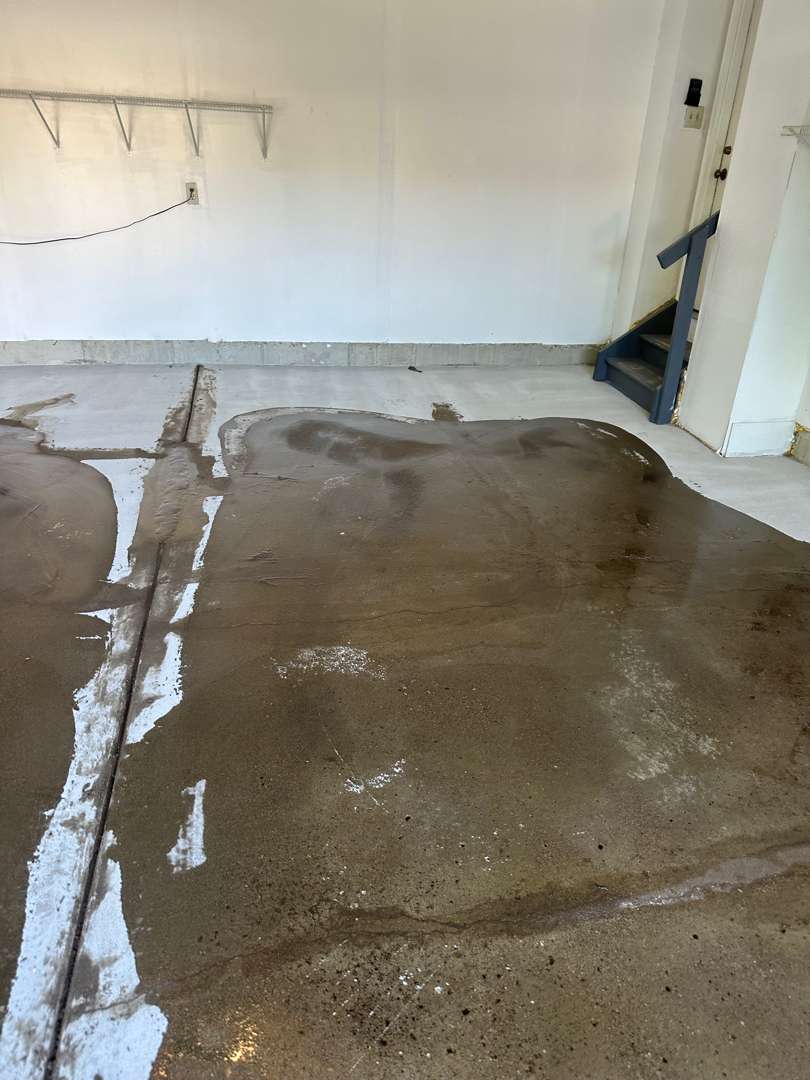
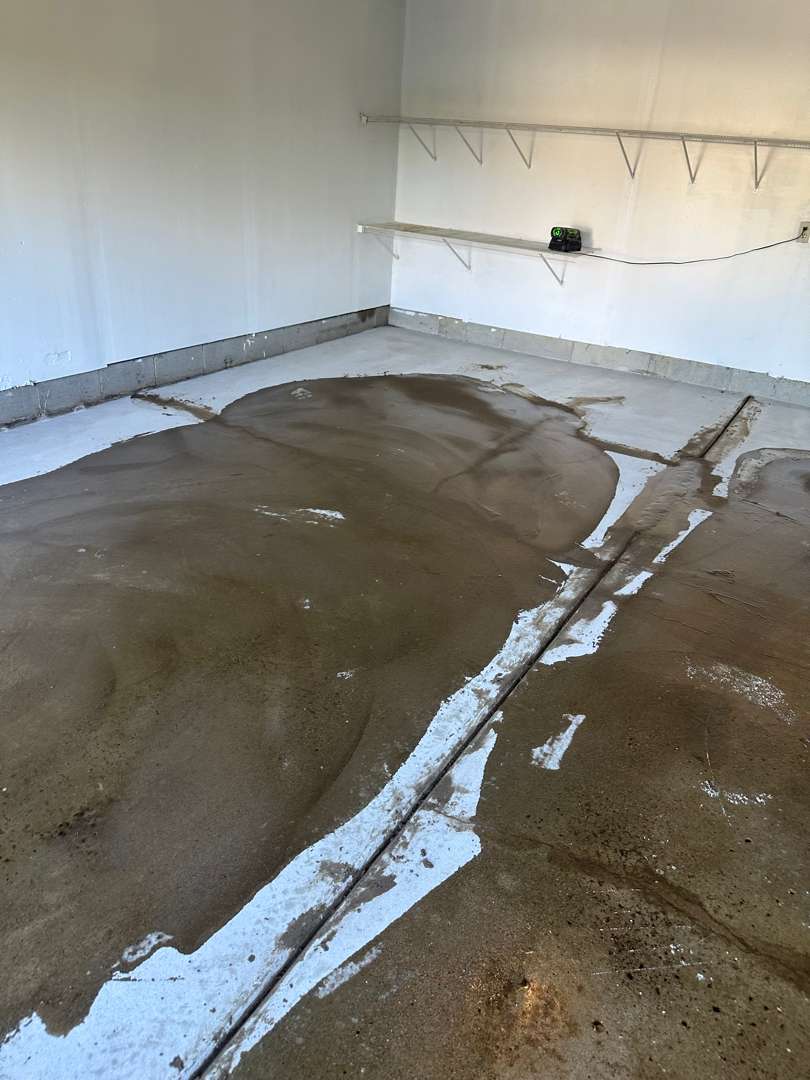
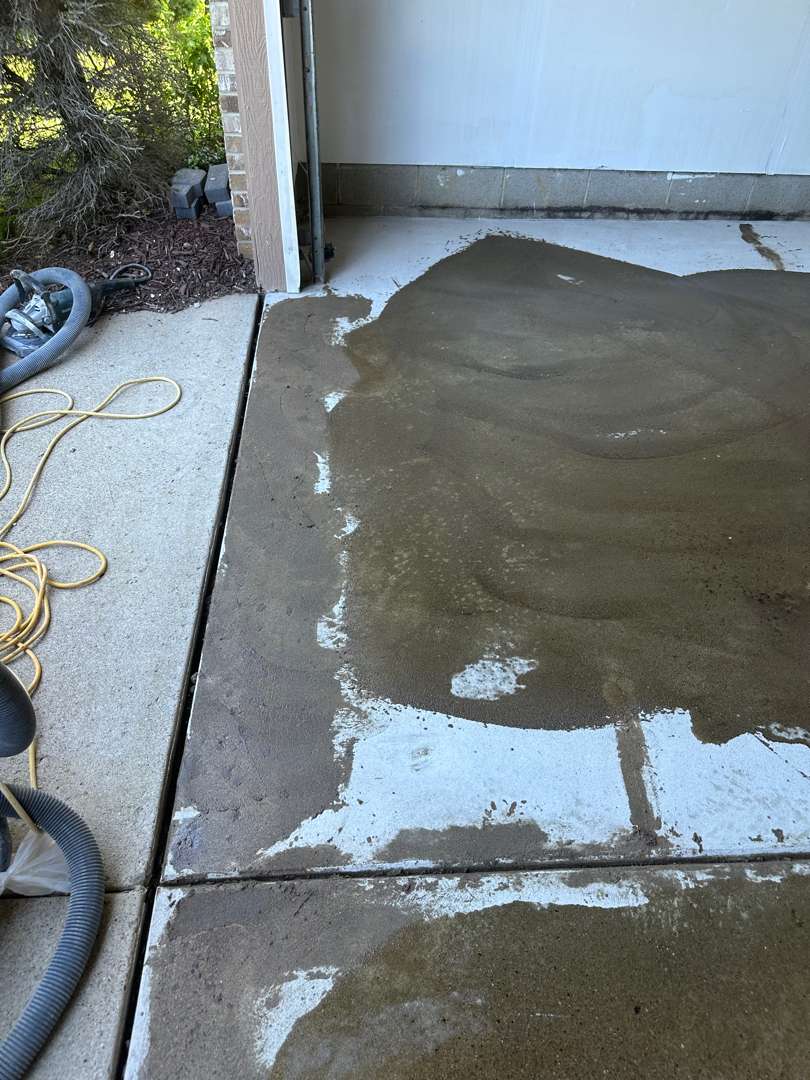
Oil Extraction

Oil penetration deep into concrete cannot be removed by grinding alone. Our crew applied a petroleum drawing compound over all contaminated areas of the slab. The compound draws petroleum molecules from within the concrete to the surface. Our team spread the material thoroughly and allowed it to cure.
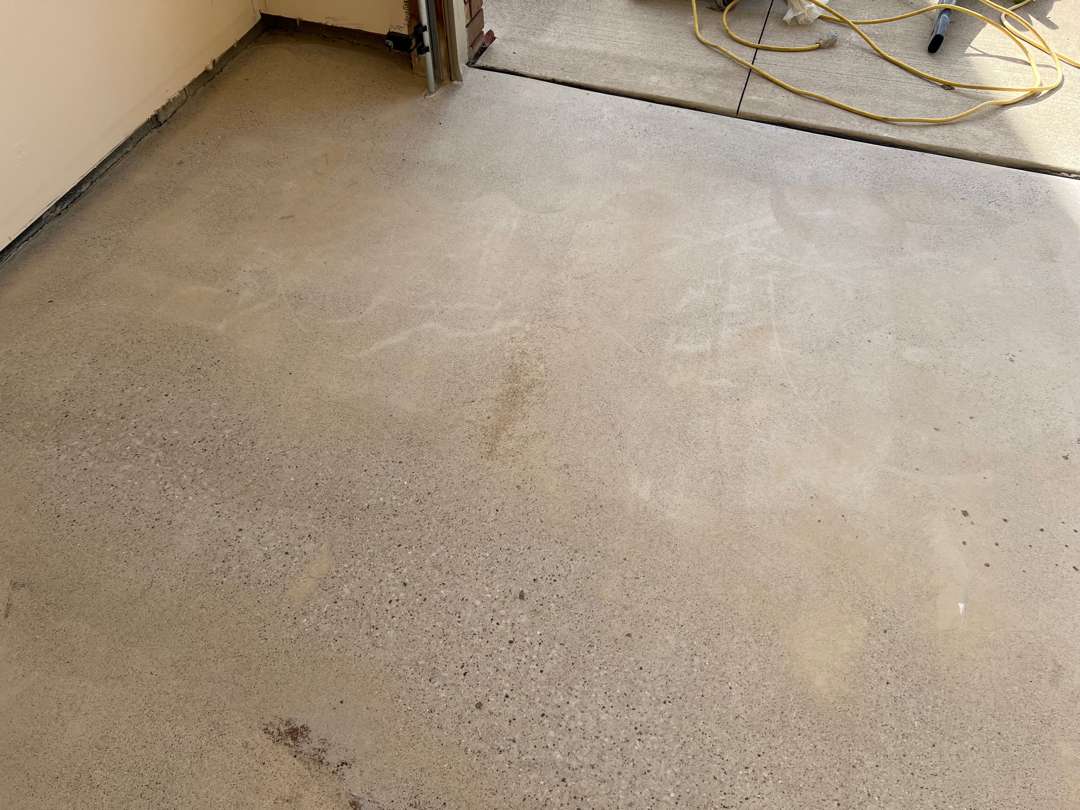
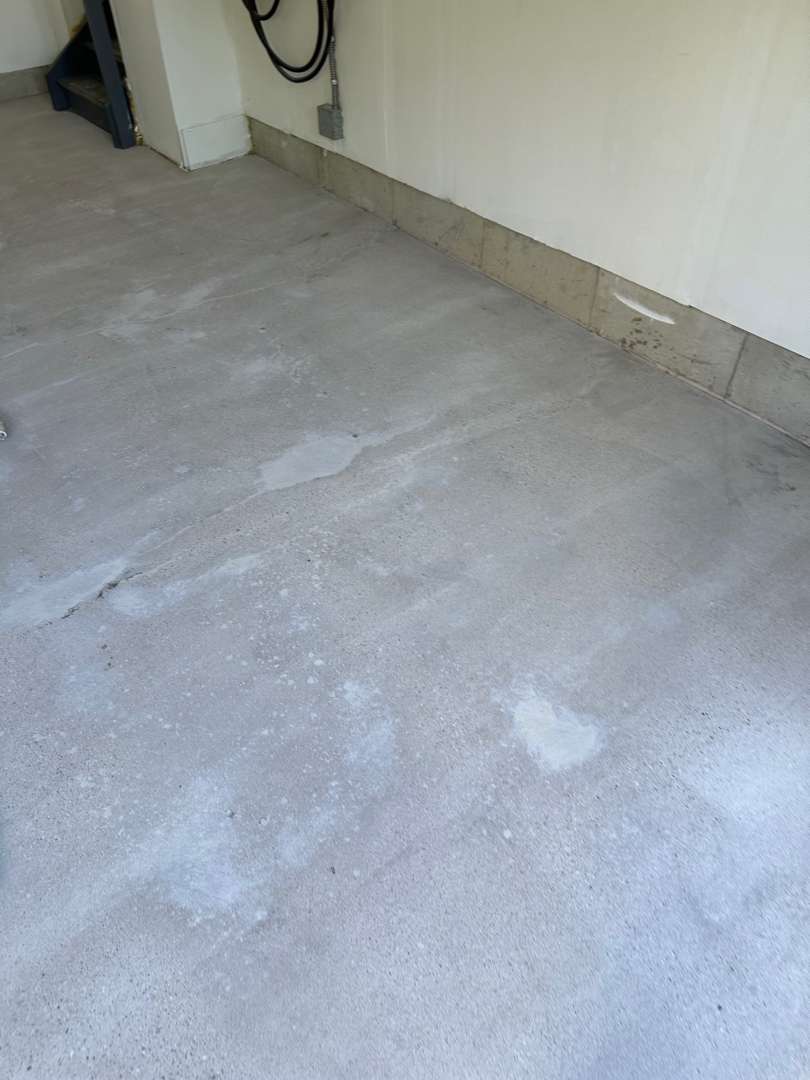
After curing, they removed the compound along with the extracted oil. The treated zones then showed lighter coloration, confirming successful extraction. This step prevents residual oil from migrating through the slab and compromising adhesion.
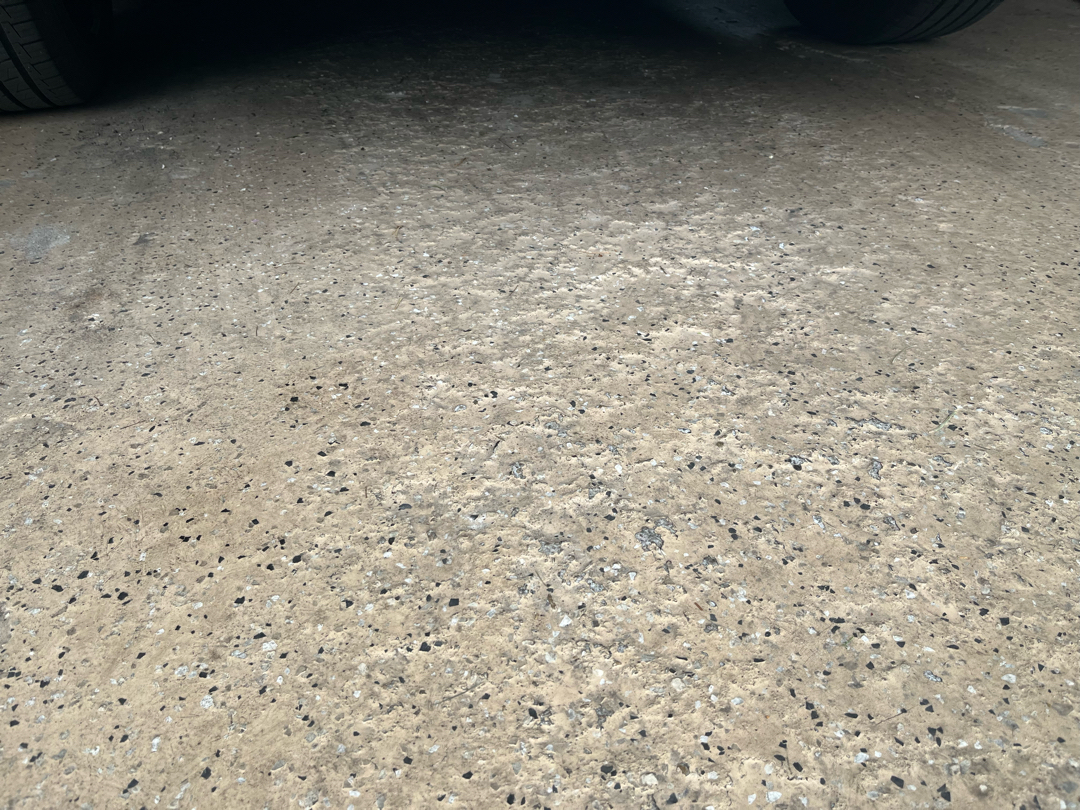
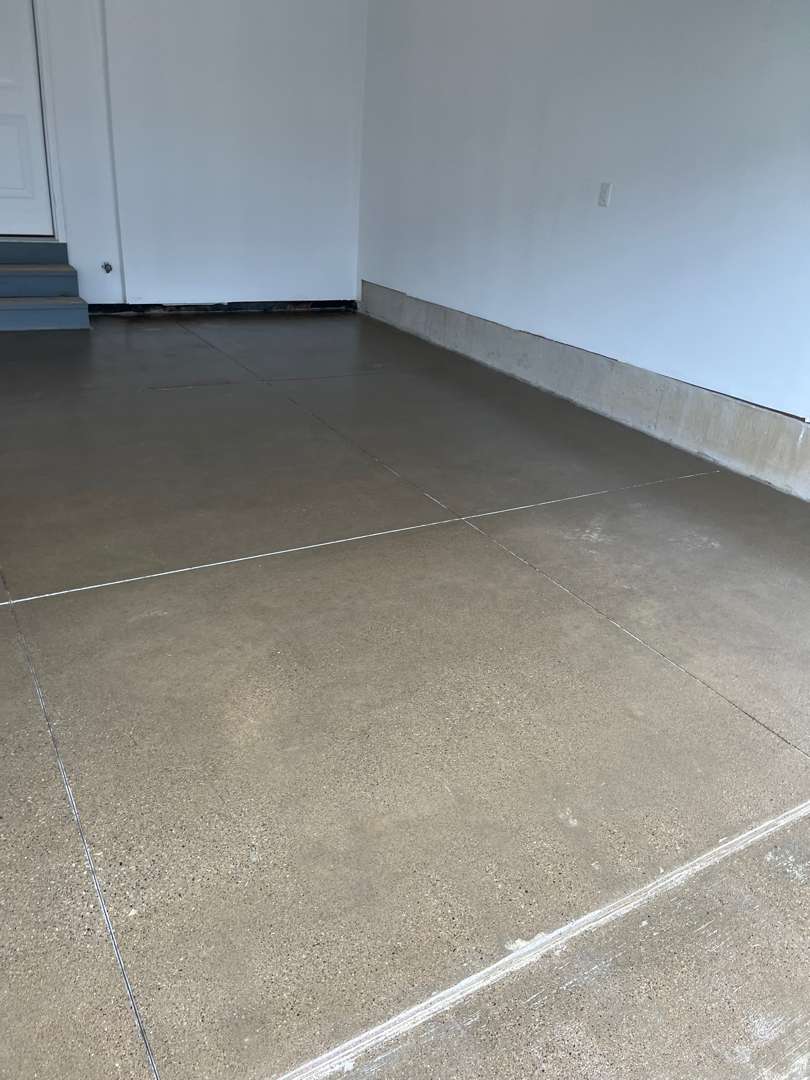
Diamond Grinding
Our crew ran diamond grinding equipment across all 540 square feet of the garage floor. The 16-grit MC4 configuration cuts aggressively into the concrete surface. This grit level creates the profile necessary for polyurea adhesion.
Our team worked systematically from one end of the garage to the other. The grinder removed surface laitance, contamination residue, and weak material.
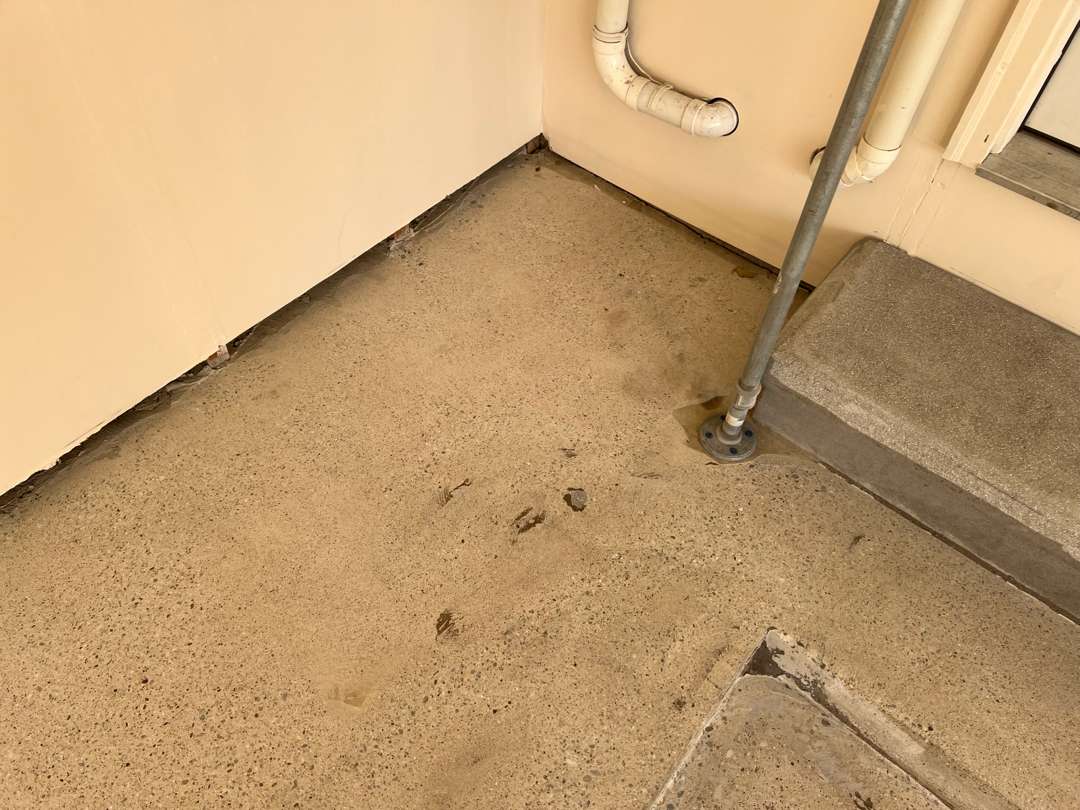
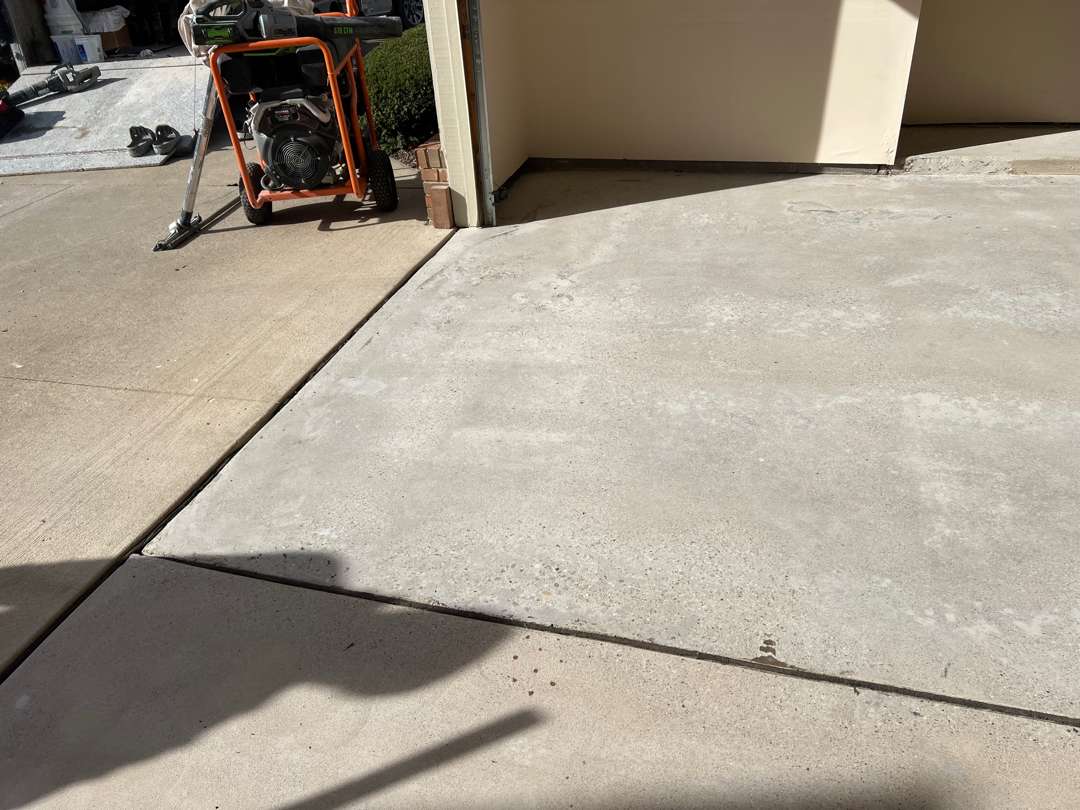
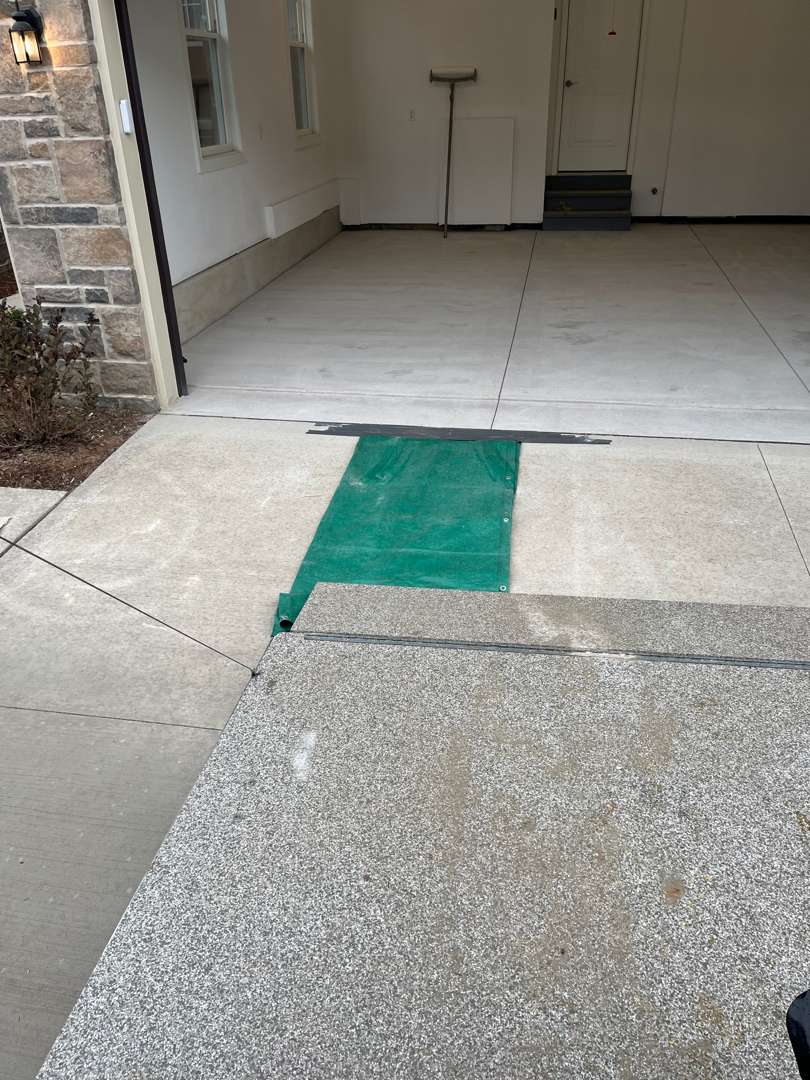
Our crew paid careful attention along the workroom perimeter to maintain a defined boundary. The workroom wood floor required no grinding and remained untouched throughout the process.
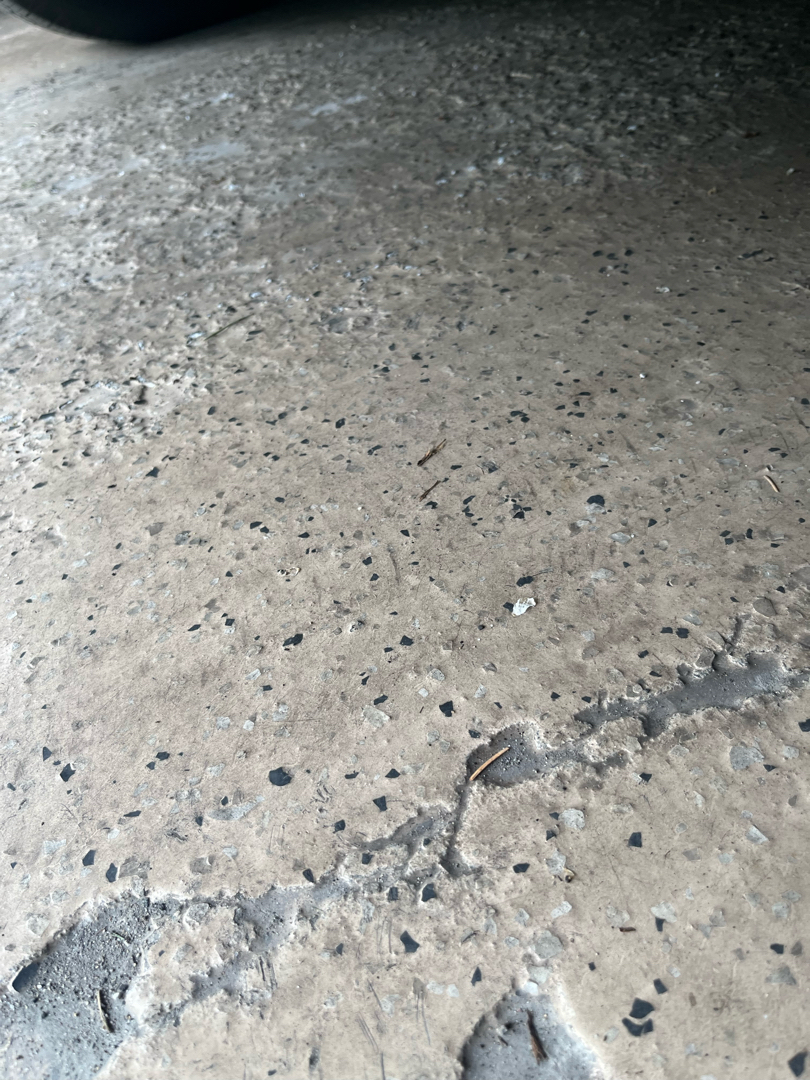
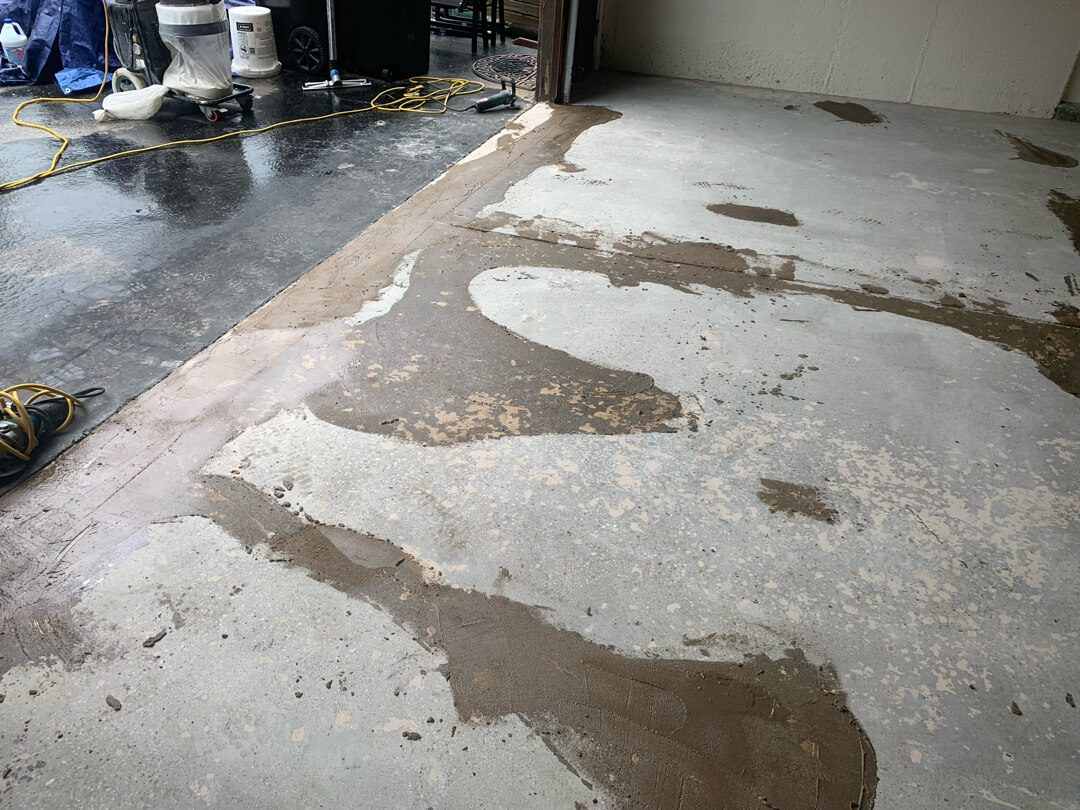
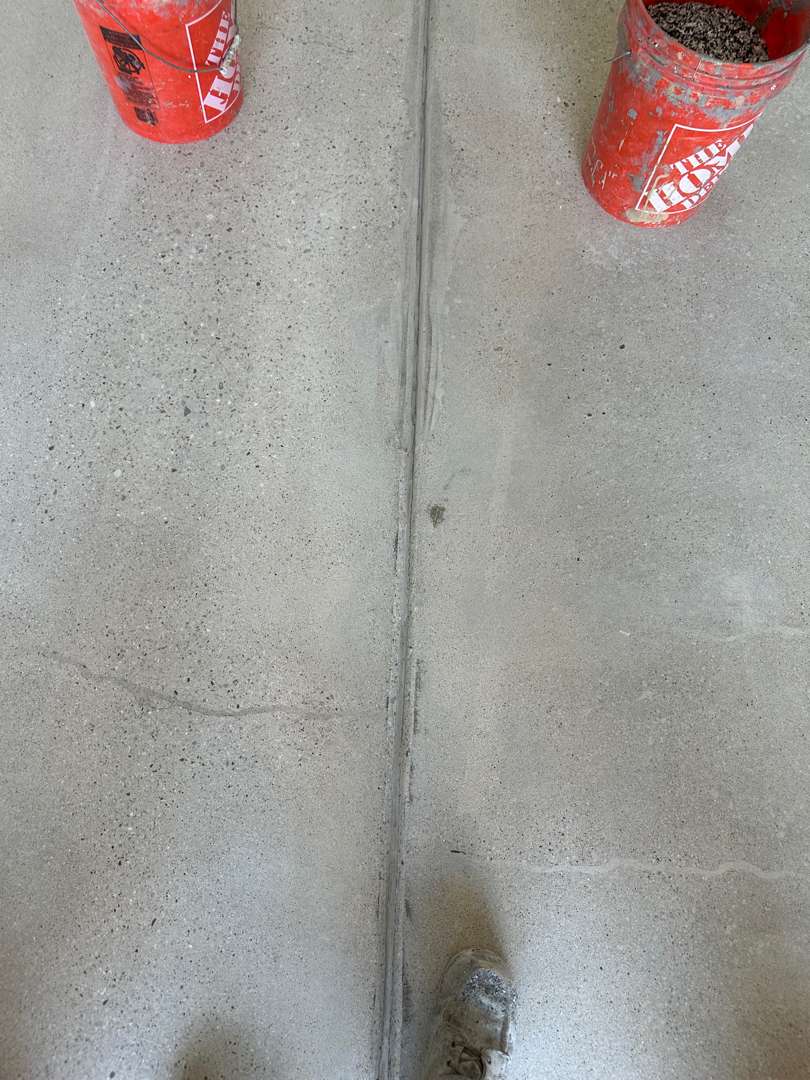
Concrete Repairs and Flooding

With grinding complete, our crew turned to the pitting and cracks across the floor.
They filled surface voids with a two-part polyurea mender compound. They troweled each repair flush with the surrounding concrete surface. The larger cracks received a flexible polyurea filler to accommodate minor slab movement.
After individual repairs cured, our crew flooded the entire floor with a skim coat.
The flood coat filled micro-voids and unified the surface texture across all 540 square feet.
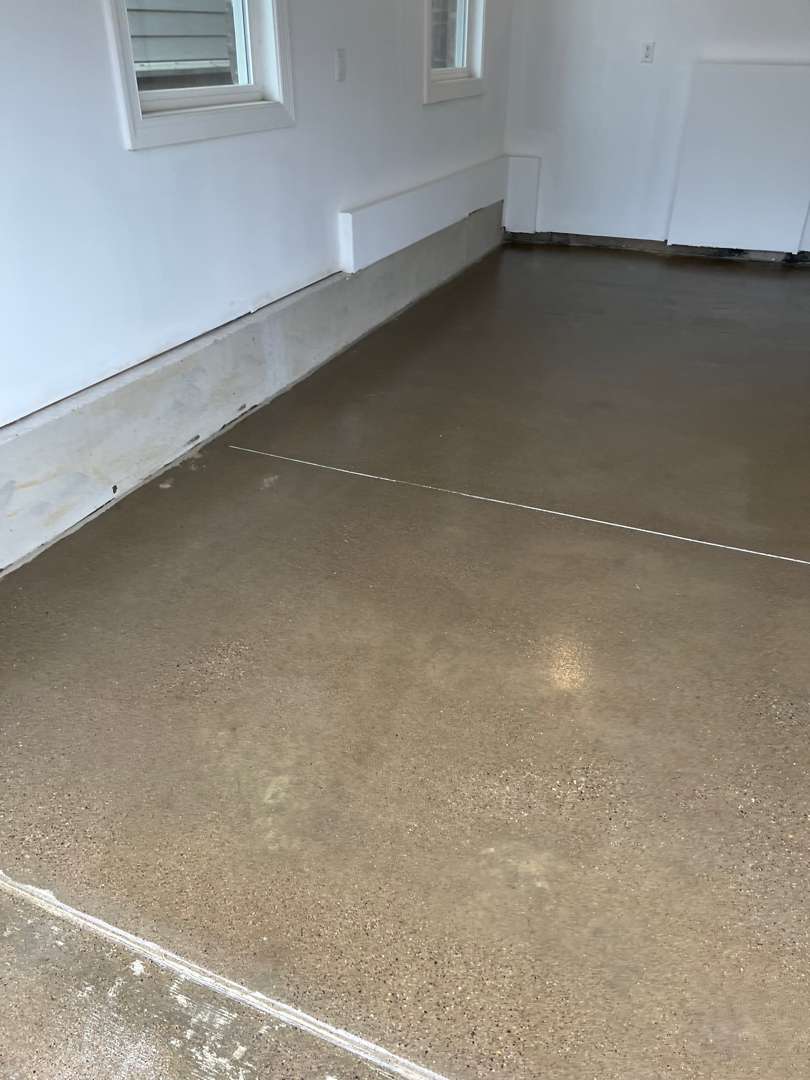
Second Grind
After repairs cured, our crew made a second pass with the diamond grinder. This grind knocked down excess repair material and leveled the flood coat.
Why two grinding passes are required when repairs are in scope →
The floor emerged with a uniform surface profile ready for coating. Our crew vacuumed the floor thoroughly to remove all grinding dust.
Moisture Barrier
Our crew applied MR50 moisture barrier primer across the entire slab. MR50 seals the concrete against vapor transmission from below the slab.
Moisture testing thresholds and barrier selection criteria →
This primer protects adhesion wherever moisture readings exceed coating thresholds.
Our team allowed full cure time before proceeding to the polyurea base coat.
Polyurea Base Coat and Pebble Beach Flakes
Our crew mixed and applied the polyurea base coat across all 540 square feet. They worked in systematic, overlapping passes to achieve consistent film thickness.
While the base coat remained open, our team broadcast the Pebble Beach flake blend. The Pebble Beach palette combines tan, warm grey, and subtle earth tones.
Flakes fell across the wet surface in dense, random coverage. Our crew recovered excess flakes after the base coat reached its gel point.
Polyaspartic Clear Coat
Our crew mixed the polyaspartic clear coat following precise component ratios. They incorporated traction additive throughout the material before application. The traction additive improves grip on the finished floor surface.
Our team applied the clear coat in even passes across the entire area. The clear coat locks the flake layer and provides surface durability.
UV stability in the polyaspartic chemistry maintains color integrity over time.
Project Specifications
Location | Overridge Drive, Ann Arbor, Michigan |
Garage Area | 540 sq ft |
Workroom Area | 21 sq ft (wood floor — boundary treated) |
Wall Verticals | None |
Steps | None |
Coating System | MC4 |
Color | Pebble Beach |
Diamond Grit | 16-grit |
Grinding Passes | Two (pre-repair and post-repair) |
Repairs | Pitting and cracking — polyurea mender and flexible crack filler |
Flood Coat | Full-slab skim coat applied after repairs |
Oil Treatment | Petroleum drawing compound extraction prior to grinding |
Moisture Barrier | MR50 primer — full slab coverage |
Traction Additive | Incorporated in clear coat |
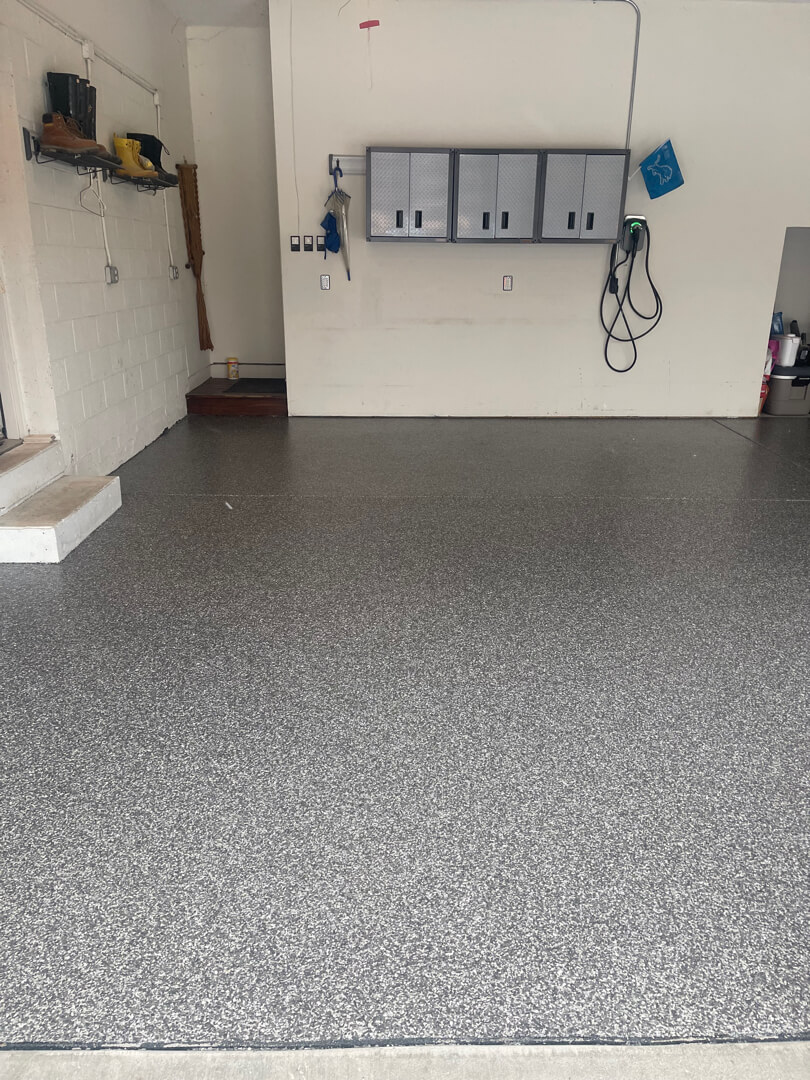
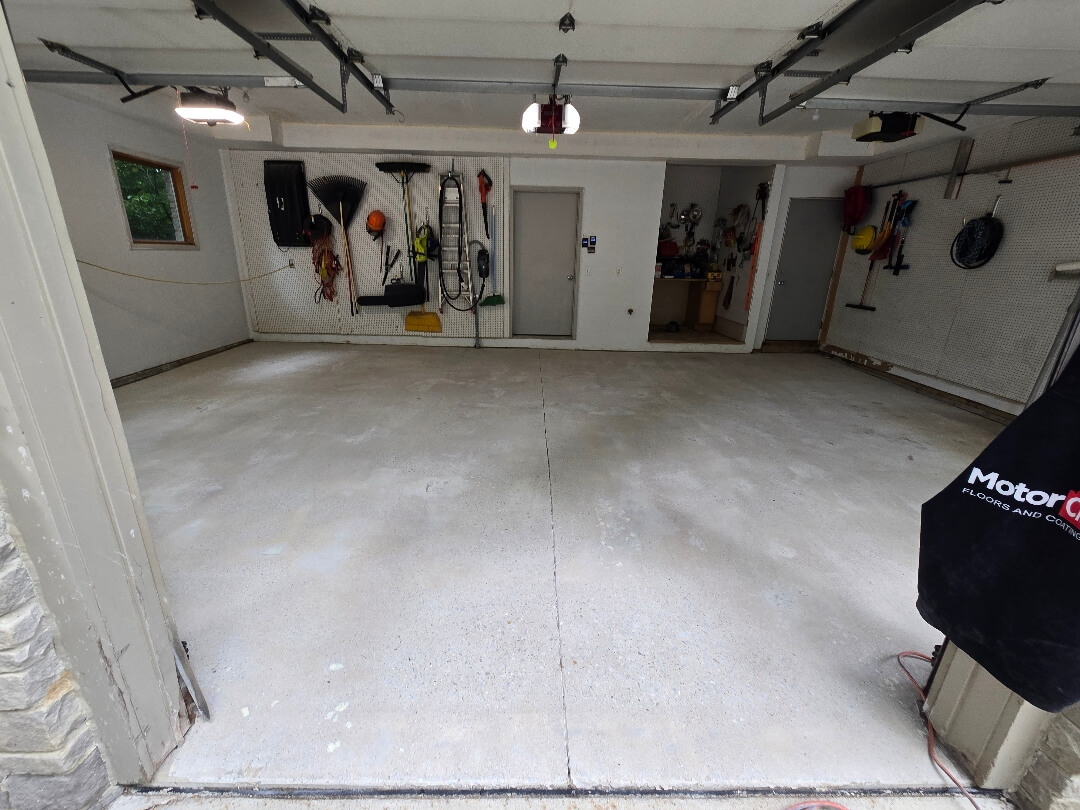
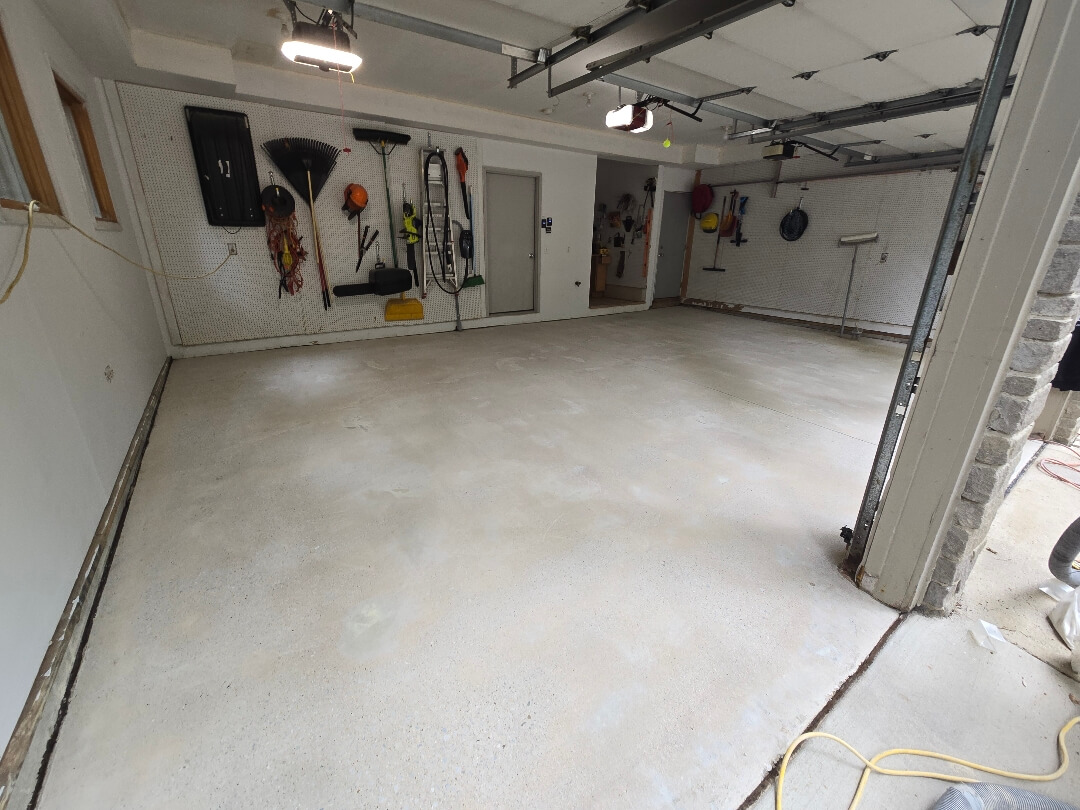
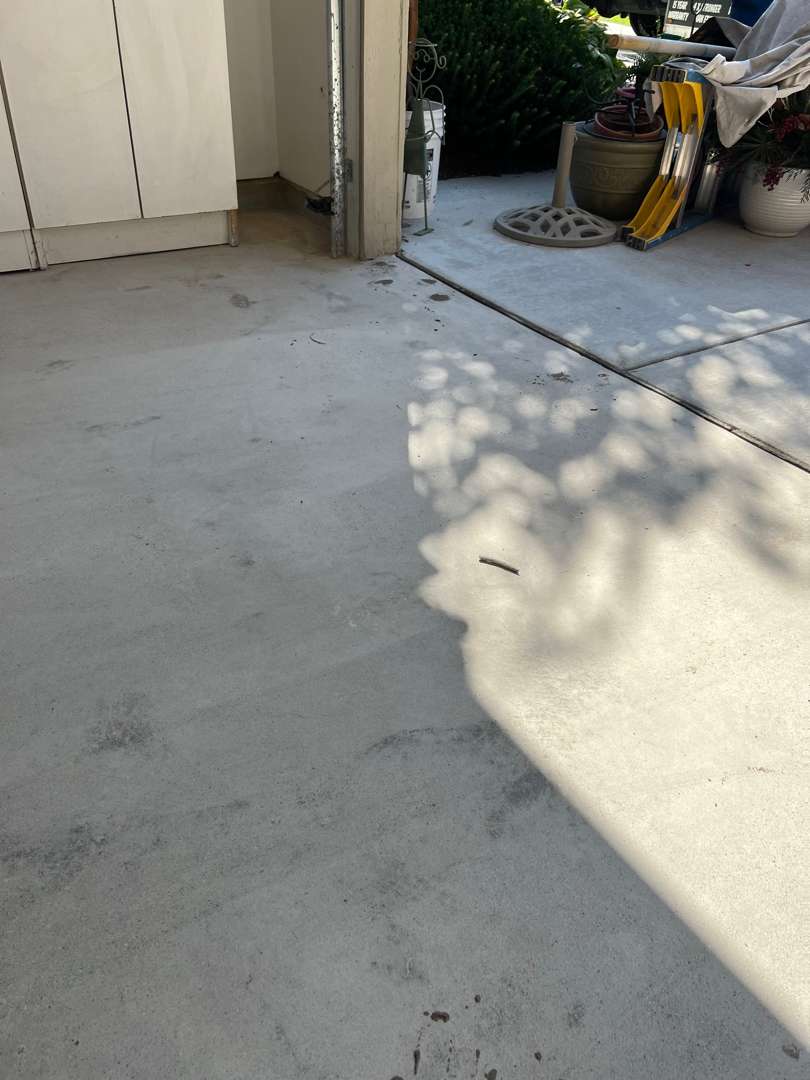
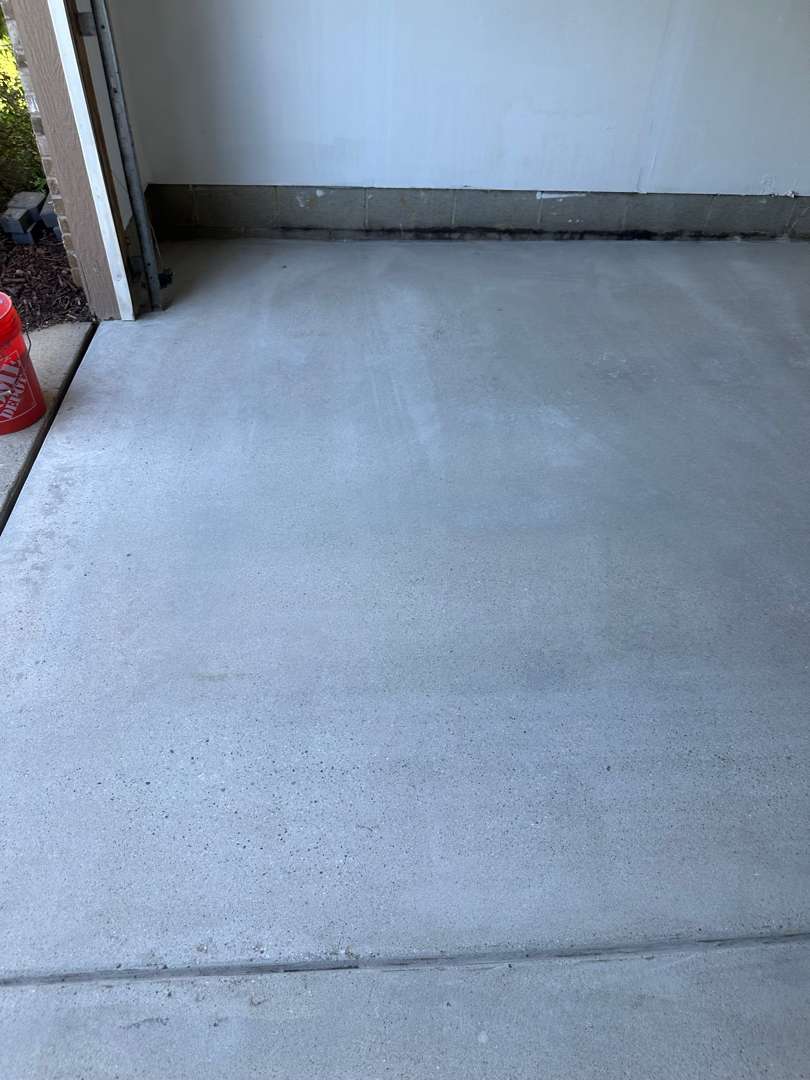
The Result
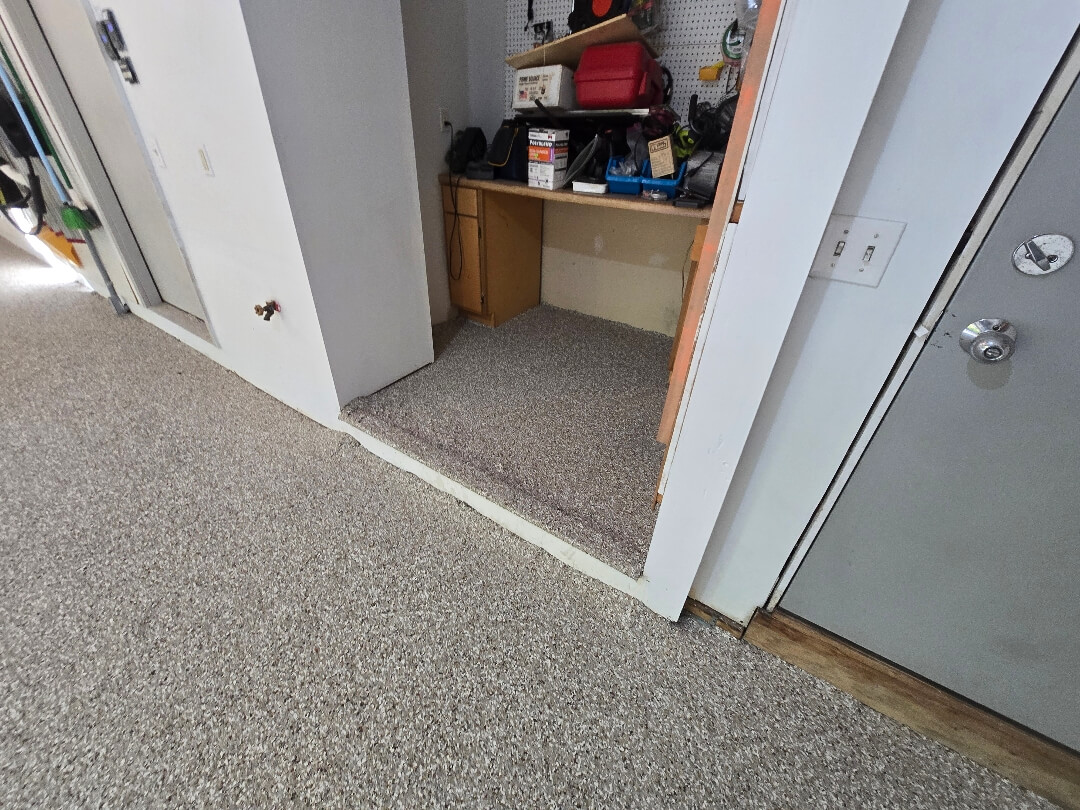
The Overridge Drive garage now presents a uniform Pebble Beach floor. Tan and warm grey tones give the space depth and a finished character. Cracks, oil stains, and surface pitting are no longer visible anywhere. The workroom threshold presents a clean, defined boundary between surfaces. The MR50 primer and MC4 coating guard against moisture intrusion over time. MotorCity Floors and Coatings delivered a durable, well-prepared garage floor coating for this Ann Arbor home.
Testimonials - Voices of Our Clients
Joseph Xuereb
Yas V
New Garage Floor Coating
on South Ridgemont Lane
South Ridgemont Lane — Ann Arbor, MI
Project Overview
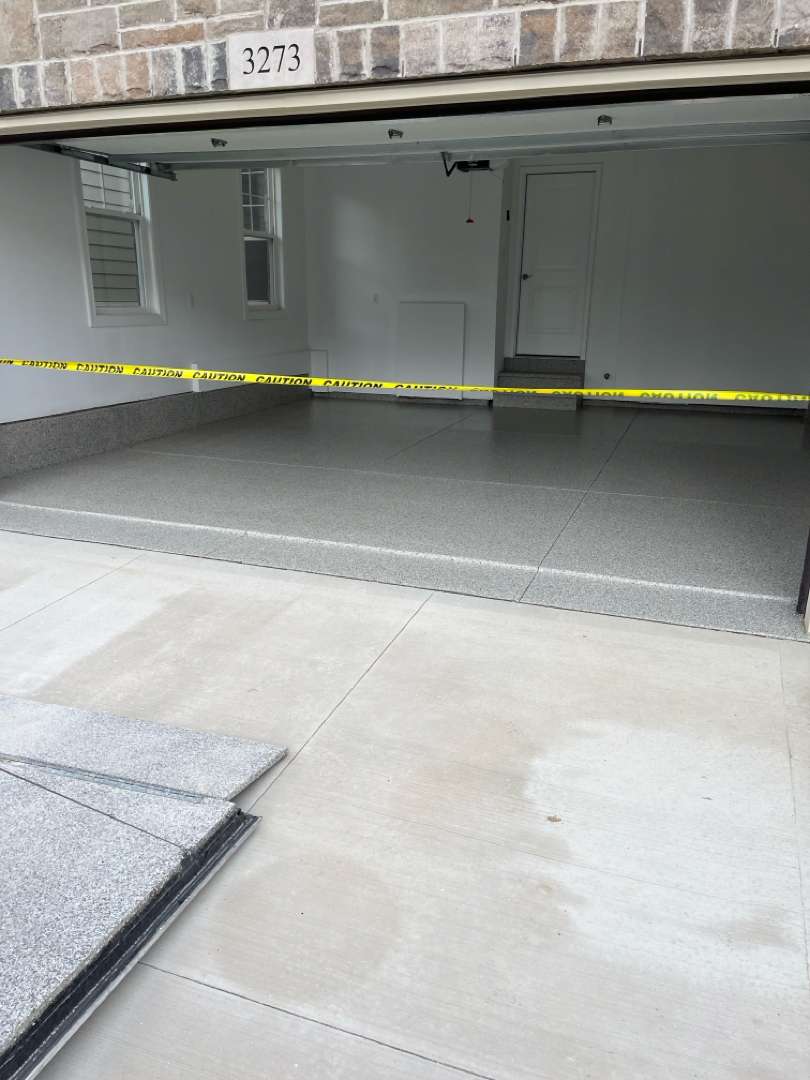
This 545 square-foot garage on South Ridgemont Ln is the 8th case study of our garage floor coating work in Ann Arbor.
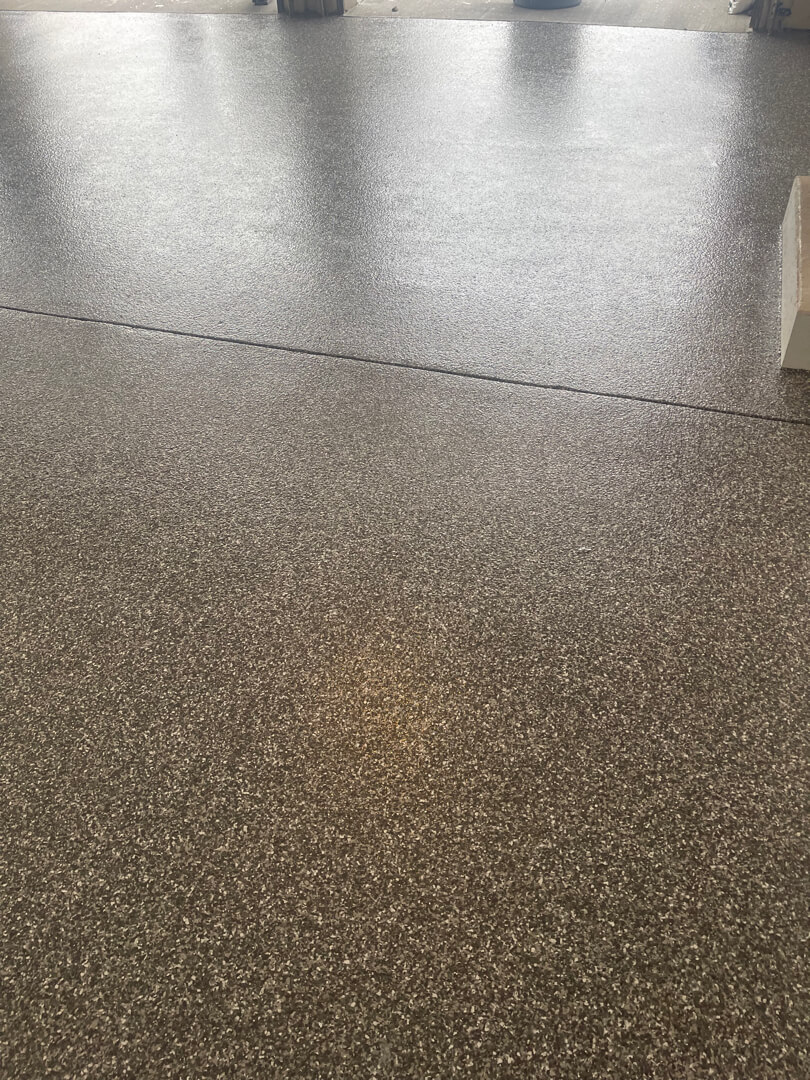
The existing surface had an old epoxy coating over heavily pitted concrete. Our crew removed the epoxy, repaired the pitting, and applied the MC3.8 system. The project finished with an Aztec Beige flake blend and 24-grit traction.
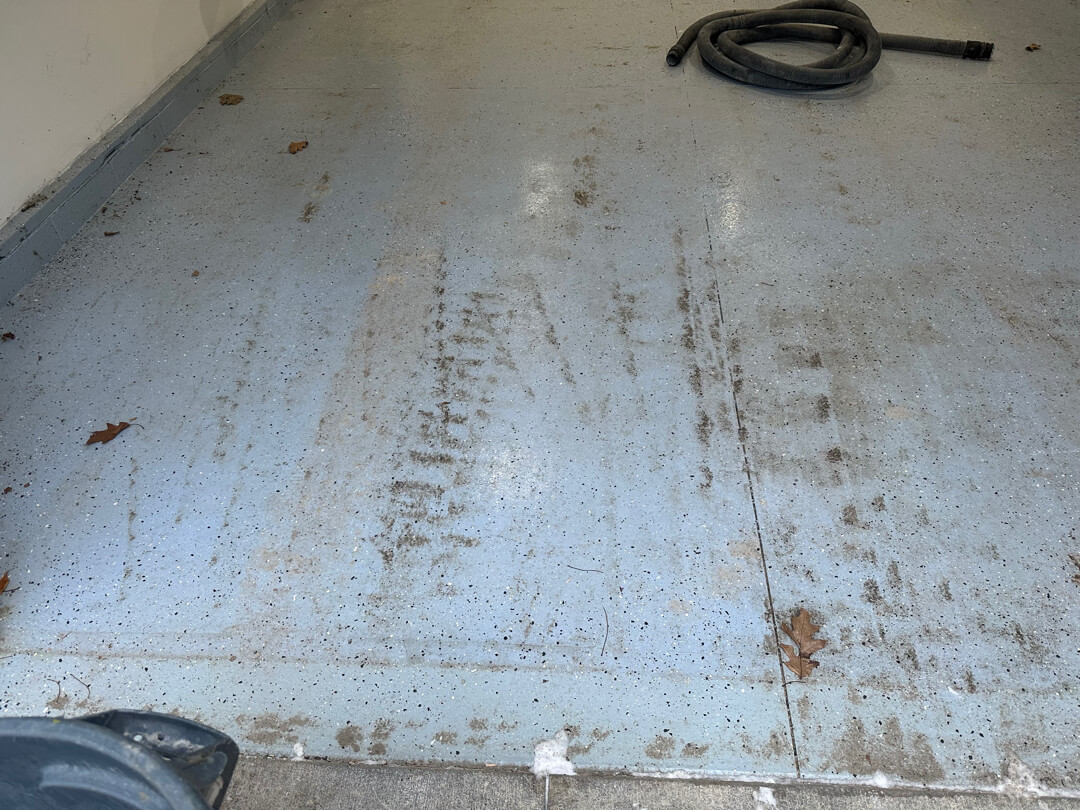
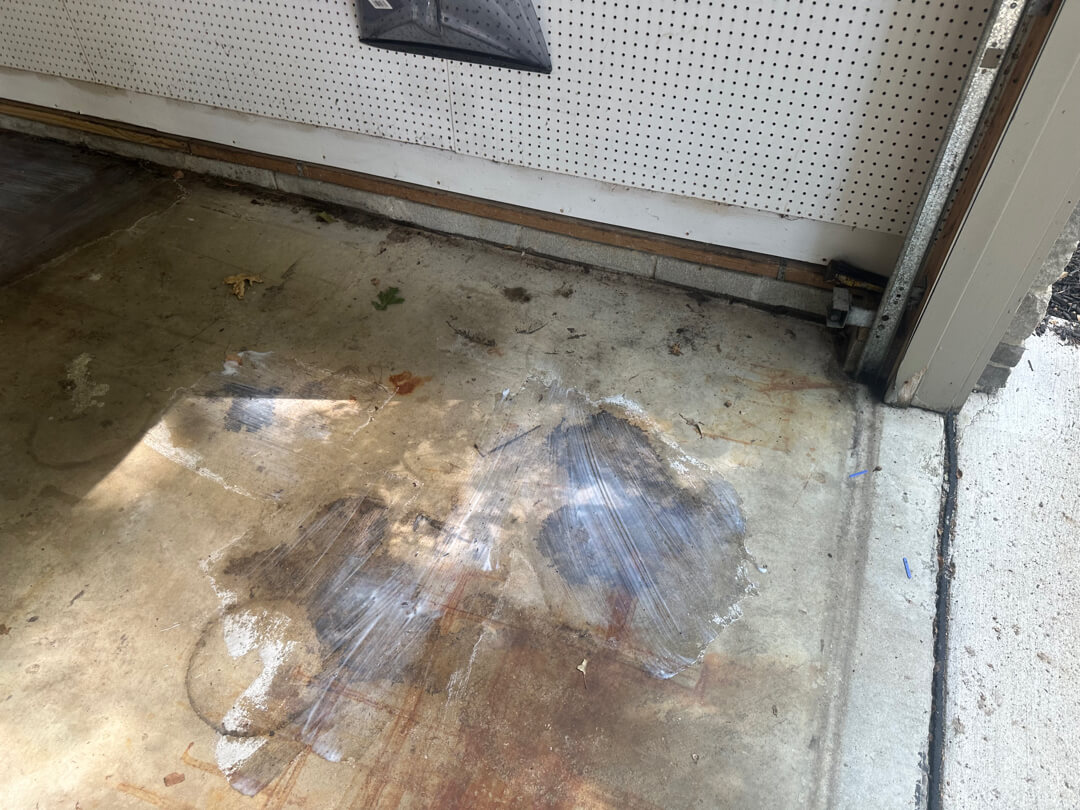
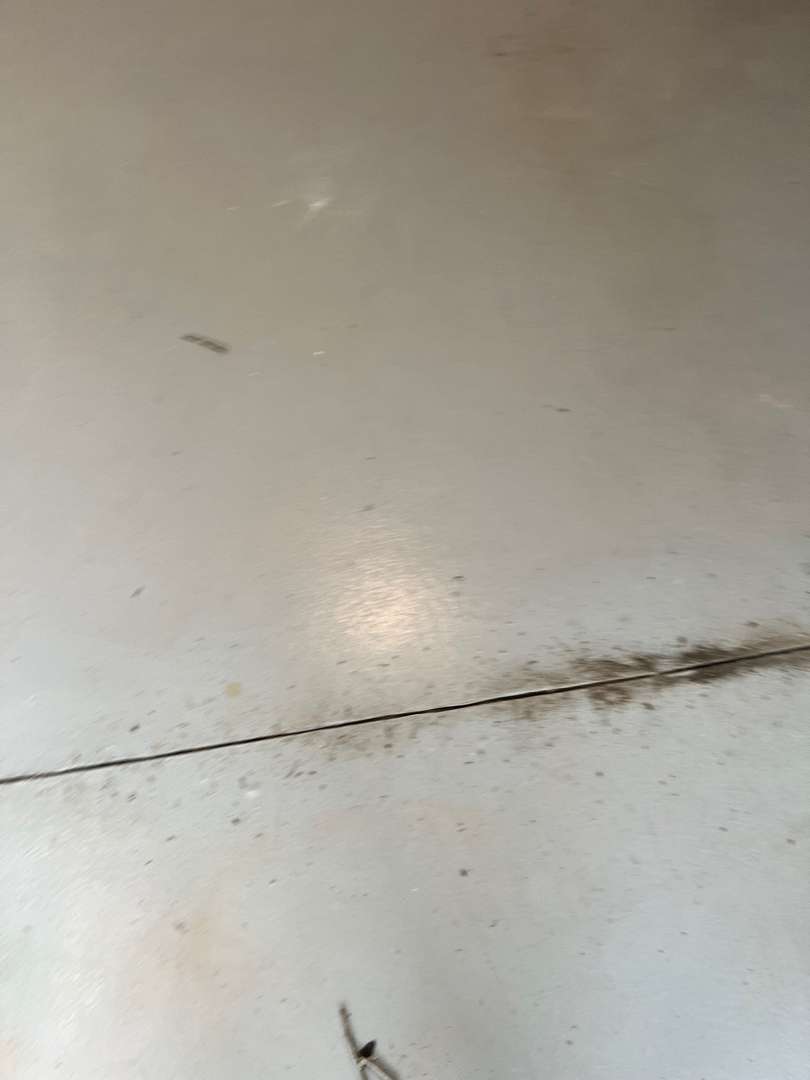
Initial Substrate Condition
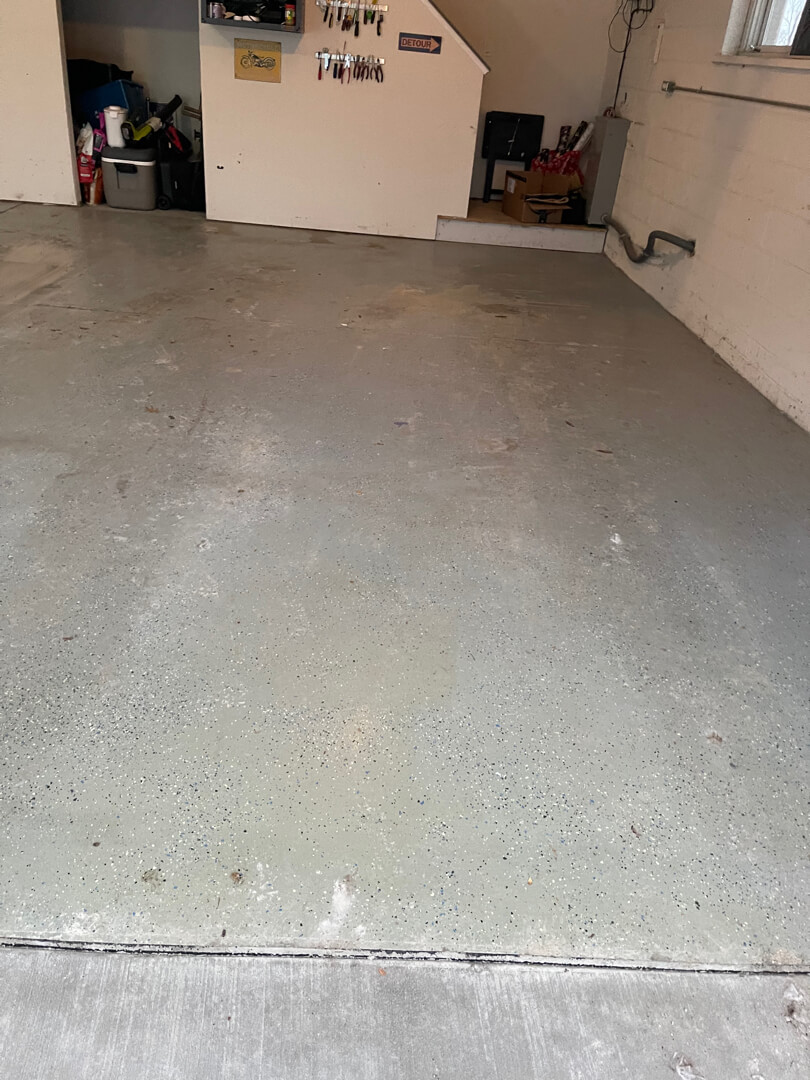
The floor showed an old epoxy coating across the entire slab. This clear epoxy coating is not very visible on the photos but you can see the yellowish, milkish tint typical of aging expoxy: as its chemicals break down, UV resistance decreases and sun exposure bakes the top layer.
Oil stains and surface contamination appeared throughout. Cracks traversed the slab between expansion joints. The concrete had no steps and no vertical surfaces.
The epoxy coating showed peeling and adhesion failure. Grinding revealed the full extent of the pitting below. The pitting spread across both slabs of the garage floor.
Surface Preparation: Epoxy Removal and Grinding
Our crew began with diamond grinding to strip the existing epoxy. The grinder removed the coating and exposed raw concrete below. Our team made multiple passes to open the surface of the concrete. Our crew vacuumed debris between passes to keep the surface clean.
The grinding process revealed heavy pitting beneath the old epoxy. Our team ground the full 545 square feet to a consistent profile. Our crew cleaned the surface thoroughly before pitting repair.
Pitting Repair: Mender Epoxy Flooding

The concrete showed heavy pitting across both sections of the slab. Standard skim coat repair does not fill deep or widespread pitting.
Mender epoxy: targeted spot treatment vs. full-slab flooding criteria →
Our crew used Mender epoxy to flood and fill the pitted areas.
Our team applied Mender across multiple zones throughout the garage to make sure to fill up voids. Then we allowed the Mender to cure before the next step. This technique produced a stable, even base across the full slab.
MC3.8 Coating System Application
Our crew applied the MC3.8 polyurea base coat across the prepared surface. Our team broadcast Aztec Beige flakes into the wet base coat. We back-rolled the flake layer for even distribution. Then we applied a polyaspartic top coat over the broadcast layer.
The top coat included a 24-grit traction additive throughout. We placed caution barriers while the coating cured to prevent accidental foot trafic. The MC3.8 system cures fast and resists return traffic within hours.
Completed Installation


The Aztec Beige blend produces a warm, natural tone across the floor. The 24-grit additive provides slip resistance in wet conditions. The MC3.8 system resists chemicals, abrasion, and UV exposure. The coating covers and seals the repaired pitting throughout the slab.
Technical Specifications
Location | Ann Arbor, MI |
Floor Area | 545 square feet |
Coating System | MC3.8 polyurea-polyaspartic |
Flake Color | Aztec Beige |
Traction Additive | 24-grit |
Pitting Repair | Mender epoxy flooding |
Verticals | None |
Steps | None |
Testimonials - Voices of Our Clients
David Rutkowski
Karolina M
NEW Garage Floor Coating
on Doral Drive
Doral Drive — Ann Arbor, MI
Project Overview

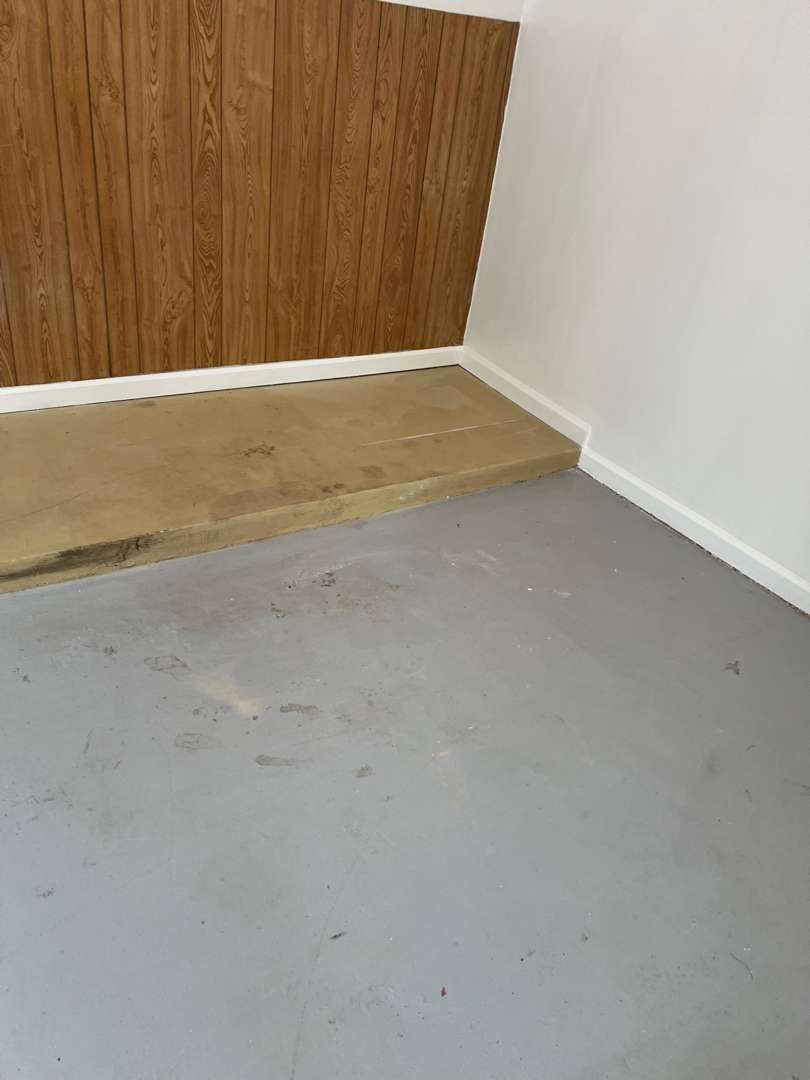
Initial Substrate Condition
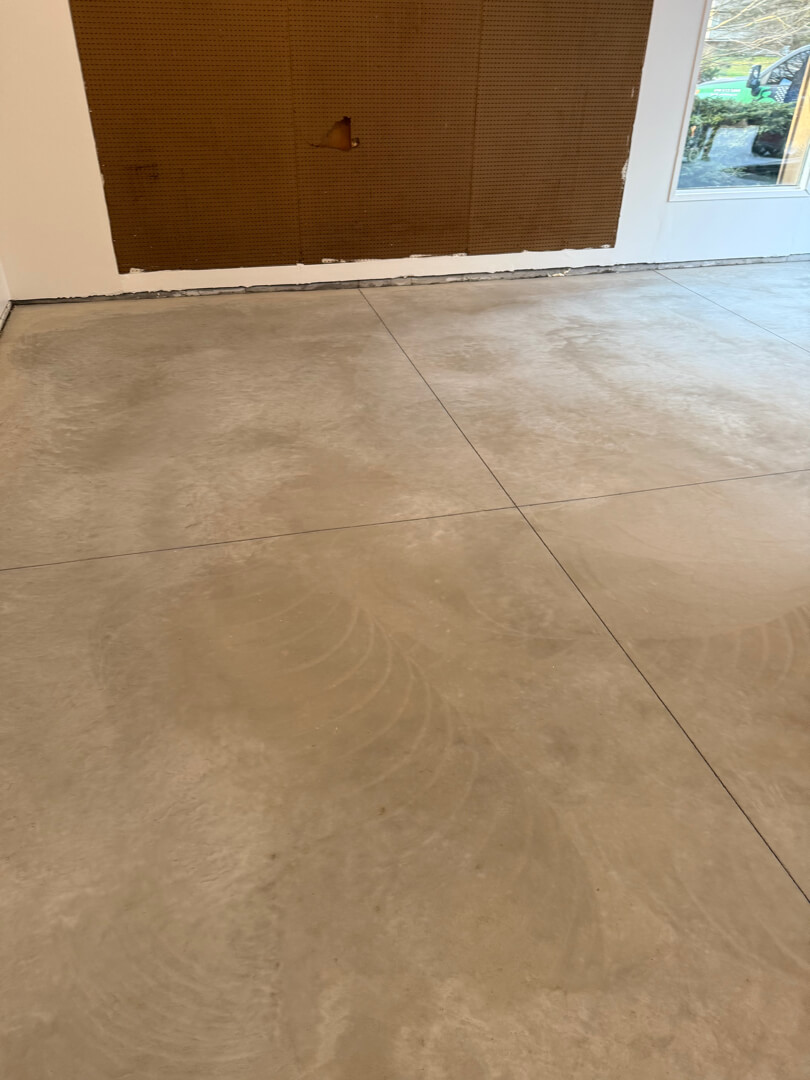
The slab showed two distinct paint layers across the full floor. A white coat sat over an older grey coat beneath. Neither layer had maintained adhesion at the control joints. Peeling and separation appeared along each seam throughout the slab.
The control joints held packed caulk beneath the paint layers. The caulk had compressed and separated over time. Light pitting appeared in isolated zones of the slab. The concrete step carried surface staining on the tread and riser face.
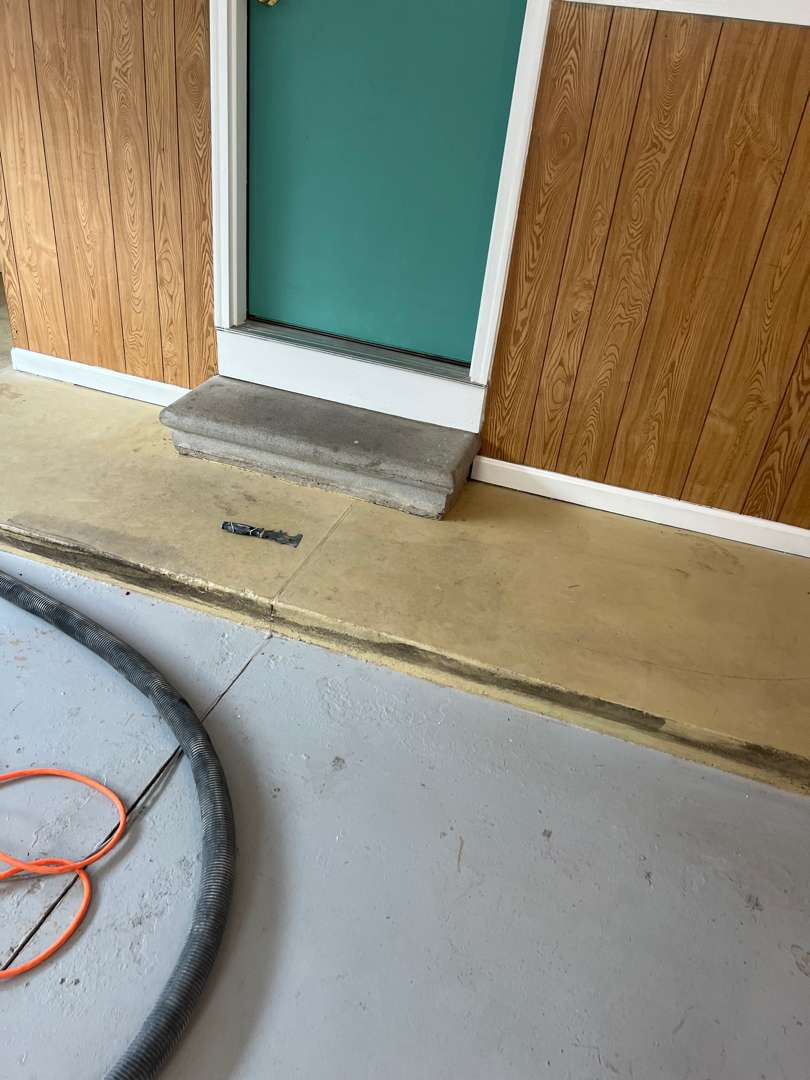
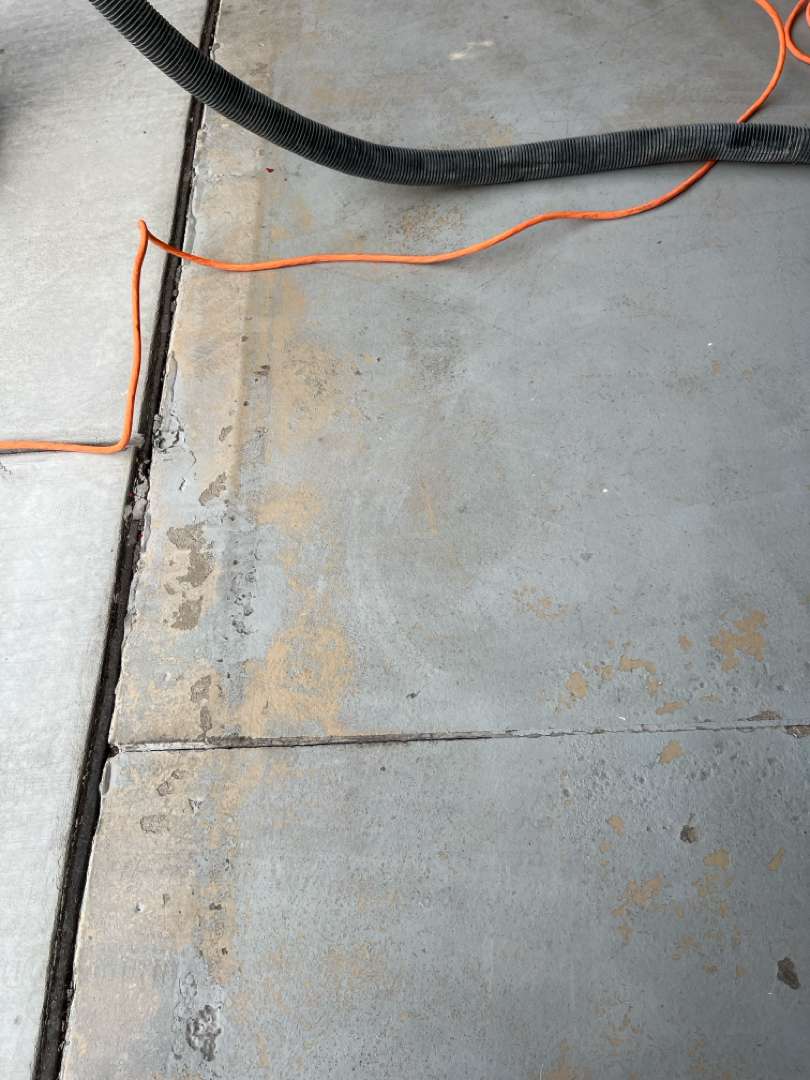
Paint Coating Removal and Surface Preparation
Removing several paint layers required aggressive diamond grinding. Our crew ran the grinder across all 450 square feet to cut through both coating layers. The 36-grit configuration removed the paint and opened the surface of the concrete beneath. Our team vacuumed between passes to keep the ground surface free of coating debris.
The control joints required separate work after grinding.
Paint removal and control joint caulk extraction protocol →
Our crew pulled the caulk from each joint by hand and cleaned the channels thoroughly. The caulk had been placed before the paint coatings went down. Removing it fully was necessary before any repair material could seat properly.
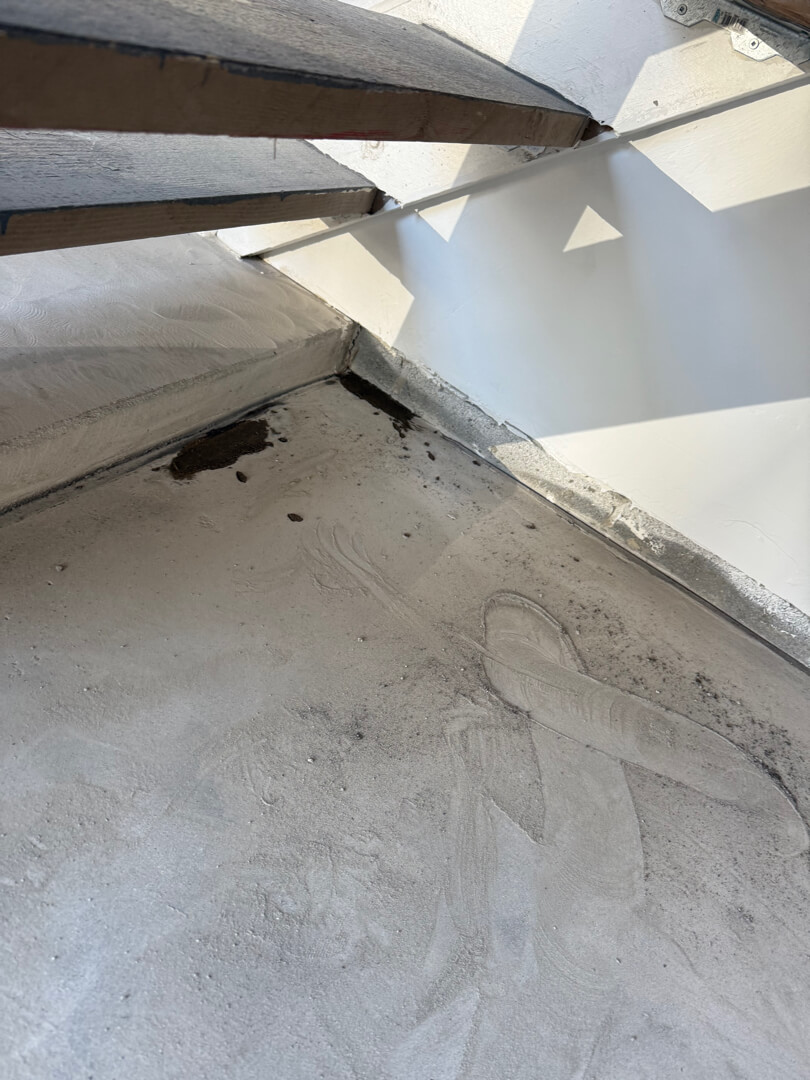
The concrete step received hand grinding on the tread and riser. Our crew worked the nosing and edges by hand for full coverage.
Pitting Repair
MC3.8 Coating System Application
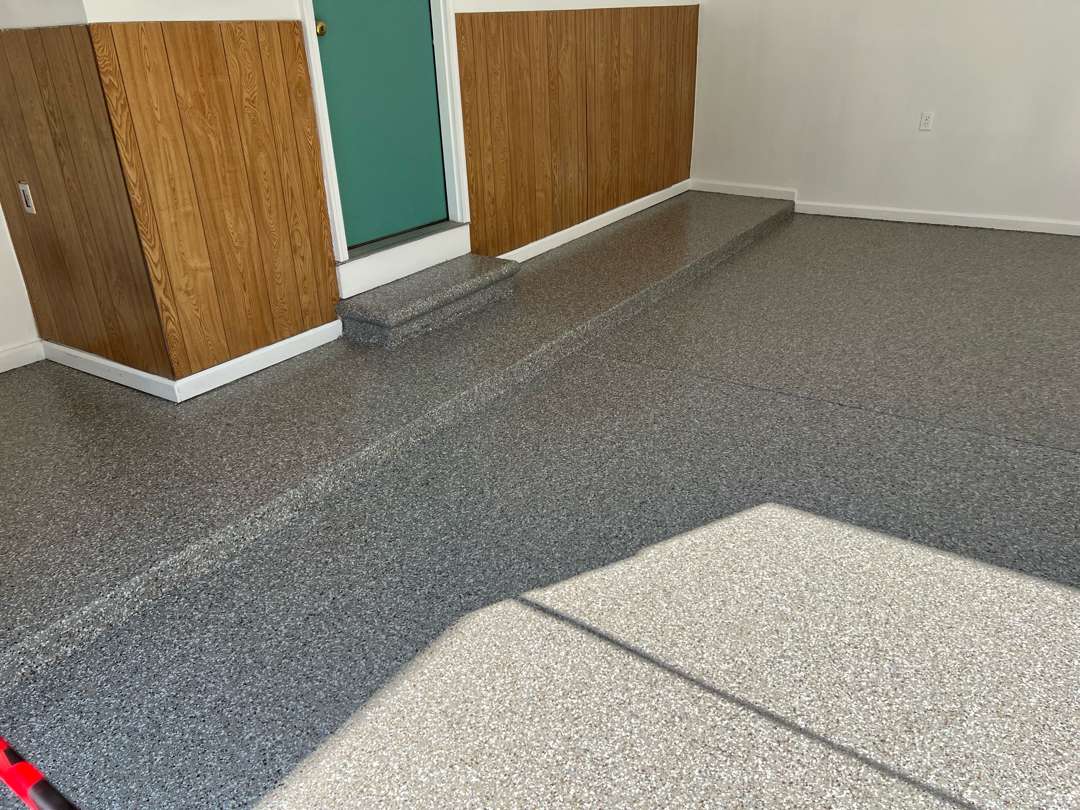
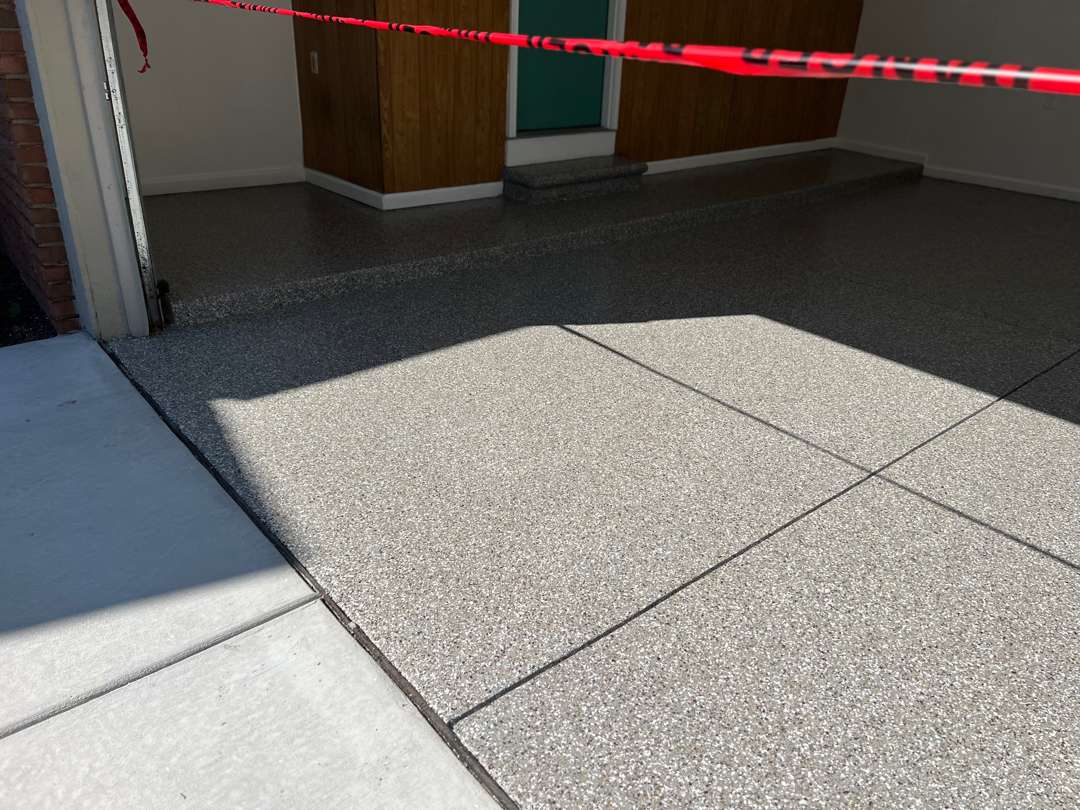
Our crew applied the polyurea base coat by roller across the prepared slab. Our team cut in along the 20 linear feet of vertical lip by hand. Our crew broadcast Pebble Beach flakes into the wet base coat across all 450 square feet. The step tread and riser received base coat and flake broadcast to match the floor.
Pebble Beach combines warm tan, soft grey, and off-white chips. The blend reads lighter and warmer than darker blends and pairs well with wood-paneled wall interiors. Our crew applied the polyaspartic top coat with 36-grit traction additive throughout. The 36-grit profile delivers firm grip underfoot in wet and dry conditions.
Completed Installation


Technical Specifications
| Location | Ann Arbor, MI |
| Floor Area | 450 square feet |
| Vertical Lip | 20 linear feet |
| Steps | 1 concrete step (tread and riser coated) |
| Prior Surface | Multiple paint coating layers — fully removed |
| Joint Prep | Caulk removed and joints cleaned prior to repair |
| Pitting Repair | Mender epoxy — isolated areas |
| Coating System | MC3.8 polyurea-polyaspartic |
| Flake Color | Pebble Beach |
| Traction Additive | 36-grit |
Testimonials - Voices of Our Clients
Brian W.
Matthew Hunwick
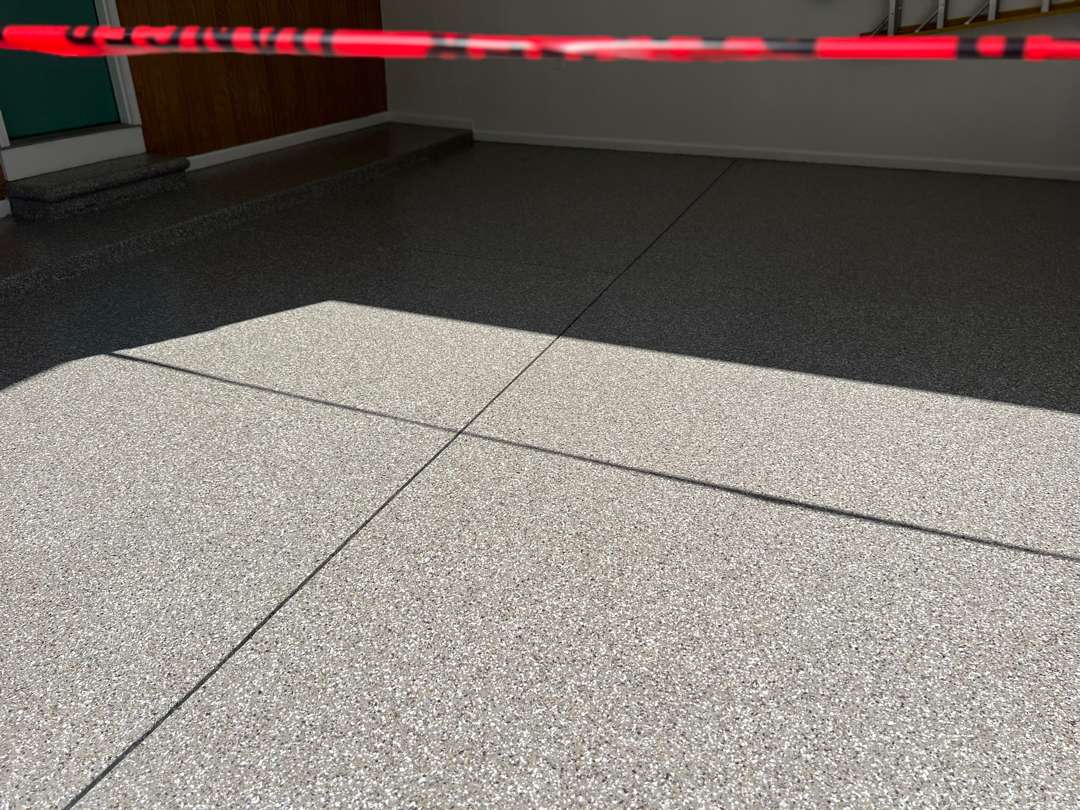
New Garage Floor Coating
on Stonebridge Drive North
Stonebridge Drive North — Ann Arbor, MI
Project Overview

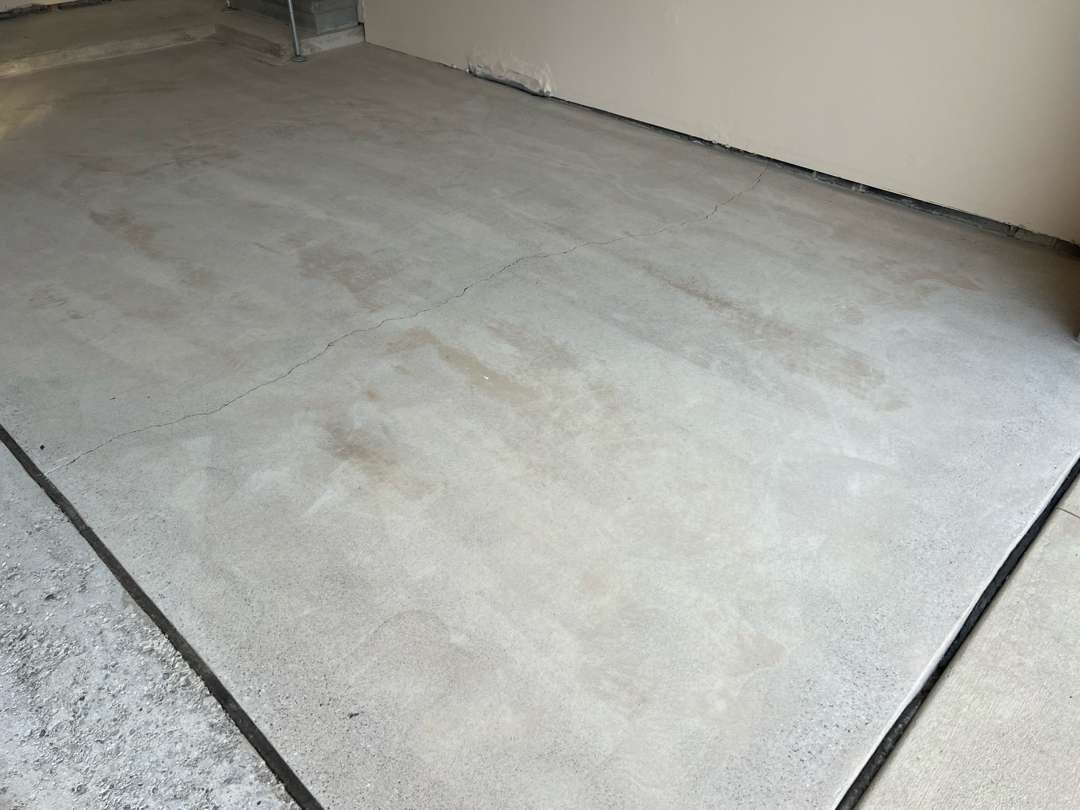
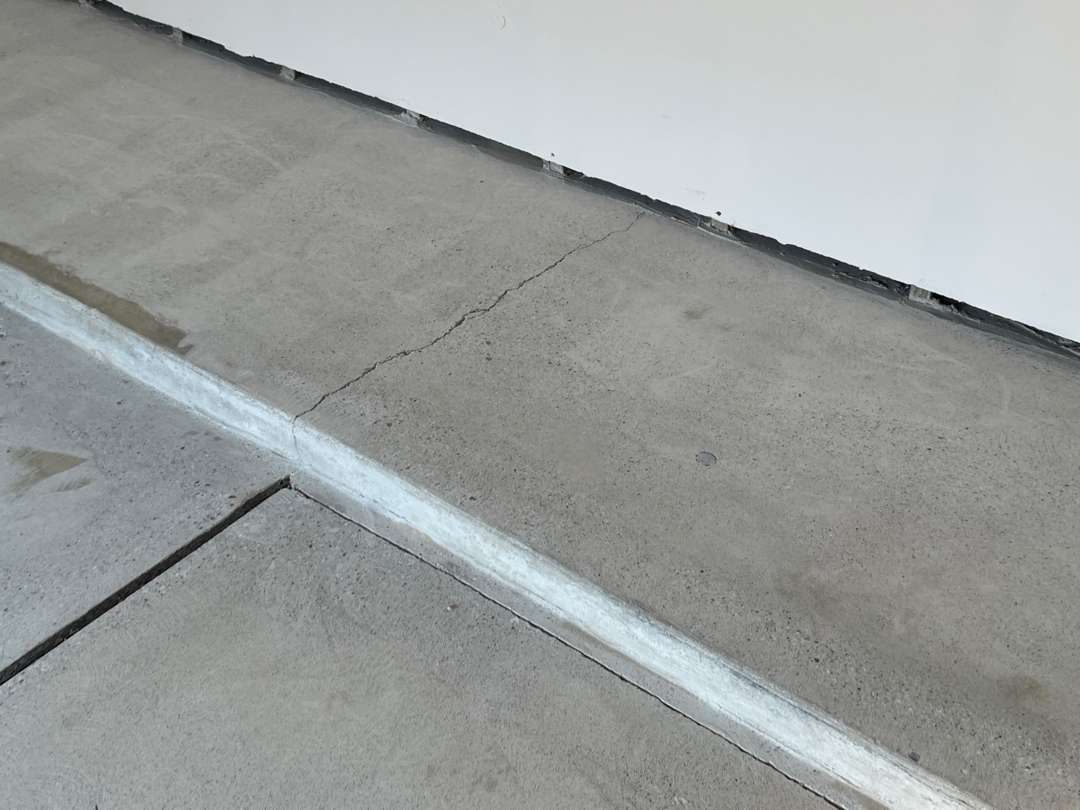
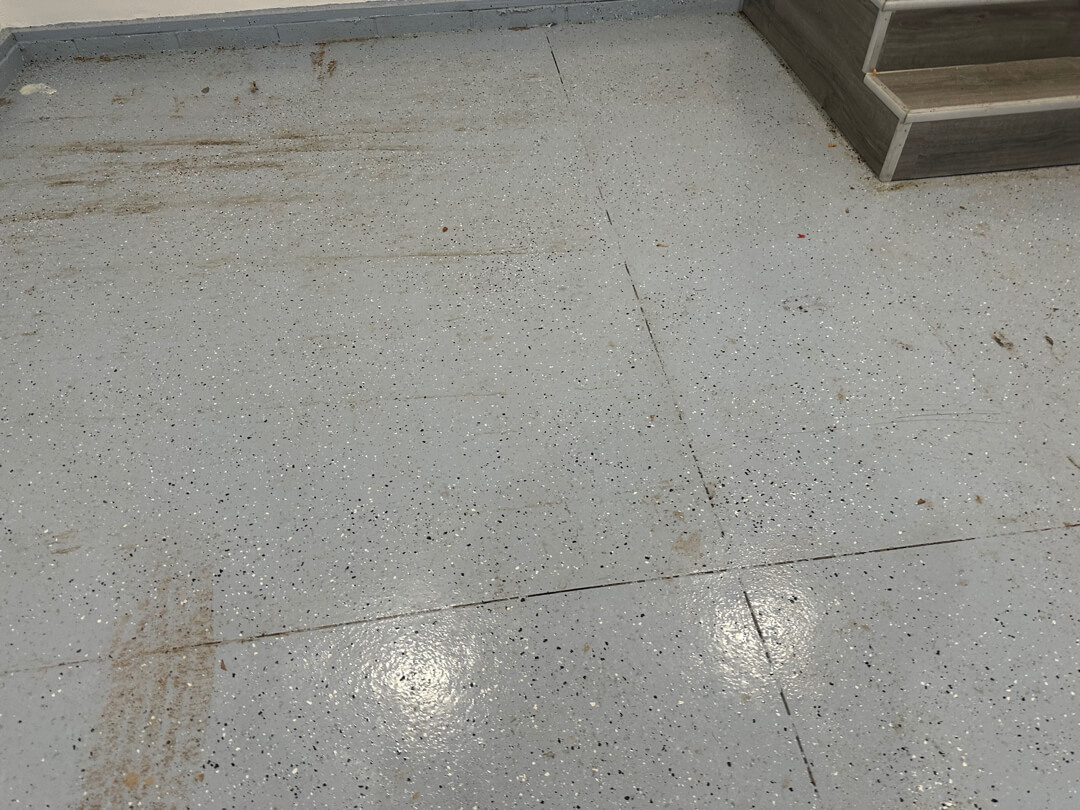
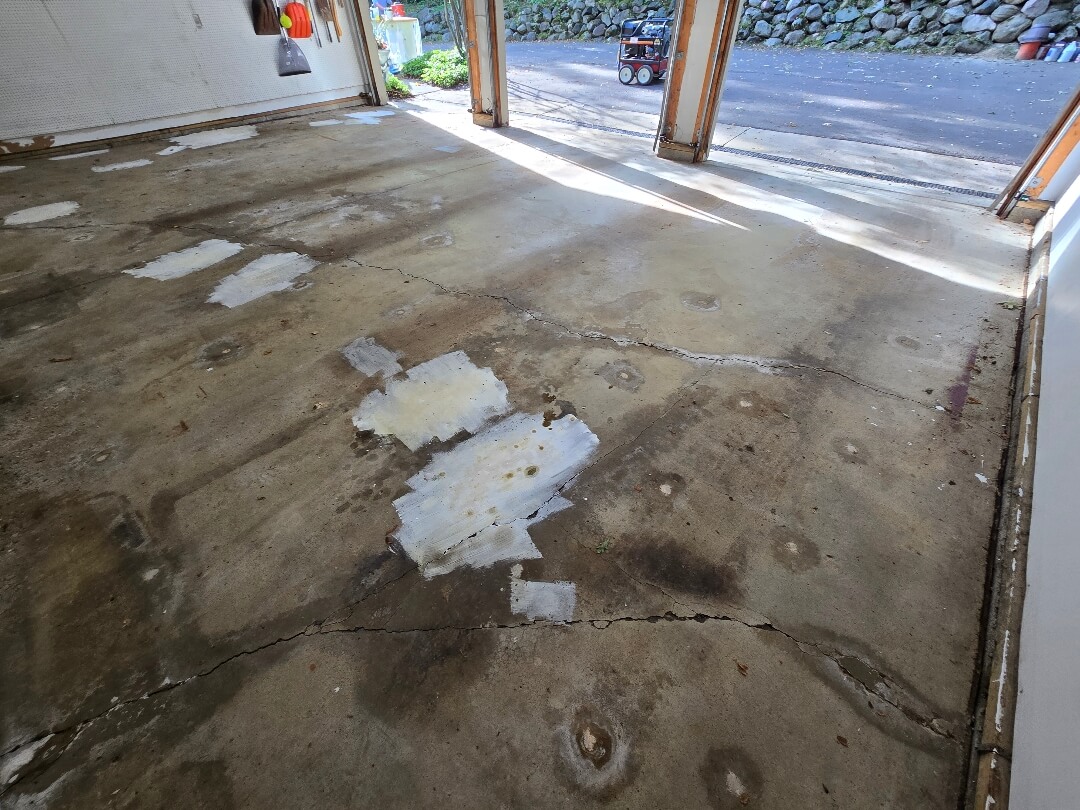
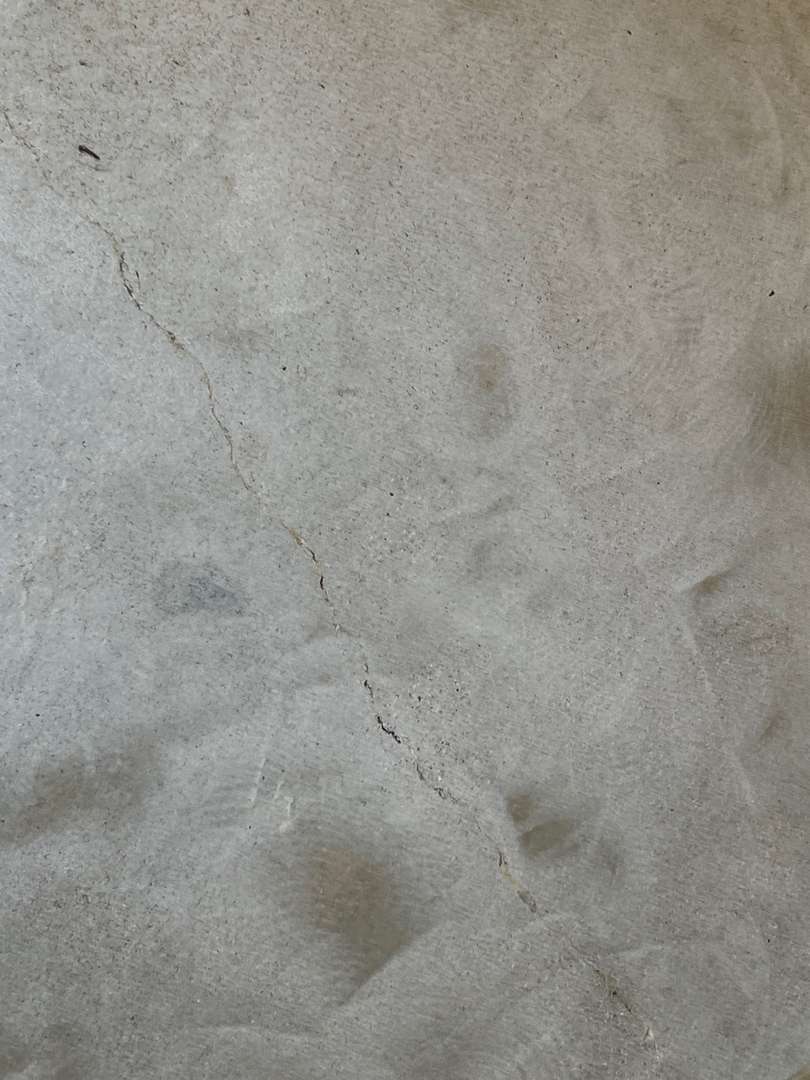
Initial Substrate Condition
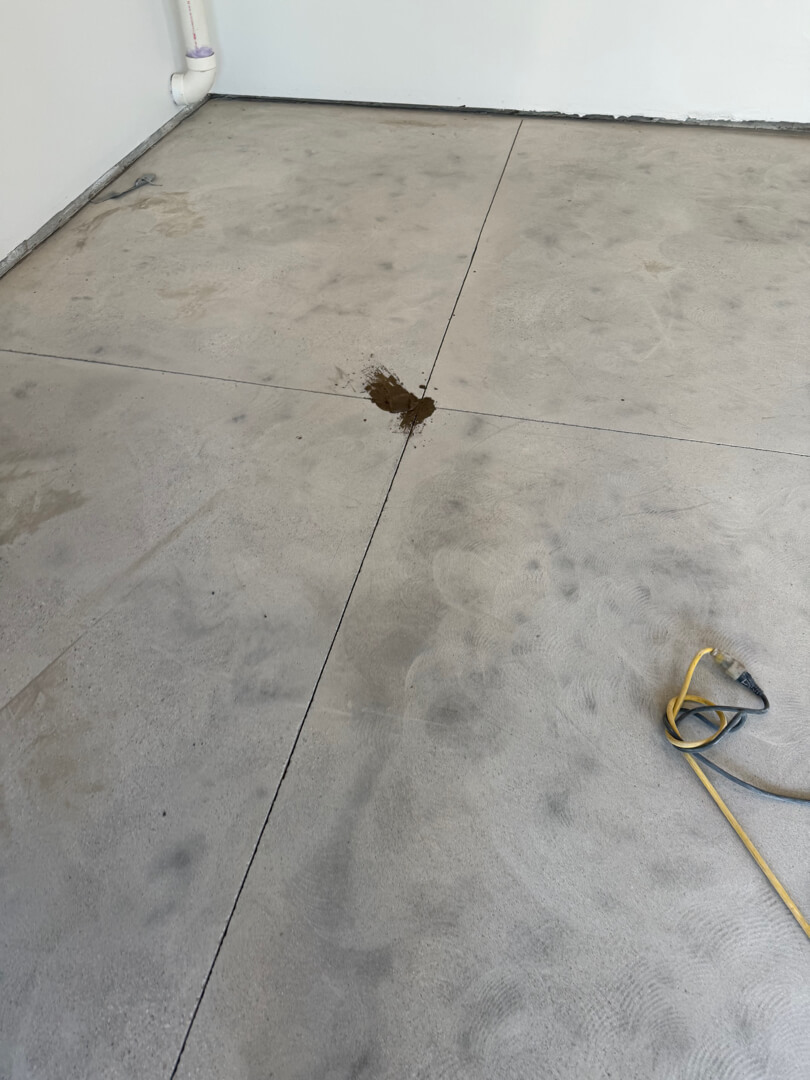
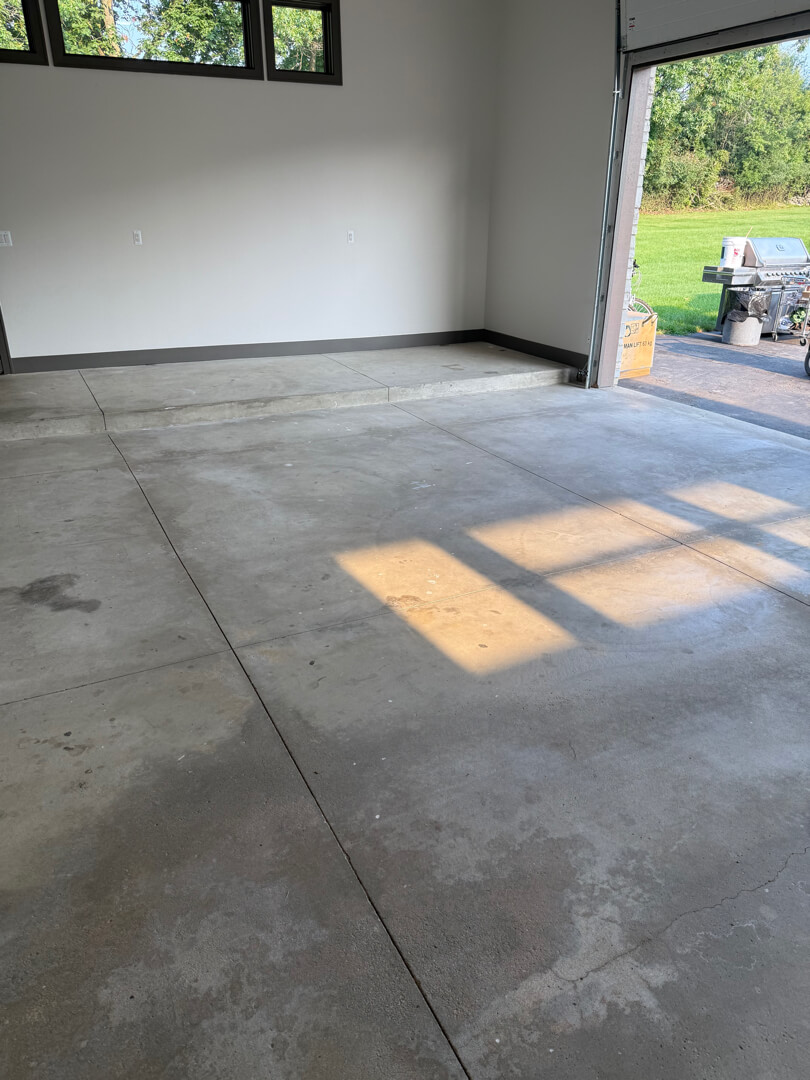
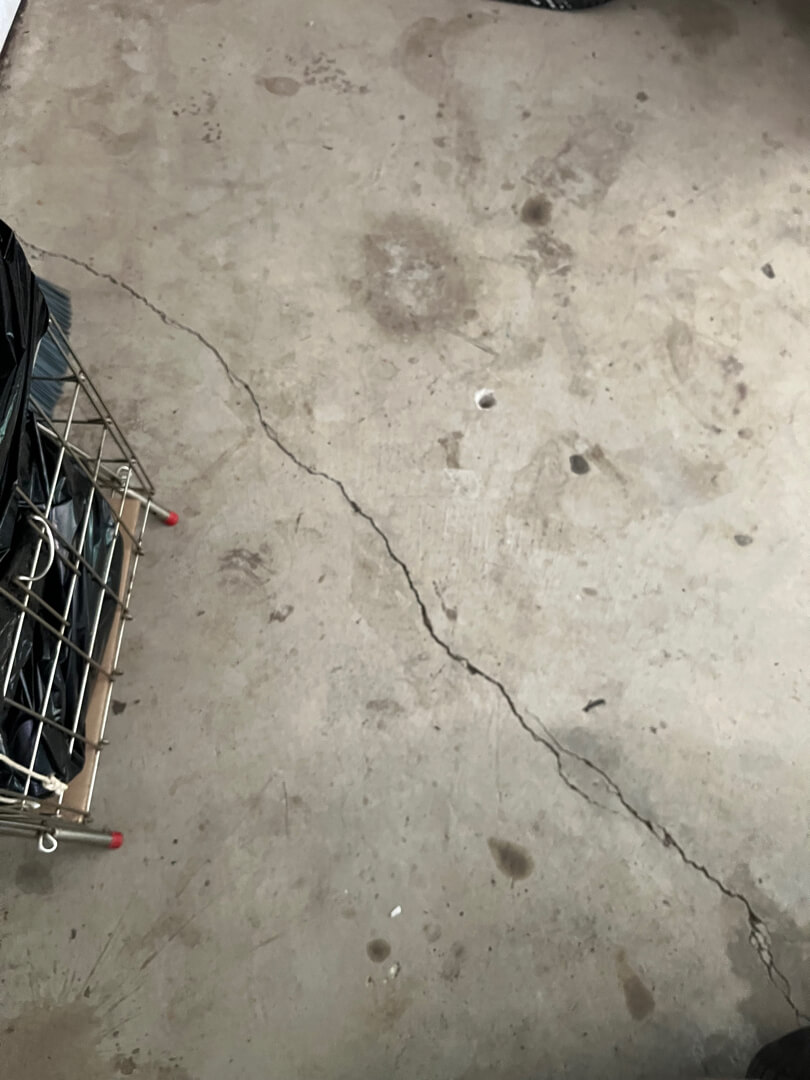
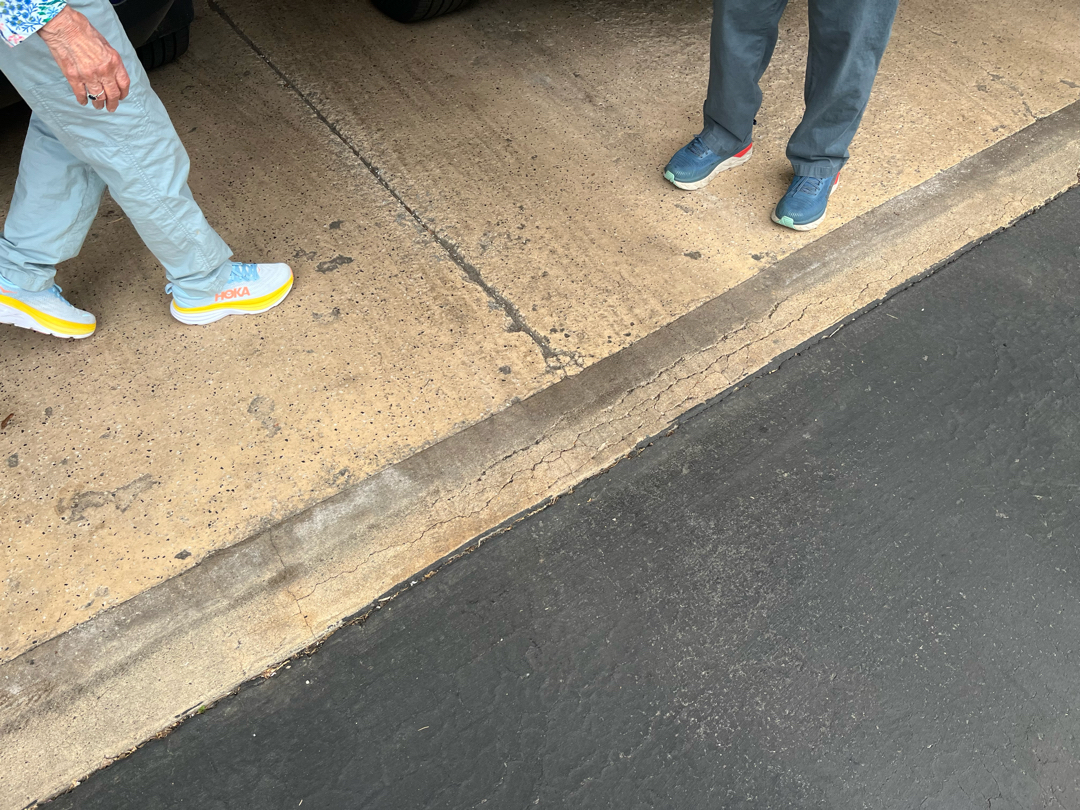
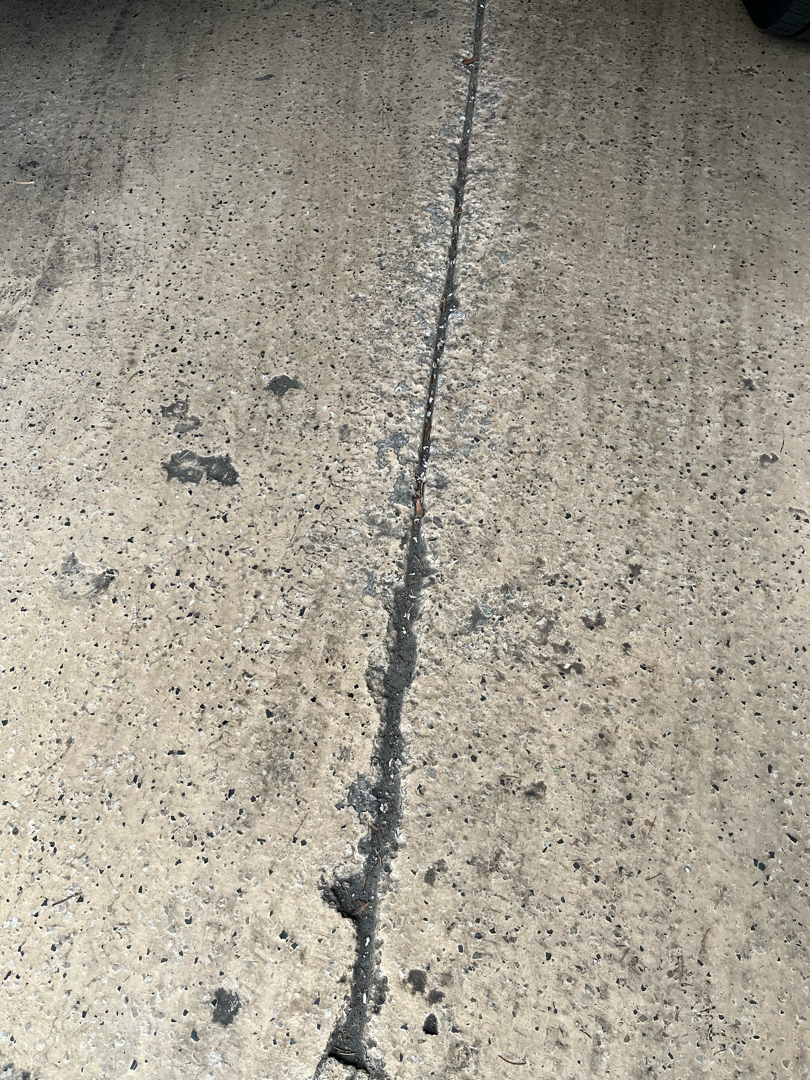
The slab showed a long diagonal crack running across one panel. Oil staining and surface wear appeared near the vehicle parking positions. The cracking was concentrated on the left side of the garage. The right side of the slab had less damage and required less repair.
Pitting on the more affected side ranged from shallow surface voids to open aggregate. The concrete step showed general wear on the tread face. The 31 linear feet of vertical lip ran along the perimeter walls and required coating. No prior coating was present — the slab was bare concrete throughout.
Diamond Grinding — First Pass
Crack and Pitting Repair
Diamond Grinding — Second Pass
After the Mender cured, our crew made a second pass with the diamond grinder. This pass knocked down cured repair material and leveled the treated areas.
Why two grinding passes are required when repairs are in scope →
Our team ground the repaired section until it matched the profile of the sound side. Our crew vacuumed the full slab before any coating began.
MC3.8 Coating System Application
Completed Installation

Technical Specifications
| Location | Ann Arbor, MI |
| Floor Area | 448 square feet |
| Vertical Lip | 31 linear feet |
| Steps | 1 concrete step (tread and riser coated) |
| Prior Surface | Bare concrete — no prior coating |
| Crack Repair | Flexible polyurea filler — diagonal crack |
| Pitting Repair | Mender epoxy flooding — one side of slab |
| Grinding Passes | Two (pre-repair and post-repair) |
| Coating System | MC3.8 polyurea-polyaspartic |
| Flake Color | Pecan |
| Traction Additive | 16-grit |
Testimonials - Voices of Our Clients
Caribbean kid
Beth Sausville
NEW Garage Floor Coating
on Hayster Drive
Hayster Drive — Ann Arbor, MI
Project Overview

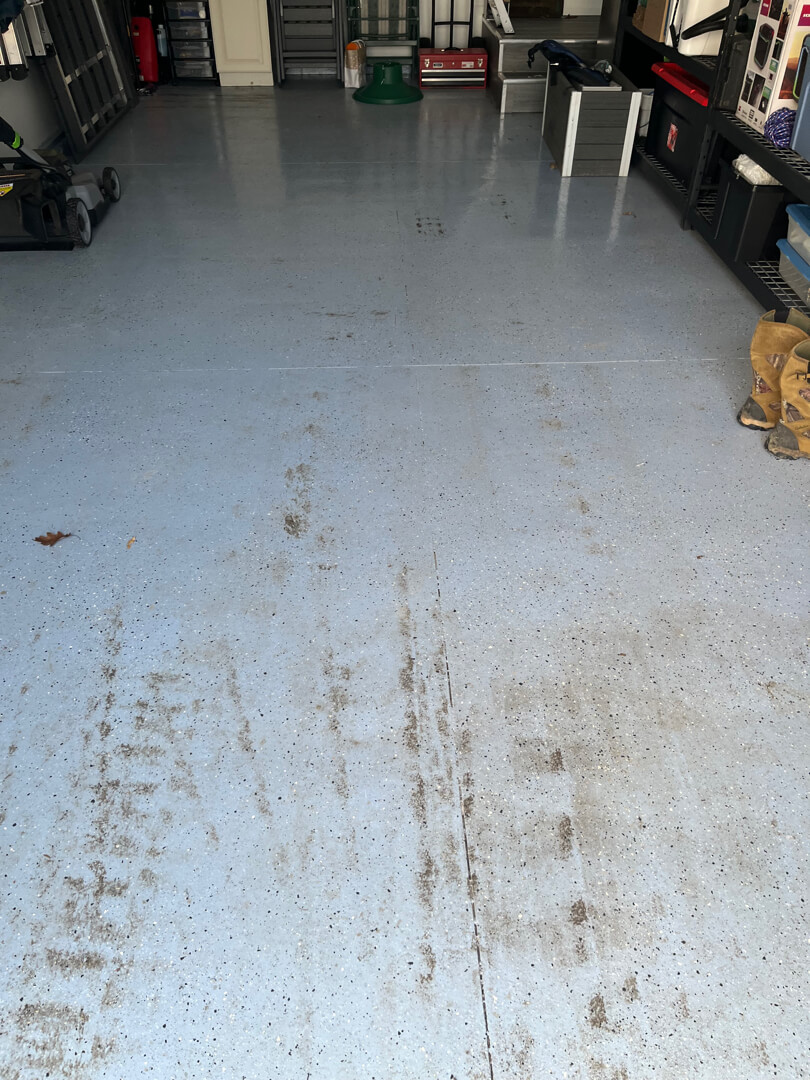
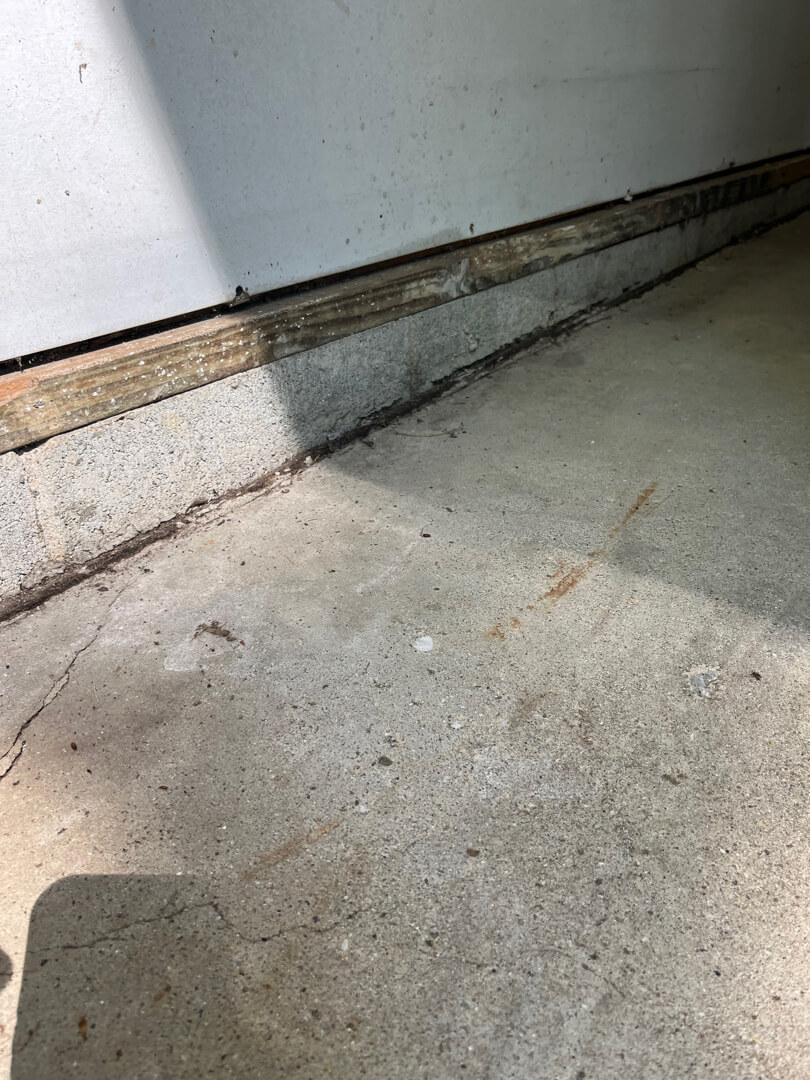
Initial Substrate Condition
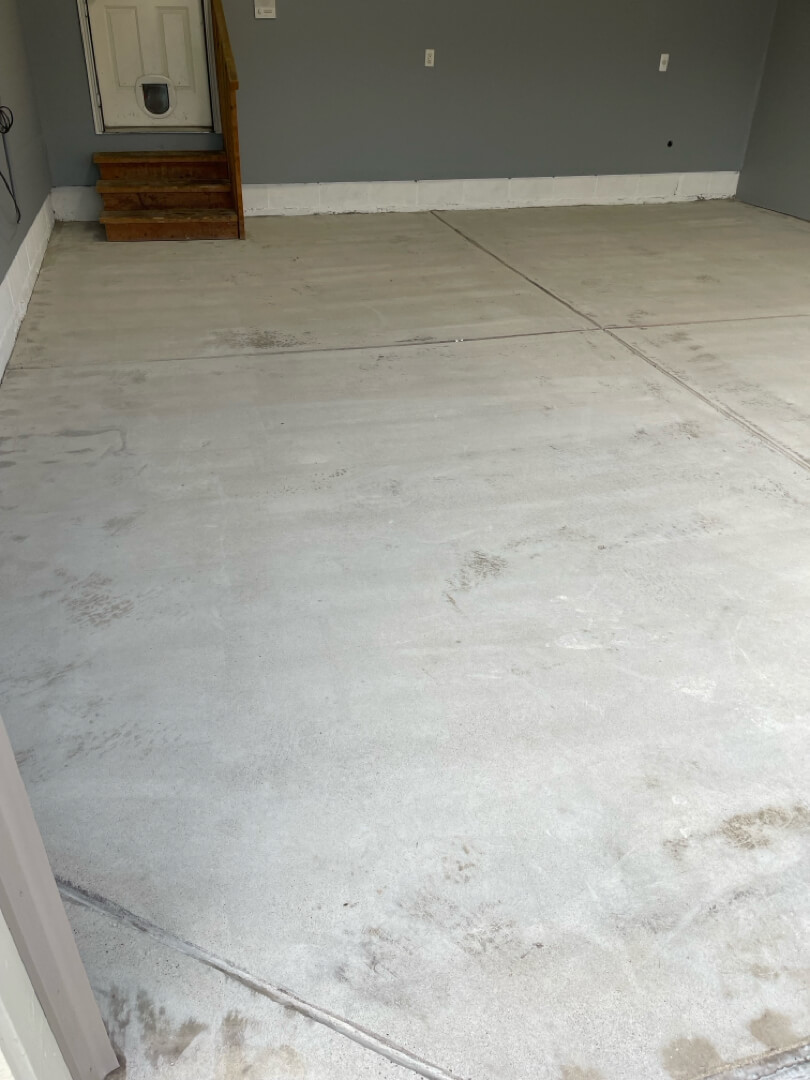
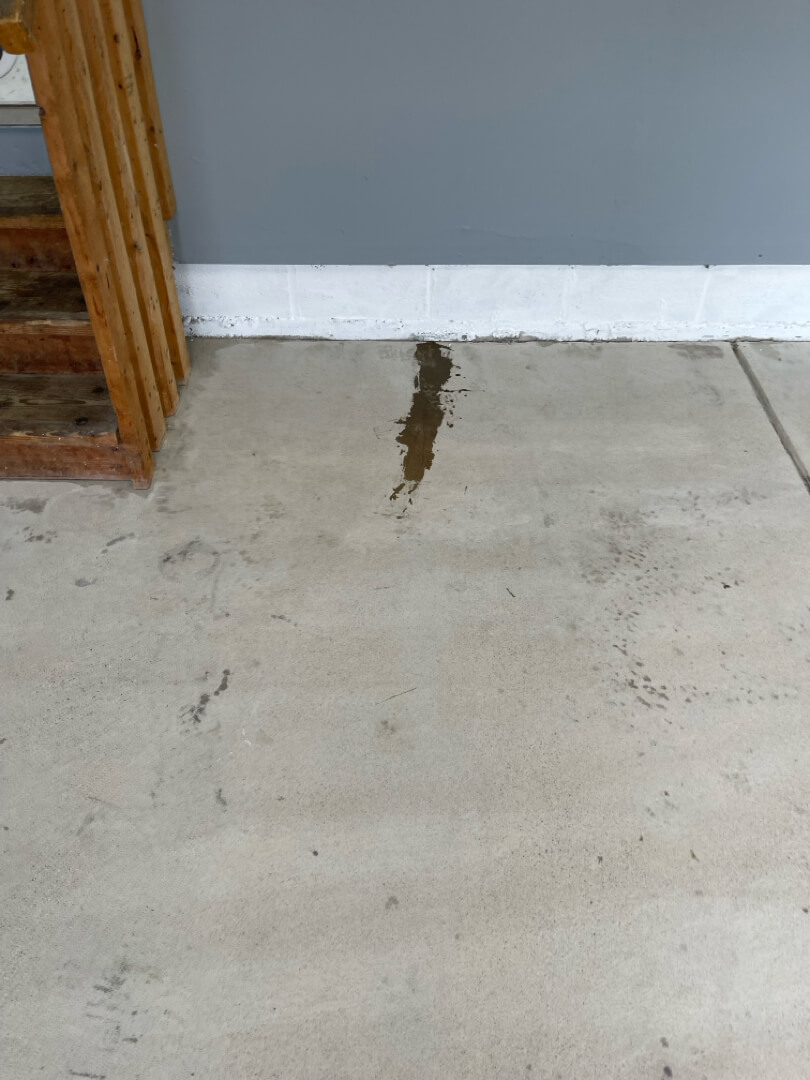
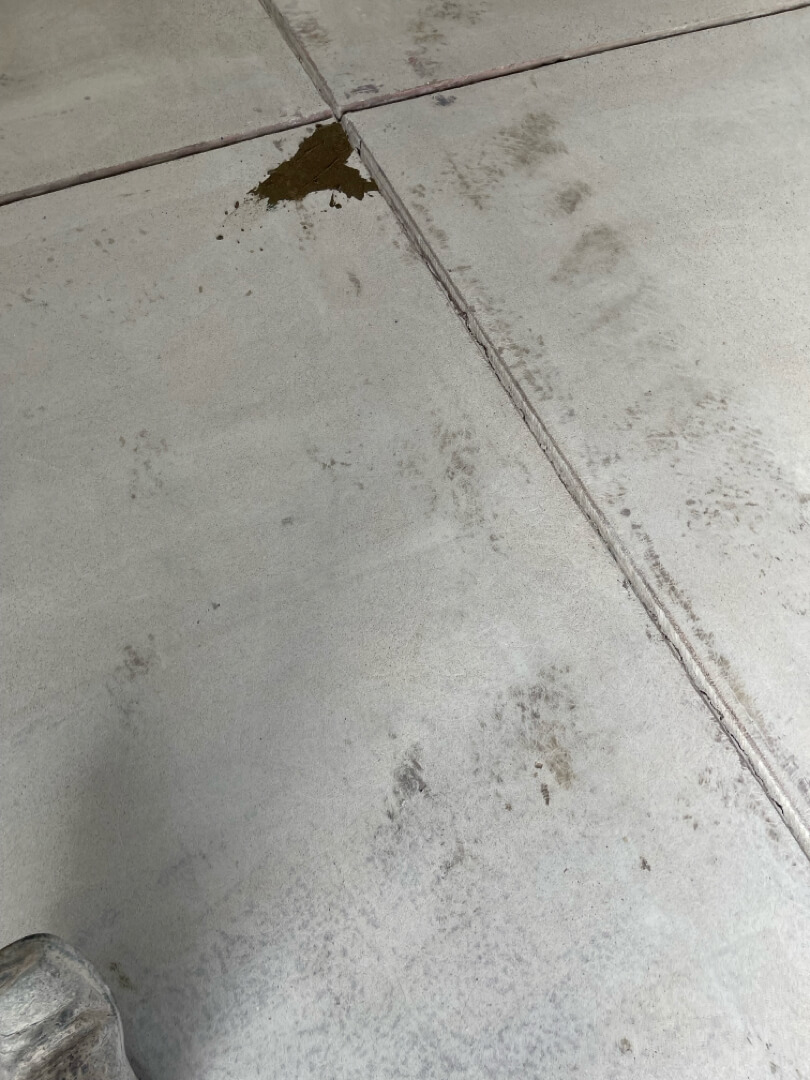
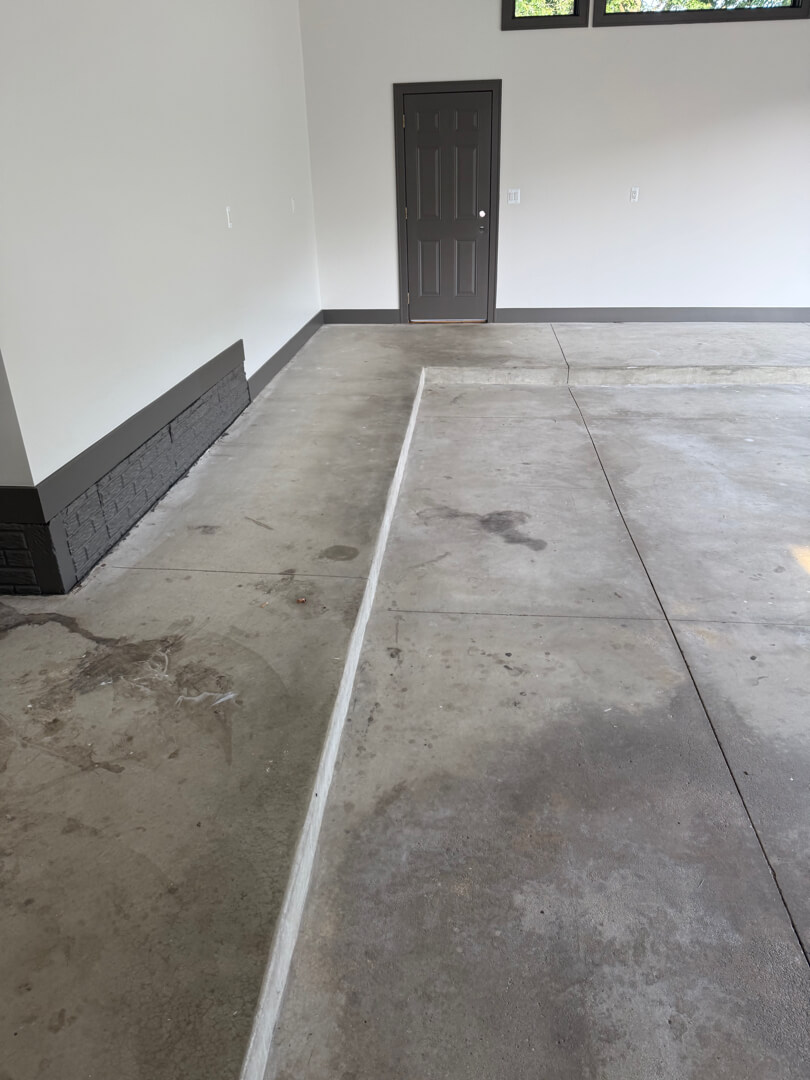
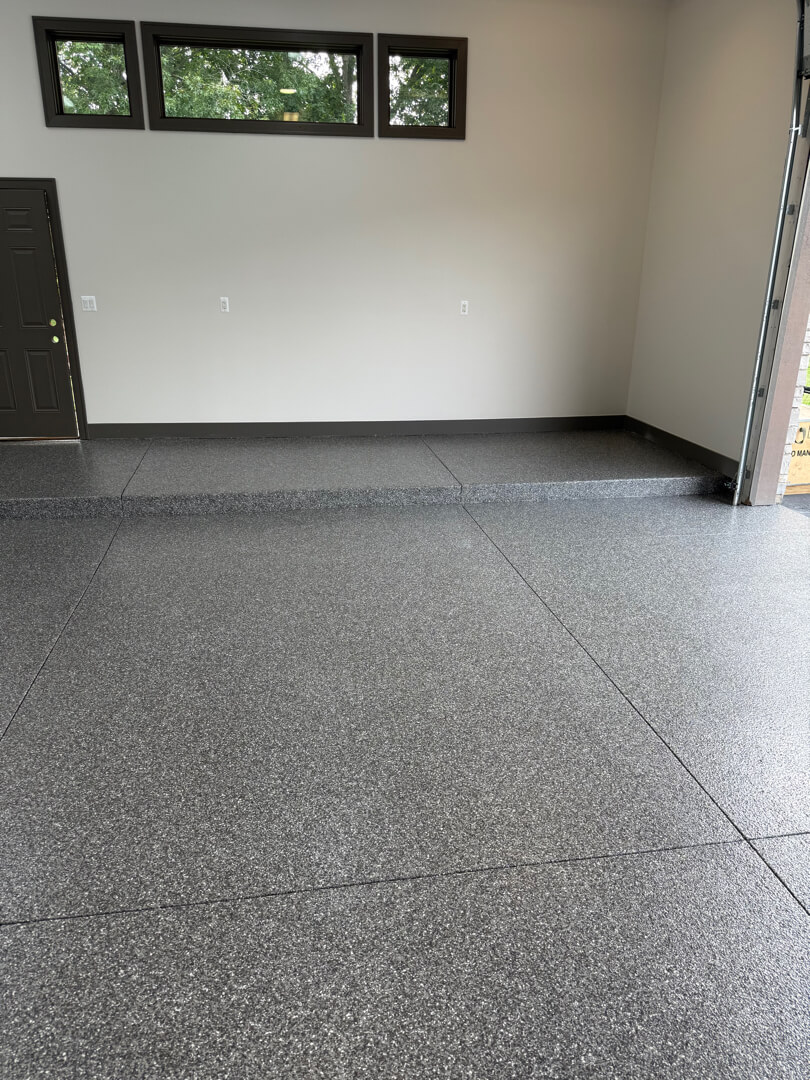
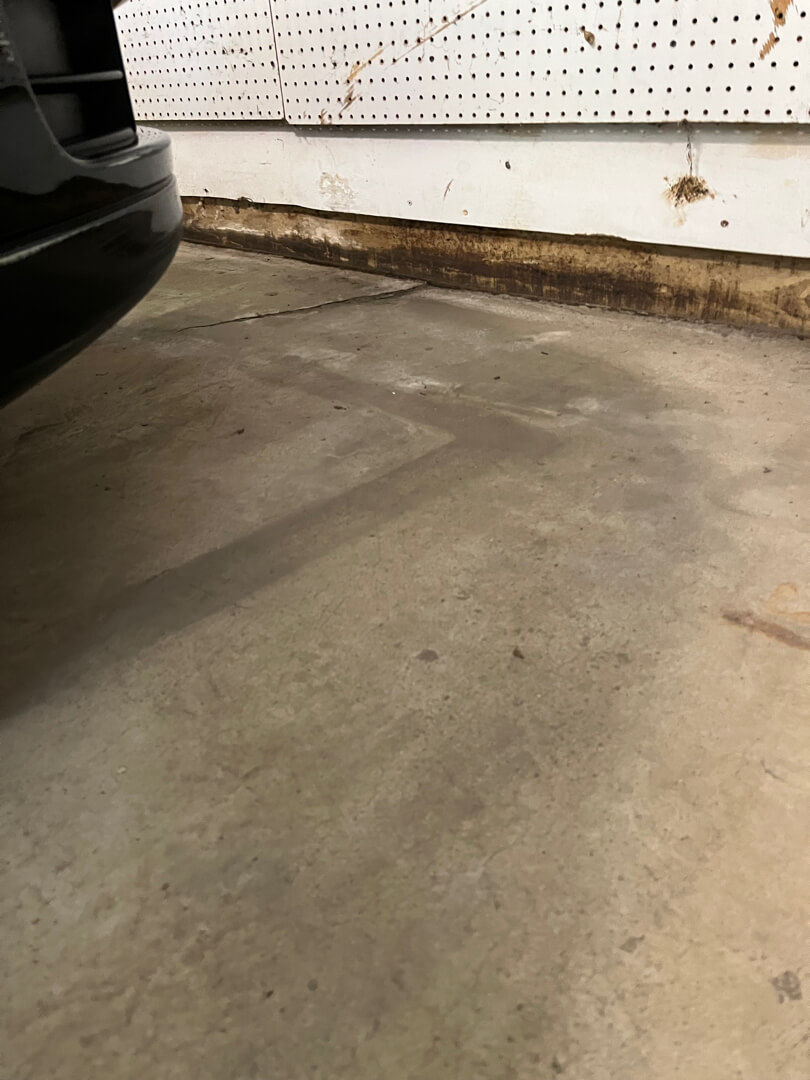
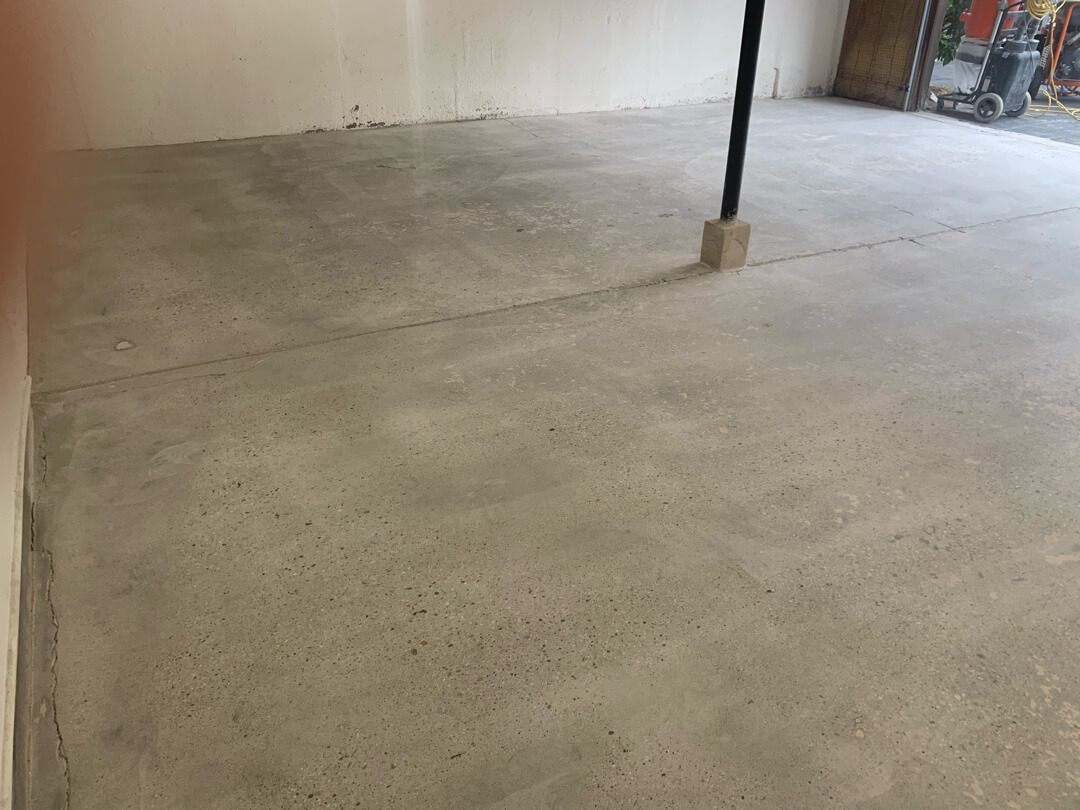
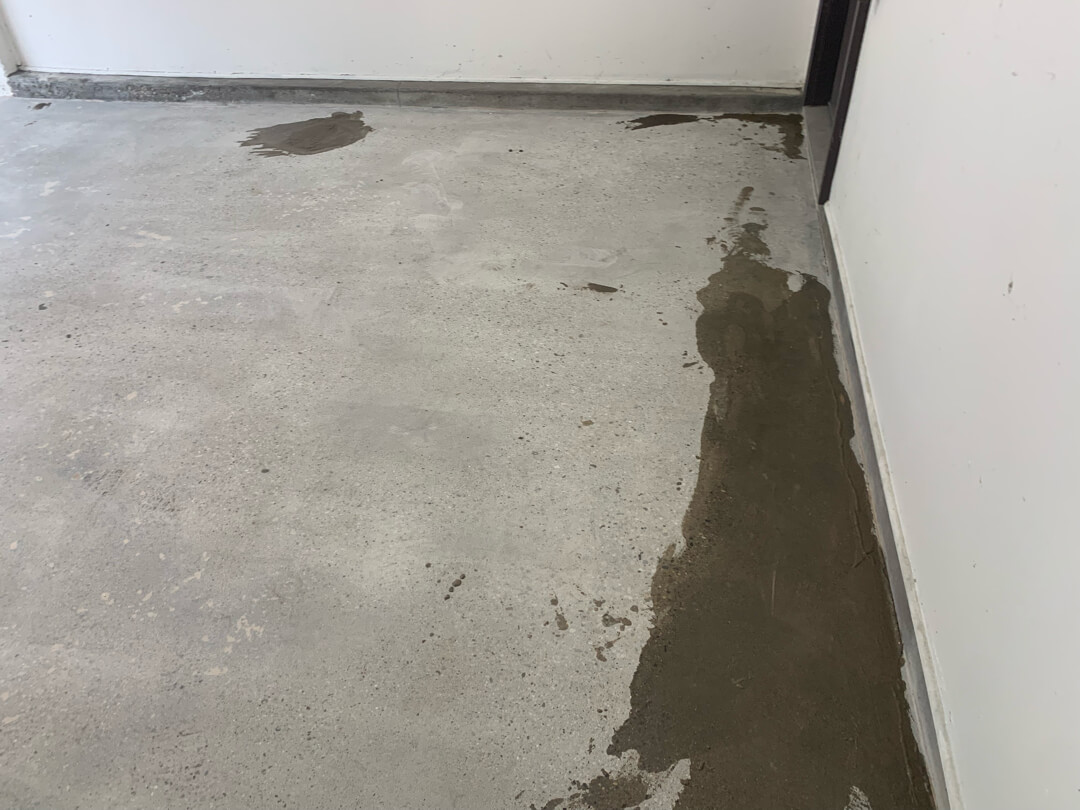
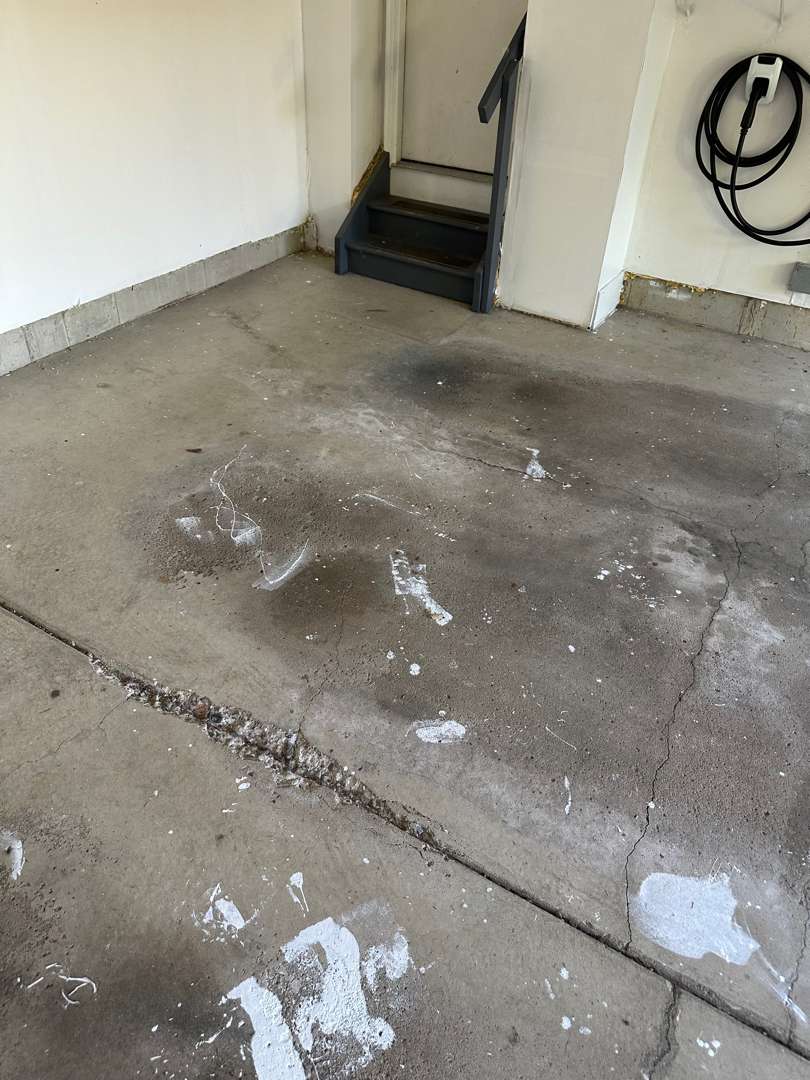
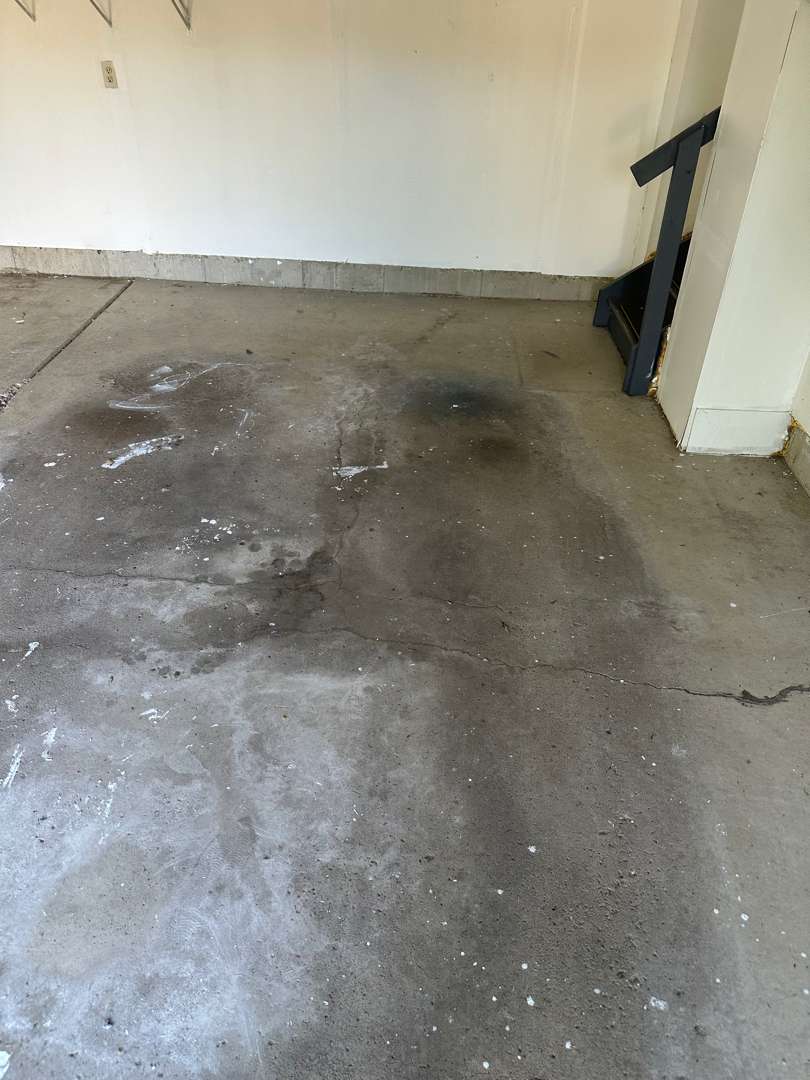
The slab was bare concrete with no prior coating to remove. Surface staining from vehicle parking was present across the main driving area. Moisture was wicking through the concrete — visible along the perimeter wall and the base of the vertical lip. The two wood steps leading to the house door showed general wear and carried a prior paint coat.
The 58 linear feet of vertical lip ran along three walls of the garage. This is one of the larger lip areas our crew encounters on residential jobs. No cracking or pitting was present — the slab required no structural repair before coating.
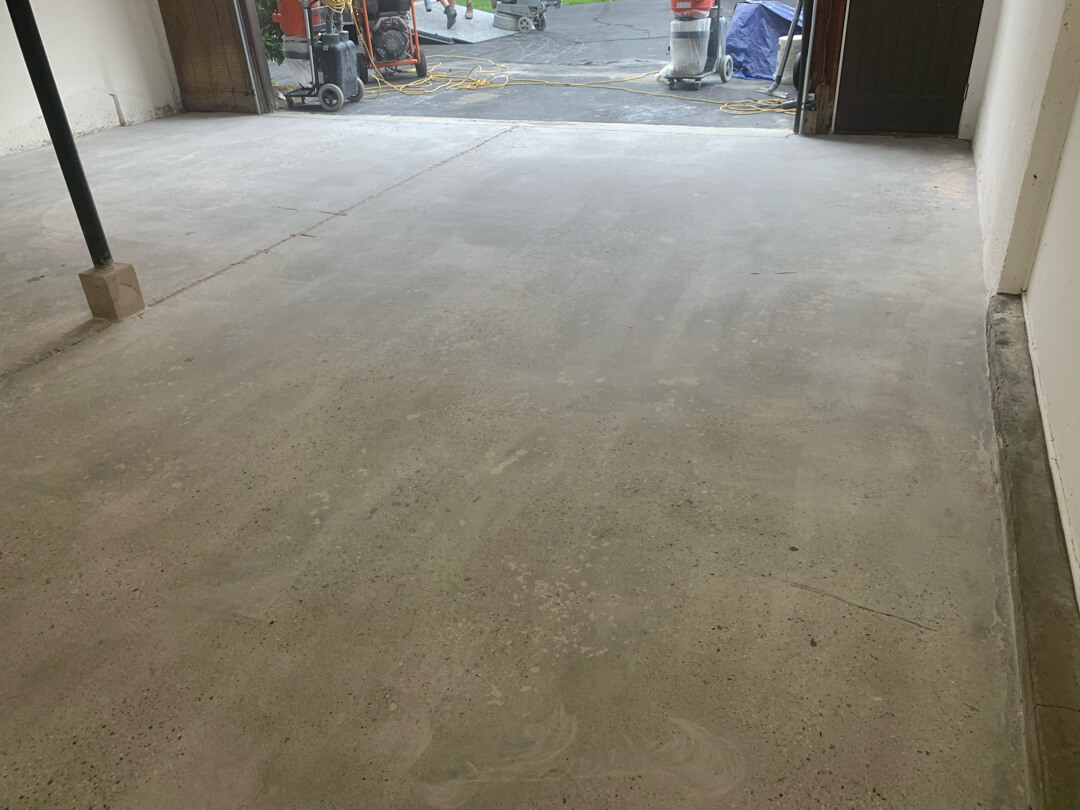
Diamond Grinding

Our crew diamond-ground the full 394 square feet to open the surface of the concrete. Grinding removed laitance and vehicle contamination from the slab. Our team used a hand grinder to work the detail areas around the step perimeter. Our crew vacuumed the full slab after grinding before proceeding to the moisture barrier.
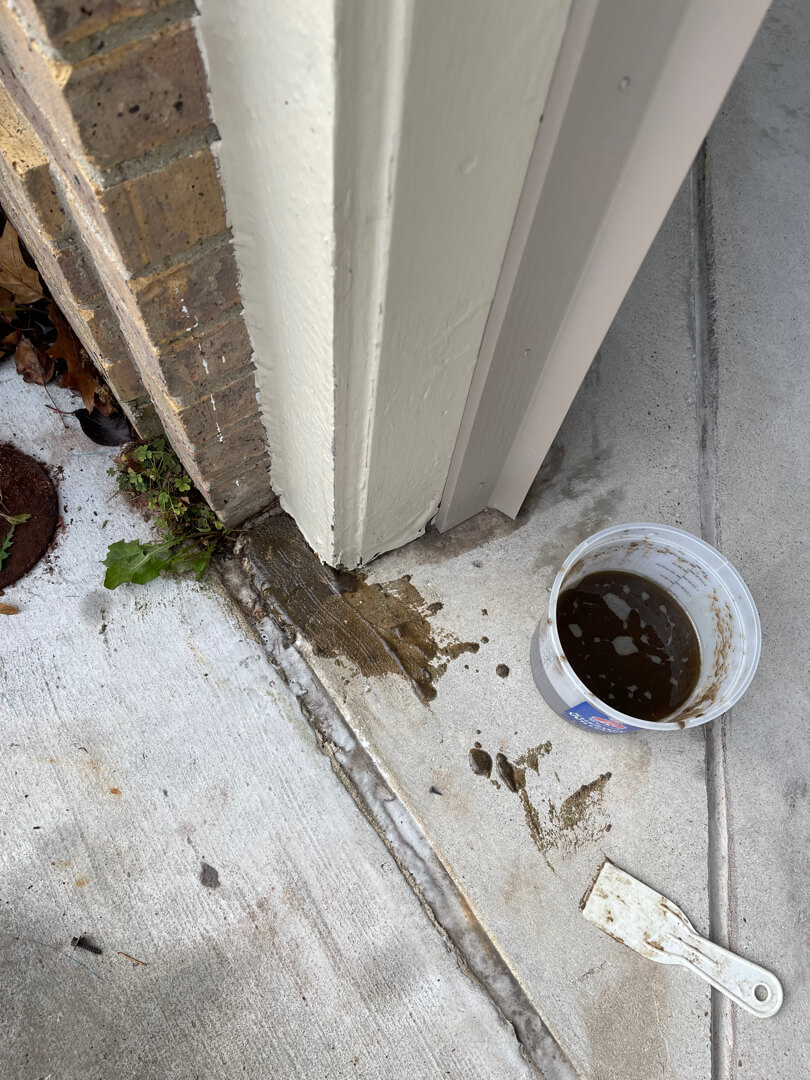
H2Out Moisture Barrier
Our crew applied H2Out moisture barrier across the full slab. This step was necessary because moisture read above the threshold for direct base coat application.
H2Out vs. MR50: moisture barrier selection criteria →
Our team rolled the barrier in sections, working from the back wall toward the garage door. Our crew also protected the driveway apron with a tarp during this phase to prevent overspray on adjacent concrete.
The H2Out barrier bonds to the concrete and blocks moisture migration from below. It creates a stable base layer that allows the polyurea-polyaspartic system to cure correctly. Without it, moisture in the slab would compromise adhesion and long-term performance.
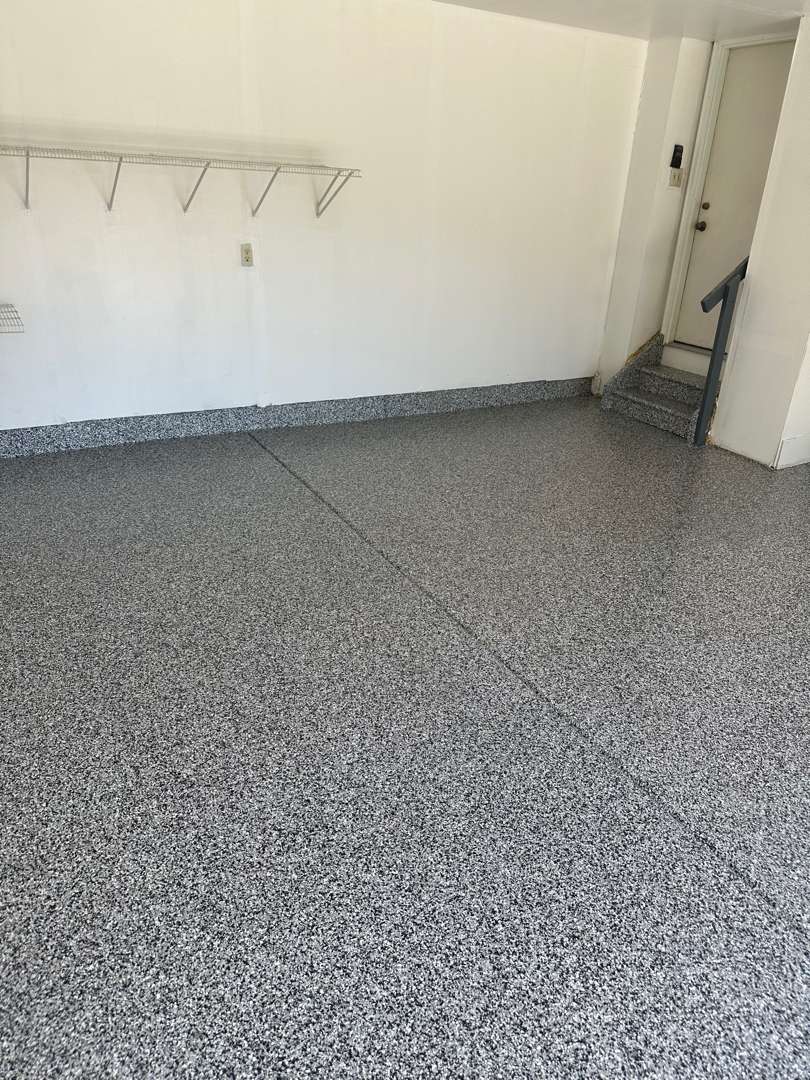
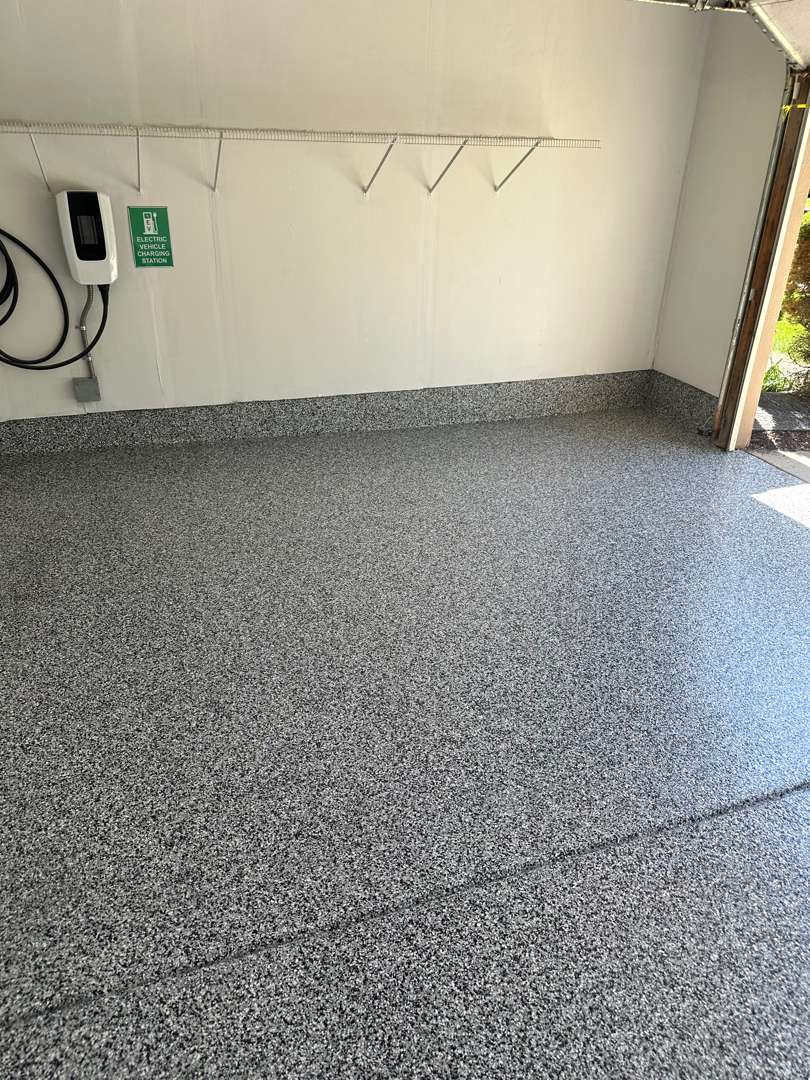
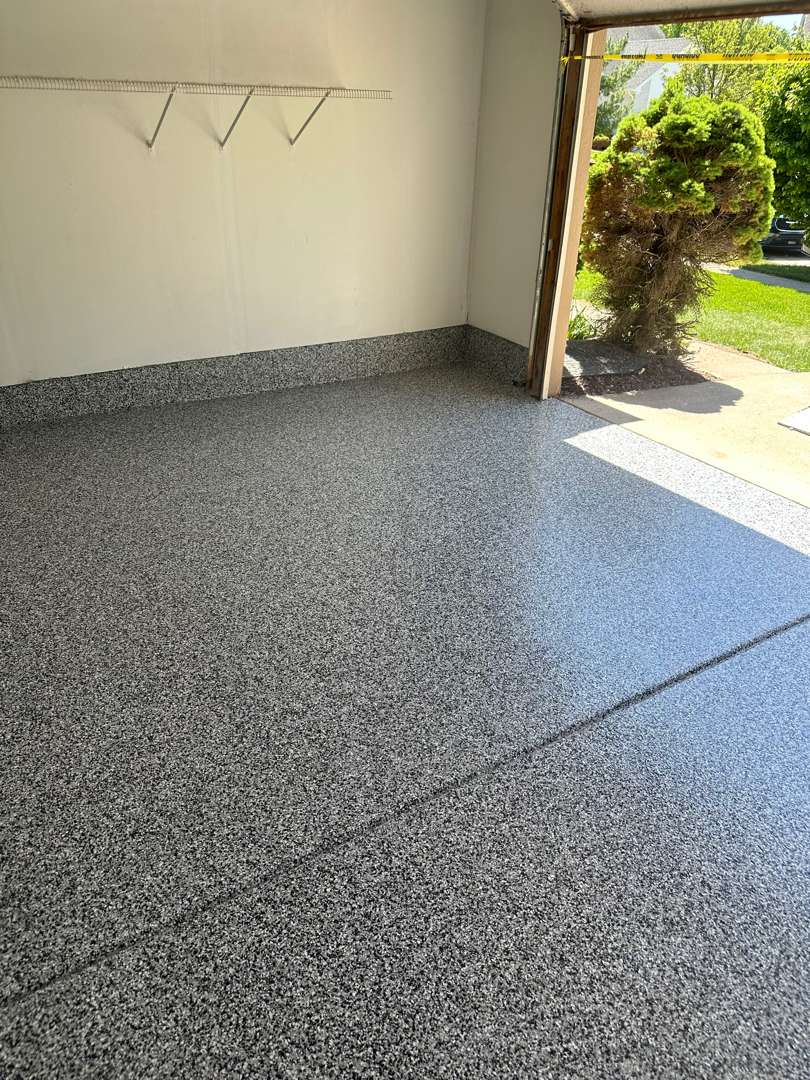
MC5.5% Coating System Application
Our crew applied the polyurea base coat by roller across all 394 square feet. Our team cut in along the 58 linear feet of vertical lip by hand, working the full perimeter. Mediterranean flakes were broadcast into the wet base coat across the floor and lip. Our crew coated both wood step treads and risers to carry the finish from the floor to the door.
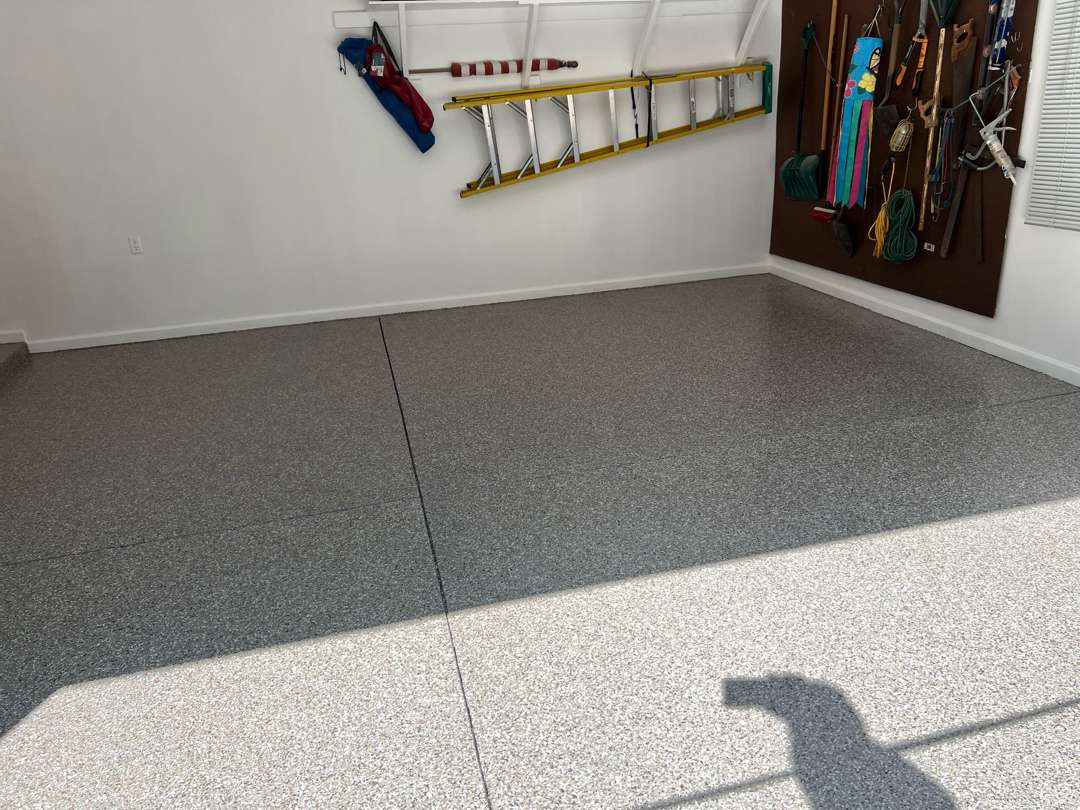
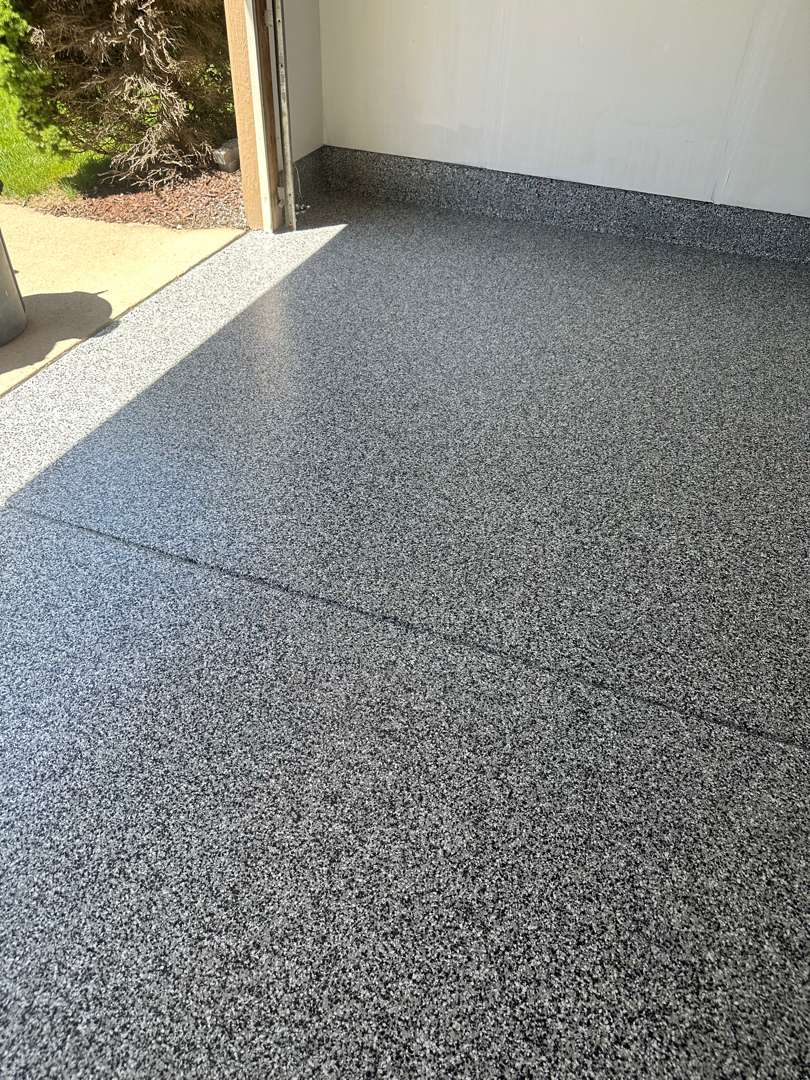
Mediterranean is a cool, medium grey with charcoal and white flecks. The color reads consistently under both natural and artificial light. It pairs well with white walls and white garage door interiors, as seen at this property. Our team applied the polyaspartic top coat with 16-grit traction additive across all coated surfaces.
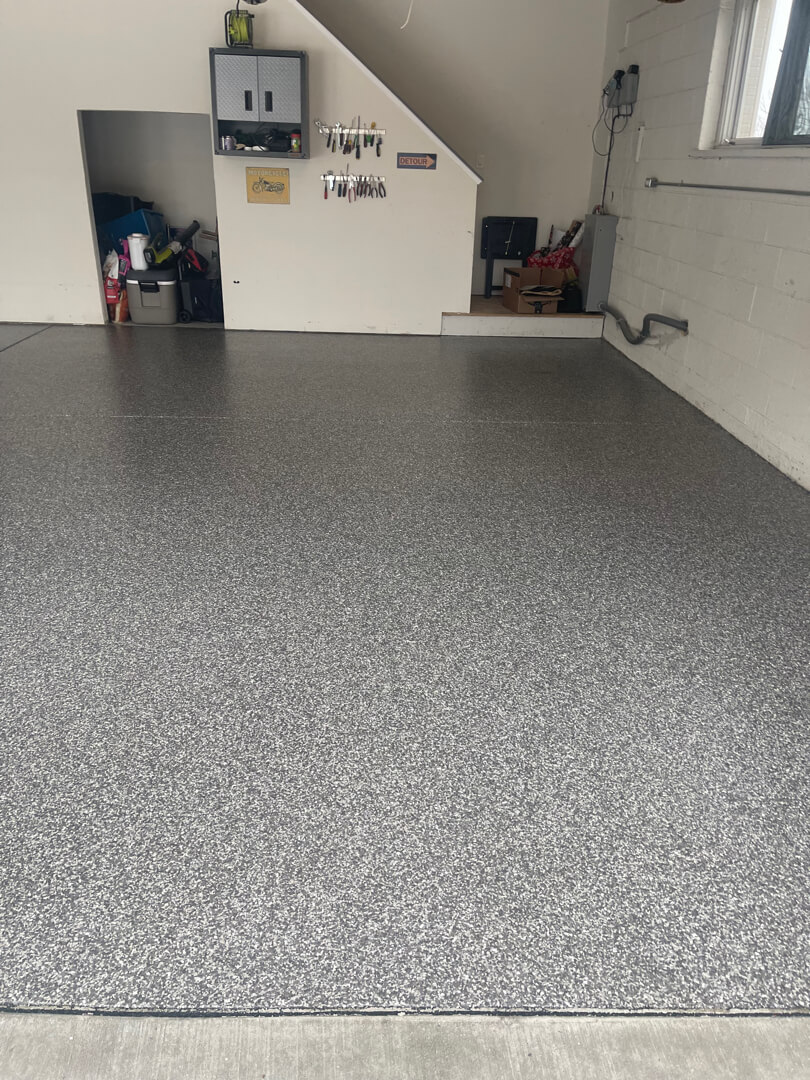
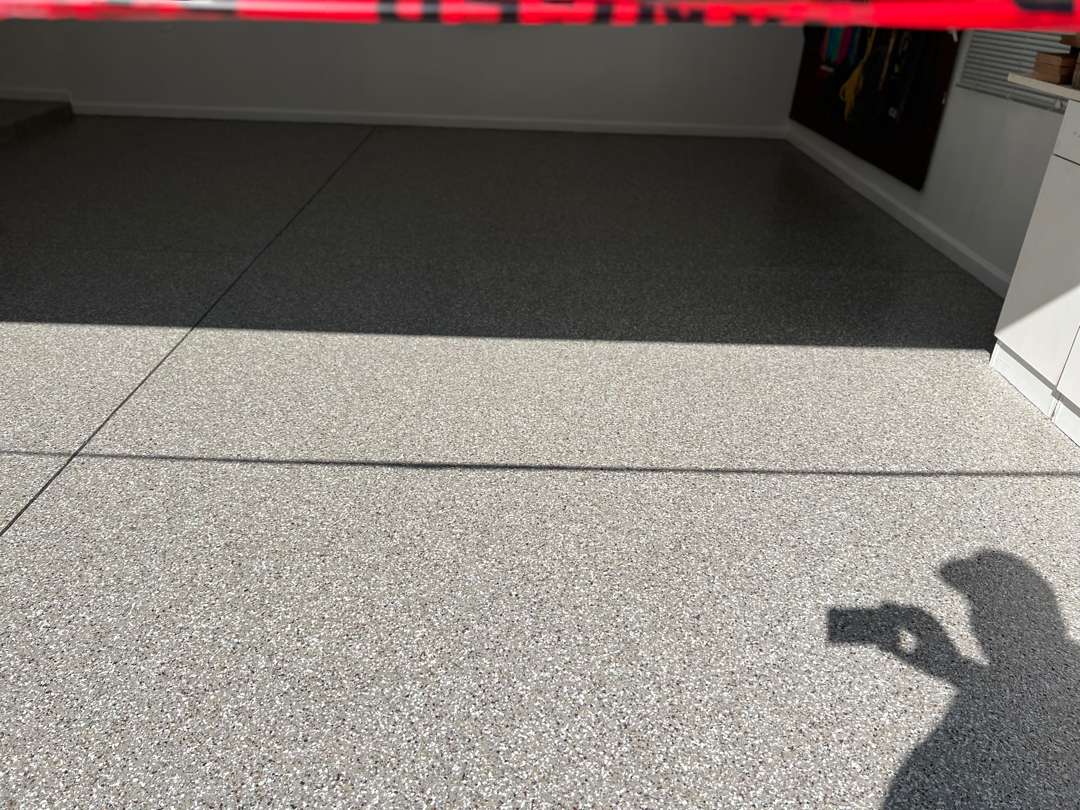
Completed Installation
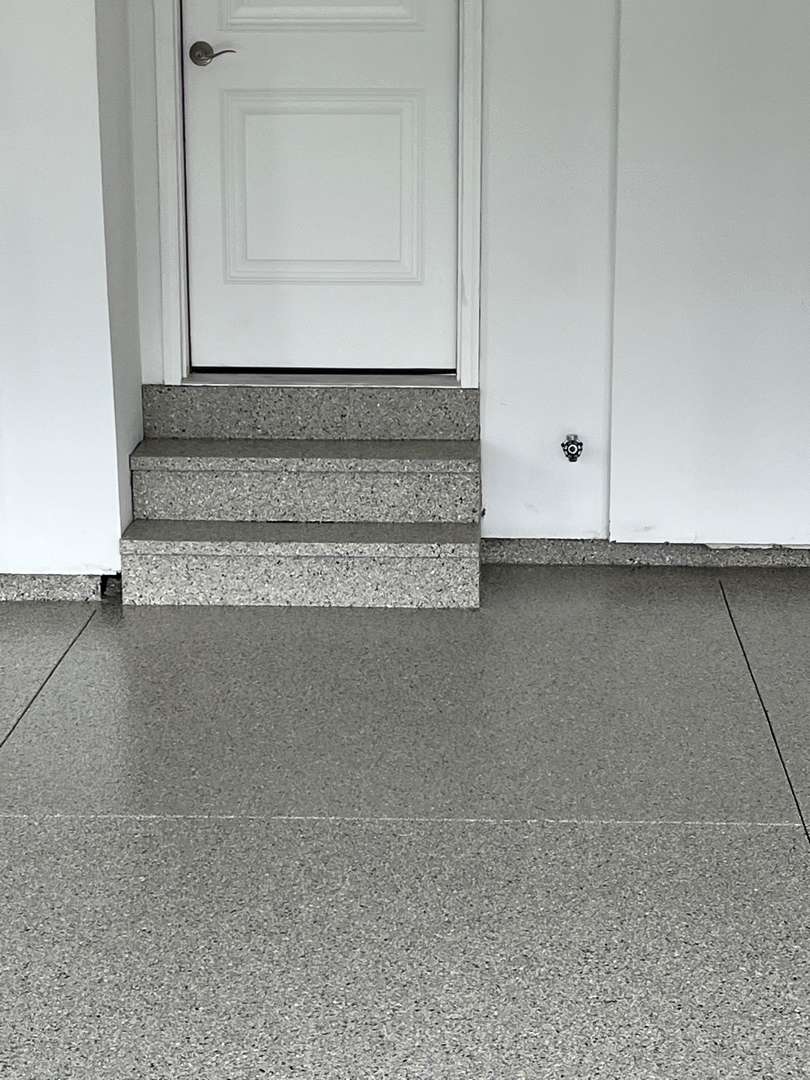
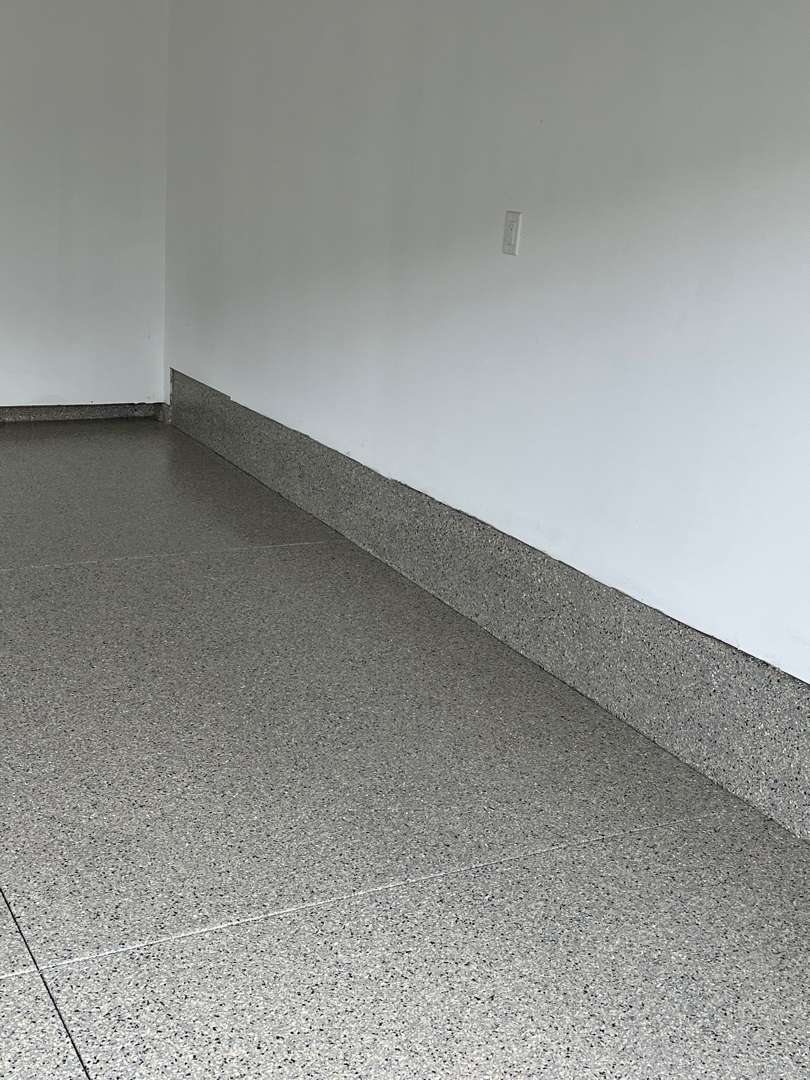
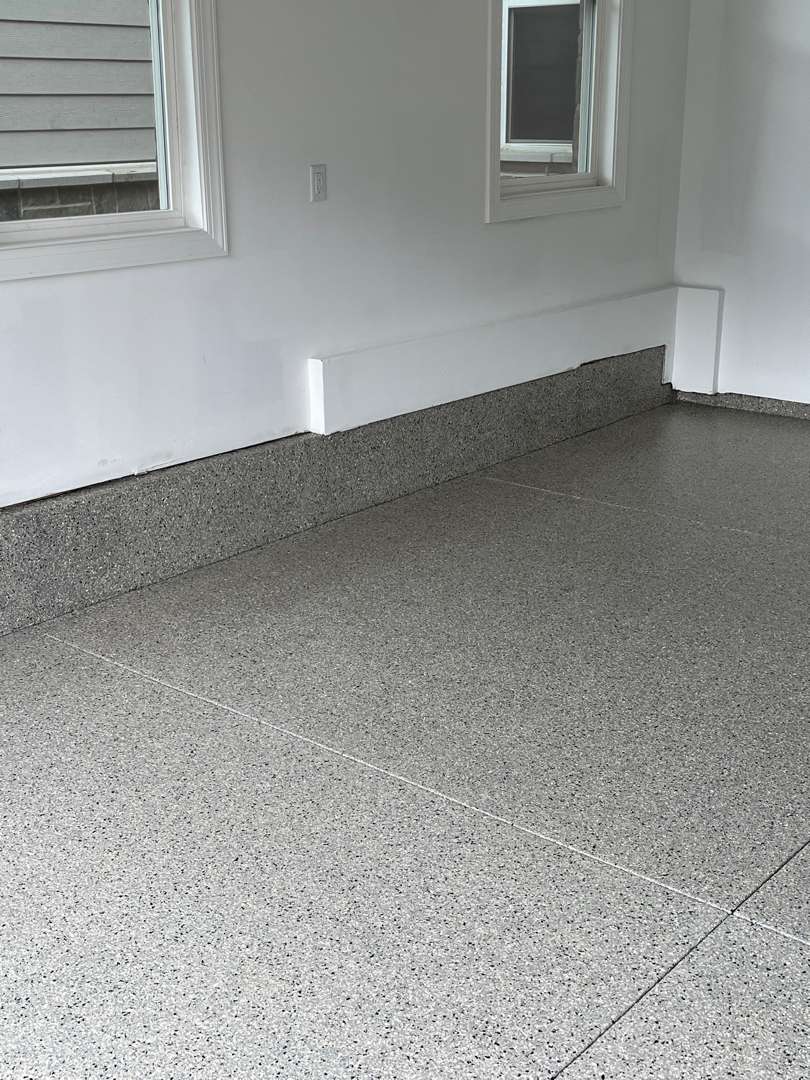
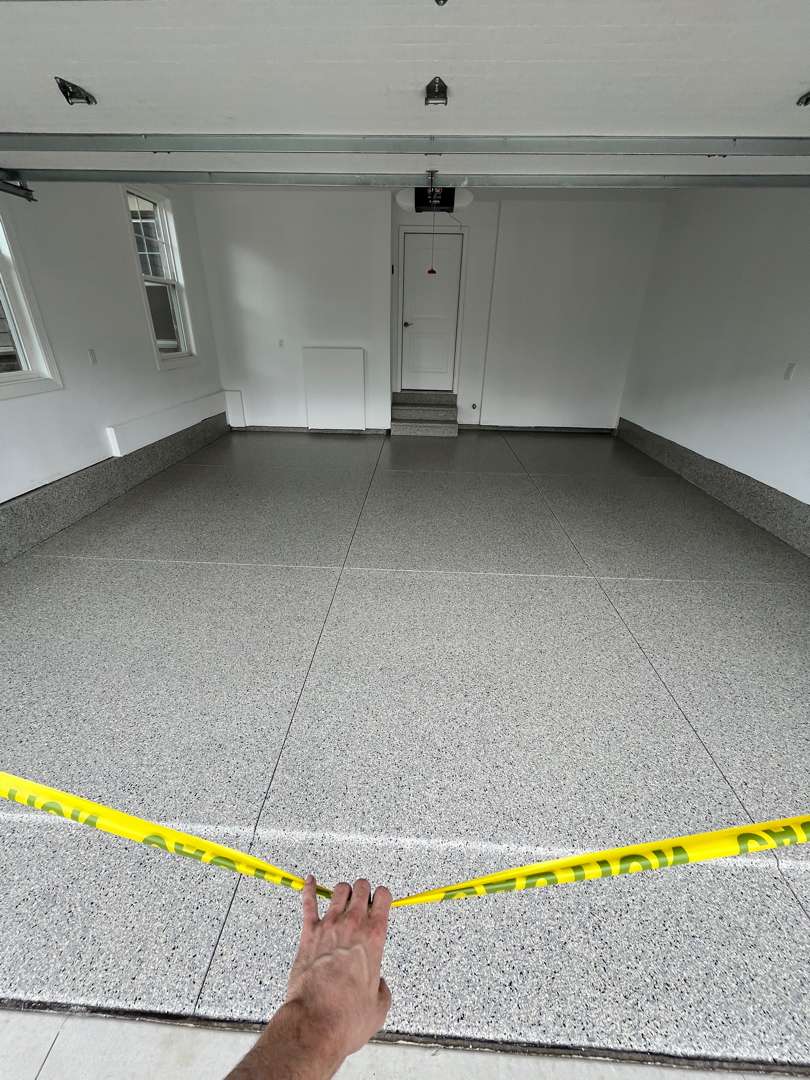
The moisture barrier is not visible beneath the finished surface. Mediterranean reads as a uniform cool grey across the full 394 square feet. The vertical lip carries the same coat around all three walls without interruption. Both wood steps integrate with the floor in a continuous Mediterranean finish. The MC5.5% system seals the slab against future moisture migration and vehicle fluids.
Testimonials - Voices of Our Clients
John Ormsby
Alexis Ducharme
Technical Specifications
| Location | Ann Arbor, MI |
| Floor Area | 394 square feet |
| Vertical Lip | 58 linear feet |
| Steps | 2 wood steps (treads and risers coated) |
| Prior Surface | Bare concrete — no prior coating |
| Crack / Pitting Repair | None required |
| Moisture Barrier | H2Out — full slab |
| Coating System | MC5.5% polyurea-polyaspartic |
| Flake Color | Mediterranean |
| Traction Additive | 16-grit |
New Garage Floor Coating
on Idlewild Court
Idlewild Court — Ann Arbor, MI
Project Overview


MotorCity Floors and Coatings installed the MC3.8 coating system in a garage on Idlewild Court. The project covered 449 square feet of floor, 58 linear feet of vertical lip, and two wood steps. The slab required the most extensive pitting and crack repair of any surface condition documented here. Our crew finished with Domino flakes and a 16-grit traction additive.
Initial Substrate Condition
The two wood steps leading to the house door were painted dark grey. The 58 linear feet of vertical lip ran along the perimeter walls and showed age-related surface wear. The extent of damage across the slab made this a multi-stage repair project before any coating could begin.
Diamond Grinding — First Pass
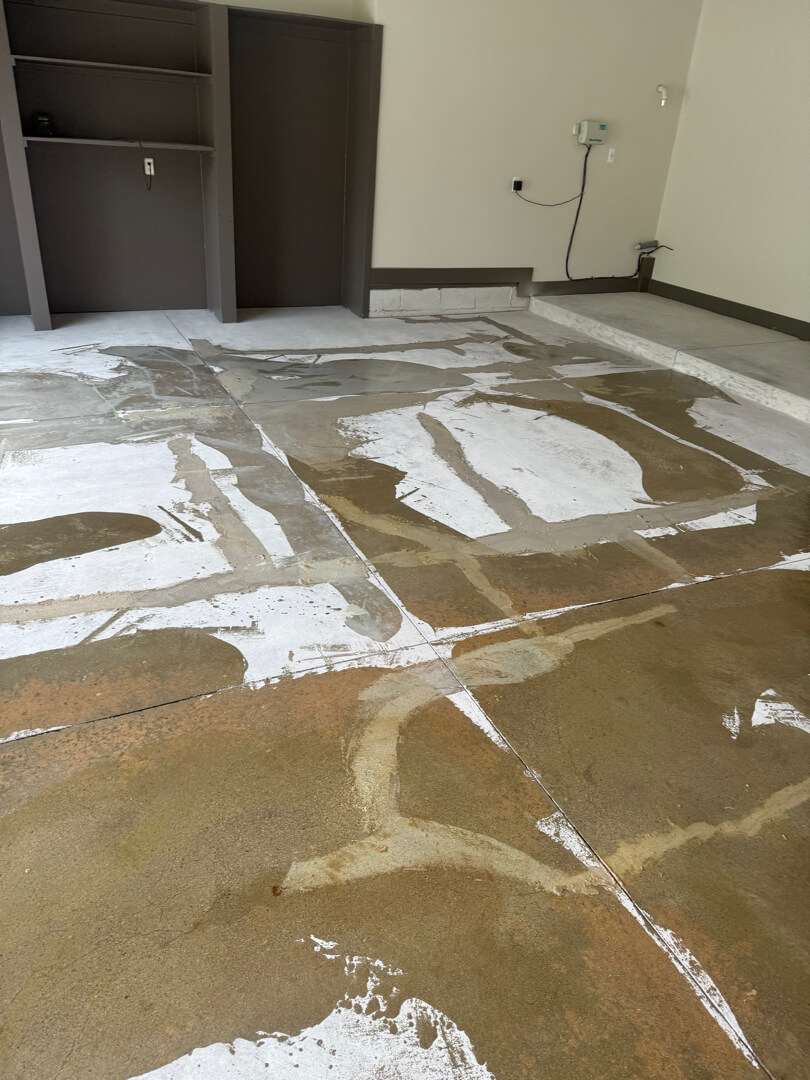
Mender Epoxy Repair — Full Slab

Our crew flooded the full slab with Mender epoxy. The extent of pitting across the floor required full-slab coverage rather than spot treatment.
Mender epoxy: targeted spot treatment vs. full-slab flooding criteria →
Our team worked the Mender across both slab panels, filling voids from the surface down. The material pooled into pitting across all zones and penetrated the open crack along the panel joint.
MC3.8 Coating System Application
Completed Installation
Testimonials - Voices of Our Clients
Jan Simmons
Mark D'Orazio
Technical Specifications
| Location | Ann Arbor, MI |
| Floor Area | 449 square feet |
| Vertical Lip | 58 linear feet |
| Steps | 2 wood steps (treads and risers coated) |
| Prior Surface | Bare concrete — no prior coating |
| Oil Contamination | Heavy — both parking positions |
| Crack Repair | Flexible filler — full panel joint seam |
| Pitting Repair | Mender epoxy — full slab flood |
| Grinding Passes | Two (pre-repair and post-repair) |
| Coating System | MC3.8 polyurea-polyaspartic |
| Flake Color | Domino |
| Traction Additive | 16-grit |
FAQ
Find answers to your technical questions about polyurea-polyaspartic garage floor coatings.
Three traction grit options are available: 16-grit for a standard finish, 24-grit for moderate texture, and 36-grit for maximum slip resistance in wet or icy conditions. The grit additive is incorporated directly into the polyaspartic clear coat before application, so it does not alter the visual appearance of the finished floor.
Flake broadcast density controls how much of the base coat remains visible through the chip layer. H-4 density gives an open, lighter pattern with visible concrete texture between chips. H-6 density produces tight, full-coverage results. Both densities use the same flake blends — density selection changes coverage, not color.
Wooden steps are handled differently because wood requires mechanical abrasion rather than diamond grinding before a polyurea-polyaspartic system can bond to it. Each tread and riser is abraded by hand, then coated with the same base coat and flake broadcast as the main garage floor for a continuous finished appearance.
Coverage depends on slab condition and system version. Across the Ann Arbor projects documented here, floor areas ranged from 371 to 1,110 square feet within a single installation day. Each layer — base coat, flake broadcast, and clear coat — is applied in full across the entire prepared surface regardless of floor area.
For deeper technical questions about our surface preparation methods, moisture diagnostics, and material science, visit our Garage Floor Coating Technical Guide
The MotorCity Advantage
MotorCity Floors and Coatings specializes in professional-grade polyurea-polyaspartic systems. These dual-coating systems are replacing epoxy products constrained by older chemistry. Our systems deliver strong chemical resistance, superior durability, greater flexibility, shorter cure times, and proven UV stability that maintains color for decades. We back every installation with an industry-leading warranty.
Each project includes thorough diamond grinding preparation, flexible polyurea crack repair, and careful application to ensure consistent coverage across the full slab. When deep oil contamination is present—as our crew found at a home on Overridge Dr.—we perform oil extraction before grinding. This step prevents petroleum from migrating through the concrete and undermining the coating bond.
