
Polyurea Garage Floor Coatings in St. Clair Shores, MI
QUESTIONS? NEED A QUOTE?
Upgrading Garage Floor Coating in St. Clair Shores with Polyurea-Polyaspartic Coatings
On this page, we document garage floor coating projects in St. Clair Shores, MI. Our dual-coating systems have converted worn concrete slabs into durable, attractive garage floors. St. Clair Shores is a Macomb County city built along the shores of Lake St. Clair — a waterfront community with long-established residential neighborhoods, well-kept homes, and attached garages that face Michigan’s full seasonal range year after year.
Many of the properties where we apply our polyurea-polyaspartic floor coating systems had accumulated the wear and tear of the harsh Michigan climate. As you will see in these case studies, our garage floor coating specialists work with concrete slabs in a wide variety of conditions: some were newer slabs needing only standard surface preparation. Others required focused remediation — oil treatment, pitting repair, and crack filling — before the polyurea and polyaspartic coats could go down. We describe the process and results, and include the before-and-after photos for each job.
St. Clair Shores Garage Floor Coating Case Studies
These case studies carefully document the condition of the concrete slab, the challenges we encountered, and the steps our crew took to prepare and restore the concrete slab before applying the dual-layer system. Each project reflects a variety of conditions to be addressed, and shows the consistent quality standards MotorCity Floors and Coatings applies to every installation.
Quality Garage Floor Coatings
Winter road salt, freeze-thaw cycles, automotive fluids, and daily vehicle traffic degrade unprotected garage concrete over time. The damage typically appears as oil staining, cracking, surface pitting, and laitance buildup that prevents coatings from bonding correctly.
St. Clair Shores garages face the same Michigan climate conditions that affect every community in the region — plus the added humidity and moisture exposure that comes with proximity to Lake St. Clair. Even newer slabs in good structural condition require proper mechanical preparation before any coating system can bond. Polyurea-polyaspartic systems provide reliable, long-term protection against these conditions and deliver a finished appearance that bare concrete or epoxy products cannot match.
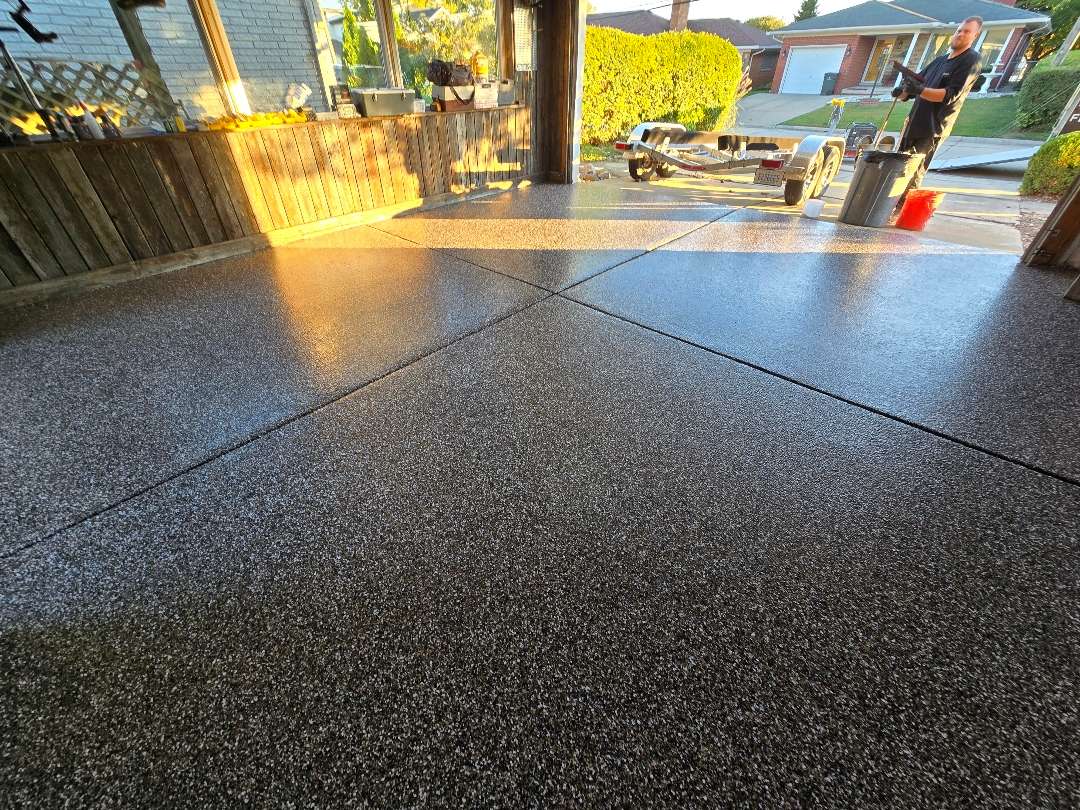
NEW Garage Floor Coating
on Centennial Street
Centennial Street, St. Clair Shores, MI
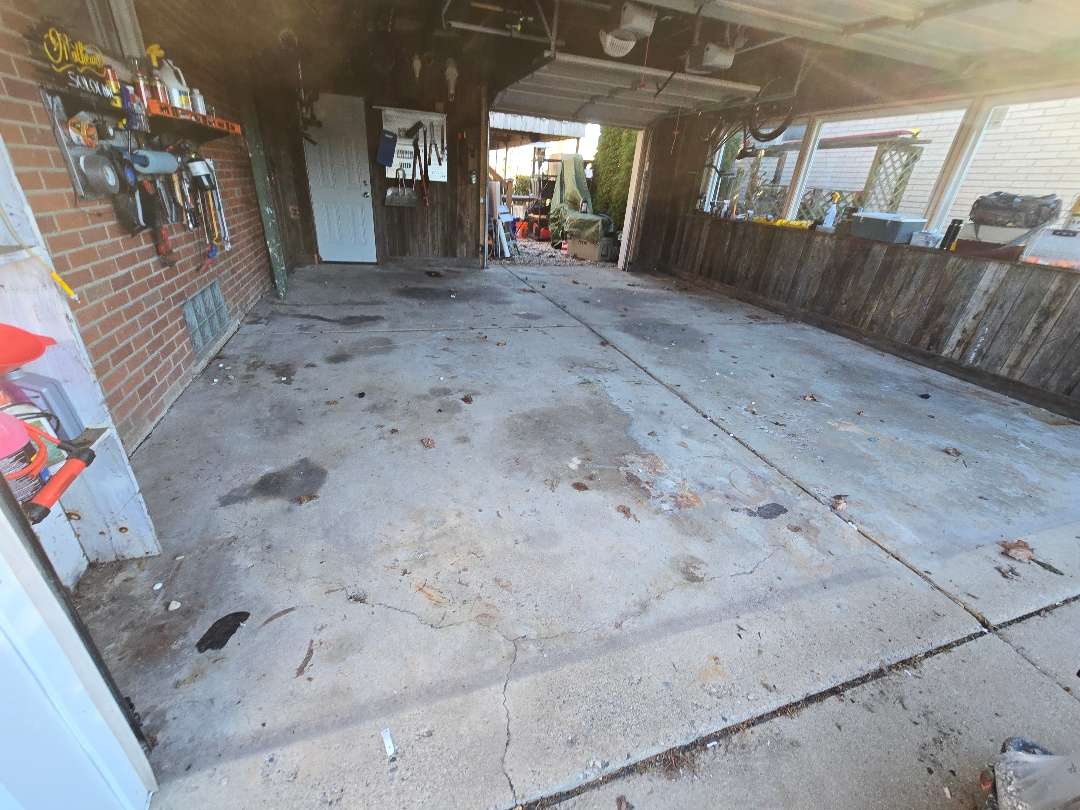
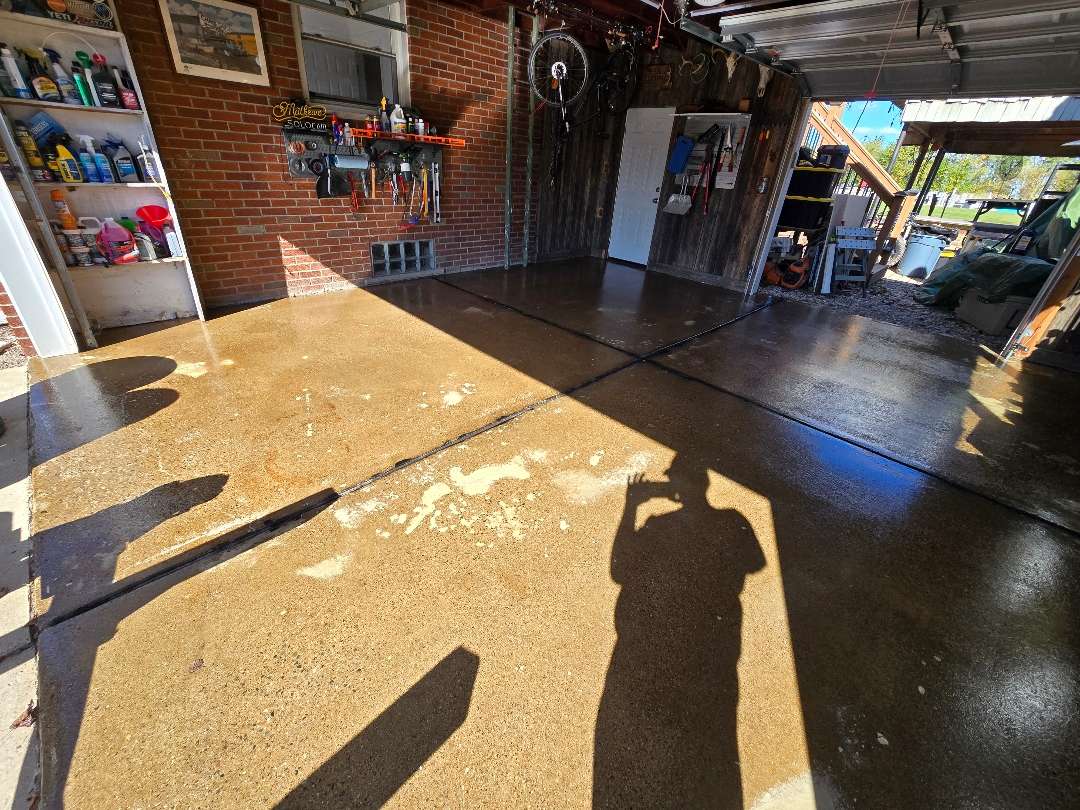
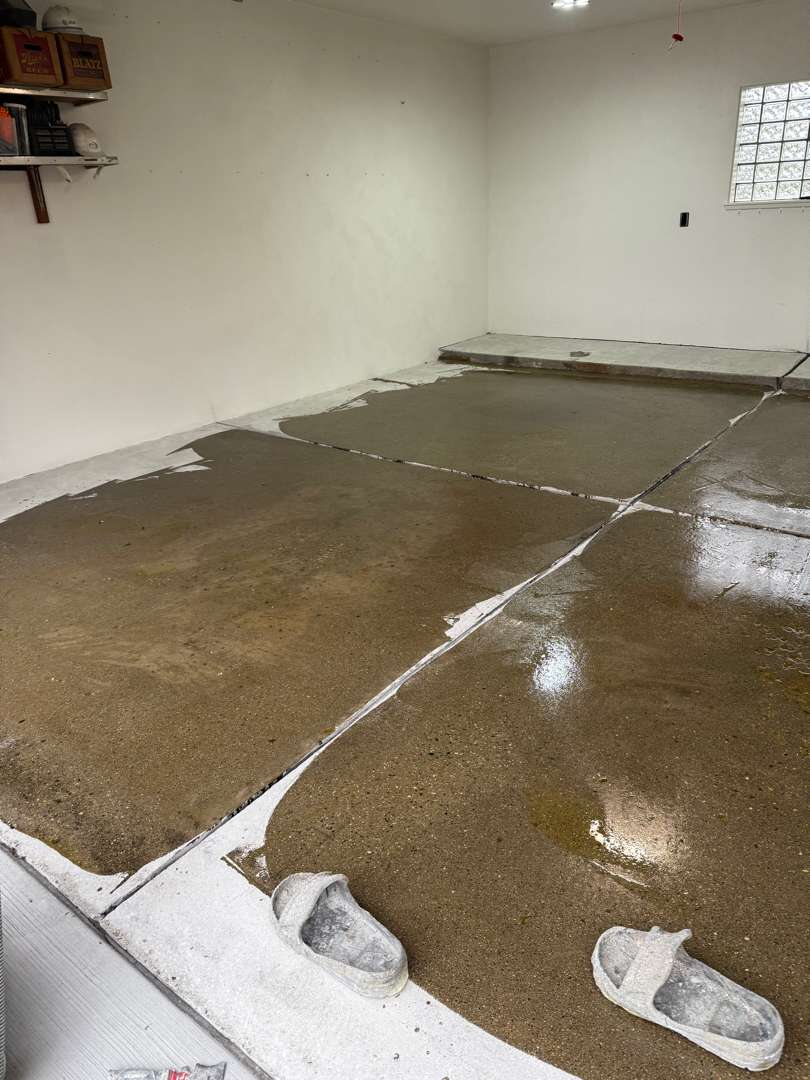
The Starting Point
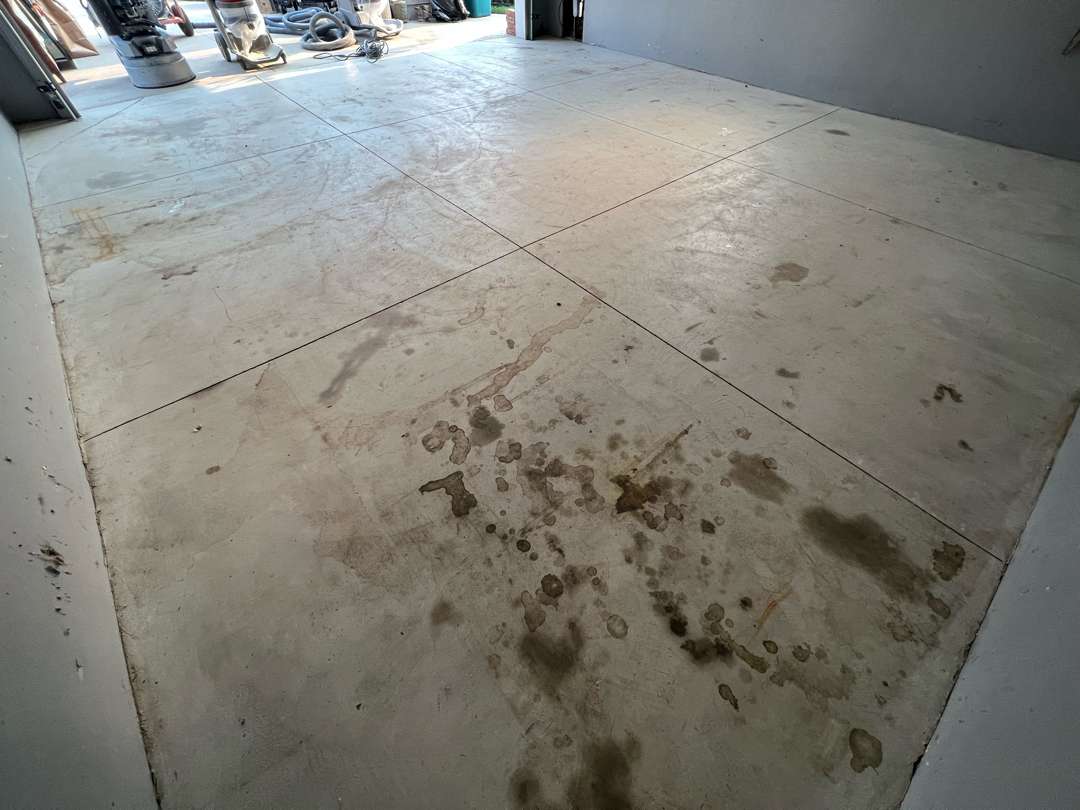
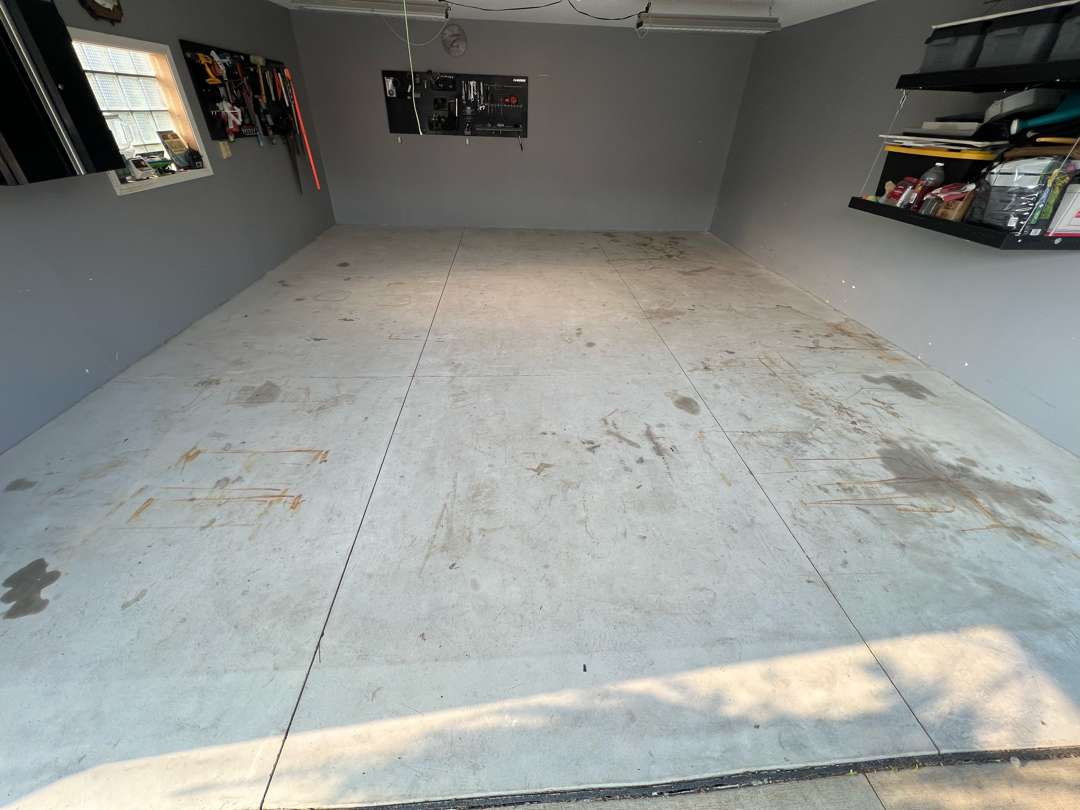
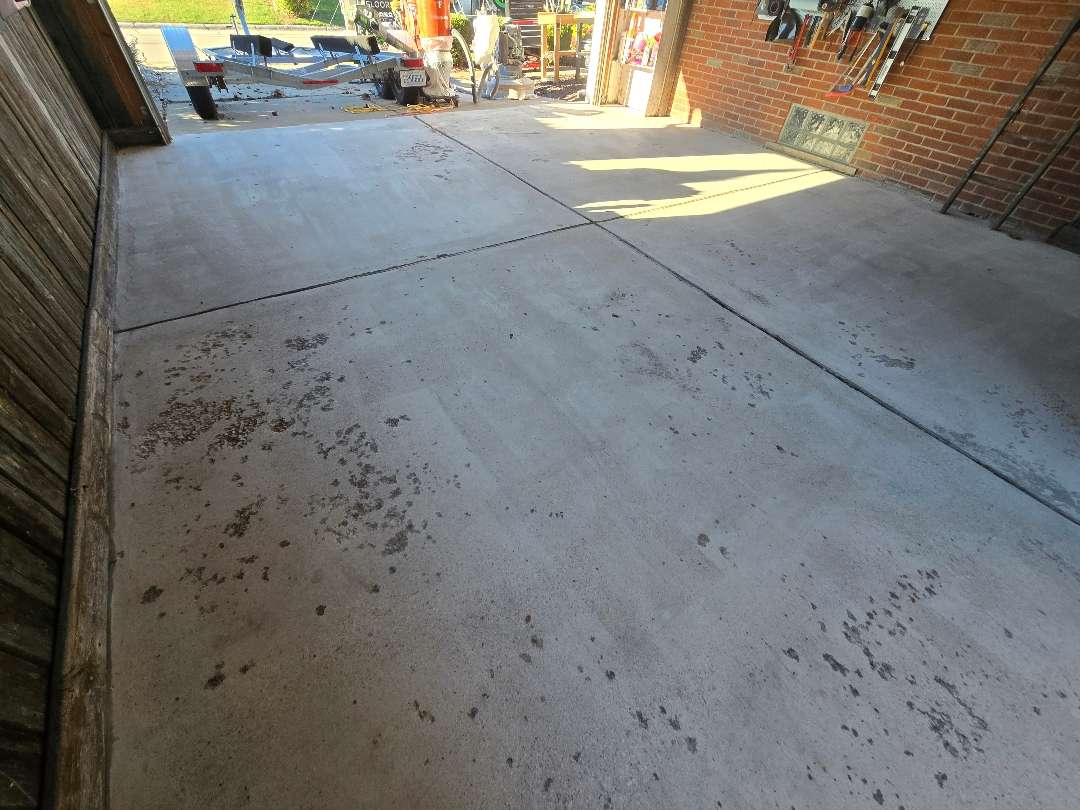
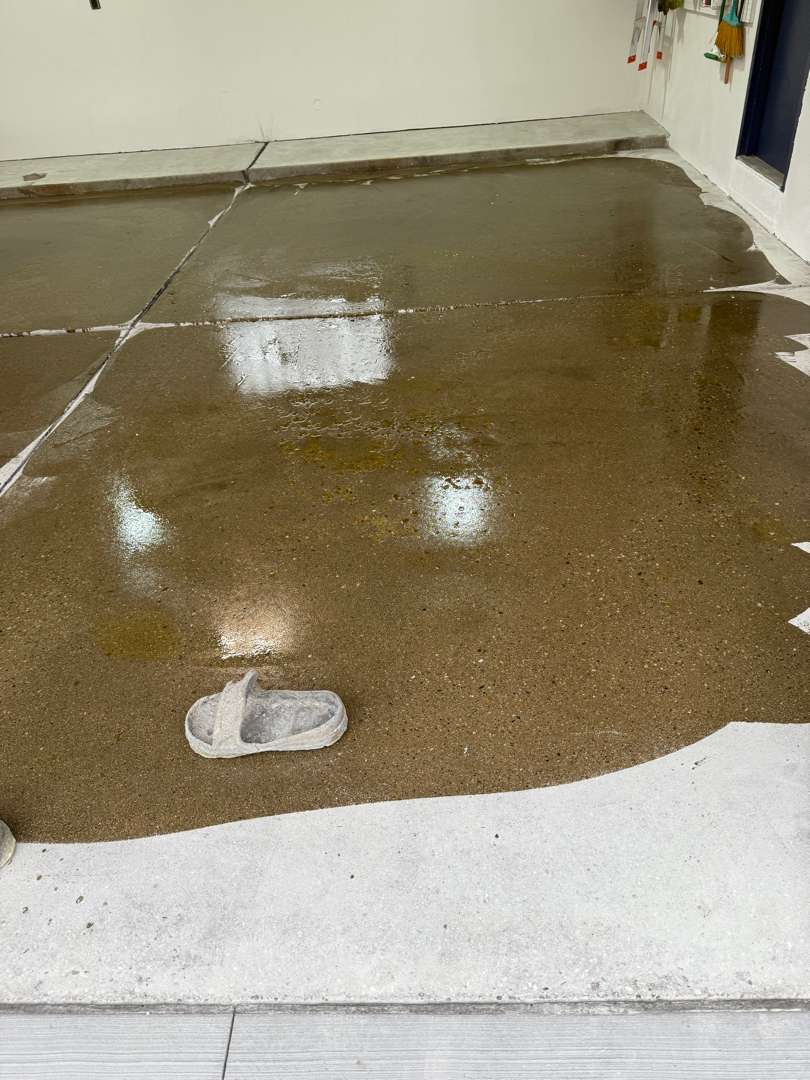
Not every concrete slab arrives in poor condition. The garage at this Centennial Street property had relatively new concrete — light in color, structurally sound, and free of the cracking, pitting, and heavy contamination that define many of the floors our crew works on. The grey-painted walls, tool board, and organized shelving told the same story: this was a well-kept space.
The slab had one oil spot near the perimeter — a spill from filling something up, caught early. Rust-colored scuff marks from equipment and metal objects crossed the surface in spots. No prior coating was present. No steps and no vertical surfaces were in scope. At 380 square feet, this was a focused, single-surface installation.
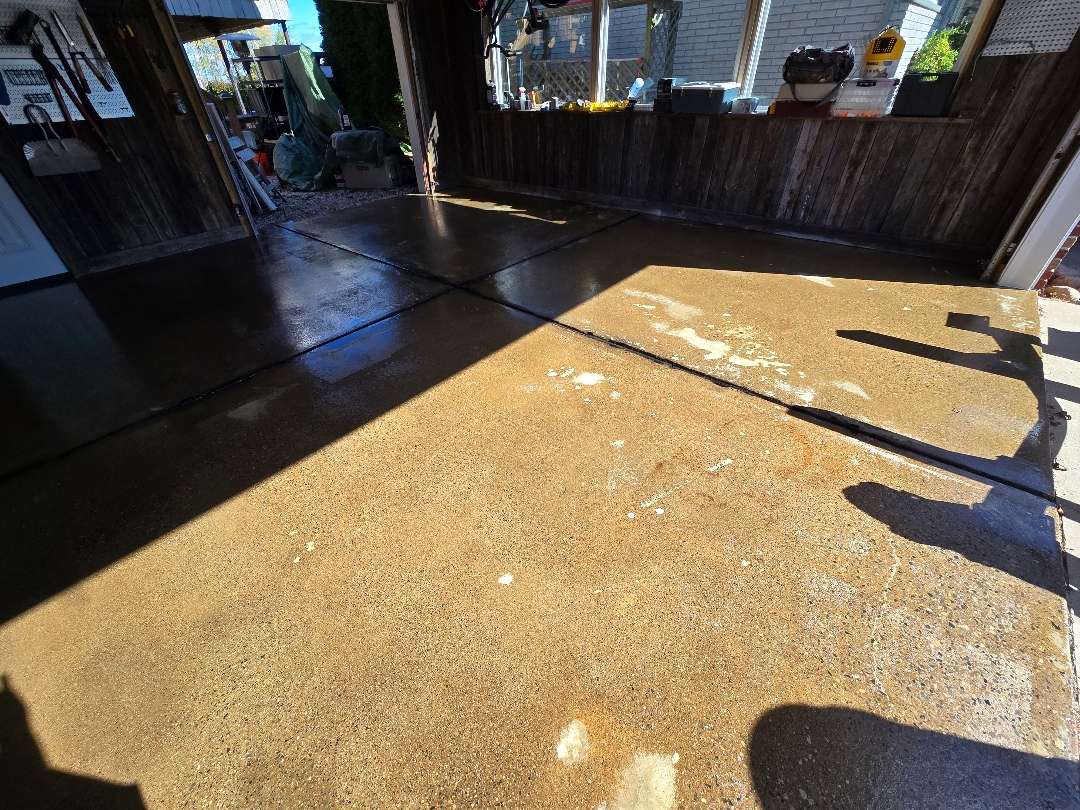
Preparing New Concrete
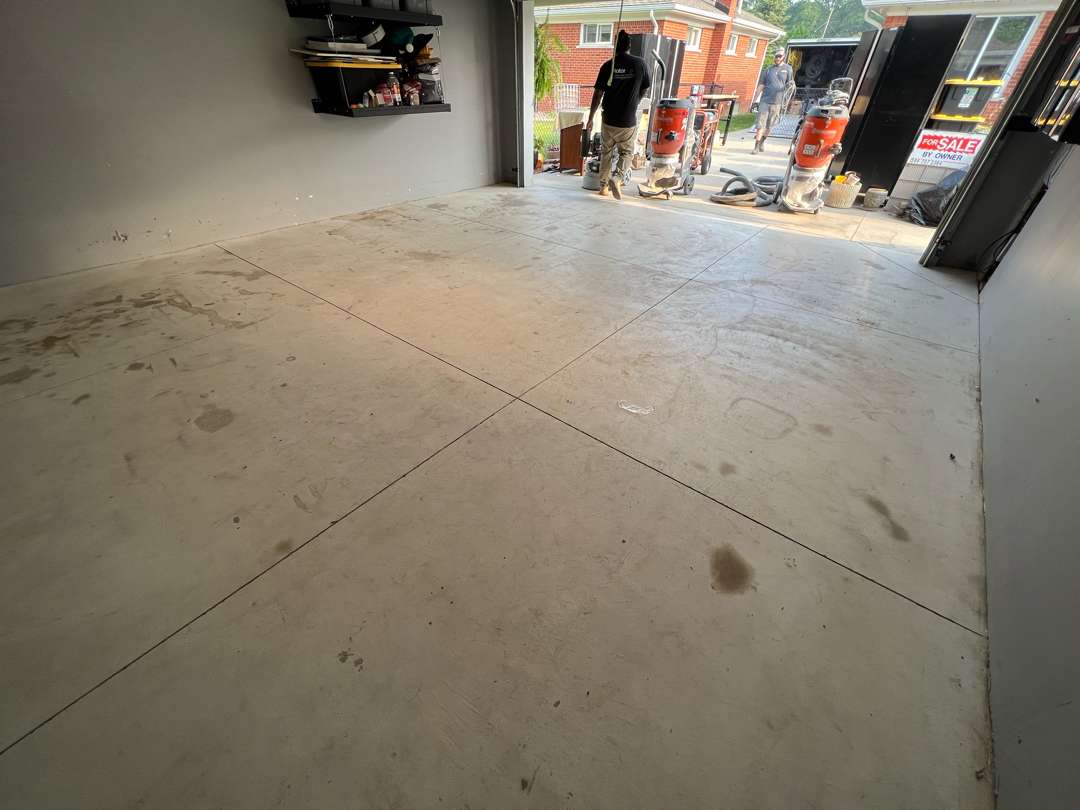
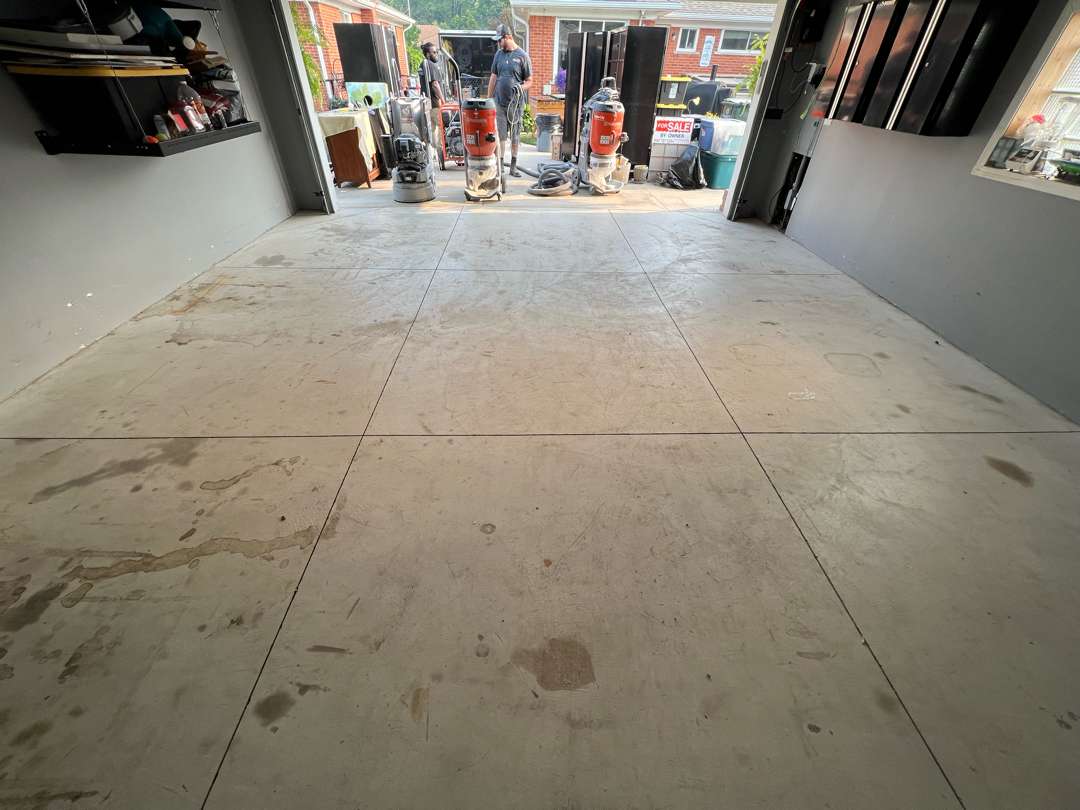
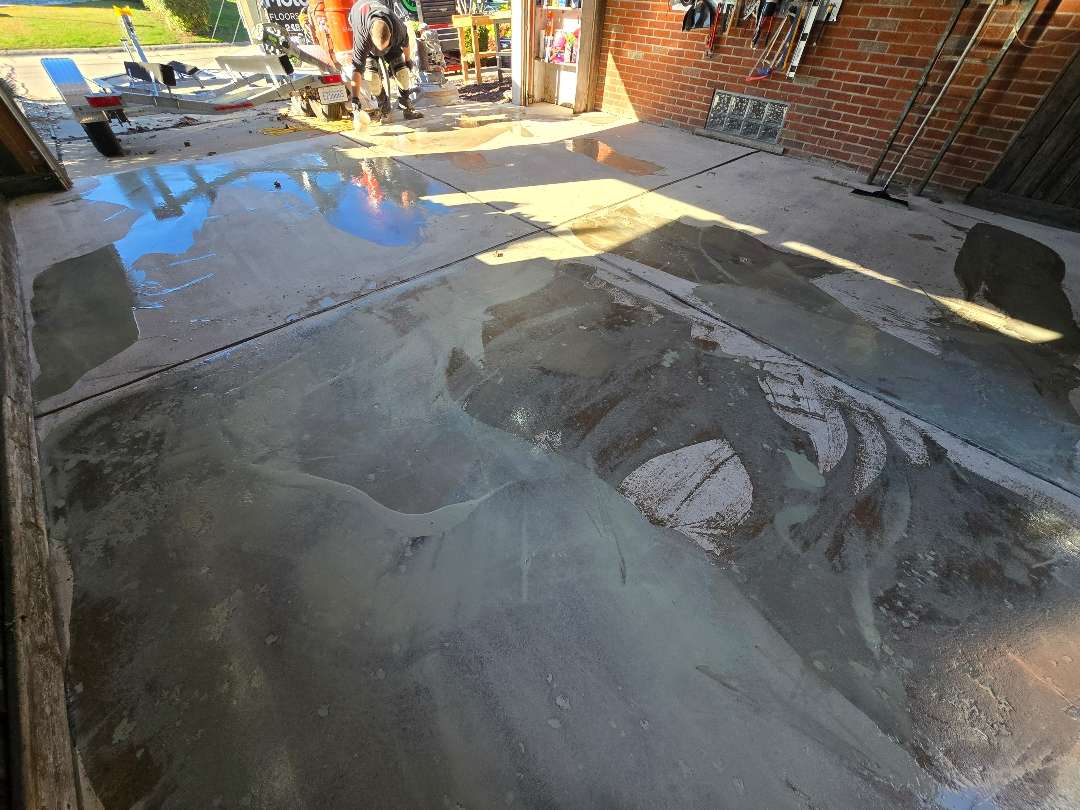
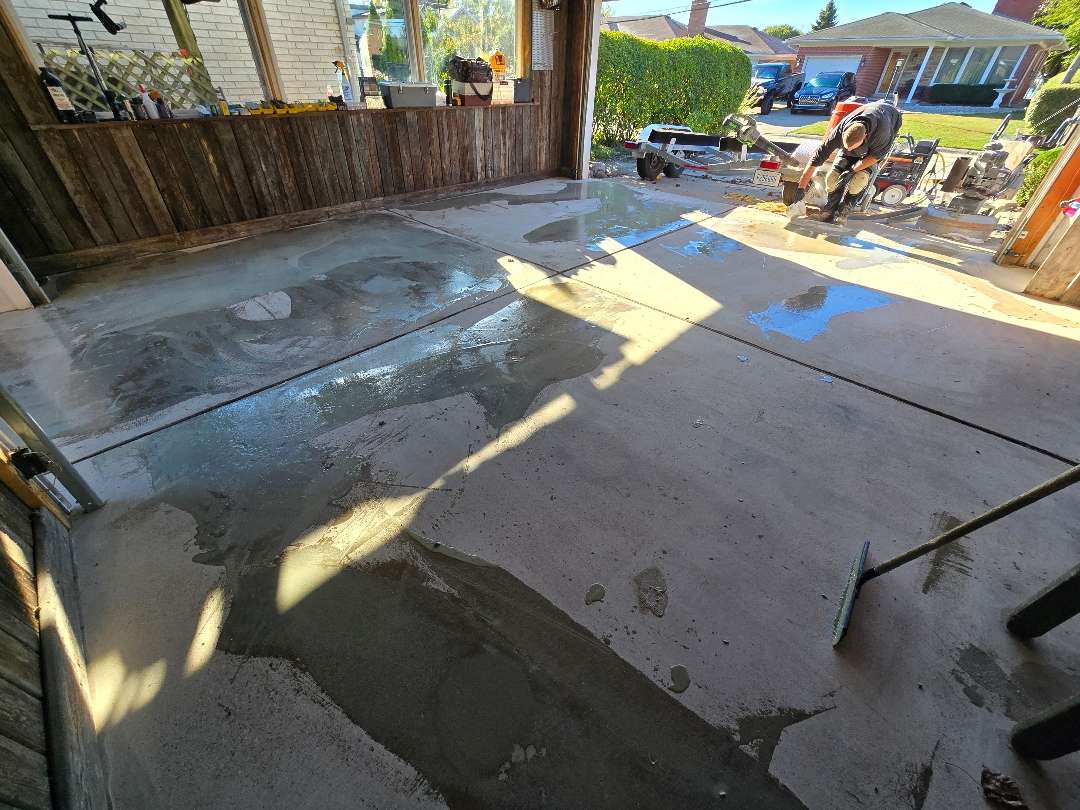
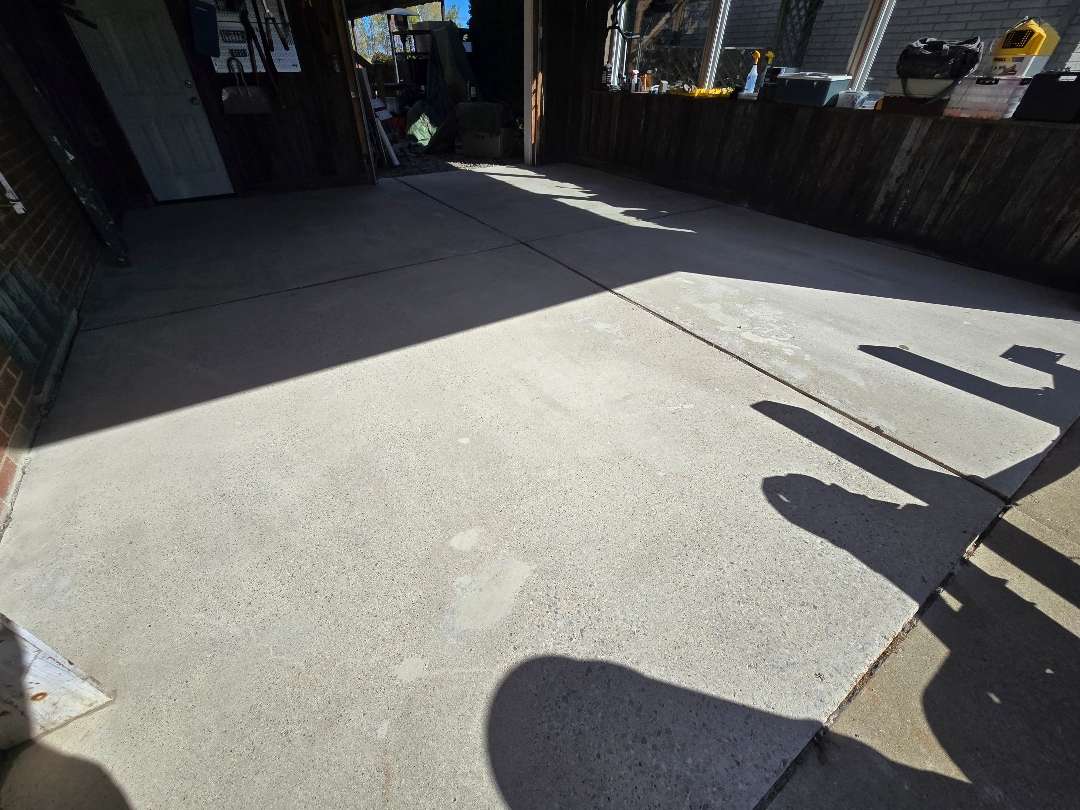
New concrete still requires full diamond grinding before any polyurea-polyaspartic system can bond. The laitance layer — the weak surface layer that forms as concrete cures — must be removed to expose the open pore structure that the coating needs to grip. Our crew ground the full 380 square feet to remove the laitance and open the surface throughout.
The oil spot was addressed during this phase. Our crew evaluated the spot on the day of the installation — the grind cleared it from the surface without the need for additional treatment. The scuff marks lifted with the laitance layer. Our team vacuumed the full floor when the grind was complete. The slab was clean, open, and consistent across every panel — ready for coating without any repair work required.
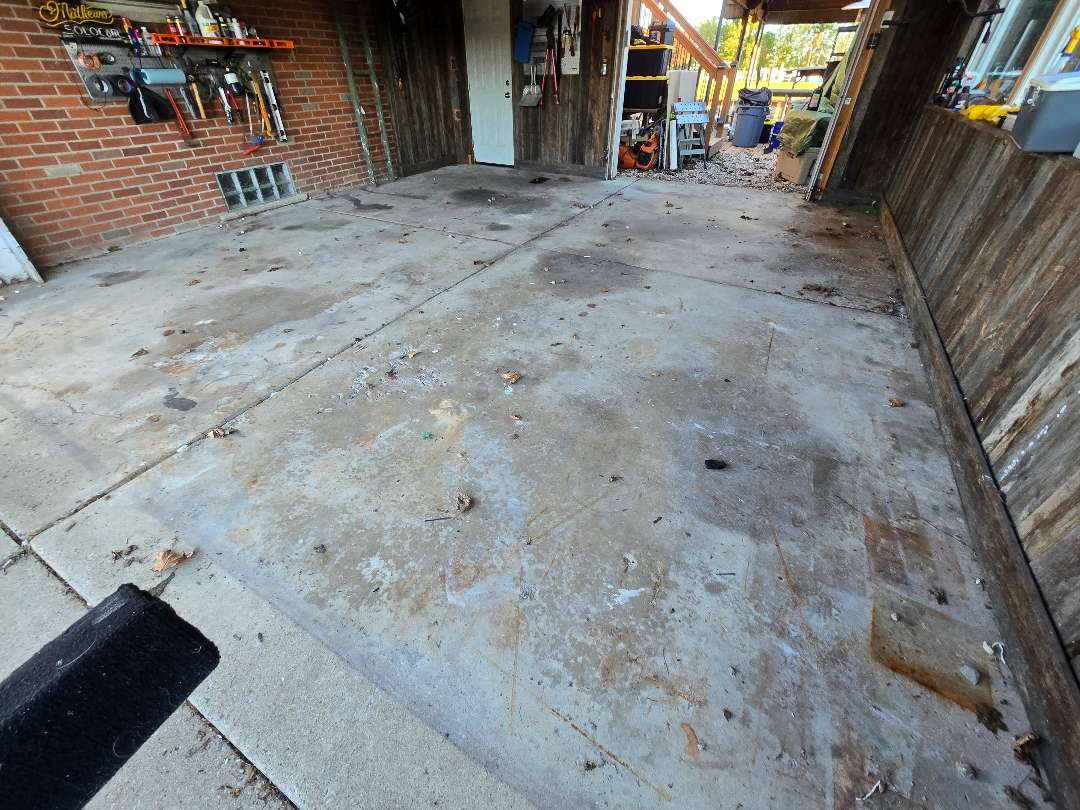
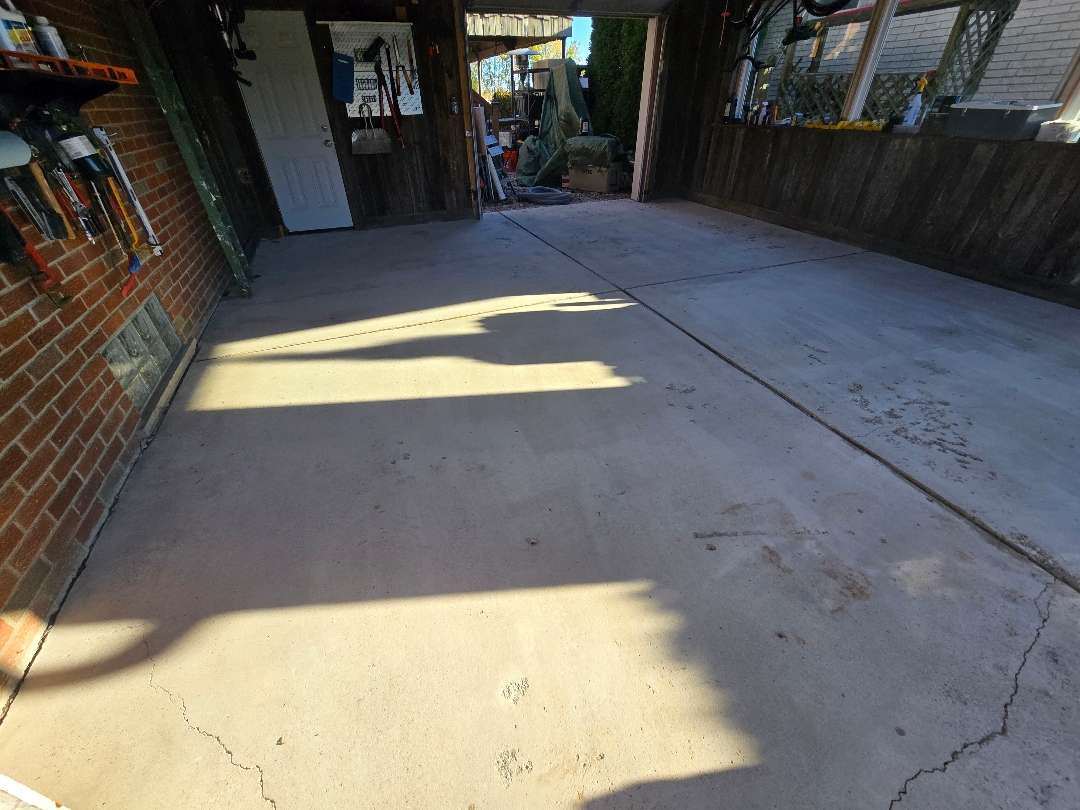
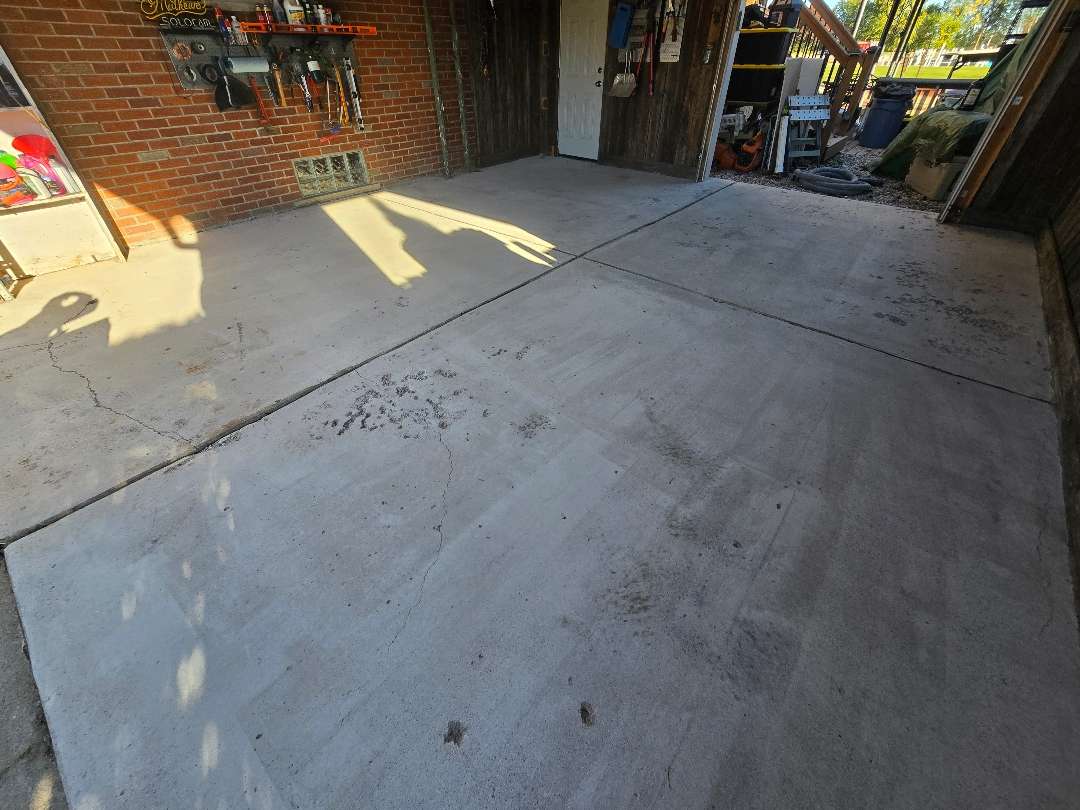
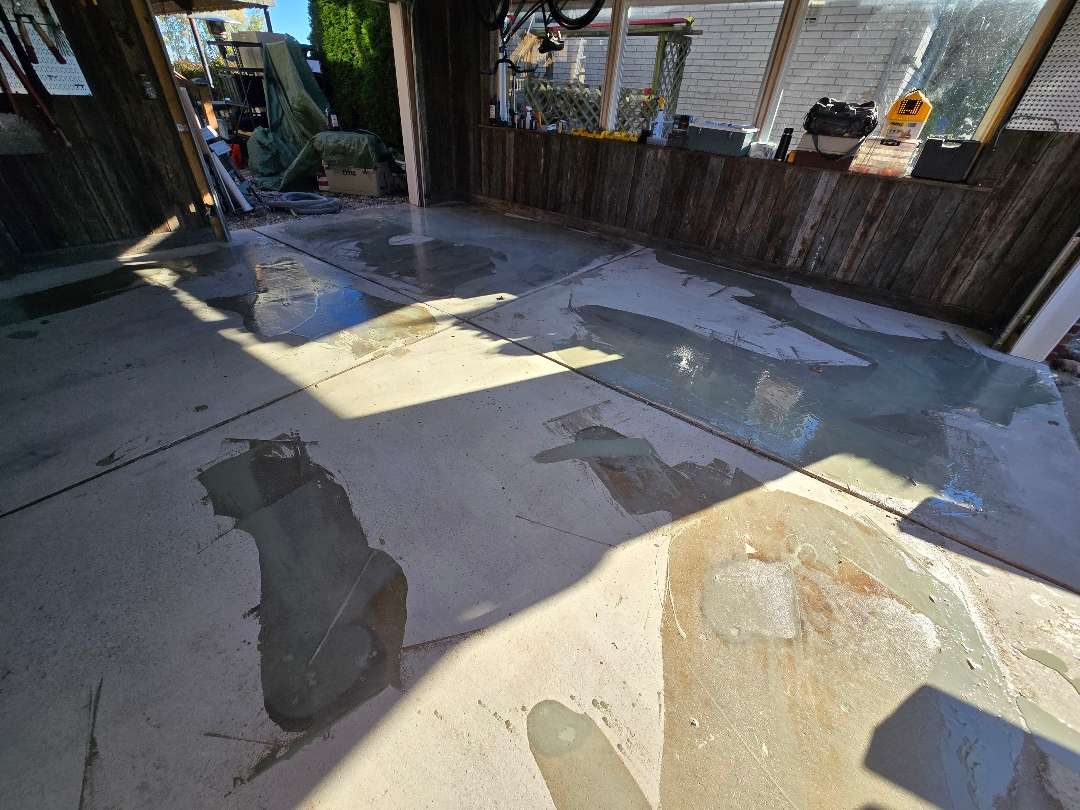
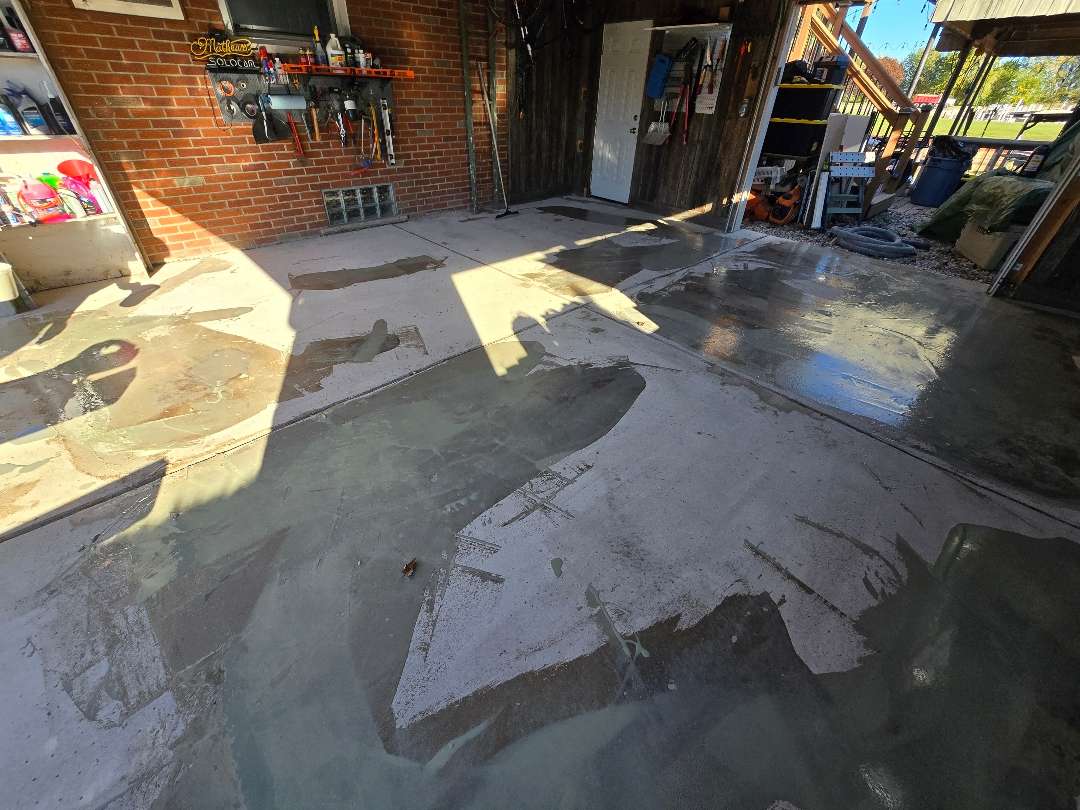
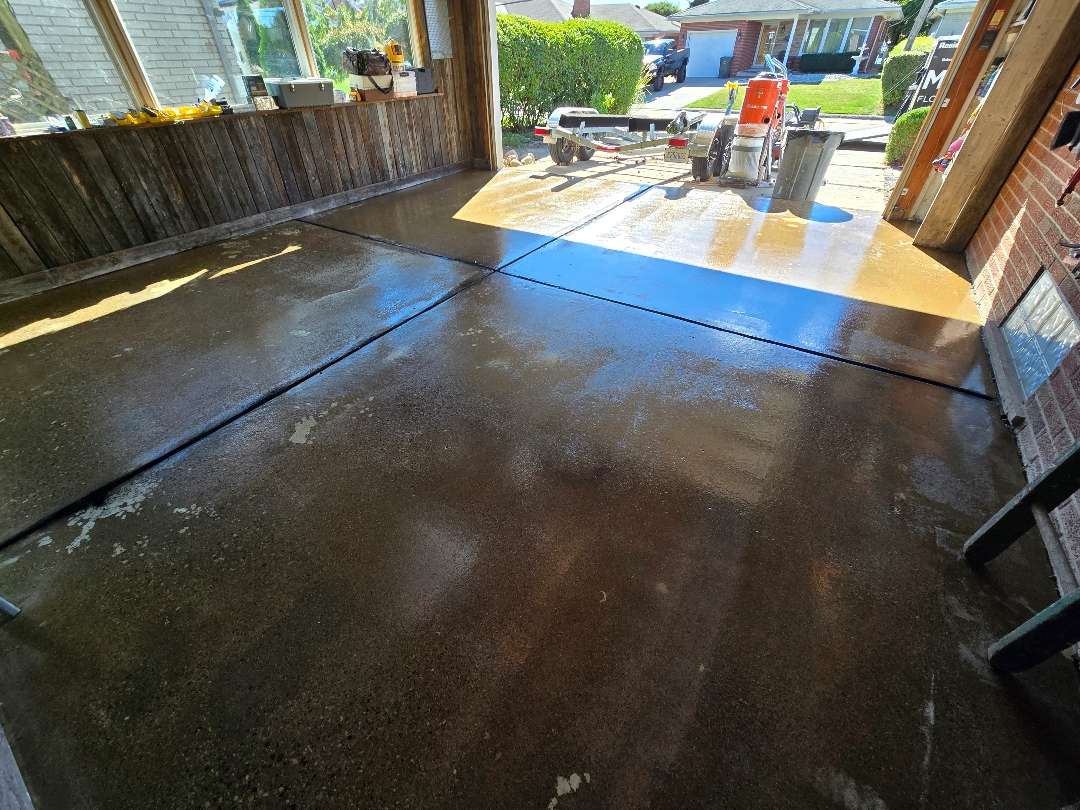
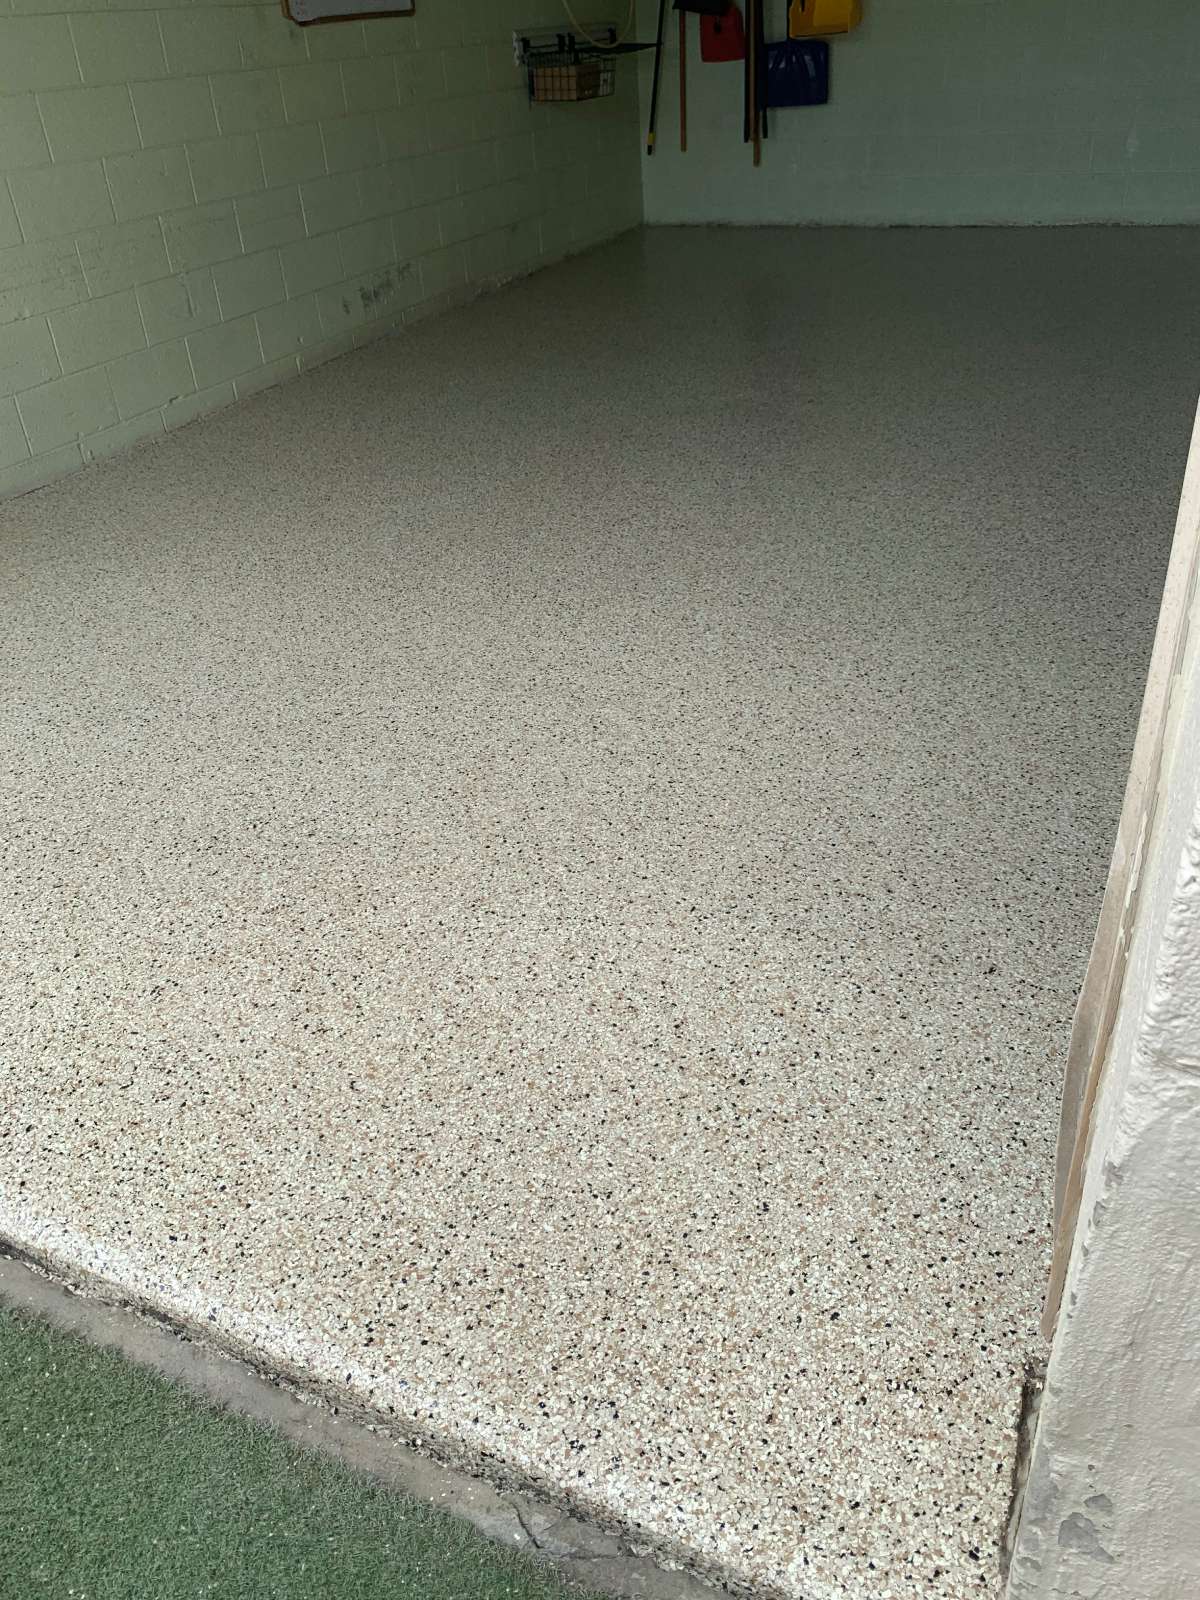
Coating Application
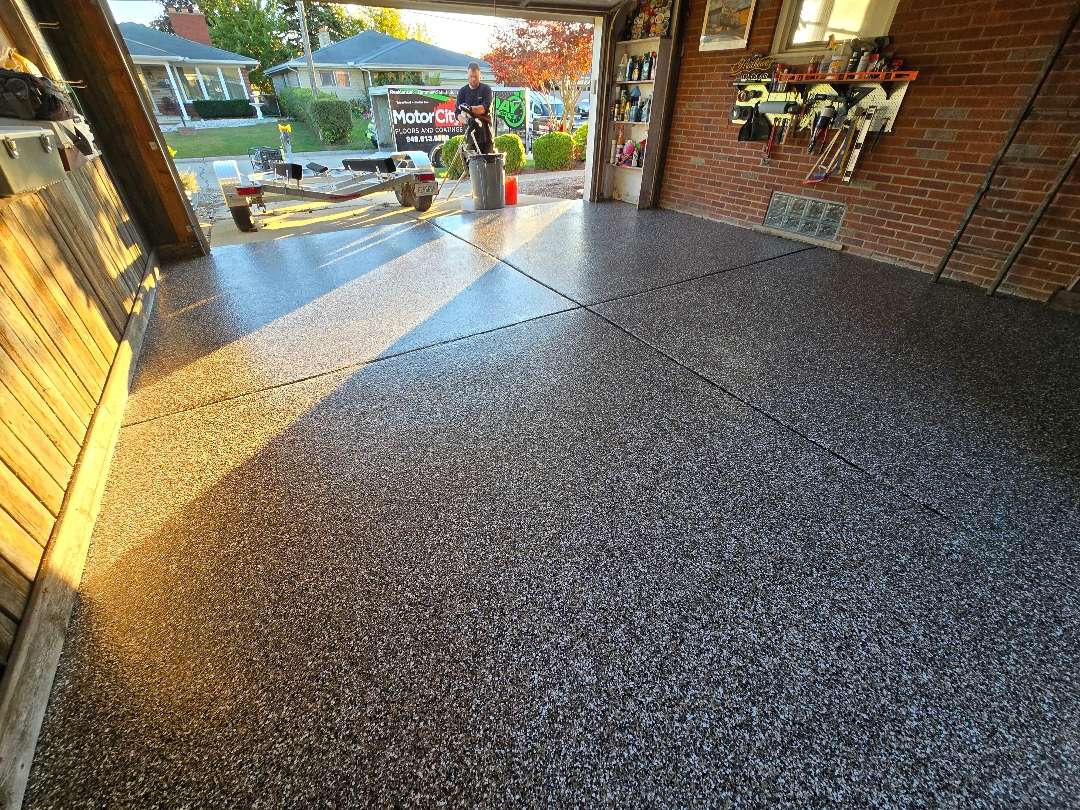
Finished Floor
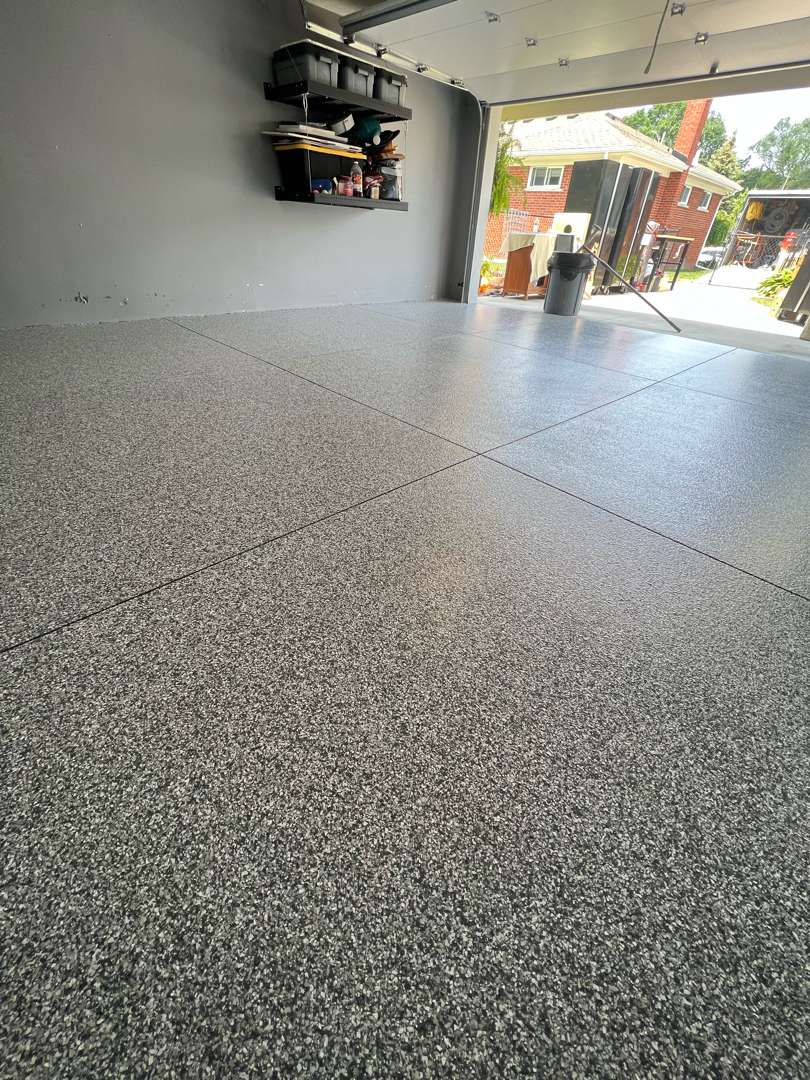
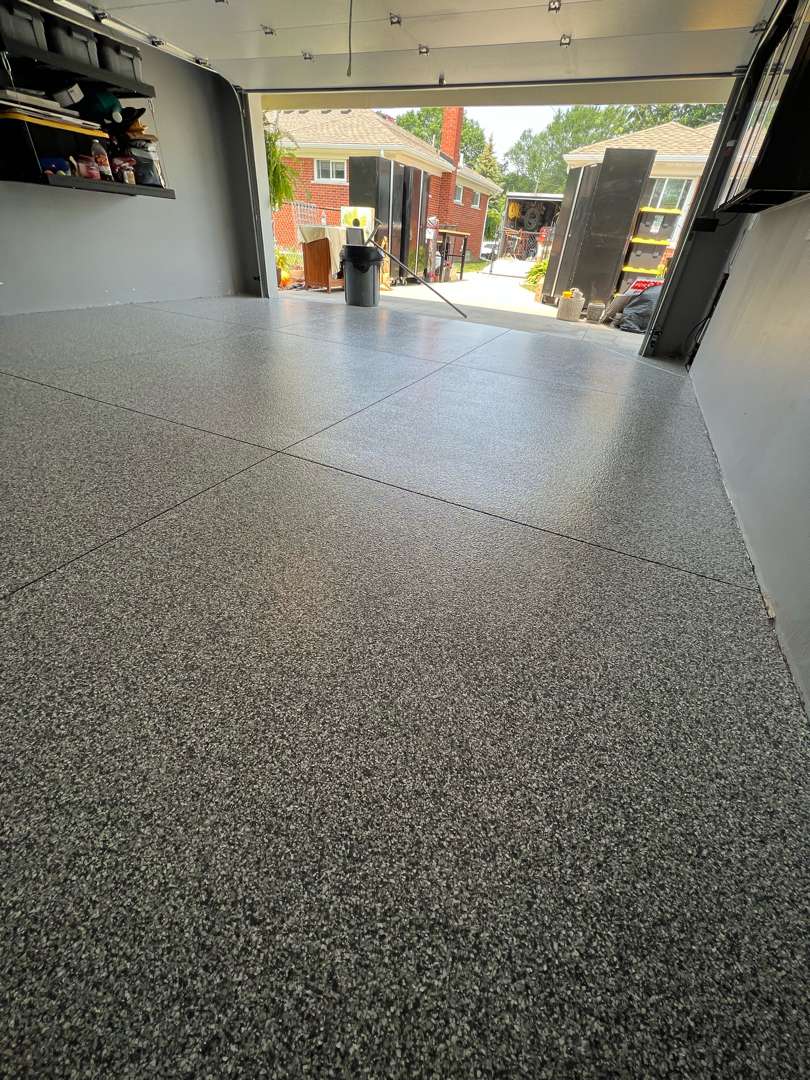
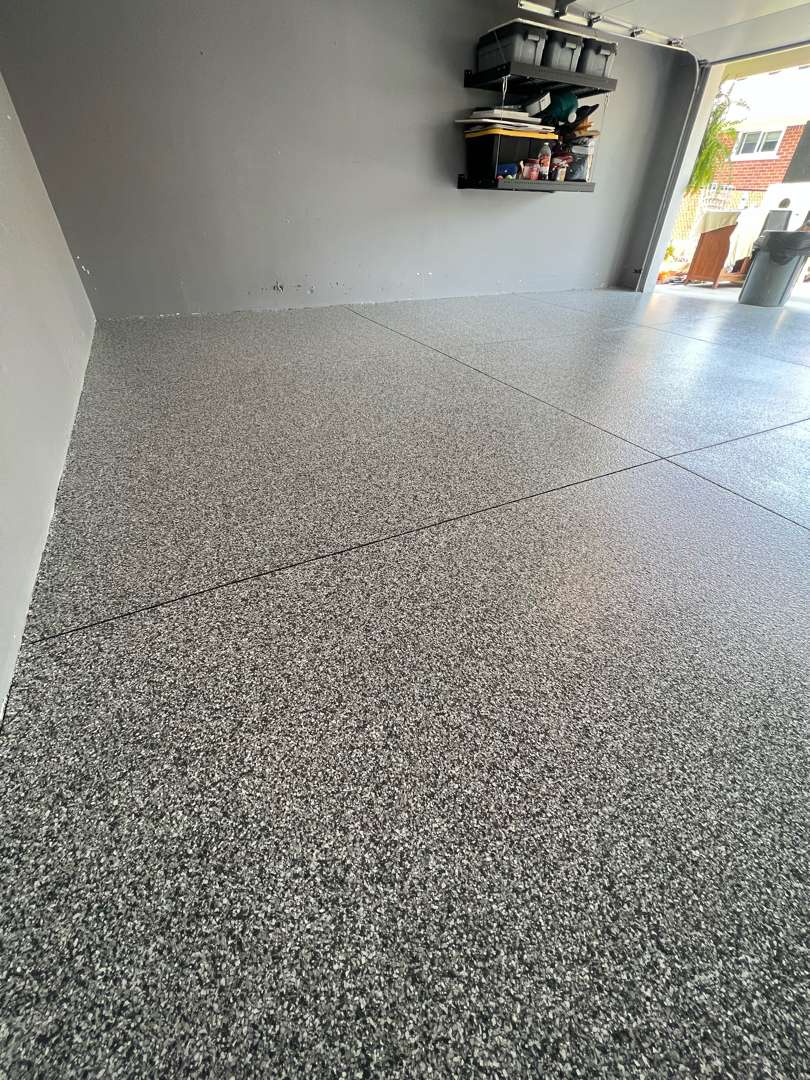
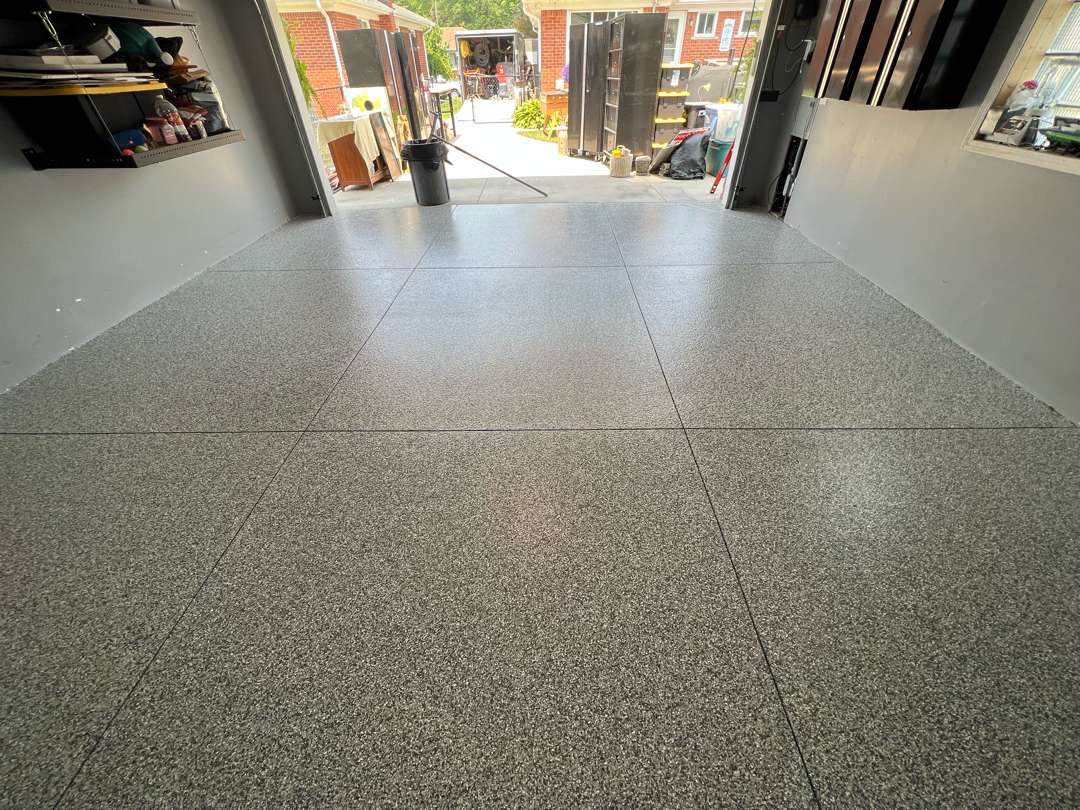
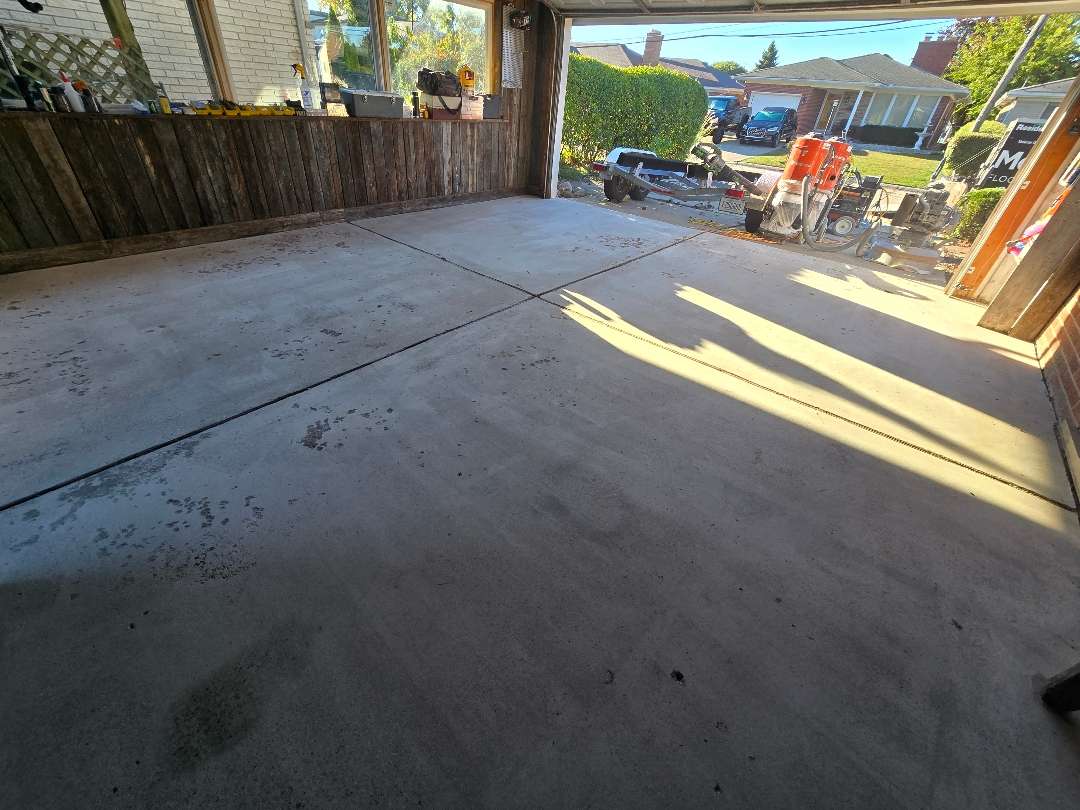
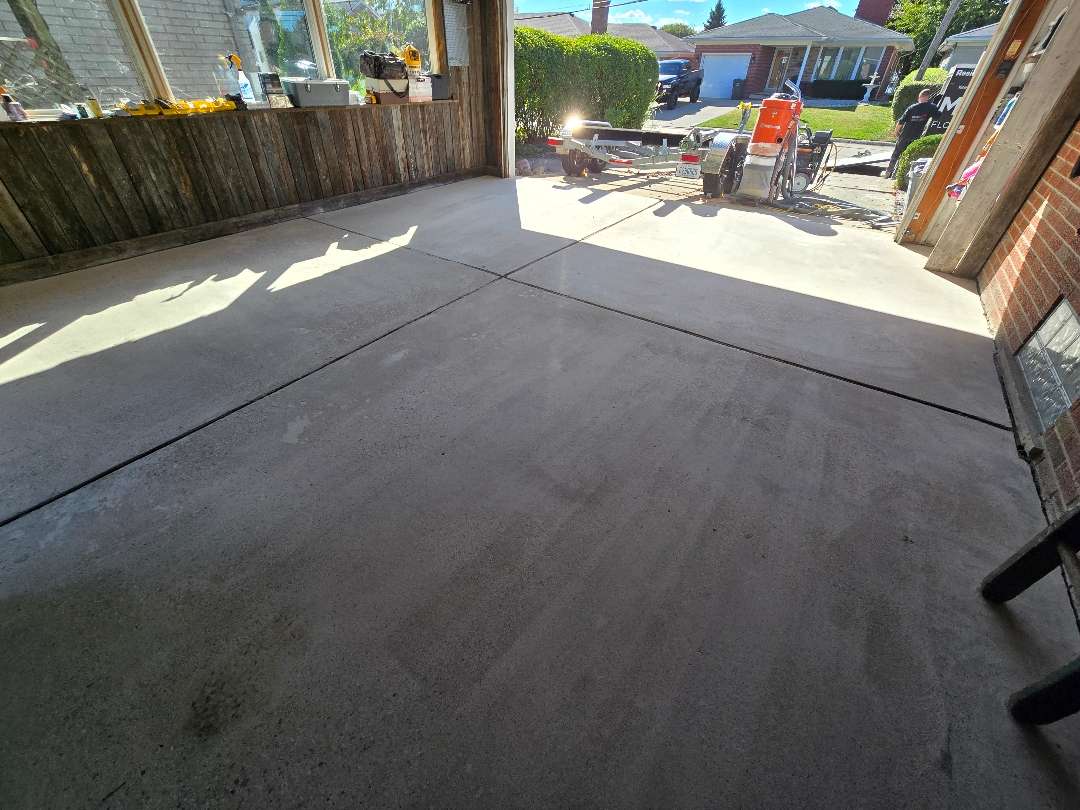
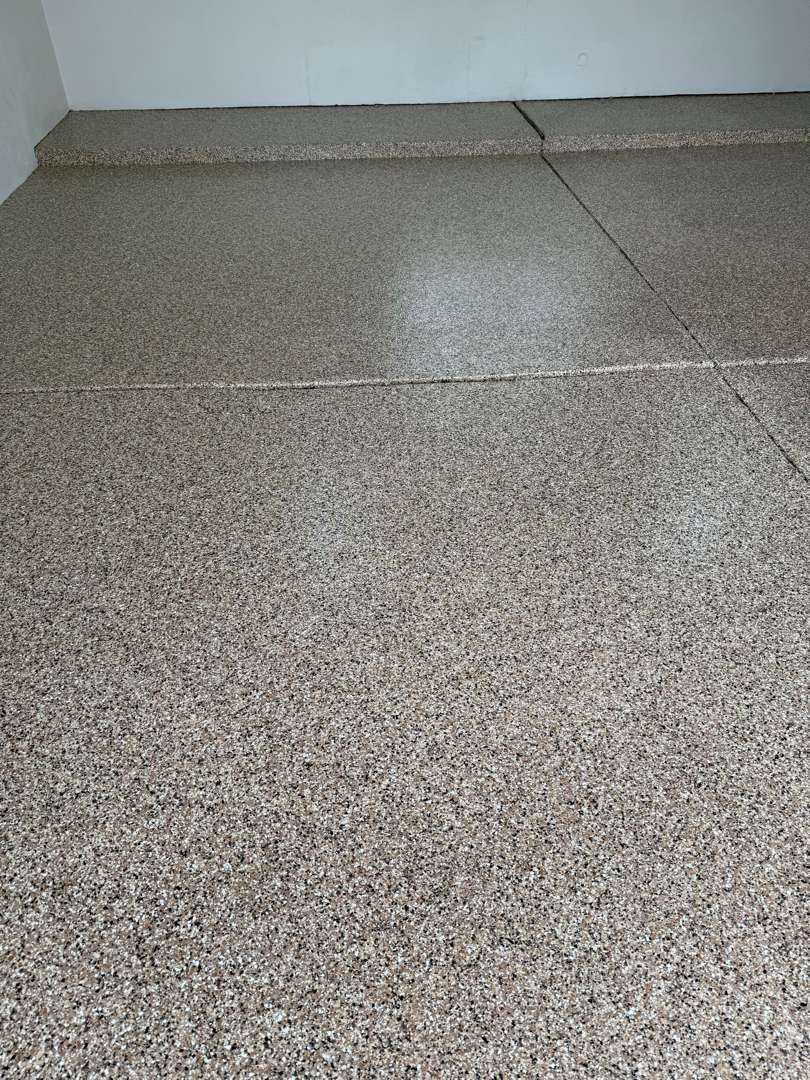
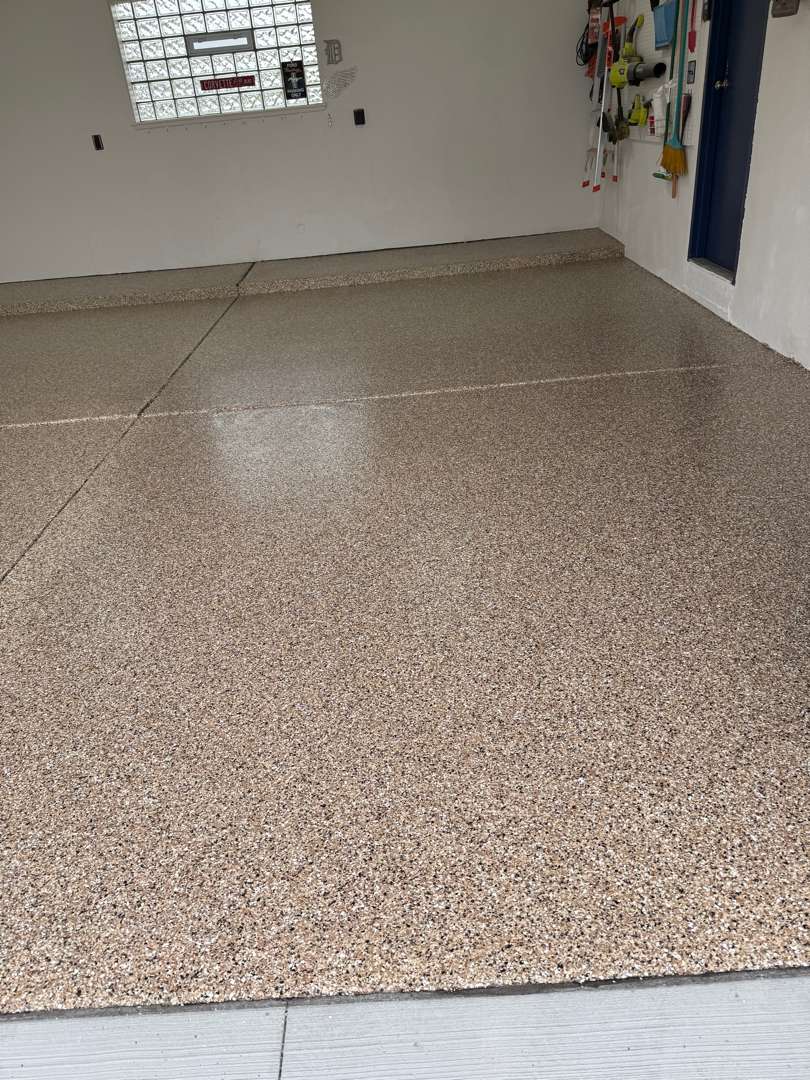
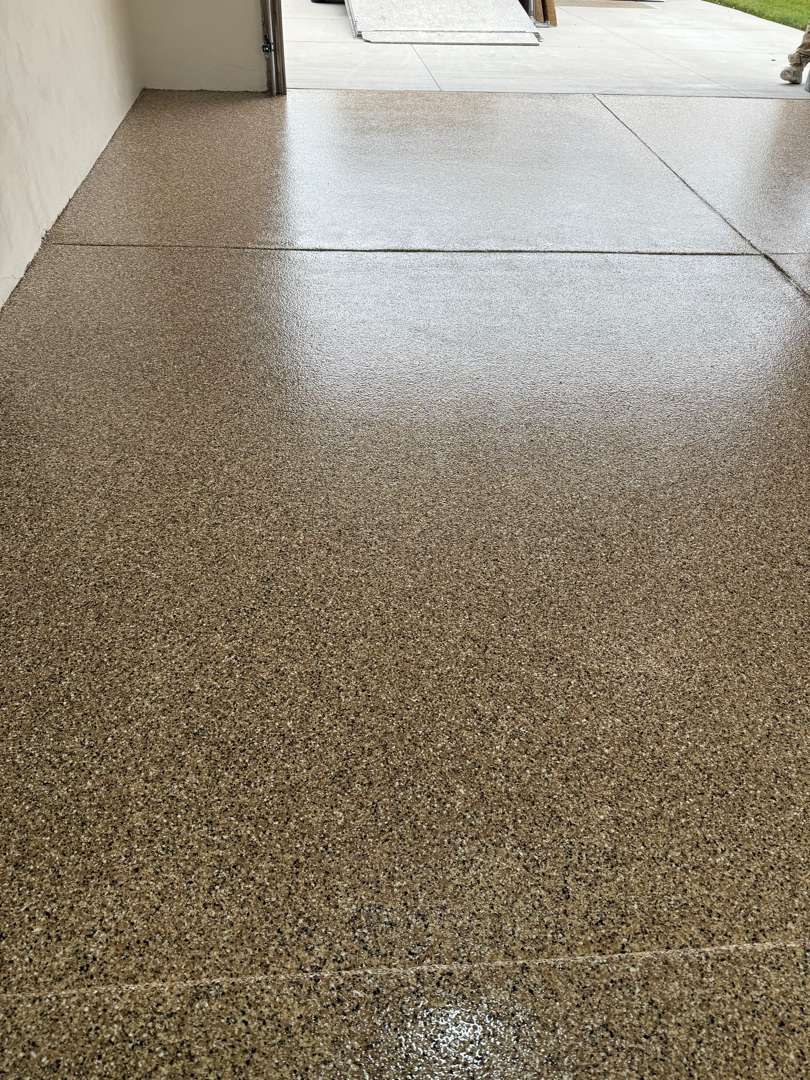
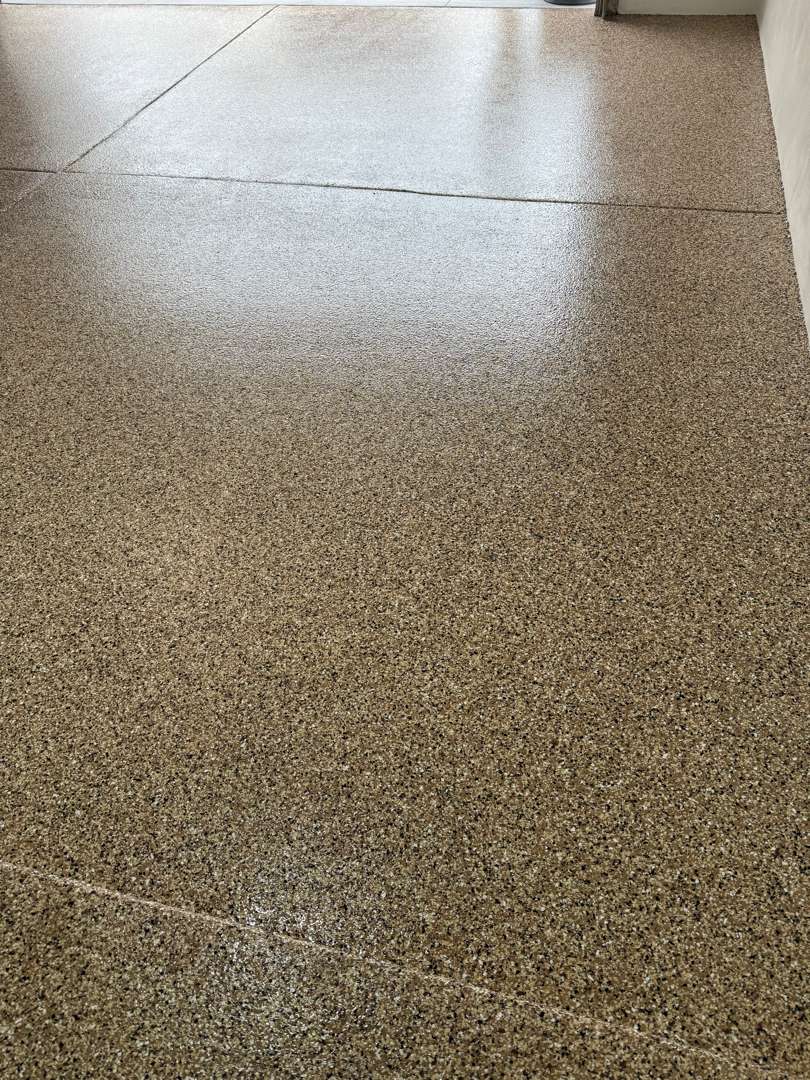
Slatestone suits this garage. The cool grey tone reads consistently with the painted walls — the floor and the interior finish the space as a single, considered environment rather than two separate decisions. The four control joints form a clean cross pattern through the finished surface. Every panel reads the same color and flake density from wall to wall.
The oil spot is gone. The scuff marks are gone. The laitance layer that was preventing any coating from bonding is gone. What the new concrete needed was proper preparation and the right system — and the MC-3.5 delivered both. All 380 square feet are sealed, protected, and finished.
NEW Garage Floor Coating
on Liberty Street
Liberty Street, St. Clair Shores, MI
The Starting Point
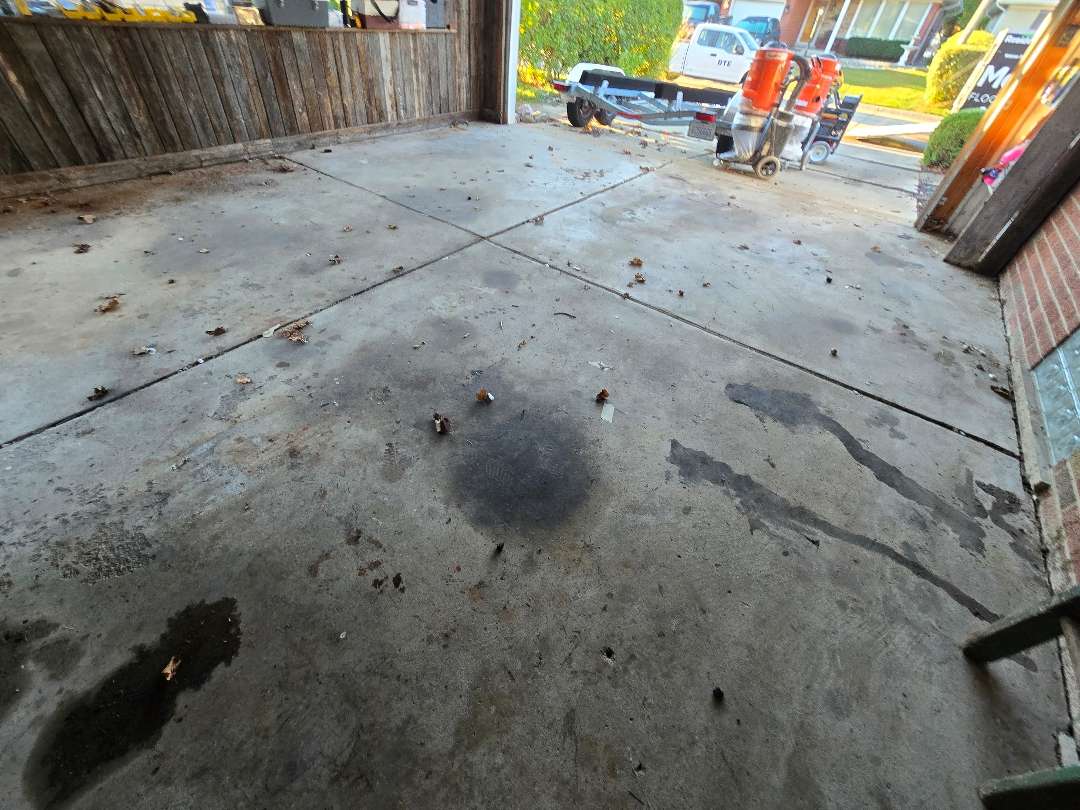
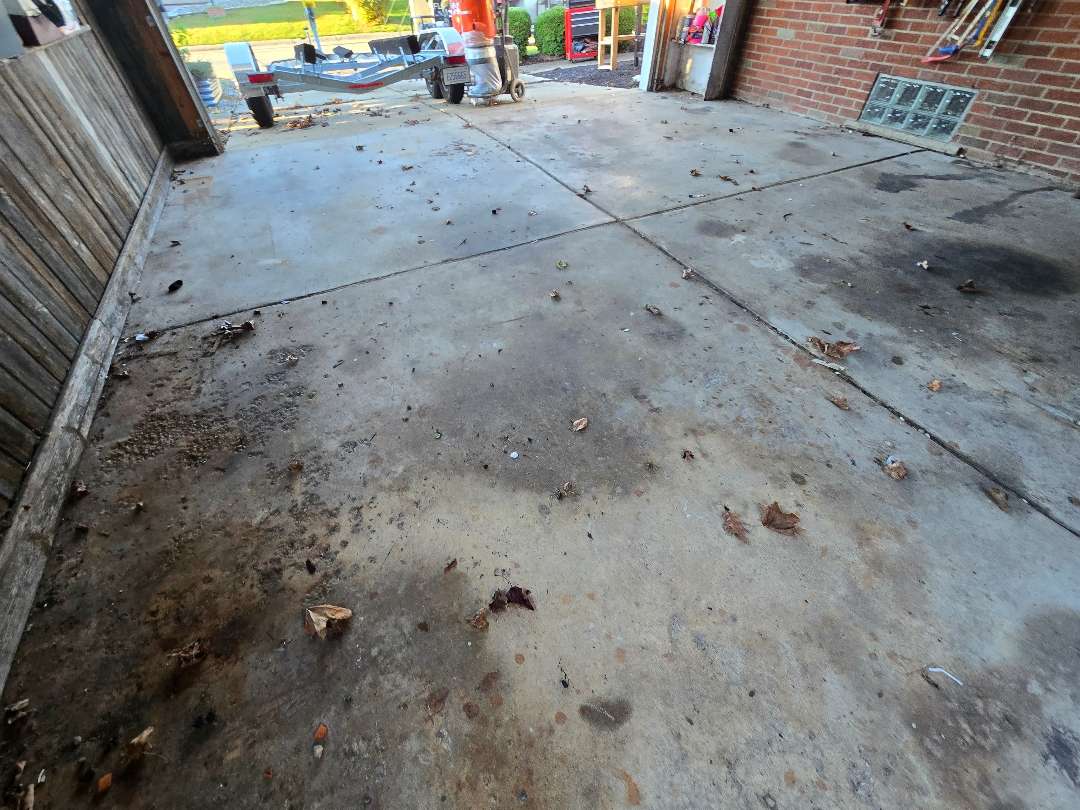
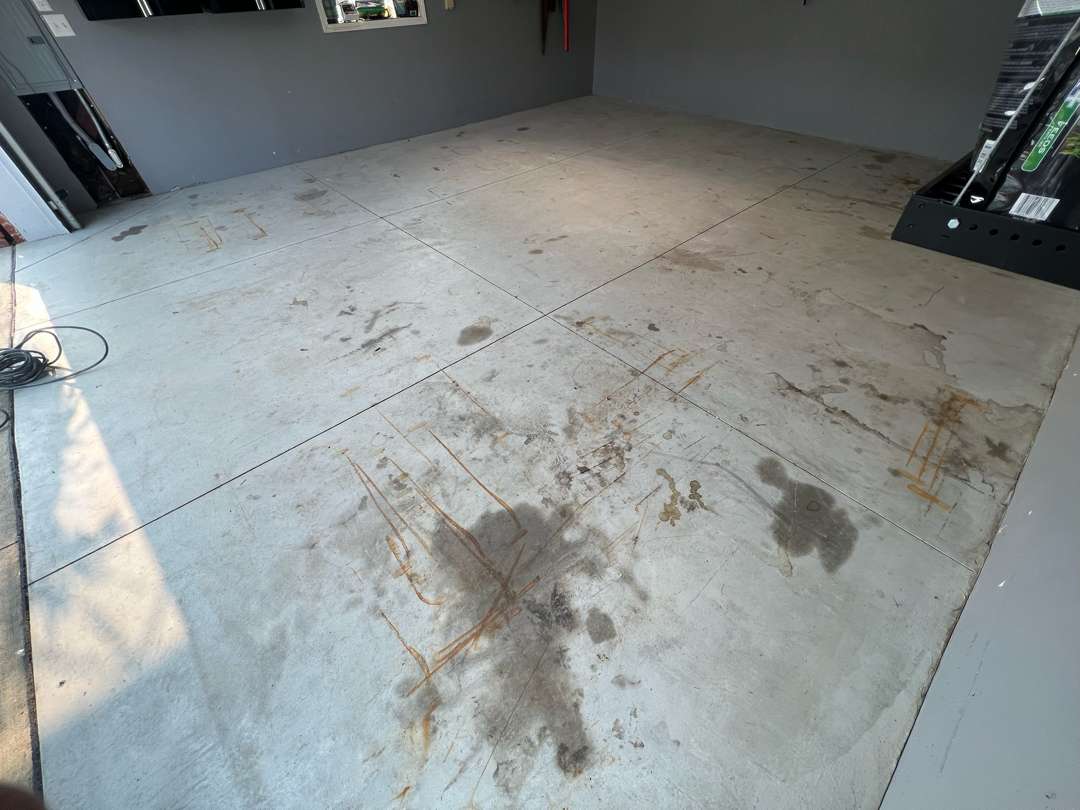
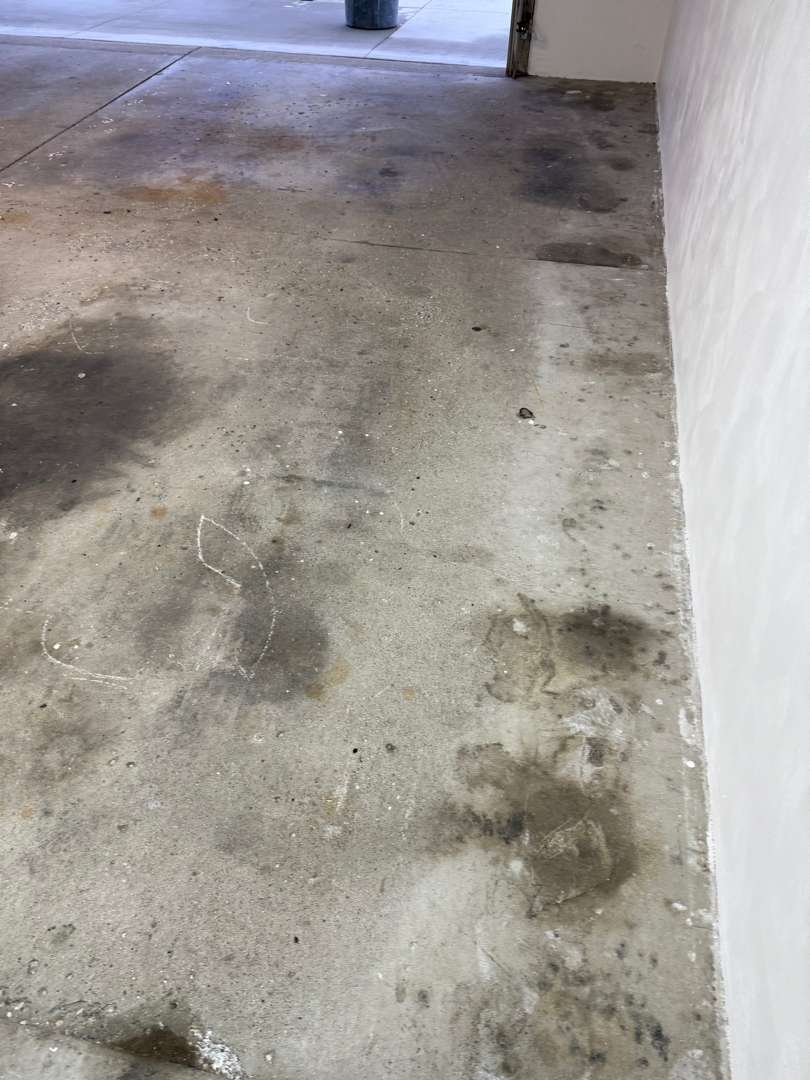
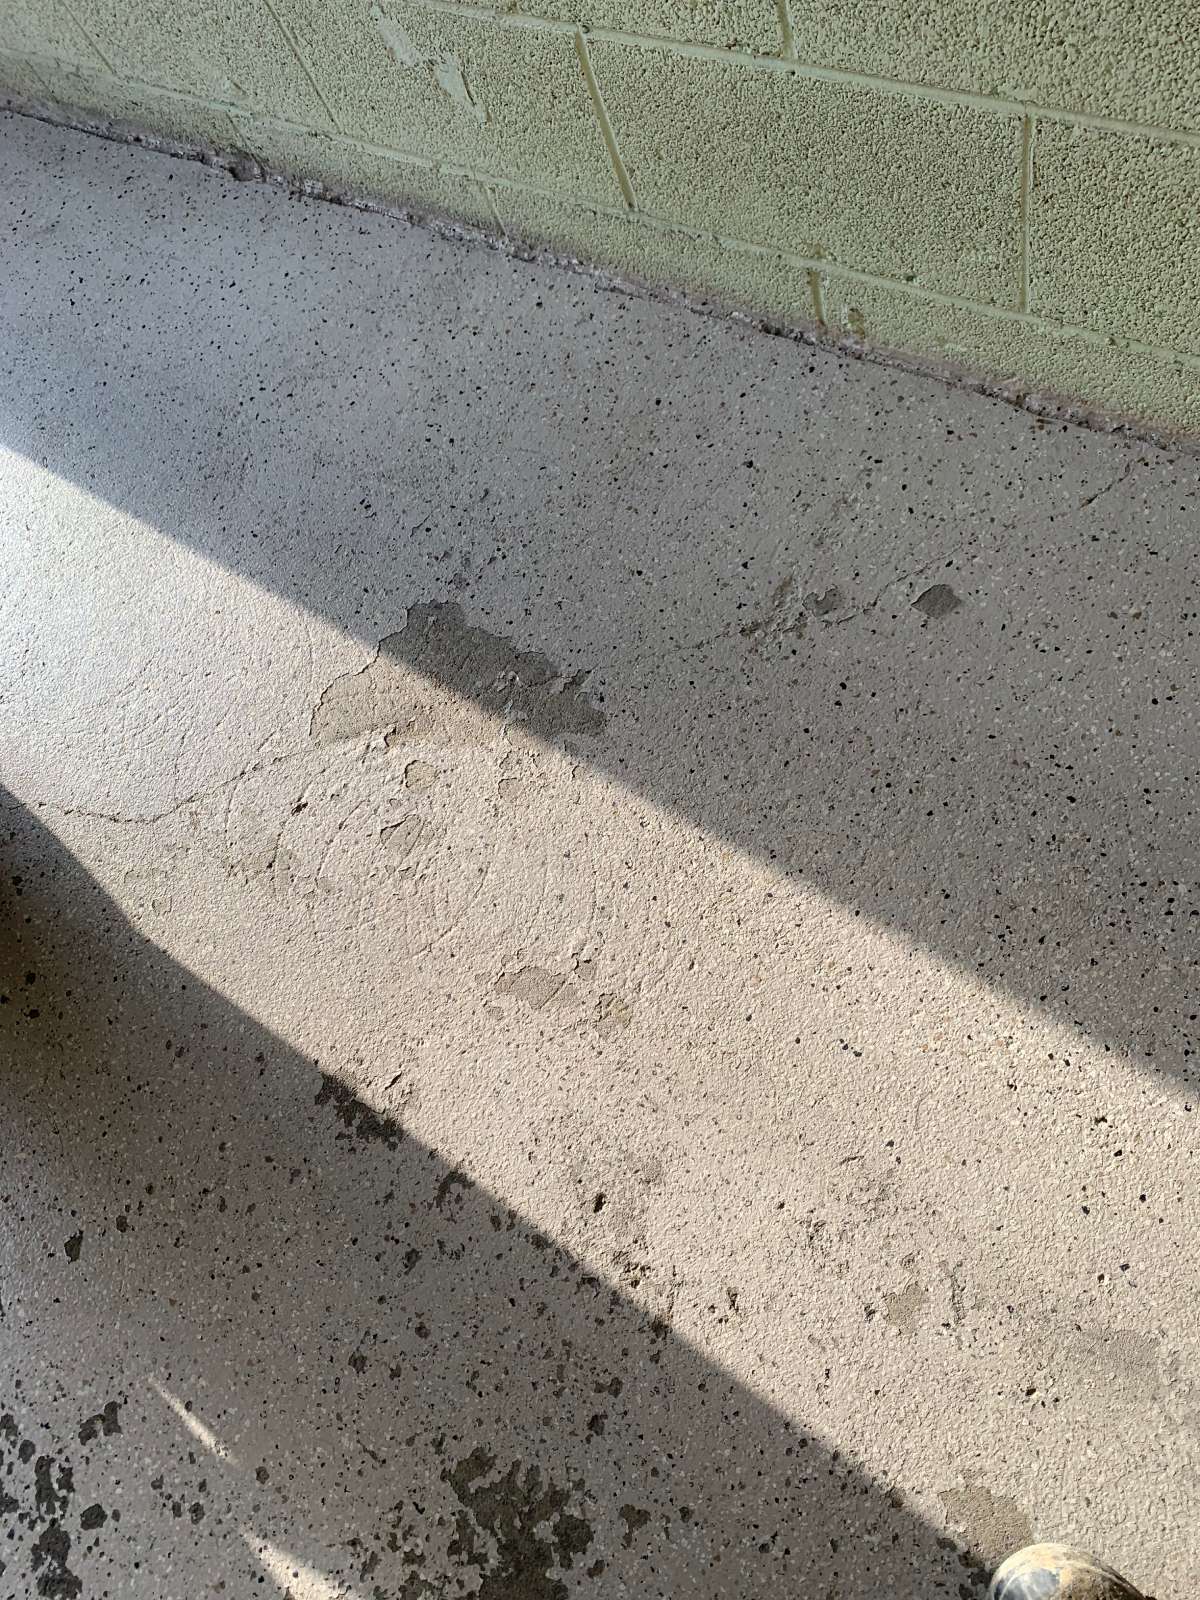
The 289-square-foot slab at this Liberty Street garage showed the kind of accumulated damage that builds over years of heavy use. Large oil stains saturated multiple zones across the surface. Several areas showed deep pitting — not surface scuffing, but genuine material loss in the concrete. A hairline crack ran through one panel. The surface was contaminated throughout, with no previous coating present.
Our crew conducted a lithium vapor meter test before any work began. The reading confirmed moisture vapor transmission above threshold. The slab required a moisture vapor barrier before the polyurea-polyaspartic system could go down. No vertical surfaces and no steps were in scope. The full job was a single horizontal surface — 289 square feet of heavily worn concrete.
First Grind
Patch, Flood Coat, and Second Grind

Our crew filled the large pits with cementitious patching compound. Our team then applied a flood coat across the entire slab. The flood coat leveled the surface and encapsulated the remaining oil contamination. It also filled the hairline crack and the smaller surface voids throughout the floor.
Our crew ground the slab a second time after the flood coat cured. This second pass knocked down the high points of the patch material. It brought the surface to a consistent profile across all four panels. Our team vacuumed the floor again when the second grind was complete. The slab was now flat, clean, and ready for the moisture vapor barrier.
Moisture Vapor Barrier
The LVM test result required a moisture vapor barrier before any finish coating. Our crew applied the MC-4.9 moisture vapor barrier coat across the full 289 square feet. Our team worked the material into the prepared surface profile. The barrier coat sealed the slab against vapor transmission. It also served as the bonding layer for the polyurea base coat to follow.
The Coating System
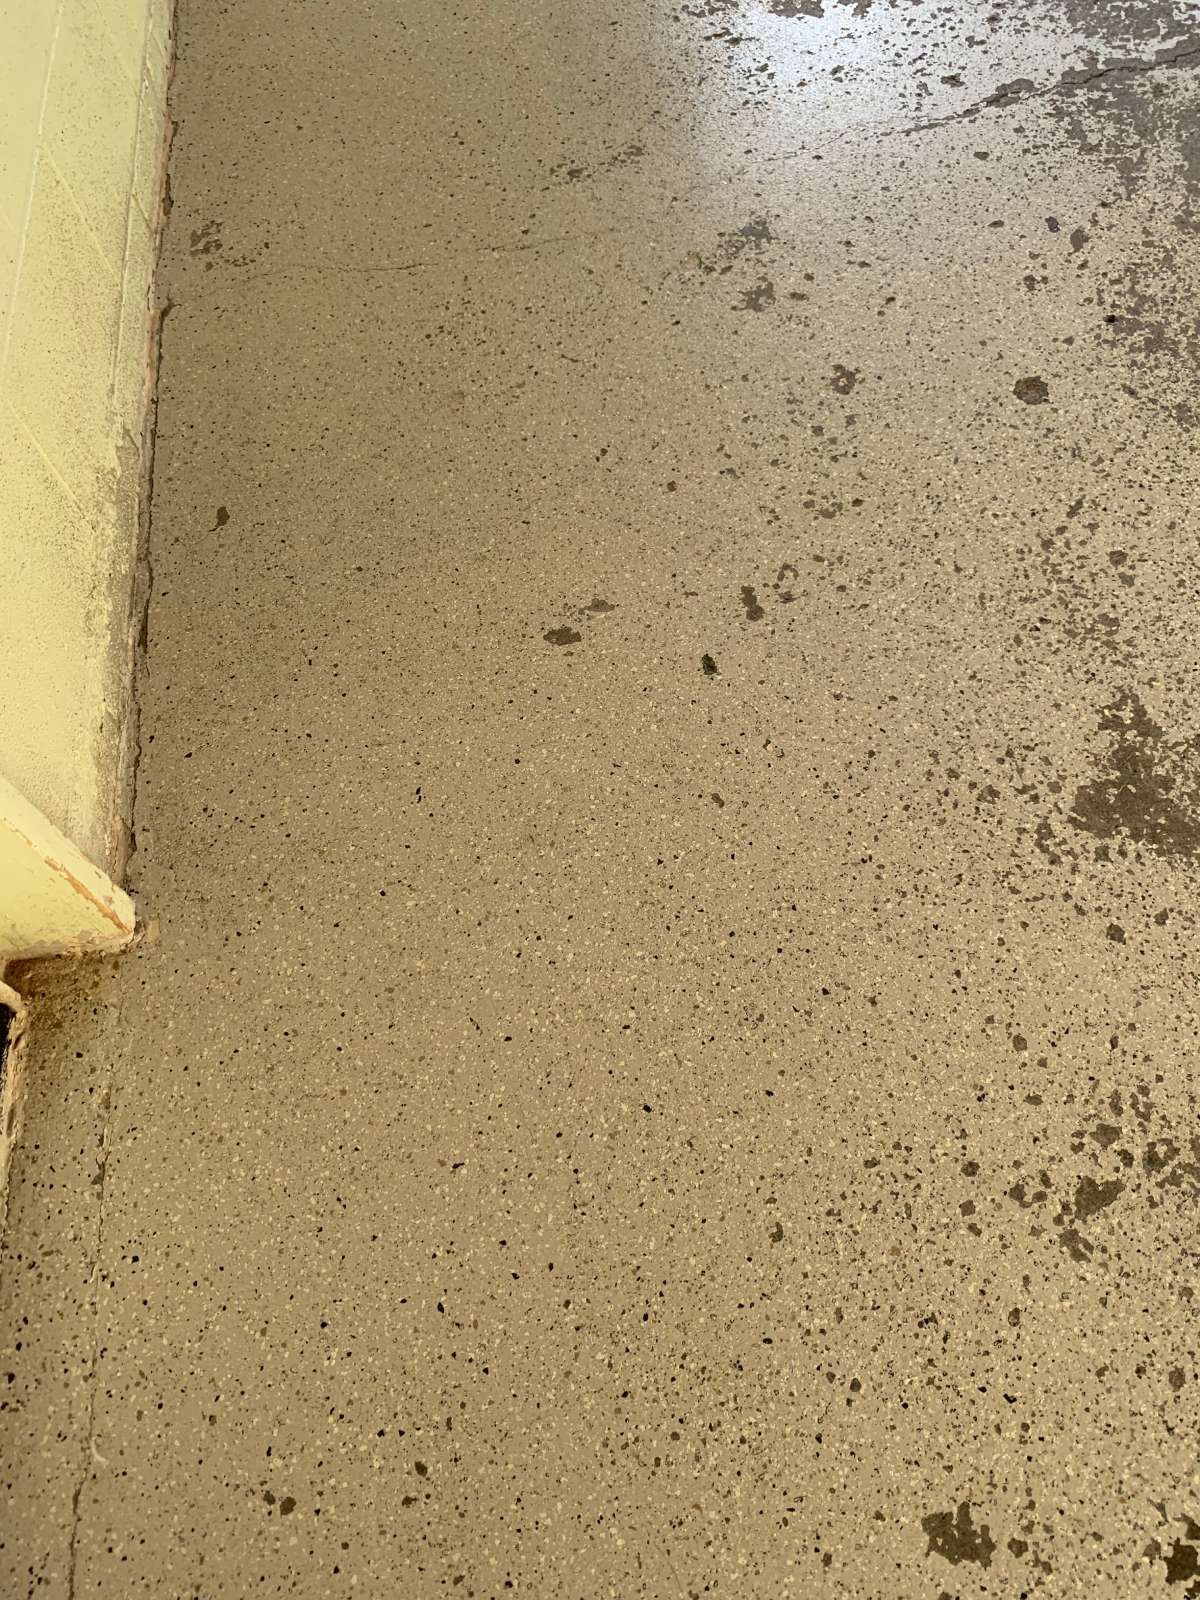
Our crew applied the H-5 polyurea base coat over the cured moisture vapor barrier. Our team broadcast Autumn Brown flakes into the wet base coat in full coverage across all four panels. Autumn Brown carries warm charcoal, brown, and cream tones — a blend that reads rich and consistent in both natural and artificial light. Our crew applied the clear polyaspartic topcoat with 36-grit traction additive throughout. The 36-grit traction provides a firm grip underfoot — suited to a working garage that sees regular foot traffic and vehicle use.
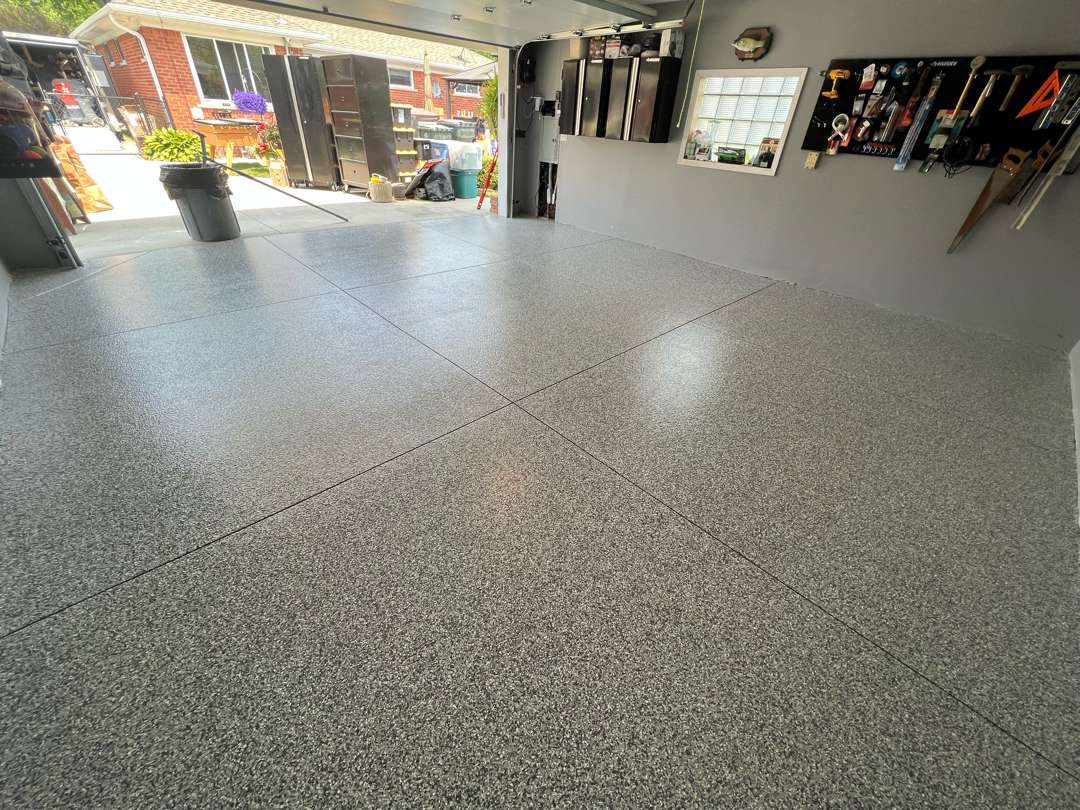
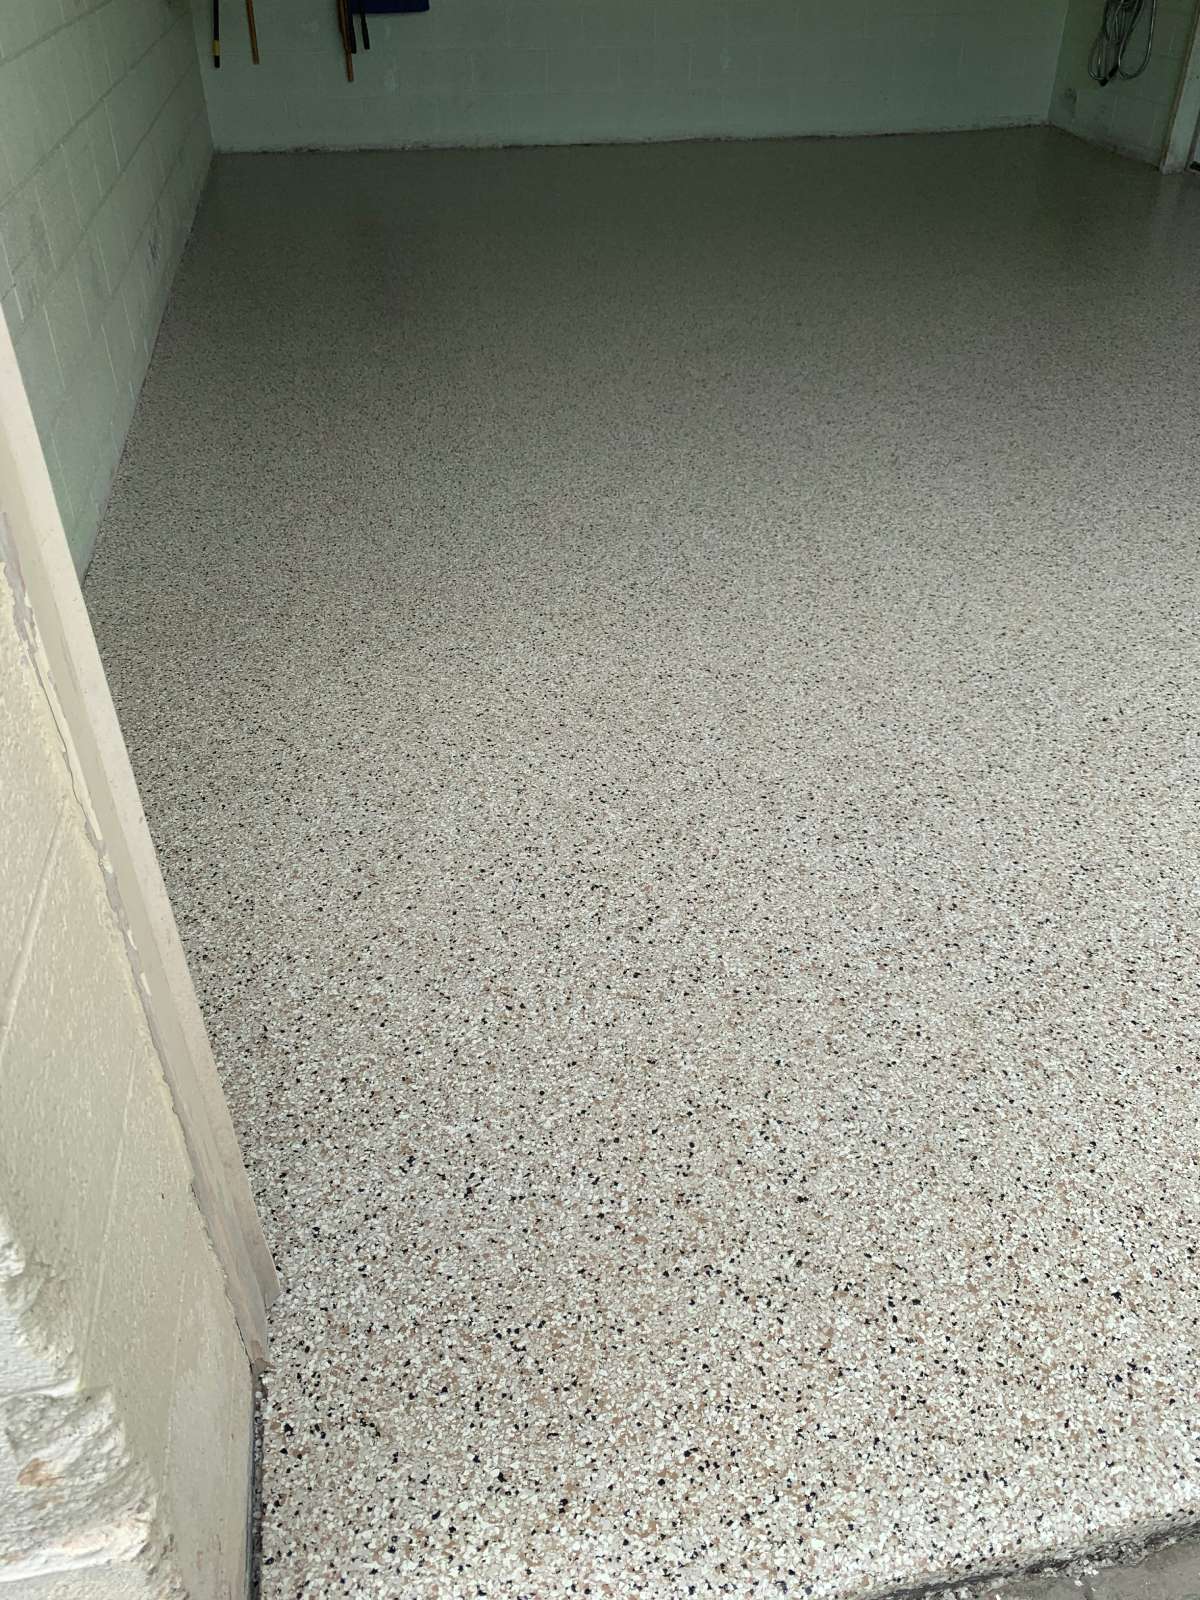
Finished Floor
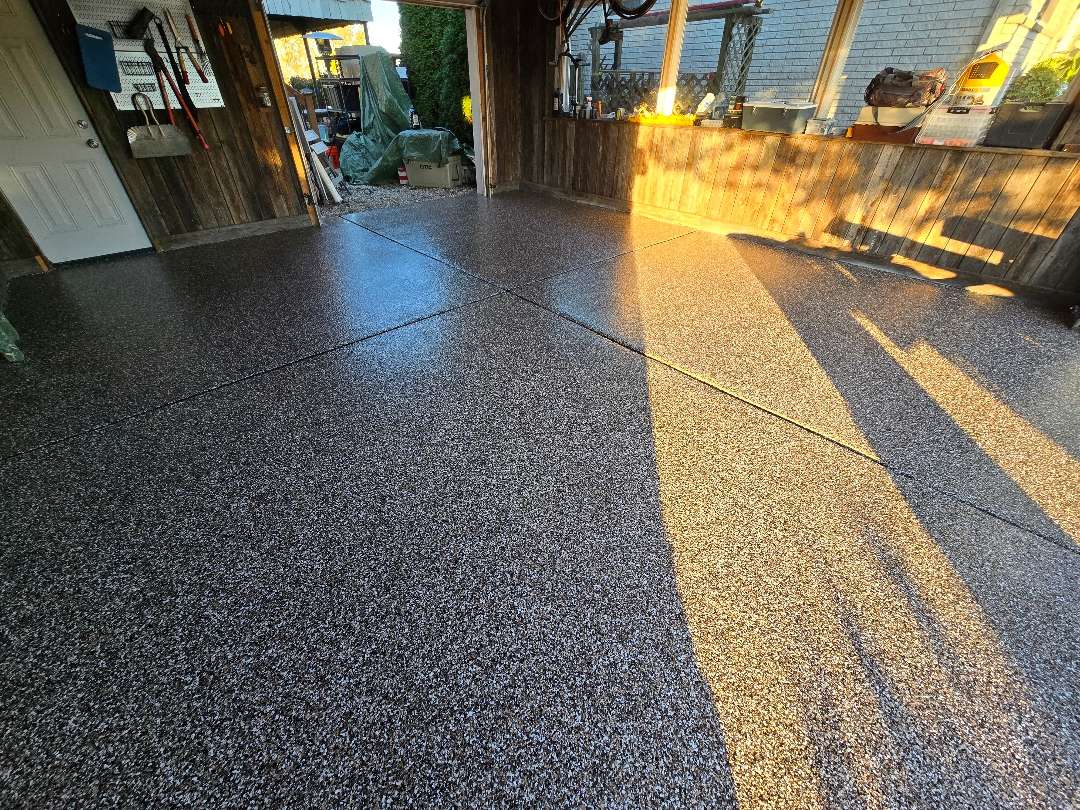
Sandstone suits this garage. The warm tone reads well against the white walls — the two surfaces work together rather than compete. The four panels of the slab finish at the same flake density and color read throughout. The raised platform at the rear received the same coverage as the main field — the floor reads as one continuous surface from front wall to back.
The oil stains are gone. The rust deposits along the joints are gone. The pitting that ran through every panel is sealed and flat. The 22 linear feet of vertical transitions are coated and consistent with the floor. All 515 square feet — horizontal and vertical — are finished and protected.
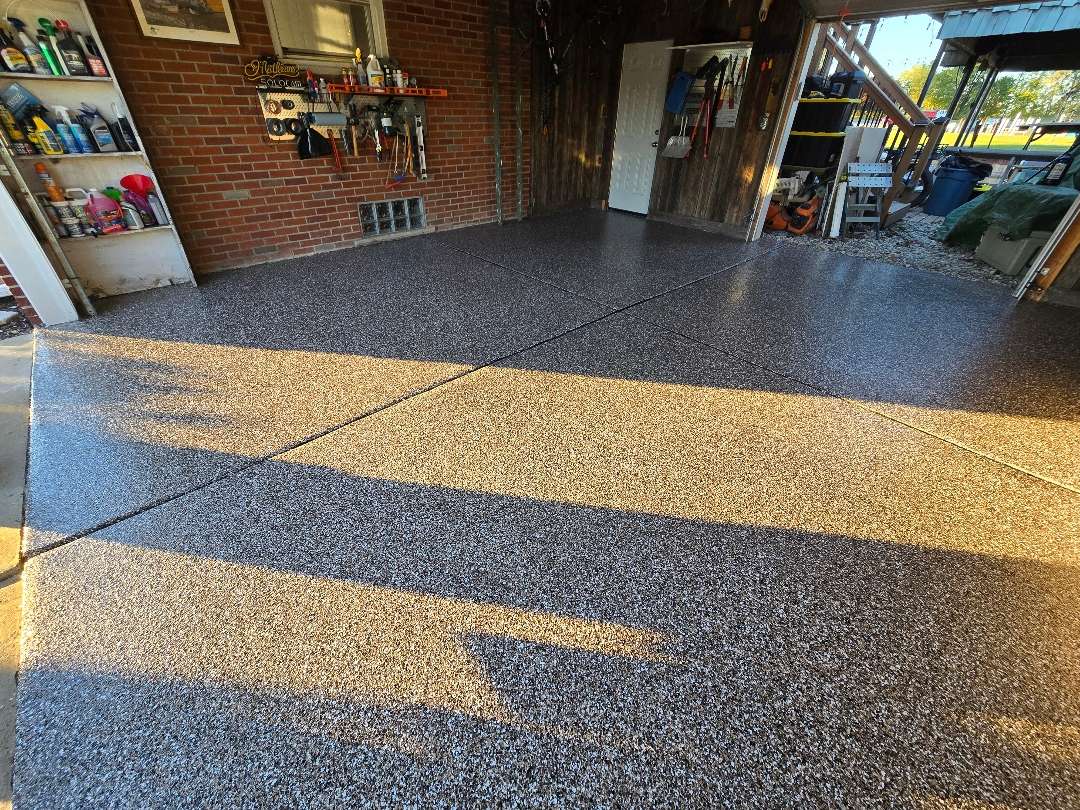
NEW Garage Floor Coating
on Hoffman Street
Hoffman Street, St. Clair Shores, MI
The Starting Point
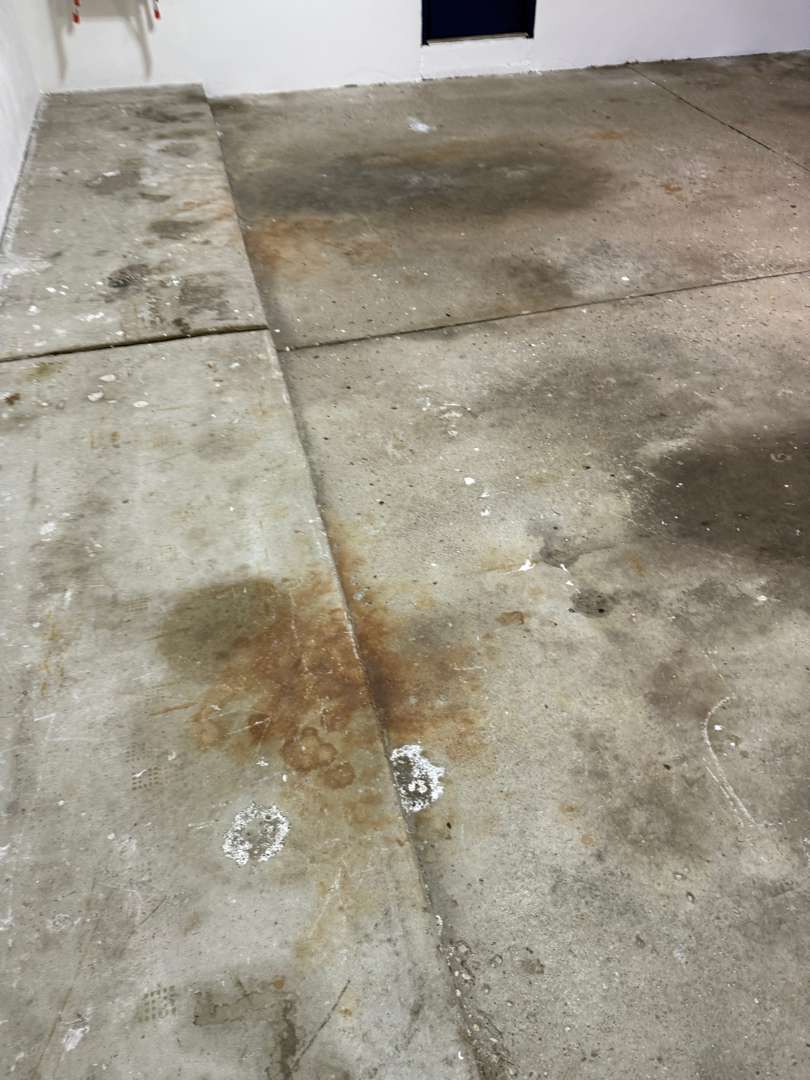
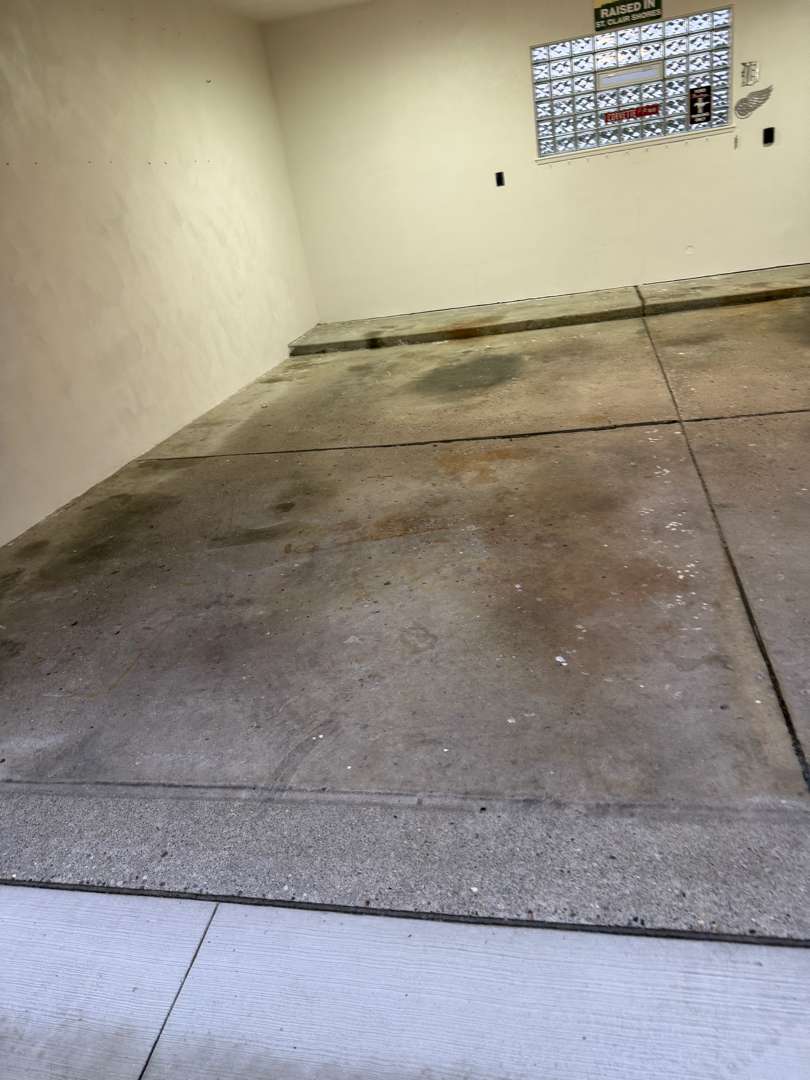
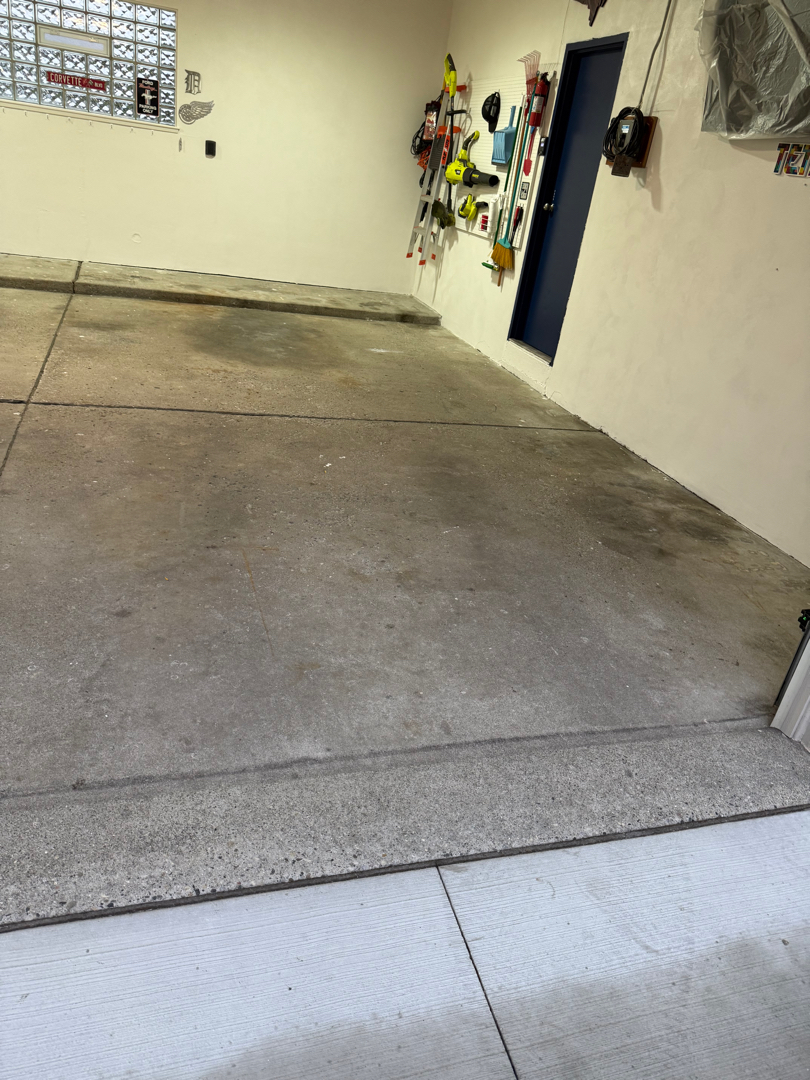
The slab at this Hoffman Street garage measured 515 square feet. The garage itself was in good shape — freshly painted white walls, a glass block window, Detroit sports memorabilia, tools organized on the wall. The concrete had not kept pace with the rest of the space.
Pitting was distributed across the full surface. No single zone was spared — the material loss showed in every panel. Oil staining covered two areas in the mid-section of the slab. Rust-colored deposits had formed along the control joint lines. White paint drips from a prior wall project had dried onto the concrete along the wall edge. Chalk markings were present across the mid-panels. No cracks were present anywhere in the slab.
The scope included 22 linear feet of vertical surfaces — the face of the raised platform at the rear of the garage. No steps were in scope. Our crew took a lithium vapor meter reading on arrival. The reading was within range for the MC-3.1 system. No moisture vapor barrier was required.
Surface Preparation
Our team diamond-ground the full 515-square-foot slab to remove the laitance layer and open the surface for coating. The grind lifted the paint drips, cleared the chalk markings, and exposed the full extent of the pitting across all four panels. Our crew evaluated the oil zones after the grind — the contamination was at the surface and came up cleanly with the laitance.
Our team filled each pit with cementitious patching compound. Our crew then applied a flood coat across the prepared slab. The flood coat leveled the pitted areas and brought the surface to a consistent profile. Our team worked the vertical face of the rear platform into the same sequence — the 22 linear feet of vertical surface received patching and flood coat treatment alongside the main floor. Our crew vacuumed the entire surface when the patch material cured. The slab was flat, clean, and consistent from wall to wall.
Coating Application
The Result
The Sandstone blend works in this space. Against white walls, the warm tone reads clearly without competing with the interior. The raised platform at the rear finishes as part of the floor — the transition is coated and continuous. Control joints are defined and clean through the finished surface on every panel.
The pitting is gone. The oil stains are gone. The rust deposits at the joints are gone. The paint drips and chalk markings that covered the surface before the grind are gone. All 515 square feet of horizontal surface and 22 linear feet of vertical face are sealed, protected, and finished.
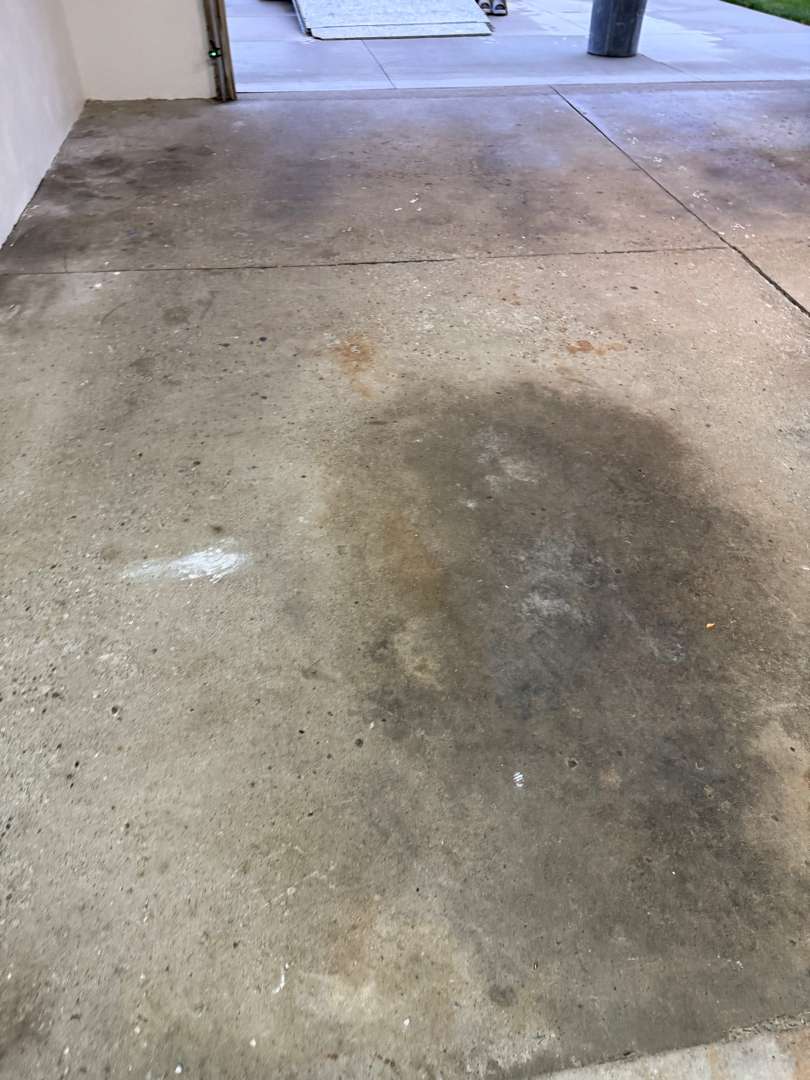
NEW Garage Floor Coating
on Harper Avenue
Harper Avenue, St. Clair Shores, MI
The Starting Point

The concrete at this Harper Avenue garage had taken significant surface damage. Pitting was heavy and distributed across the full slab — denser and more widespread than typical vehicle-traffic wear. Oil stains covered multiple zones. A footprint impression had dried into the surface near the wall, left by spilled material that cured into the concrete. The block walls — painted a pale sage green — were in good condition. No cracks were present. No steps were in scope.
Our crew evaluated the surface on arrival. The pitting depth and oil saturation required full mechanical preparation before any coating could go down.
Surface Preparation
Our crew diamond-ground the full slab to remove the laitance layer and open the pore structure of the concrete. The grind cut through the footprint impression and removed the surface contamination across the oil zones. Our team filled each pit with cementitious patching compound after the grind pass. Our crew vacuumed the floor when the patch material cured. The surface was flat, open, and consistent — ready for coating.
Coating Application
Finished Floor

Driftwood is a strong choice for a block-wall garage. The light flake tone reflects the overhead lighting well. The finished floor reads bright and clean against the pale green block — the two surfaces work together to open the space visually.
The heavy pitting that covered the full slab is sealed. The oil stains are gone. The footprint impression that had become part of the concrete surface is gone. The floor is protected and finished wall to wall.
The MotorCity Advantage
MotorCity Floors and Coatings specializes in professional-grade polyurea-polyaspartic systems. These dual-coating systems are replacing epoxy products constrained by older chemistry. Our systems deliver strong chemical resistance, superior durability, greater flexibility, shorter cure times, and proven UV stability that maintains color for decades. We back every installation with an industry-leading warranty.
Each project includes thorough diamond grinding preparation, flexible polyurea crack repair, and careful application to ensure consistent coverage across the full slab. Even on newer concrete in good condition — as our crew found at the Centennial Street property in St. Clair Shores — full diamond grinding is required to remove the laitance layer and open the pore structure of the concrete before any base coat goes down. There are no shortcuts in preparation. The quality of the finished system depends entirely on the quality of the surface beneath it.