
Polyurea Garage Floor Coating in Auburn Hills, MI
QUESTIONS? NEED A QUOTE?
Transforming Auburn Hills Homes with Premium Garage Floor Coating
In this page, we describe in details seven completed projects in garage floor coating in Auburn Hills, MI. Our dual-coating systems have transformed traditional concrete garage floors into beautiful and functional family spaces. Auburn Hills, MI is a Oakland County community with a diverse housing stock—from newer condos and townhomes to well-maintained single-family homes.
Importantly, many of the homes where we install our polyurea-polyaspartic systems have weathered multiple Michigan seasons. As you will see in these 7 case studies, our garage floor coating specialists have to take care of concrete slabs in a wide range of conditions: some slabs were nearly new and only needed standard preparation. Others required extensive intervention—oil extraction, epoxy removal, moisture remediation, and major crack and spalling repair—before the polyurea and polyaspartic coats could be applied. We have described the process and the results, and show before/after photos.
Why Does Quality Garage Floor Coating Matter?
Our local climate is very stressful for garage floors: winter road salt, freeze-thaw cycles, automotive fluids, and in-and-out vehicle motion degrade unprotected concrete slabs. Typically, this shows in oil-stained, cracked, and pitted surfaces.
Several of our garage floor coating jobs in Auburn Hills involved slabs with heavily spalled control joints—damage caused by water entering the joint, freezing, and fracturing the concrete edges over repeated winter cycles. Polyurea-polyaspartic coating systems provide comprehensive protection and offer an aesthetic appeal that bare concrete or even epoxy products can’t offer.
The MotorCity Advantage
MotorCity Floors and Coatings specializes in professional-grade polyurea-polyaspartic systems. Dual-coating systems are gradually replacing epoxy products limited by older chemical technology. In fact, one of our Auburn Hills projects on Hillsdale Drive involved stripping an epoxy coating that had worn through and delaminated. We needed to strip the epoxy before we could install the polyurea-polyaspartic system.
Our systems deliver strong chemical resistance, superior durability, greater flexibility, shorter cure times, and proven UV stability that maintains color for decades. We back up all our work with an industry-leading warranty.
Every installation includes comprehensive diamond grinding preparation, flexible polyurea crack repair, and meticulous application ensuring uniform coverage. When a slab has deep oil contamination—as we found in a customer’s home on Beverly Ave—we perform oil extraction before grinding to ensure no petroleum can migrate through the concrete and compromise the coating bond.
Auburn Hills Case Studies
These 7 case studies document some of MotorCity’s jobs in garage floor coating in Auburn Hills neighborhoods. We documented the state of the substrate, the challenges we faced, and the steps we took to prepare and restore the concrete on which we applied our dual-layer coating. These projects illustrate the versatility of polyurea-polyaspartic coating, as well as the consistent commitment to quality of MotorCity Floors and Coatings.
Polyurea Garage Floor Coating
on Ashburnham Street
Ashburnham St., Auburn Hills
When the homeowner on Ashburnham St. contacted MotorCity Flooring and Coatings, they had a compact 262-square-foot garage floor that had seen better days. Years of Michigan winters had taken their toll on the concrete, leaving behind extensive pitting across the surface, scattered oil stains, and a small area of old paint in one corner.
The 58 linear feet of vertical block walls framing the garage added an extra dimension to the project. The rough condition of the floor was not unusual for our team: we have developed a technical process to take care of all situations.
Surface Preparation
Our crew began with aggressive diamond grinding using 36-grit tooling across the entire garage floor. It was necessary to use a coarser grit given the condition of the concrete as it needed to cut through years of surface contamination, remove the light paint residue in the corner, and open up the pores of the concrete to create the deep mechanical profile required for maximum coating adhesion.
As the grinders move methodically across the slab, they reveal the raw concrete beneath decades of grime. The machines produce the consistent scratch pattern that ensures a permanent bond between concrete and coating.
Our team also prepped the 58 linear feet of vertical block wall along the garage perimeter, grinding and cleaning the lower portion to accept the protective cove base that would seal the wall-to-floor transition.
Moisture Testing and Remediation
Before we could apply the first coat, our crew tested the moisture content of the slab and recorded a reading of MC 3.8. To ensure long-term coating performance and prevent potential delamination from moisture vapor transmission, we needed to flood the prepared surface with MR50 moisture remediation primer.
This is a critical step to penetrate into the pore structure of the concrete, and create a moisture barrier that protects the coating system from below. We worked the MR50 across the entire floor. The product pools in the low spots and saturates all heavily pitted areas where moisture can become trapped.
Pitting Repairs
With the surface ground and moisture-treated, our crew turned their attention to the most labor-intensive phase: repairing the heavy pitting. Years of freeze-thaw cycles and road salt exposure had left the concrete riddled with pockmarks and surface voids ranging from shallow dimples to deeper craters.
The team mixed generous batches of two-part mender with sand, carefully troweling the repair compound into every pit, void, and surface irregularity. This wasn’t a quick pass—the extensive pitting demanded patience and precision, with our crew working section by section to build a smooth, level substrate. Once the mender cured, the repaired surface presented a uniform canvas ready to accept the coating system.
Base Coat and Decorative Flakes
With repairs complete and the surface fully prepped, our crew applied the polyurea-polyaspartic base coat. The two-part system was precisely measured and mixed, then rolled across the floor in overlapping passes from back to front. The base coat transformed the patched and ground concrete into a uniform, smooth foundation.
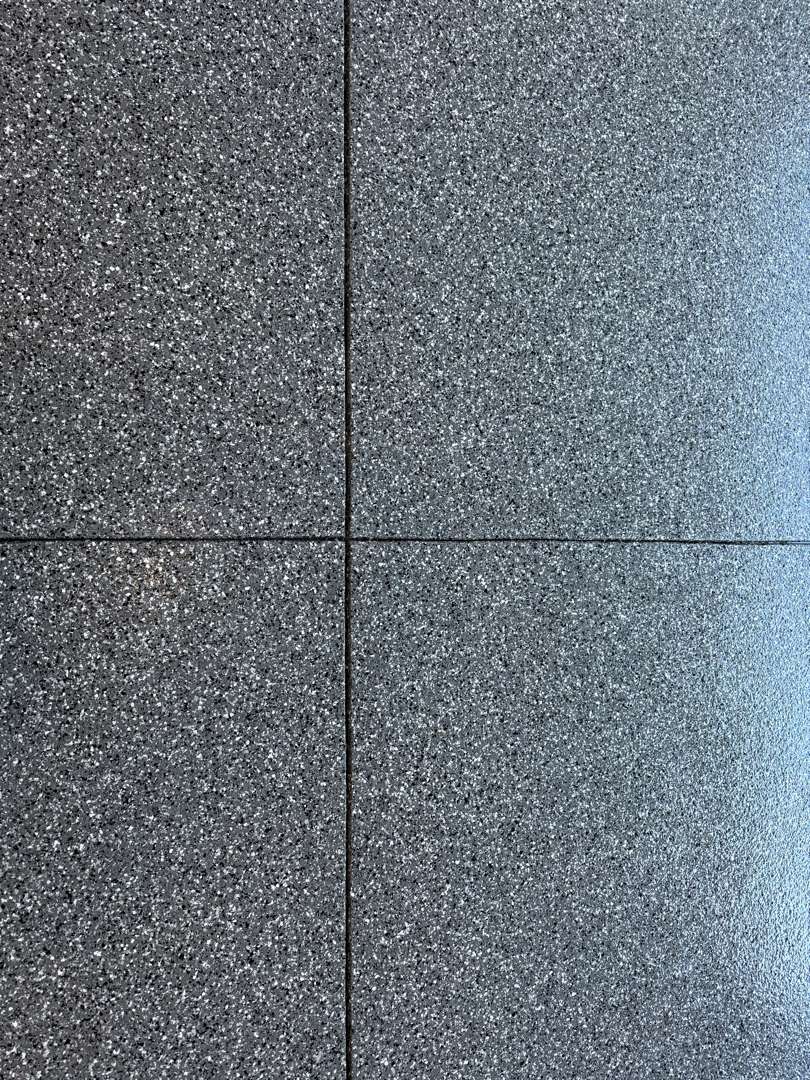
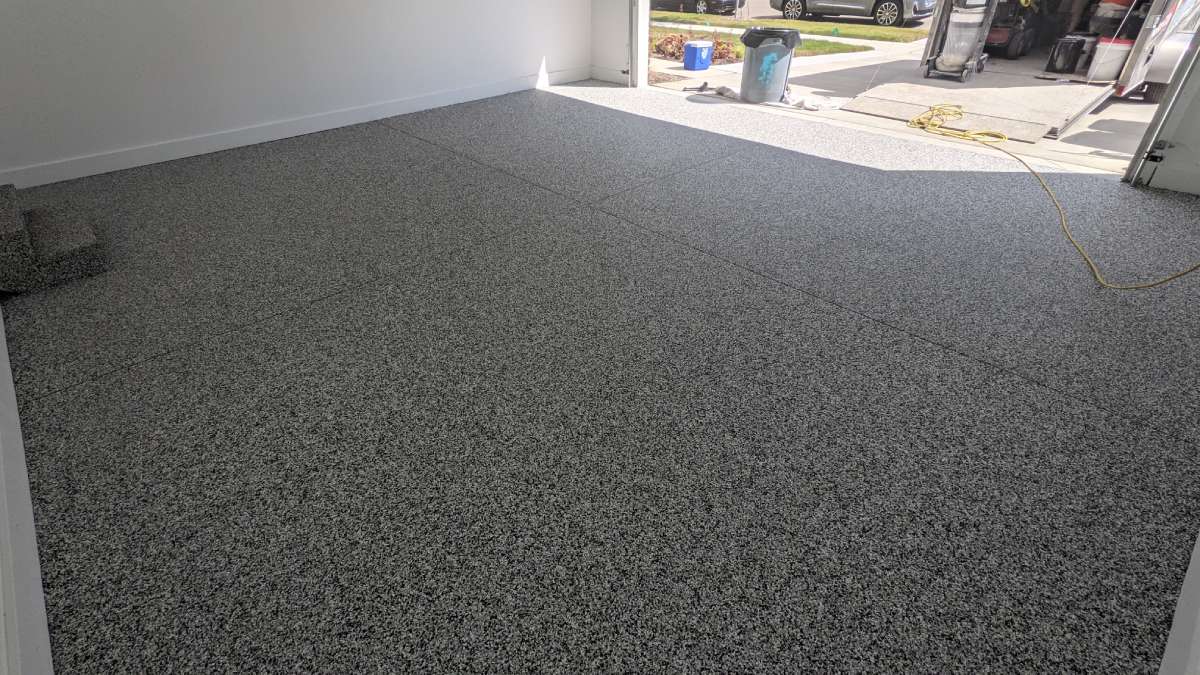
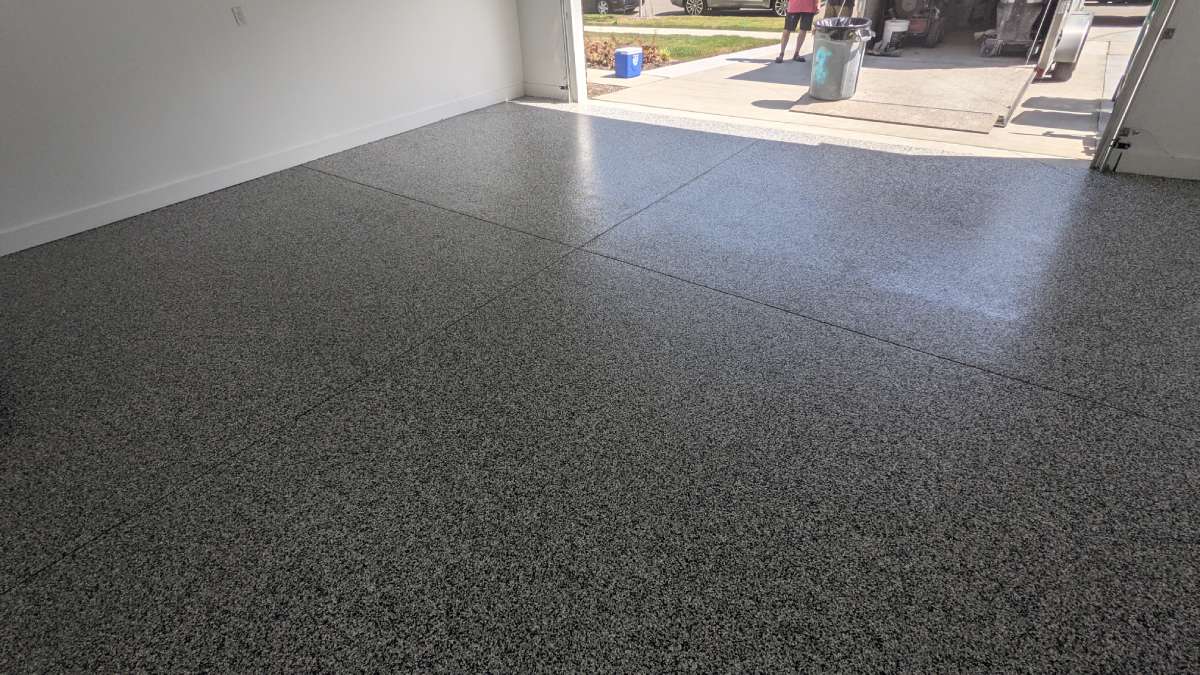
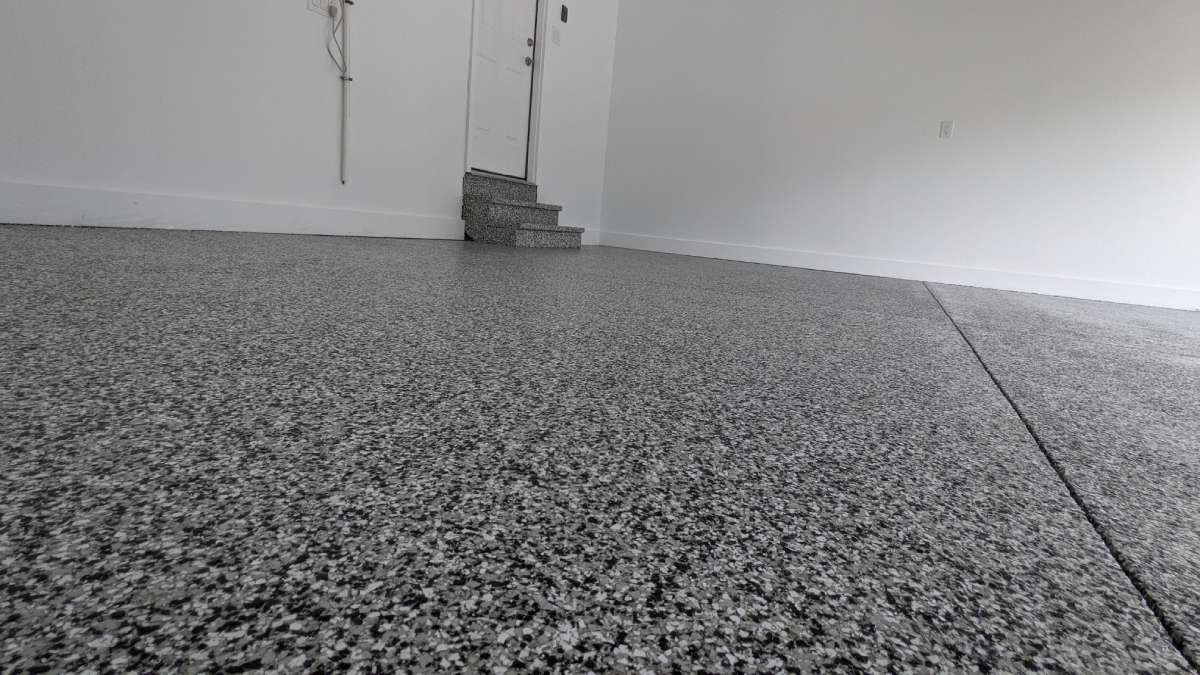
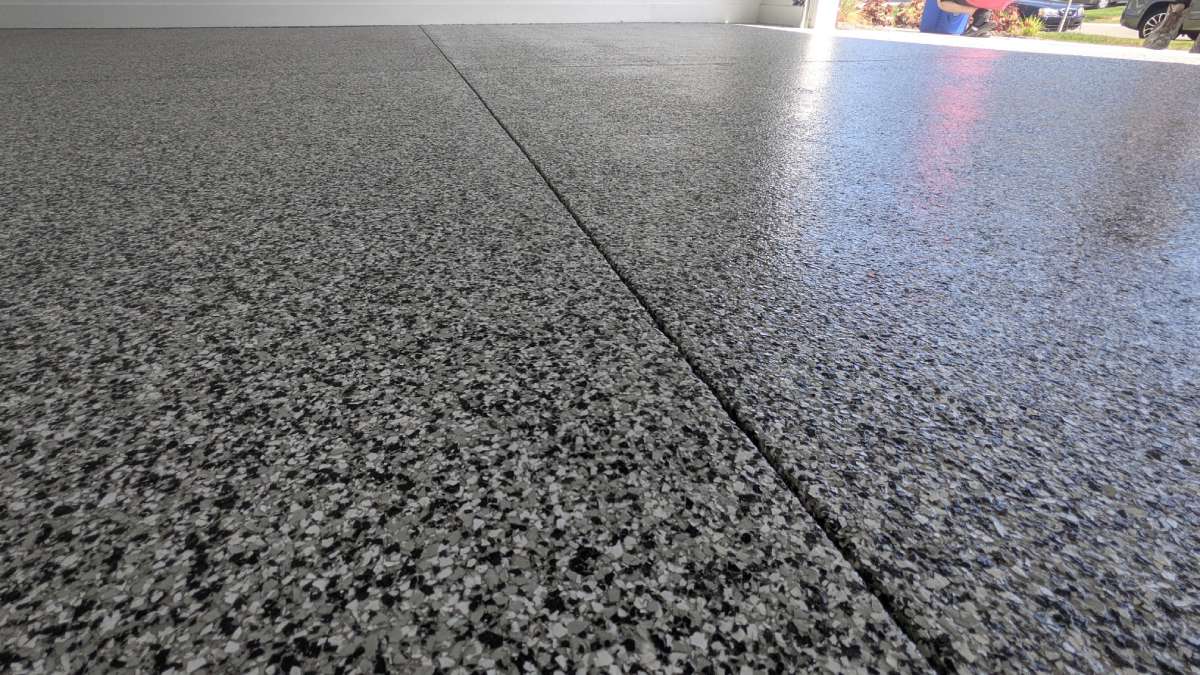
While the base coat remained wet, the team immediately broadcast the Stoney Creek decorative flake blend across the entire surface. The Stoney Creek palette—a sophisticated mix of cool greys, silver, black, and white tones—created a refined, granite-like appearance with excellent coverage and visual depth. The flakes settled into the wet base coat, locking into place and building the multi-dimensional texture that defines a professional floor coating installation.
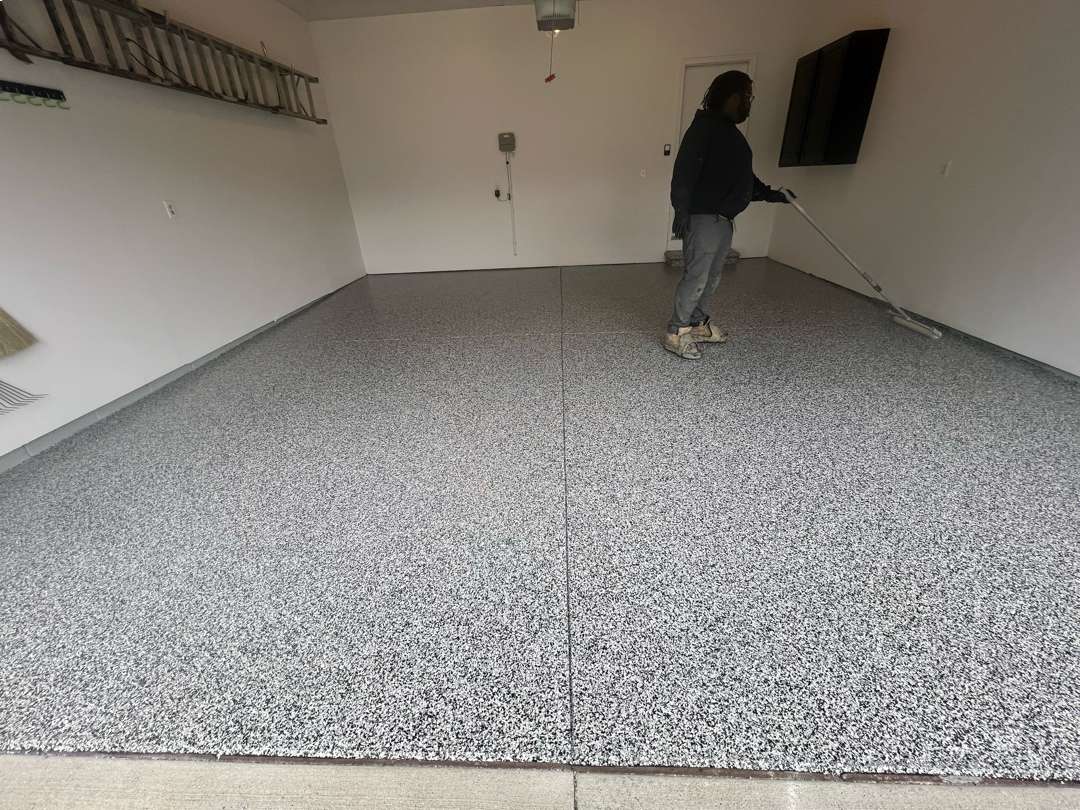
Polyaspartic Clear Coat Protection
The final phase involved applying the protective polyaspartic clear coat system with slip-resistant additive. The crew laid down generous, even passes of clear coat, encapsulating every decorative flake and sealing the entire surface beneath a tough, transparent shield. As the clear coat went on, the transformation was immediate—the matte flake surface turned glossy and vibrant, with the Stoney Creek color palette coming alive beneath the protective layer. The cool grey and silver tones deepened, the black accents sharpened, and the overall finish took on the brilliant, wet-look sheen of a professionally coated floor. The team also applied the coating system to the 58 linear feet of vertical block wall, creating a seamless cove base that ties the floor to the walls and eliminates the gap where dirt, moisture, and debris typically collect.
The Result
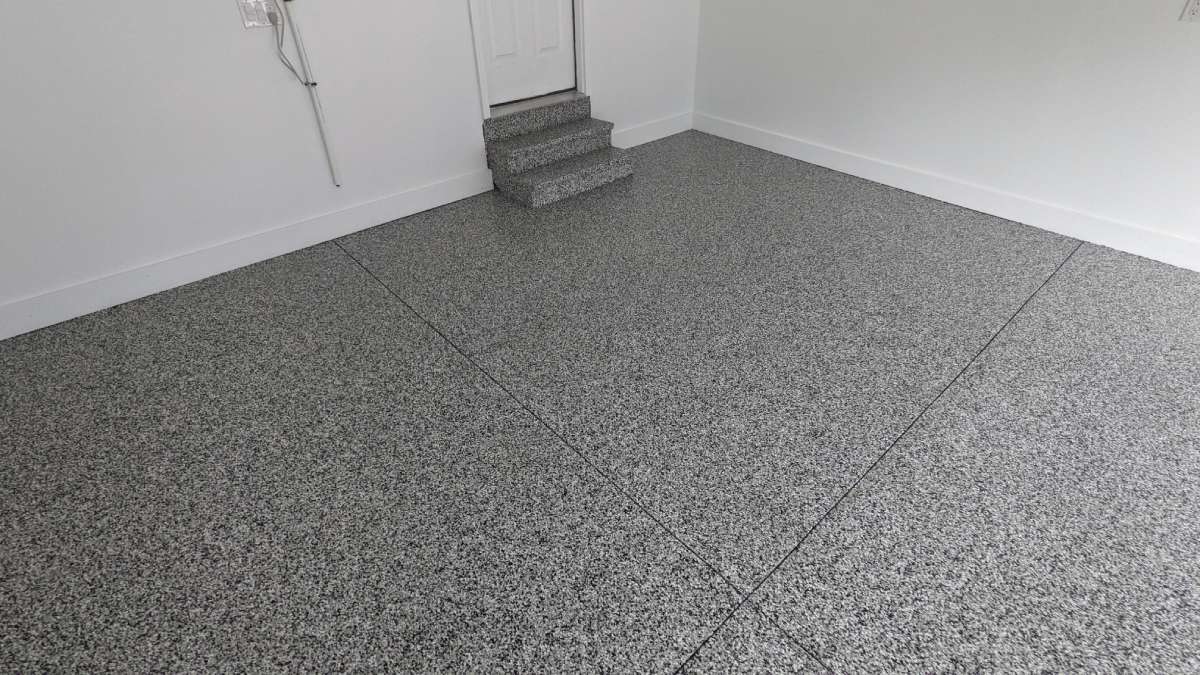
The finished floor is a dramatic before-and-after story. What was once a heavily pitted, stained, and deteriorating 262-square-foot concrete slab is now a stunning, high-gloss surface with the Stoney Creek flake finish lending a clean, modern aesthetic to the entire garage. The glossy clear coat reflects light across the floor, making the compact space feel larger and brighter.
The sealed cove base along all 58 linear feet of block wall delivers a finished, professional edge that also serves a practical purpose—preventing moisture intrusion at the wall-to-floor joint. Most importantly, this floor is now fully armored against the punishing climate of Michigan. Road salt, motor oil, hot tire pickup, chemical spills, and freeze-thaw cycles won’t penetrate this professionally installed polyurea/polyaspartic coating system. The homeowner can maintain the like-new appearance of their garage floor with nothing more than simple sweeping and occasional mopping for years to come.
Click on the photos to enlarge them
Polyaspartic Garage Floor Coating
on Ashton Drive
Ashton Dr, Auburn Hills, MI
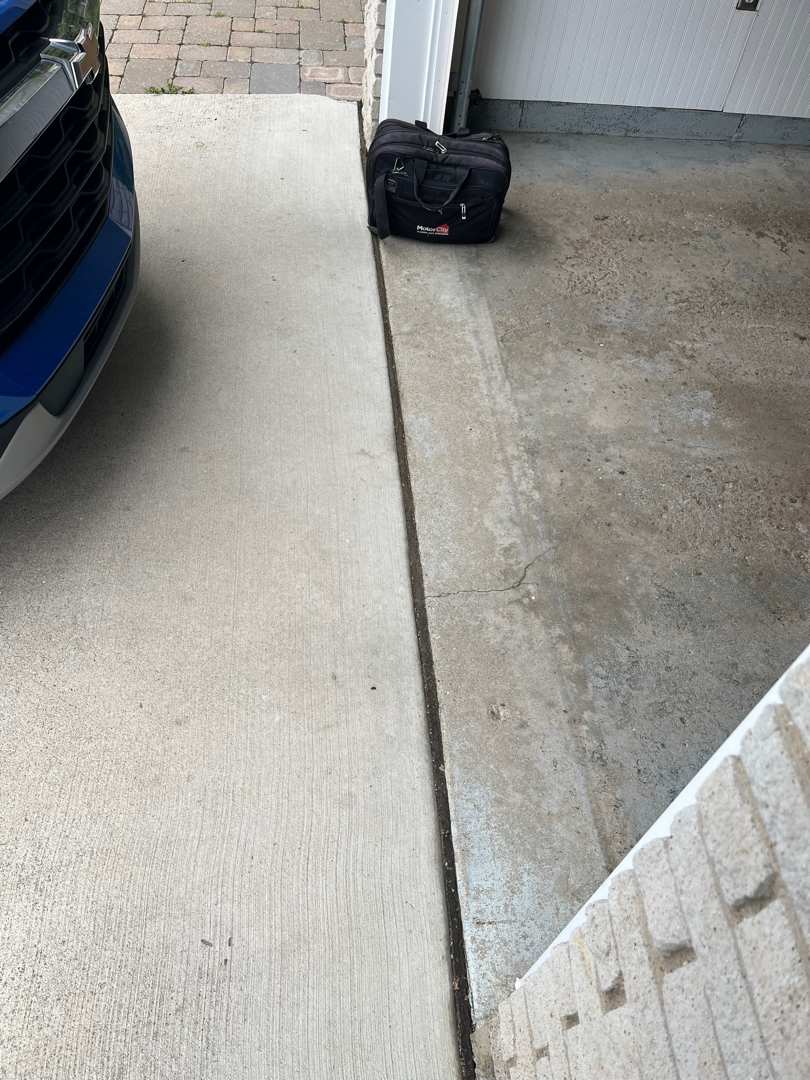
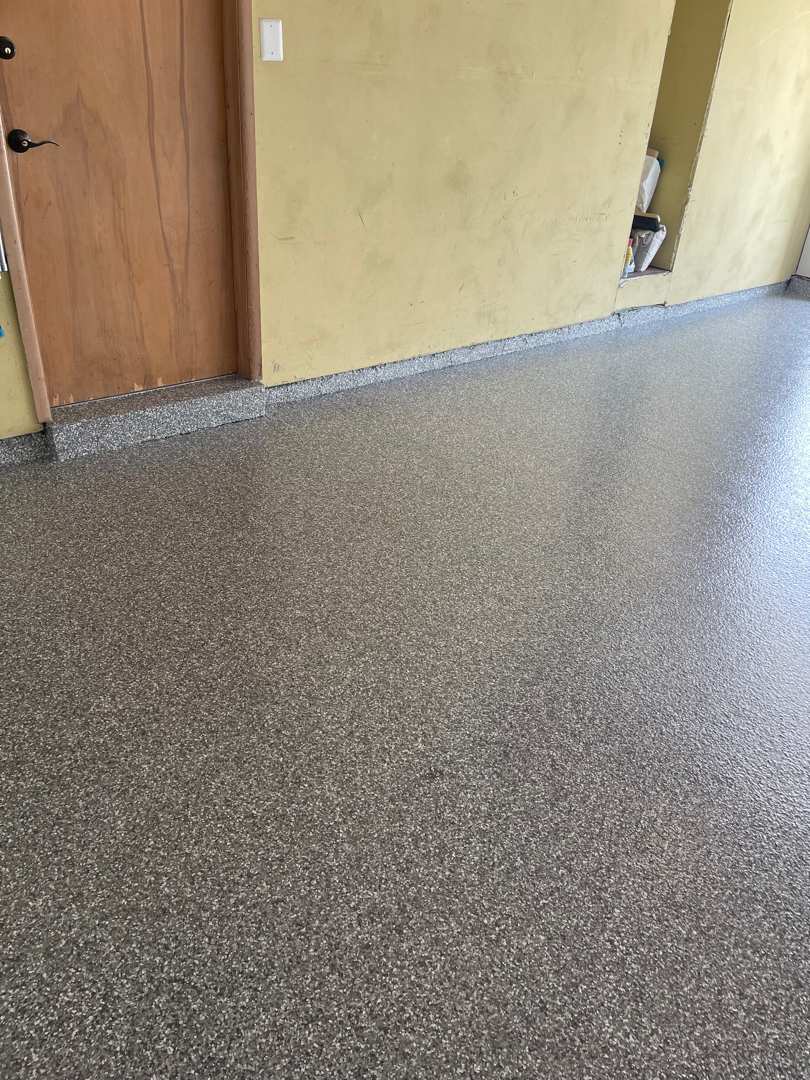
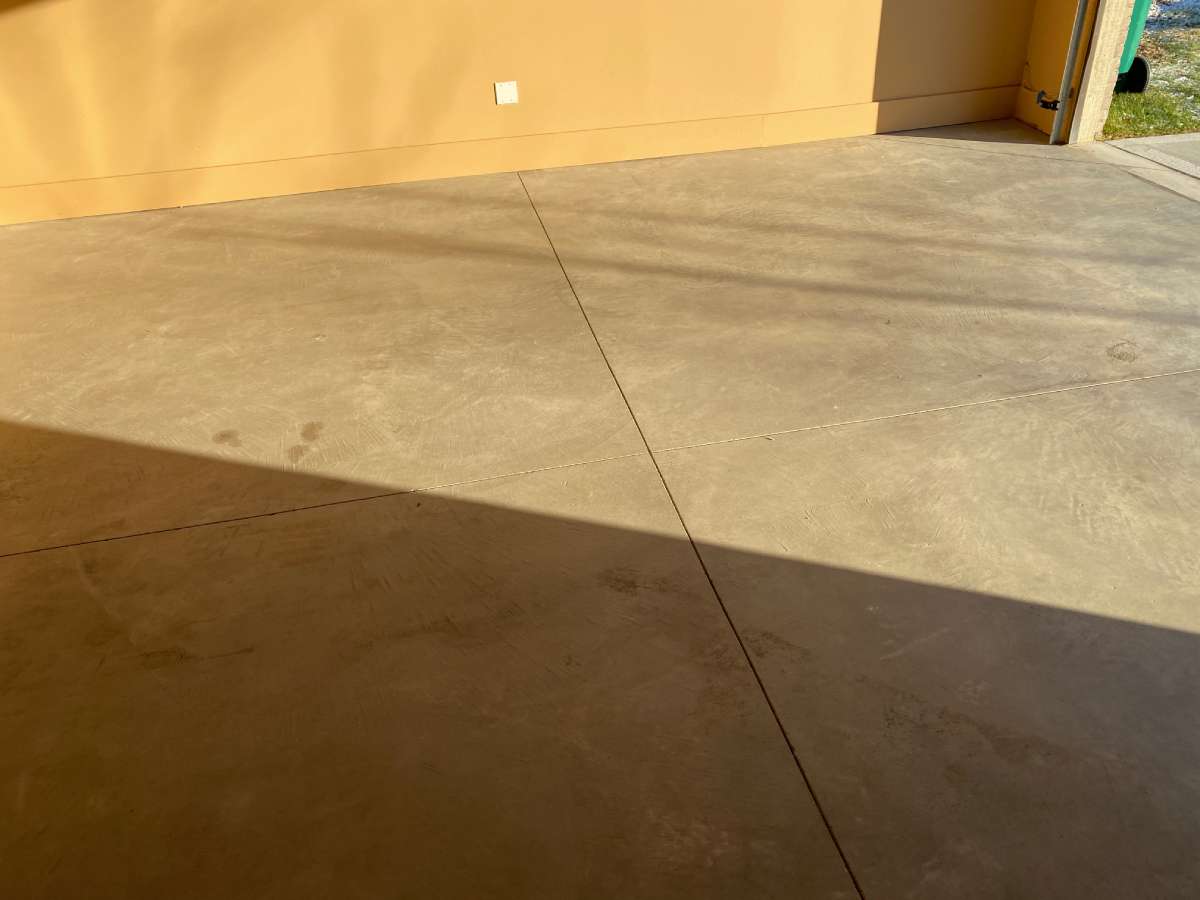
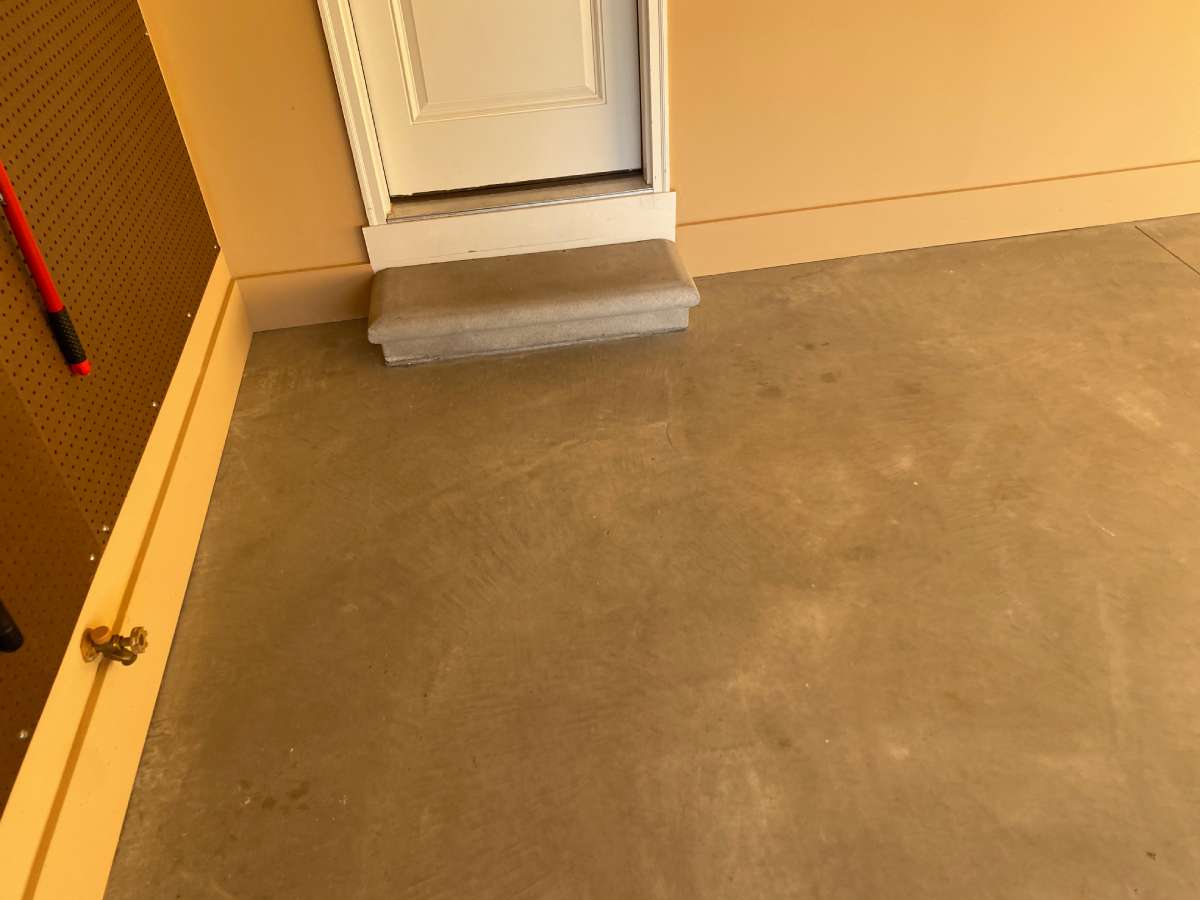
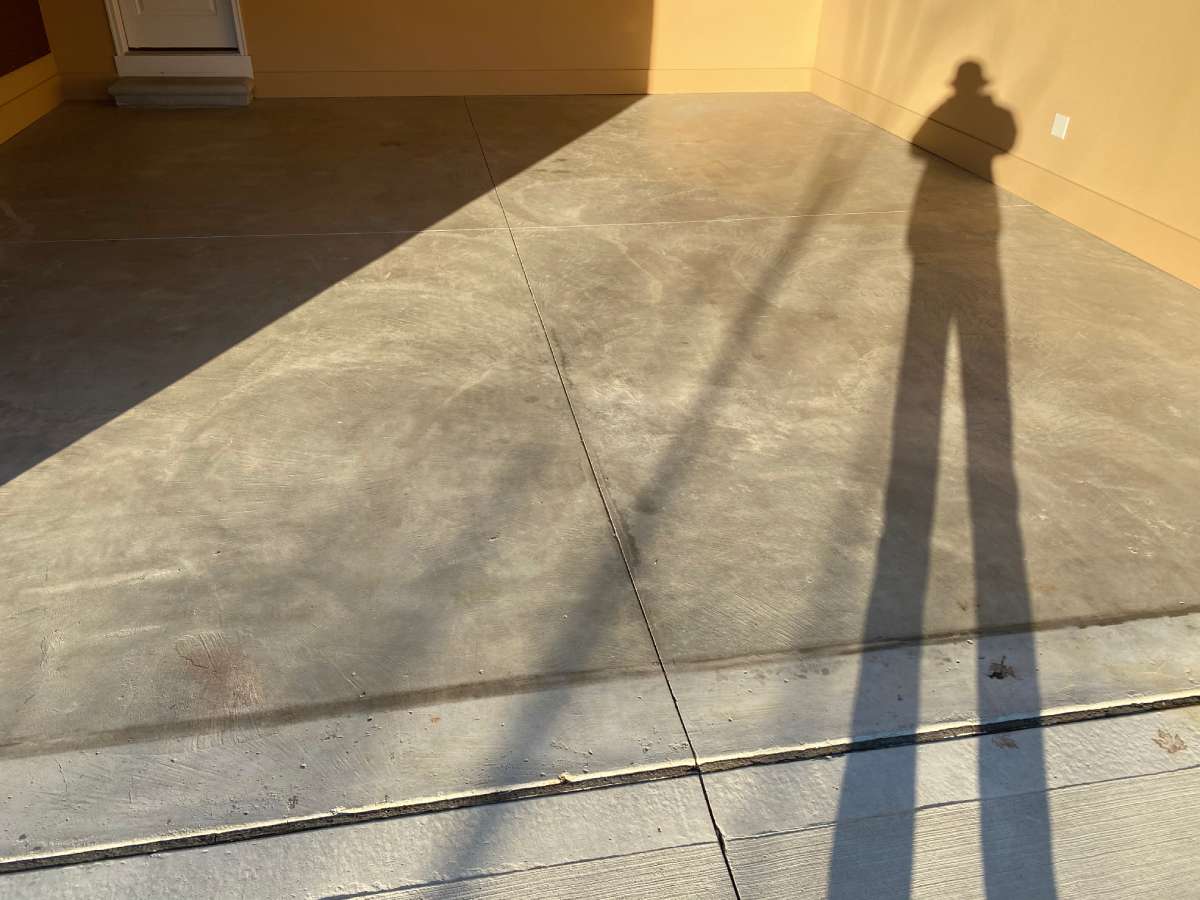
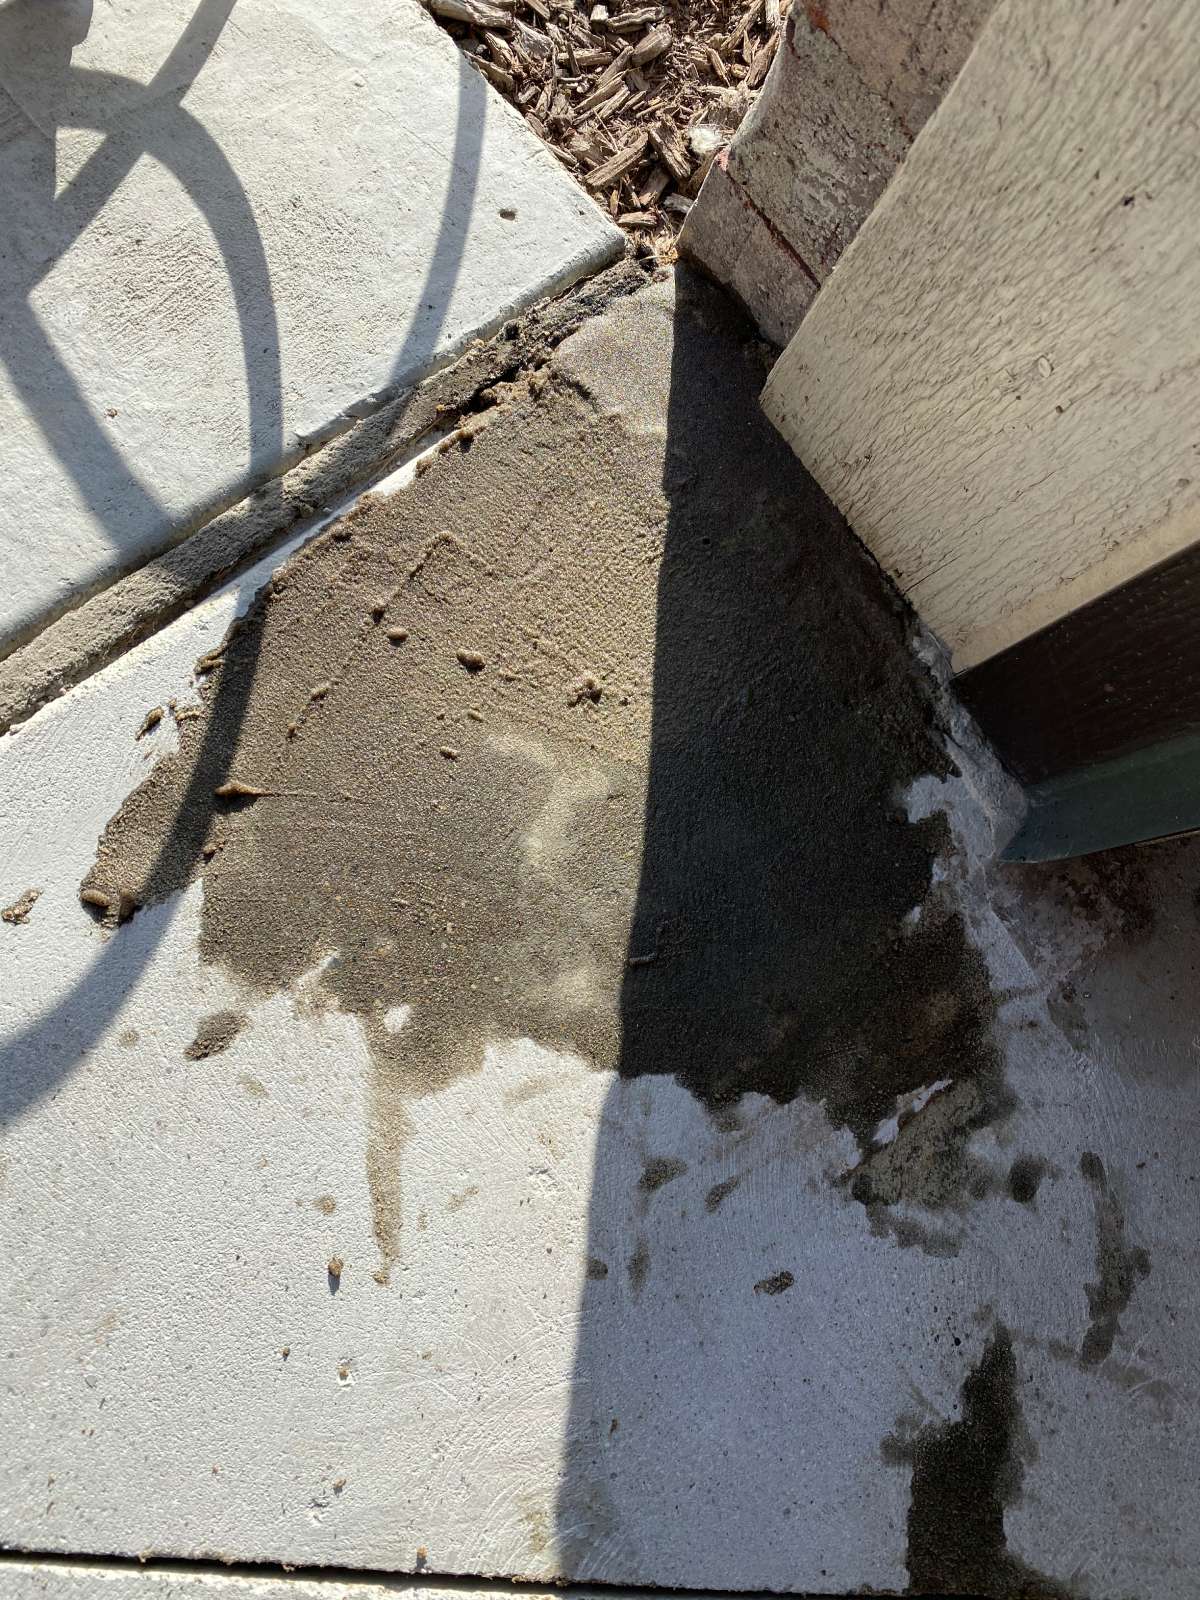
The homeowners on Ashton Dr. contacted MotorCity Flooring and Coatings to estimate a garage floor coating job. Their spacious two-car garage had 435 square feet of relatively new concrete in excellent overall condition. The smooth, well-finished slab showed clean control joints and minimal wear—a testament to quality concrete work.
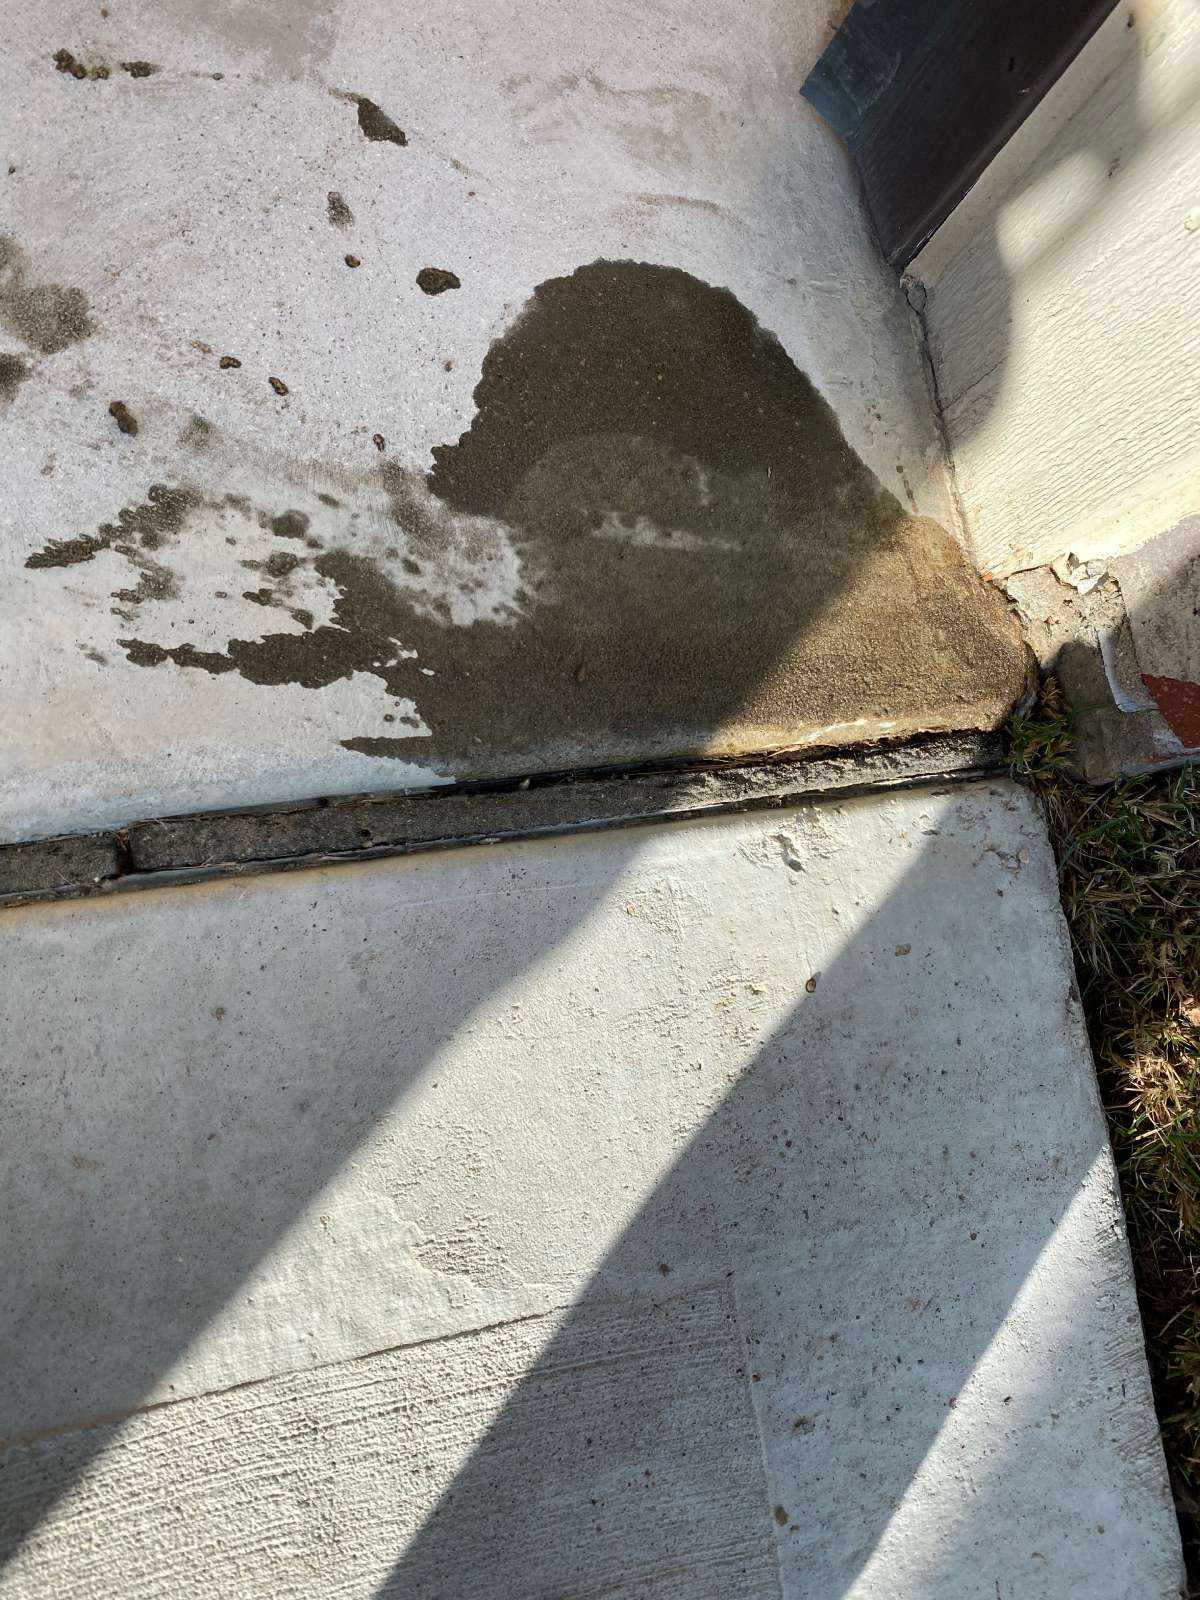
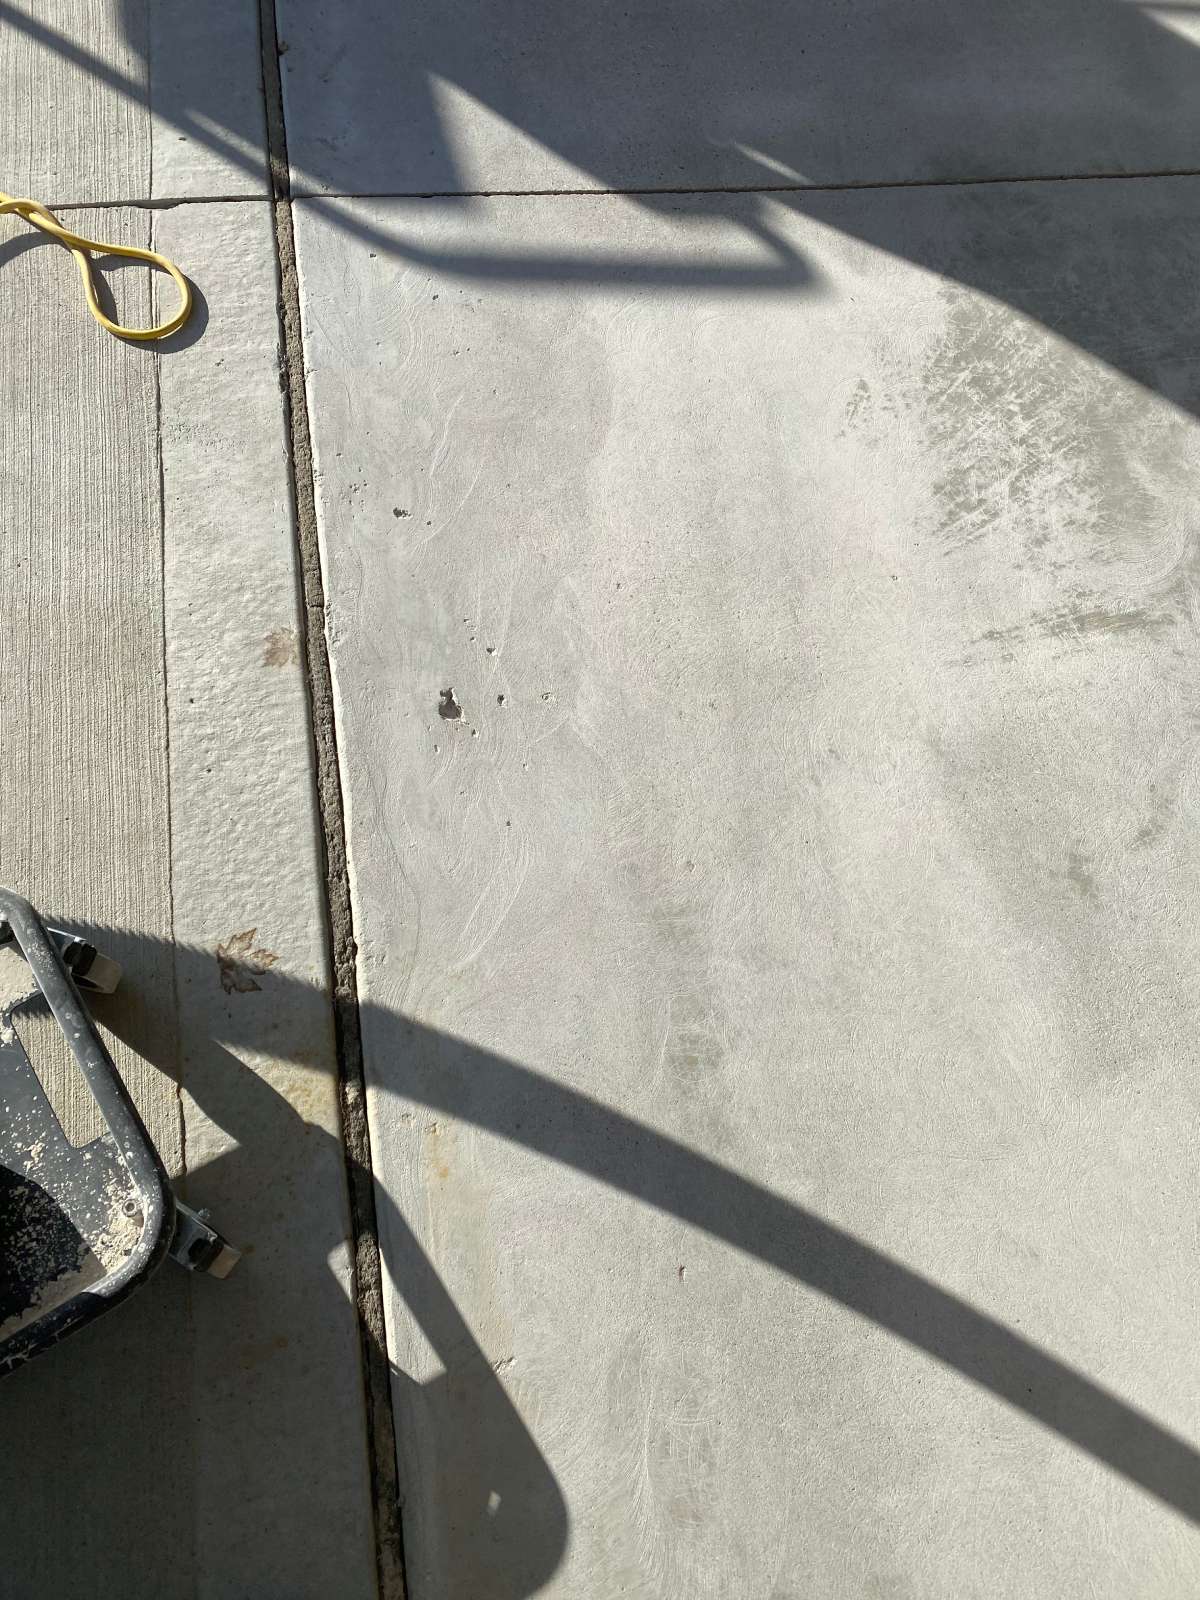
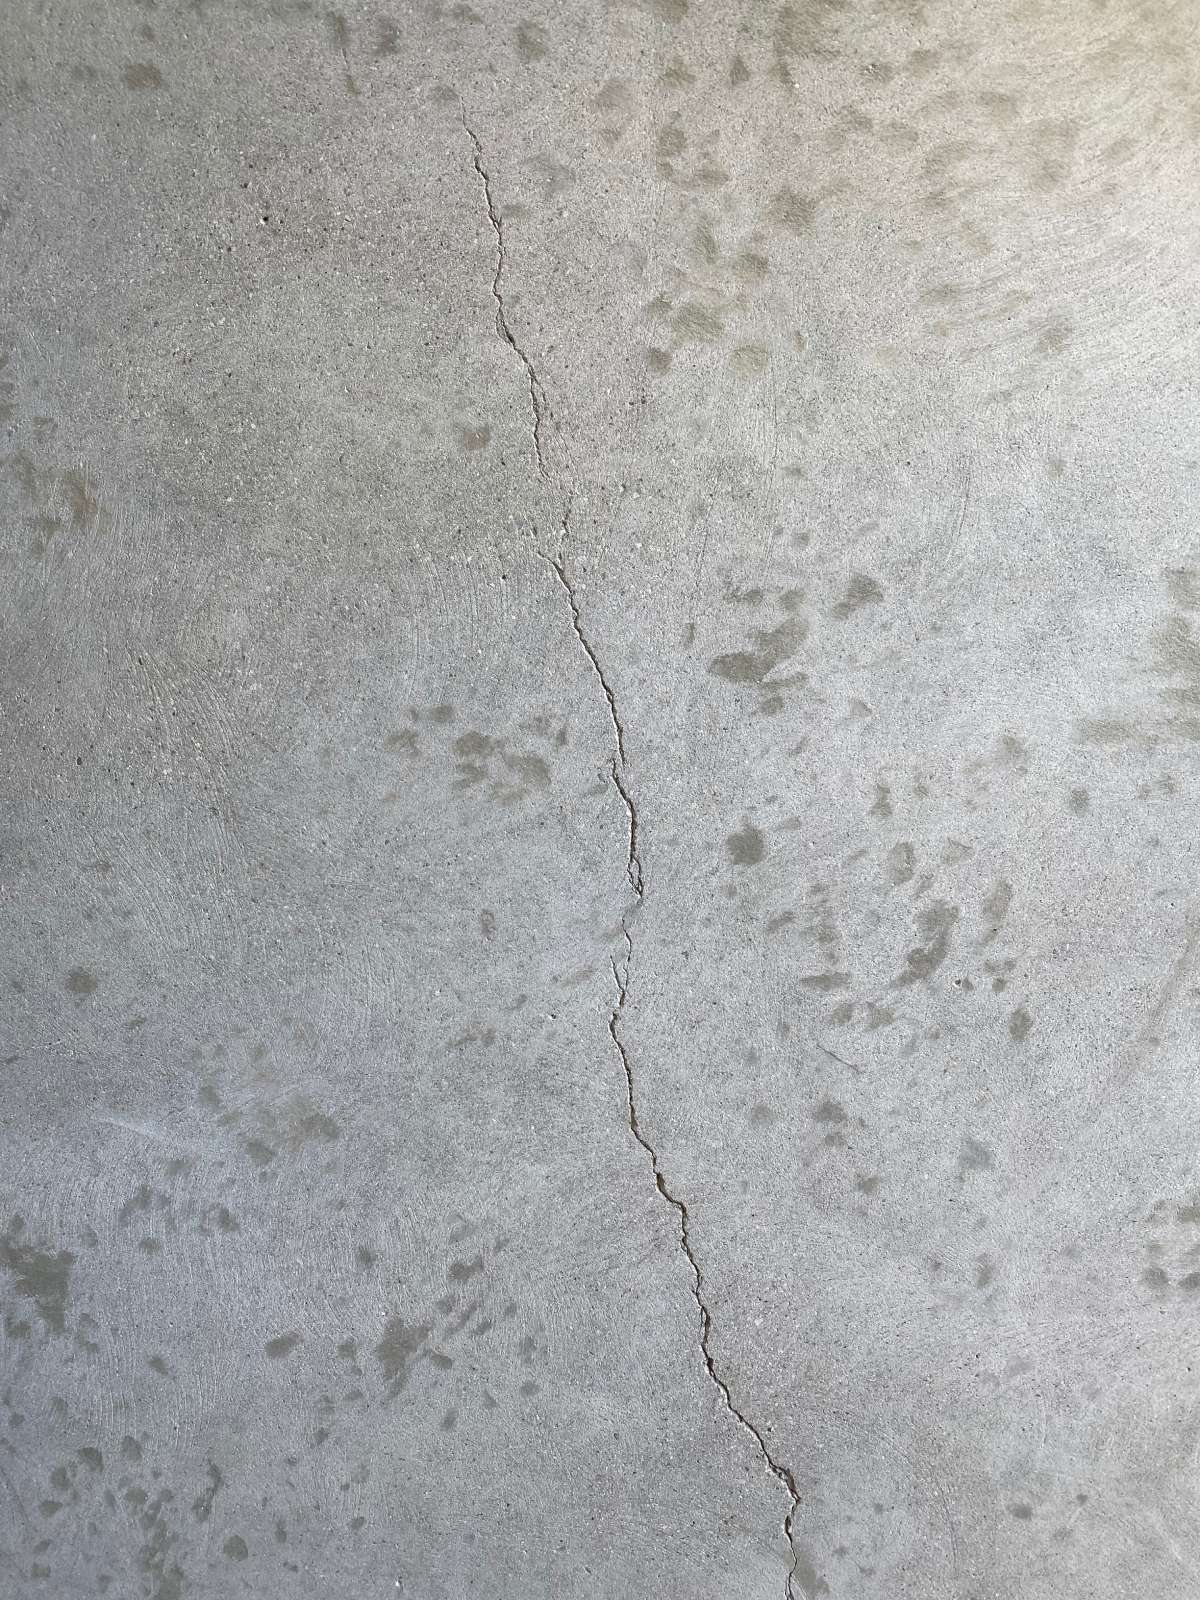
The only notable issue was a stained area on the garage apron near the threshold that required repair, along with a small hairline crack and minor pitting near the garage door entrance. With finished drywall walls painted in a warm gold tone and a neat concrete step at the interior entry door, this garage was already well-maintained.
The homeowner wanted a coating system that would match the quality of their space—and the Pebble Beach flake finish delivered exactly that.
Surface Preparation
The MotorCity crew began with thorough diamond grinding across the entire garage floor. Even though the concrete was newer and in good shape, grinding remained essential—it opened the pores of the slab and created the mechanical profile necessary for the polyurea/polyaspartic system to achieve a permanent bond.
Our crew moved the grinders covered methodically across each section, producing the consistent scratch pattern that ensures maximum coating adhesion. The crew paid careful attention to the areas around the control joints, the garage door threshold, and the concrete step at the interior entry door, ensuring every surface that would receive the coating was properly profiled.
Minimal Repairs
Given the excellent condition of the concrete, repairs were targeted and minimal. The primary concern was the garage apron near the threshold, where staining and minor surface damage required attention. The crew mixed a batch of two-part mender with sand and carefully troweled it into the affected area, restoring a smooth, level surface at the transition point.
They also addressed a small hairline crack that ran through the slab, routing and filling it with mender to prevent it from telegraphing through the finished coating. A few minor pits near the garage door entrance received the same treatment. The small repair quantities confirmed what the initial inspection had shown—this was a sound concrete slab that needed only spot corrections before coating.
Base Coat and Decorative Flakes
Once repairs cured, our crew applied the polyurea/polyaspartic base coat across the full 435 square feet. The two-part system was precisely measured and mixed, then rolled in overlapping passes from the back of the garage toward the door. The base coat covered the repaired areas seamlessly, transforming the ground concrete into a uniform foundation.
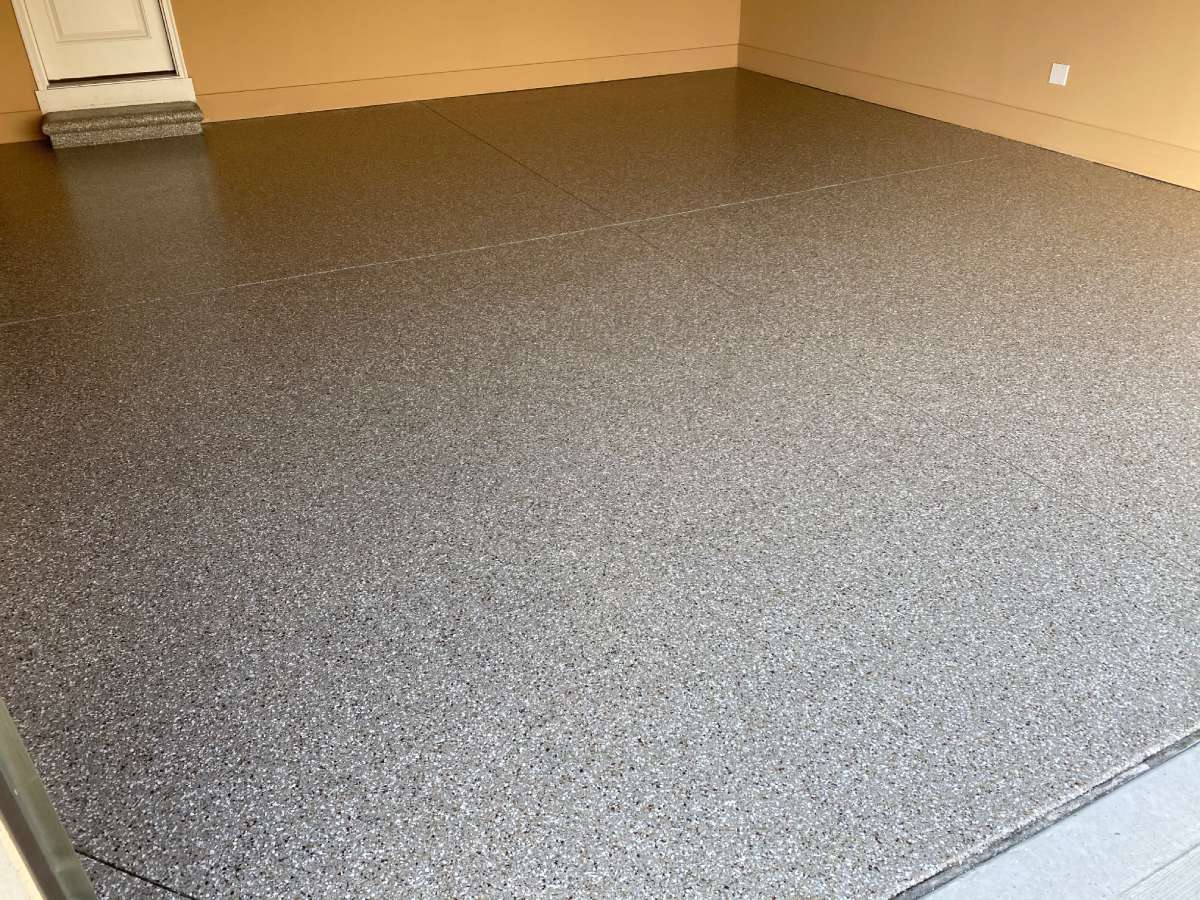
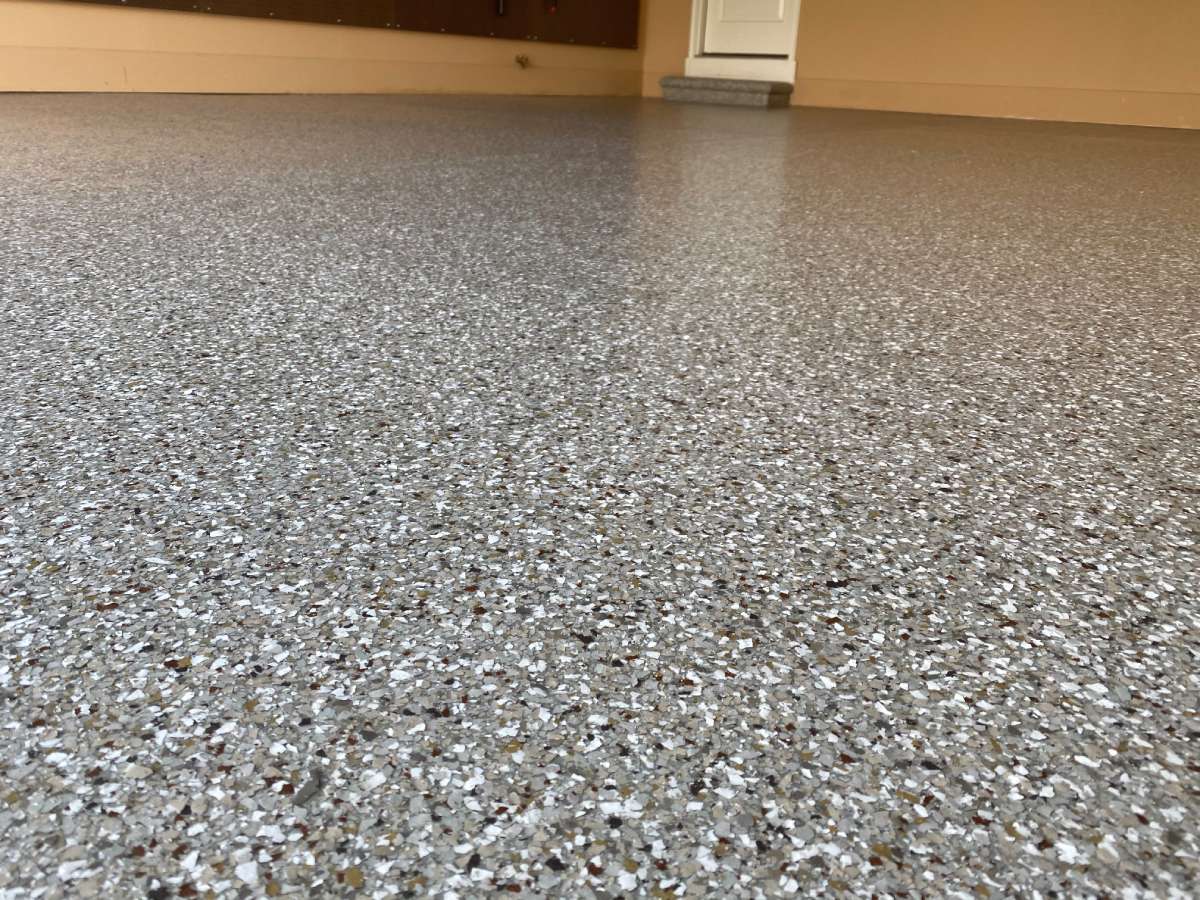
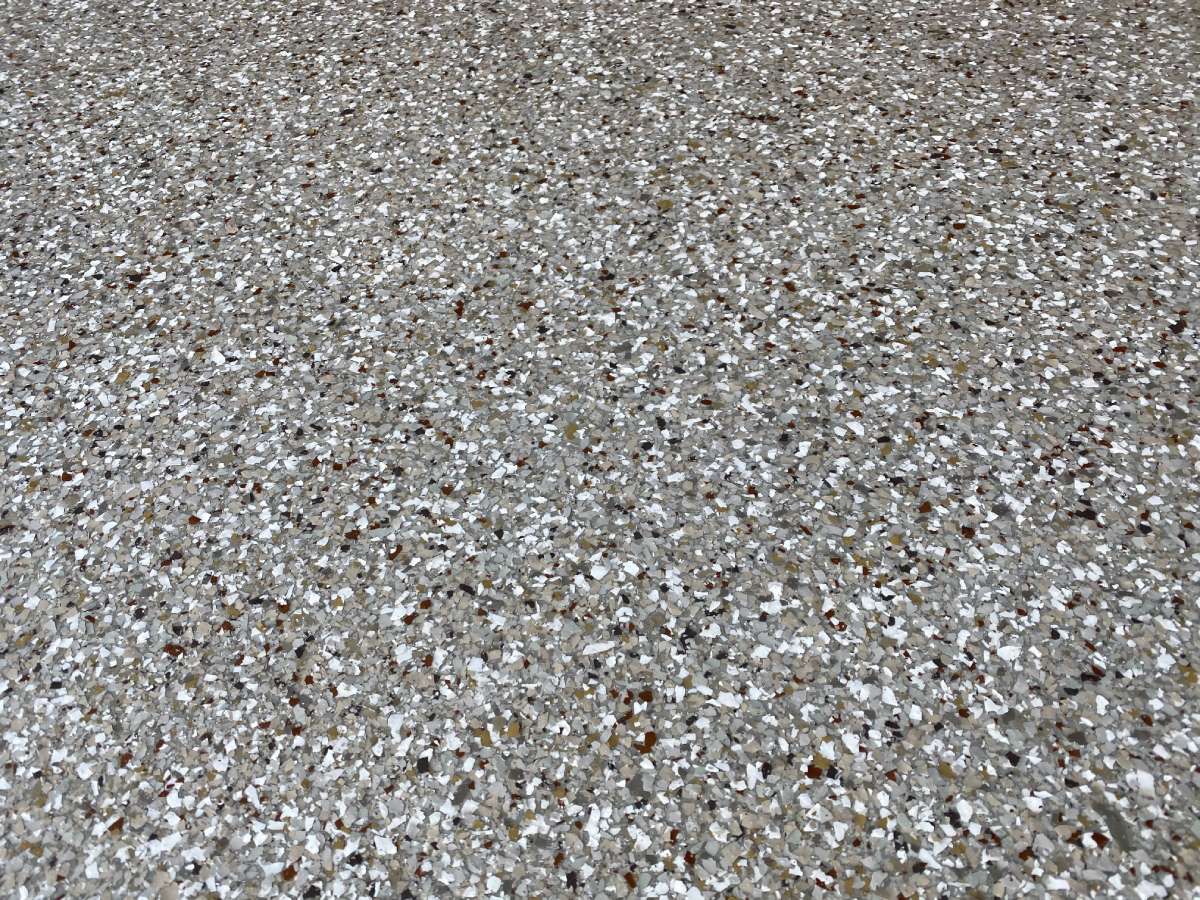
While the base coat remained wet, the team immediately broadcast the Pebble Beach decorative flake blend across the entire surface, including the concrete step at the interior door. The Pebble Beach palette features a mix of cool grey, white, and silver tones punctuated by warm brown and maroon accents—creating a natural, stone-like appearance with rich visual depth. The multi-tonal flakes settled into the wet base coat and locked into place, building the textured, multi-dimensional surface that defines a premium floor coating installation.
Clear Coat Protection
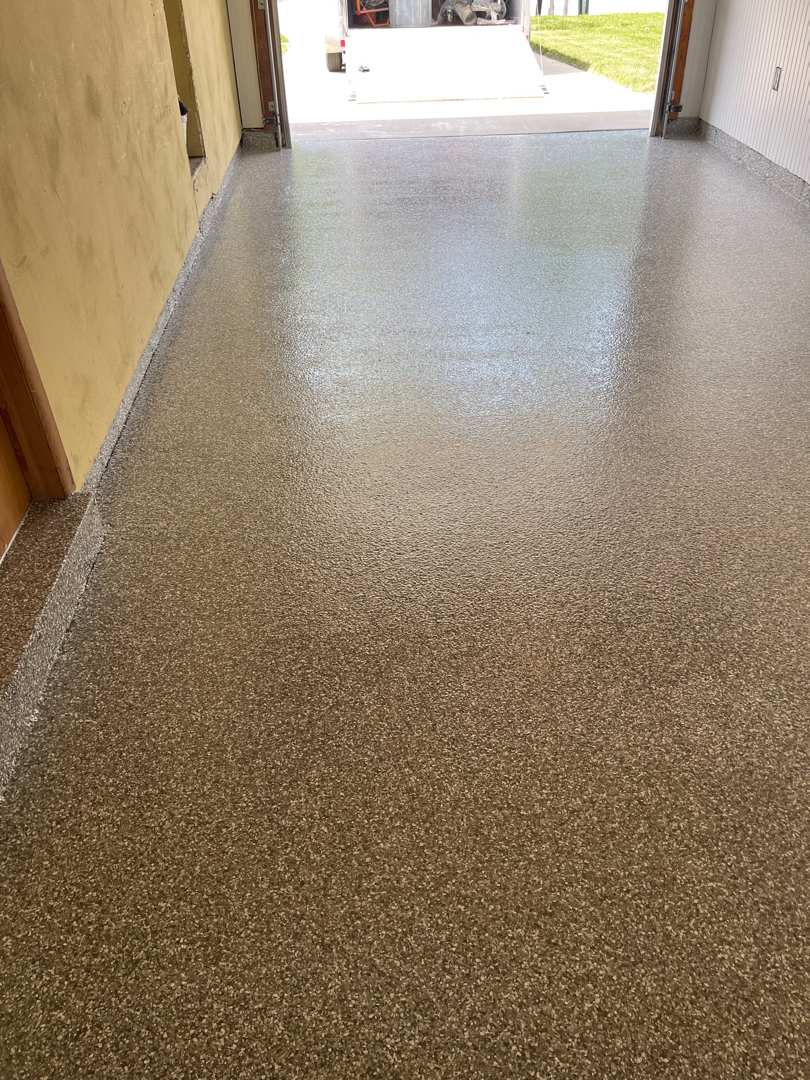
The final phase involved applying the protective polyaspartic clear coat system with slip-resistant additive. The crew laid down generous, even passes across the entire floor and step, encapsulating every decorative flake beneath a tough, transparent shield. As the clear coat went on, the transformation was dramatic—the matte flake surface turned brilliantly glossy, and the Pebble Beach color palette came alive. The cool greys and whites brightened, the brown and maroon accents deepened with warmth, and the overall finish took on the brilliant, wet-look sheen that makes a professionally coated floor unmistakable. The high-gloss surface reflected the overhead lighting across the full expanse of the two-car bay, amplifying the sense of space and cleanliness.
The Result
The finished floor elevates an already well-kept garage into a true showpiece. The 435 square feet of Pebble Beach flake finish pairs beautifully with the warm gold walls, creating a polished, cohesive aesthetic that feels more like a finished living space than a typical garage. The coated concrete step at the interior door provides a clean, seamless transition between the garage and the home. Where there was once a stained apron and a hairline crack, there is now a continuous, flawless surface sealed beneath a high-gloss protective layer. Most importantly, this floor is now fully protected against Michigan’s demanding conditions—road salt, motor oil, hot tire pickup, chemical spills, and freeze-thaw cycles won’t penetrate this professionally installed polyurea/polyaspartic coating system. The homeowner can maintain the like-new appearance of their garage floor with nothing more than simple sweeping and occasional mopping for years to come.
Click on the photos to enlarge them
Polyurea Garage Floor Coating
on Beverly Avenue
Beverly Ave, Auburn Hills, MI
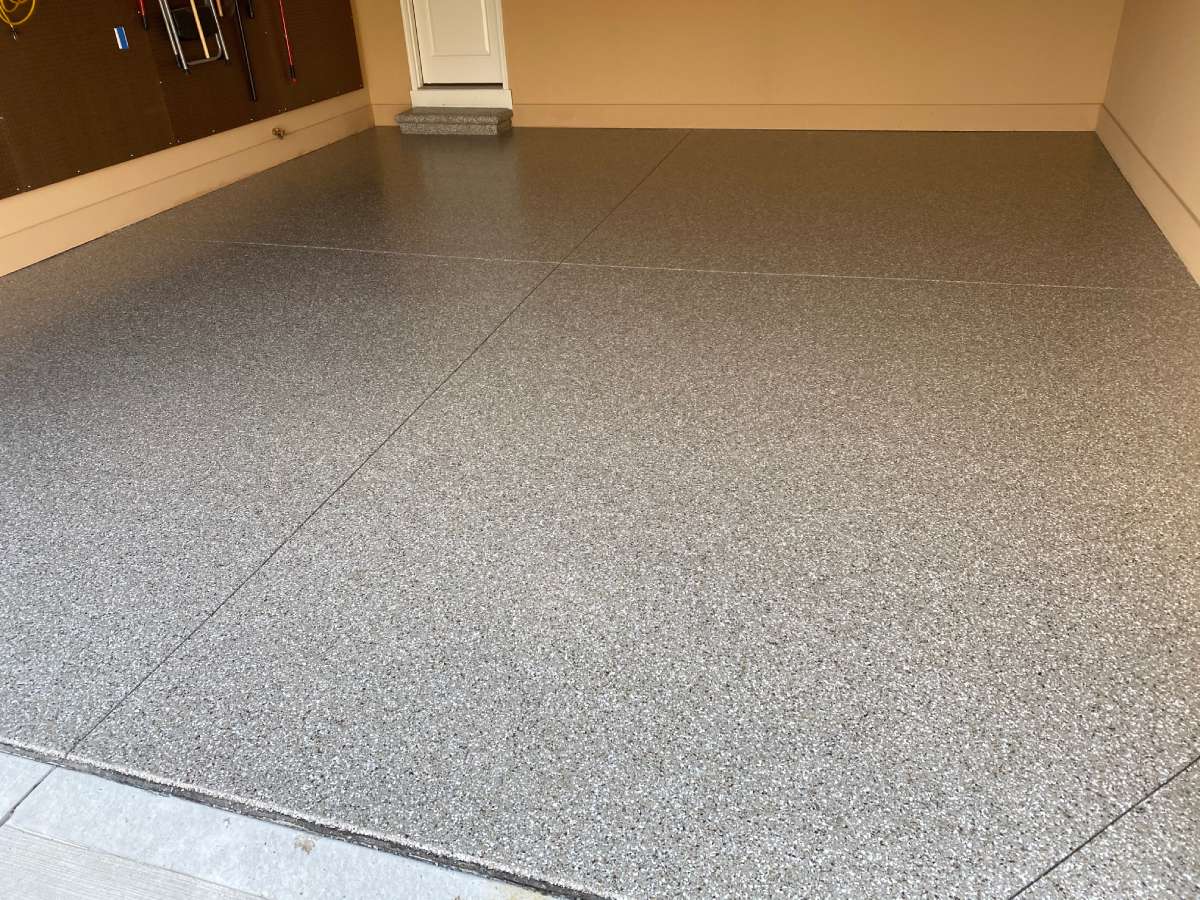
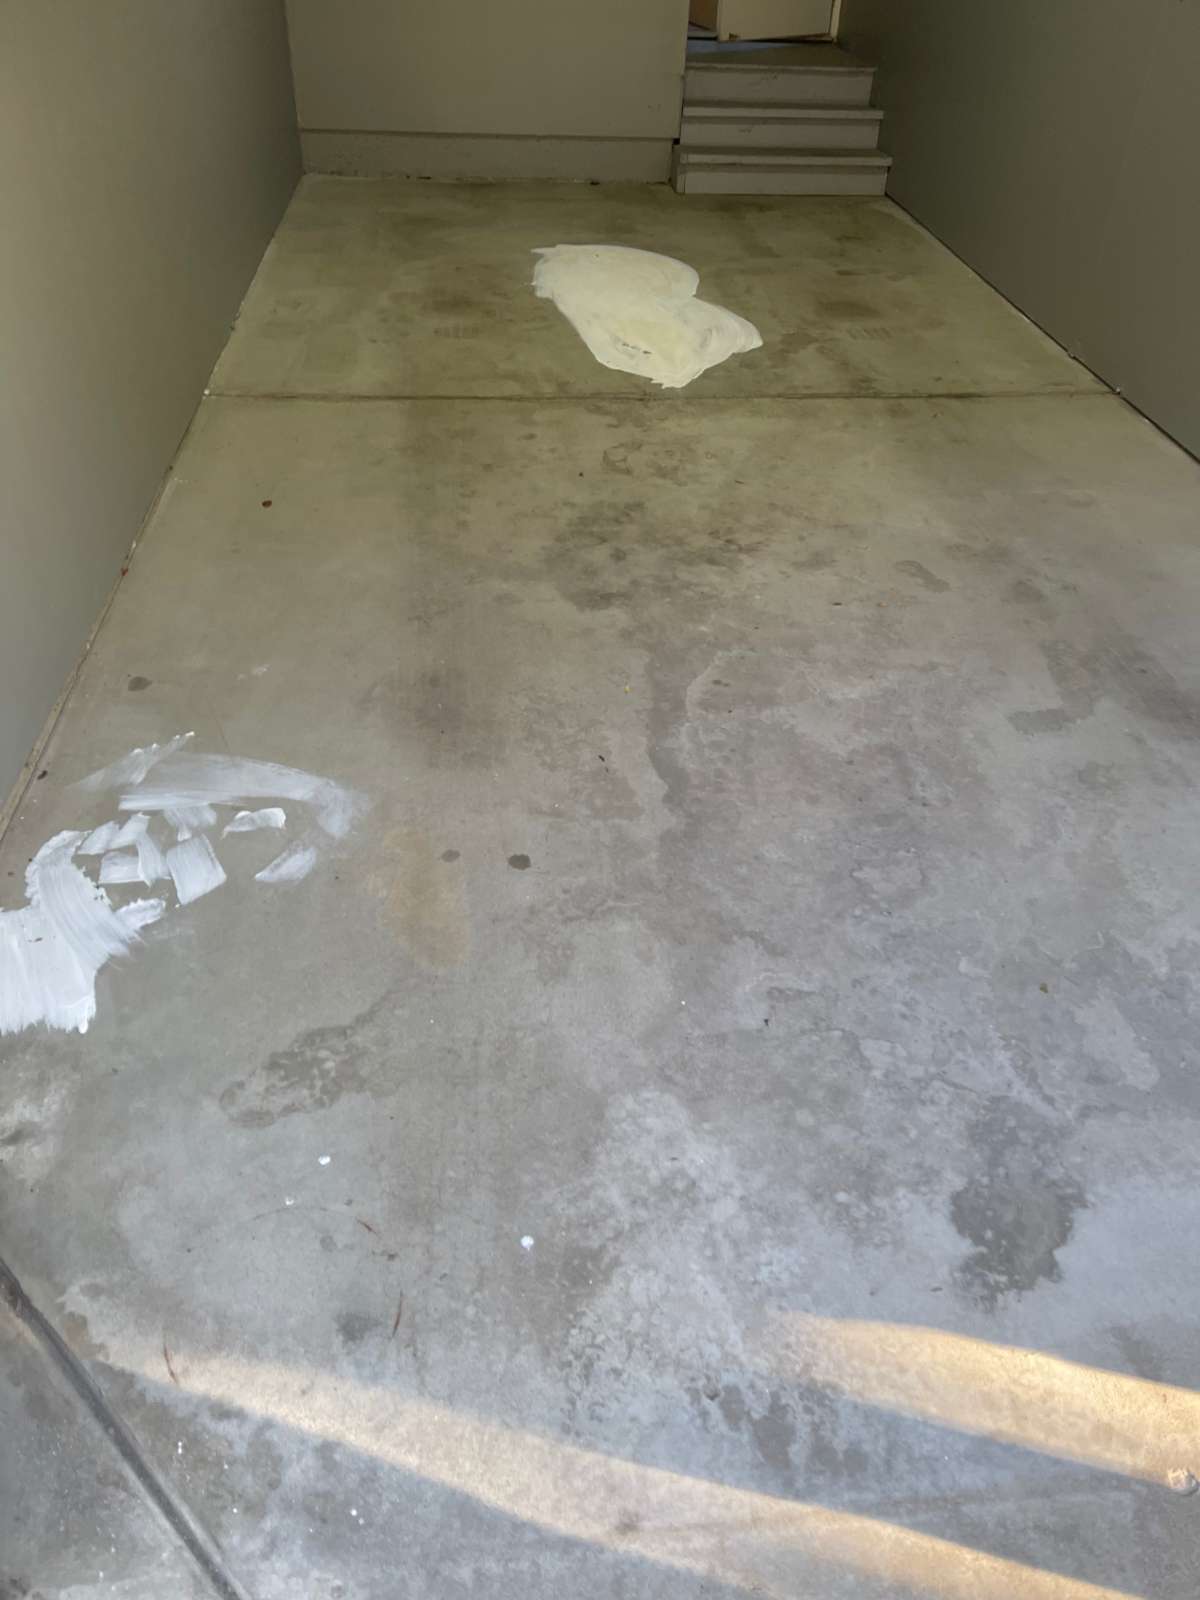
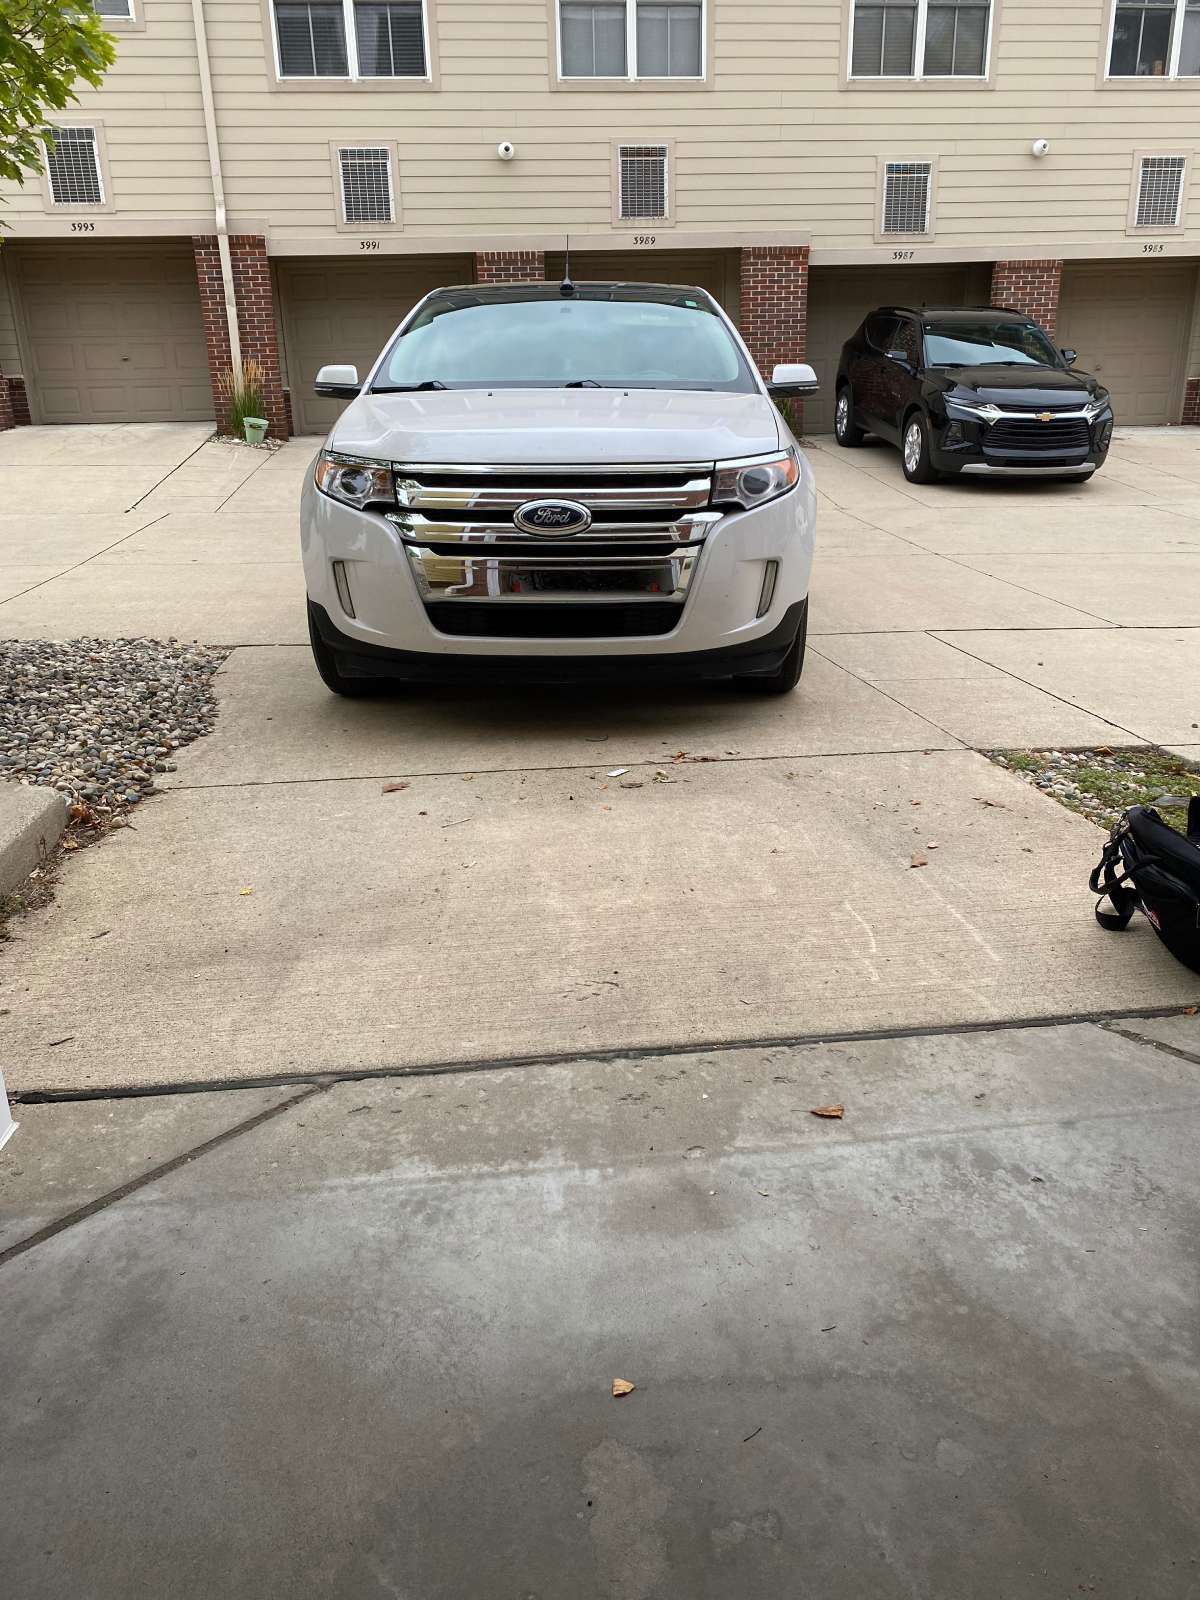
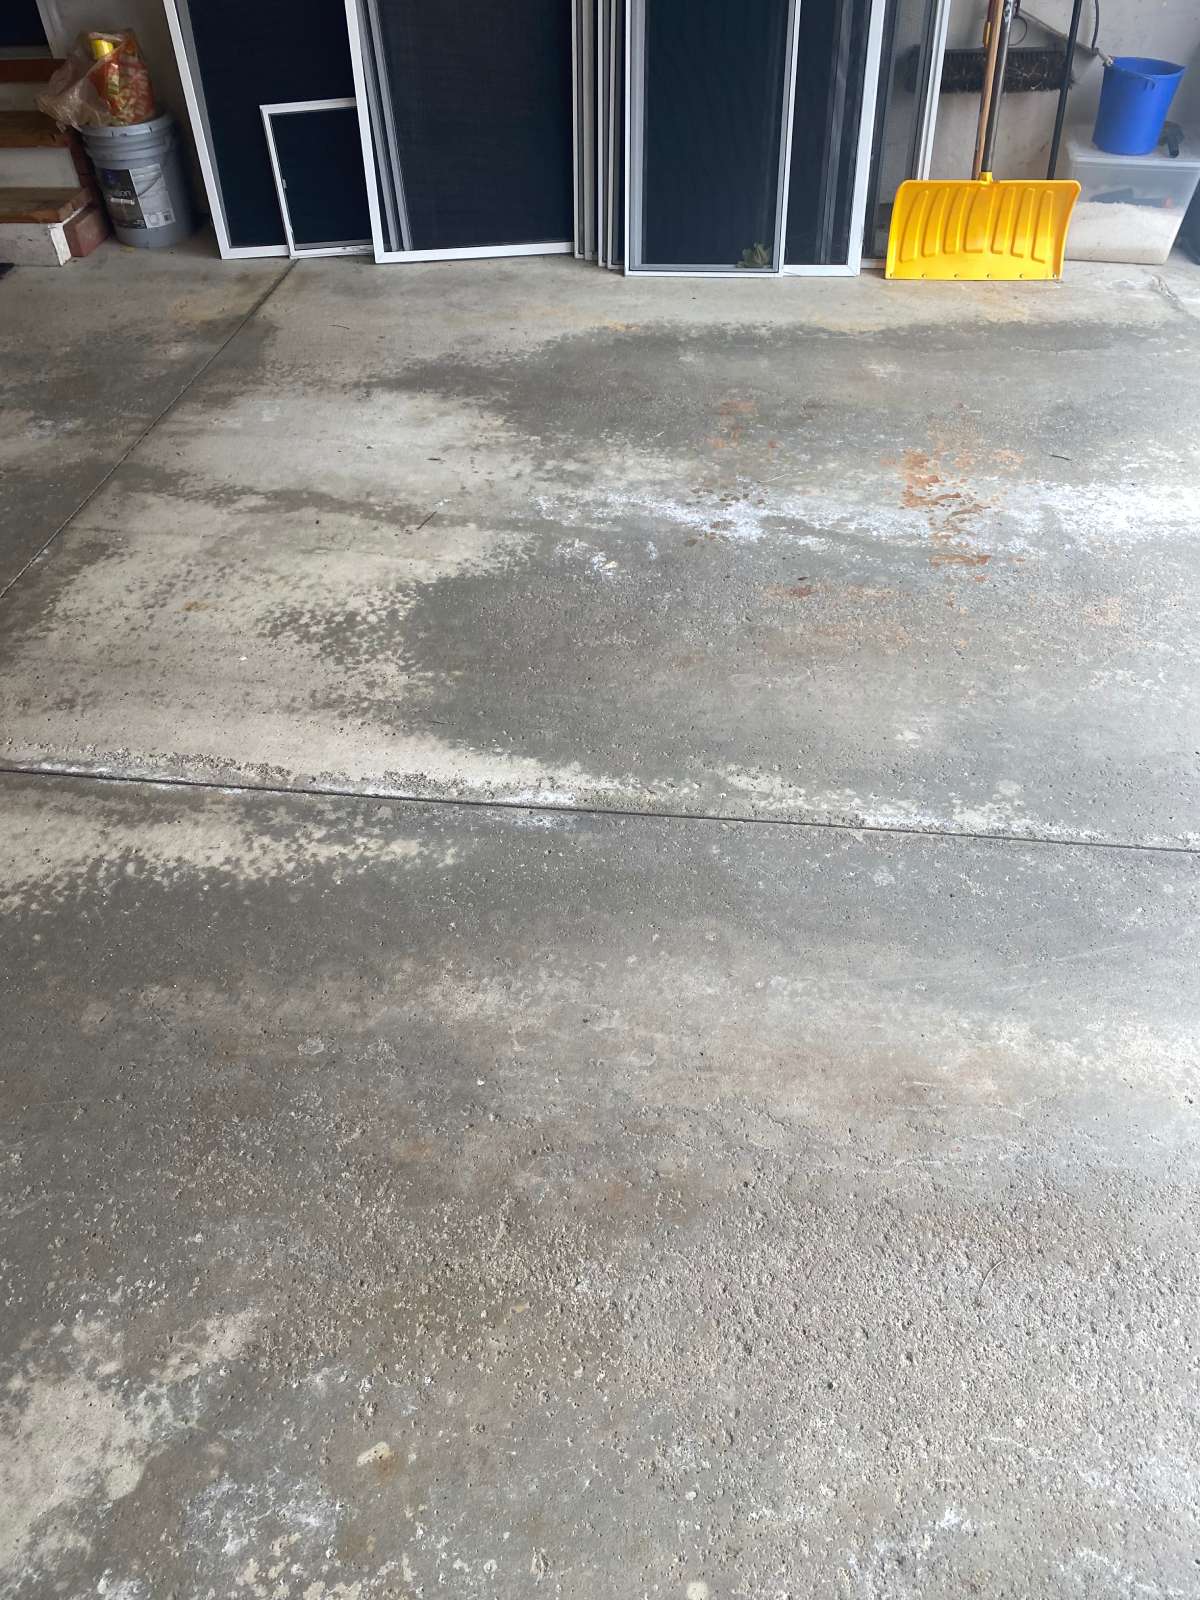
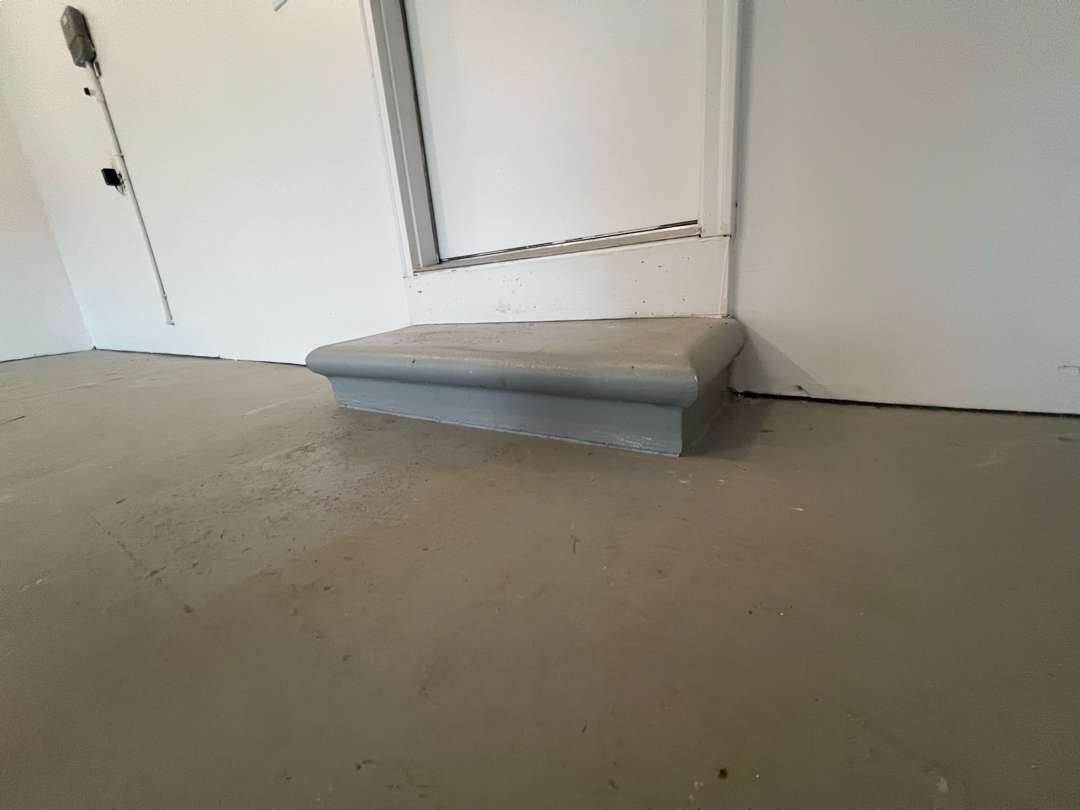
When the homeowner on Beverly Avenue contacted MotorCity Flooring and Coatings, they had a compact 255-square-foot single-car garage with a problem that goes deeper than the surface. A large oil stain had saturated the concrete in the center of the floor—not just a surface discoloration, but petroleum contamination that had soaked deep into the pore structure. Paint spatters and general surface staining added to the worn appearance of the floor.
Two wooden steps and a landing led up to the interior entry door at the back of the garage, and the grey-painted drywall walls were ready for a fresh start. This was a townhome unit with a dedicated single-car bay, and the coating would terminate at the garage door threshold.
The homeowner chose the Domino flake color on a grey base—a bold, high-contrast palette that would bring dramatic new life to this hardworking space.
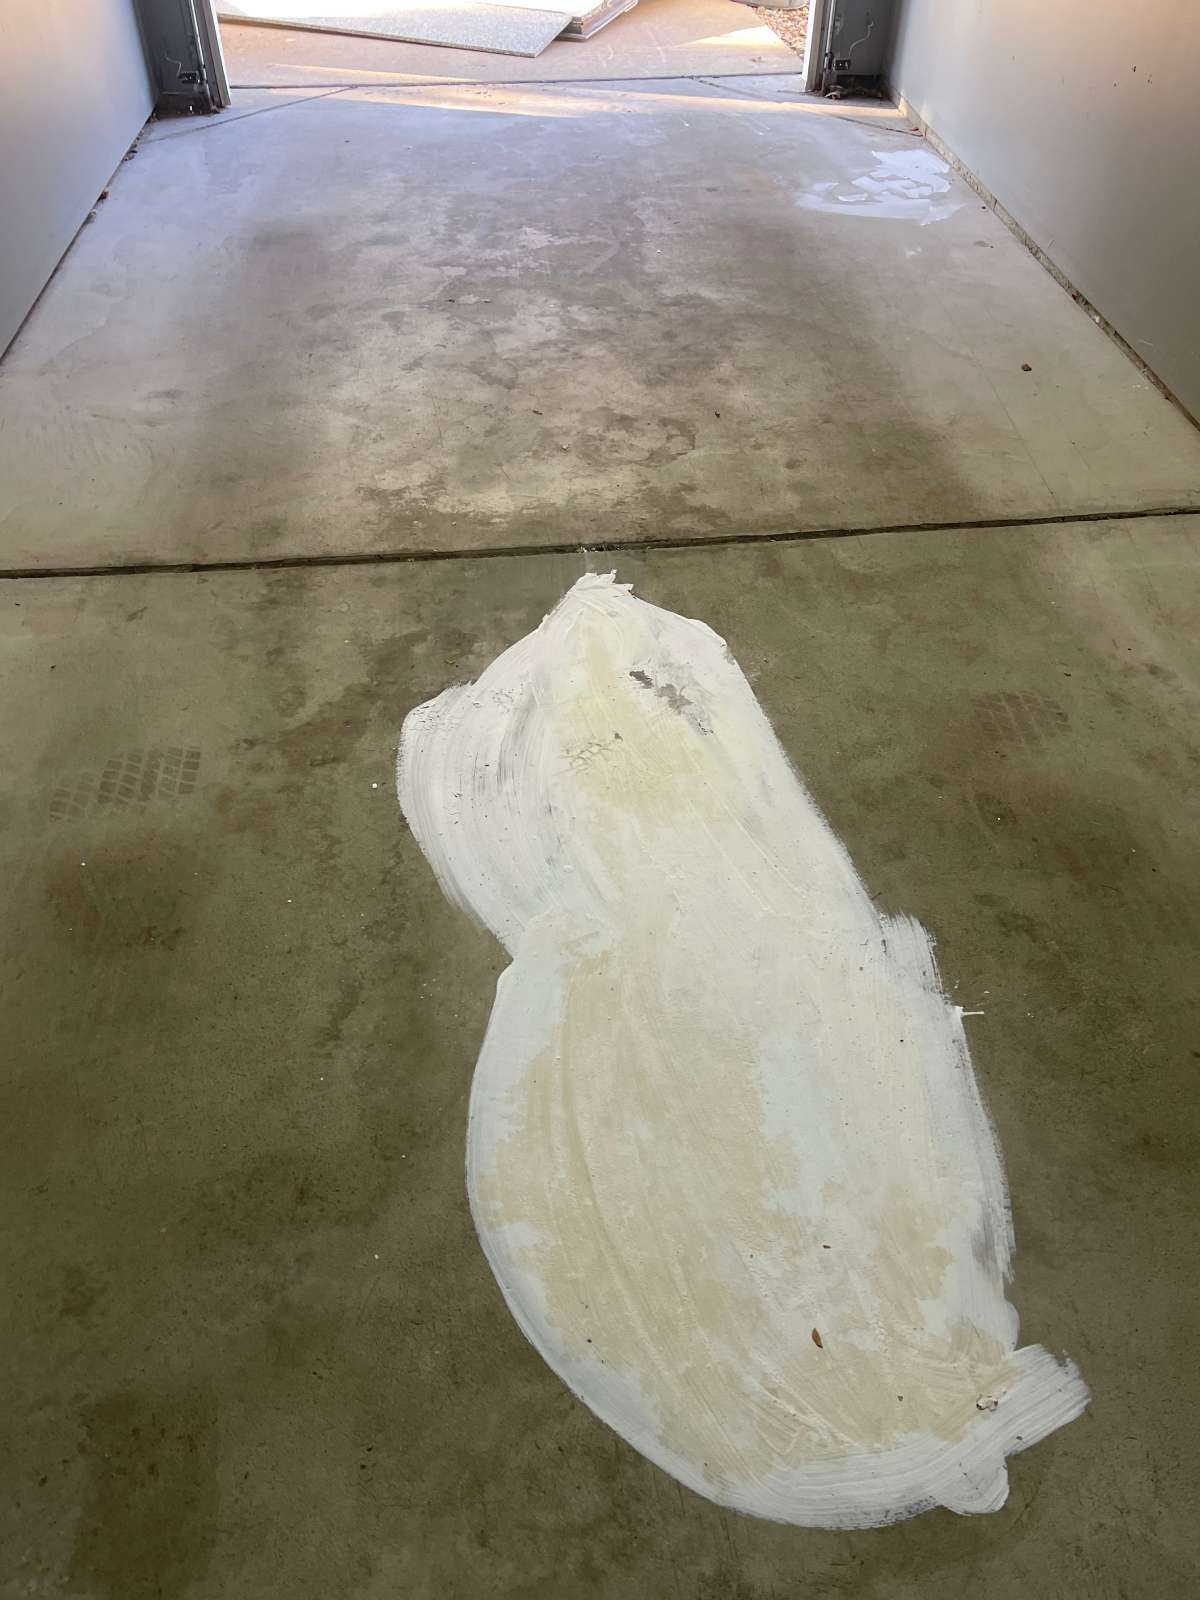
Oil Extraction
Before any grinding or coating could begin, the crew needed to address the deep oil contamination in the concrete. Oil that has penetrated below the surface can’t simply be ground away—it will continue to migrate upward through the slab and compromise coating adhesion from beneath.
The MotorCity team applied a thick oil extraction poultice over the entire contaminated area, spreading the drawing compound generously across the stain. The poultice works by pulling the petroleum up out of the pore structure of the concrete and absorbing it into the surface material, effectively reversing the penetration.
This critical pre-treatment step ensured that the concrete substrate would be clean and oil-free before the coating system was applied—eliminating the risk of delamination caused by residual oil migration.
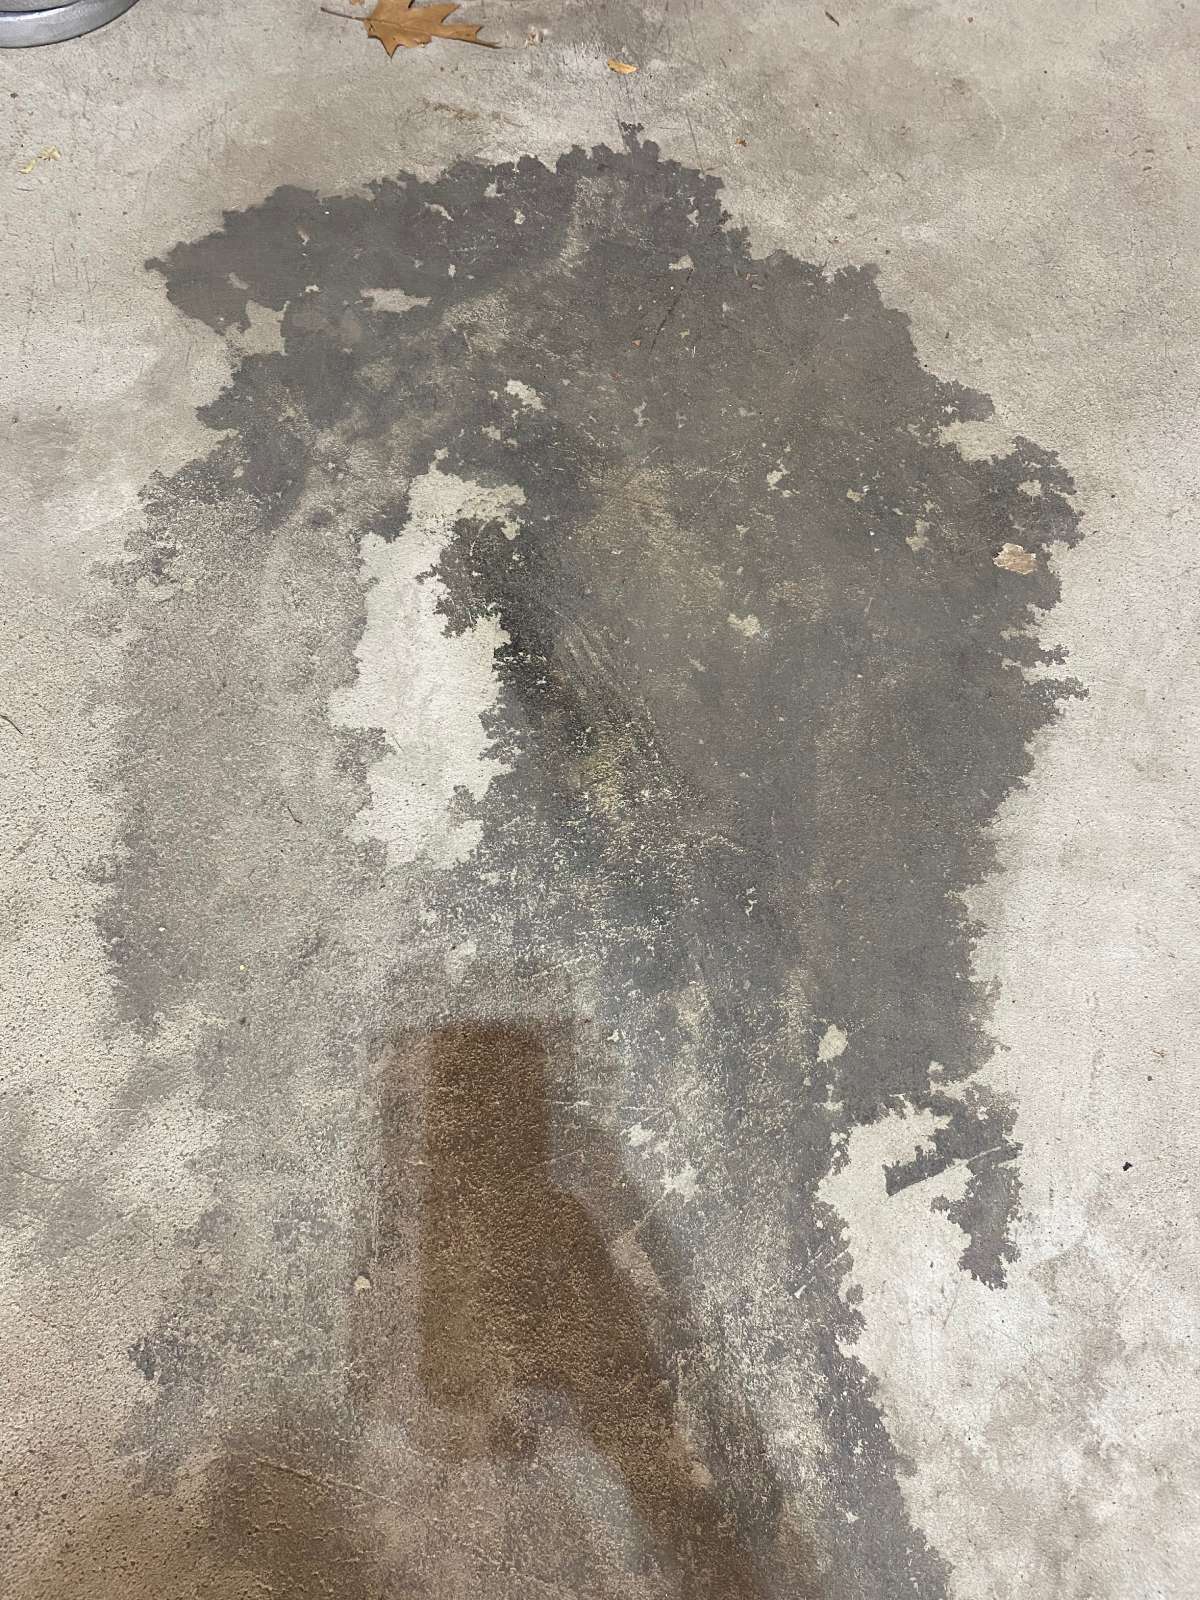
Surface Preparation
With the oil extraction complete, the crew moved to diamond grinding across the entire 255-square-foot floor. The grinders removed the remaining surface staining, paint spatters, and any residual extraction compound, opening the pores of the concrete and creating the mechanical profile necessary for the polyurea/polyaspartic system to achieve a permanent bond.
The moisture content tested at MC 4.1, and the concrete temperature registered 59 degrees Fahrenheit throughout the floor on the day of application—both within acceptable parameters for the coating system. A light application of MR50 moisture remediation primer was applied to the oil extraction area to further seal the treated zone and ensure no residual contamination could reach the coating layers above.
The crew also prepped the two wooden steps and landing at the interior entry door, sanding and cleaning the painted surfaces to accept the coating.
Base Coat and Decorative Flakes
With the surface prepped and sealed, the crew applied the grey polyurea/polyaspartic base coat using 2 liters of base paint and 1 liter of hardener—a precise mix scaled to the compact floor area.
The base coat was rolled in overlapping passes from the back of the garage toward the door, covering the treated oil extraction zone seamlessly and creating a uniform grey foundation across the entire floor.
The crew also coated the two wooden steps and landing at the interior entry door, wrapping each tread, riser, and the landing surface for a complete, unified finish. While the base coat remained wet, the team immediately broadcast the Domino decorative flake blend across the entire surface. One box of flakes was thrown with three-quarters of a box recovered—confirming thorough coverage on this compact floor. The Domino palette—a striking high-contrast blend of bold black, charcoal grey, medium grey, and crisp white—created dramatic visual depth across the single-car bay.
Clear Coat Protection
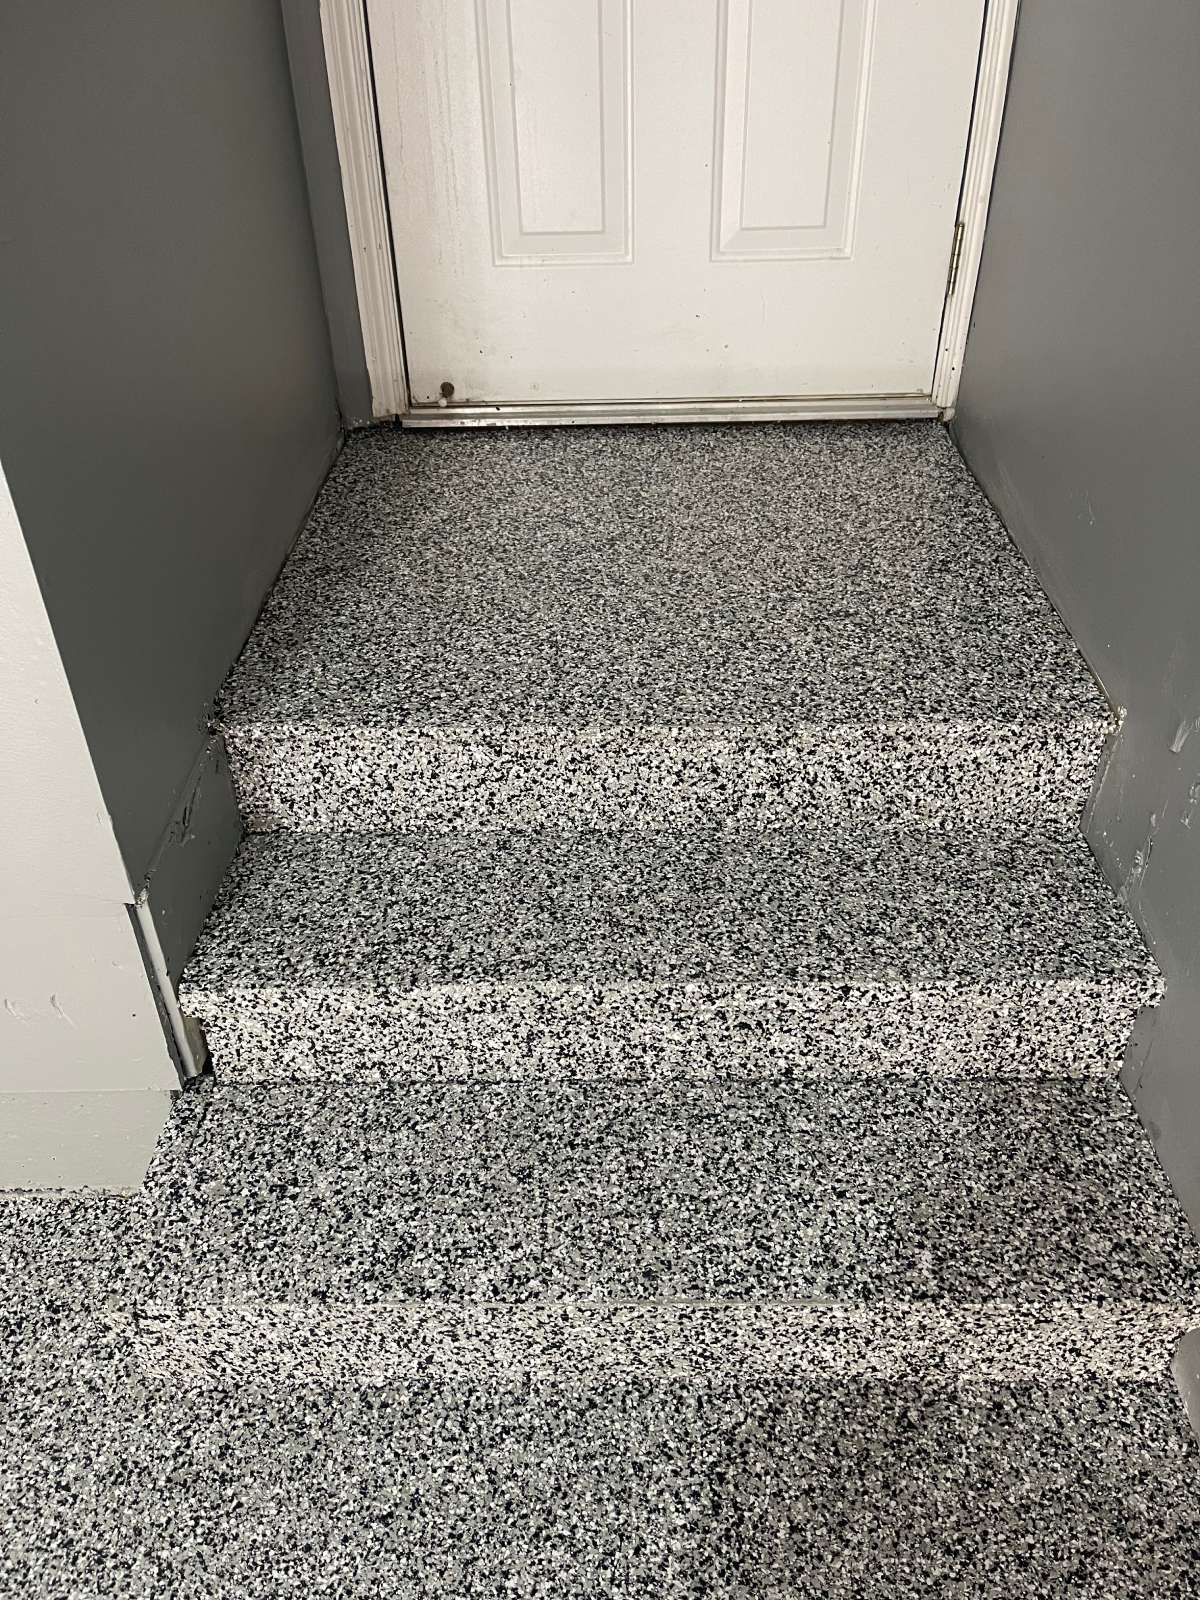
The final phase involved applying the protective polyaspartic clear coat system: 3 liters each of Clear Part A and Part B, combined with 6 cups of Shark Grip 16-grit slip-resistant additive. The coarser 16-grit traction additive was mixed into the clear coat to provide reliable footing—especially important in a single-car garage where the walking path is concentrated and winter conditions bring wet shoes and snow melt through the door. The crew laid down generous, even passes across the entire floor, steps, and landing, stopping cleanly at the garage door threshold. As the clear coat went on, the transformation was immediate—the matte flake surface turned brilliantly glossy, and the Domino color palette came alive. The deep blacks intensified, the greys took on a polished sheen, and the white accents popped with sharp contrast against the grey-painted walls, creating a bold, cohesive look throughout the garage.
The Result
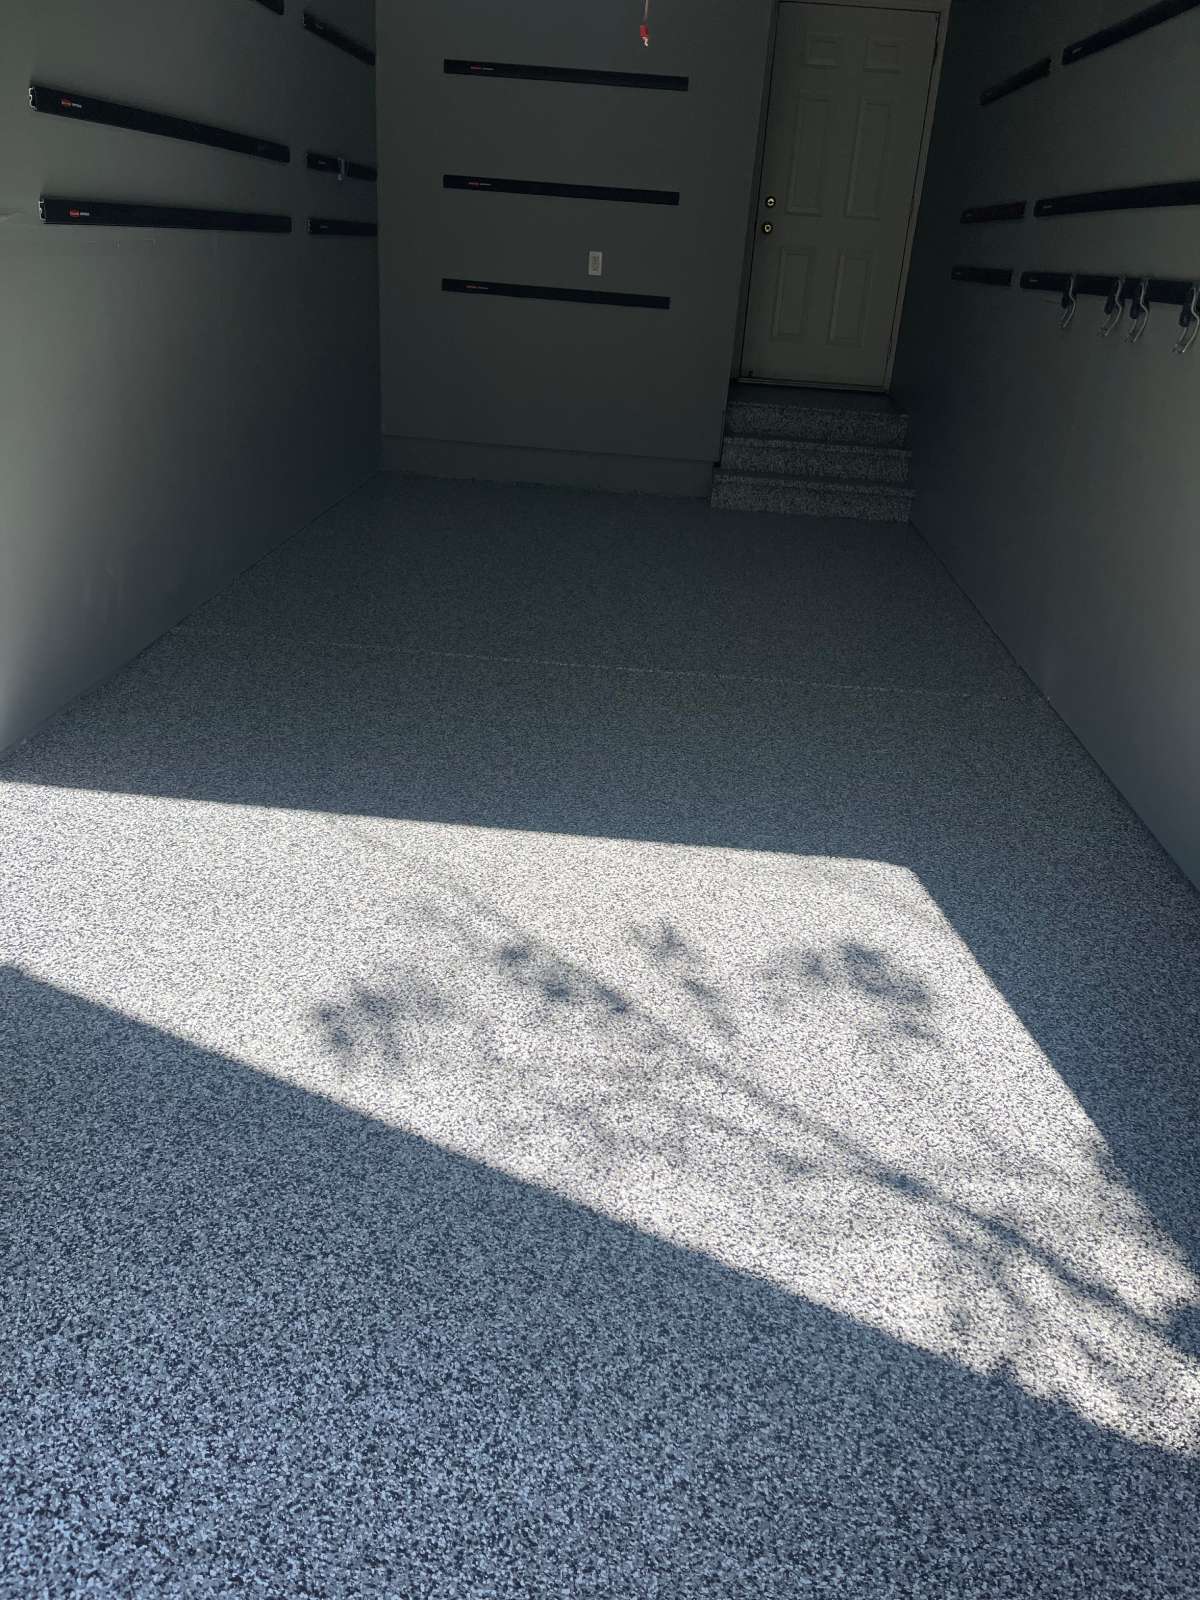
The finished floor transforms this compact single-car garage into a polished, professional-grade space. The 255 square feet of Domino flake finish pairs beautifully with the grey-painted walls and the black magnetic tool bars the homeowner has installed for organized storage. The coated wooden steps and landing provide a seamless, unified transition from the garage floor to the interior door—every surface matching in the same bold Domino pattern. Where there was once a deep, unsightly oil stain that had saturated the concrete, there is now a flawless, continuous coating with no trace of the contamination beneath. The oil extraction process, followed by moisture remediation and the full polyurea/polyaspartic system, ensures that no residual petroleum can migrate through the slab to compromise the finish. Most importantly, this floor is now fully armored against future spills, road salt, hot tire pickup, and Michigan’s freeze-thaw cycles. The homeowner can maintain the appearance of their garage floor with nothing more than simple sweeping and occasional mopping for years to come.
Click on the photos to enlarge them
Polyurea Garage Floor Coating
on Chase Way
Chase Way Blvd, Auburn Hills, MI
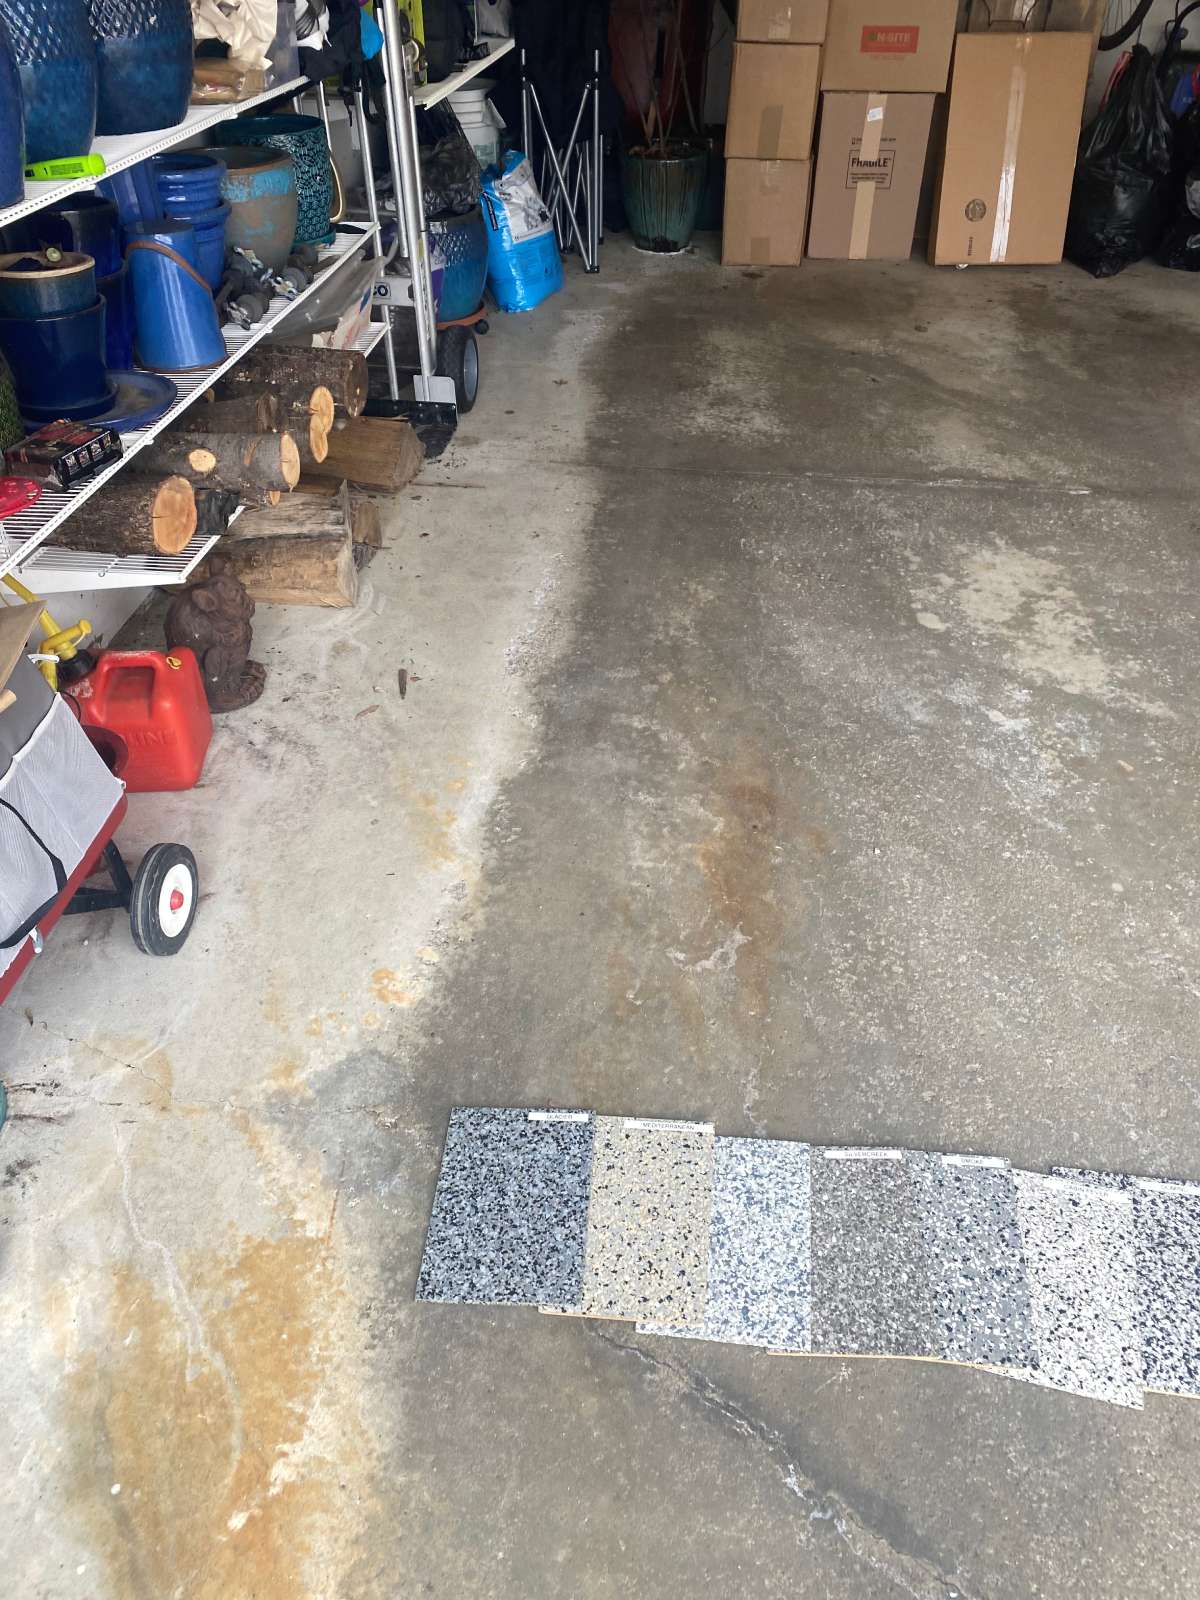
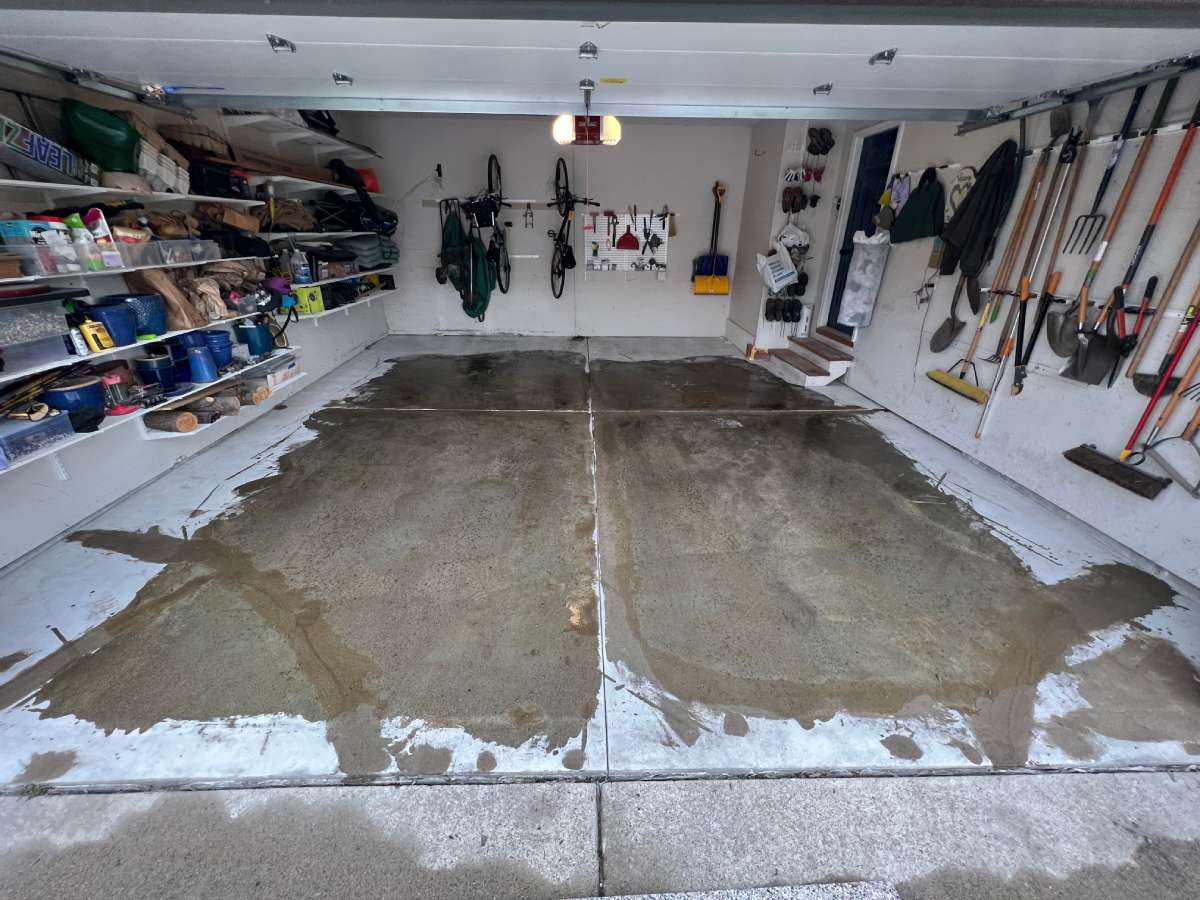
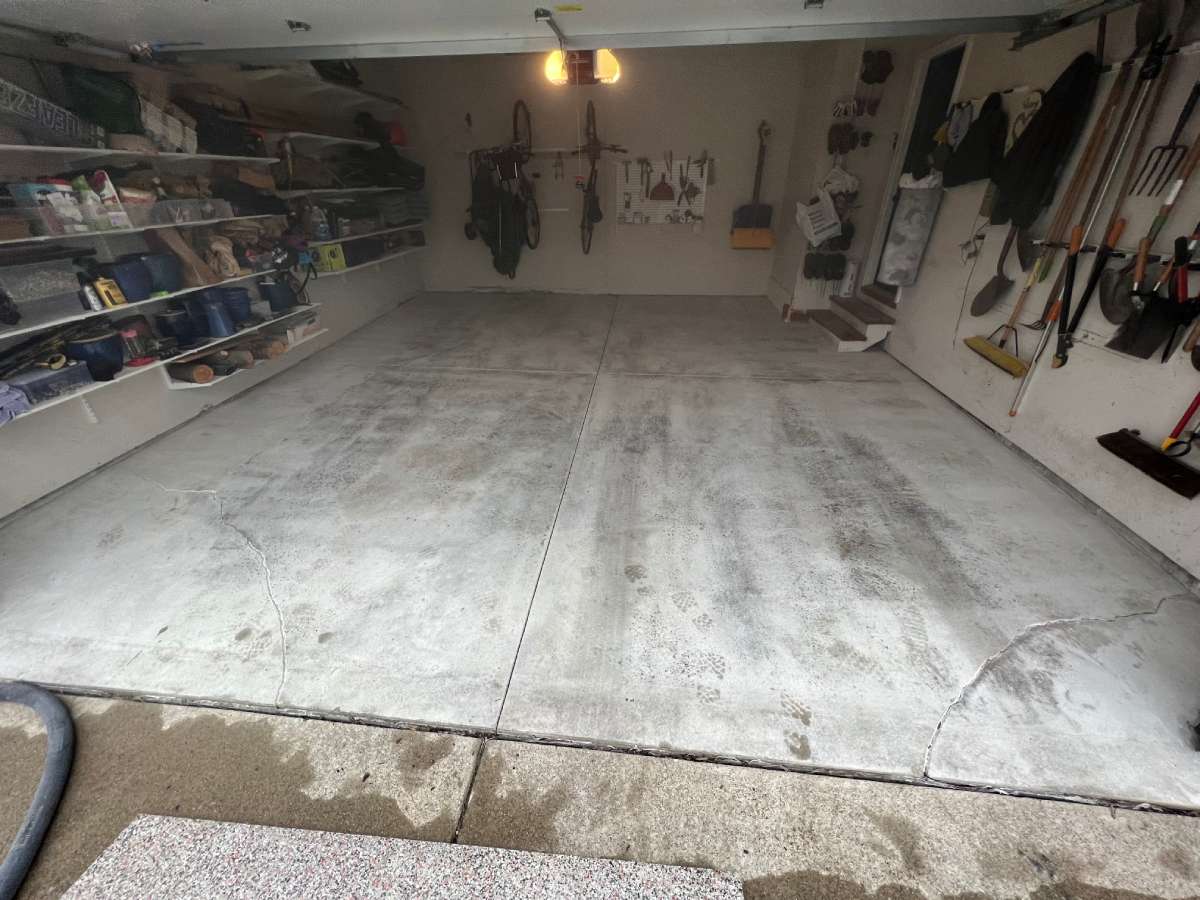
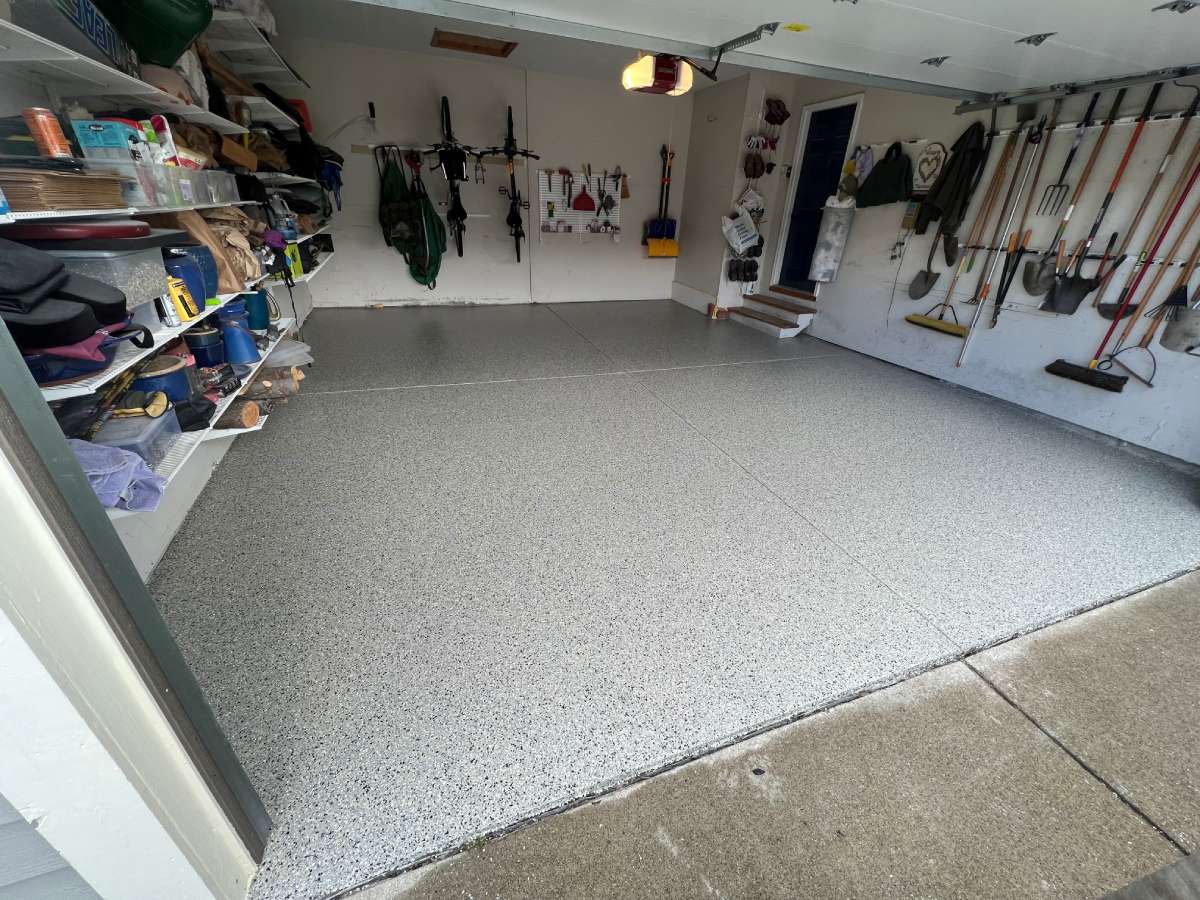
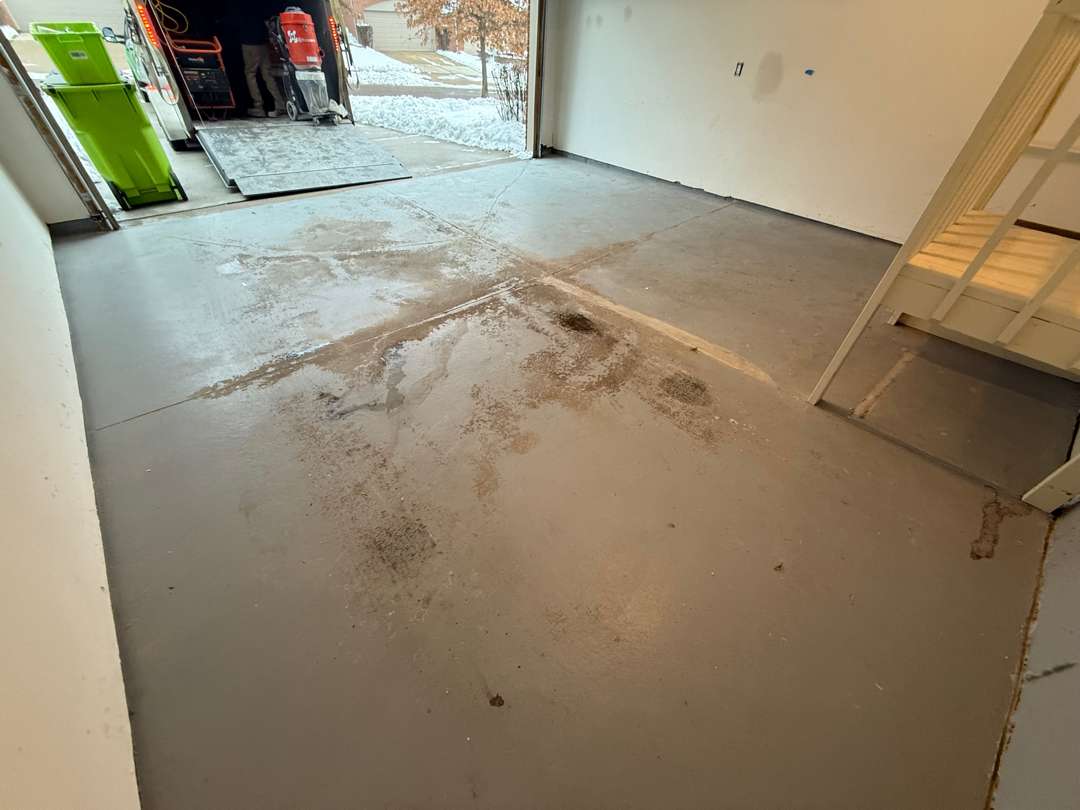
When the homeowner on Chase Way Blvd reached out to MotorCity Flooring and Coatings, they had a well-used 424-square-foot two-car garage: Wall-mounted shelving lined both sides of the bay, bicycles hung from pegboard on the back wall, and garden tools, shovels, and seasonal gear were neatly organized on hooks along every available surface.
The concrete floor, however, told a different story. Years of Michigan winters had left their mark—rust staining, road salt residue, light pitting scattered throughout, and a few small cracks running through the slab. With a moisture content reading of 4%, the concrete also needed remediation before any coating could be applied.
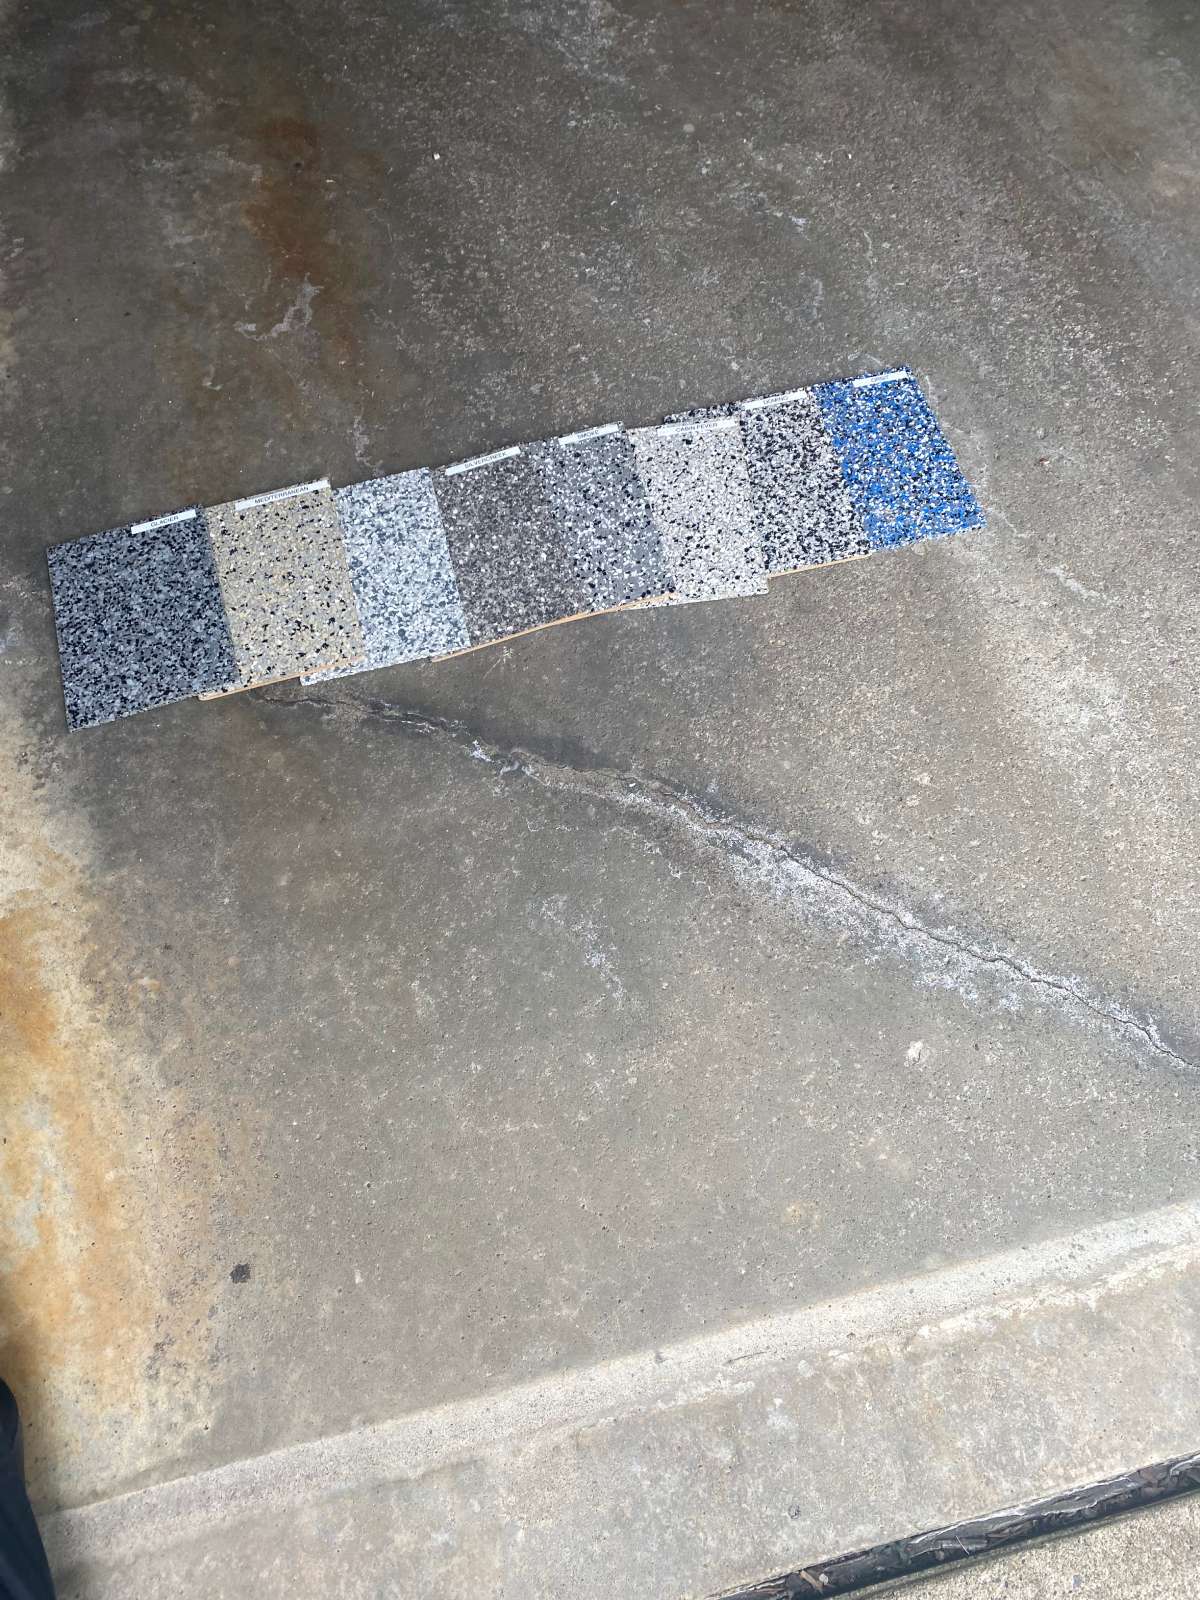
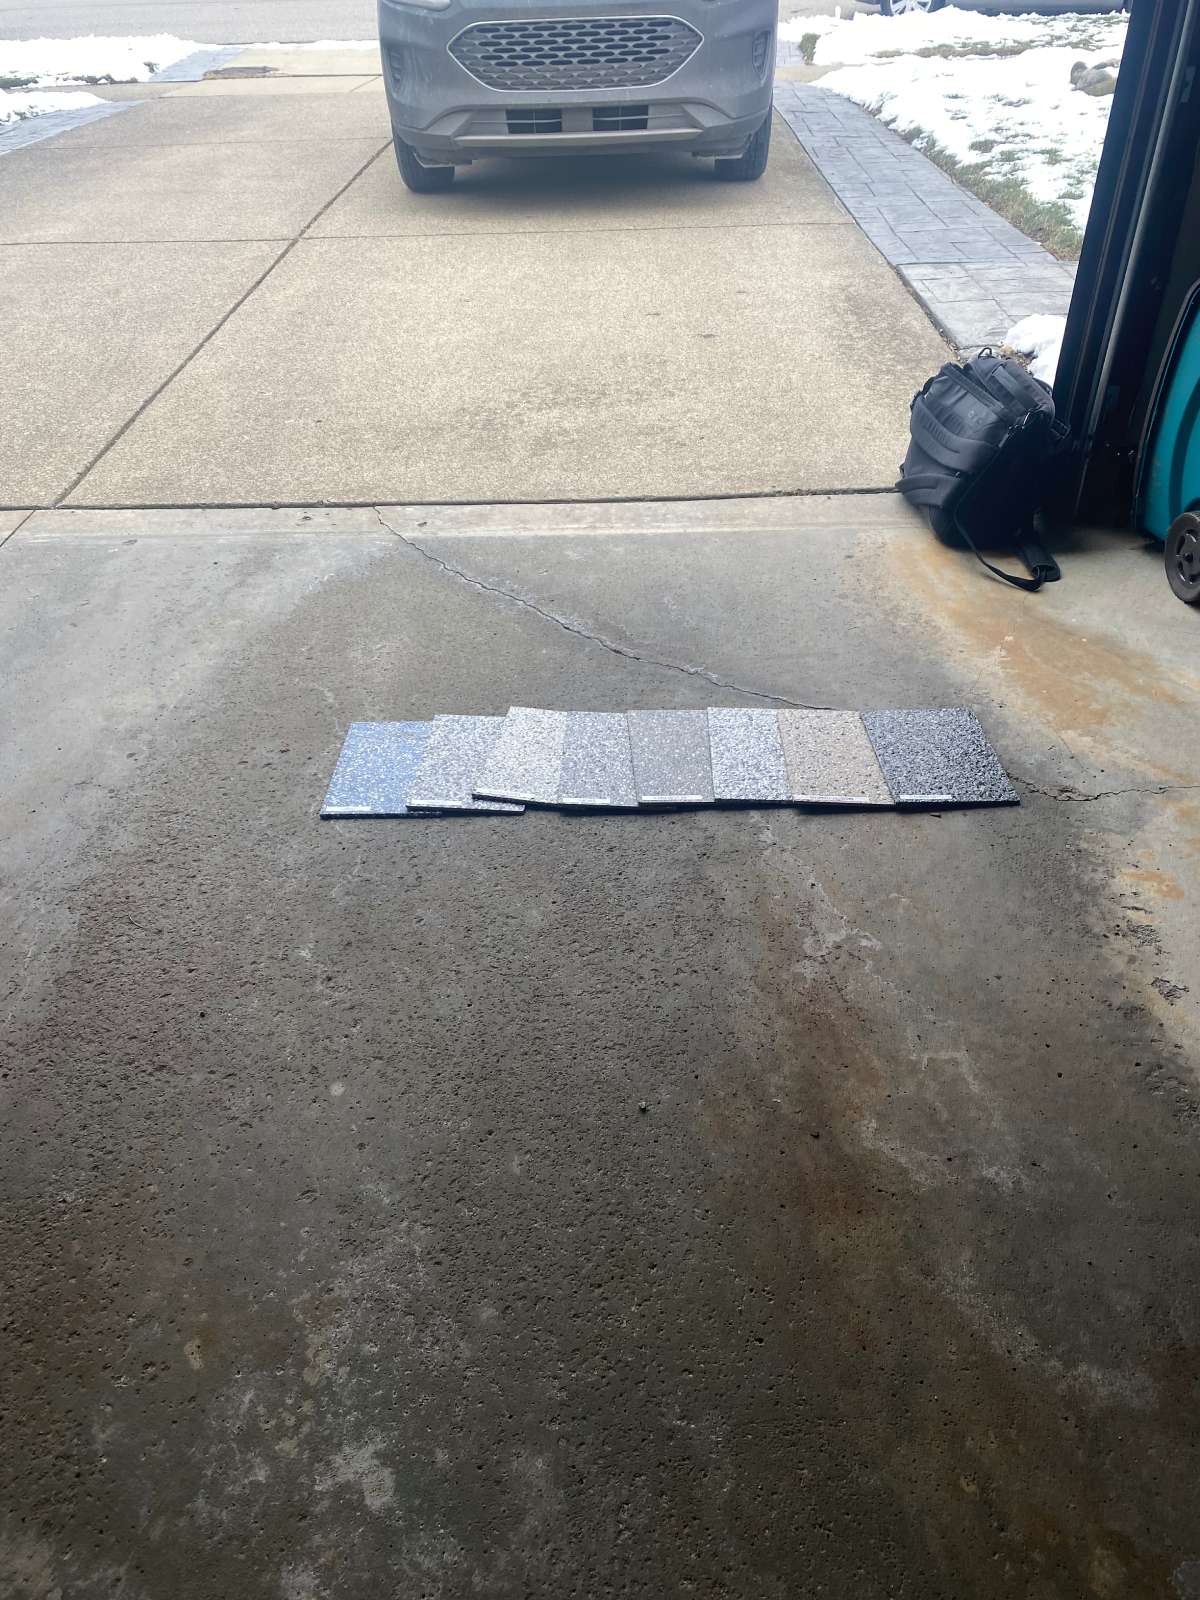
The homeowner chose the Mediterranean flake color on a grey base—a warm, earthy palette that would complement the well-organized character of this garage.
Surface Preparation
The MotorCity crew began with thorough diamond grinding across the entire garage floor. The grinders cut through the surface staining, rust deposits, and road salt residue that had accumulated over years of Michigan driving seasons, revealing clean, light grey concrete beneath. The grinding process opened the pores of the slab and created the deep mechanical profile necessary for optimal coating adhesion.
The crew worked carefully around the control joints and paid special attention to the two steps at the interior entry door, ensuring every surface that would receive the coating was properly profiled and free of contaminants.
Moisture Testing and Remediation
Before any coating could be applied, the crew tested the slab’s moisture content and recorded a reading of MC 4%. To ensure long-term coating performance and prevent potential delamination from moisture vapor transmission, the team flooded the prepared surface with MR50 moisture remediation primer—4 liters each of Part A and Part B.
This critical step penetrated deep into the pore structure of the concrete, creating a moisture barrier that would protect the entire coating system from below. The MR50 was worked across the full floor area, pooling along the control joints and saturating the areas where moisture could otherwise become trapped and compromise adhesion over time.
Pitting and Crack Repairs
With the surface ground and moisture-treated, our crew turned their attention to repairing the light pitting and small cracks throughout the slab. They mixed two-part mender with 8 cups of sand, creating a durable repair compound that was carefully troweled into every pit, surface void, and crack.
The small cracks were routed and filled to prevent them from telegraphing through the finished coating, while the scattered pitting received patient, section-by-section attention. Once the mender cured, the repaired areas were lightly ground to blend with the surrounding surface, producing a smooth, level substrate ready to accept the coating system.
Base Coat and Decorative Flakes
Once repairs cured, our crew applied the grey polyurea/polyaspartic base coat using 4 liters of base paint and 2 liters of hardener. The two-part system was precisely measured and mixed, then rolled across the floor in overlapping passes from the back of the garage toward the door.
The base coat covered the repaired areas seamlessly, transforming the ground concrete into a uniform grey foundation. The crew also coated the two steps at the interior entry door, ensuring a continuous finished surface from threshold to threshold. While the base coat remained wet,
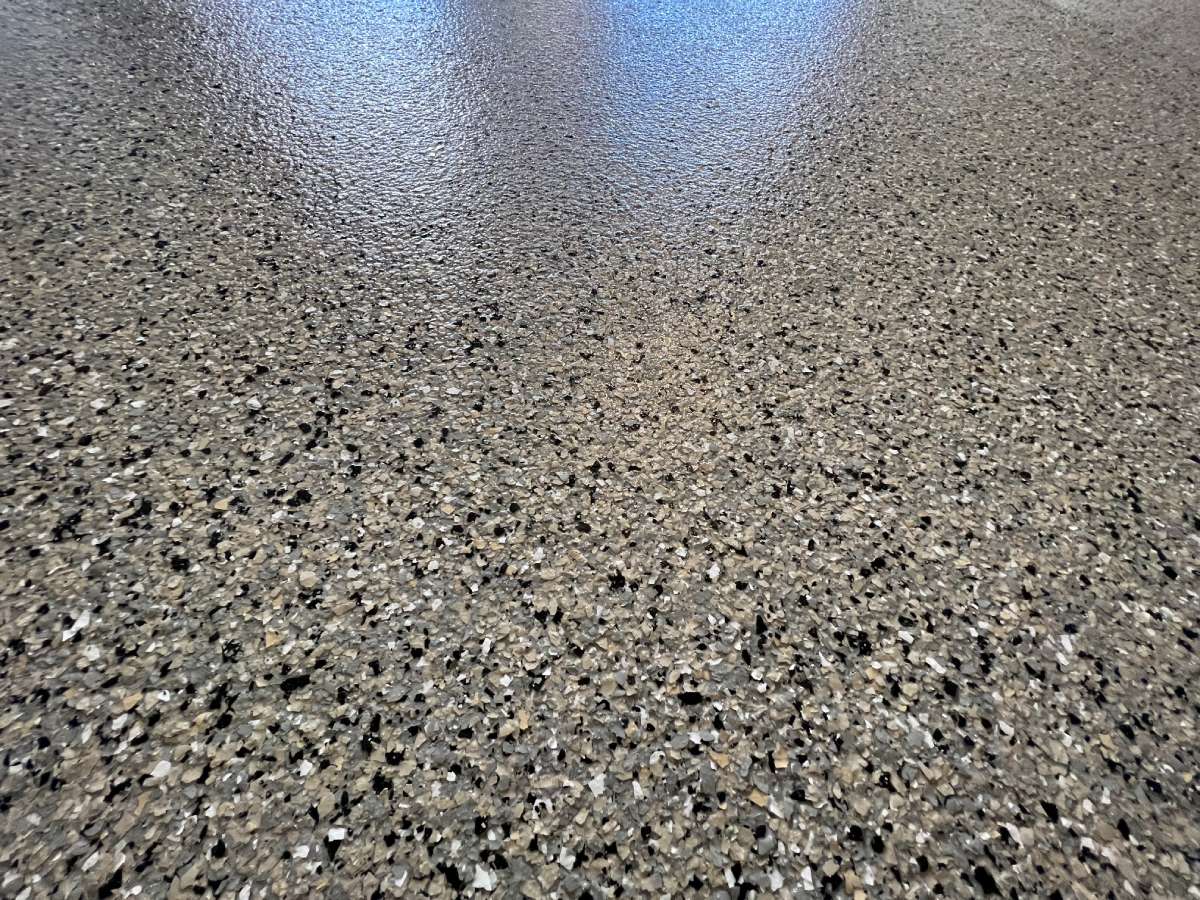
Our team immediately broadcast the Mediterranean decorative flake blend across the entire surface. Three full boxes of flakes were thrown, with two boxes recovered—confirming substantial, generous coverage. The Mediterranean palette features a rich mix of warm tan, cool grey, crisp white, and bold black tones that create an earthy, natural stone appearance with exceptional visual depth.
Clear Coat Protection
The final phase involved applying the protective polyaspartic clear coat system: 6 liters each of Clear Part A and Part B, combined with 12 caps of Shark Grip 16-grit slip-resistant additive. The coarser 16-grit traction additive was mixed into the clear coat to provide reliable footing on the finished surface—especially important in a Michigan garage that regularly sees wet shoes, snow melt, and slippery winter conditions.
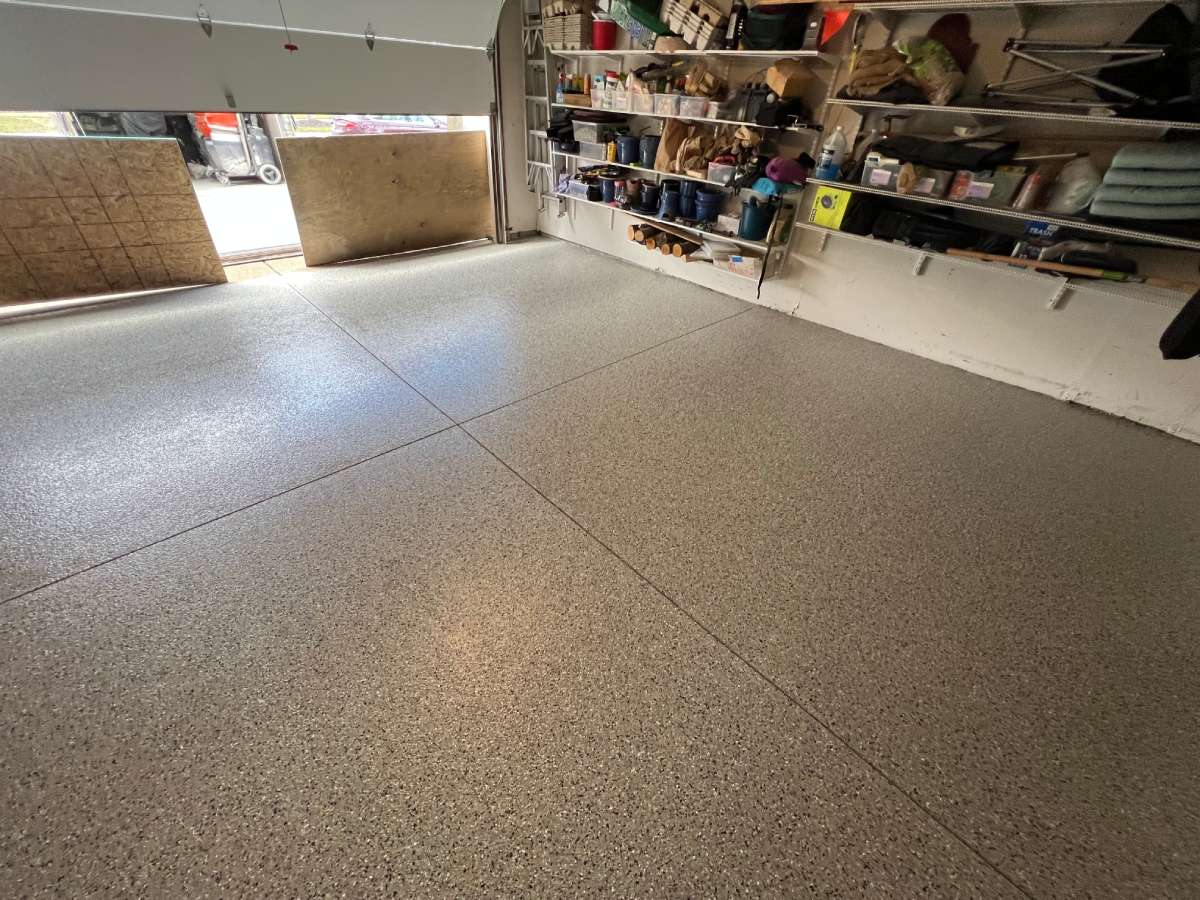
Our crew laid down generous, even passes across the entire floor and steps, encapsulating every decorative flake beneath a tough, transparent shield. As the clear coat went on, the transformation was immediate—the matte flake surface turned brilliantly glossy, and the Mediterranean color palette came alive. The warm tans deepened, the greys took on a polished sheen, and the black accents sharpened with contrast, creating a rich, multi-dimensional finish beneath the protective layer.
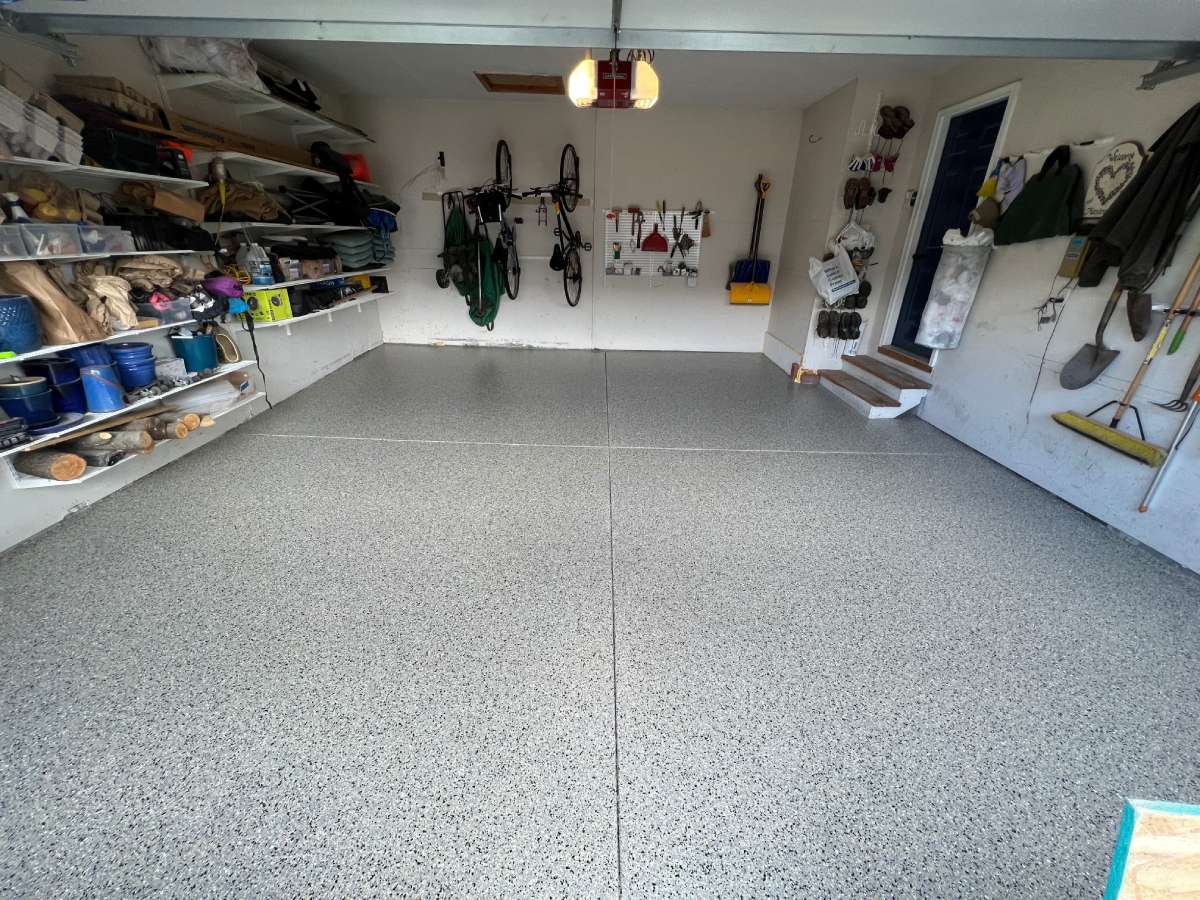
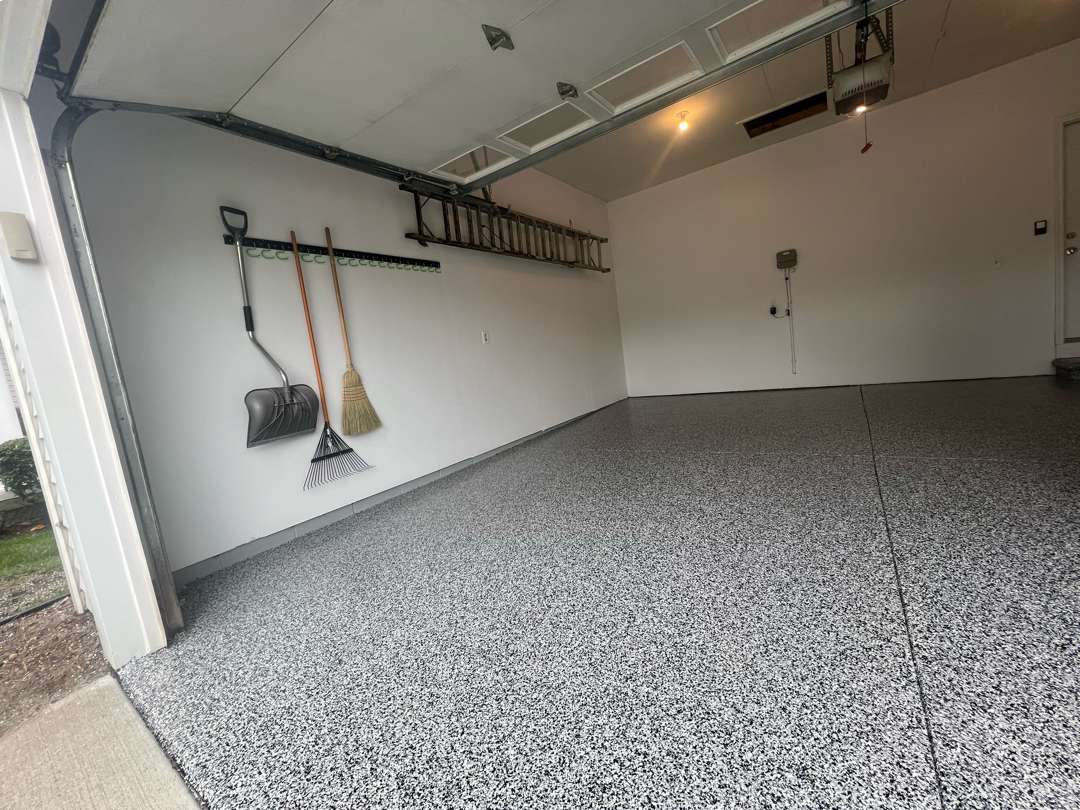
The Result
The finished floor transforms this hardworking two-car garage into a space that looks as organized and intentional as the walls above it. The 424 square feet of Mediterranean flake finish brings warmth and sophistication to what was once a stained, pitted concrete slab. The glossy clear coat reflects the overhead lighting across the full bay, making the space feel brighter, cleaner, and larger. The coated steps at the interior door provide a seamless, finished transition between the garage and the home, while the 16-grit traction additive ensures safe footing even when conditions are wet. Where there were once rust stains, salt residue, and cracked concrete, there is now a continuous, flawless surface sealed beneath a high-gloss protective layer.
Most importantly, this floor is now fully armored against demanding weather conditions—road salt, motor oil, hot tire pickup, chemical spills, and freeze-thaw cycles won’t penetrate this professionally installed polyurea/polyaspartic coating system. The homeowner can maintain the appearance of their garage floor with nothing more than simple sweeping and occasional mopping for years to come.
Click on the photos to enlarge them
Polyurea Garage Floor Coating
on Hillsdale Drive
Hillsdale Dr., Auburn Hills, MI
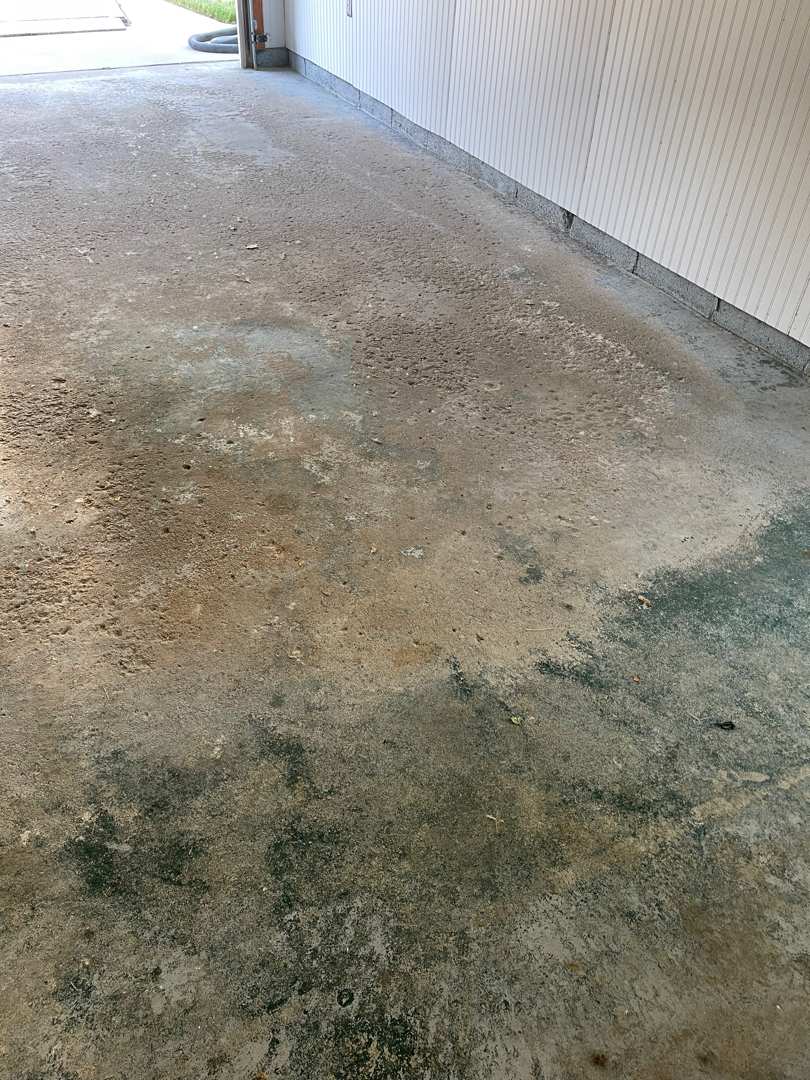
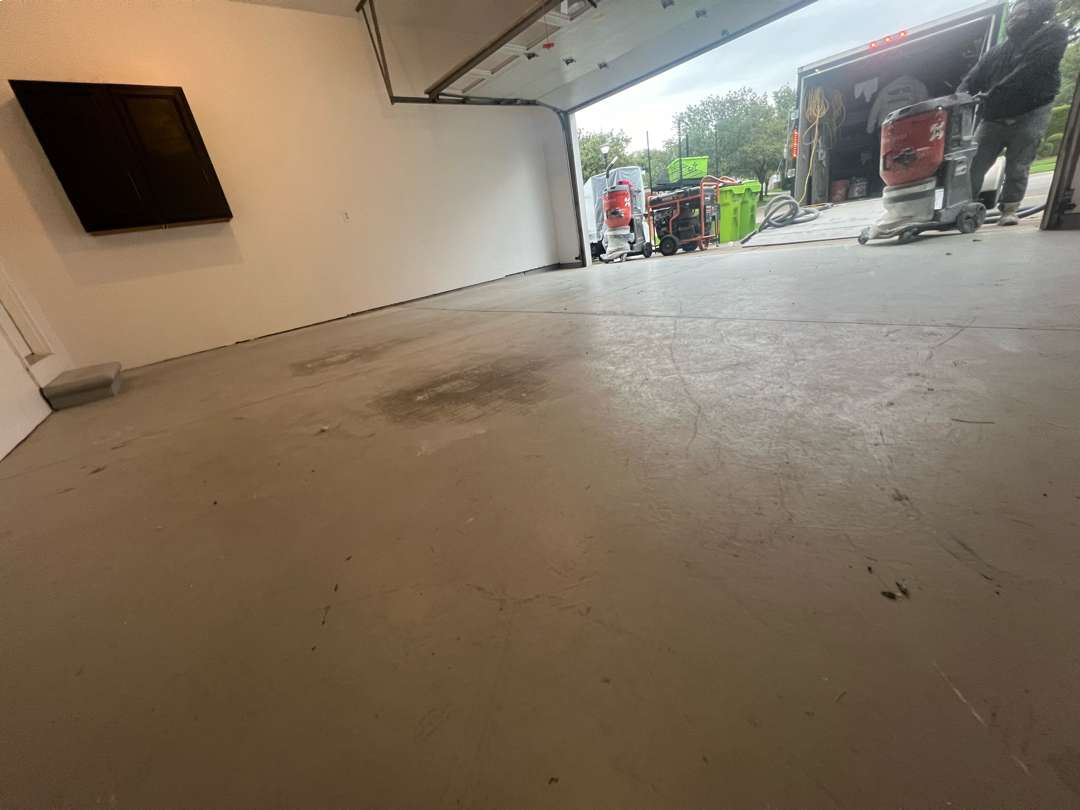
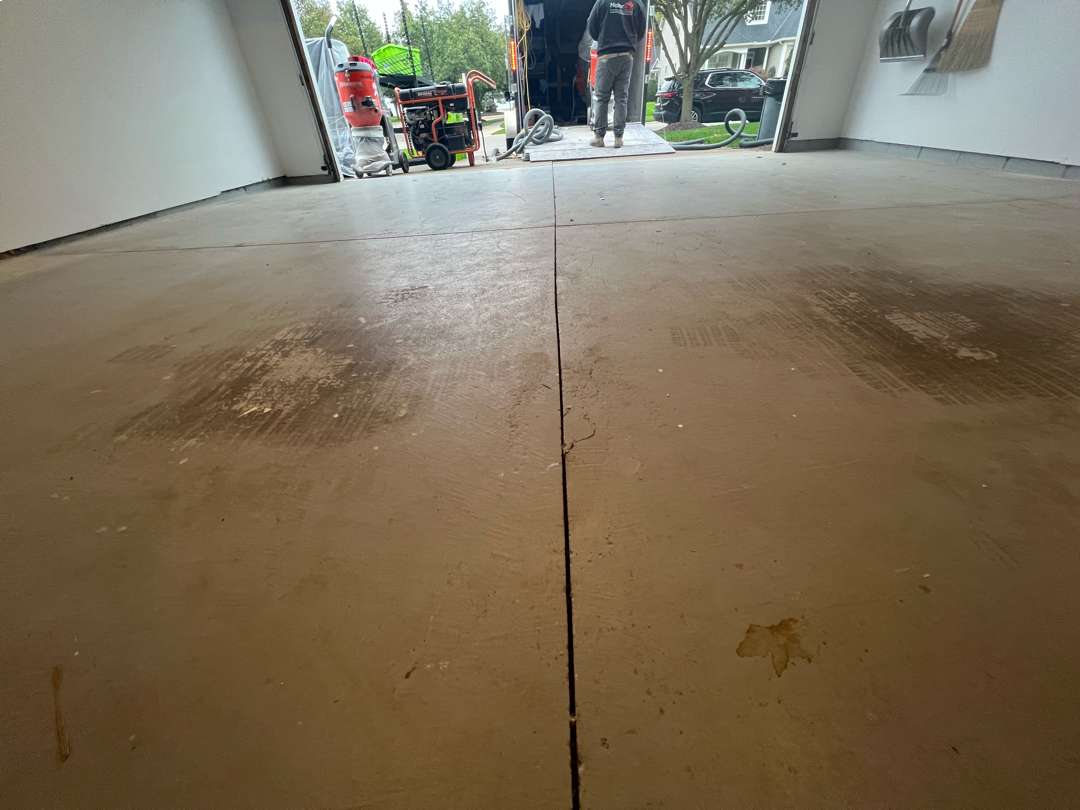
When the homeowner on Hillsdale Dr. contacted MotorCity Flooring and Coatings, they had a 400-square-foot garage floor with a failing epoxy coating that had seen its best days. The old epoxy was worn through in the high-traffic areas, scarred with tire marks and scuff lines, and stained with oil spots that had penetrated the compromised surface.
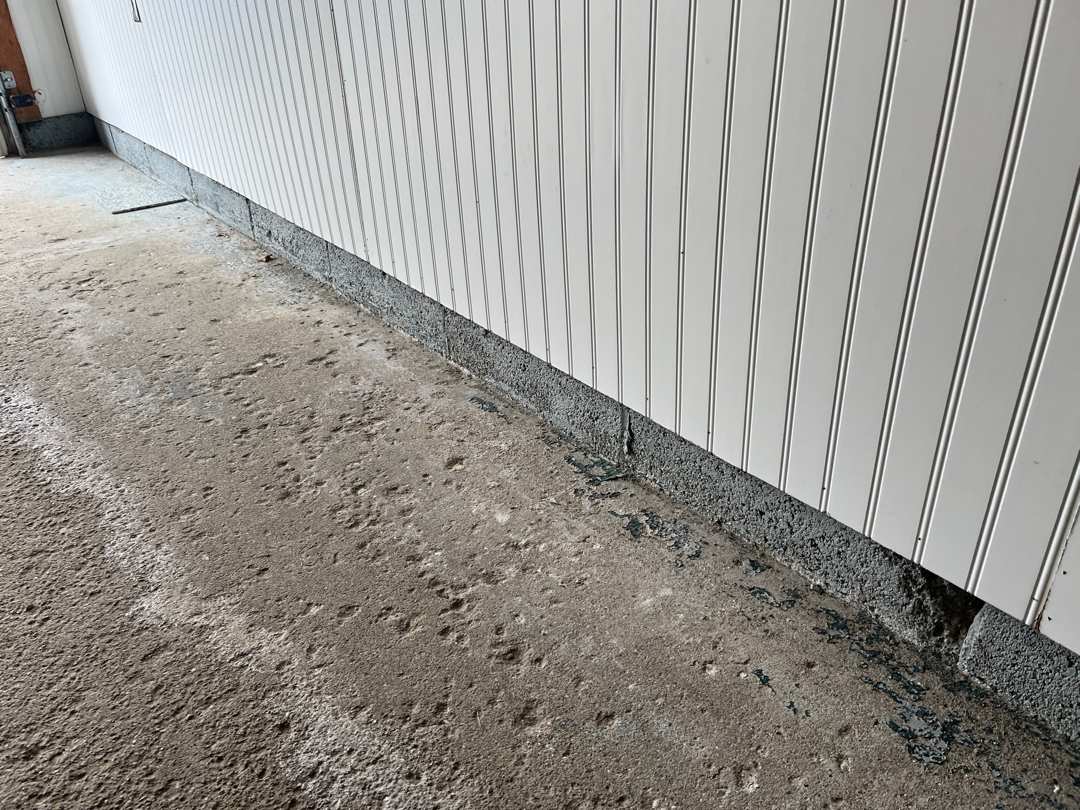
Beneath the deteriorating coating, the concrete itself had issues—the center control joint had suffered significant spalling from years of freeze-thaw cycling, leaving deep erosion and cracking that ran the length of the slab. A single painted concrete step at the interior entry door completed the picture.
With clean white drywall walls and neatly organized wall-mounted tools, the garage was well-kept above floor level—the homeowner was ready to bring the floor up to the same standard with the bold Domino flake color on a grey base.
Surface Preparation and Epoxy Removal
The MotorCity crew faced an aggressive prep phase on this job. Before any new coating could be applied, the old epoxy had to be completely removed—a critical step, since polyurea/polyaspartic systems require a direct bond to the concrete substrate and will not adhere over existing coatings.
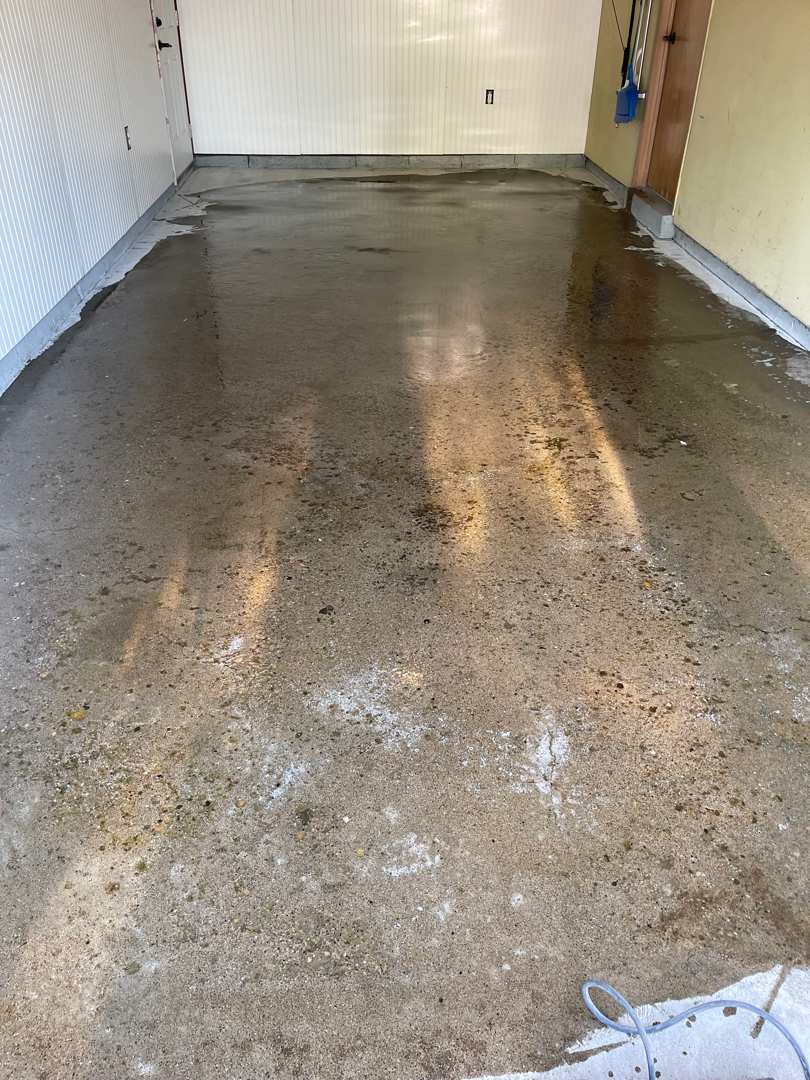
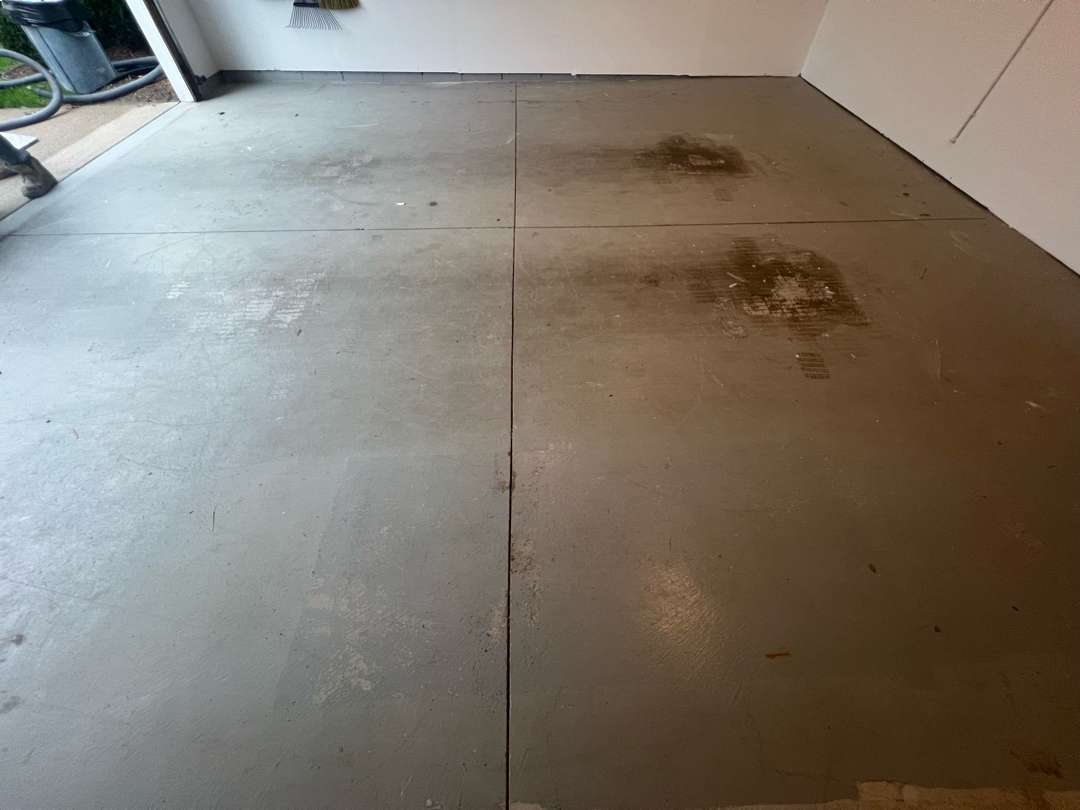
Our crew brought in their diamond grinders and worked methodically across the entire 400-square-foot floor, cutting through the failing epoxy layer to expose the raw concrete beneath. The grinding process removed not only the old coating but also the embedded tire marks, oil stains, and surface contaminants that had accumulated underneath and around the deteriorating epoxy.
With a moisture content reading of just MC 1.5, the slab was dry and sound—no moisture remediation was necessary. Once the epoxy was fully stripped and the concrete profiled, the floor revealed clean, uniform substrate with the consistent scratch pattern needed for optimal coating adhesion.
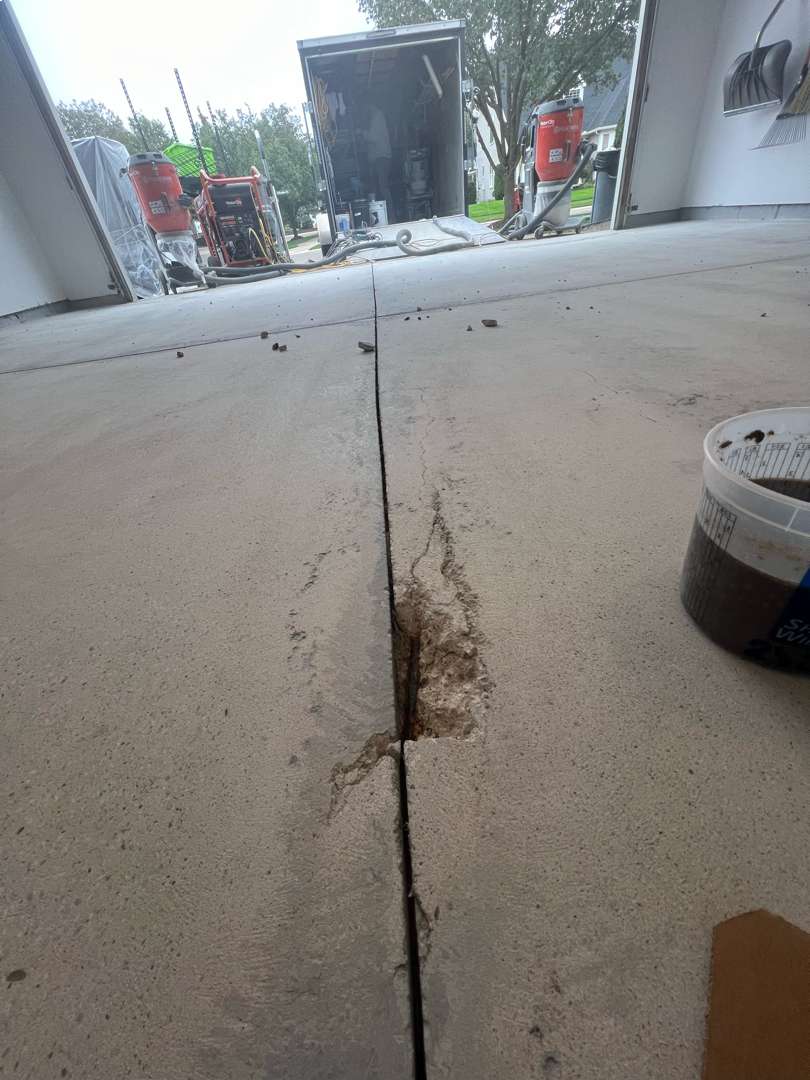
Control Joint and Spalling Repairs
With the epoxy removed and the concrete exposed, the full extent of the control joint damage became clear. The center joint running the length of the garage had suffered severe spalling—freeze-thaw cycles and moisture infiltration had eroded the concrete edges, leaving deep voids and fractured material along the joint line. This was the most labor-intensive phase of the project.
Our crew chased out the loose and deteriorated concrete along the joint, then mixed generous batches of two-part mender with sand and carefully packed the repair compound into every void, rebuilding the joint edges to create a smooth, level transition. The single concrete step at the interior door was also prepped, with the old paint ground off to ensure the coating system could bond directly to the concrete surface.
Once all repairs cured, our crew lightly ground the mended areas to blend seamlessly with the surrounding floor, producing a uniform substrate ready to accept the coating system.
Base Coat and Decorative Flakes
Once repairs were complete and the surface fully prepped, the crew applied the grey polyurea/polyaspartic base coat across the entire 400 square feet.
The two-part system was precisely measured and mixed, then rolled in overlapping passes from the back of the garage toward the door. The base coat covered the repaired control joint seamlessly, transforming the patched and ground concrete into a uniform grey foundation.
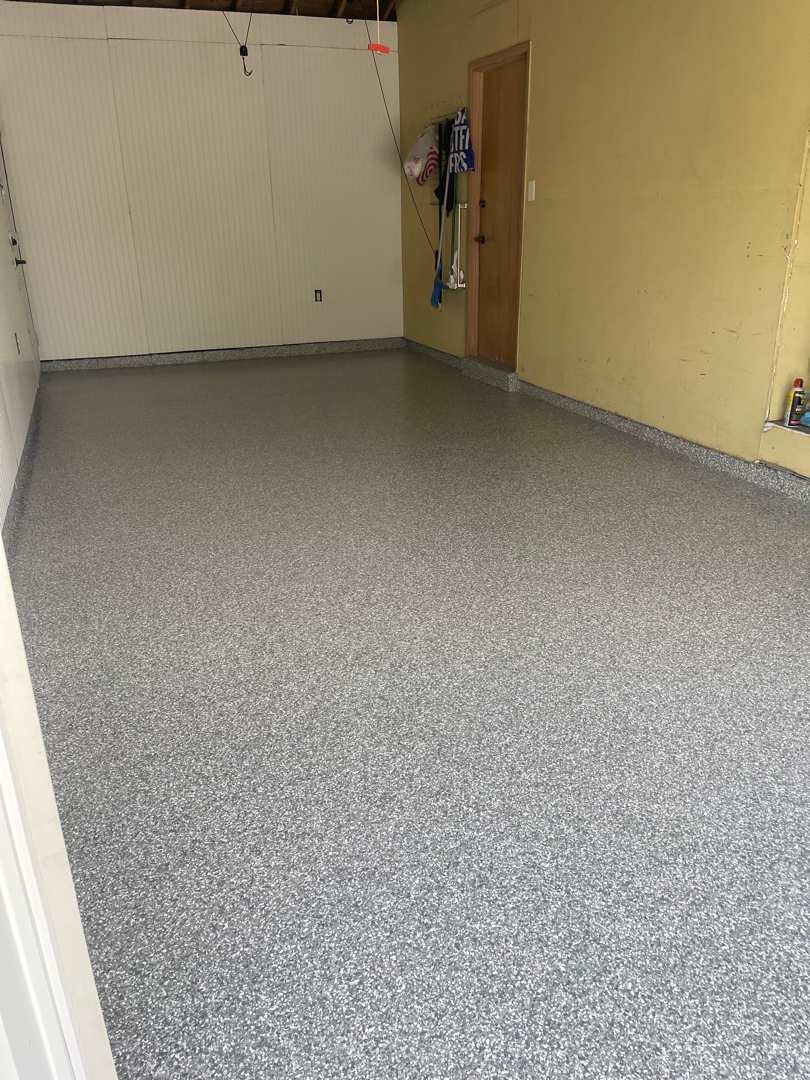
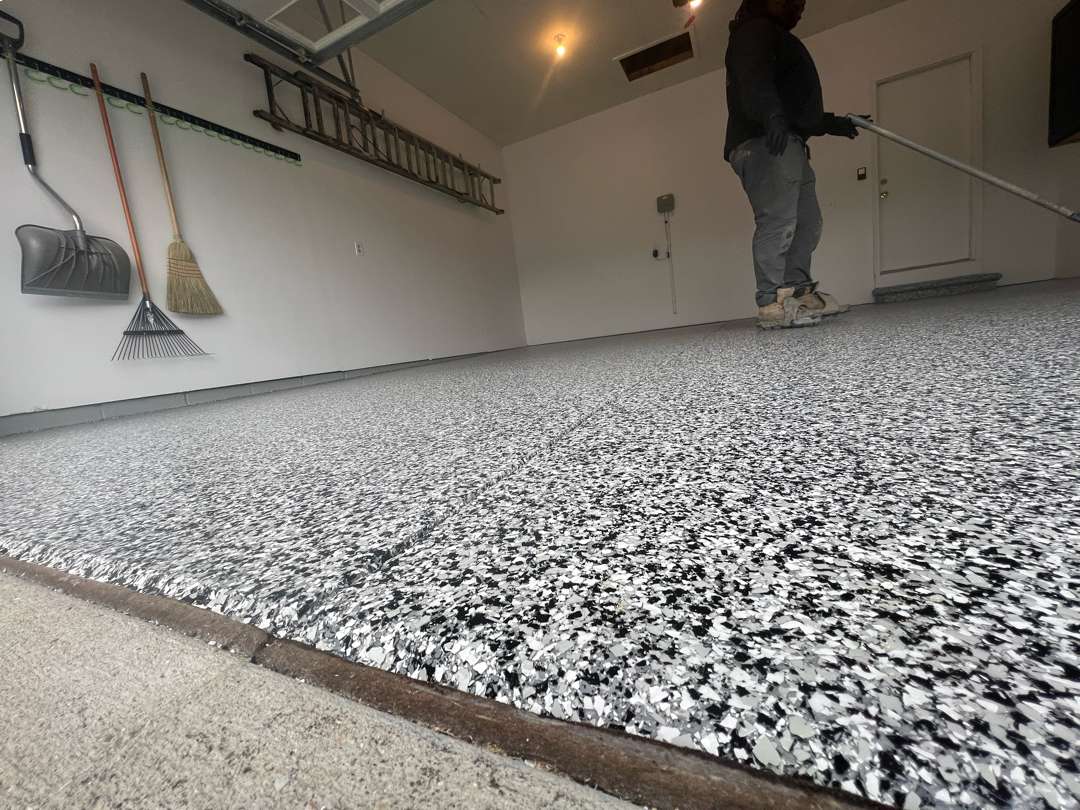
The crew also coated the concrete step at the interior entry door, wrapping the tread and riser for a finished, unified look. While the base coat remained wet, the team immediately broadcast the Domino decorative flake blend across the entire surface. The Domino palette—a striking high-contrast mix of bold black, charcoal grey, medium grey, and crisp white—created dramatic visual depth and a modern, granite-like appearance as the flakes settled into the wet base coat and locked into place.
Clear Coat Protection
The final phase involved applying the protective polyaspartic clear coat system with 16-grit Shark Grip slip-resistant additive. The coarser 16-grit traction additive was mixed into the clear coat to provide reliable footing—especially important for a garage that would see wet shoes, snow melt, and slippery winter conditions.
The crew laid down generous, even passes across the entire floor and step, encapsulating every decorative flake beneath a tough, transparent shield. As the clear coat went on, the transformation was immediate—the matte flake surface turned brilliantly glossy, and the Domino color palette came alive.
The deep blacks intensified, the greys took on a polished sheen, and the white accents popped with sharp contrast, creating a bold, modern finish that caught and reflected the garage’s overhead lighting across the entire bay.
The Result
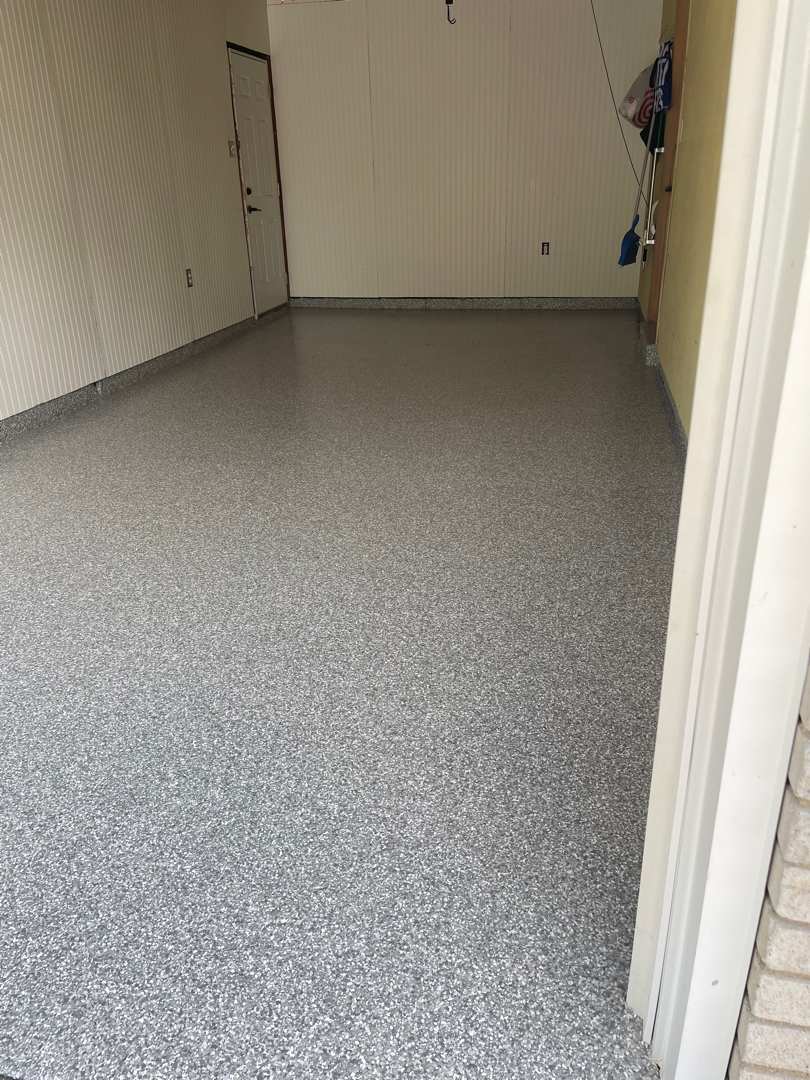
The finished floor tells a transformation story. Where there was once a failing epoxy coating, embedded tire marks, and a severely spalled control joint, there is now 400 square feet of flawless Domino flake finish sealed beneath a high-gloss protective layer. The bold black, grey, and white palette pairs perfectly with the clean white walls, creating a sharp, modern aesthetic that elevates the entire garage.
The coated concrete step provides a seamless transition from the garage floor to the interior door, while the 16-grit traction additive ensures safe footing even in wet conditions. Unlike the old epoxy that wore through, peeled, and failed,
this polyurea/polyaspartic coating system is engineered for permanence—it won’t delaminate, yellow, or hot-tire lift. Road salt, motor oil, chemical spills, and Michigan’s punishing freeze-thaw cycles won’t penetrate this professionally installed system.
Click on the photos to enlarge them
Polyurea Garage Floor Coating
on Lexington Drive
Lexington Dr., Auburn Hills, MI
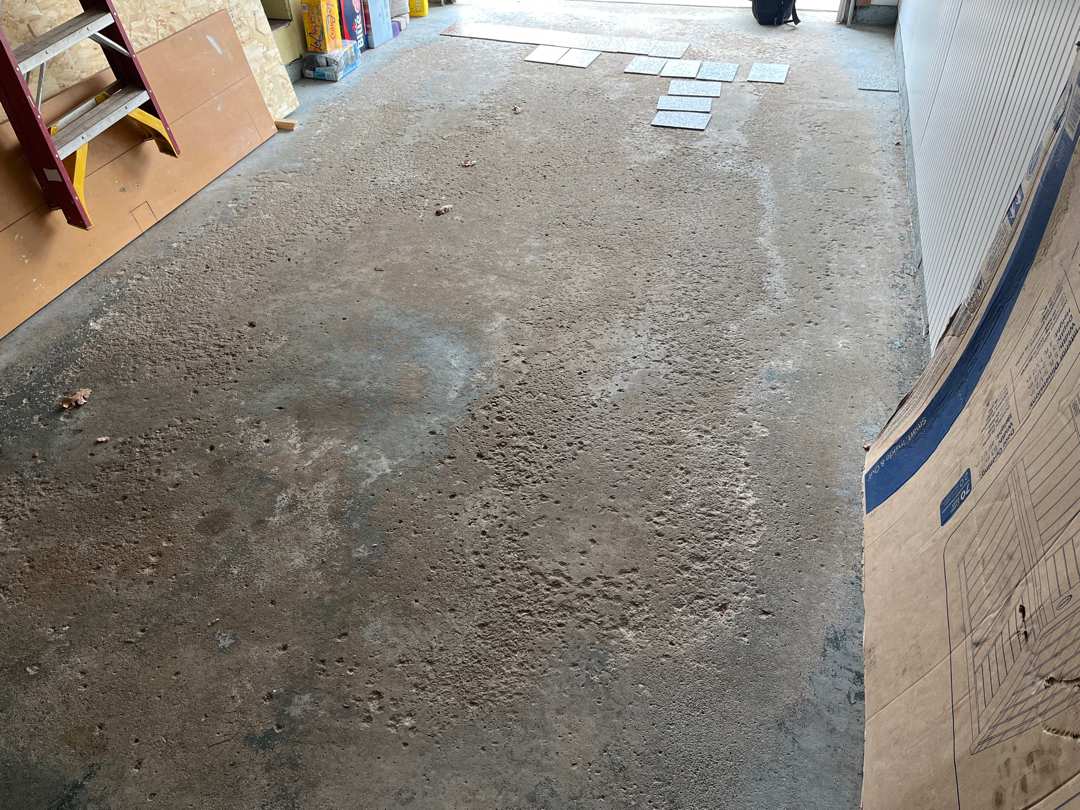
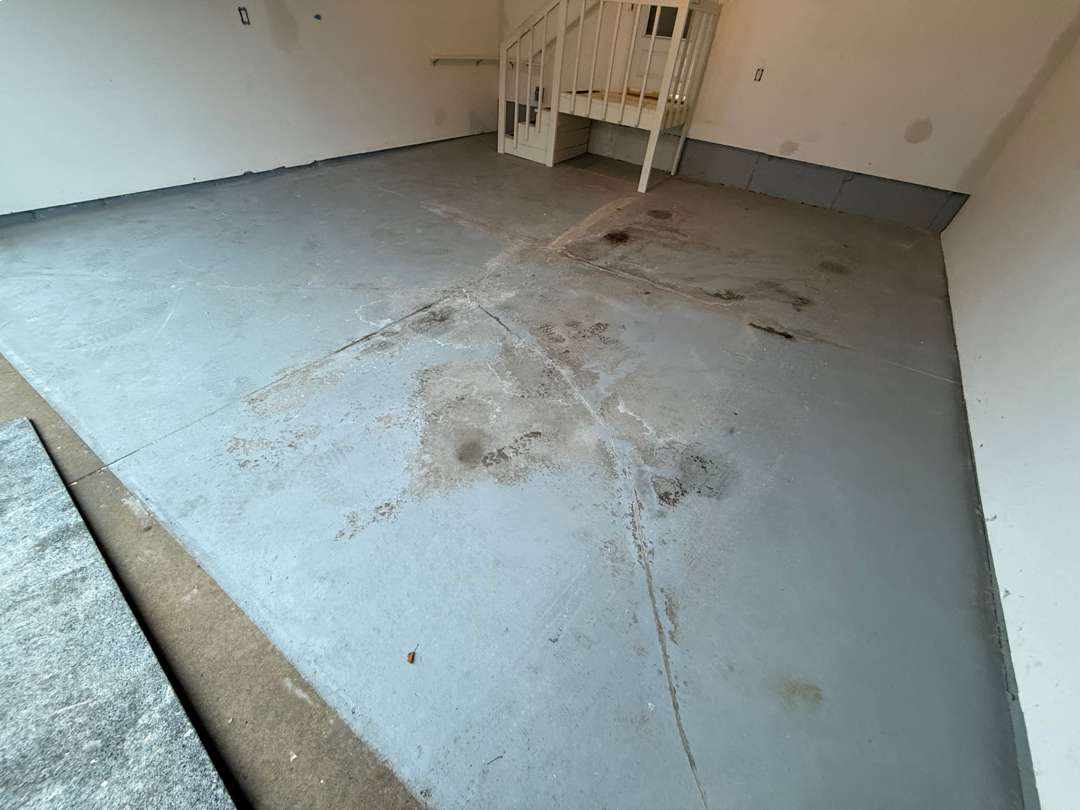
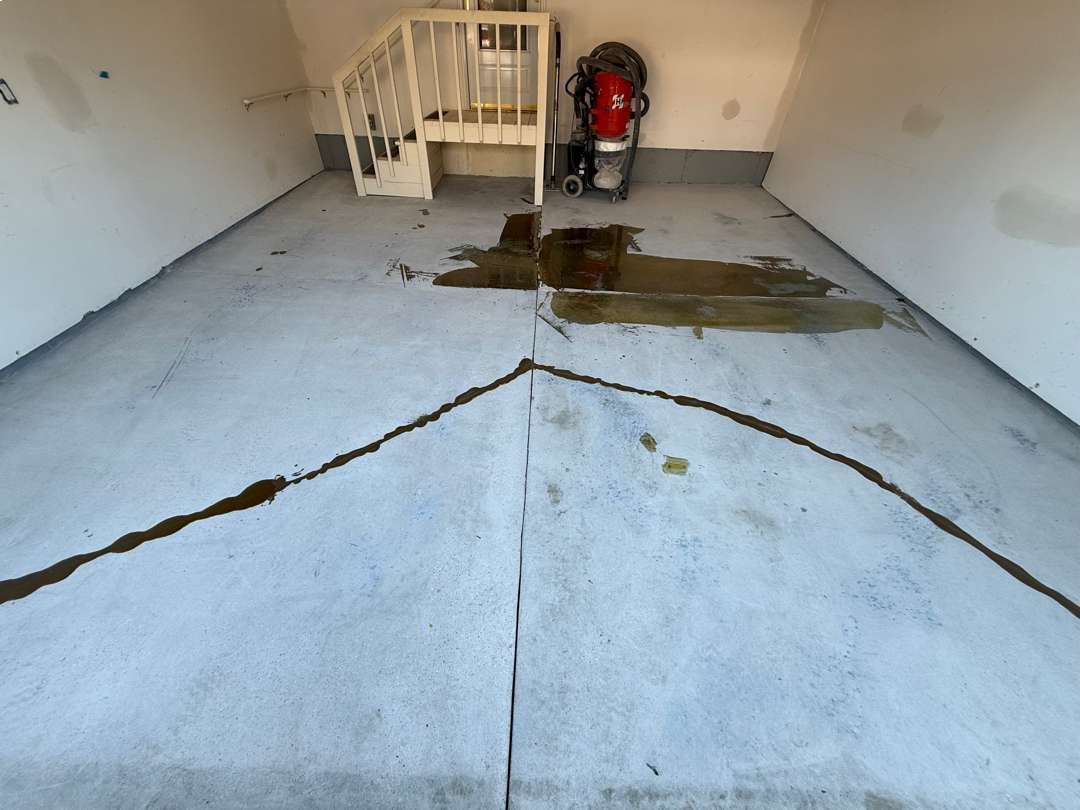
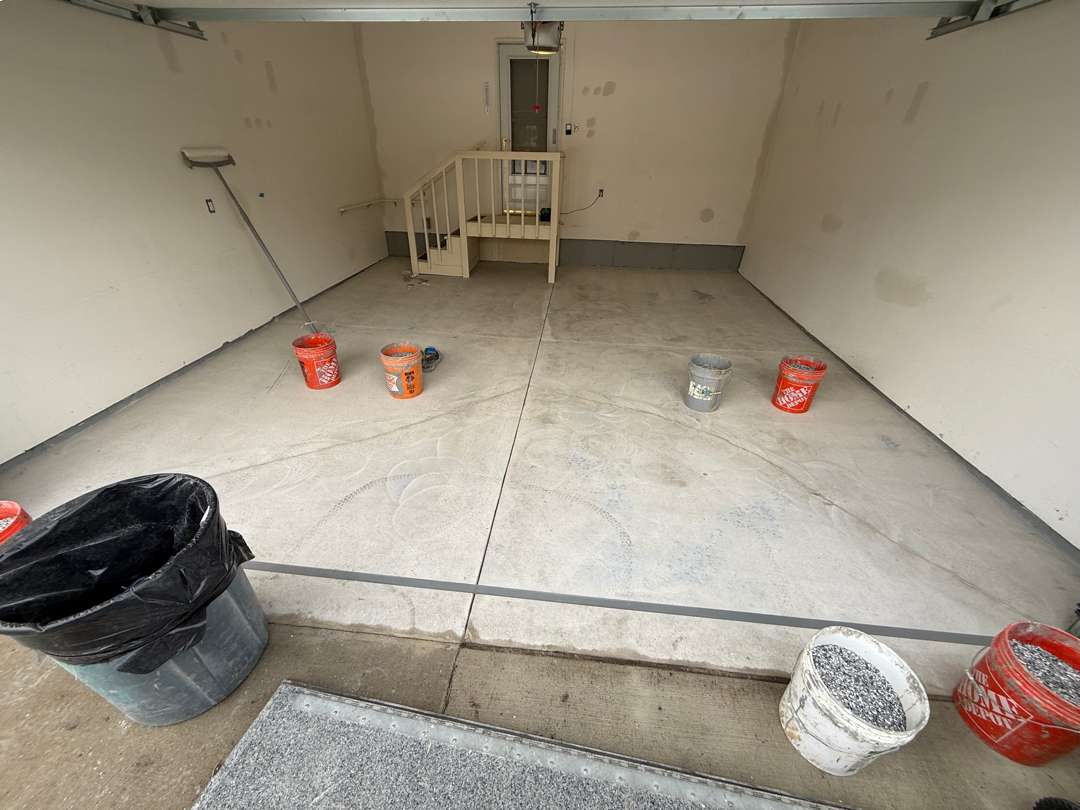
The homeowners on Lexington Dr. contacted MotorCity Flooring and Coatings had a 371-square-foot garage floor showing the unmistakable wear of Michigan winters. The concrete was scarred with oil stains, road salt residue, and scattered surface damage.
Cracking had developed across the slab, including a prominent V-shaped crack pattern radiating from the center control joint, and the joints themselves had begun to spall from years of freeze-thaw cycling. Old paint on portions of the floor added another layer of complexity to the prep work.
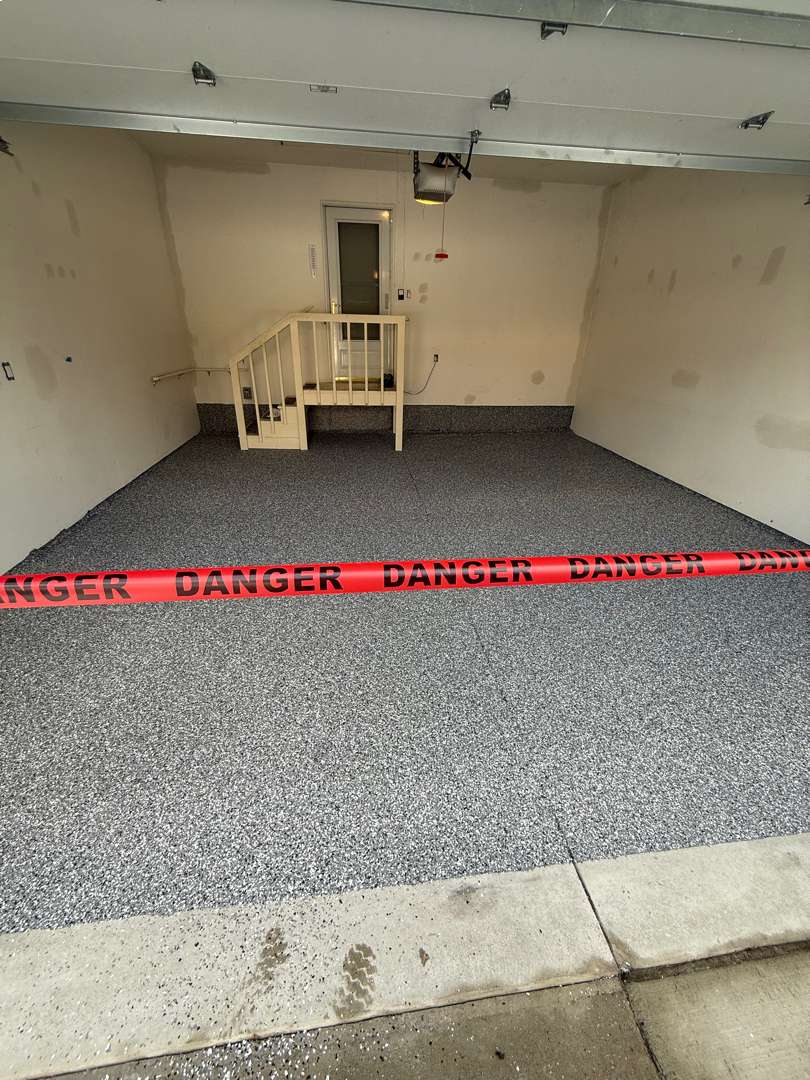
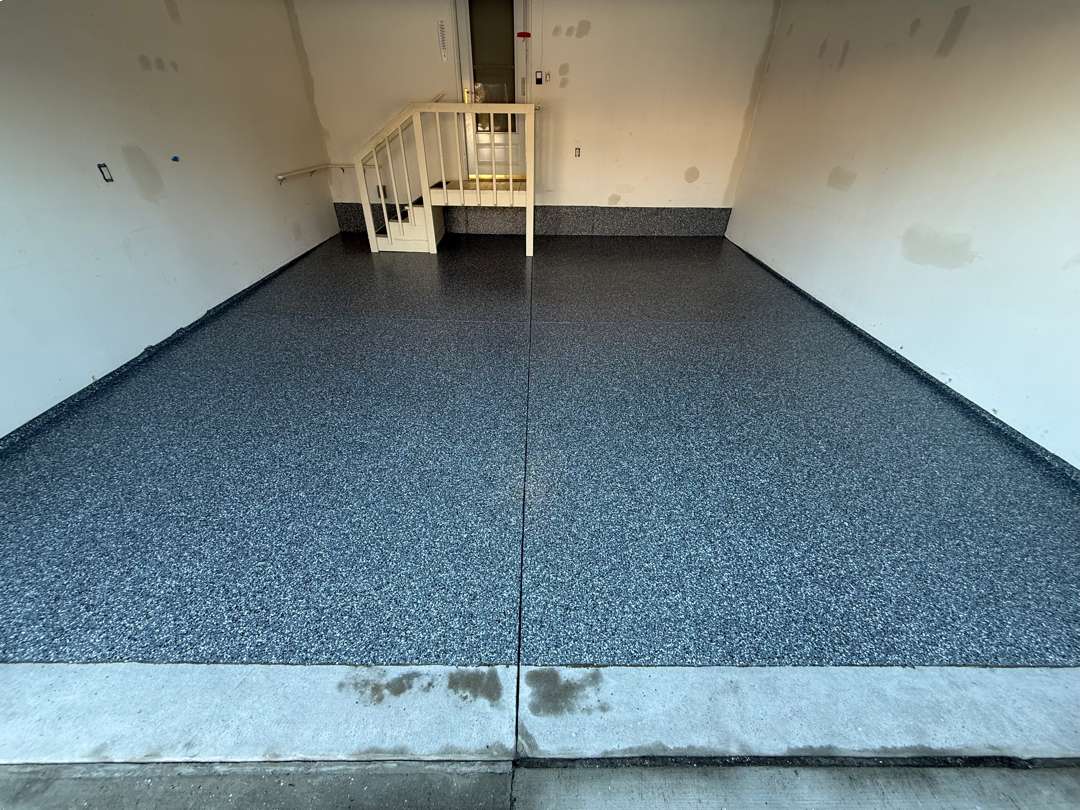
A staircase with a white railing at the back of the garage led up to the interior entry door, and 20 linear feet of vertical block wall along the back ran two feet high—surfaces that would also receive the coating system as a protective cove base. The homeowners chose the Smoke flake color—a refined, fine-grain dark charcoal palette that would bring a sleek, modern look to the space.
Surface Preparation and Paint Removal
The MotorCity crew faced a multi-layered prep phase on this project. Diamond grinding across the entire 371-square-foot floor needed to accomplish several things at once: remove the old paint, cut through the oil stains and salt contamination, and open the pores of the concrete to create the mechanical profile necessary for coating adhesion.
Our crew moved the grinders worked methodically across each section of the slab, stripping away the paint layer and the embedded grime beneath it to expose clean, raw concrete. The grinding also addressed the 20 linear feet of vertical block wall along the back of the garage, profiling the two-foot-high surface to accept the cove base coating that would seal the wall-to-floor transition.
The crew paid careful attention to the areas around the staircase base and the perimeter where the floor meets the walls, ensuring complete and thorough preparation of every surface that would receive the coating system.
Cracking and Pit Repairs
With the surface ground and paint removed, the full extent of the concrete’s damage became visible. The center control joint had spalled in several places, and a V-shaped crack pattern branched outward from the joint intersection, running diagonally across the slab. These weren’t superficial hairline cracks—they had depth, and the spalled joint edges had eroded into voids that needed to be rebuilt.
The crew chased out the loose and deteriorated material along the cracks and joints, then mixed generous batches of two-part mender with sand. Working methodically, they packed the repair compound into every crack, spalled joint edge, pit, and surface void, rebuilding the damaged areas to create smooth, level transitions.
The mender was worked into the V-shaped crack pattern and along the full length of the affected control joints. Once cured, the repaired areas were lightly ground to blend flush with the surrounding concrete, producing a uniform substrate across the entire floor.
Base Coat and Decorative Flakes
With the surface fully repaired and prepped, our crew applied the polyurea/polyaspartic base coat across the entire 371-square-foot floor and the 20 linear feet of vertical block wall. The two-part system was precisely measured and mixed, then rolled in overlapping passes from the back of the garage toward the door.
The base coat covered the repaired cracks and spalled joints seamlessly, transforming the patched and ground concrete into a uniform foundation.
While the base coat remained wet, the team immediately broadcast the Smoke decorative flake blend across the entire surface. The Smoke palette is a fine-grain blend dominated by deep charcoal and dark grey tones with subtle silver and white accents—creating a refined, almost stone-like appearance that reads darker and more uniform than coarser flake blends.
The fine flake size delivered dense, even coverage with a texture that complements the sleek aesthetic the homeowner was after.
Clear Coat Protection
The Result
Click on the photos to enlarge them
Polyurea Garage Floor Coating
on Sumerlyn Court
Sumerlyn Court, Auburn Hills, MI
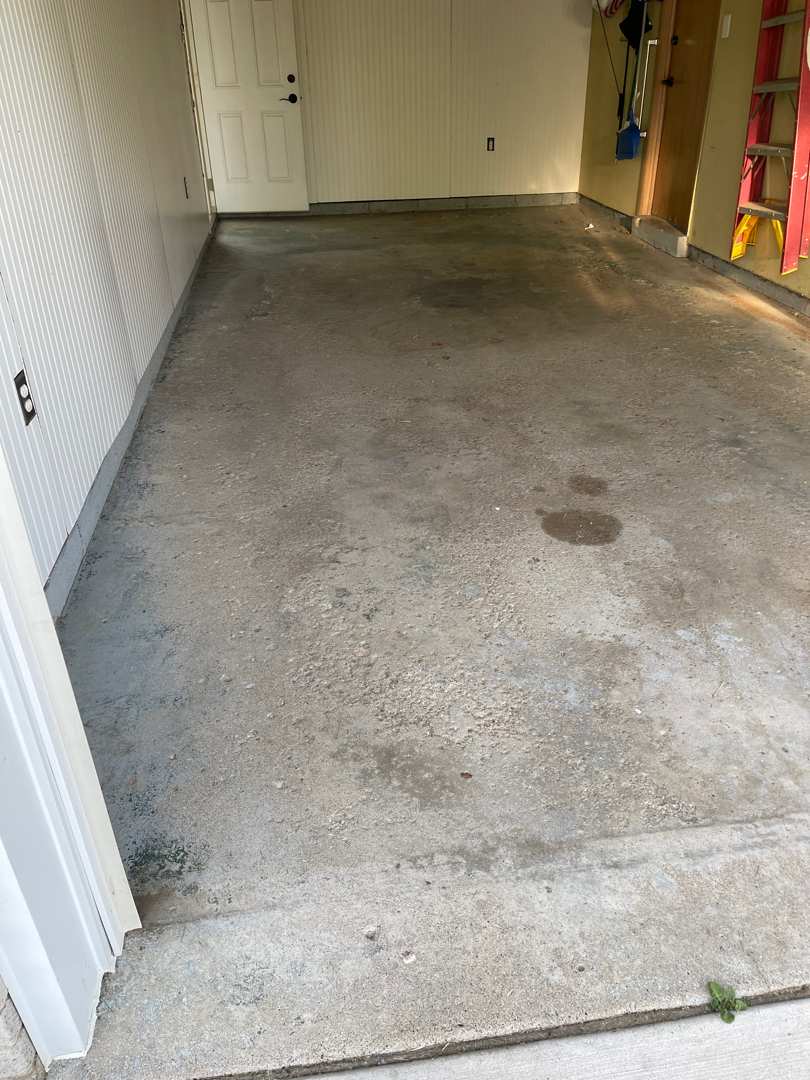
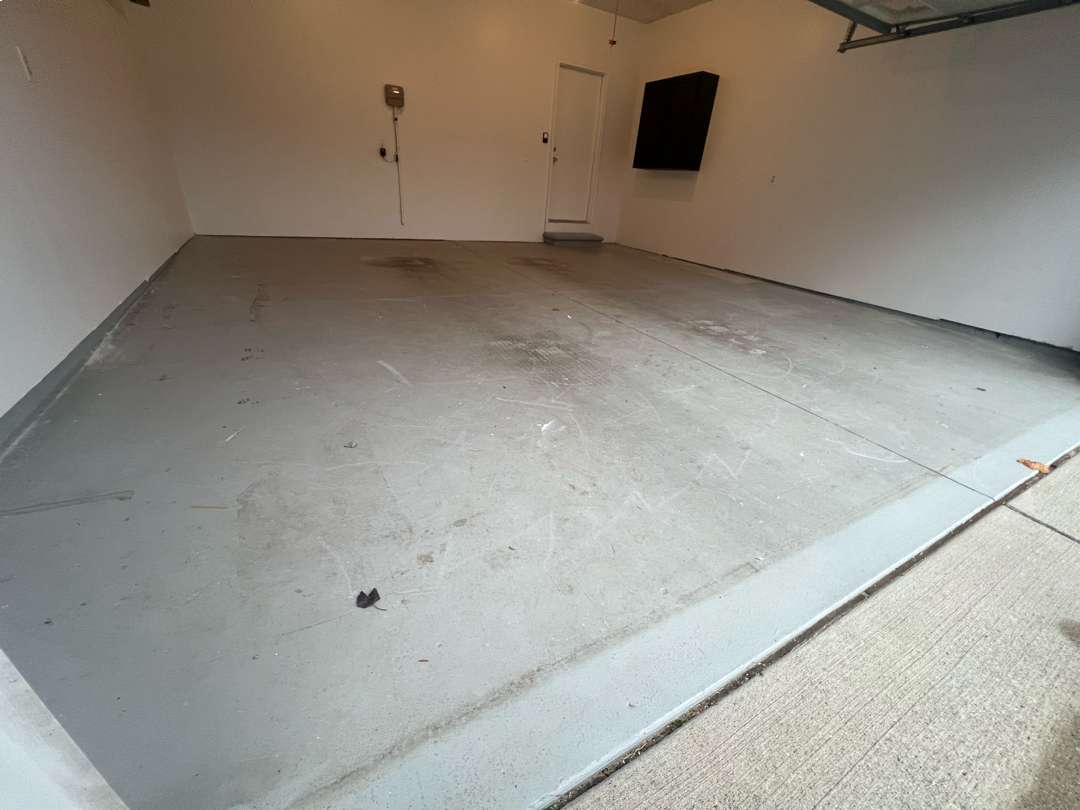
The homeowners of Sumerlyn Court contacted MotorCity Flooring and Coatings to lay donw a new garage floor coating over a 414-square-foot slab in near-perfect condition. The slab was smooth, clean, and structurally sound—the kind of canvas that makes a coating installer’s job a pleasure. The only blemishes were a few scattered paint spatters from interior renovation work and minor surface staining.
With clean white drywall walls, crisp white baseboards, and two wooden steps leading to the interior entry door, this modern condo garage was already well-finished. The homeowners chose the Domino flake color on a grey base—a bold, high-contrast palette that would transform the plain concrete into a striking showpiece floor.
Surface Preparation
The MotorCity crew began with thorough diamond grinding across the entire garage floor. Even on new concrete in excellent condition, grinding is essential—it removes the smooth troweled surface, opens the pores of the concrete, and creates the mechanical profile necessary for the polyurea/polyaspartic system to achieve a permanent bond. The grinding process also removed the scattered paint spatters and light surface staining, revealing a uniform, clean substrate beneath.
Our crew worked carefully around the control joints and along the perimeter where the floor meets the finished baseboards, ensuring complete edge preparation without damaging the surrounding trim. The coating stopped at the garage door threshold—a clean termination point that our crew prepped and taped for a sharp, finished edge.
Minimal Repairs
Given the excellent condition of the floor, no mender or crack repair was required. The new concrete was free of pitting, spalling, and structural cracks—a rarity in Michigan. The moisture content tested at MC 4%, but the newness of the slab and its sound condition meant no MR50 moisture remediation primer was necessary. Once grinding was complete, the floor was vacuumed clean and ready to receive the coating system directly—a streamlined prep phase that reflected the quality of the underlying concrete.
Base Coat and Decorative Flakes
With the surface prepped and clean, the crew applied the grey polyurea/polyaspartic base coat using 4 liters of base paint and 2 liters of hardener. The two-part system was precisely measured and mixed, then rolled across the floor in overlapping passes from the back of the garage toward the door. The base coat transformed the bare concrete into a uniform grey foundation.
Our crew also coated the two wooden steps at the interior entry door, wrapping each riser and tread to create a seamless, finished transition between the garage and the home.
While the base coat remained wet, the team immediately broadcast the Domino decorative flake blend across the entire surface. Two boxes of flakes were thrown with one and a half recovered—confirming thorough, generous coverage.
The Domino palette is a striking high-contrast blend of black, charcoal grey, medium grey, and white tones that creates a bold, granite-like appearance with dramatic visual depth.
Clear Coat Protection
The final phase involved applying the protective polyaspartic clear coat system: 6 liters of Clear Part A and 4 liters of Clear Part B, combined with 4 caps of Shark Grip slip-resistant additive.
Our crew laid down generous, even passes across the entire floor, steps, and up to the clean termination line at the garage door threshold, encapsulating every decorative flake beneath a tough, transparent shield. As the clear coat went on, the transformation was immediate—the matte flake surface turned brilliantly glossy, and the Domino color palette came alive. The deep blacks intensified, the greys took on a polished sheen, and the white accents popped with contrast.
The Result
The finished floor elevates this already modern condo garage into a polished, magazine-worthy space. The 414 square feet of Domino flake finish pairs perfectly with the clean white walls and crisp baseboards, creating a high-contrast aesthetic that feels intentional and sophisticated.
The coated wooden steps provide a seamless, unified transition from the garage floor to the interior door, while the clean termination at the garage door threshold delivers a sharp, professional edge. The glossy clear coat reflects natural light pouring through the open garage door, making the space feel brighter and more expansive. Most importantly, this floor is now fully protected against the harsh weather of Michigan—road salt, motor oil, hot tire pickup, chemical spills, and freeze-thaw cycles won’t penetrate this professionally installed polyurea/polyaspartic coating system. The homeowners can maintain their garage floor with nothing more than simple sweeping and occasional mopping for years to come.
Click on the photos to enlarge them