
Polyurea-Polyaspartic Garage Floor Coating in Farmington Hills, MI
QUESTIONS? NEED A QUOTE?
Welcome to MotorCity Flooring and Coatings’ showcase of examples of garage floor coating in Farmington Hills, MI. In this page, you will find detailed project stories from locations all around Farmington Hills—real installations that demonstrate our commitment to quality and durability.
Our specialist teams serve every neighborhood in Farmington Hills with comprehensive garage floor coating services. Each project begins with thorough concrete preparation: diamond grinding to remove old coatings and contaminants, repairing cracks and pitting, and addressing moisture concerns. We then apply our advanced polyurea-polyaspartic coating system—a hybrid technology that combines the incredible durability of polyurea material with the UV stability and fast cure times of polyaspartic coating.
This dual-component system creates a floor that withstands the harsh weather cycles of Michigan—from sub-zero winters to humid summers—without cracking, peeling, or yellowing. The chemical-resistant surface repels oil, salt, and automotive fluids while standing up to the constant pressure from vehicle tires and foot traffic.
Every garage floor installation includes decorative flakes for a professional appearance and customizable traction levels for safety. The result? A garage floor coating that shows very strong UV resistance, reduced hot tire pickup, greater flexibility, excellent chemical resistance, good abrasion resistance, a wide temperature application range, and a better temperature cycling than epoxy. Our floor coating system cures in hours rather than days and comes with our industry-leading warranty.
For ultimate convenience, we install your new floor coating in just 1 day. We come early in the morning and operate discreetly to minimize noise inconvenience to your neighbors. You don’t need to be home if you have other things to do.
Explore the projects below to see our process, results, and the difference professional installation makes.
Garage Floor Coating
on Oak Forest Drive
Oak Forest Drive, Farmington Hills, MI
Lead Tech: Brad


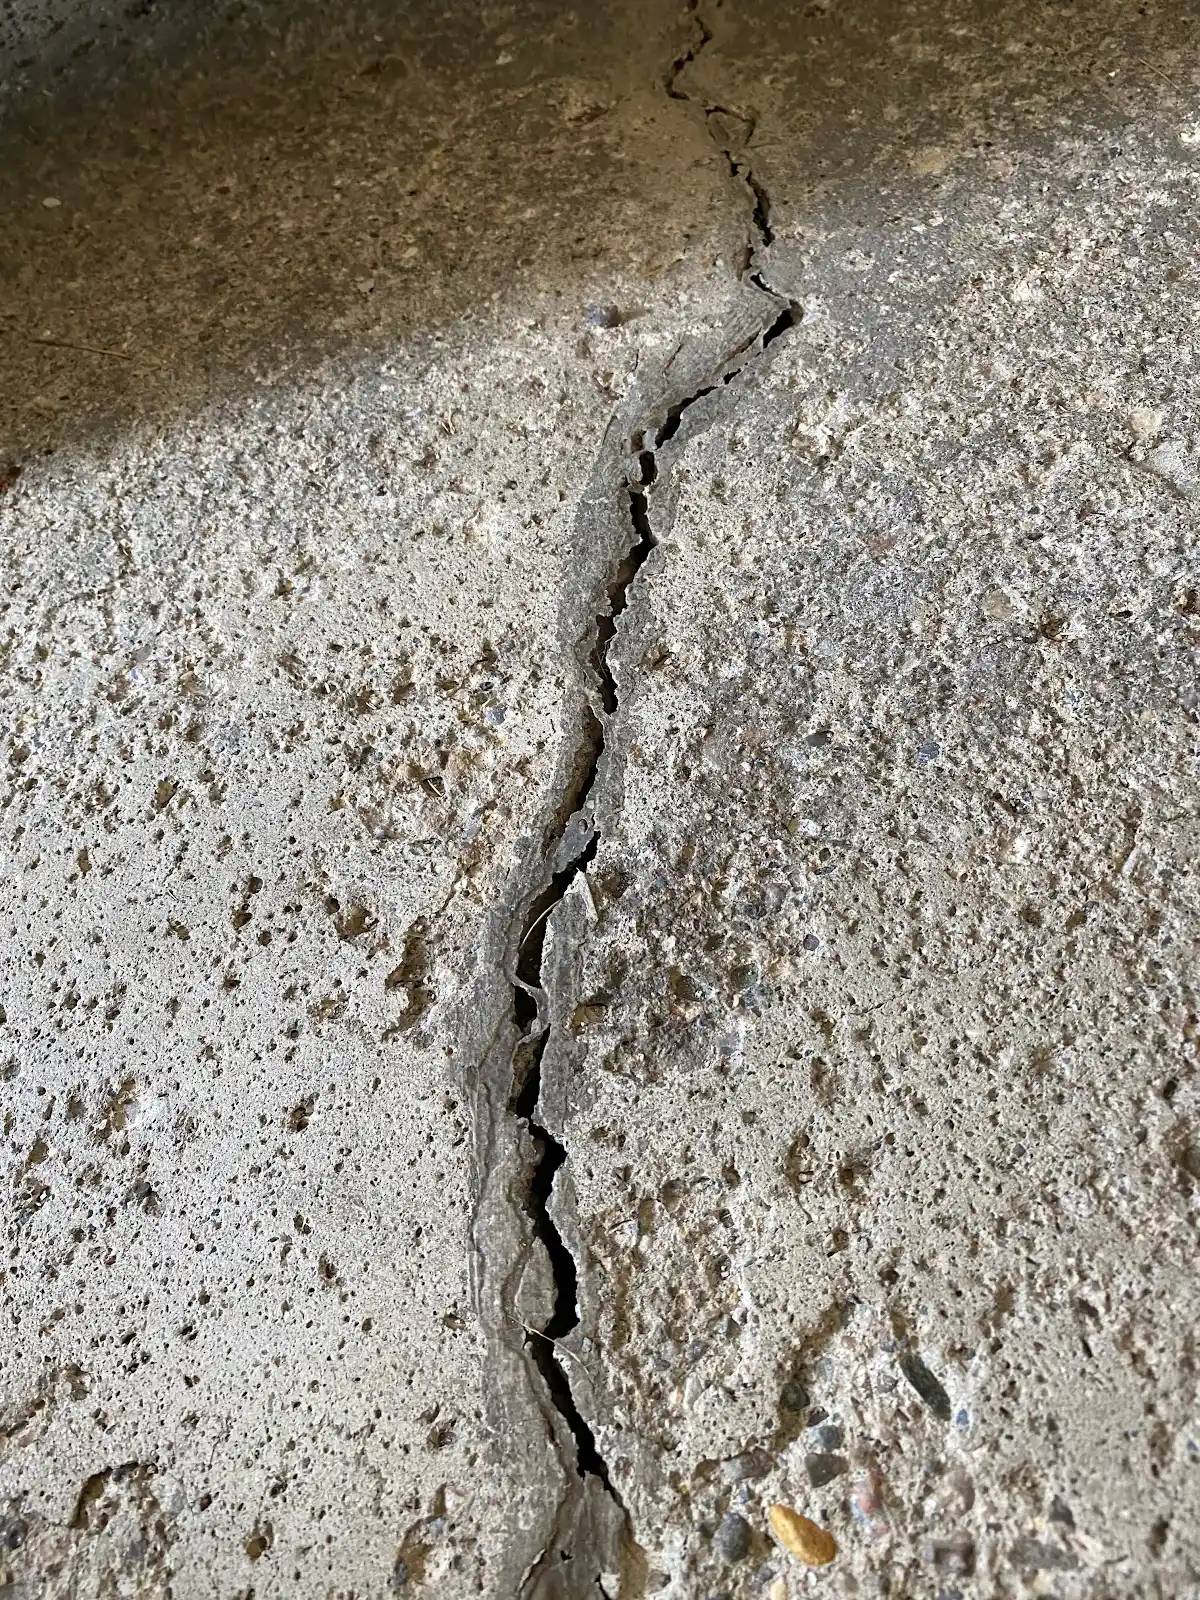
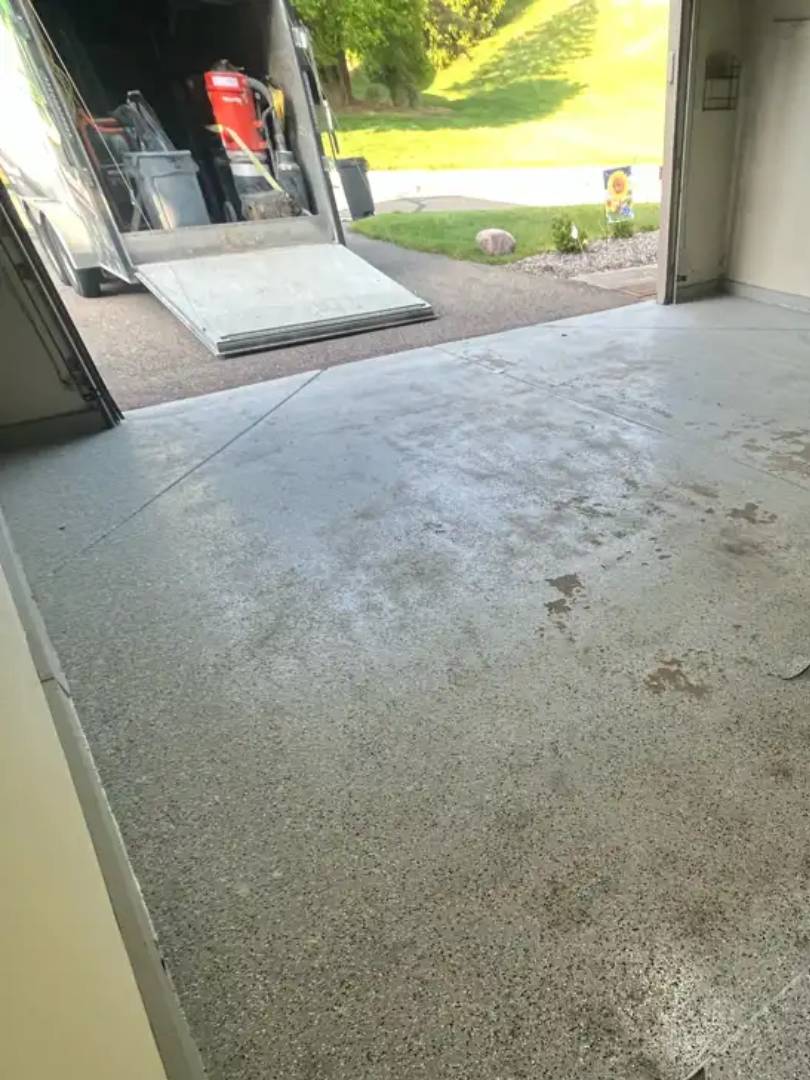
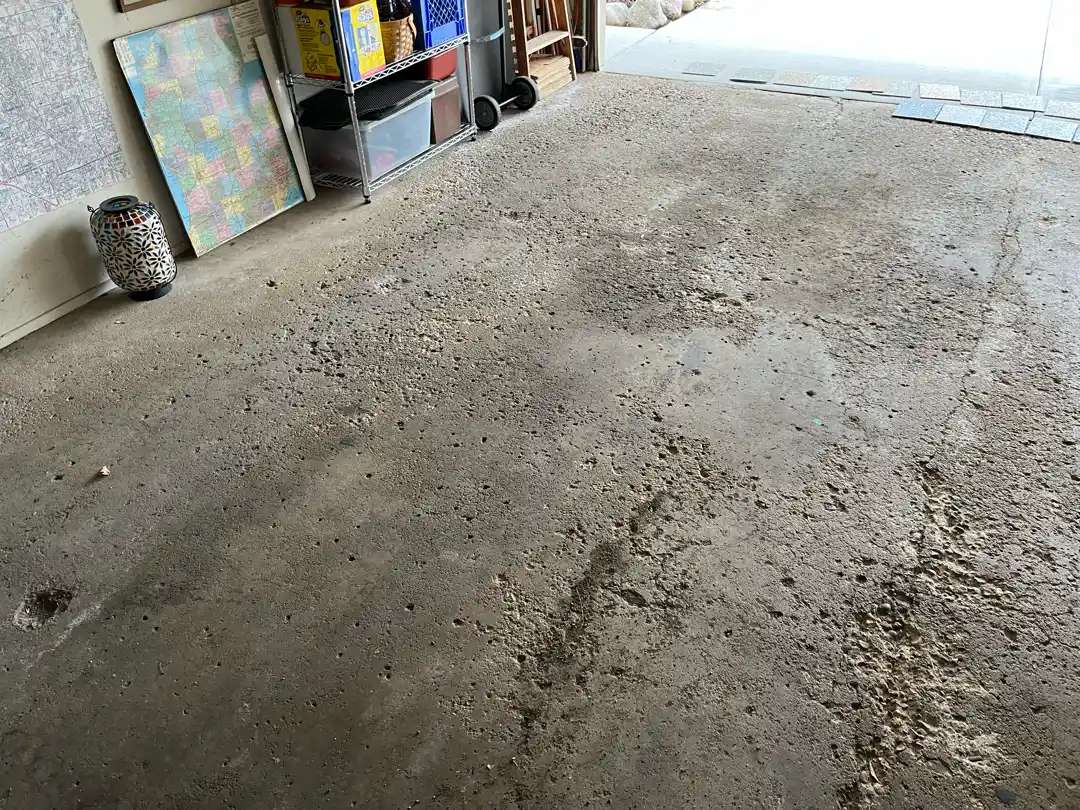
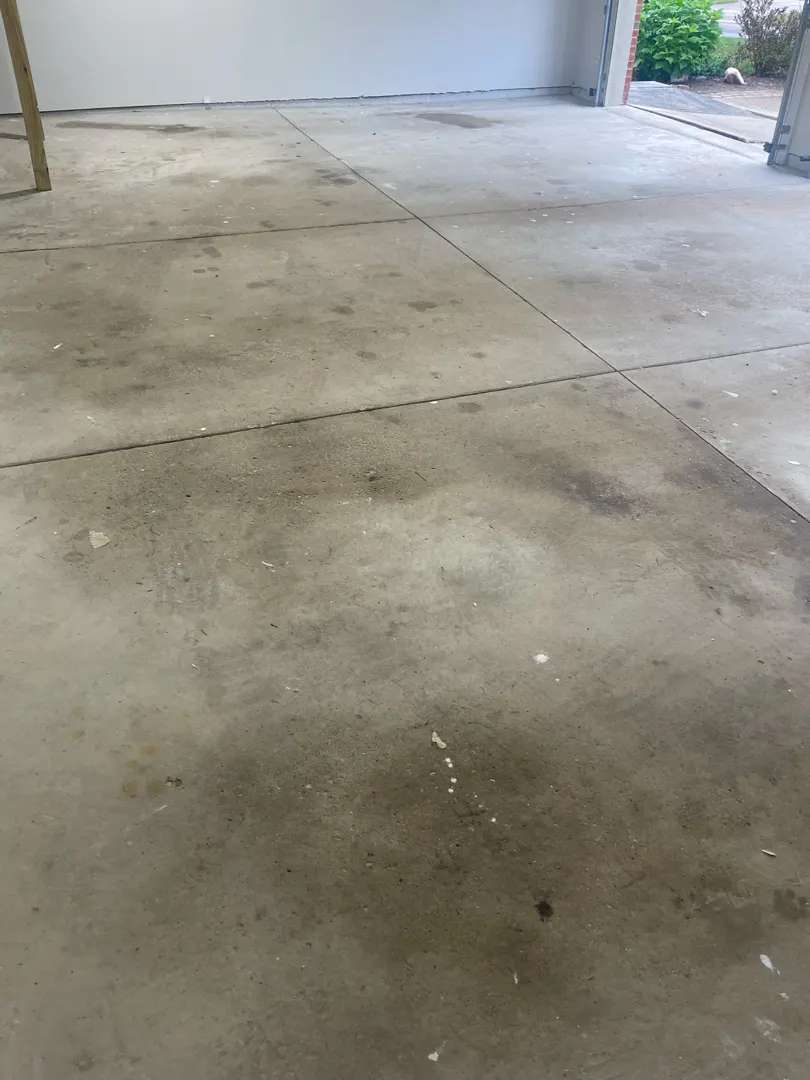
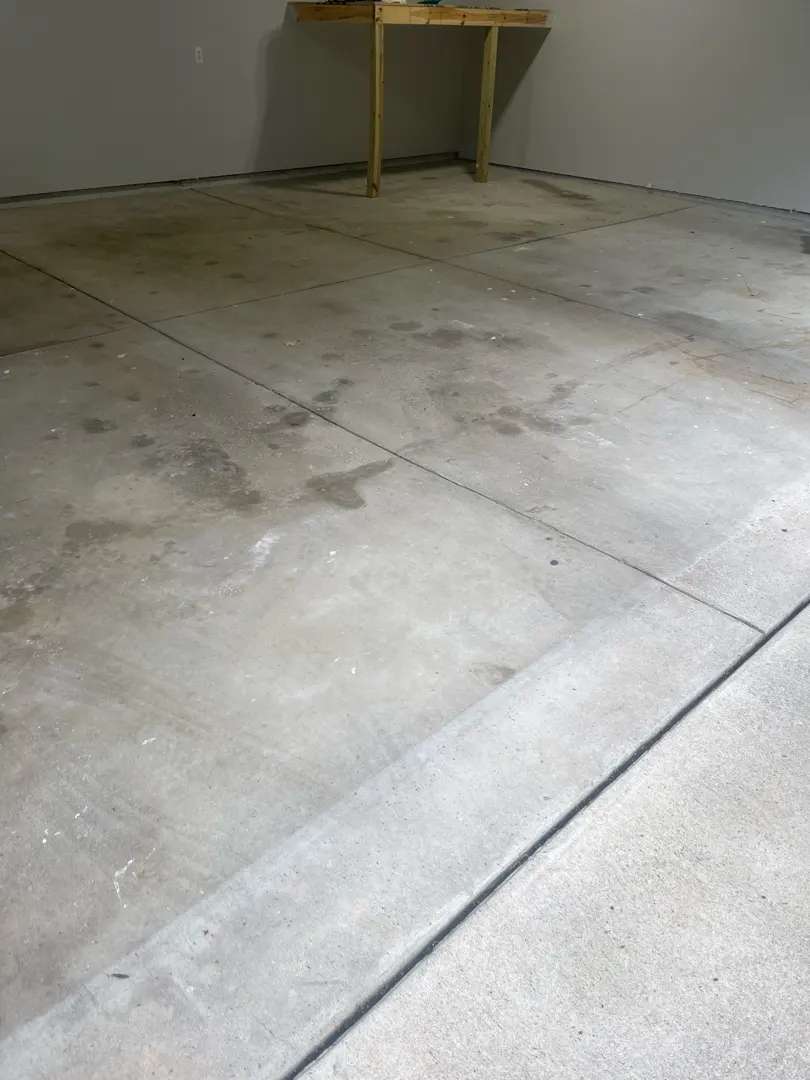
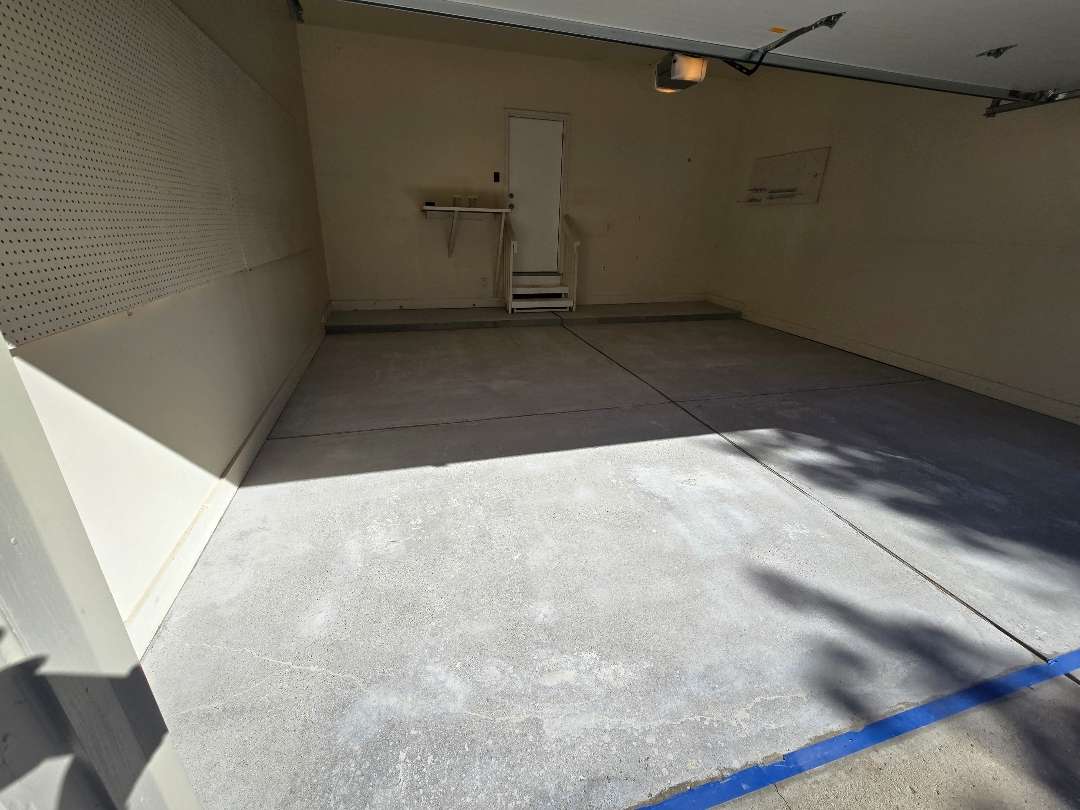
Brad and his crew found 484 square feet of concrete in rough condition. Pitting and cracking were scattered across the surface. Moisture content read at 3.4%. The slab showed the worn look of years of use.
The scope included 22 linear feet of vertical lip transitions and one concrete step. The coating needed to extend to the edge of the driveway for a seamless finish.
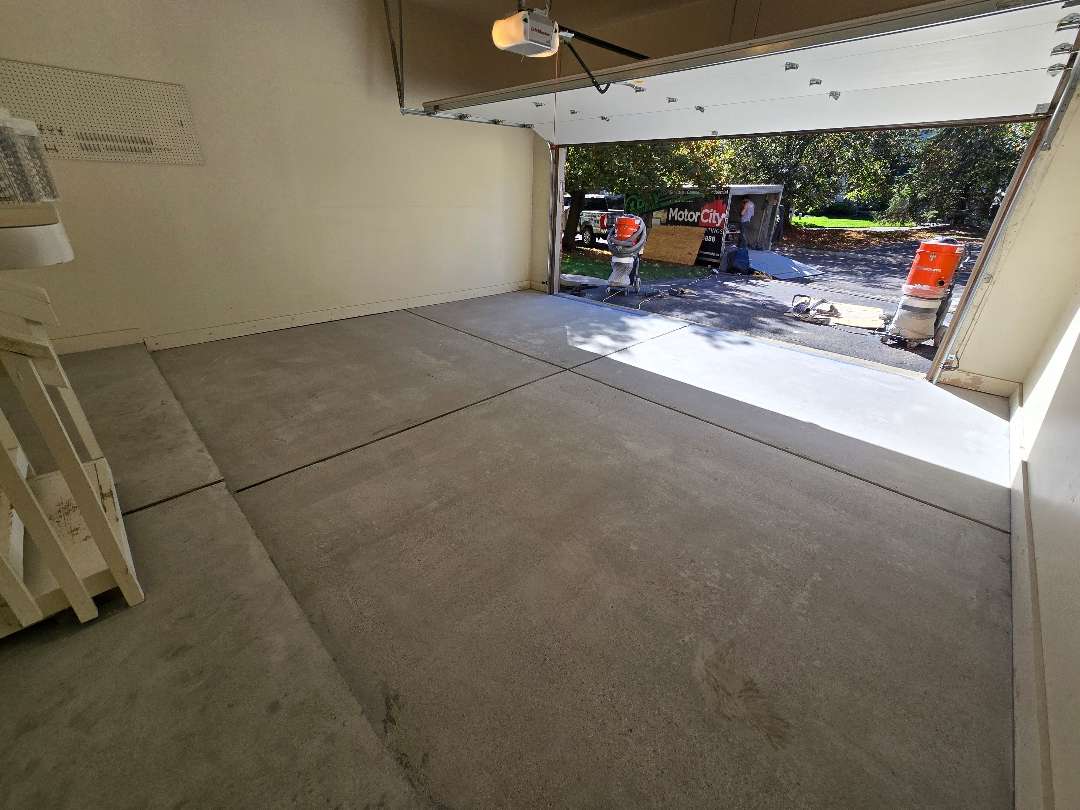
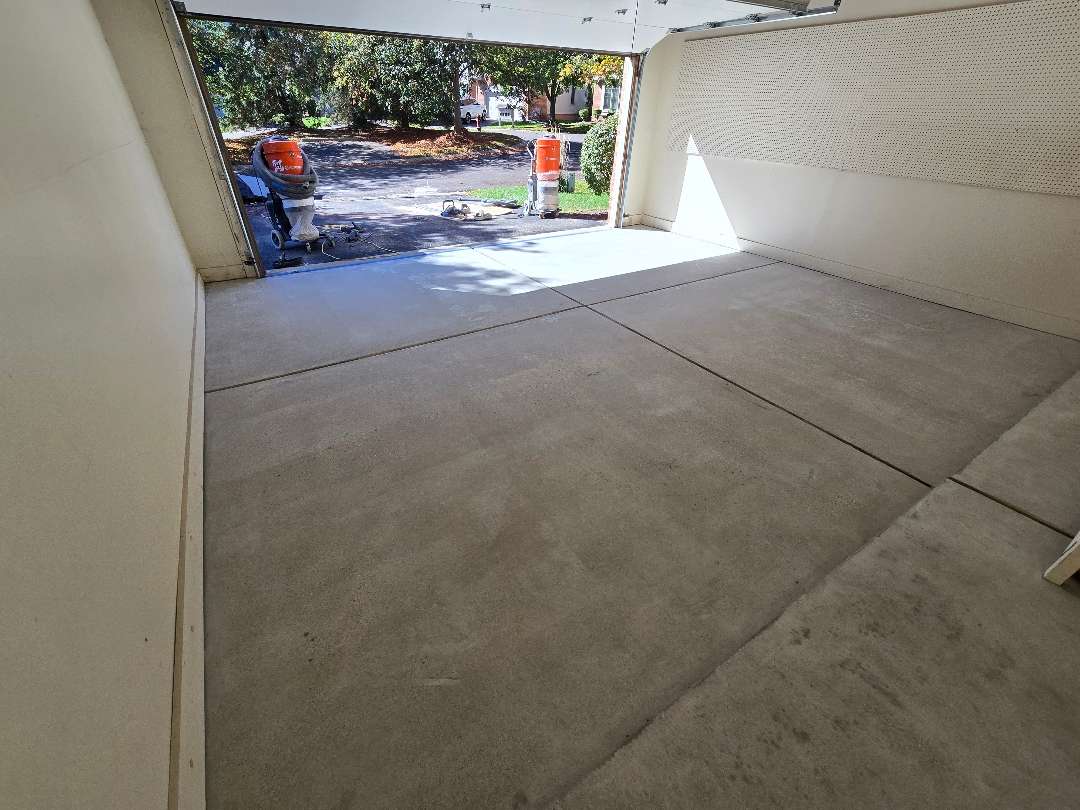
Surface Preparation
No existing coating required removal. Our crew prepared the concrete with 24-grit shark grip for aggressive surface profiling. This grit level ensures proper adhesion across the full slab before any material goes down.
The Build-Up
Our crew worked through the system methodically. The foundation layer mixed 6 liters each of MR-50 primer Part A and Part B. Our crew added 2 cups of sand for grip and void filling. The Siberian base coat used 5 liters of Part A and 2.5 liters of Part B.
Our crew broadcast 4.5 boxes of color flake across the wet base coat. Our team recovered 2 boxes for reuse, a 44% recovery rate. The clear topcoat used 8 liters of Part A and 4 liters of Part B. It locked in the flakes under a hard surface.
Application Detail
Our crew used 3-inch chip brushes for edge work and 18-inch rollers for broad coverage. Our team measured each batch with quart cups throughout. The job filled three trash bags by completion.
Our crew brought the coating up and over the 22 linear feet of vertical lip. We coated the concrete step to match the main floor. The system carried through to the edge of the driveway. It creates a continuous transition from garage to exterior.
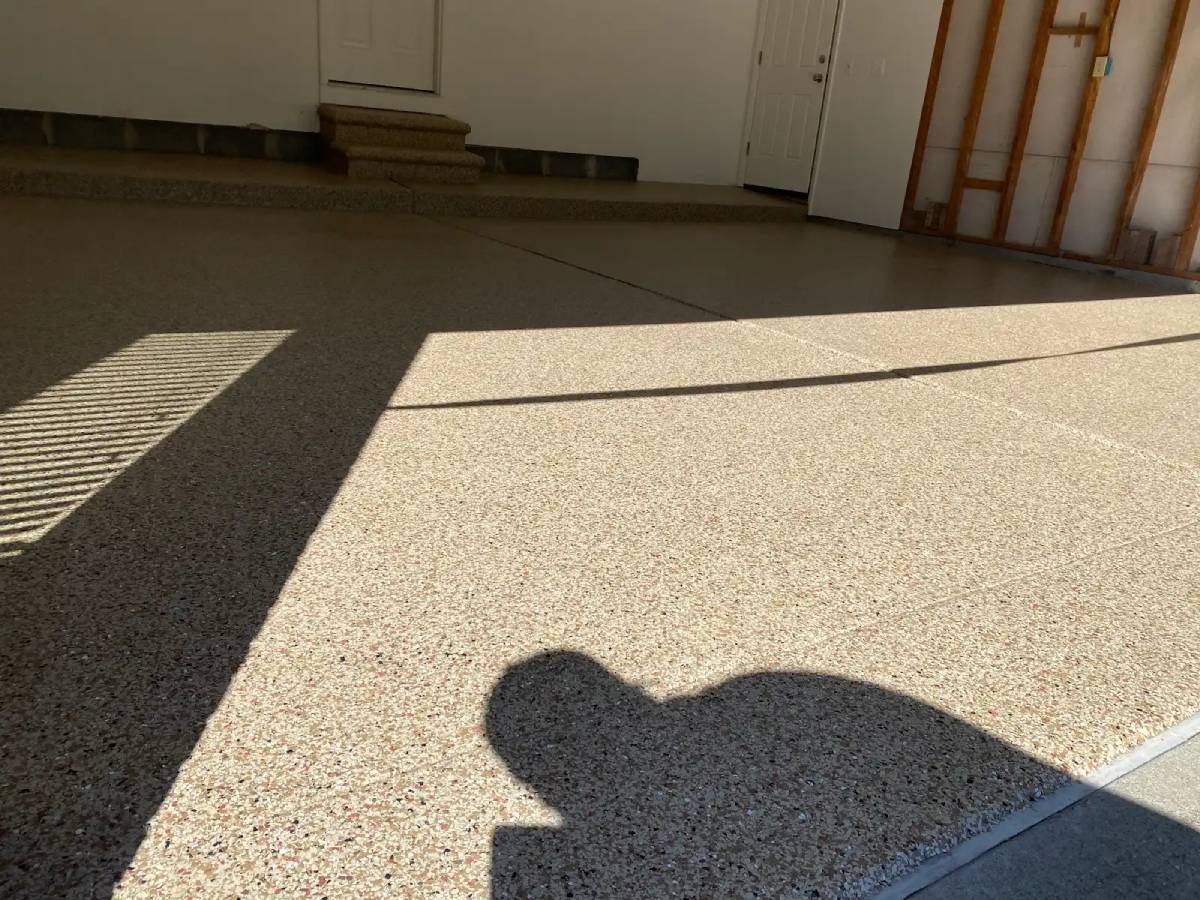
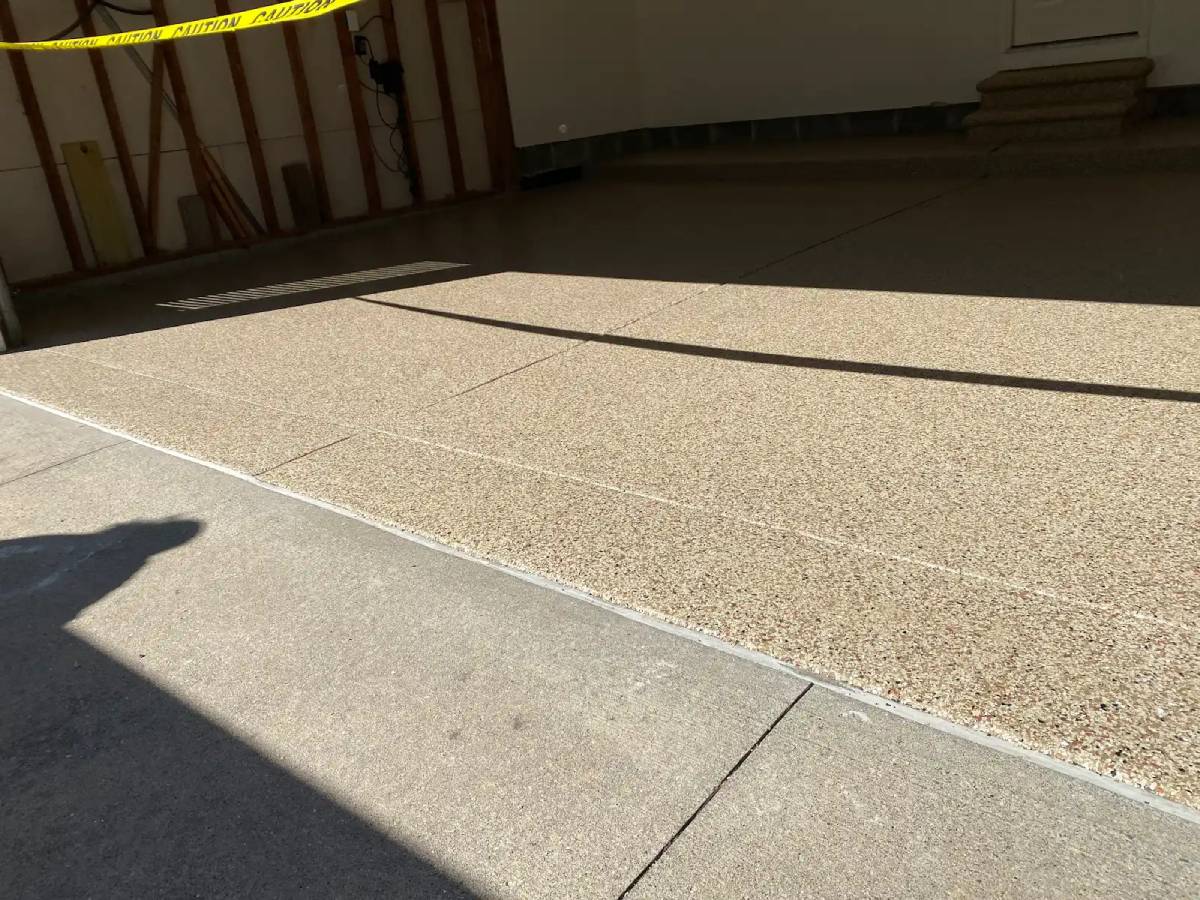
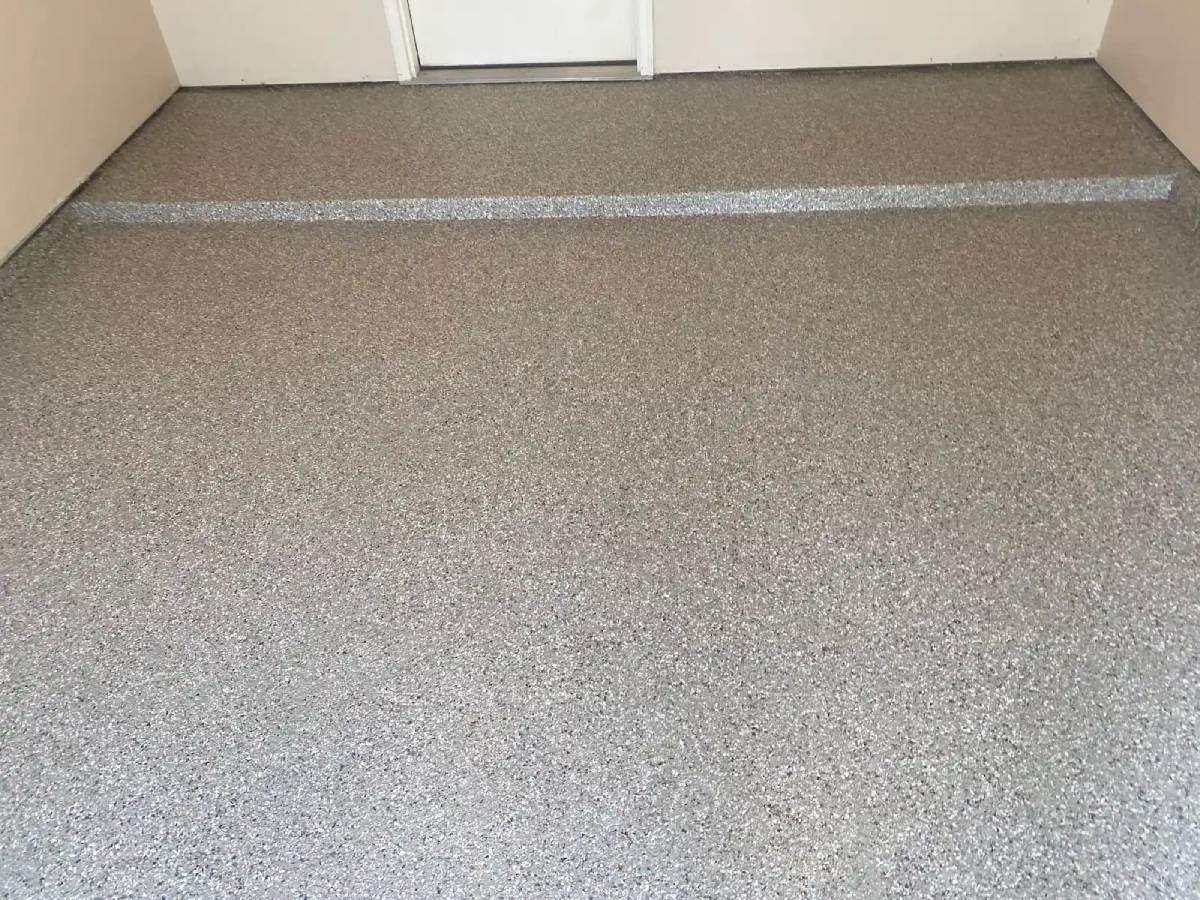
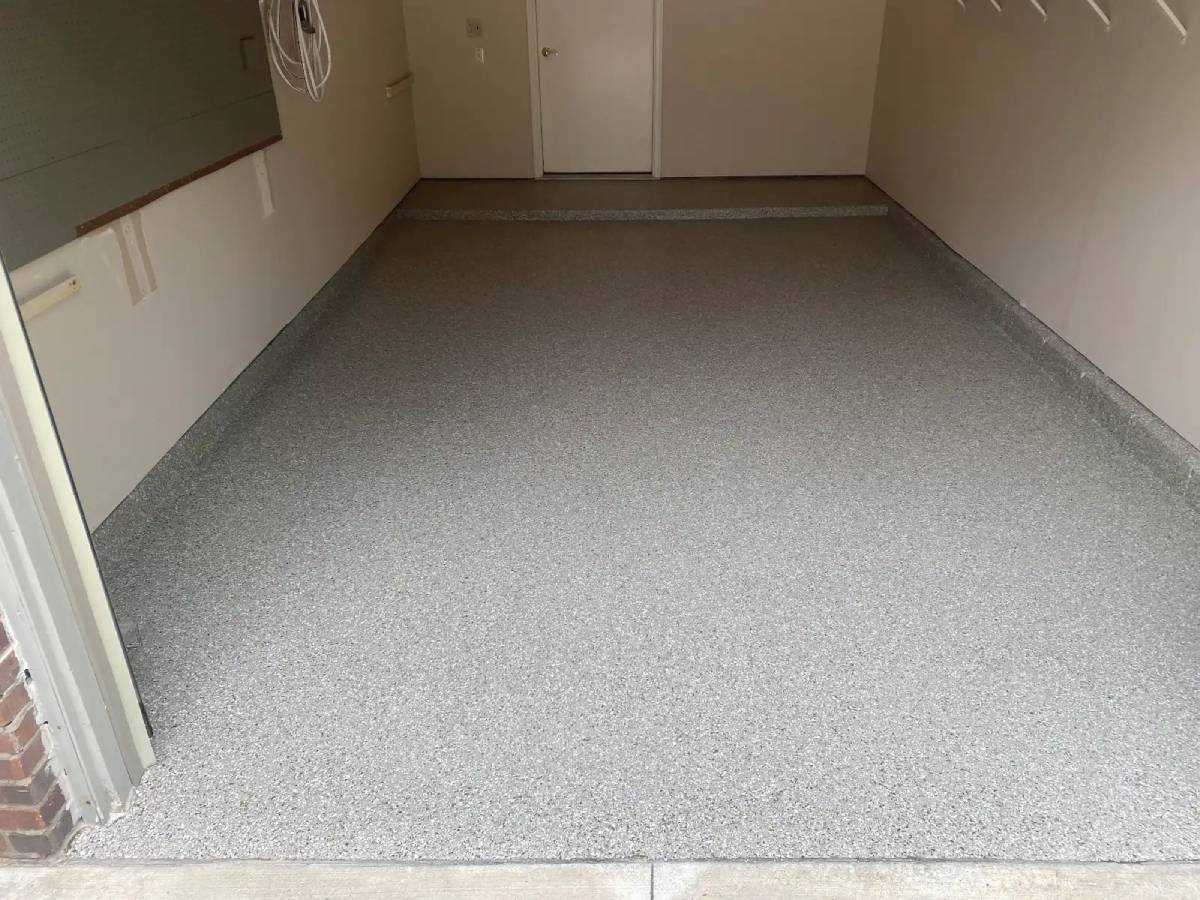
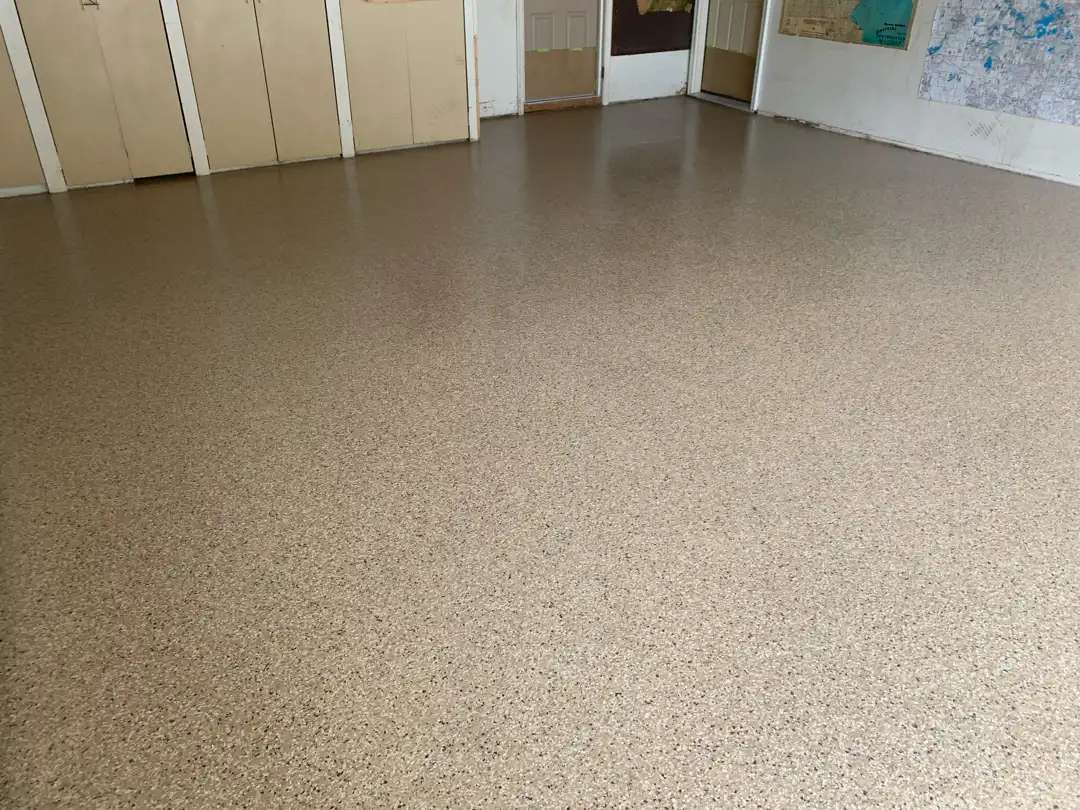
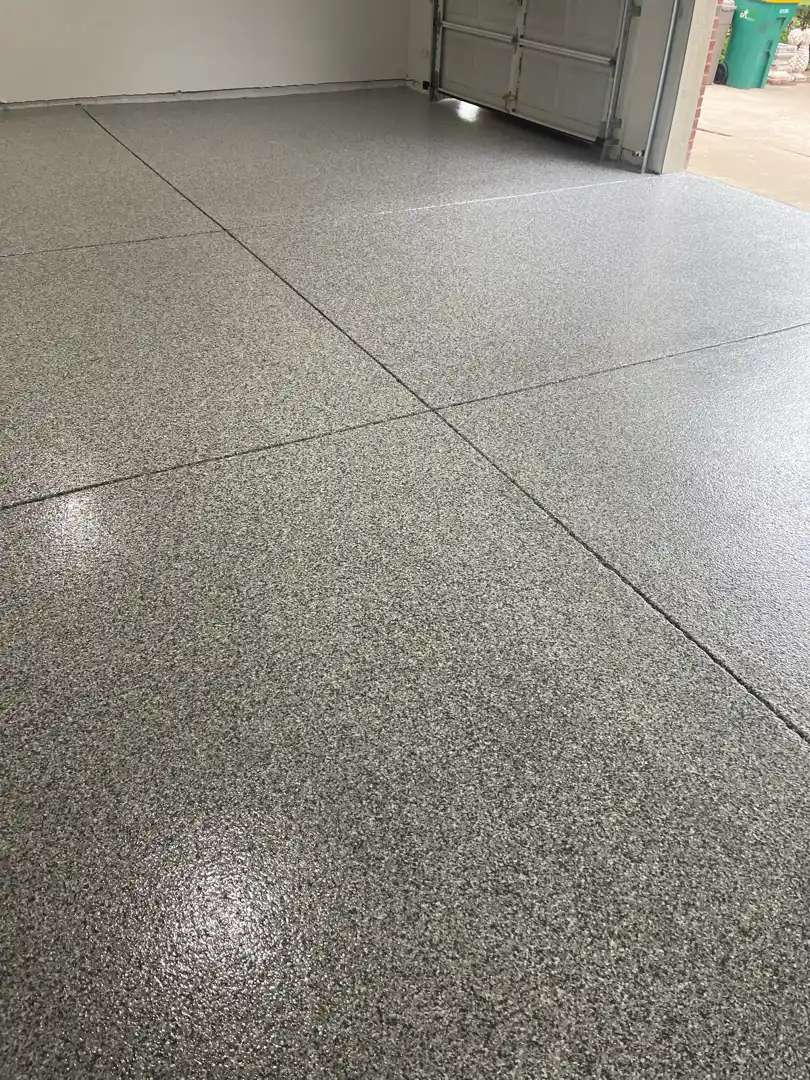
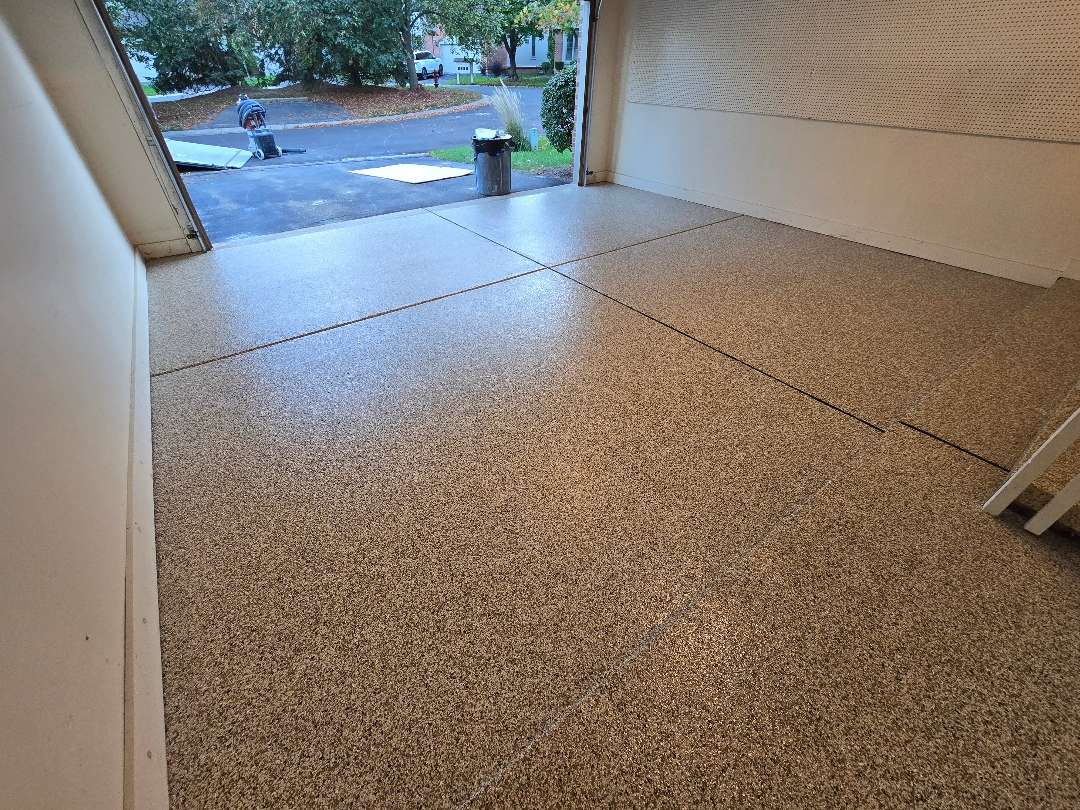
484 Square Feet, Pitting Sealed, Driveway-to-Door Coverage


Siberian runs wall to wall across all 484 square feet. The light grey and tan blend with decorative flake transforms the space from utilitarian to refined. The step and vertical lip carry the same finish as the main floor.
The pitting and cracking are sealed. The driveway transition reads as one continuous surface.
Garage Floor Coating
on Shadowglen Dr.
Shadowglen Drive, Farmington Hills, MI
Lead Tech: G. Cain, Truck #5


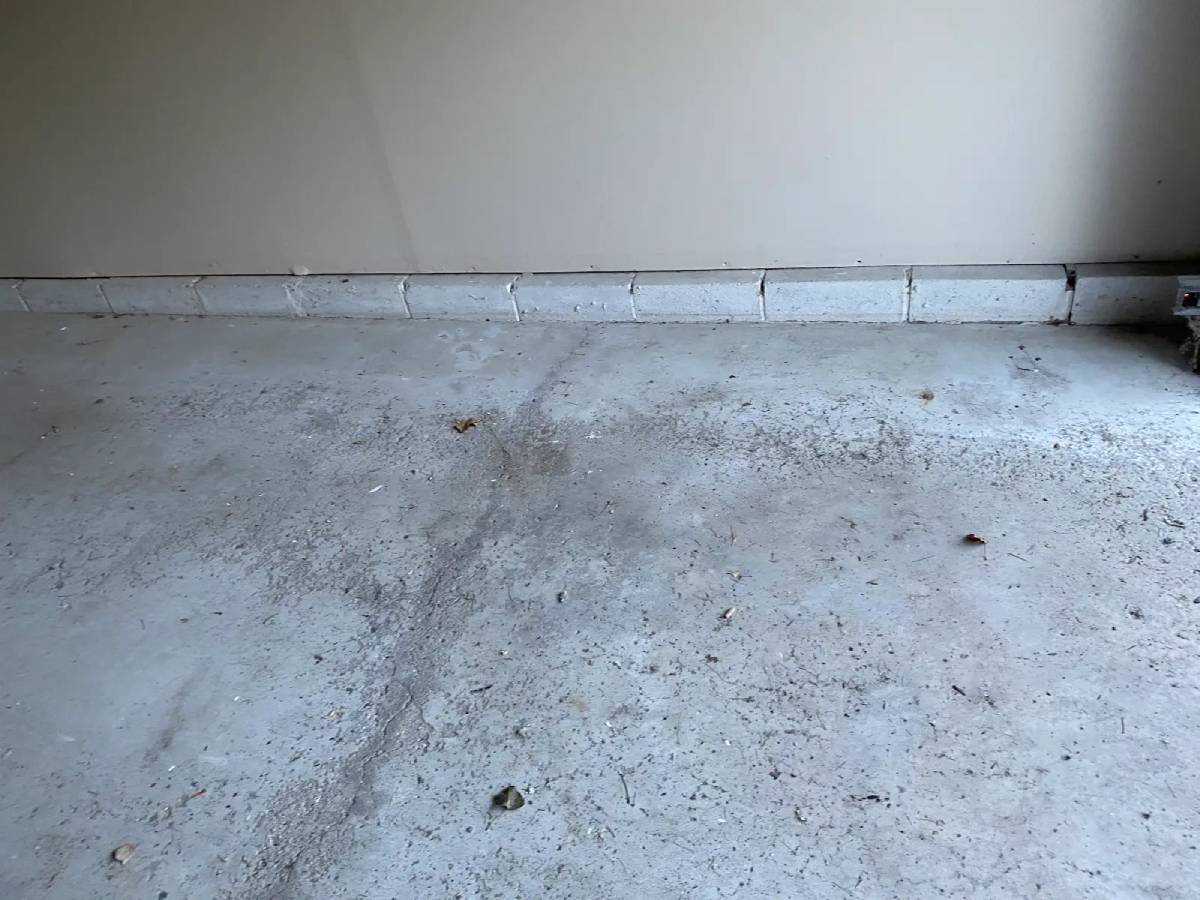
G. Cain and his crew found 462.89 square feet of badly damaged concrete. Jagged cracks ran across the surface. Heavy pitting covered the slab throughout. Loose concrete had concentrated in the middle sections on both sides of the garage.
Moisture content read at 3.9%. The scope included two concrete steps and 22.07 linear feet of vertical lip. Coating needed to extend seamlessly to the edge of the driveway.
Setting Expectations
Before work began, G. Cain discussed the scope of damage with the client. The cracking and pitting repairs fell outside warranty coverage. The damage was too extensive for standard terms. The client understood and approved the work.
Felt paper covered roughly half the garage floor and remained in decent condition. Our clients asked that it not be sprayed black. Our crew worked around it, respecting that request throughout the job.
Grinding
Our crew used 24-grit preparation on the main floor. We hand-threw an additional 8 ounces for extra bite. The grind went smoothly across most of the slab.
The loose concrete in the middle sections required extra attention and cleanup. Our crew applied a complete flood coat to ensure proper saturation across the compromised surface.
The Build-Up
Our crew mixed the MR-50 primer foundation from 4 liters each of Part A and Part B. Our team added 6 cups of sand for structural reinforcement and void filling.
The Pecan base coat used 6 liters of Part A and 3 liters of Part B. Our crew broadcast 3 boxes of flake across the wet coat. Our team recovered 2 boxes for reuse, a 67% recovery rate. The heavy clear topcoat used 9 liters each of Part A and Part B.
The Steps
The concrete steps had absorbed coating like a sponge — porous material soaked through repeated passes. Our crew hit them multiple times to achieve full coverage. G. Cain returned with additional clear coat after the material cured. He touched up spots that had over-absorbed.
Vertical Lip and Driveway Edge
Our crew used 5 chip brushes for edge detail and 2 each of rollers and trowels. The crew burned through 5 bags of rags and 25 pairs of gloves. The job filled 8 trash bags by completion.
Our crew applied a black coating to the vertical walls along the lip. This created a professional finish. Our crew coated to the edge of the driveway outside the door. This created a seamless transition from garage to exterior.
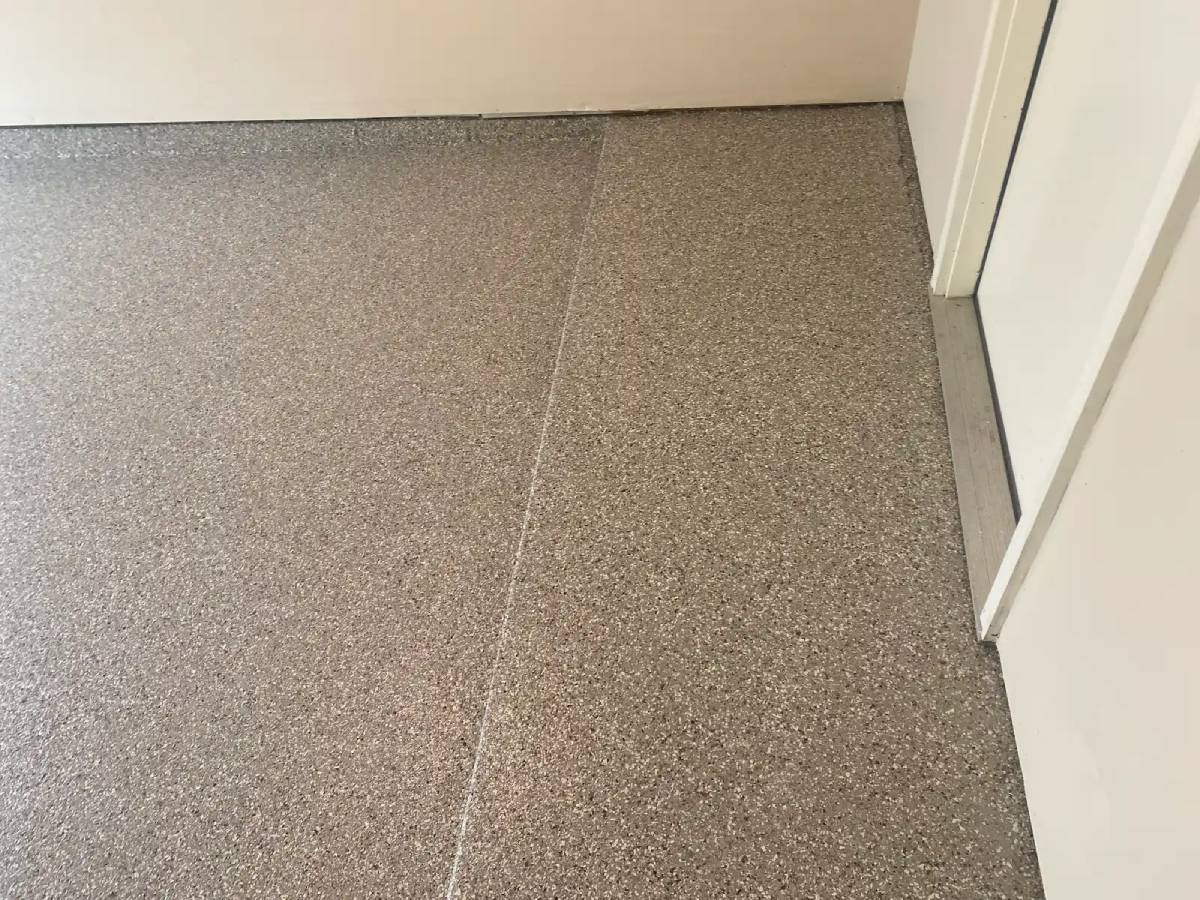
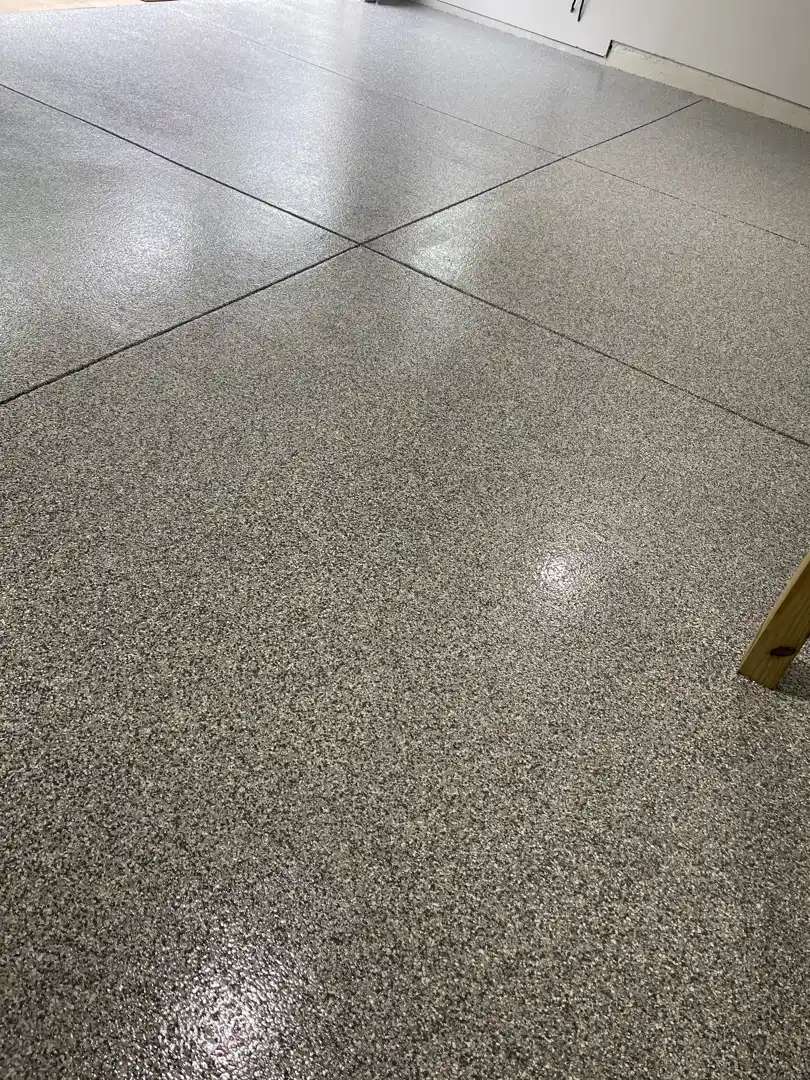
462.89 Square Feet, Liability to Showcase


Pecan runs wall to wall across all 462.89 square feet. The tan base with its speckled flake pattern transformed the space. The steps now match perfectly.
The edge at the driveway threshold shows precise work.
The cracking and pitting are sealed. Mr. Tack paid by check on completion.
Garage Floor Coating
on Juniper Ct.
Juniper Ct, Farmington Hills, MI
Lead Tech: G. Cain, Truck #5

G. Cain arrived at Mr. Dybus’s condo garage on Juniper Court for 244 square feet of work. Mr. Dybus, an elderly client with a disability, had one priority above all others: traction.
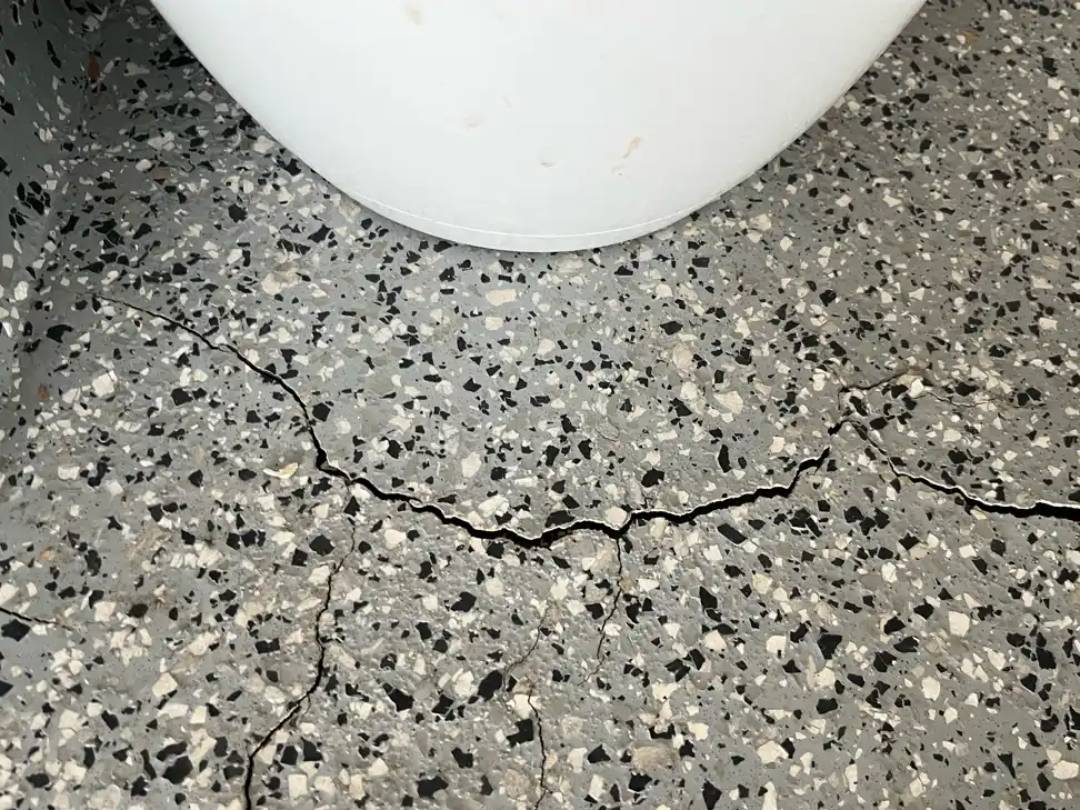
The concrete showed pitting throughout and general cracking. One deep crack ran through the middle of the floor. Moisture content read at 3.8%.
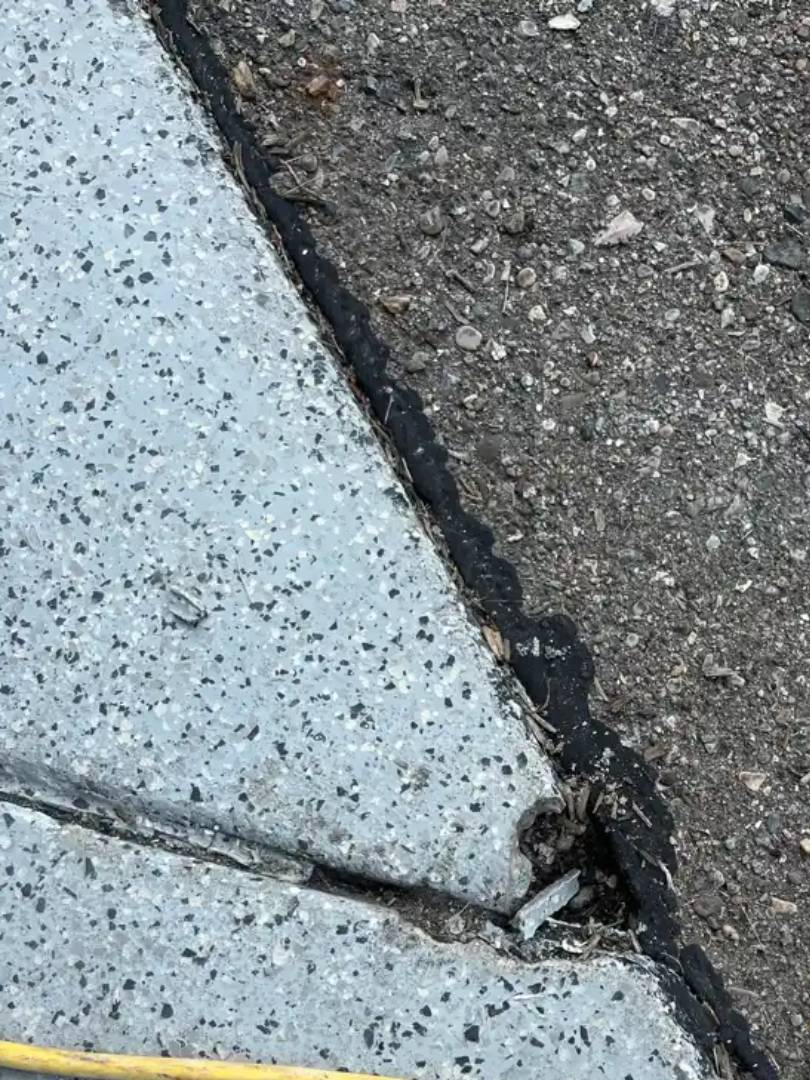
No existing coating required removal. The front right lip had a chunk missing that needed rebuilding.
The Traction Solution
After hearing Mr. Dybus’s concerns, G. Cain made the call. Our crew used aggressive 24-grit preparation plus hand-thrown shark grip in the topcoat. This was not the usual approach. It was the approach Mr. Dybus’s safety required.
The Build Process
With 52 linear feet of walls and lip to coat, our crew moved efficiently through preparation. The MR-50 foundation used 3 liters each of Part A and Part B. Our crew added 3 cups of sand for structural fill. Our crew applied a complete flood coat to seal and prepare the damaged surface.
The Pebble Beach base coat used 3 liters of Part A and 1.5 liters of Part B. Pebble Beach carries a salt-and-pepper blend mimicking beach stones. Our crew broadcast 1.5 boxes of flake and recovered 1 box for reuse, a 67% recovery rate.
The heavy traction clear coat used 4.5 liters each of Part A and Part B. Our crew hand-threw 8 full ounces of 24-grit shark grip across the wet topcoat. This doubled the normal traction for added safety.
The Vertical Challenge
Our crew rebuilt the missing chunk on the front right lip with mender compound. They coated it seamlessly with the rest of the verticals. The 52 linear feet of black wall coating came out clean, with strong adhesion. It carries sharp contrast against the Pebble Beach floor.
Application Detail
244 Square Feet of Security


Pebble Beach covers what was cracked, pitted, stained concrete with industrial-grade traction underfoot. The color reads light greys, tans, and whites scattered like stones on a shoreline. The heavy 24-grit provides serious grip without sacrificing the finished look.
Mr. Dybus now has a floor he can walk on with confidence.
Garage Floor Coating
on Amber Dr.
Amber Dr, Farmington Hills, MI
Arrival: 8:00 AM


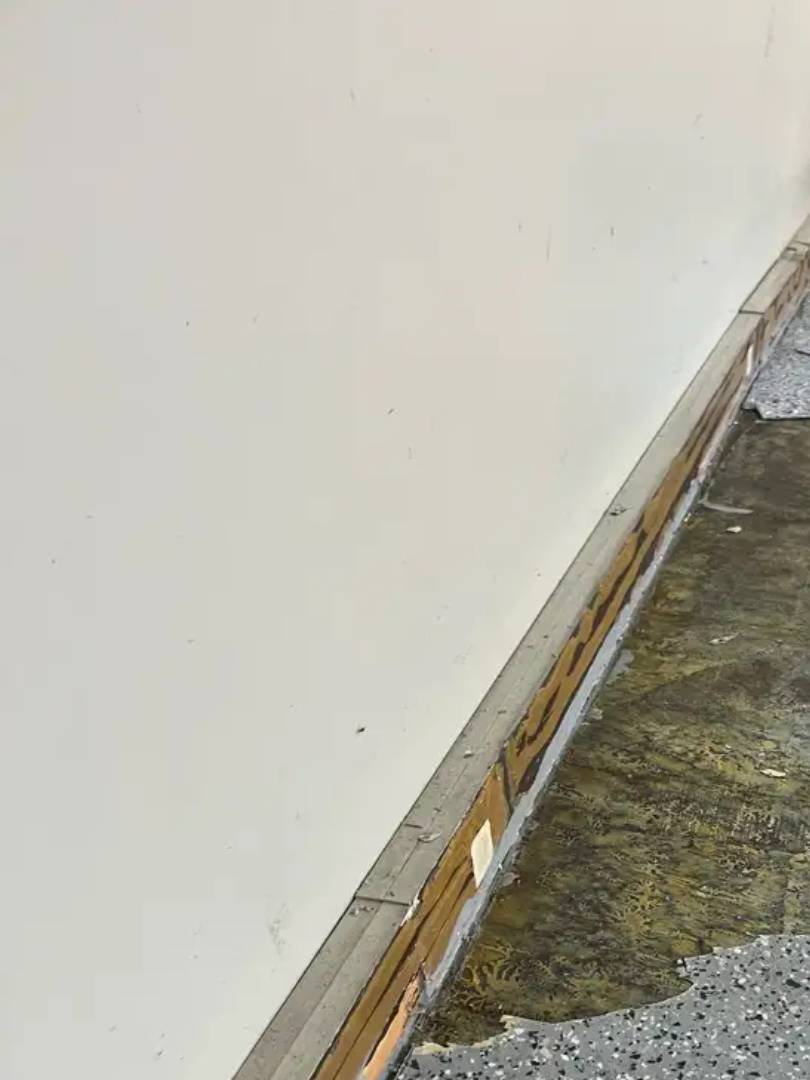

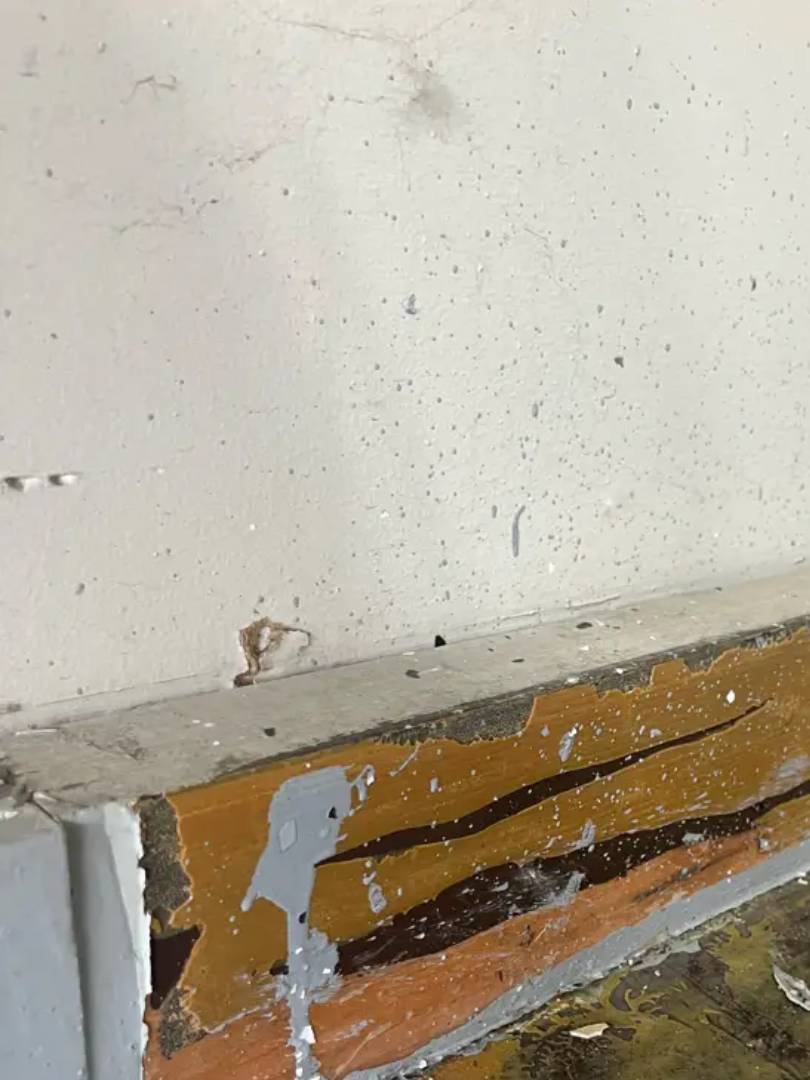
Our crew arrived at this Amber Drive property to find 453 square feet of epoxy disaster. Work from a previous contractor had failed completely. Paint had splattered onto the trim.
Decorative flakes were embedded in the baseboards. Coating had spilled onto the driveway.
The floor itself showed a roadmap of failure. Spiderweb cracks radiated from stress points, and pitting covered the surface throughout. Sections of the old epoxy were peeling away. The front lip was broken and crumbling — a hazard for any foot or tire.
Removal and Repair
Our crew removed the old caulk and the failed epoxy completely. We ground through 29 linear feet of contaminated vertical surfaces. Moisture content read at 3.8%. Our crew prepared and repaired the damaged concrete, including the broken front lip.
The Heat Problem
Hot conditions caused materials to set fast — too fast for standard application. Paint dried within five minutes of mixing. Our crew had to mix half batches to keep pace with the cure time.
The five-minute window left no margin for standard application. Our crew shifted to a square-by-square approach instead. They mixed small, applied fast, and moved to the next square.
Square-by-Square Topcoat
The clear topcoat required the same precision. Flashing or uneven cure would have marred the glass-like finish. Our crew clear-coated square by square, maintaining wet edges throughout. The process was slow and meticulous, but it held the quality standard the conditions threatened.
Pebble Beach — Floor, Lip, and Verticals
Our crew applied 36-grit traction preparation across the full slab for serious grip. We applied the Pebble Beach base coat in calculated sections to manage the fast cure. Our crew broadcast decorative flakes to create the natural stone appearance.
Our crew rebuilt and reinforced the broken front lip. We coated one wood step to match the main floor. Our crew cleaned and coated the 29 linear feet of verticals. This addressed the baseboard contamination from the previous job throughout.
453 Square Feet, Crime Scene to Showcase


Pebble Beach carries a blend of greys, tans, and whites throughout. The 36-grit traction provides serious grip without sacrificing the finished look. The front lip that was broken and dangerous is now rebuilt and coated seamlessly.
The baseboards that carried the previous job’s mess are clean. The driveway spill is gone. The square-by-square topcoat shows no flashing anywhere across the slab.
Garage Floor Coating
on Rocky Crest Street
Rocky Crest Street, Farmington Hills, MI
Lead Tech: Jesus M., Truck #7
The 3 AM Start
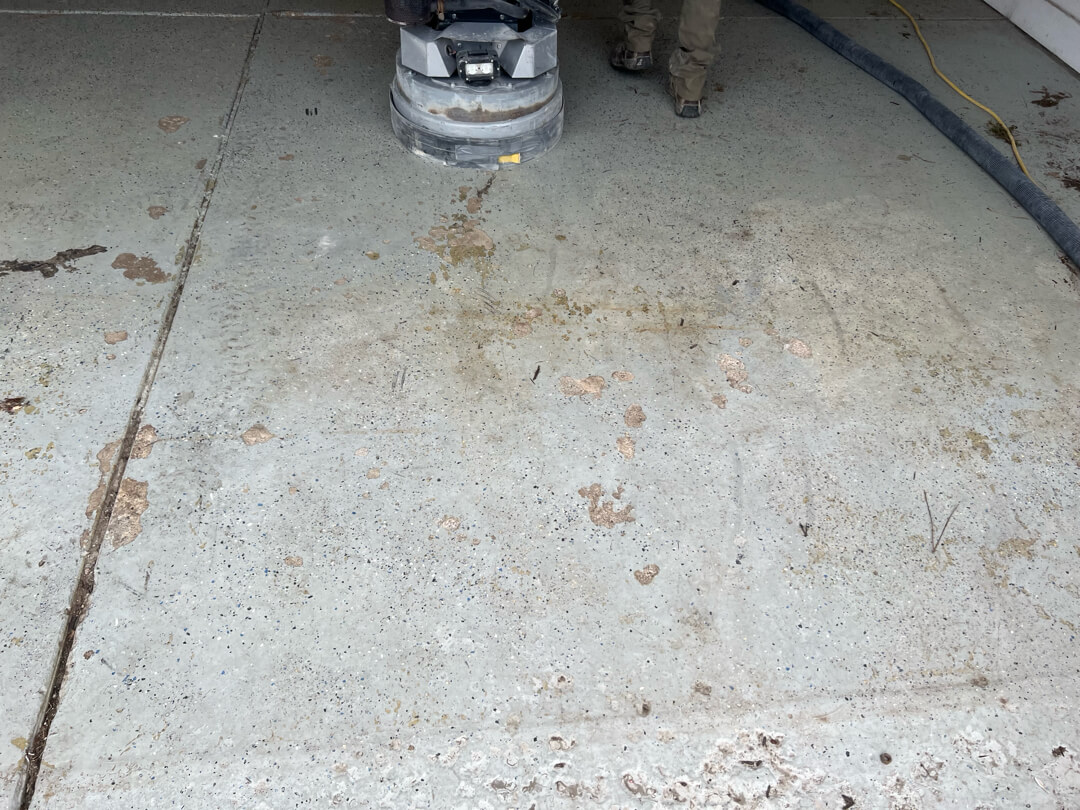
When Jesus M. and his crew arrived at Rocky Crest Street at 3:00 in the morning on May 1, 2023, they weren’t early – they were strategic. The concrete temperature reading at 41° told them everything: Michigan’s unpredictable spring weather meant they needed to work with the temperature, not against it.
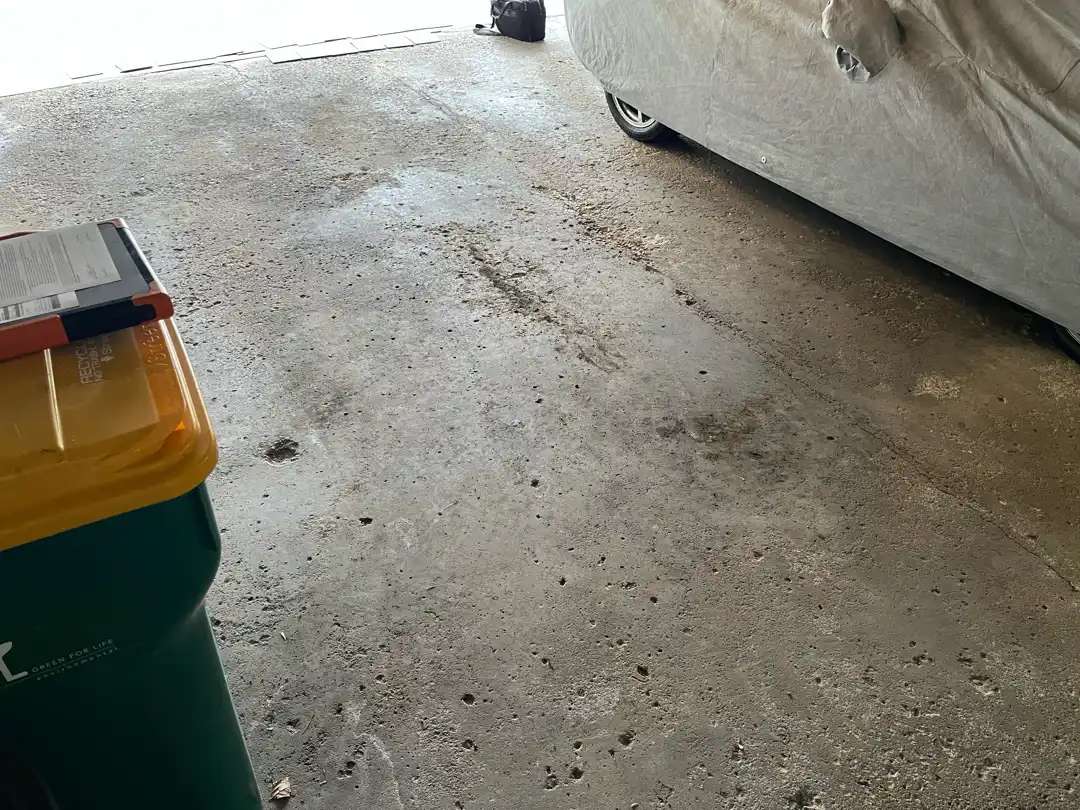
The 420.5-square-foot garage floor waiting for them had clearly served hard duty. Oil stains penetrated deep into the porous concrete. Tire tracks had worn permanent paths across the surface. Years of Michigan winters – road salt, freeze-thaw cycles, moisture infiltration – had left the concrete pitted and deteriorating. This wasn’t cosmetic damage; this was structural degradation in progress.
The Cold Concrete Challenge
That 41° concrete temperature created a specific technical challenge. Too cold, and coatings won’t cure properly. Too warm, and they flash too fast. Jesus and his team were working in that narrow window where precision matters more than speed.
The moisture content tested clean – no barrier needed, no oil extraction required. But the temperature meant careful material management, adjusted mix ratios, and constant monitoring of cure times. This is where experience separates professionals from weekend warriors.
The Heavy Prep
With no vertical walls to coat and no steps to address, the crew could focus entirely on the horizontal surface – but that surface needed serious attention.
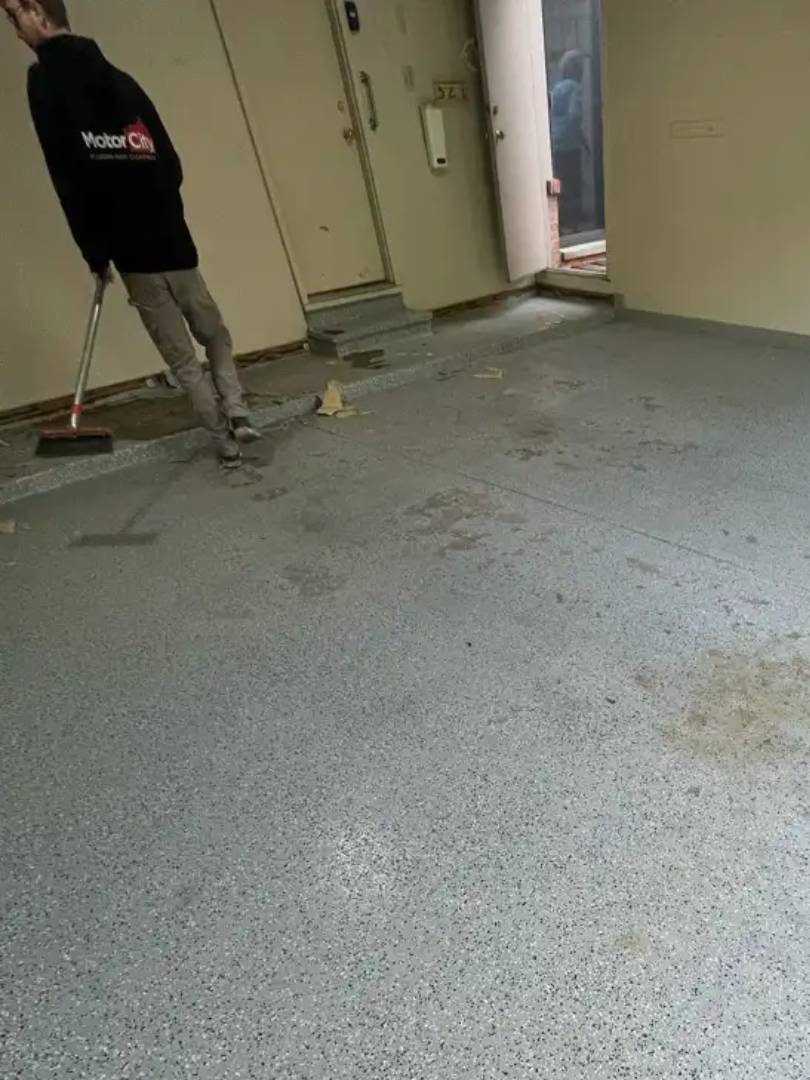
Diamond grinding began, opening up the porous concrete surface to accept the coating system. The crew worked methodically across 420.5 square feet, removing contamination, smoothing irregularities, and creating the ideal profile for adhesion. The photos show the transformation during prep: from stained, deteriorating concrete to clean, properly profiled substrate.
The Safari Build
Starting at 3:00 AM, working through the temperature challenges, Jesus’s team built up the Safari floor system:
MR 50 Foundation Primer:
- 1.5 liters Part A + 1.5 liters Part B
- 12 cups of sand mixed in for additional grip and structural fill
- Applied as penetrating primer to seal and prepare
18 Caps of Shark Grip:
- Substantial traction additive
- Mixed throughout the system for safety and durability
Safari Base Coat (Tan):
- 4.0 liters Part A + 2.0 liters Part B
- That warm, inviting Safari tan that would transform the space
Decorative Flake Layer:
- 3.5 boxes broadcast across the wet base coat
- 2.0 boxes recovered for reuse (57% recovery rate)
- Creating depth, character, and the signature textured appearance
Heavy Clear Topcoat:
- 8.0 liters Part A + 8.0 liters Part B
- Maximum protection and durability
- Sealing the flakes and creating that glass-like finish
The Marathon Day
From 3:00 AM to 3:08 PM – over 12 hours on site. This wasn’t a quick spray-and-go operation. This was methodical, professional floor coating that accounts for temperature, proper cure times, complete coverage, and quality control at every stage.
The crew worked through their consumables systematically: 24 five-quart cups for precise mixing, 5 chip brushes for detailed edge work, 2 each of 18″ rollers and trowels for efficient application, 8 pairs of gloves maintaining clean technique throughout the day.
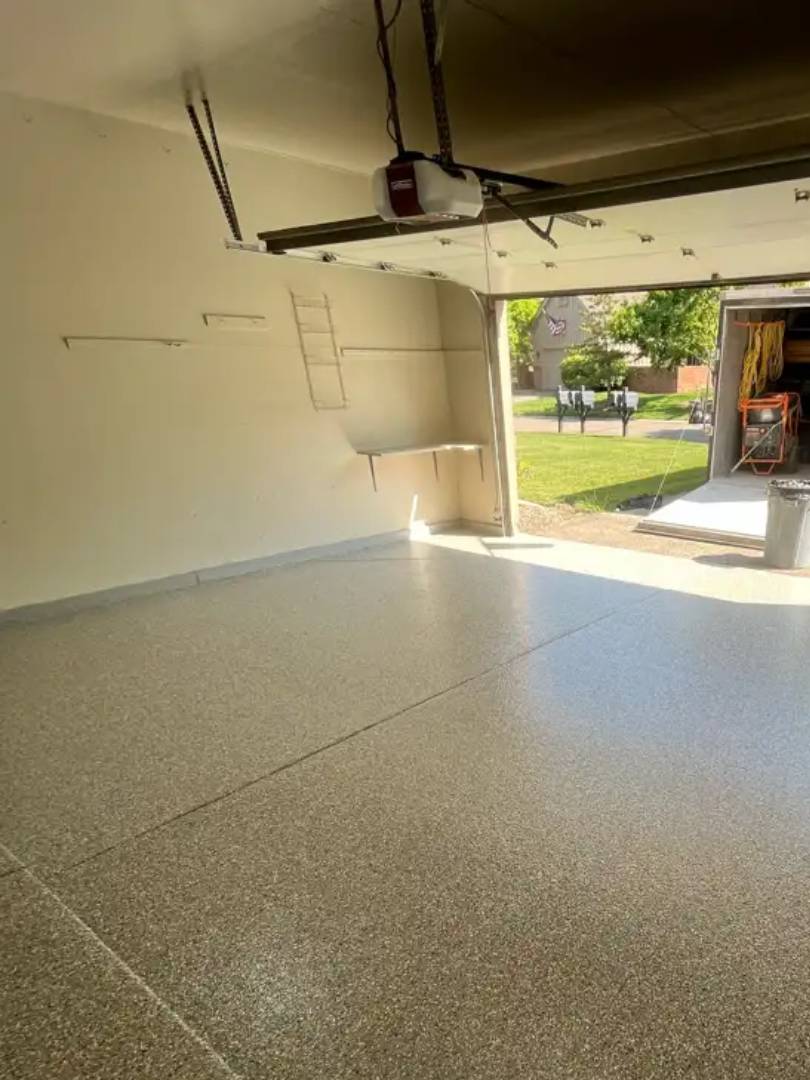
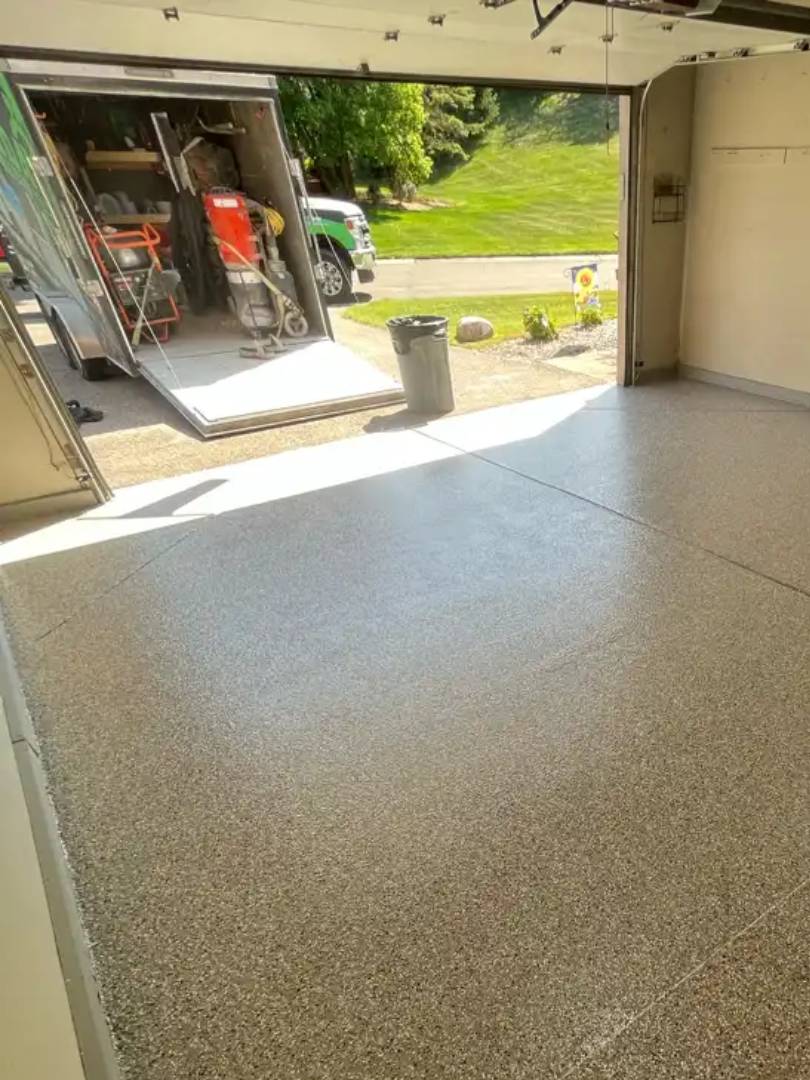
The Transformation
The before-and-after contrast tells the complete story. What started as deteriorating, stained, pitted concrete – a garage floor that was actively degrading – became a showroom-quality Safari floor that looks more like decorative terrazzo than utilitarian garage coating.
The warm Safari tan creates an inviting space. The decorative flakes add visual interest and texture. The heavy shark grip traction ensures safety even with moisture present. The sealed, protected surface now repels oil, resists tire marks, and stands ready to handle Michigan’s harshest weather cycles.
The Technical Reality
This job exemplifies what professional garage floor coating requires:
- Pre-dawn start times to manage temperature conditions
- Proper concrete testing and preparation
- Material adjustments for environmental factors
- 12+ hour workdays when that’s what quality demands
- Systematic application following proven processes
420.5 square feet on Rocky Crest Street. From 3 AM deterioration to 3 PM transformation.
That’s the MotorCity Floors and Coatings standard.
Click on the photos to enlarge them
Garage Floor Coating
on Cheswick Street
Cheswick Street, Farmington Hills, MI
The Canvas: 668 Square Feet of Hard Use
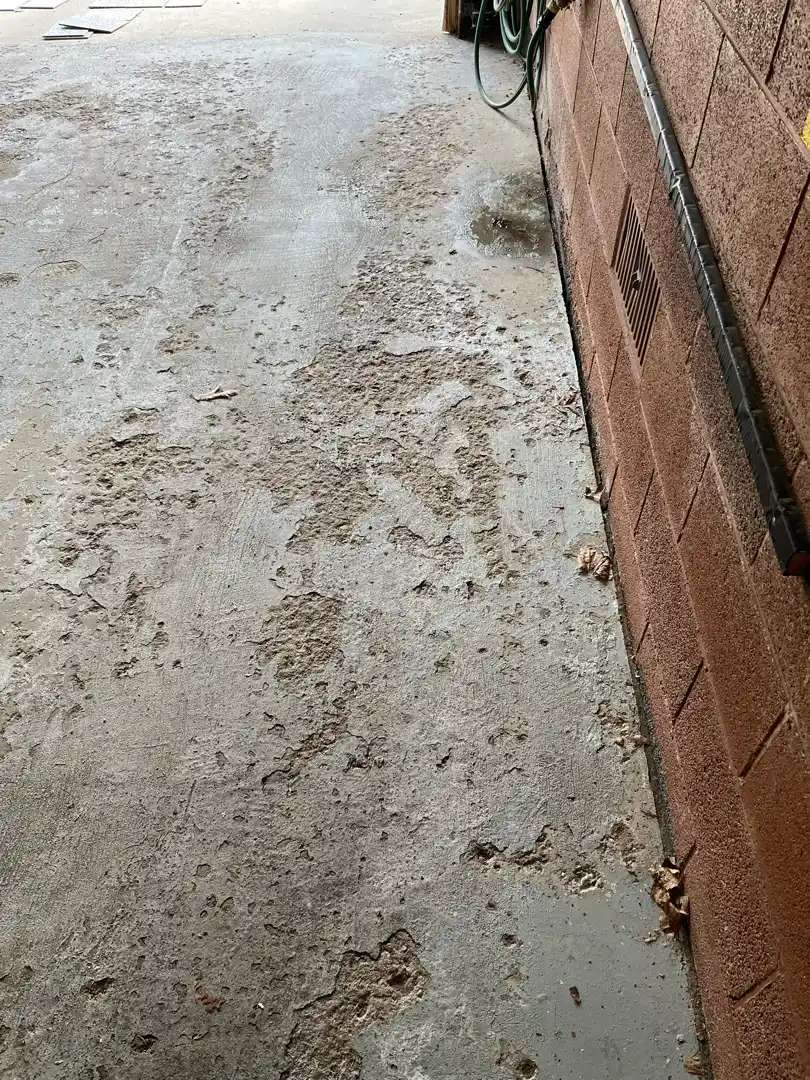
The garage on Cheswick Street had clearly served its purpose well over the years—perhaps too well. At 668 square feet, this wasn’t a small space, and every inch of it showed the accumulated damage of Michigan winters, automotive fluids, and constant vehicle traffic.
Oil stains had penetrated deep into the porous concrete, creating dark patches scattered across the floor. Pitting pockmarked the surface where moisture had infiltrated and freeze-thaw cycles had done their destructive work. Cracks spider-webbed through sections of the slab, some superficial, others running deeper and wider. The threshold area near the garage door showed particularly severe deterioration—years of water infiltration, road salt, and traffic had taken their toll.
Even the wooden stairs leading to the interior door bore the marks of garage life: stained, worn, utilitarian.
The moisture content tested at 3.8%—acceptable, no barrier needed—but this floor needed serious repair work before any coating could be applied.
The MR-50 Solution
Before any cosmetic work could begin, the MotorCity crew needed to address the structural issues. This is where MR-50 primer becomes more than just a base coat—it becomes a repair material.
The photos document the process: pools of MR-50 filling the pitted areas, bridging the cracks, rebuilding the damaged threshold. This isn’t just slapping primer on concrete; this is structural remediation. The MR-50 penetrates into the damaged areas, bonds at a molecular level with the concrete, and creates a unified surface that’s actually stronger than the original slab.
The crew worked systematically across 668 square feet, identifying every pit, every crack, every compromised section, and addressing each one. No shortcuts. No “good enough.” Just methodical restoration.
The Slatestone Build
- Aggressive diamond grinding across the entire surface
- Creating optimal profile for adhesion
- Removing all surface contamination
- Opening the pores for coating penetration
- Applied over the prepared and repaired surface
- Creating the foundation for the Slatestone finish
- Full broadcast of decorative chips
- Creating that natural stone appearance
- Adding texture and visual depth
- The signature speckled pattern that defines the Slatestone look
- Sealing the chips under a protective layer
- Incorporating 24-grit for serious traction
- Creating that glass-like finish
- Maximum durability for long-term protection
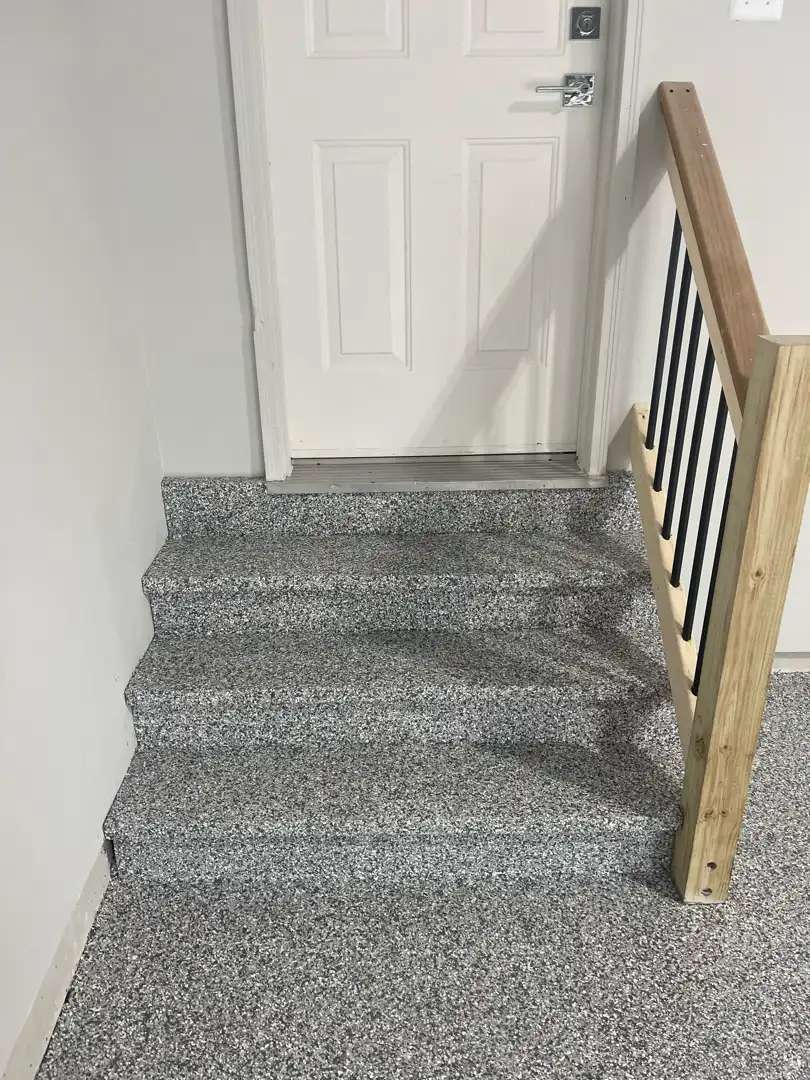
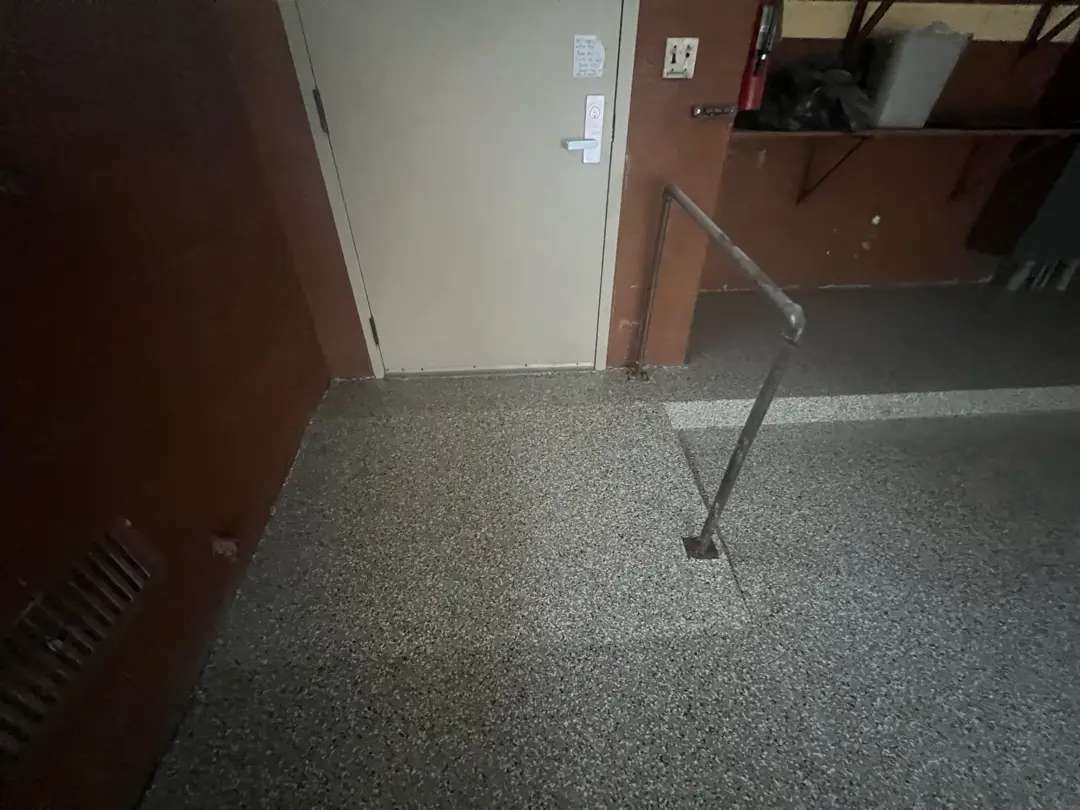
The Stair Detail
Notice in the finished photos: those worn wooden stairs are now coated to match the floor. This is the kind of detail work that separates comprehensive installation from basic floor coating. The stairs now integrate seamlessly with the space, providing the same durable, easy-to-clean surface as the main floor.
The Transformation
The before-and-after contrast is dramatic. What started as 668 square feet of stained, pitted, cracked concrete—a floor that was actively deteriorating and looked every year of its age—became a showcase Slatestone installation that looks like it belongs in a showroom.
The grey tones of Slatestone create a sophisticated, neutral palette that works with any décor or vehicle color. The decorative chips add visual interest without being overwhelming. The 24-grit traction provides safety even when moisture is present. The sealed surface now repels oil, resists staining, and stands ready to handle whatever Michigan weather and daily use can throw at it.
Most importantly: the structural repairs mean this isn’t just cosmetic. The floor is actually in better structural condition now than when it was first poured.
The Technical Reality
This job demonstrates why proper garage floor coating requires both technical knowledge and craftsmanship:
- Identifying which damage can be coated over and which requires repair
- Using MR-50 as both primer and structural repair material
- Proper surface preparation across a large area
- Systematic application maintaining quality across 668 square feet
- Attention to detail including stairs and transitions
- Understanding material chemistry and cure requirements
668 square feet on Cheswick Street. From deteriorating liability to durable asset.
That’s what professional installation delivers.
Click on the photos to enlarge them
Garage Floor Coating
on Middlebelt Road
Middlebelt Road, Farmington Hills, MI
The Monastery Garage Challenge
When the MotorCity crew arrived at the monastery on Middlebelt Road, they knew immediately this wouldn’t be a standard garage floor job. The 523-square-foot space had clearly served the religious community for decades—and every one of those years showed.
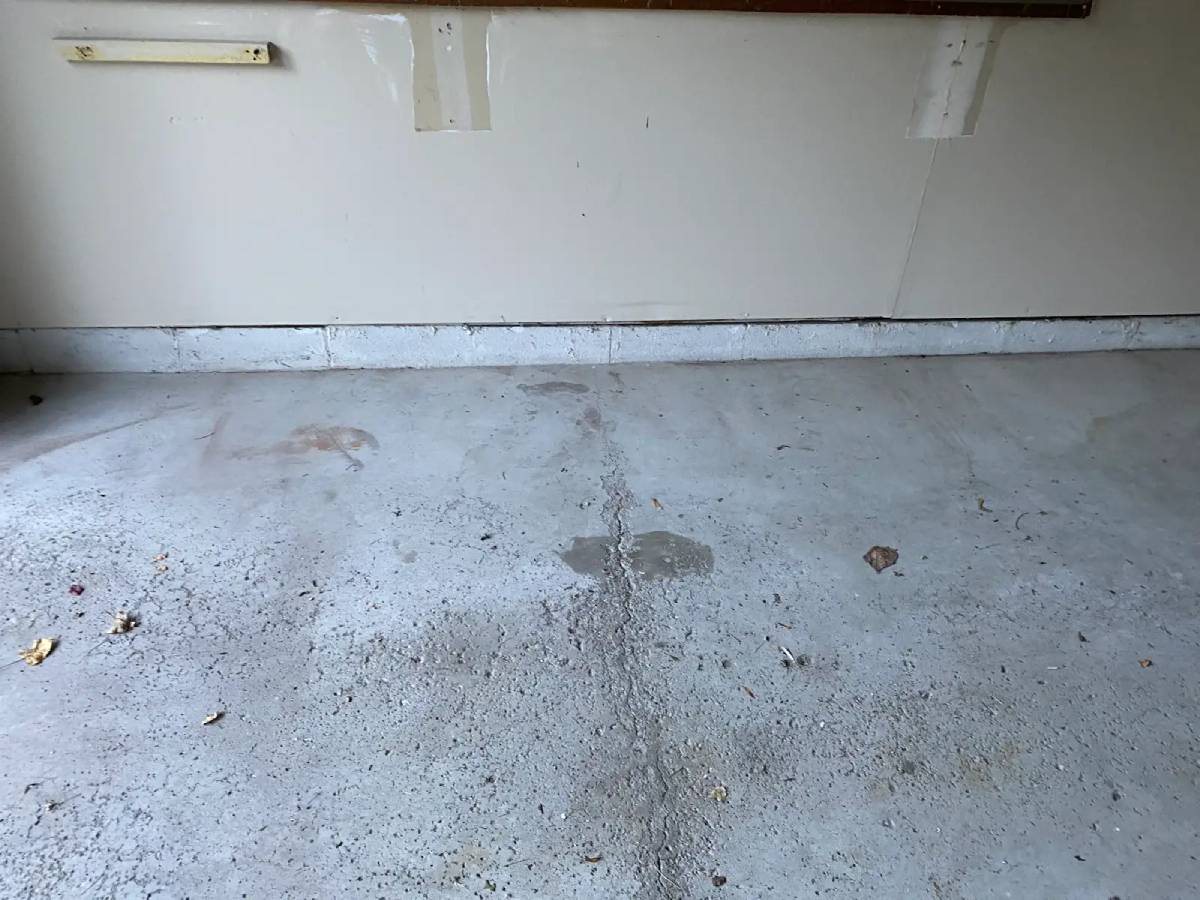
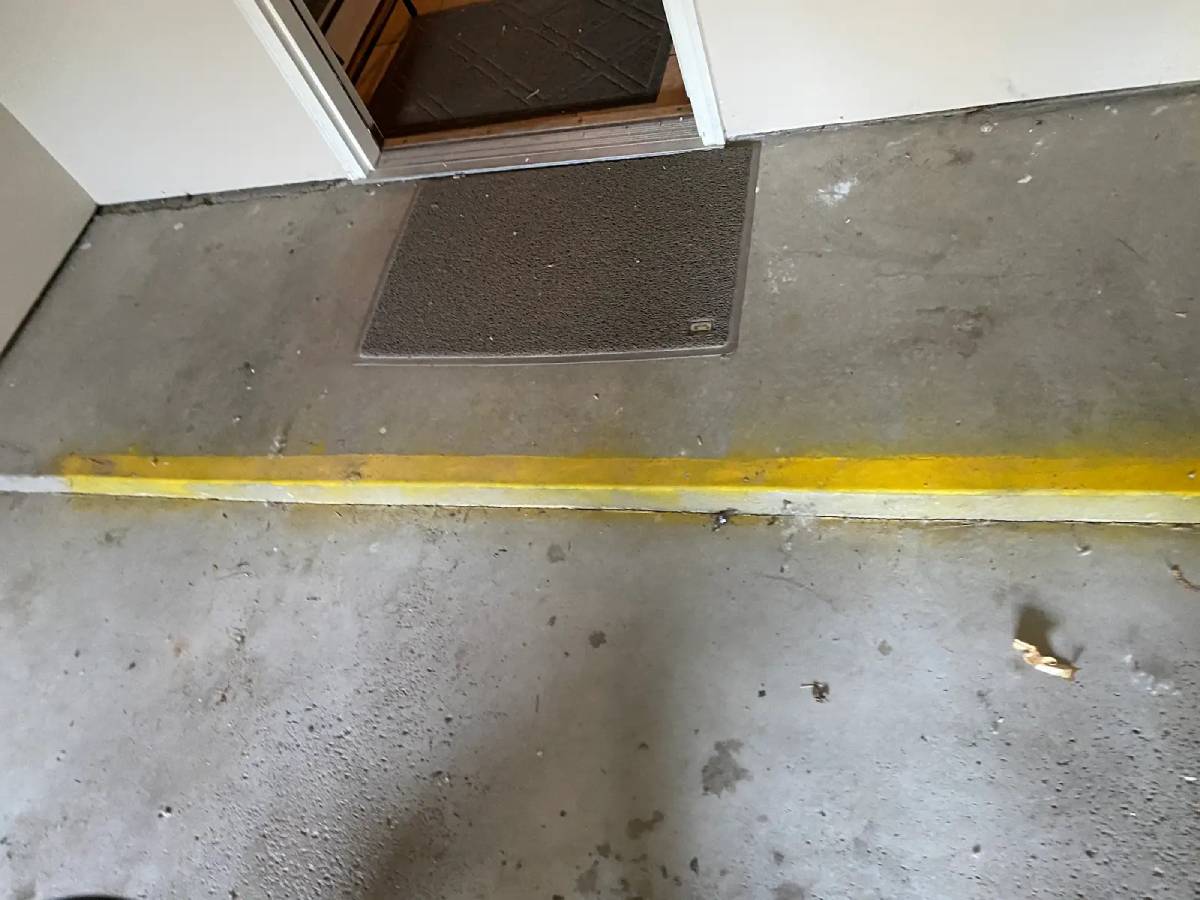
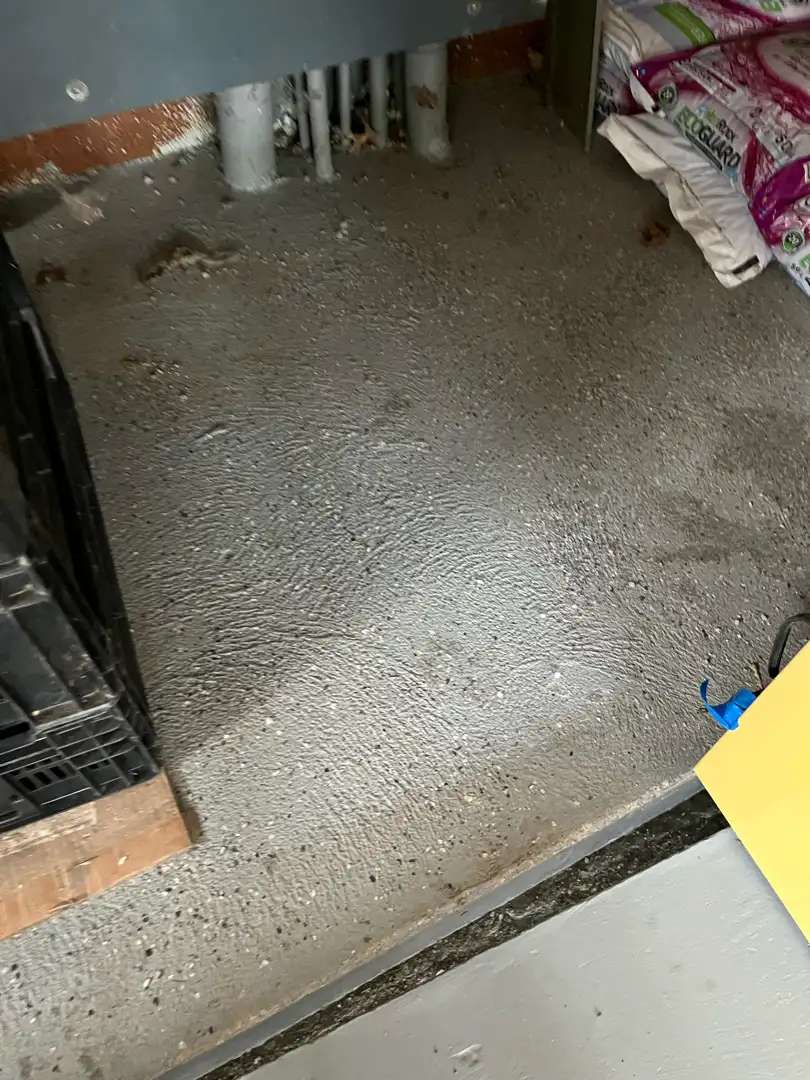
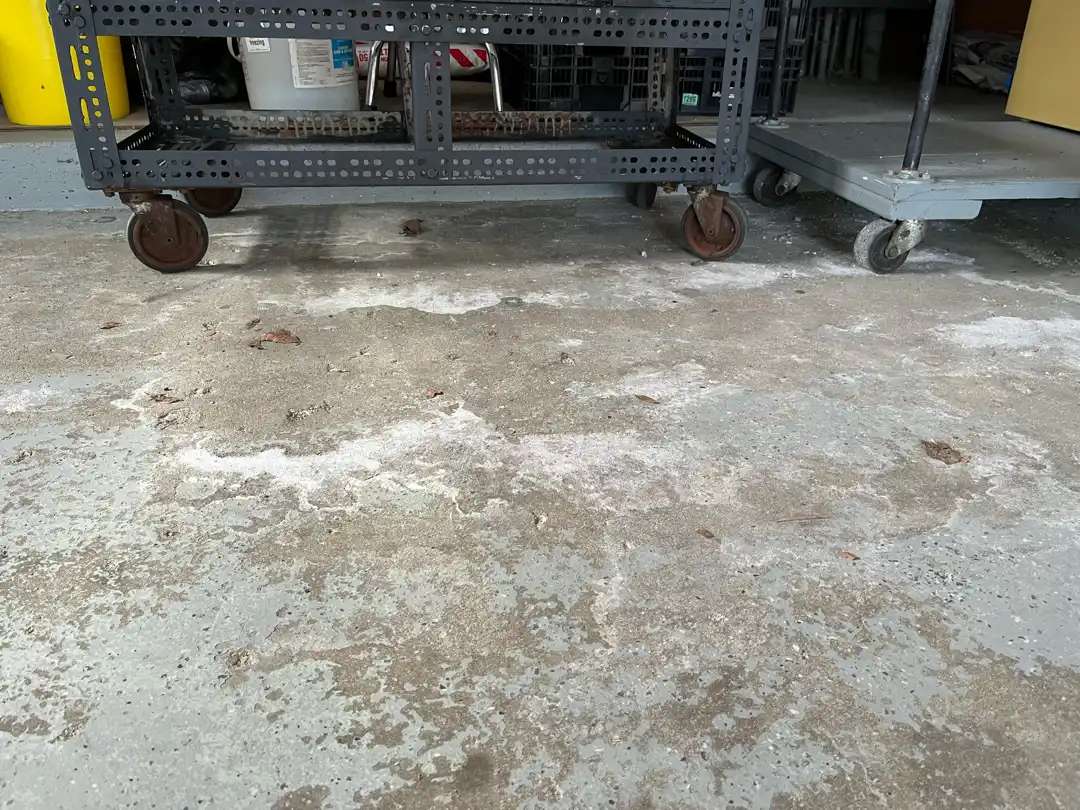
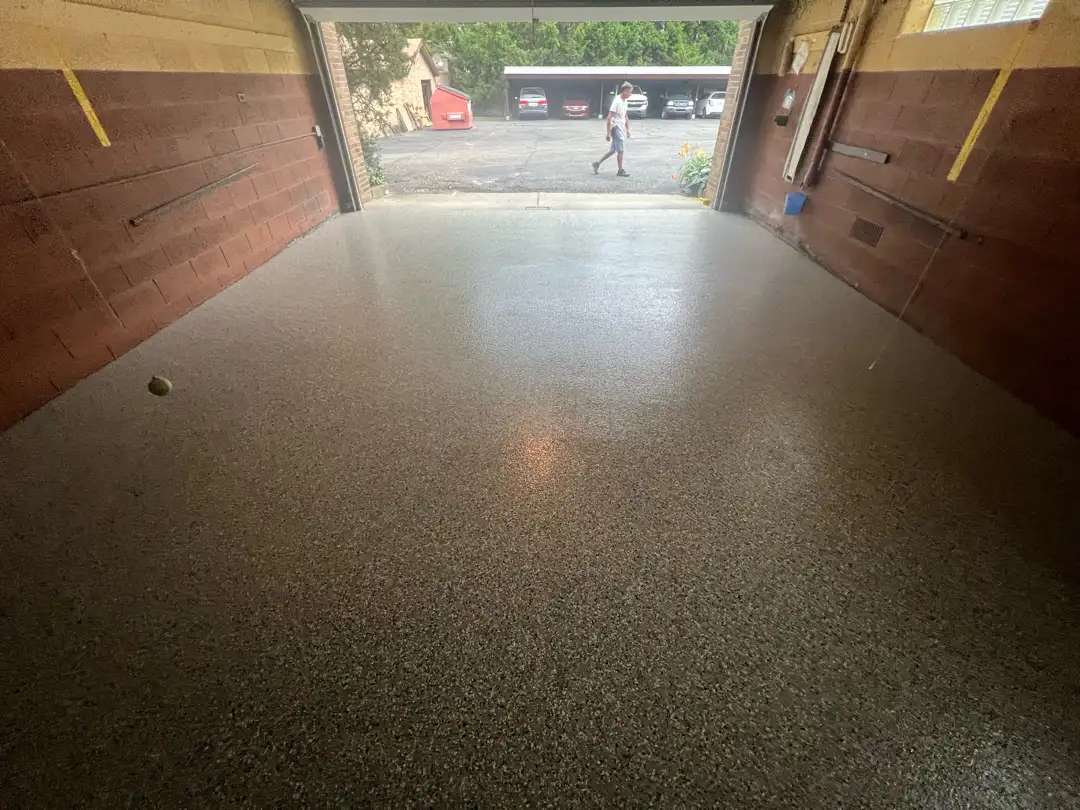
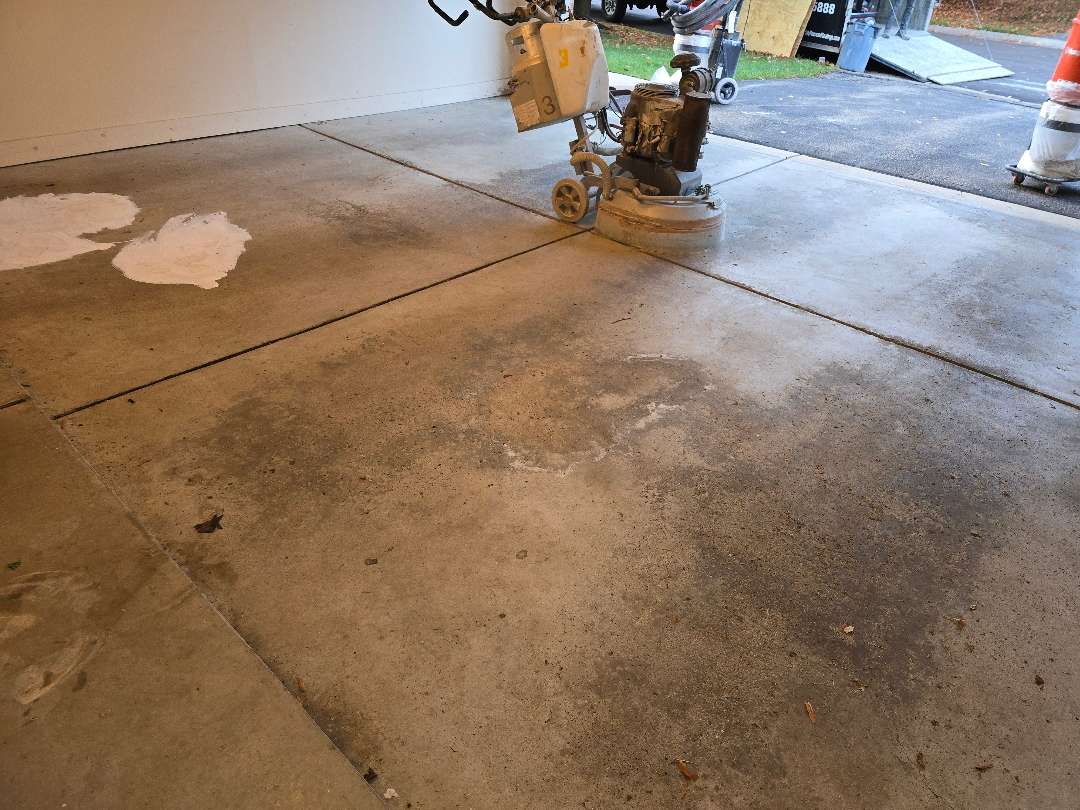
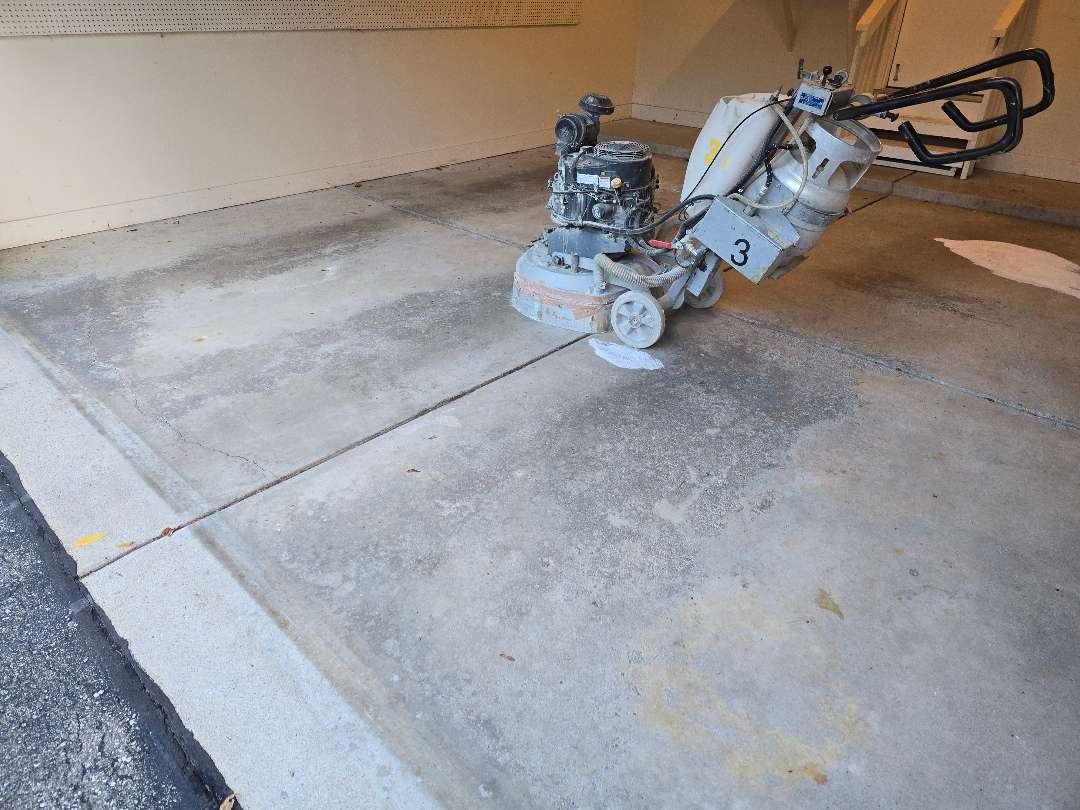
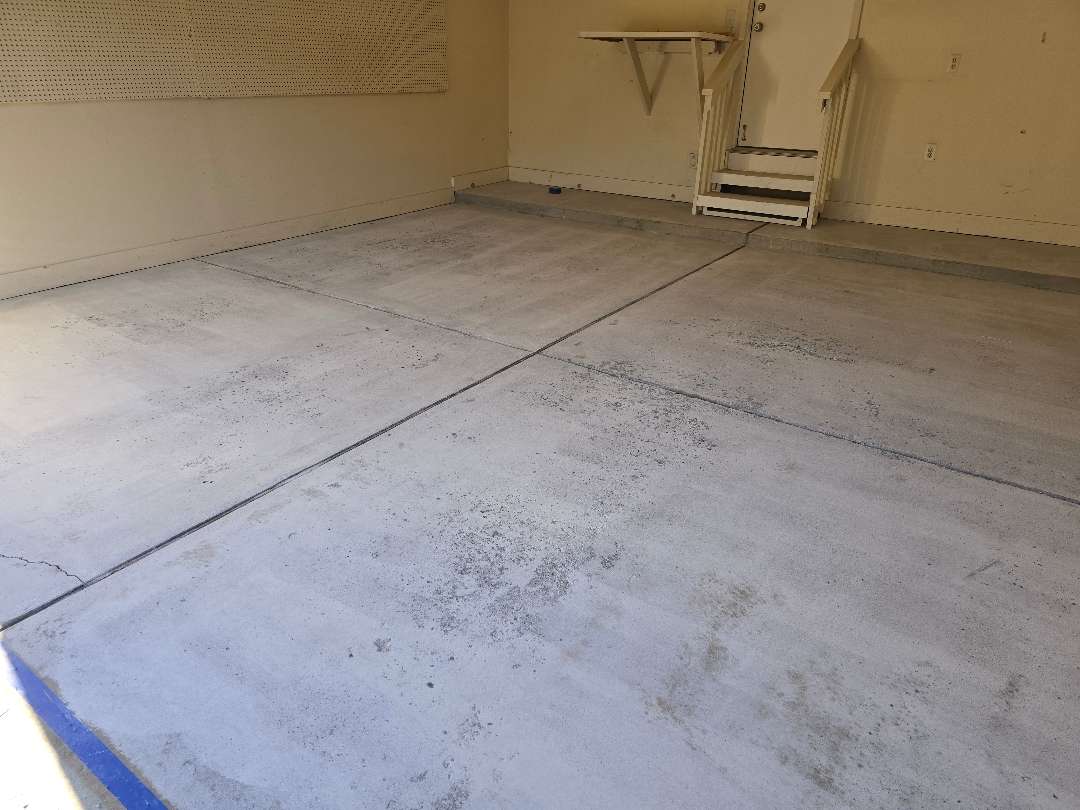
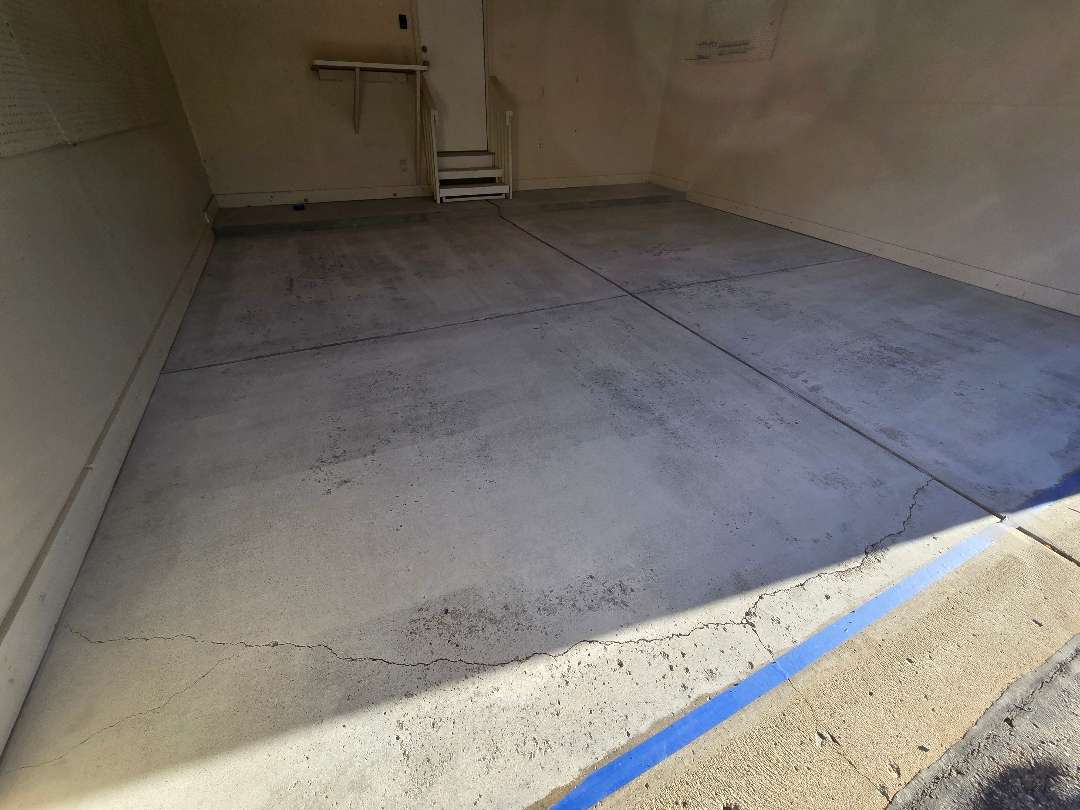
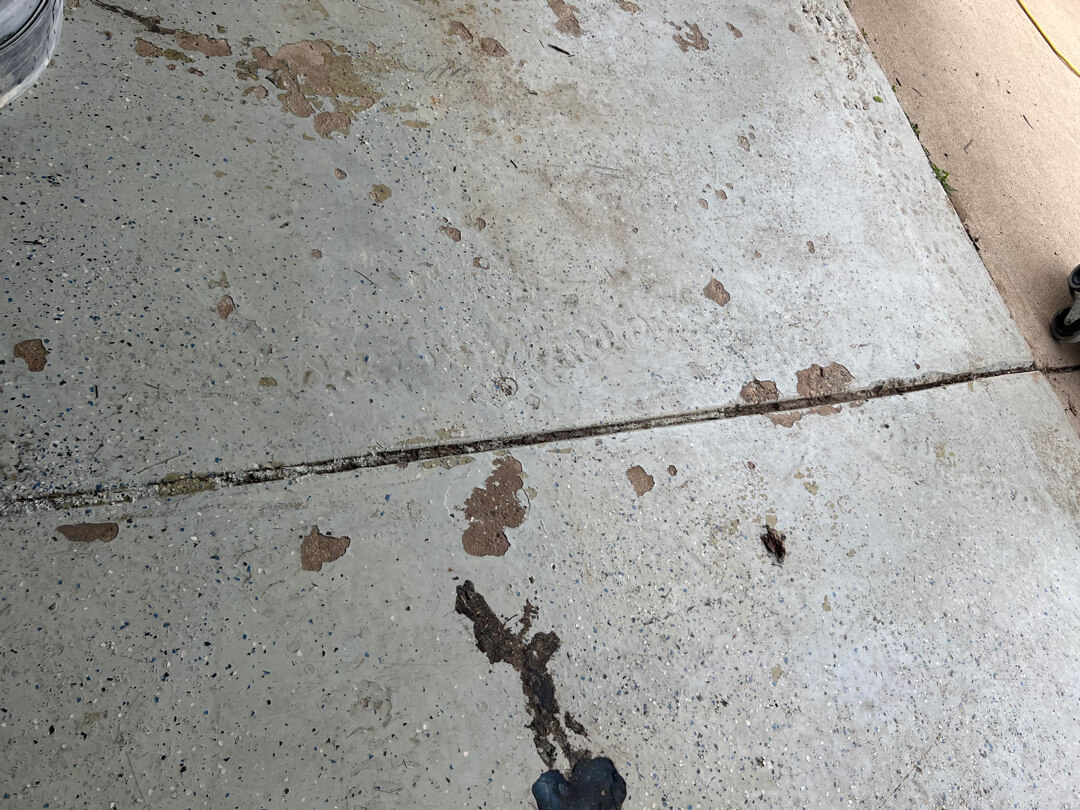
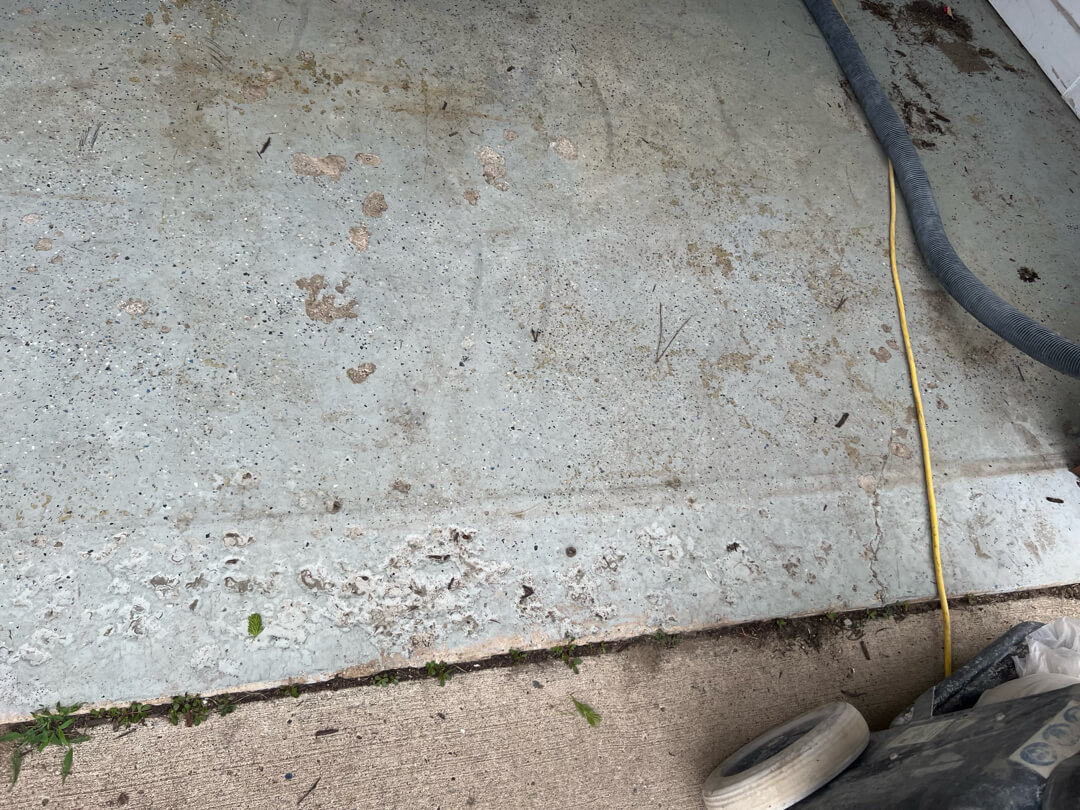
The concrete was beyond typical wear. Heavy pitting covered nearly the entire surface, some craters deep enough to collect water, others creating rough, jagged surfaces that made the floor treacherous. Oil stains had penetrated deep into the porous concrete. But the biggest challenge? An old paint coating covered sections of the floor, a previous attempt at protection that had failed spectacularly and now needed complete removal.
Yellow parking lines still visible on the surface told the story of organized use, but the concrete beneath told the story of neglect and deterioration. This floor wasn’t just ugly—it was actively degrading.
The Removal and Repair Phase
Before any new coating could be applied, the crew had to address the fundamental problems. This meant starting from scratch.
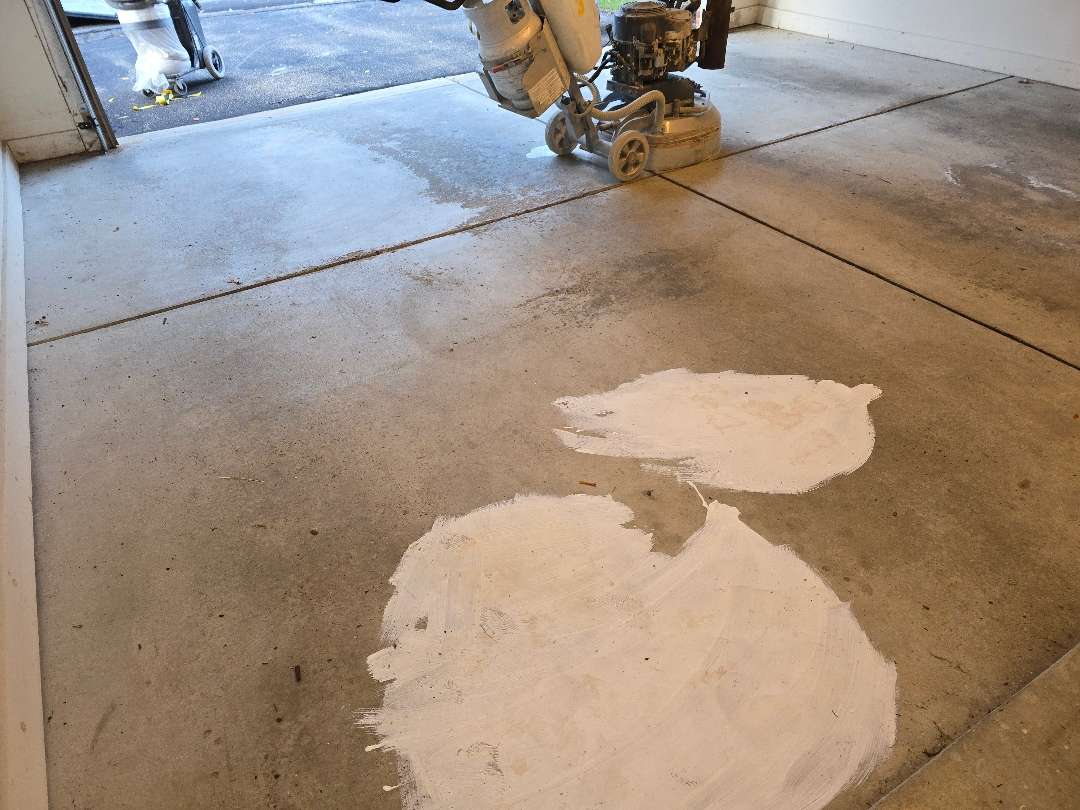
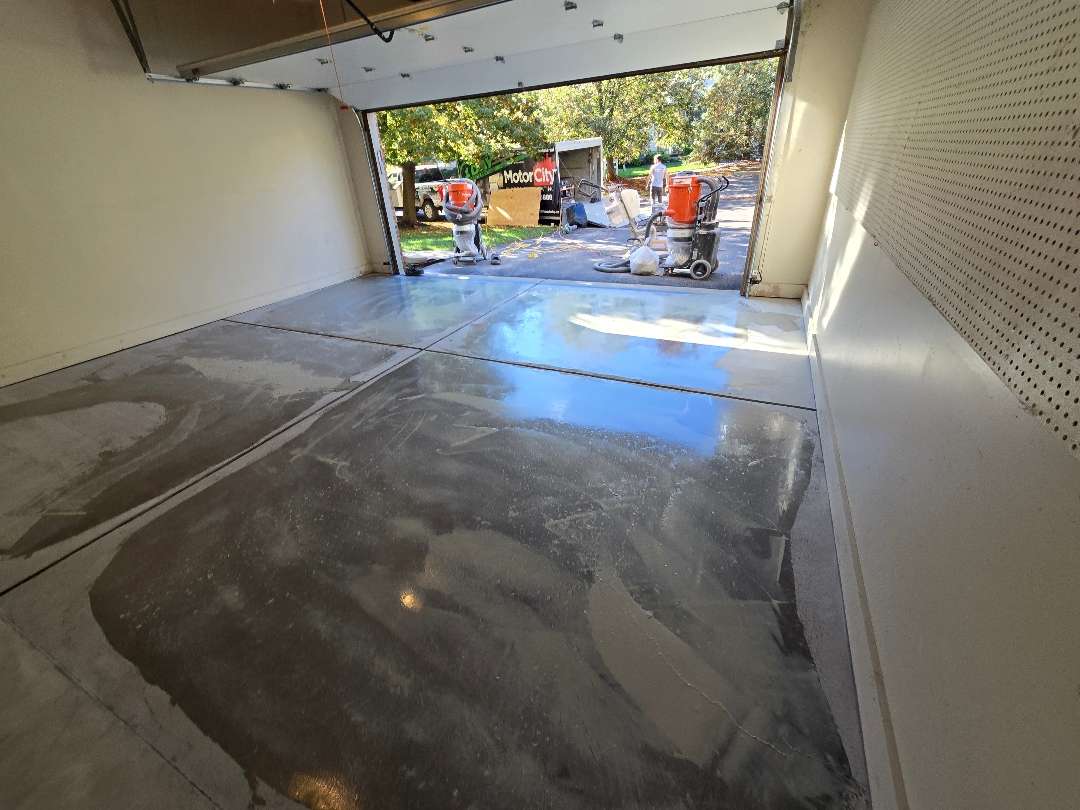
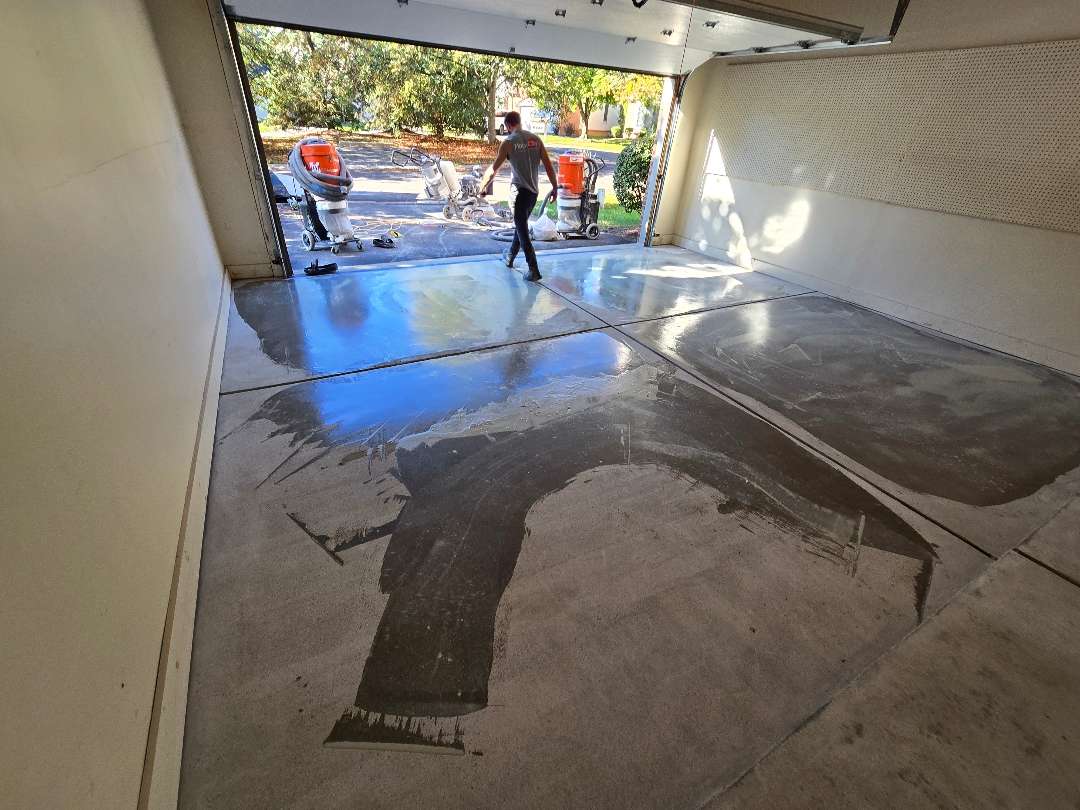
Paint Removal: Diamond grinding began, the machines working methodically across 523 square feet to remove every trace of the failed coating. The HEPA vacuums attached to the grinders captured the dust, keeping the monastery’s air clean while the crew worked. This wasn’t quick work—old paint doesn’t surrender easily—but it was essential work.
Pitting Repair: With the old coating removed, the true extent of the damage became visible. The photos document the repair process: pools of MR-50 mender filling the countless pits scattered across the floor. This wasn’t superficial patching; this was structural restoration. Each pit needed to be filled, leveled, and bonded to create a sound surface.
The crew worked through the damaged areas systematically, identifying every compromised section, every crater, every void. The moisture content tested at 3.8%—acceptable, no barrier needed—but the physical damage required serious attention.
The Pebble Beach Build
With repairs complete and the surface properly prepared, the coating process could finally begin:
Step 1 – Aggressive Preparation:
- Diamond grinding across the entire 523 sq ft
- Creating optimal profile for adhesion
- HEPA vacuum dust control throughout
- 24-grit preparation for maximum traction
Step 2 – Pure Polyurea Basecoat:
- 100% solids, self-priming formulation
- Applied over the repaired and prepared surface
- Creating the foundation for the Pebble Beach finish
Step 3 – Hand Broadcast Decorative Chips:
- Applied manually across the wet basecoat
- Creating that natural stone appearance
- Providing color, texture, and visual depth
- The signature Pebble Beach aesthetic
Step 4 – Curing and Scraping:
- Allowing proper cure time
- Scraping to remove vertical or loose flakes
- Thorough vacuuming for clean surface
Step 5 – UV-Stable Polyaspartic Clear Coat:
- Heavy topcoat with 24-grit traction
- UV-stable formulation for long-term clarity
- Maximum protection and durability
- Glass-like finish sealing everything
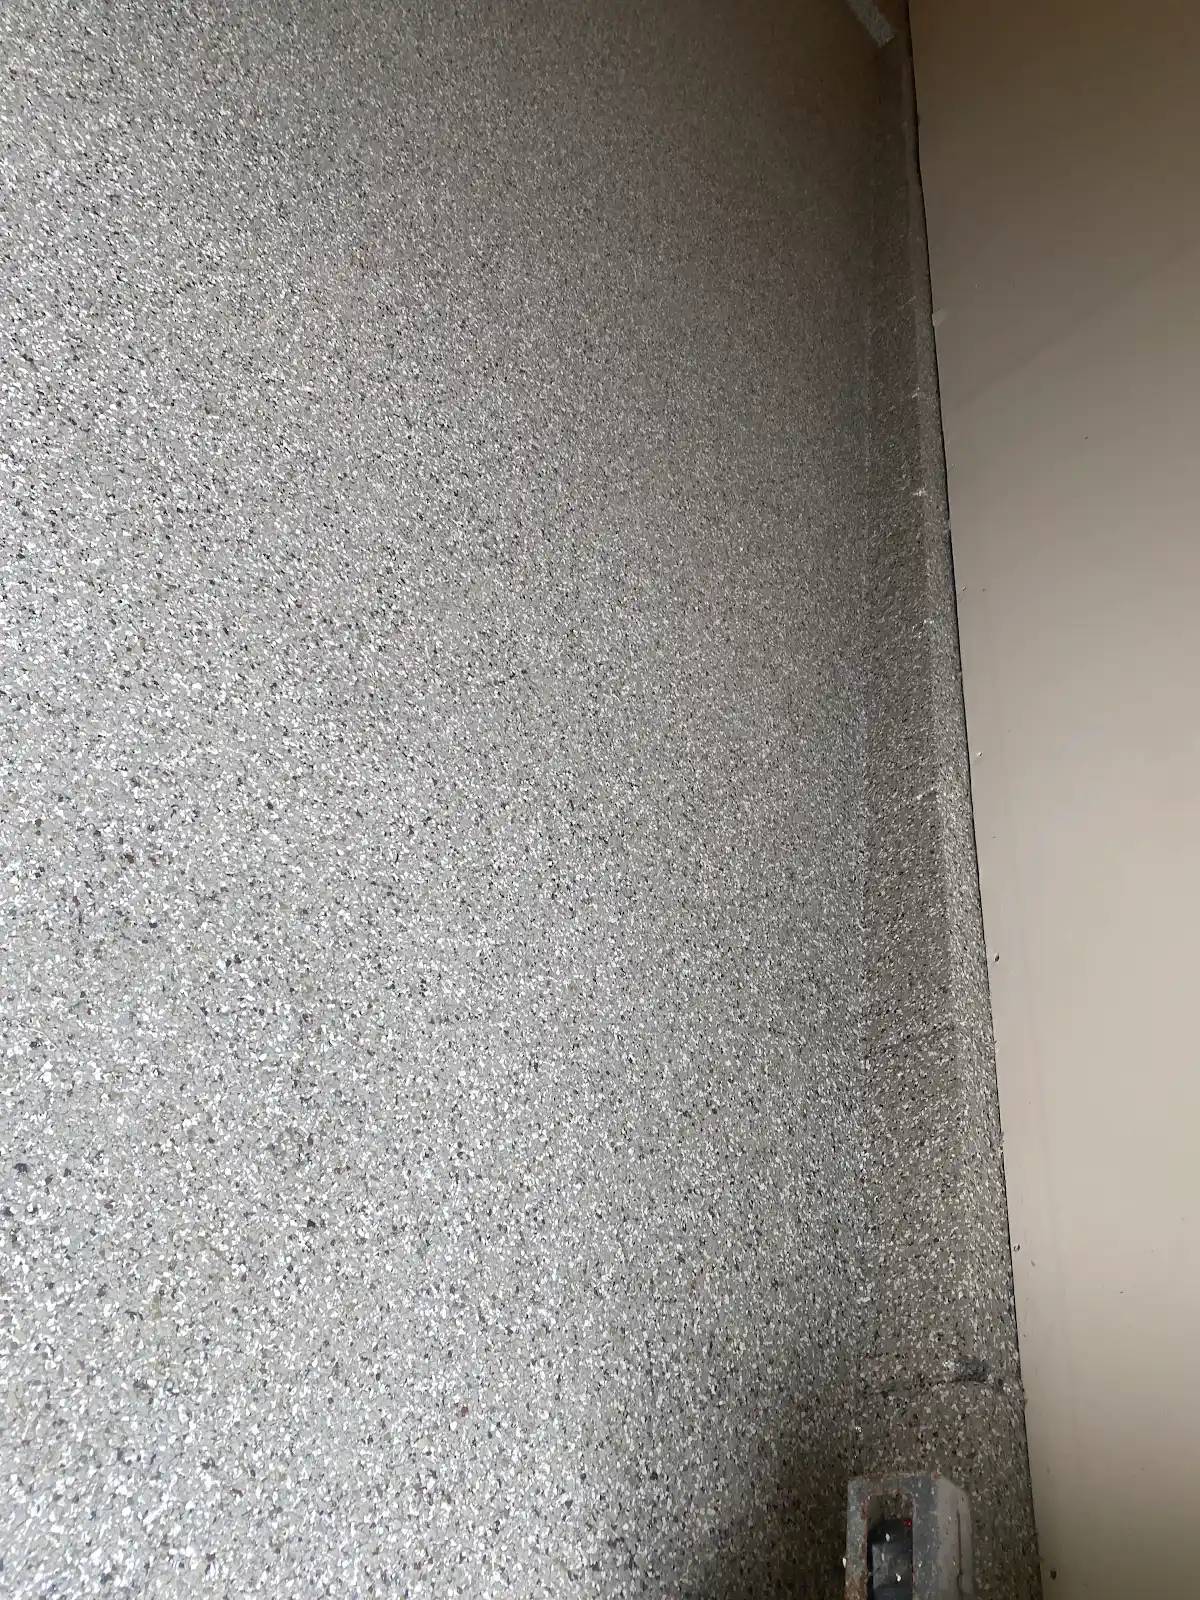
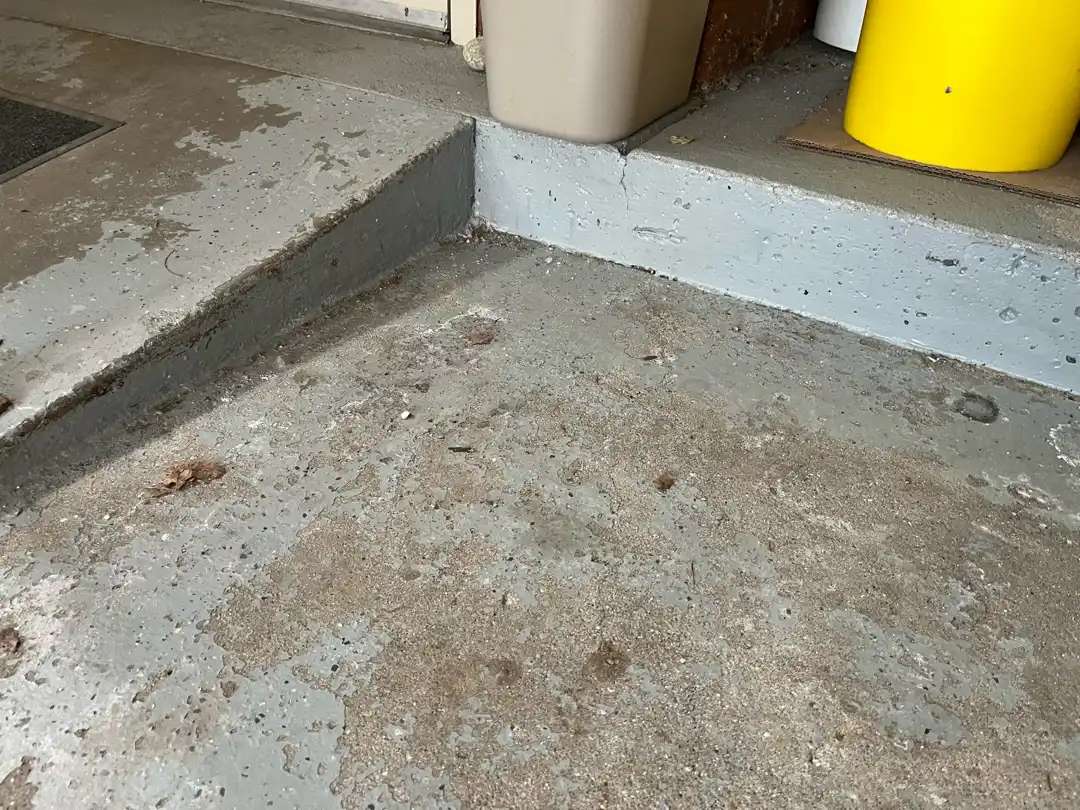
Step 6 – Vertical Lip Detail:
- 13 linear feet of vertical lip coated
- Matching the floor system for complete protection
- Professional edge detail work
The Storm
As the crew finished the final clear coat application and began packing up equipment, the sky darkened ominously. A massive storm was rolling in—the kind of Michigan weather event that can dump inches of rain in minutes.
But the monastery garage had advantages: a very large overhang protecting the entrance, and a steep slope from the garage floor down to the driveway. The crew lowered the garage door almost to the floor, leaving just enough clearance for air flow while preventing any rain from blowing in.
The timing was close. As they drove back to the shop, the storm hit with full force. But back at the monastery, the new Pebble Beach floor was curing under ideal protection—the overhang and slope ensuring no water would compromise the fresh coating.
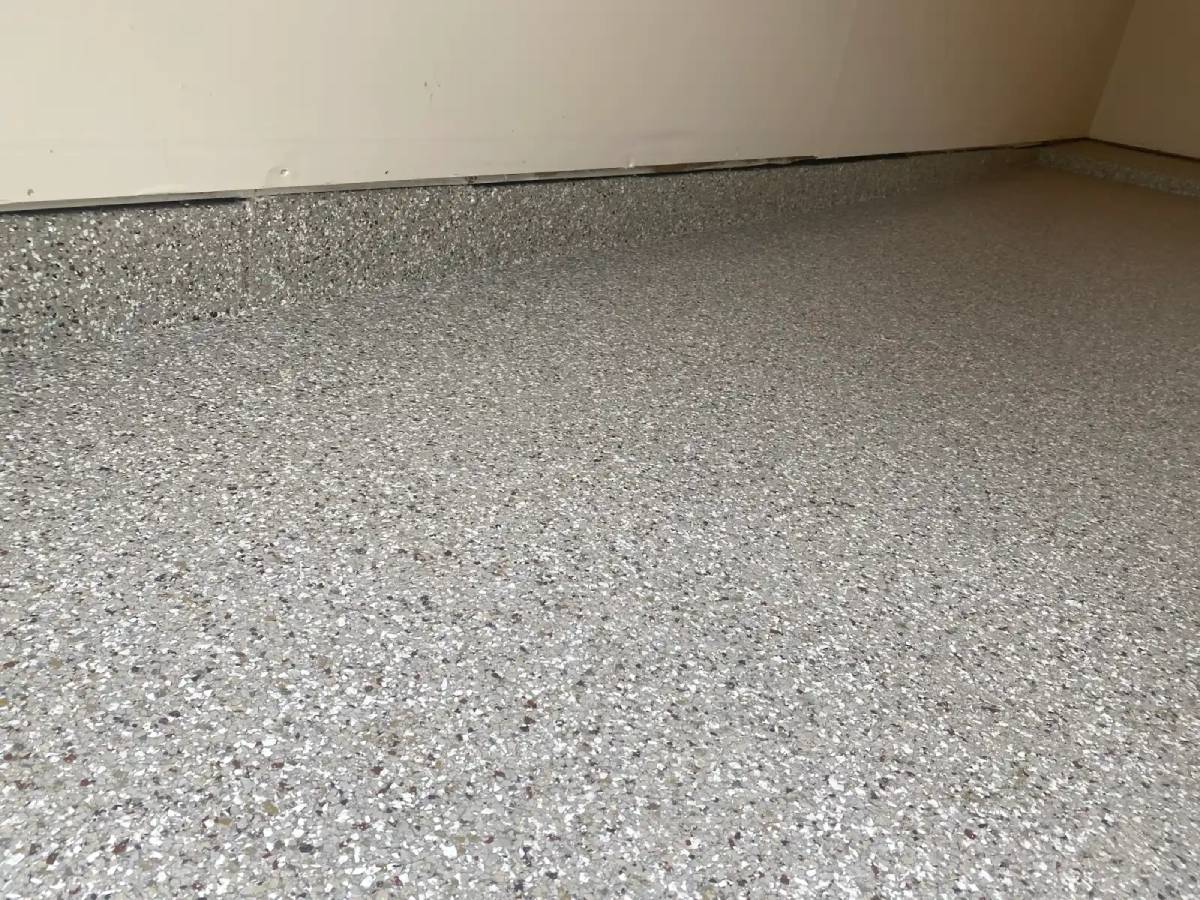
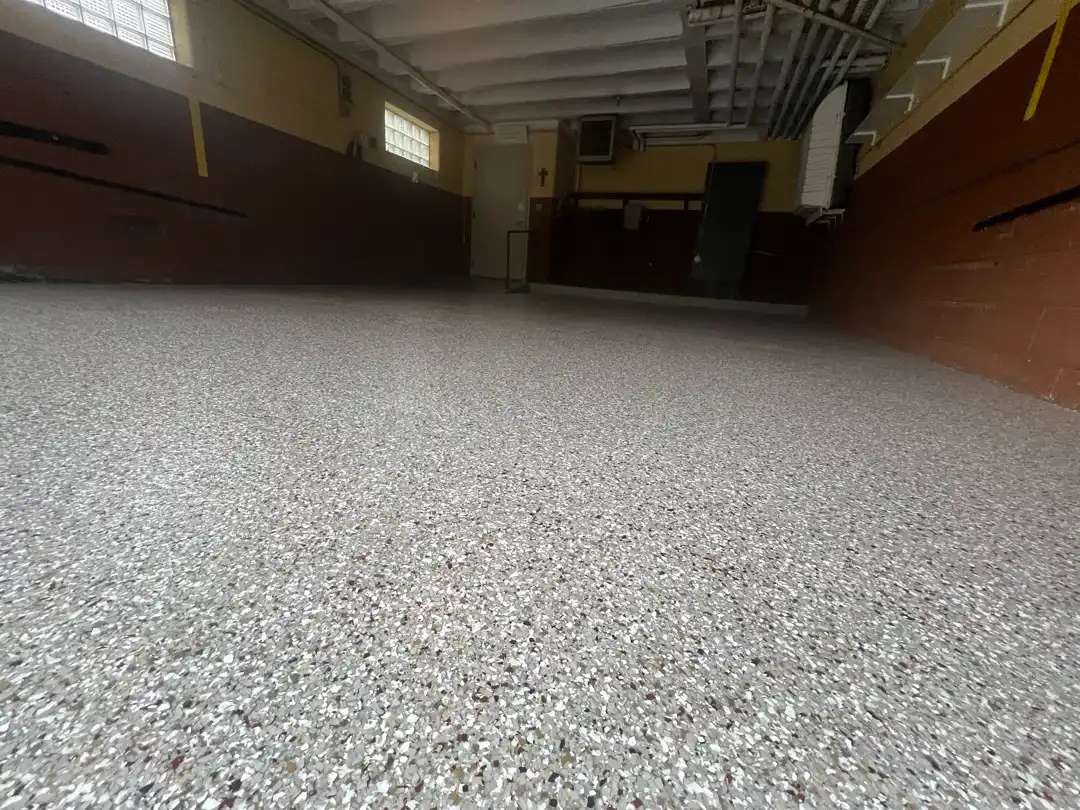
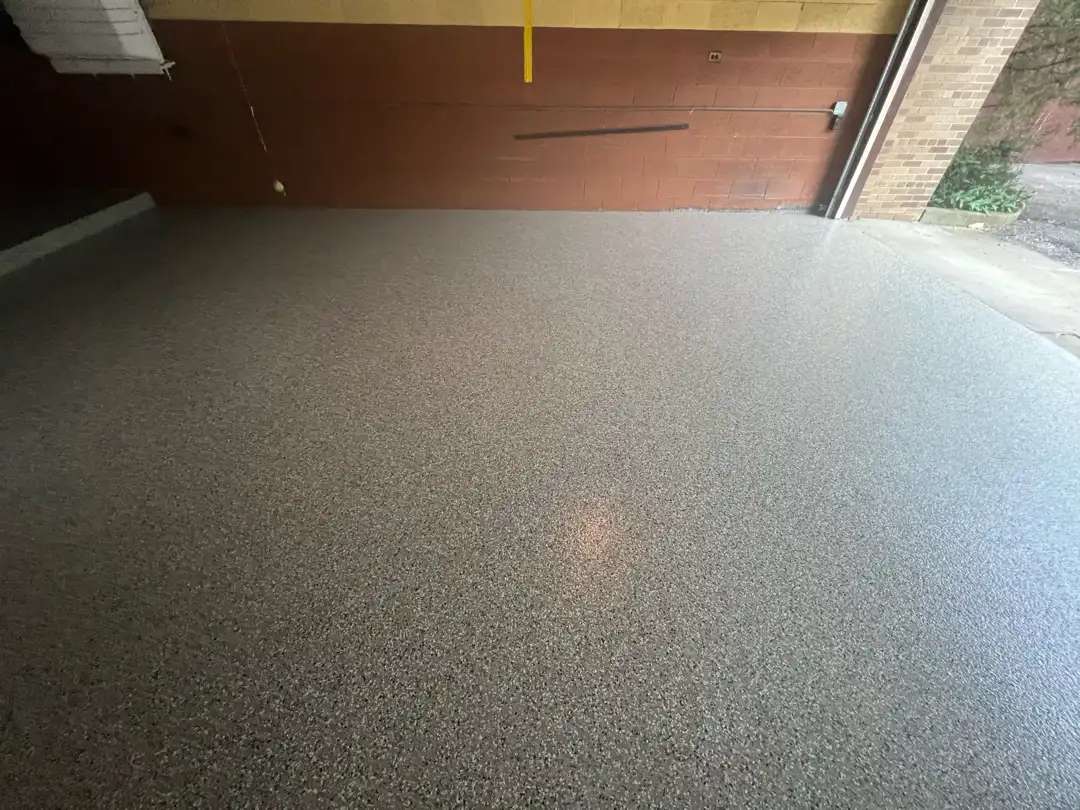
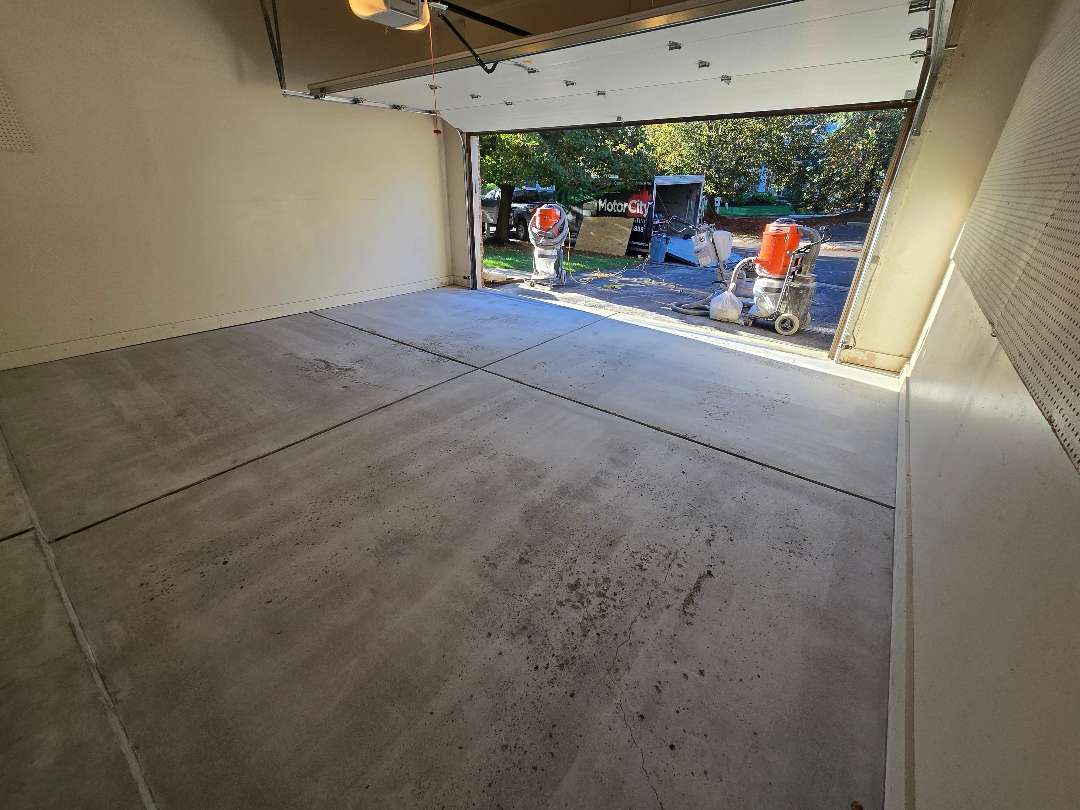
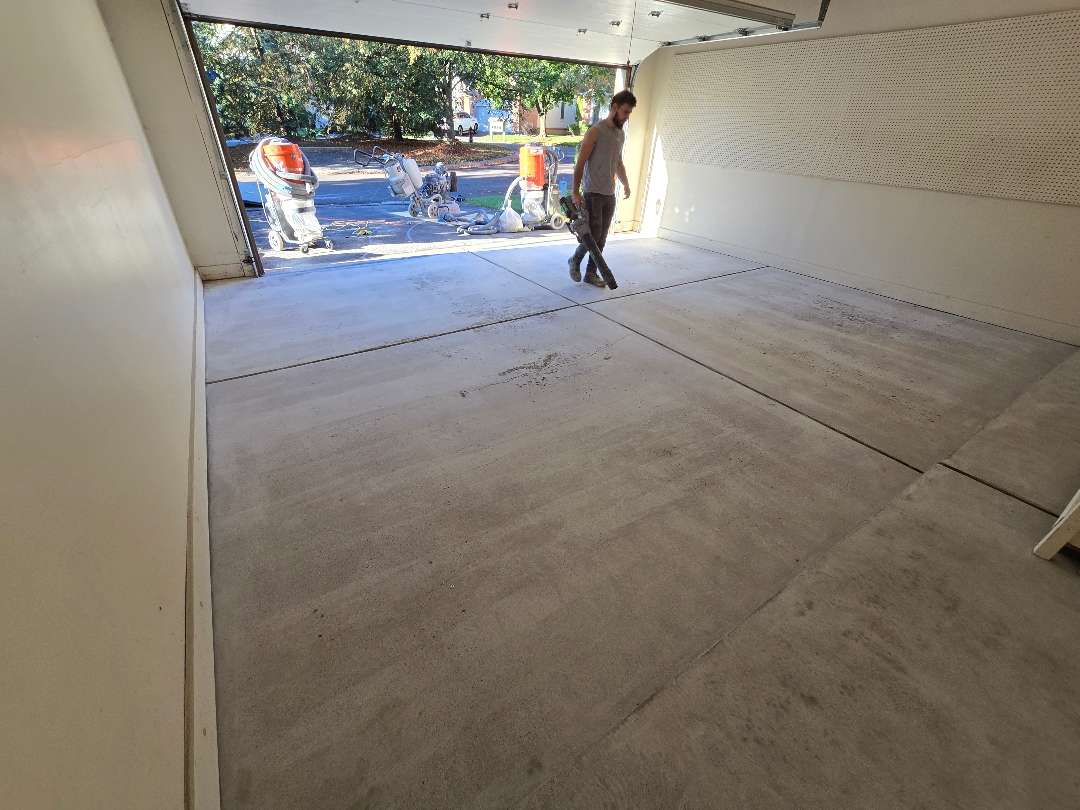
The Transformation
The before-and-after contrast is remarkable. What started as 523 square feet of severely pitted, paint-covered, deteriorating concrete became a pristine Pebble Beach installation that looks more like natural stone terrazzo than garage floor.
The sophisticated grey and tan palette with decorative flakes creates visual interest without overwhelming the space. The 24-grit traction provides safety. The heavy clear topcoat seals and protects. Most importantly, the extensive mending work means this floor is structurally sound—actually in better condition now than when it was first poured.
The Technical Reality
This project exemplifies the full scope of professional garage floor restoration:
- Complete removal of failed previous coatings
- Extensive concrete repair using MR-50 menders
- Proper surface preparation with dust control
- Systematic application of advanced coating systems
- Attention to details like vertical lips and edges
- Professional project management including weather considerations
523 square feet on Middlebelt Road. From deteriorating monastery garage to protected, beautiful workspace. And finished just before the storm.
That’s professional floor coating.
Click on the photos to enlarge them
Garage Floor Coating
on Hazelwood Court
The Starting Point
Two-Phase Approach
This project required two visits. On October 3rd, our crew applied a specialized oil extraction compound across the contaminated area. The compound draws oil upward out of the concrete pores over time. That process cannot be rushed. Our team left the material to work and returned once the extraction was complete.
Surface Preparation
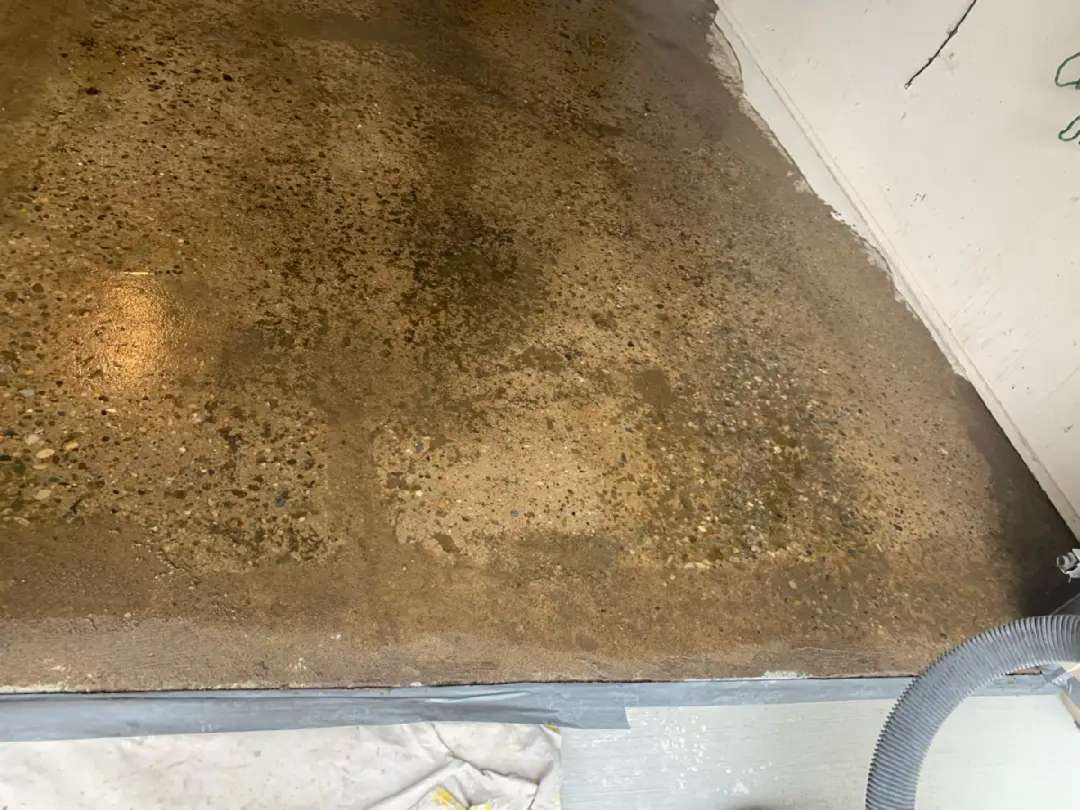
With the oil addressed, our crew began mechanical preparation. The first grind opened the surface of the concrete and removed the laitance layer. The photos from this phase show the floor in transition — contamination lifting, texture emerging, pores opening.
The concrete required a second grind. Our team made a second pass to ensure a uniform surface profile across all 392 square feet. This step is visible in the images: the floor grew progressively cleaner and more consistent with each pass.
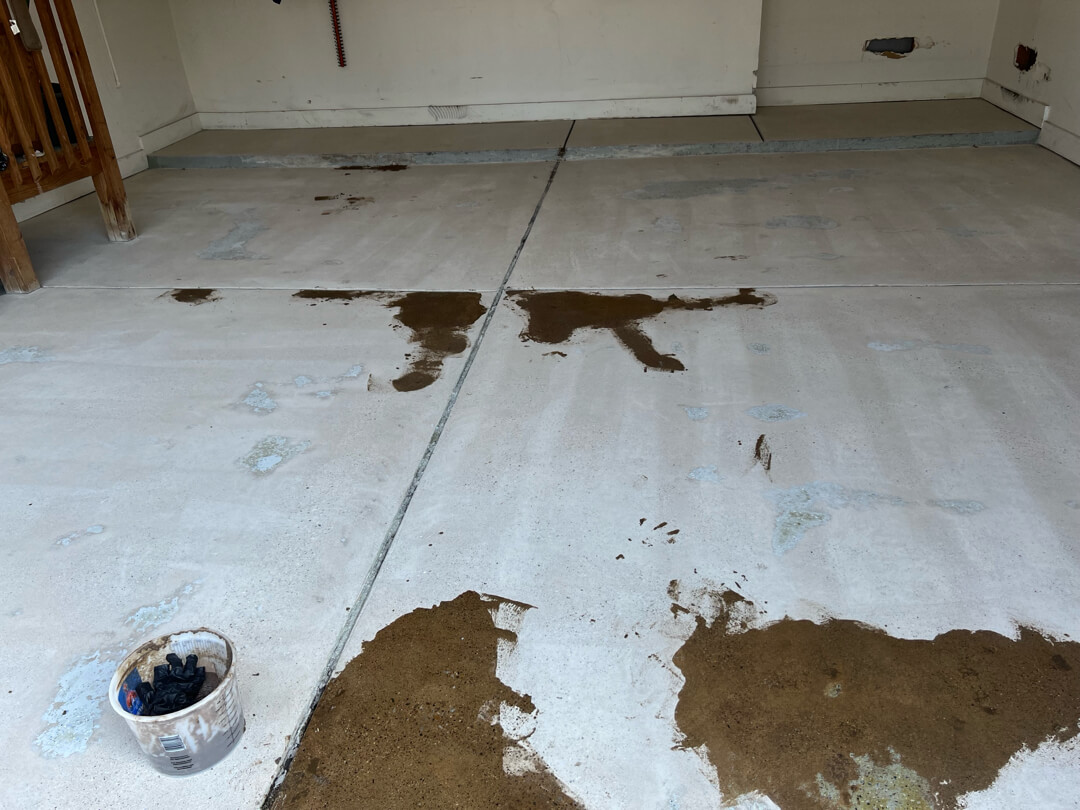
Patching and Flood Coat
Our crew addressed the pitting and cracking directly. They applied mender compound to each damaged area, filling voids and rebuilding the surface. The patch-and-flood photos document the work: white repair material pooling into low spots, bridging cracks, and leveling the compromised sections.
Our team then applied a flood coat to seal and unify the prepared surface. This step tied together the repaired areas and the surrounding concrete. The floor was now ready to accept the coating system.
Moisture Barrier
Testing confirmed moisture required a barrier before coating. Our crew applied a moisture barrier coat across the full slab. This step protects the system above from moisture vapor pushing up through the concrete. Skipping it risks adhesion failure over time.
The Coating System
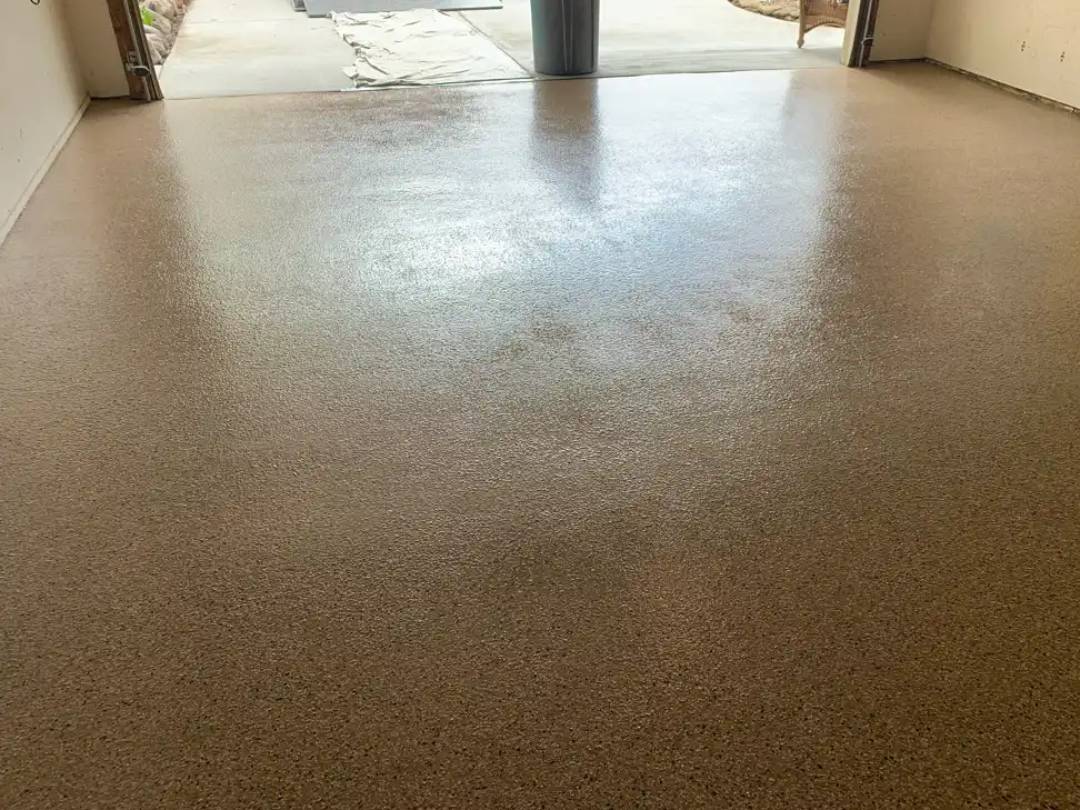
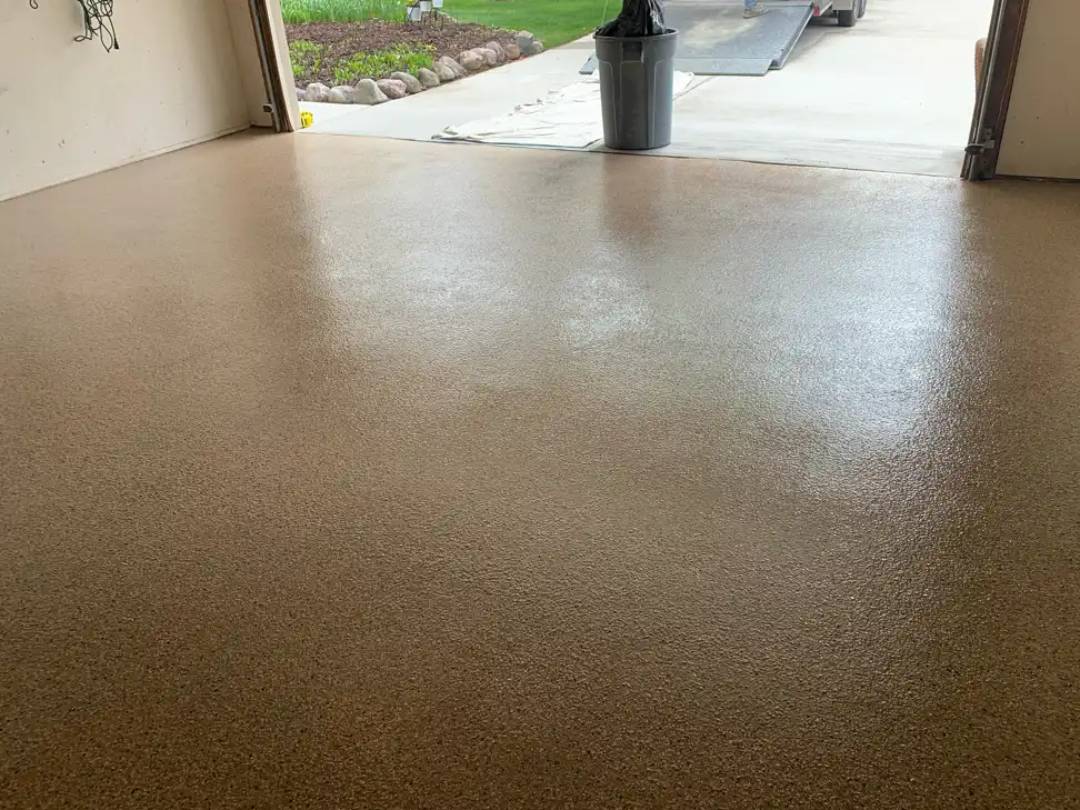
Our crew applied the MC4.6 polyurea-polyaspartic coating system with 36-grit traction throughout. The color chosen was Pecan — a warm blend of tans and browns that gives the floor depth and character. Our team broadcast the decorative flake across the wet base coat. They then applied the heavy clear topcoat to lock in the flakes and seal the surface.
The scope included 19 linear feet of vertical lip and one concrete step. Our crew coated both to match the main floor. The vertical lip received clean, precise edge work. The step now integrates seamlessly with the finished floor.
The Result
The before-and-after contrast tells the full story. What arrived as an oil-stained, pitted, cracked concrete floor became a Pecan flake installation with a protective, durable surface. The two-phase process — oil extraction followed by full installation — was the only way to do this job correctly. Our crew did not cut corners. The result reflects that.
392 square feet on Hazelwood Court. Done right.
Click on the photos to enlarge them
Garage Floor Coating
on Forest Hill Drive
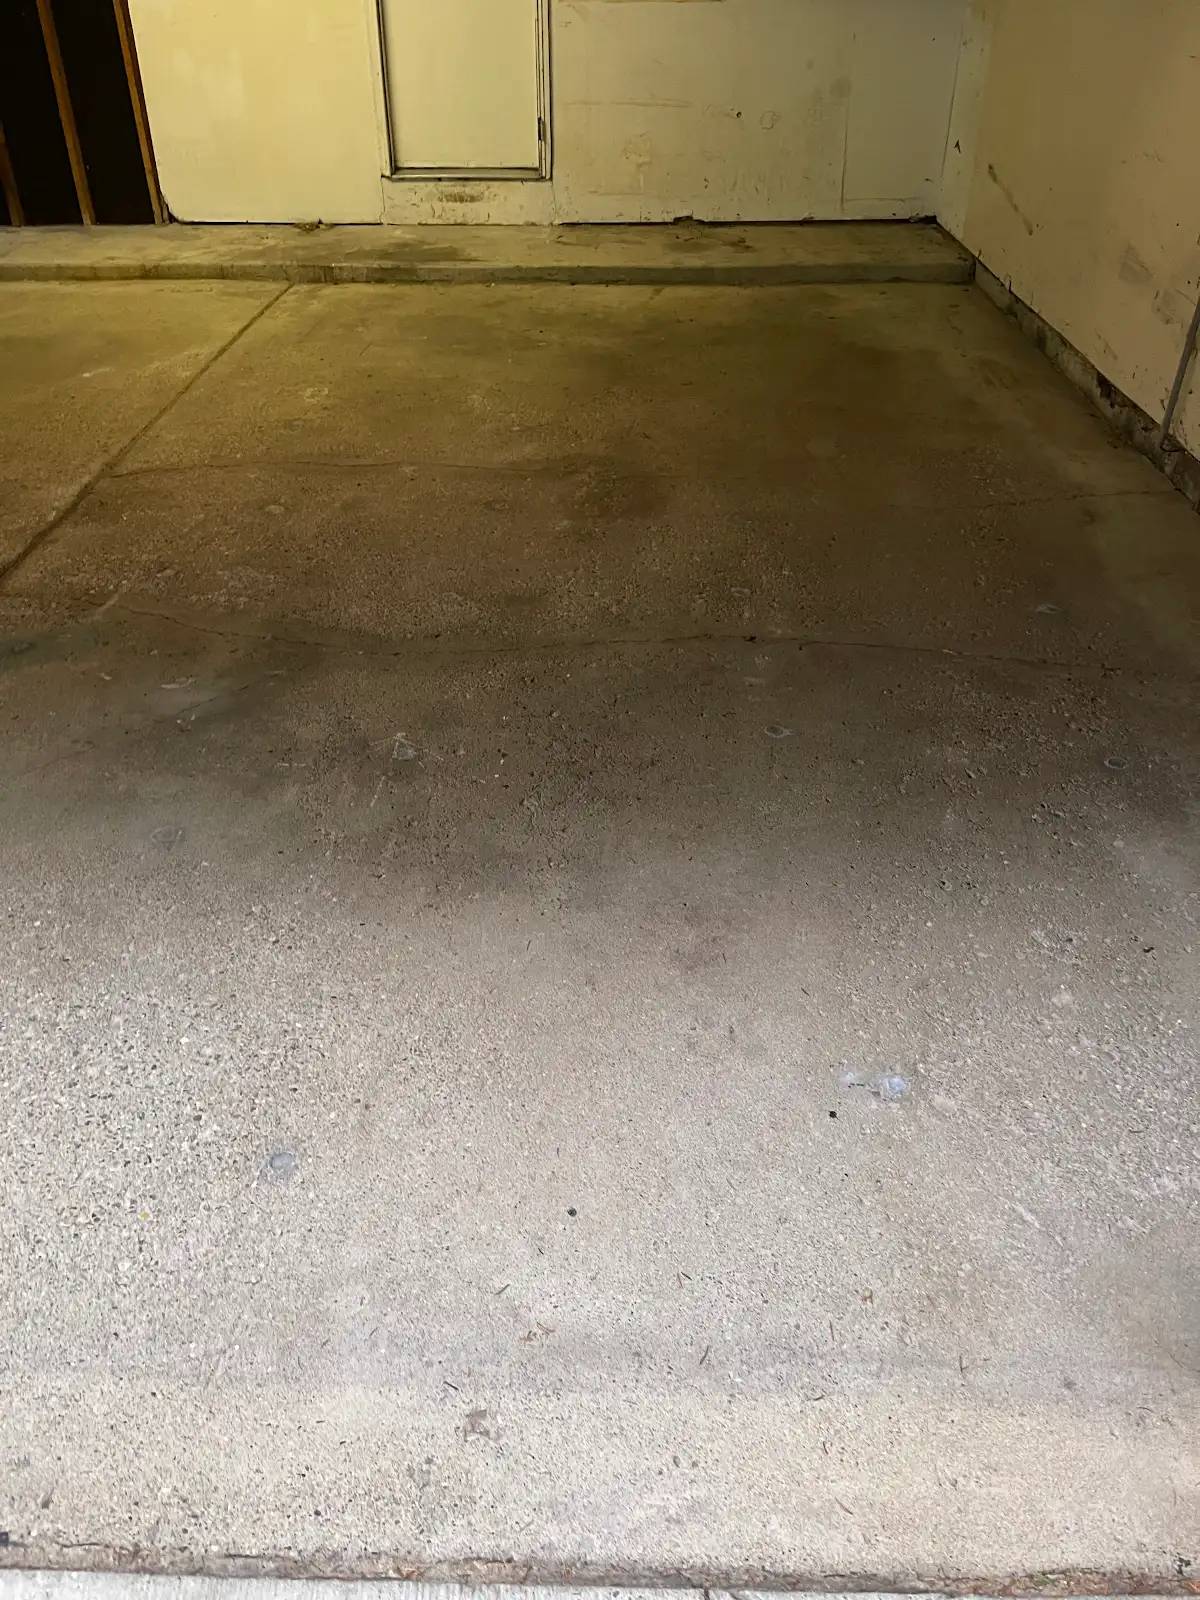
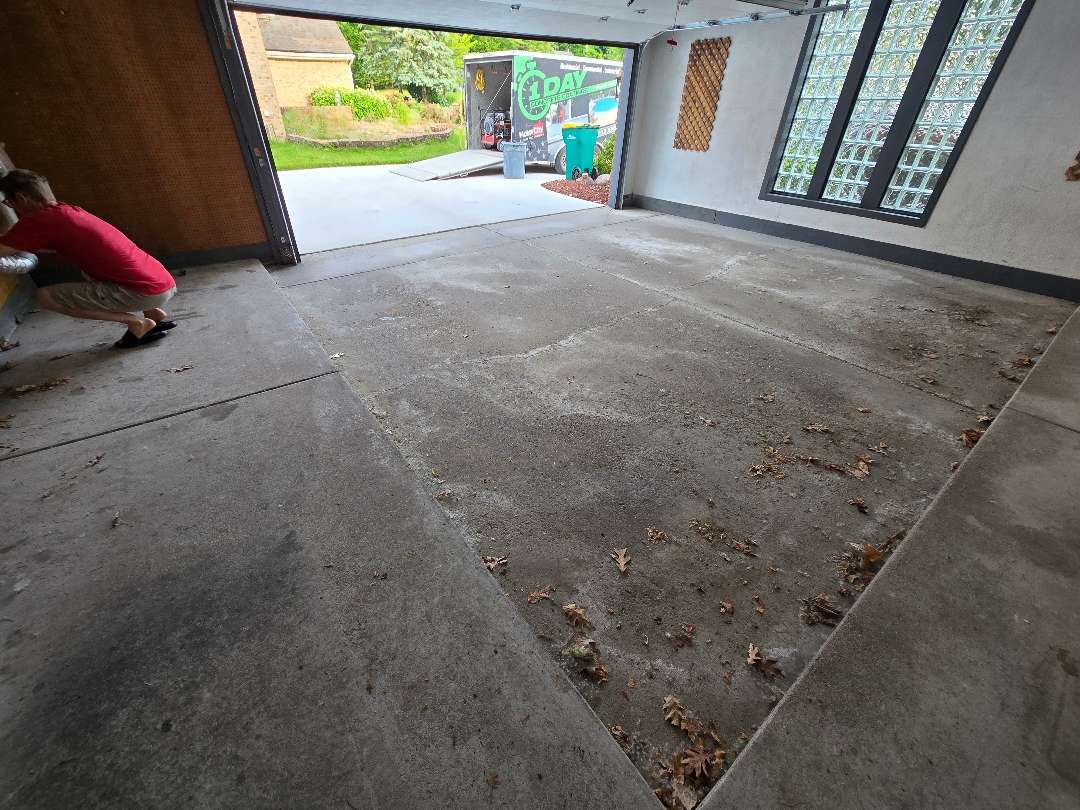
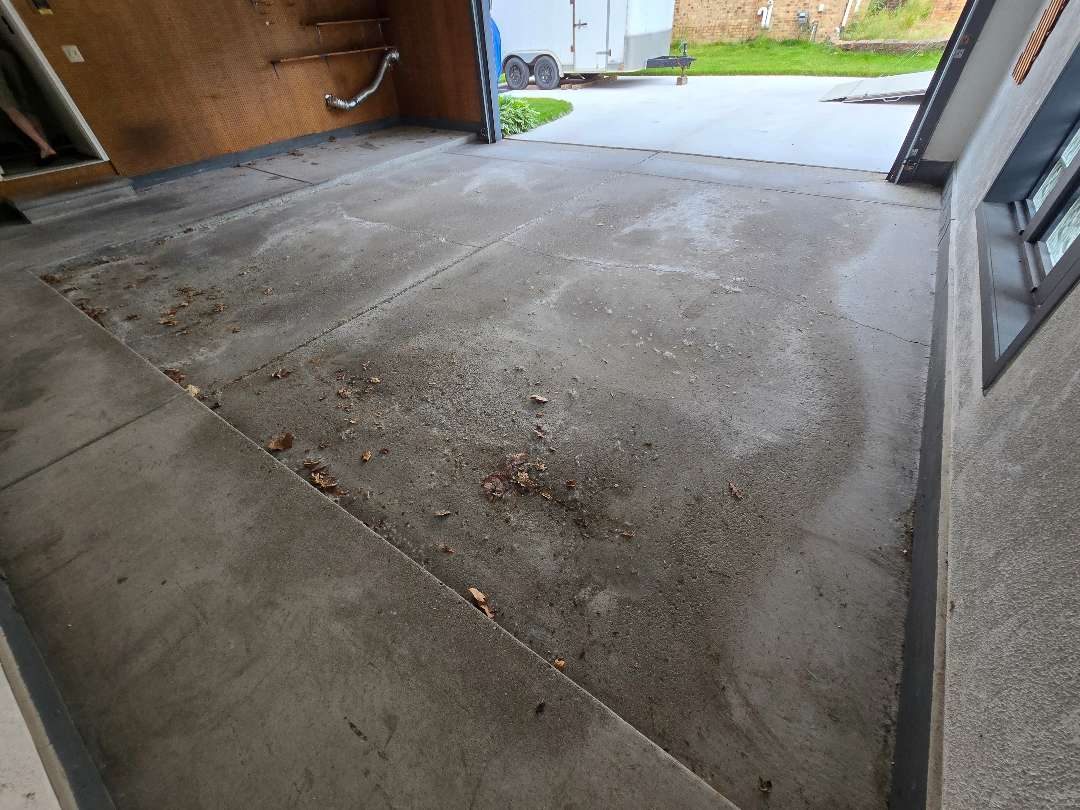
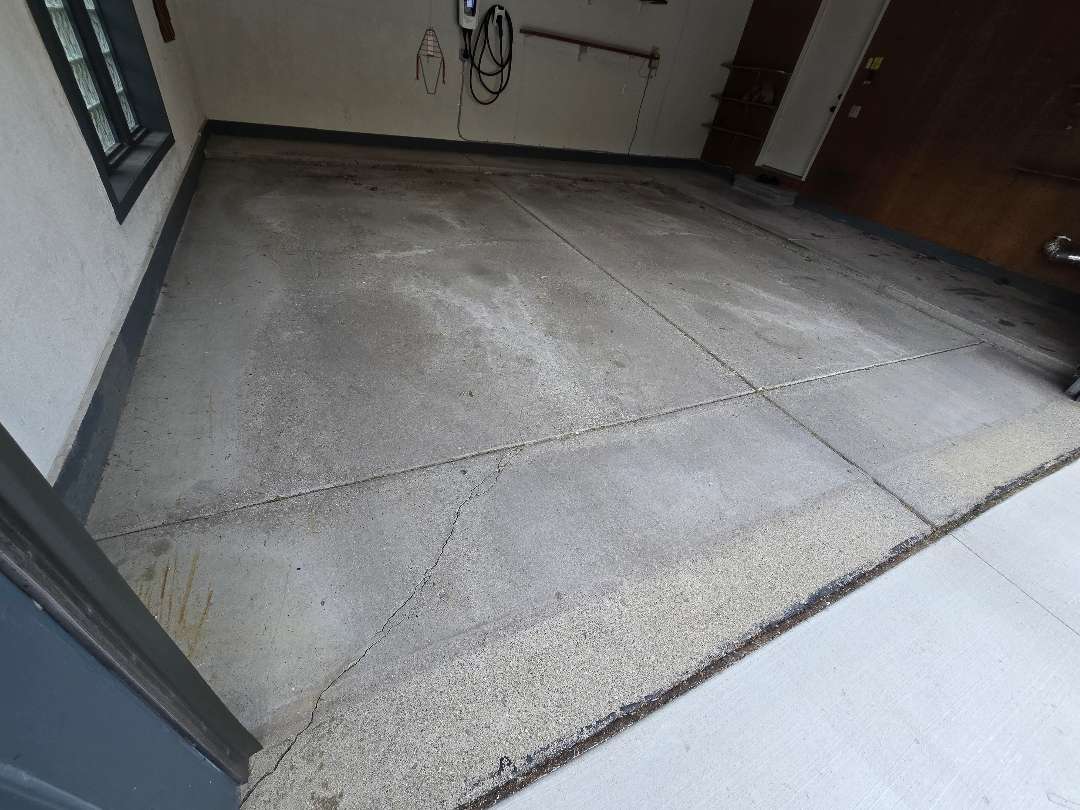
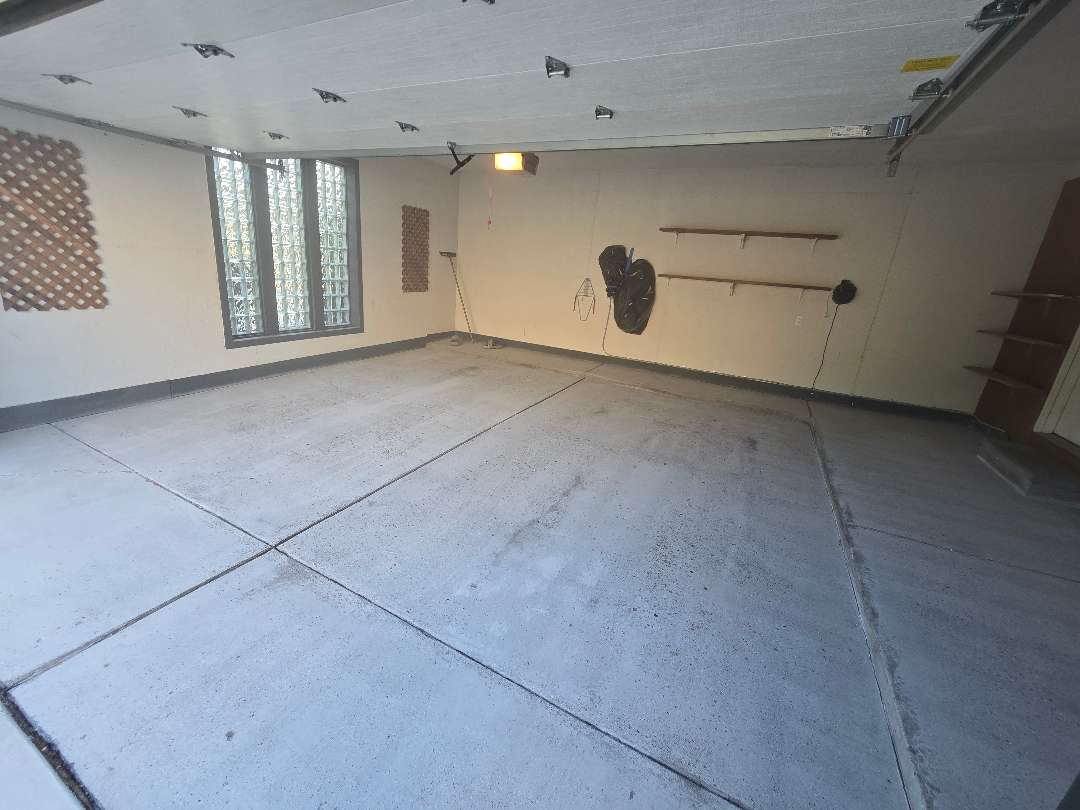
The Starting Point
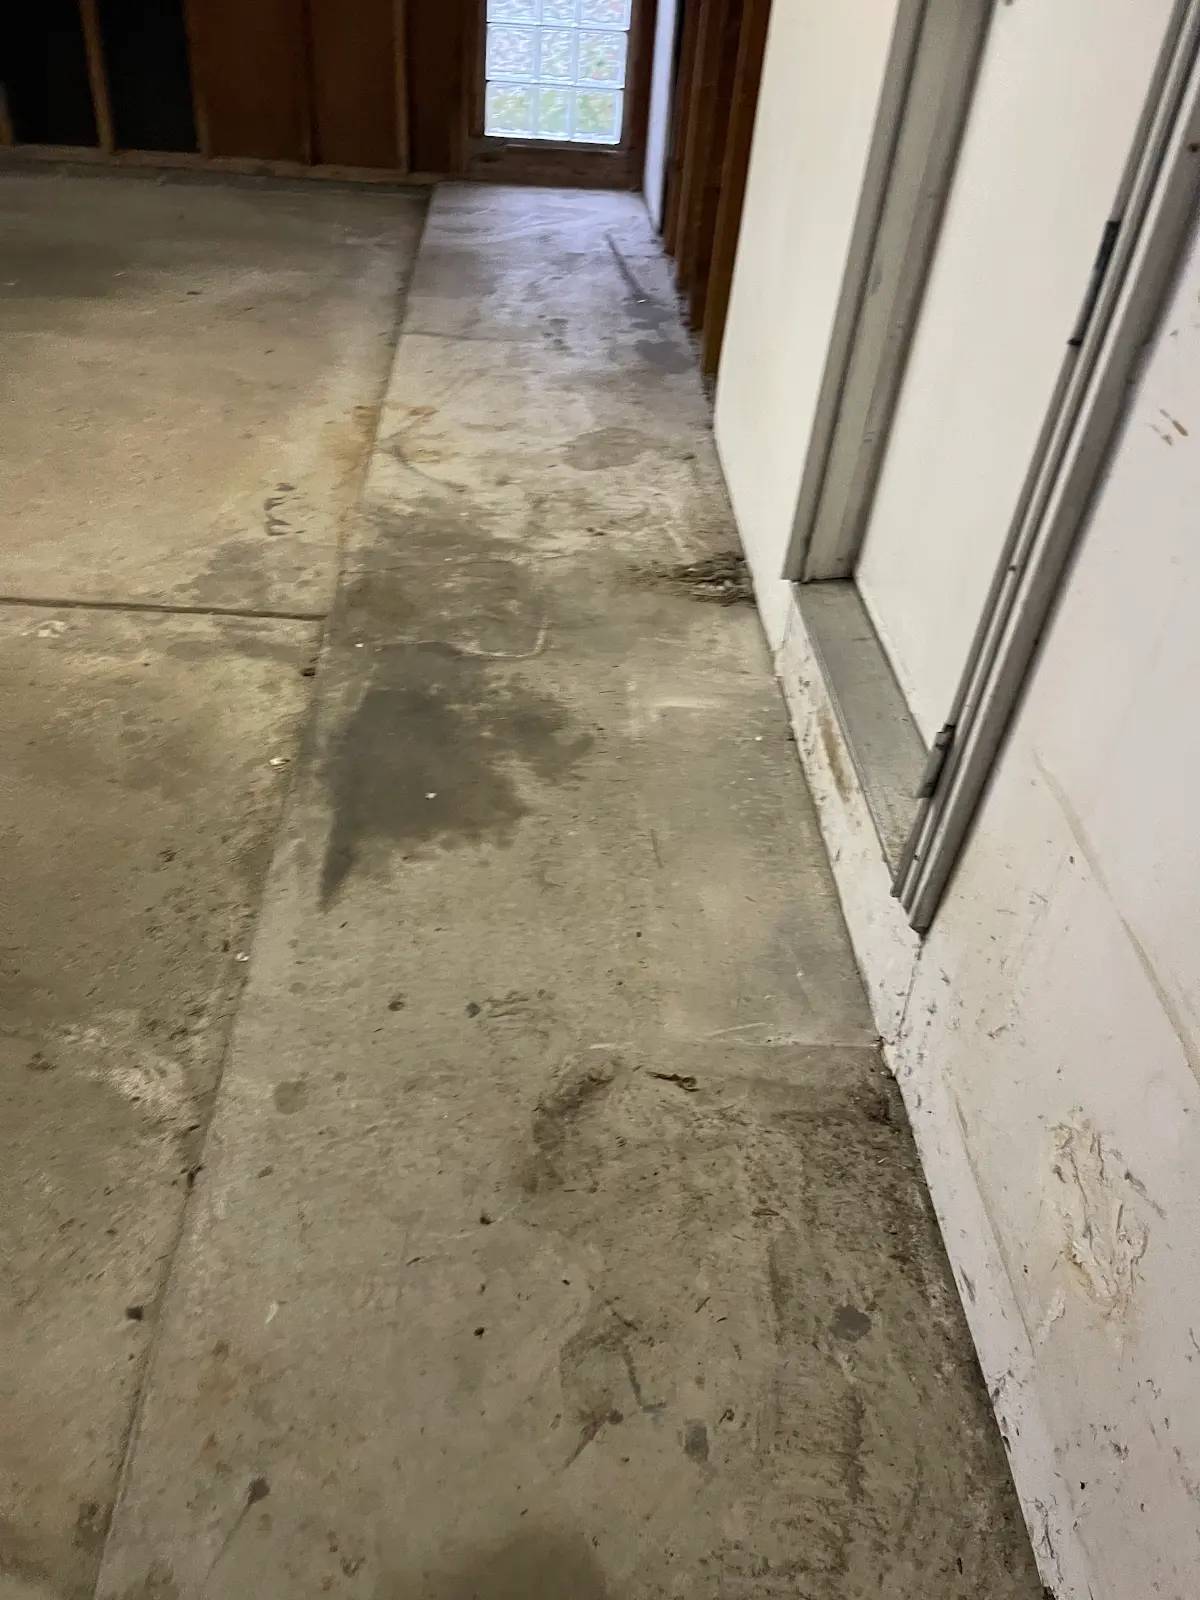
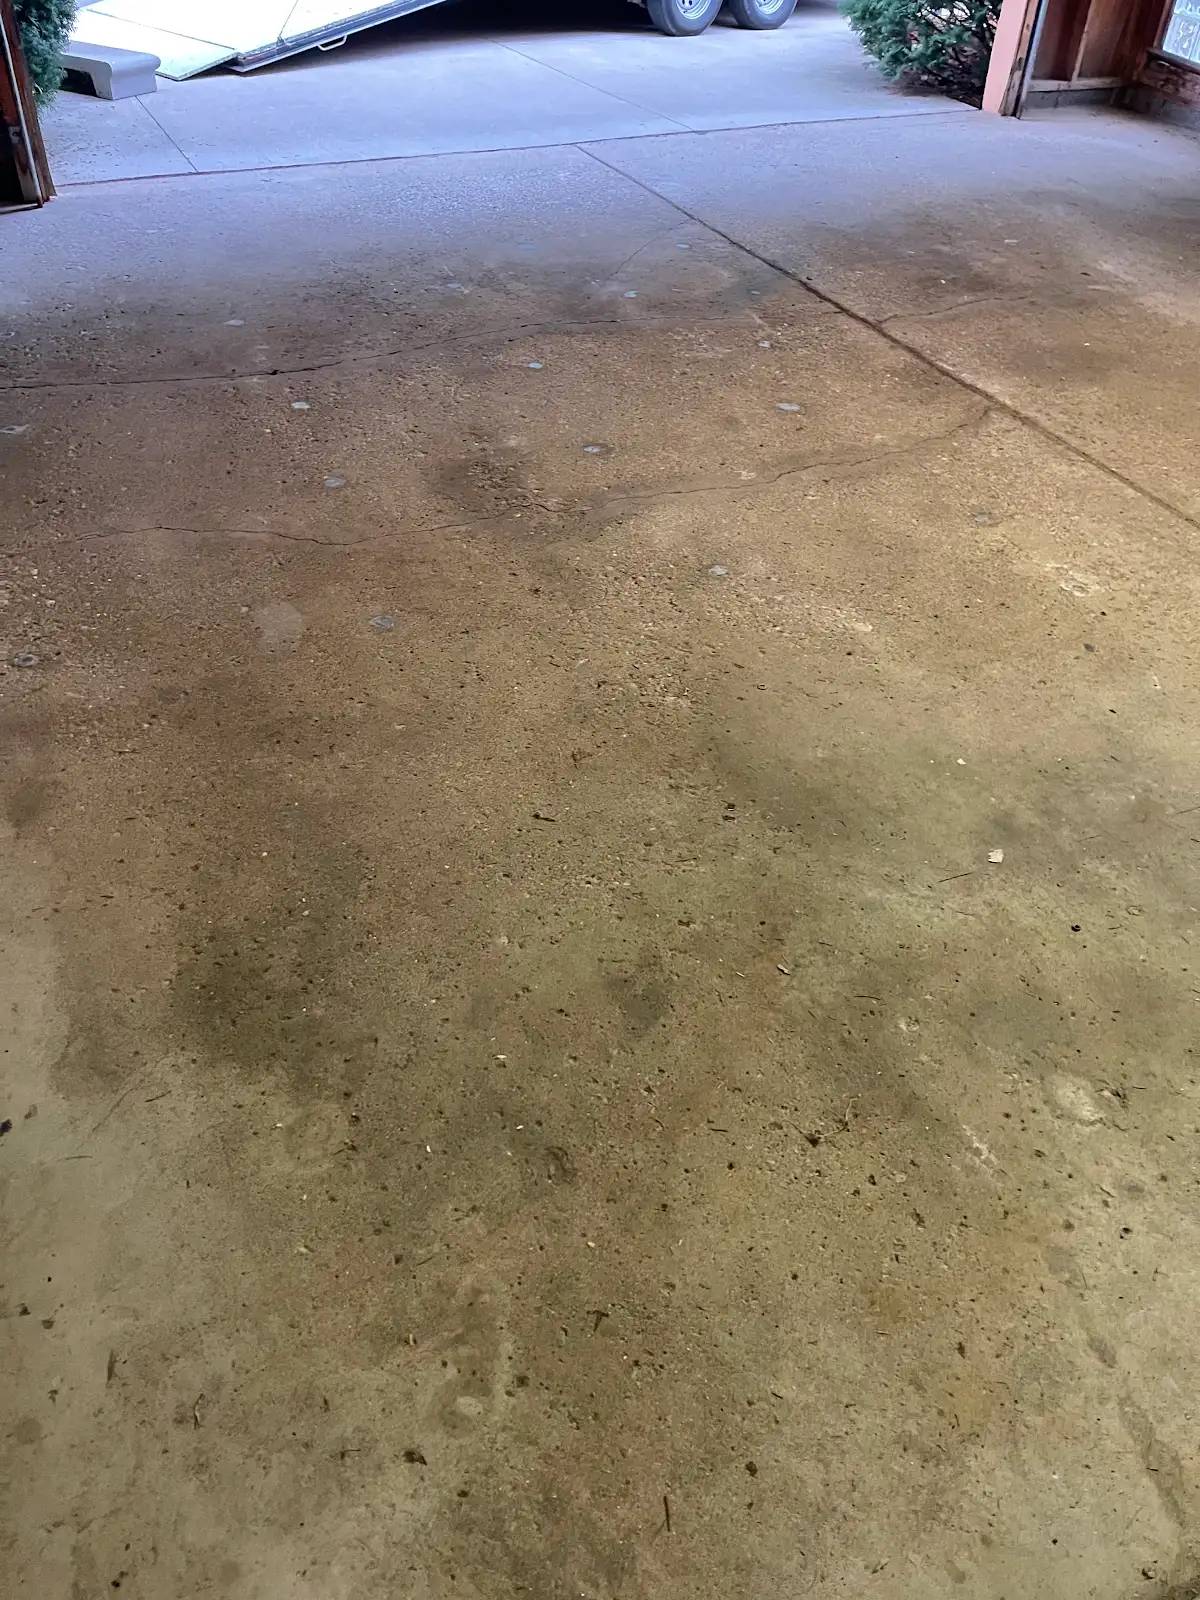
Our crew arrived at this Forest Hill Drive property to find a large two-car garage. The concrete looked intact from a distance. Up close, the story changed. Cracks ran through multiple slab sections. Dark staining had worked deep into the pores of the concrete. Years of vehicle traffic had left their mark well below the surface.
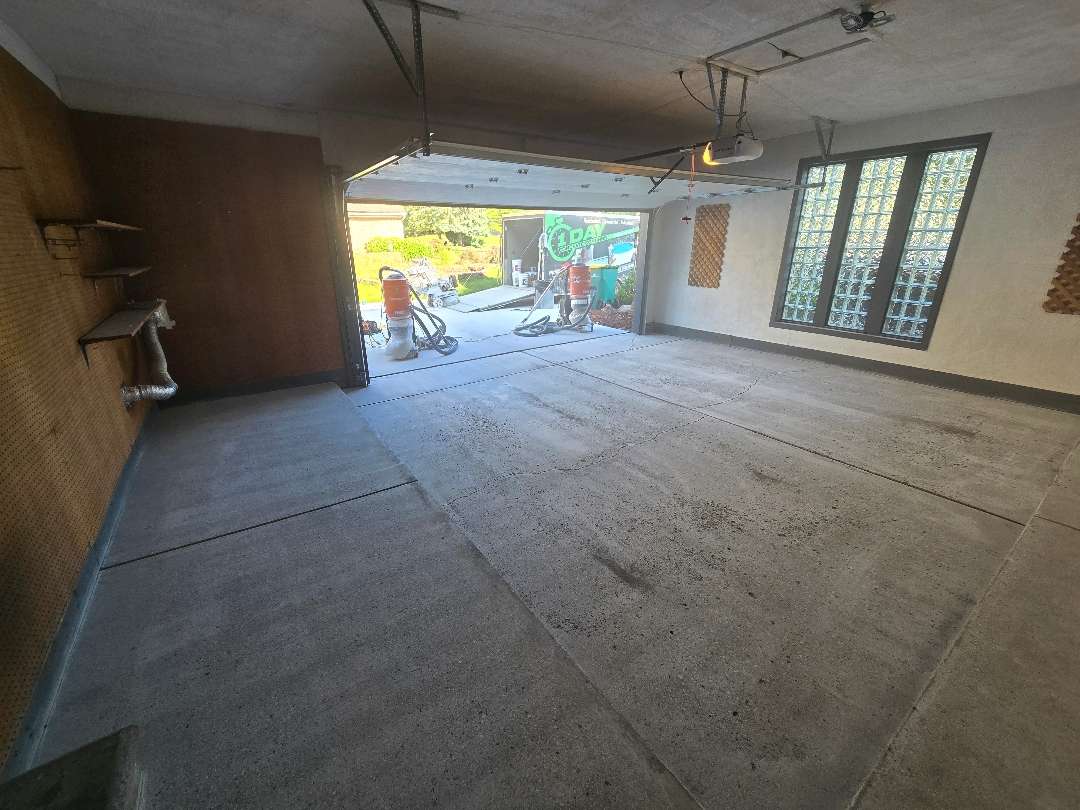
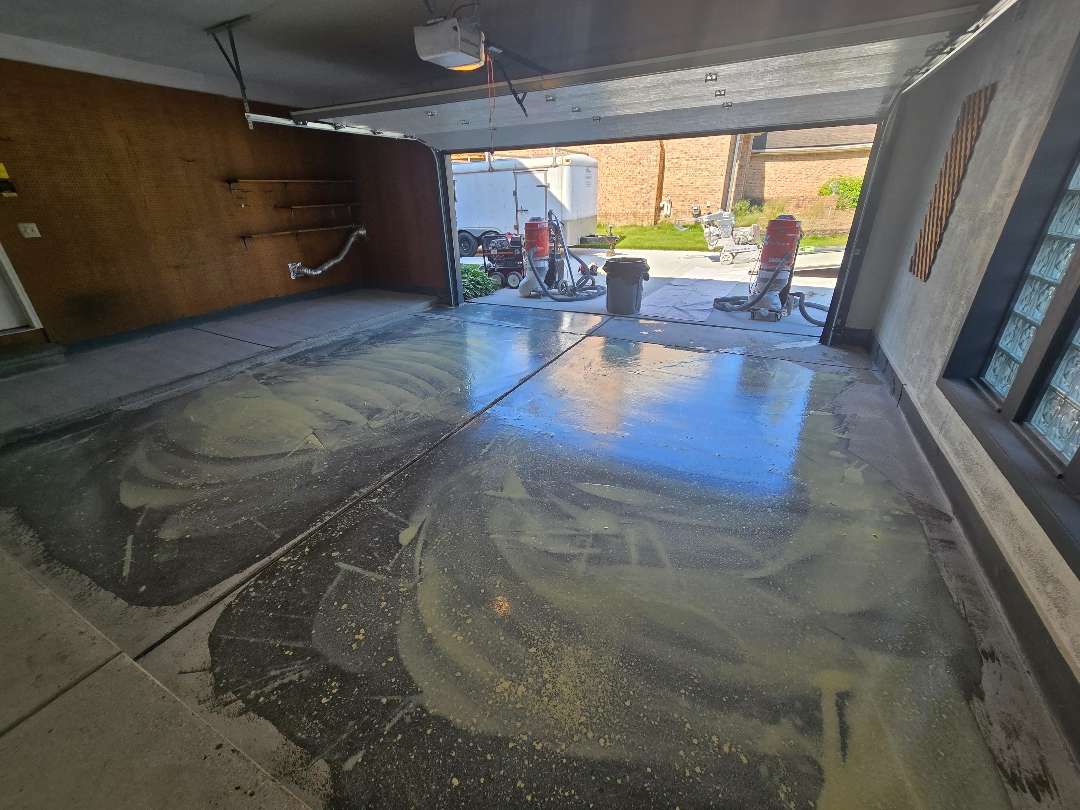
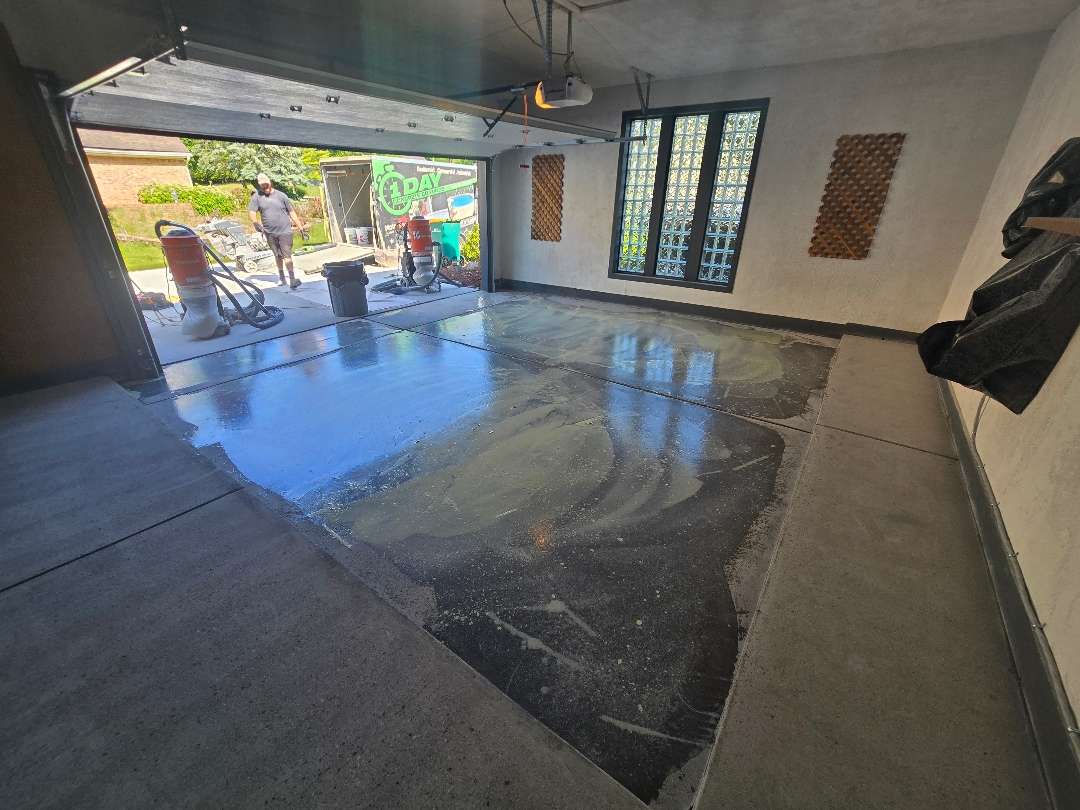
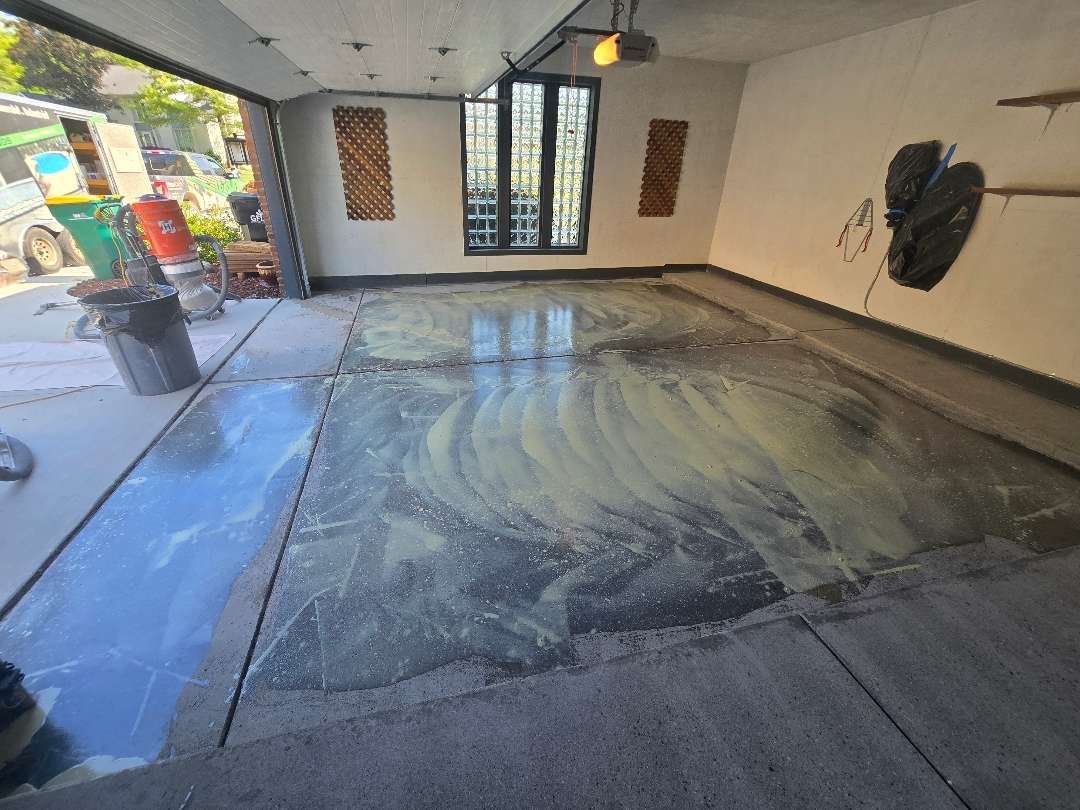
What the Grind Revealed
Our crew began mechanical preparation with diamond grinding equipment. The grinding photos tell the real story. Dark, contaminated material lifted off in sheets as our team worked across the slab. The concrete had absorbed far more than surface grime. Our crew made full passes across the floor. Each pass removed another layer of contamination. Each pass opened the pores of the concrete for the coating system.
Patching and Flood Coat
With grinding complete, our crew addressed the cracks and damaged areas directly. They applied mender compound to each compromised section. White repair material filled the cracks and low spots across the slab.
Our team then applied a flood coat over the repaired surface. This unified the patched areas with the surrounding concrete. Our crew then performed a flood grind over the cured flood coat. This created a flat, consistent surface profile. The floor was now ready for coating.
Final Cleanup
Our crew vacuumed and cleaned the entire floor before coating. The cleanup photos show a flat, open, uniformly prepared surface. No contamination remained. No loose material remained.
The Coating System
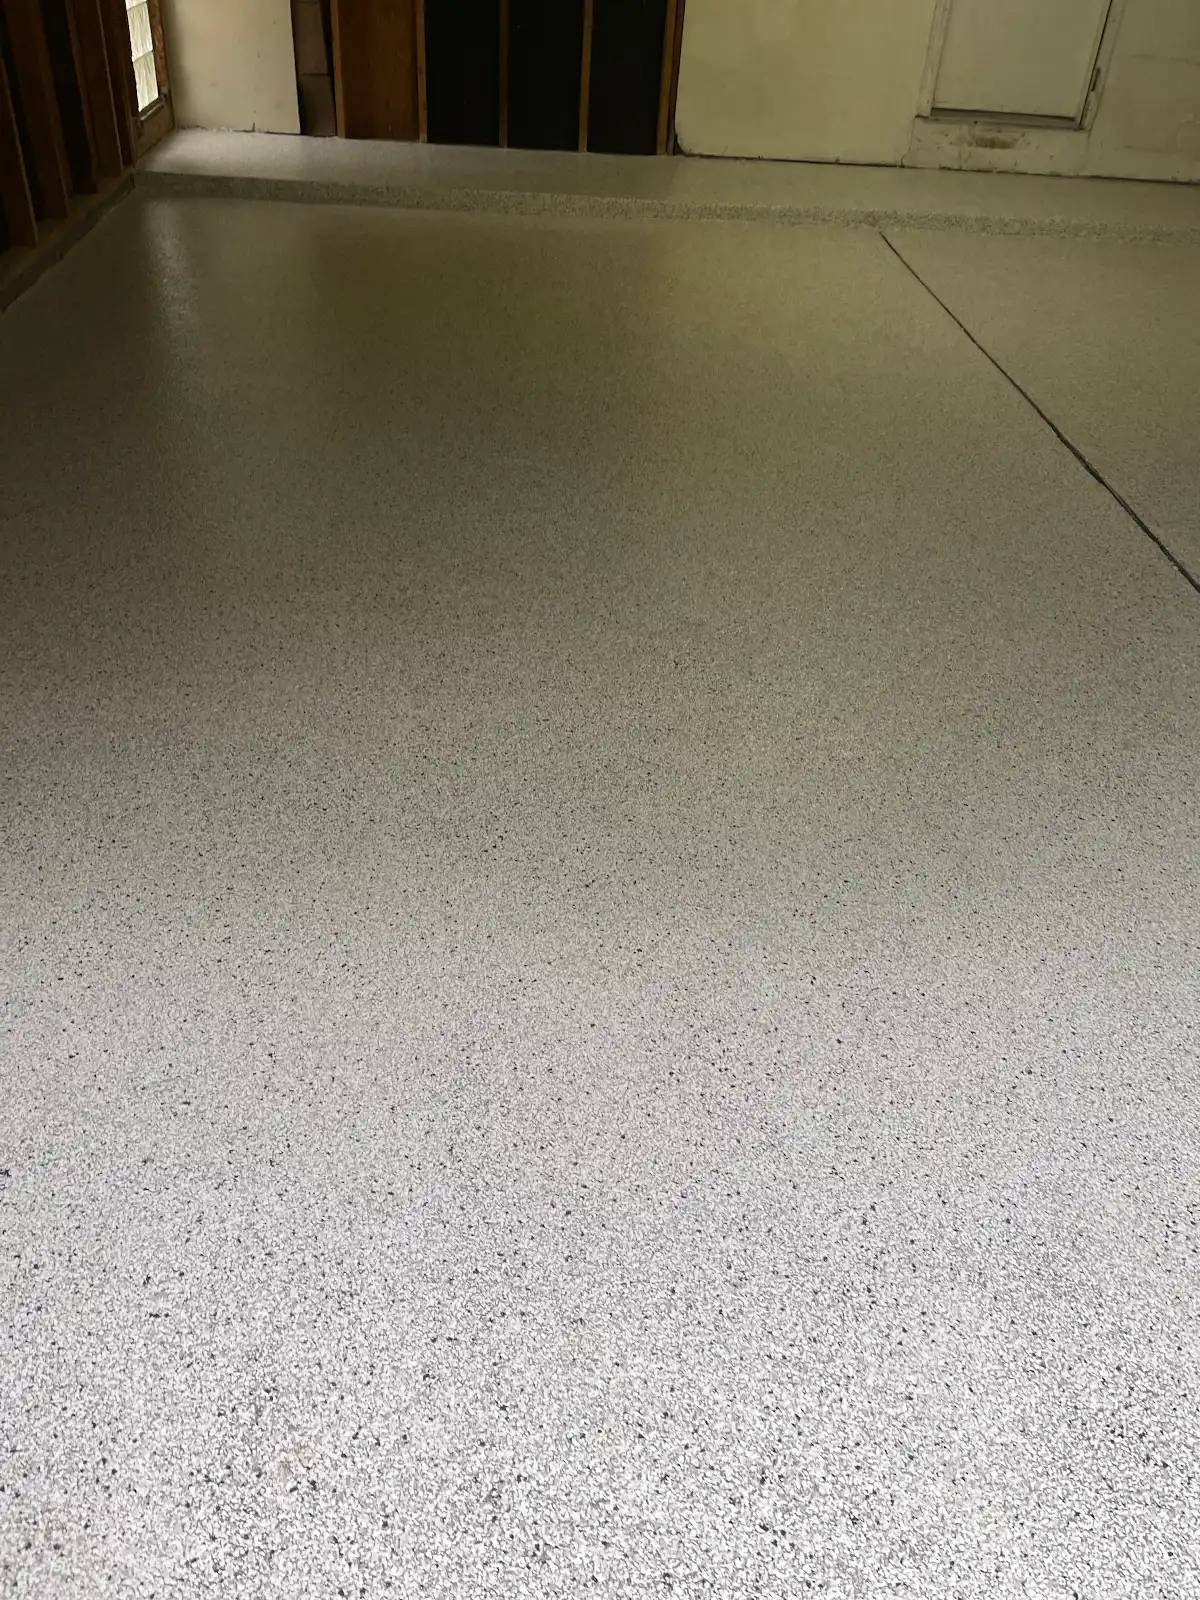
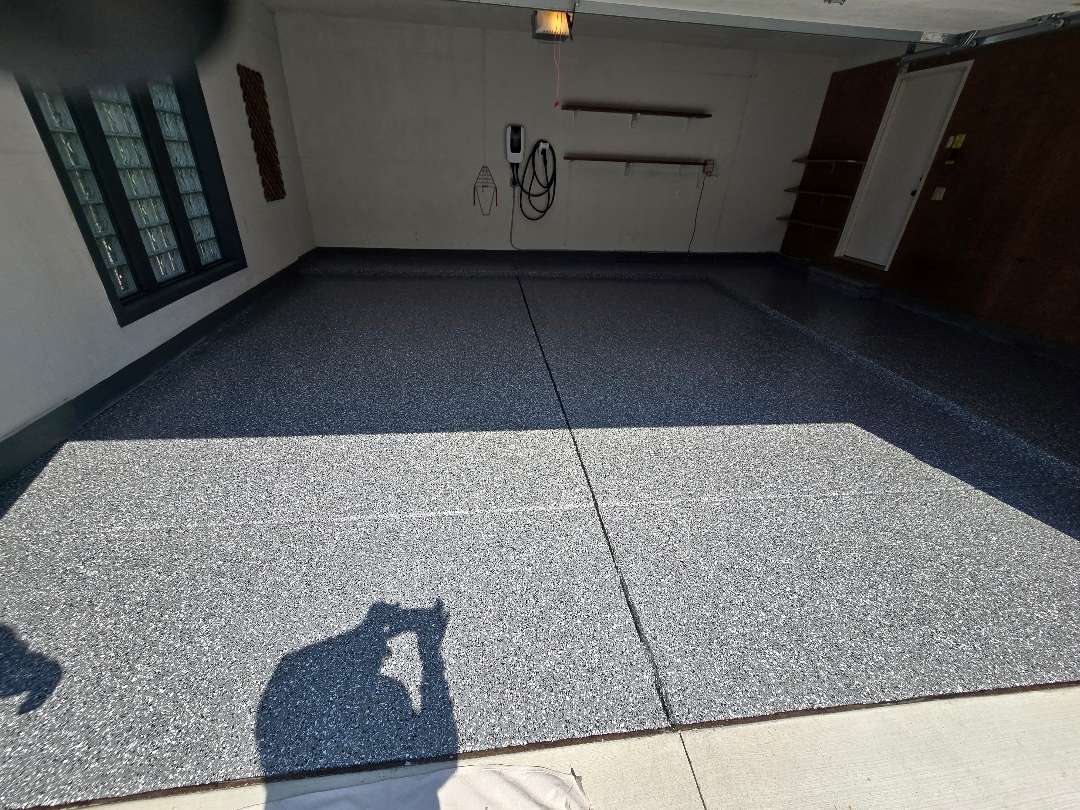
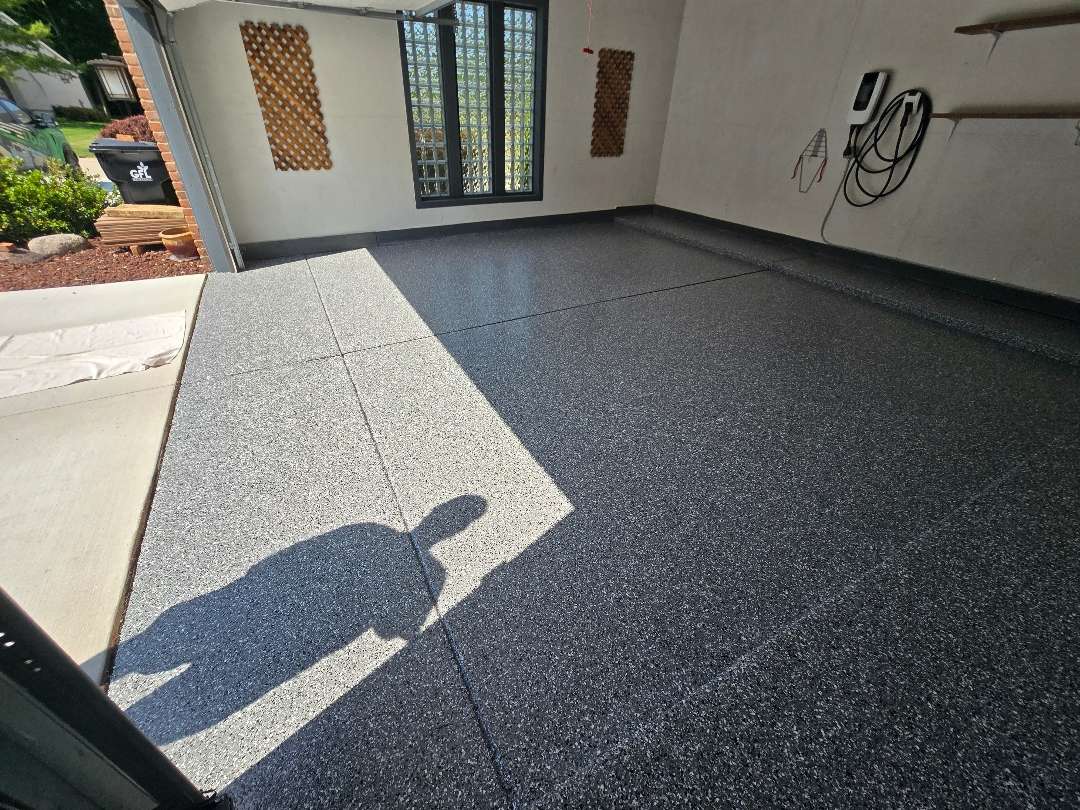
The homeowner selected Smoke — a deep charcoal color with dark and light flecks. Our crew applied the polyurea-polyaspartic coating system with medium 36-grit traction. Our team broadcast the decorative flake across the wet base coat. They then applied the heavy clear topcoat to lock in the flakes. The 36-grit traction provides grip underfoot without compromising the finished appearance.
The Result
The finished floor stands apart from what our crew found on arrival. Deep charcoal Smoke flake now covers what was stained, cracked, contaminated concrete. The glass block windows bring natural light into the space. That light plays off the dark flake finish throughout the day. The floor is sealed, protected, and ready for years of use.
Click on the photos to enlarge them
Garage Floor Coating
on Sheffield Drive
Sheffield Drive, Farmington Hills, MI
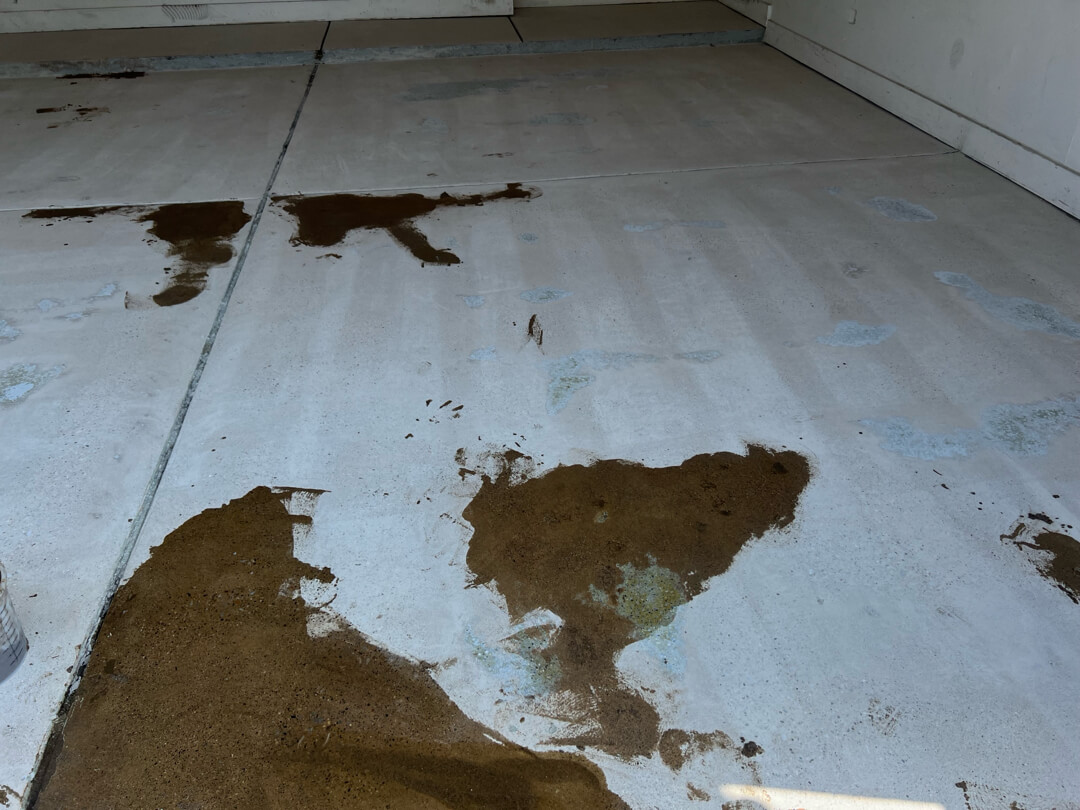
The Starting Point
The Pitting Problem
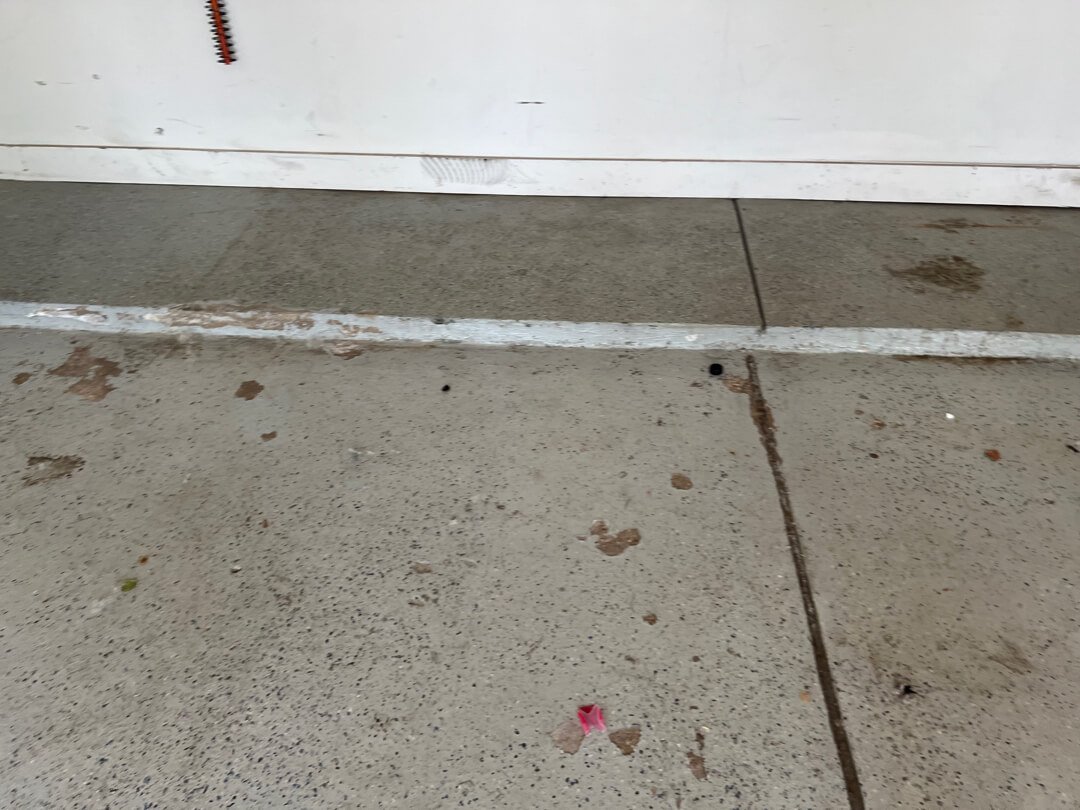
The pits on this floor had a distinct character. They were bladed — narrow, defined voids cut into the concrete. The previous epoxy fills showed clearly in the close-up photos. Some fills were intact. Others had partially failed. Our crew assessed each pit across the slab.
The overall condition was not severe. The structure of the concrete was sound. The damage was surface-level and addressable. Our team proceeded with mender compound to fill and rebuild each affected area.
Mender Application
Surface Preparation
Testing confirmed moisture required a barrier before coating. Our crew applied a moisture barrier coat across the full slab. This step protects the system above from moisture vapor pushing up through the concrete. Skipping it risks adhesion failure over time.
The Coating System
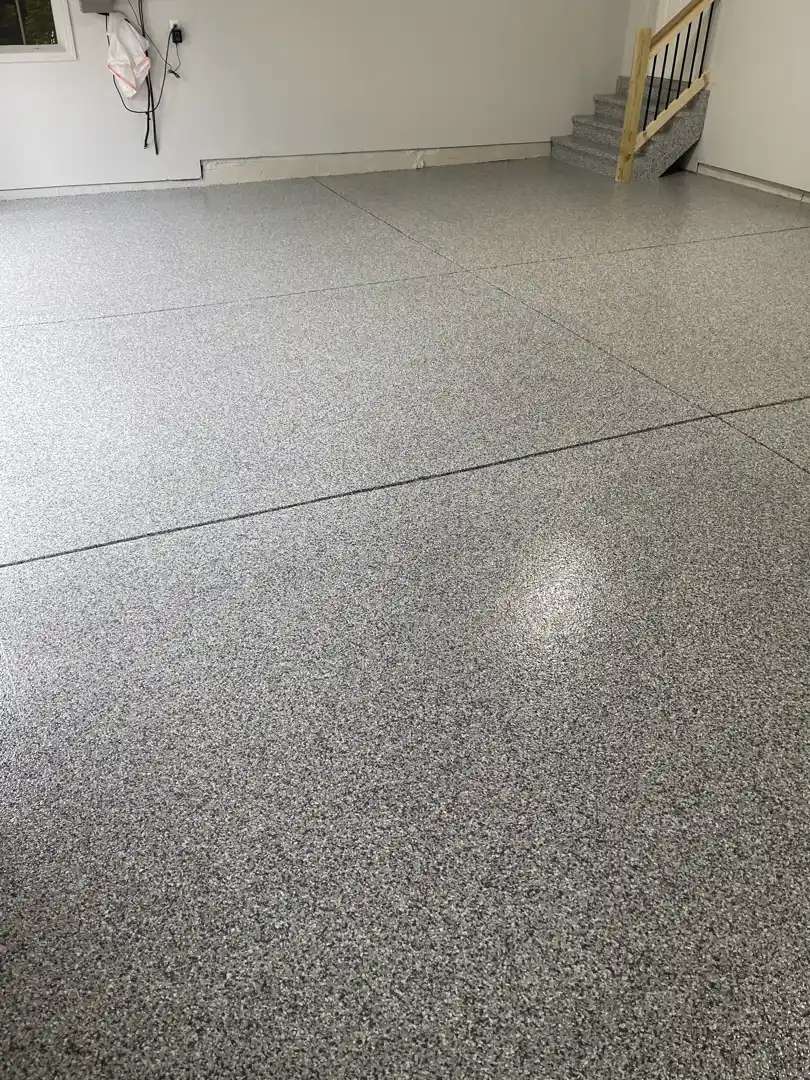
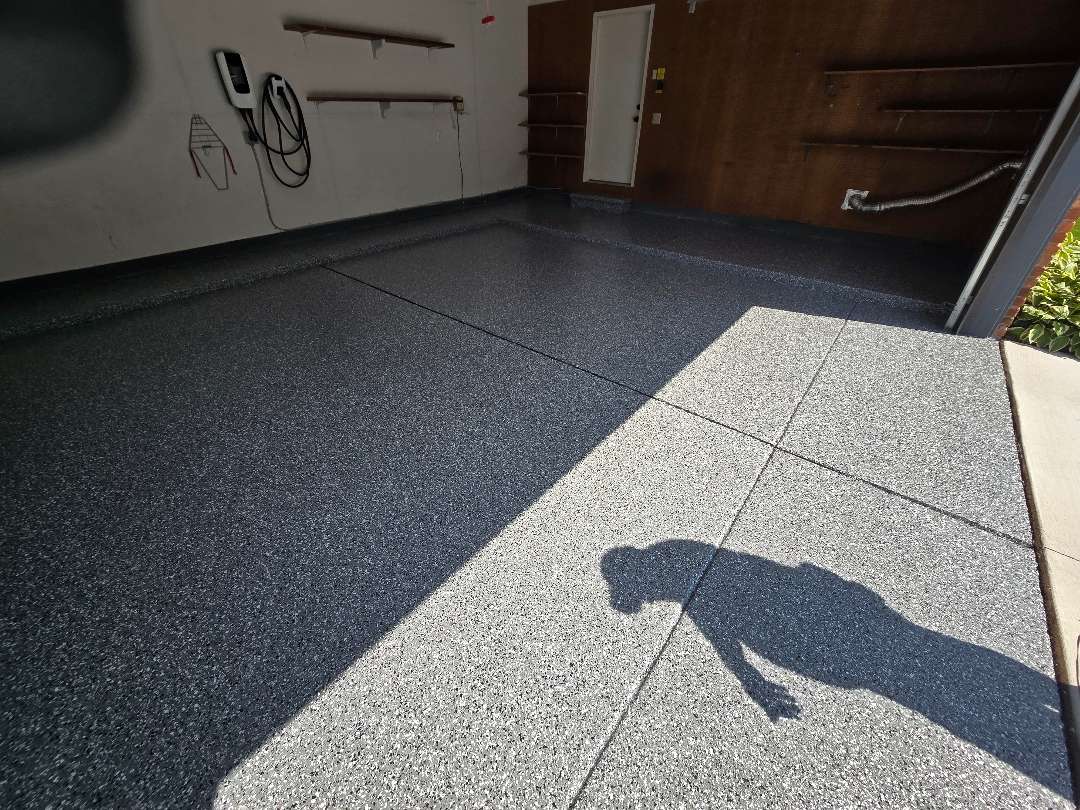
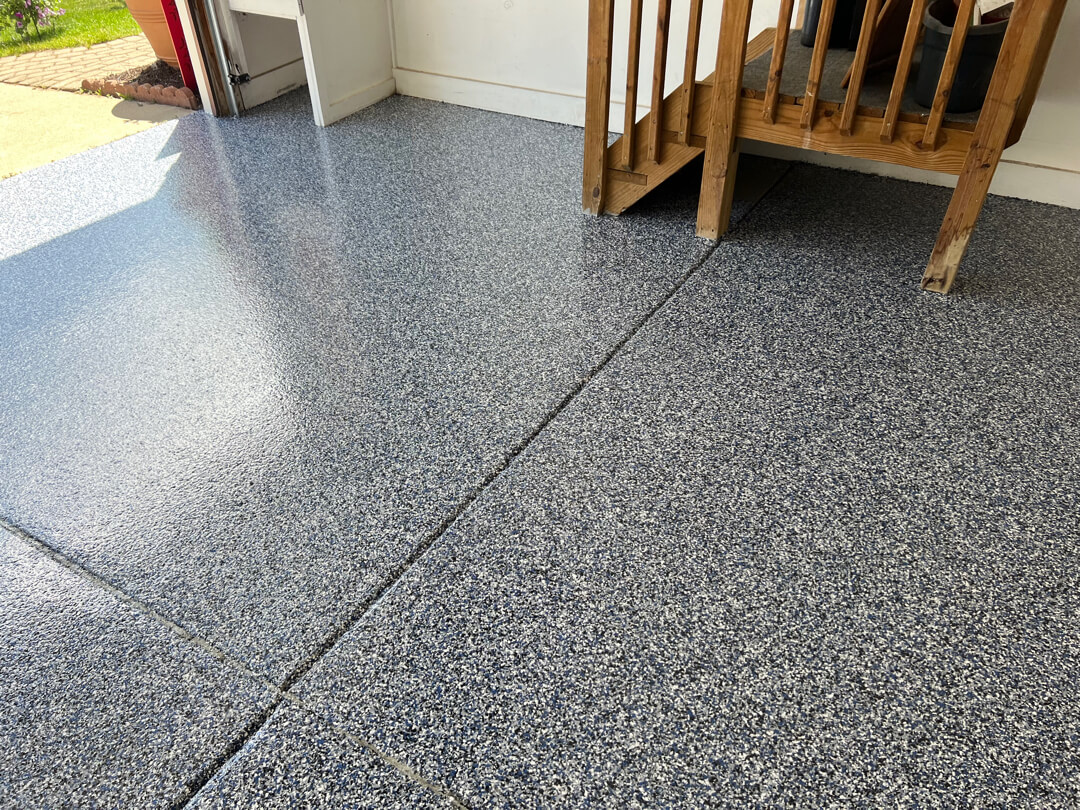
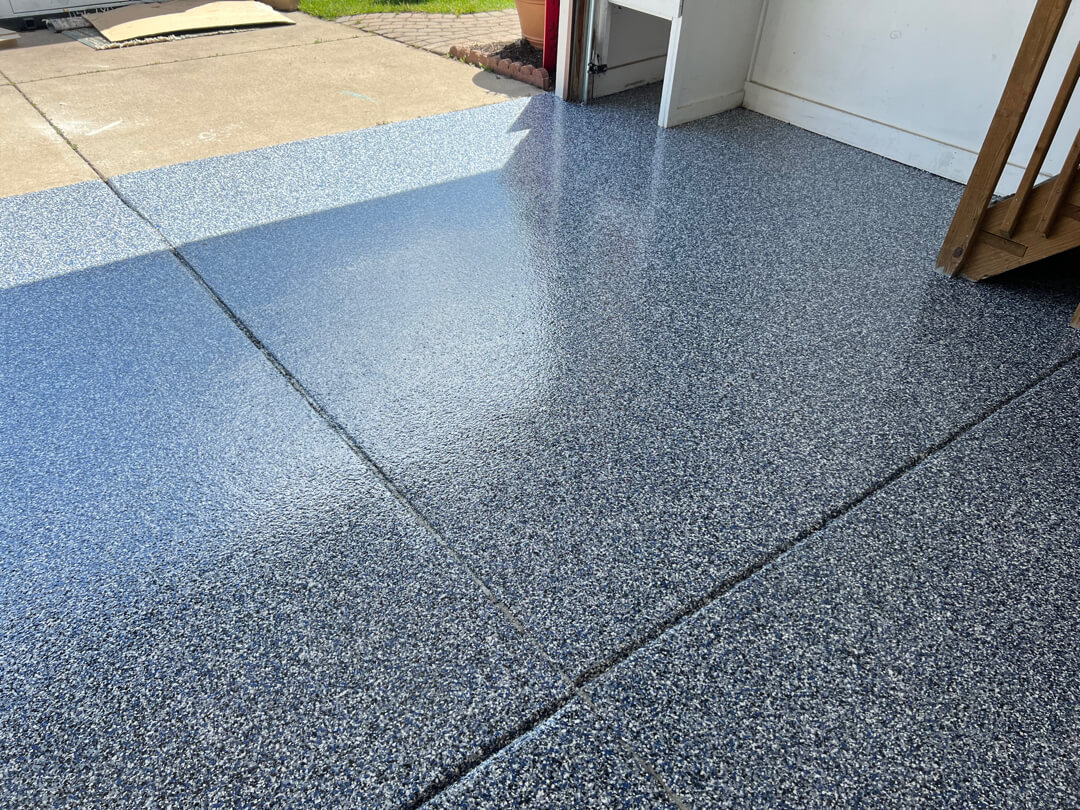
Our crew applied the polyurea-polyaspartic coating system over the prepared slab. The color selected was a blue-grey flake blend. A cool slate tone, it carries silver and white flecks throughout. Our team broadcast the decorative flake across the wet base coat. They then applied the heavy clear topcoat to lock everything in place.
The step received the same system as the main floor. Our crew brought the coating up and over the riser and tread. It integrates cleanly with the rest of the installation.
The Result
The floor on Sheffield Drive is a clear upgrade from what our crew started with. Scattered staining and bladed pits are gone. A consistent blue-grey flake surface now covers the full slab. The color gives the space a clean, cool character. The sealed surface repels stains and handles daily use.
Click on the photos to enlarge them