 Skip to content
Polyurea-Polyaspartic Garage Floor Coating in Livonia, MI
QUESTIONS? NEED A QUOTE?
8 Garages. 8 Different SERIES OF ISSUES. ONLY 1 Standard of Work.
In this page, we show how we delivered 8 instances of polyurea-polyaspartic garage floor coating in Livonia, MI. Our systems transform ugly or plain garages into beautiful, durable, multi-functional spaces. Livonia is one of the major cities in Wayne County. It’s a densely developed community where housing stock ranges from postwar ranches and bungalows (built in the 1950s and 60s) to two-car-garage colonials (from the 80s and 90s) and subdivision tract homes built since the 2000s.
The concrete floor in their garages reflects that history. Some slabs have already been epoxy-coated or painted before. Some have never been touched and have remained raw concrete. All of them have absorbed the punishment of decades of Michigan winters.
As you will see in these 8 case studies, the range of conditions we encountered is wide: a failing epoxy system (very common) that had to be stripped before recoating; a slab so “out of level” that an outside specialist was required before we could proceed with coating; new concrete with an intact curing compound sealer blocking adhesion; heavy pitting from years of freeze-thaw cycling; paint removal down to bare concrete; oil contamination in vehicle parking zones; and failed caulk in control joints that had to come out entirely.
No two jobs were the same. The preparation approach on each was specific to what the concrete actually needed.
Why Quality Garage Floor Coating Systems Matter
The Michiganian climate is hard on unprotected concrete. Winter road salt, repeated freeze-thaw cycles, automotive fluids, and the constant in-and-out of vehicle traffic degrade garage slabs in predictable ways: oil staining soaks into open pores; control joints spall as water enters, freezes, and fractures the edges; hairline cracks widen over time; and paint or epoxy coatings that were never properly bonded begin to peel. By the time most homeowners call us, their floor has been living with these problems for years.
Several of the jobs in this collection involved prior coatings that had failed — a red flake epoxy system on Summers St. had delaminated throughout, a failed epoxy on Levan Rd had stained and degraded without protecting the concrete beneath it; paint on the floor of a garage on Dover Ave. was peeling in sheets. Applying a new coating over a failing old one is NOT a solution. The new coating system is only as good as what it bonds to. The only correct approach is removal first, then preparation, then coating.
When this process is carried out at a high level of quality, a polyurea-polyaspartic garage floor coating promises to last 25+ years with only surface-level clean-ups and an occasional spot retouching.
The MotorCity Advantage
MotorCity Floors and Coatings specializes in professional-grade polyurea-polyaspartic systems. These dual-coating systems are replacing epoxy coatings across the industry because their technology is better adapted to all kinds of circumstances. A polyurea-polyaspartic system delivers strong chemical resistance, longer durability, greater flexibility, shorter cure times, and proven UV stability that maintains color for decades. MotorCity Floors and Coatings backs all our work with an industry-leading warranty.
Every installation begins with comprehensive diamond grinding to open the concrete surface profile and remove contamination. Cracks are filled with flexible polyurea repair material. Pitting is patched with repair compound before coating begins. Some slabs require a flood coat to address widespread surface damage, and sealing. Sometimes a prior coating has to come off first. Sometimes, oil stains needs to be extracted from the concrete. We never shortcut the preparation steps to fit a schedule or a price — these steps need to be done to the level the substrate requires.
You will see that on the Pollyanna St. job, the garage floor was so significantly “out of level” that we brought in A-1 Specialists, a concrete leveling contractor, before our crew proceeded. That is not a common step on residential garage work. These case studies of garage floor coating in Livonia cover both simple jobs and complex tasks. We hope you find this page useful, and we remain at your disposal if you have any question or want an estimate. Call our garage floor coating specialists at (248) 613-5888.
Our Livonia Case Studies
These 8 case studies document actual MotorCity Floors and Coatings installations across Livonia neighborhoods. Each one describes the condition of the substrate at the start of the job, the challenges our crew encountered, and the preparation and coating work performed to bring the floor to a finished, warranted installation. The projects cover a range of sizes — from 379 to 540 square feet — color selections including Slatestone, Driftwood, Pebble Beach, and Silver Creek, and a full spectrum of concrete conditions from new slabs to heavily damaged ones. They are an honest record of what this work actually involves.
Garage Floor Coating
on Blue Skies Street
Blue Skies St., Livonia, MI
The New Concrete Issue
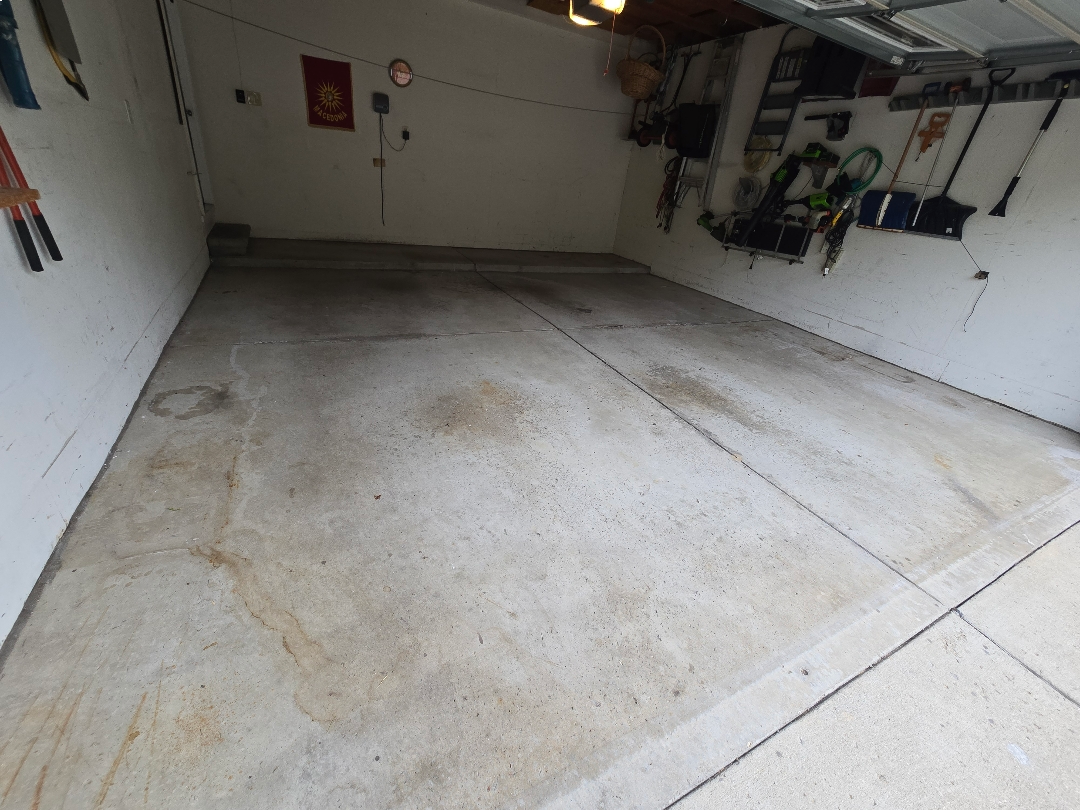
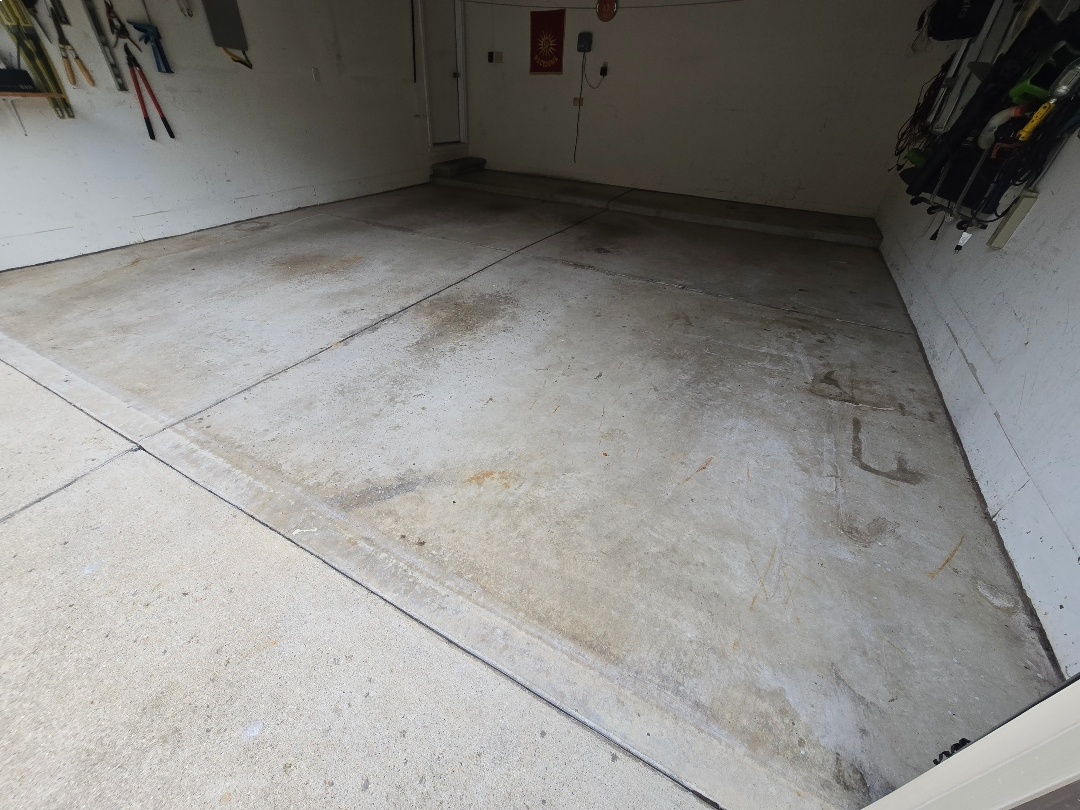
There is a common misconception that for garage floor coating purposes, new concrete is the easiest surface to work with — clean, undamaged, no prior coating to remove. The case of this 387-square-foot garage on Blue Skies Street is a good illustration of why that assumption can get you into trouble.
When concrete is poured and finished, the homebuilder almost always apply a curing compound or concrete sealer to the surface shortly after. Its job is to retain moisture and allow the slab to cure properly — which it does. The problem is that same sealer becomes a barrier between the concrete and anything you try to bond to it afterward. If we apply a polyurea basecoat over an intact sealer, it will not bond to concrete at all. it will bond to a thin chemical layer that itself has marginal adhesion to the slab. The result will be delamination.
New concrete doesn’t mean “ready to coat”. It means the sealer removal step is the first job.
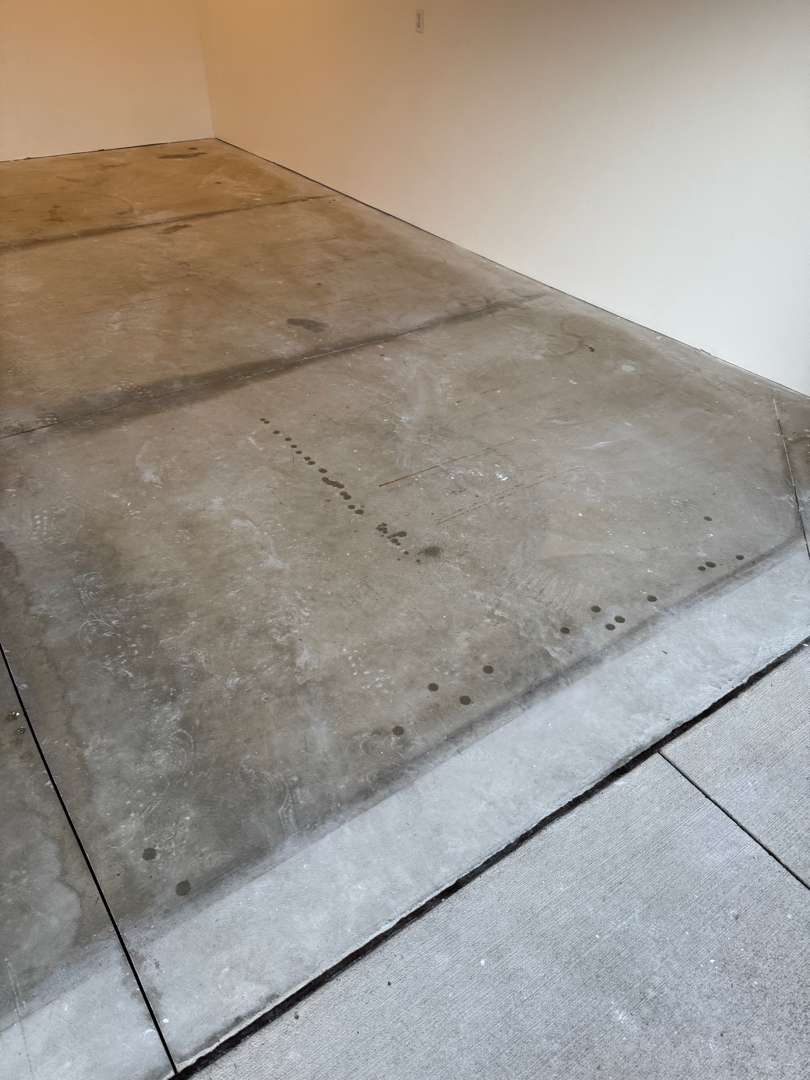
Removing the Sealer
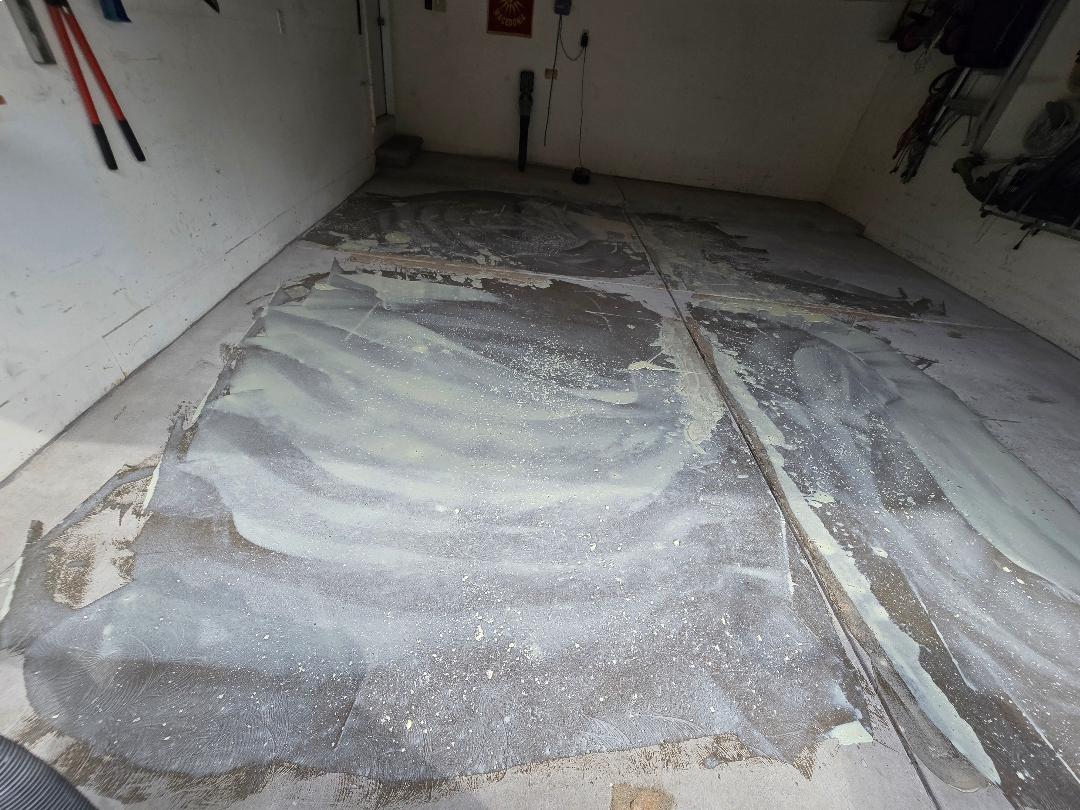
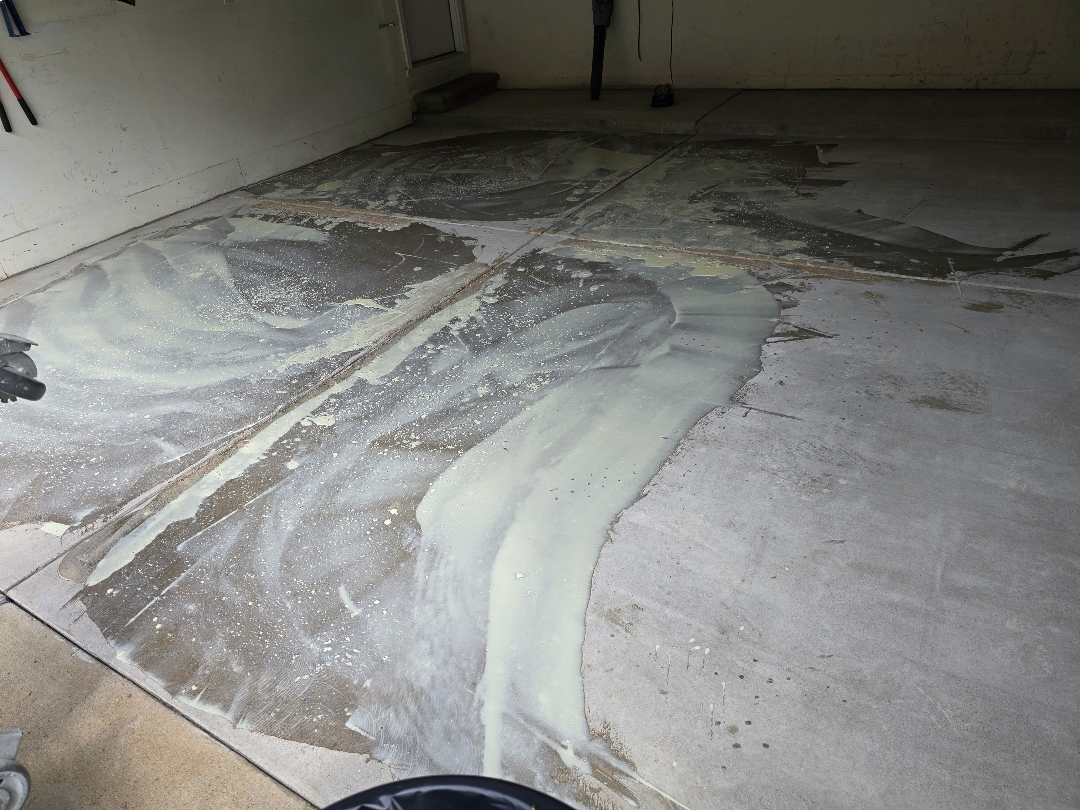
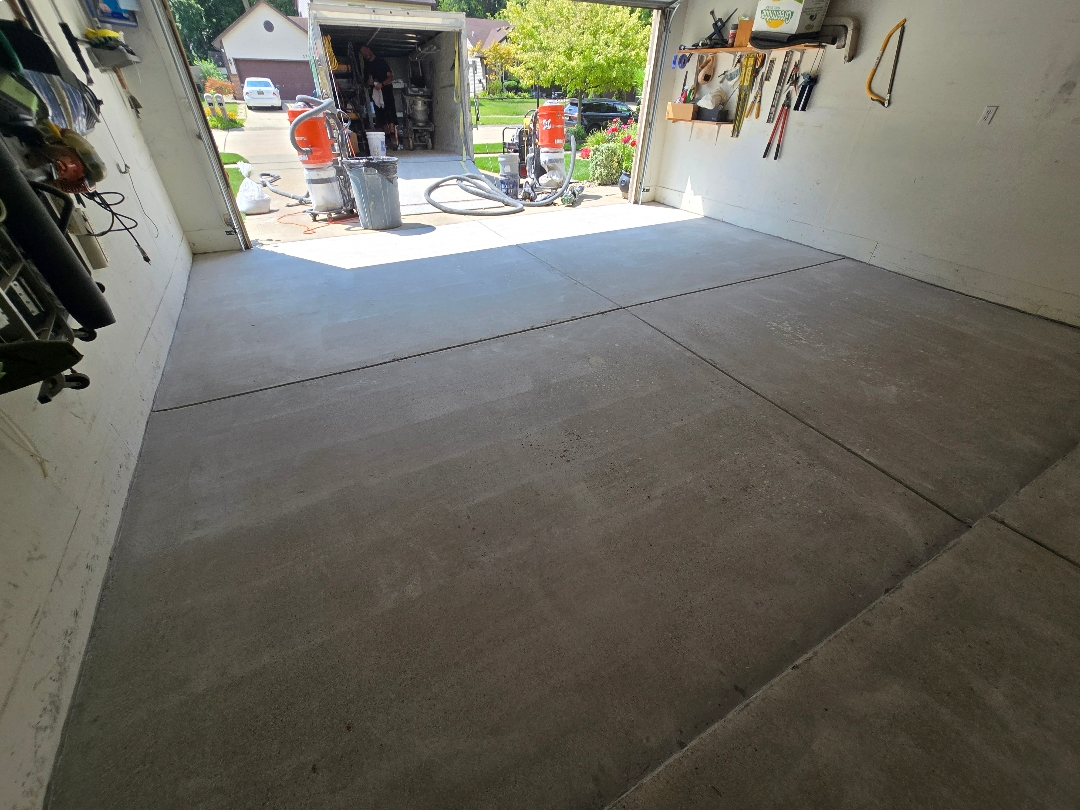
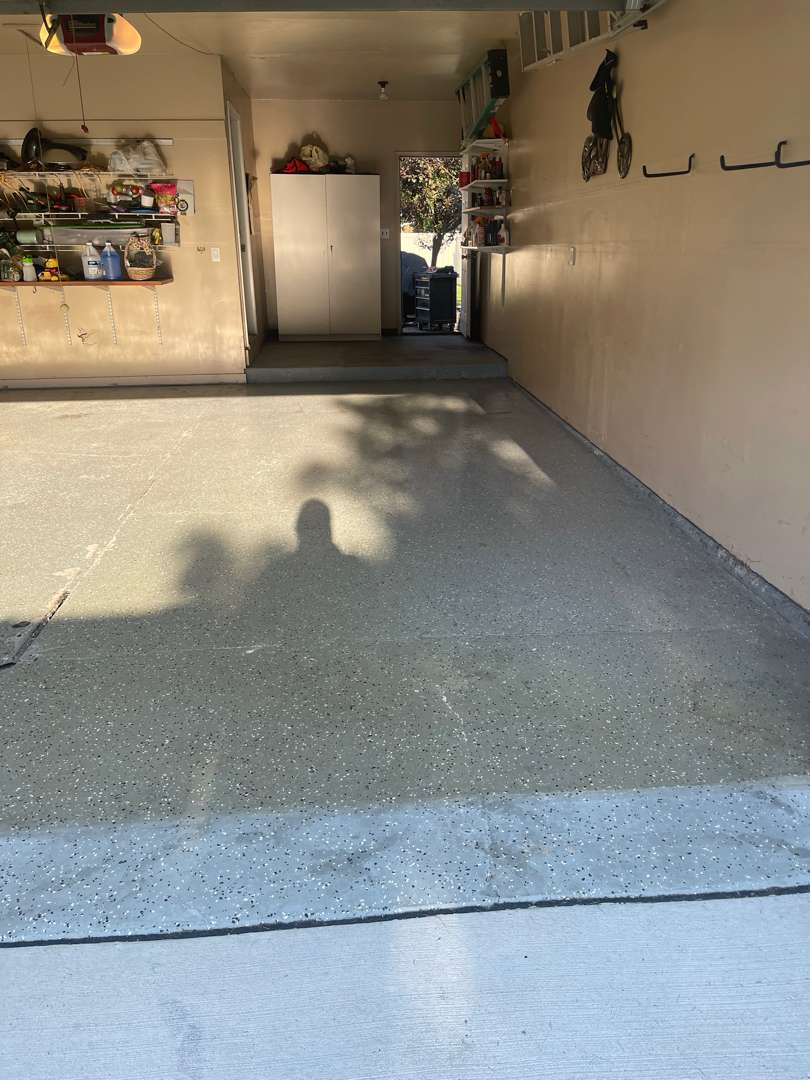
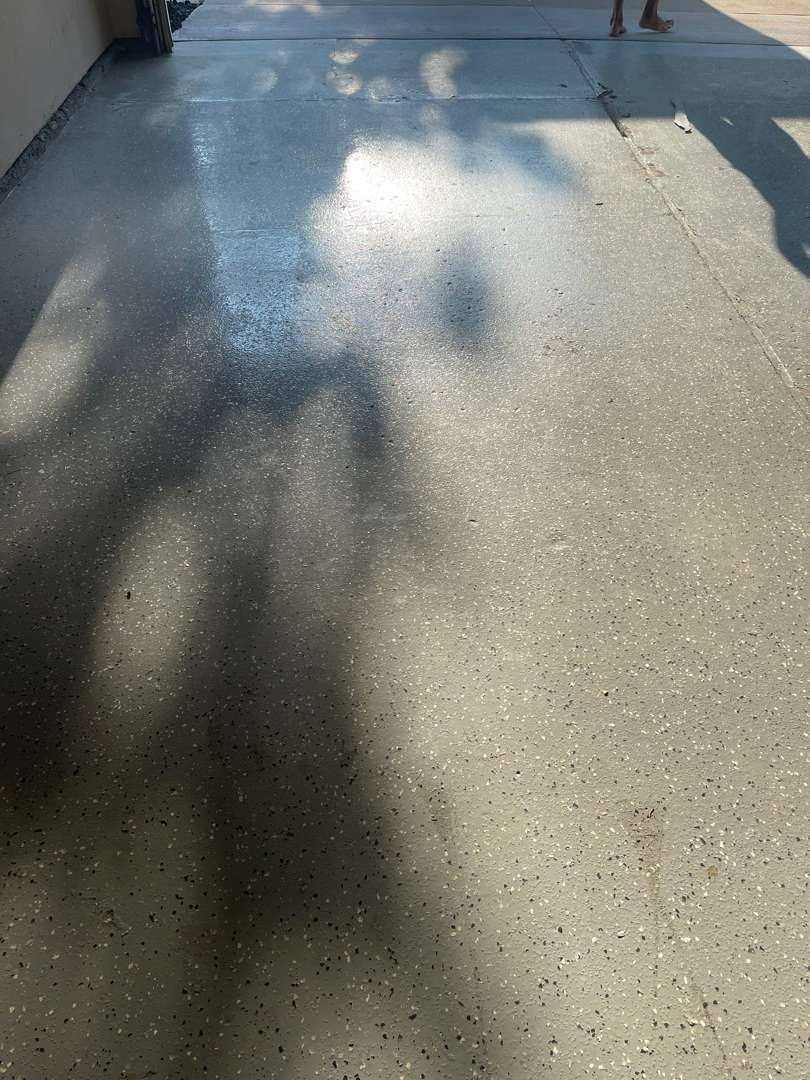
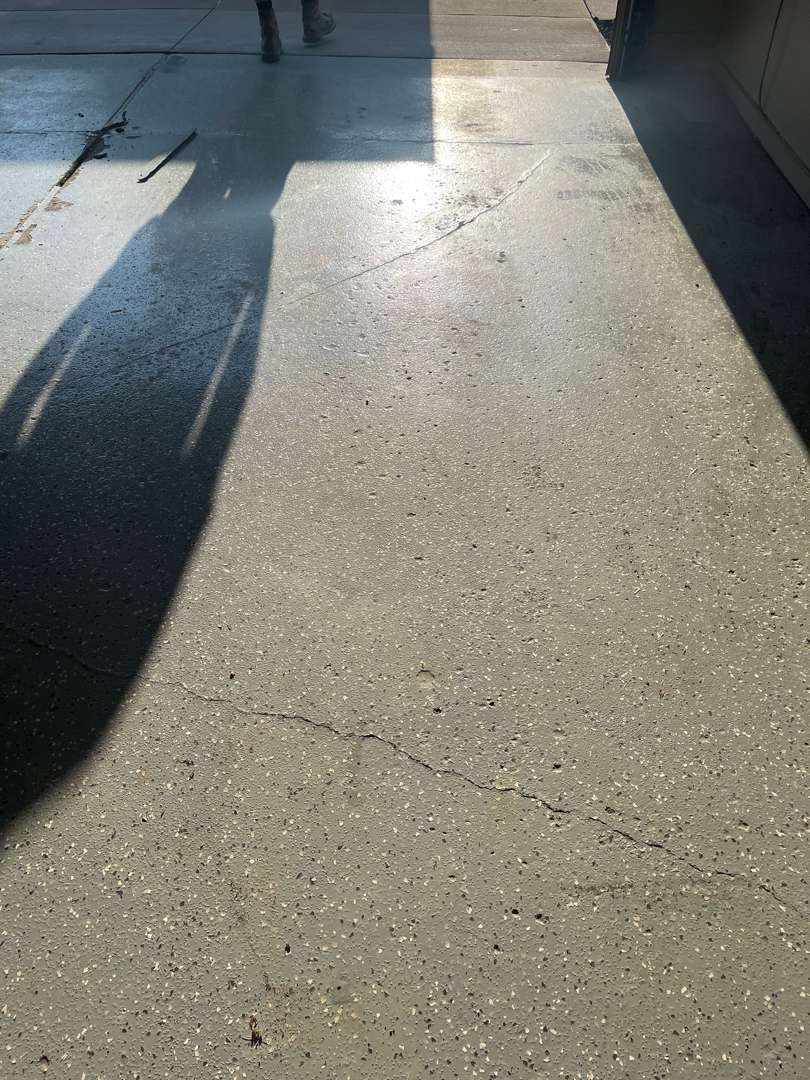
The prep photos from Blue Skies St. show exactly what this process looks like in progress. The swirling, cloudy patterning visible across the slab in the “before” images is the curing compound being worked off the surface by the diamond grinder — the sealer lifting and smearing as the tooling cuts through it.
On the right side of the slab in those images, you can see the contrast: sections where the sealer is still intact look smooth and grey-white. The ground-out areas already have the matte, open-pore texture the coating system needs.
We used Xylene to remove the sealer. Xylene is a solvent that breaks down the curing compound and helps lift it from the concrete surface before and during mechanical grinding. The combination of chemical and mechanical attack is what gets the job done on a sealed slab. One without the other leaves residue.
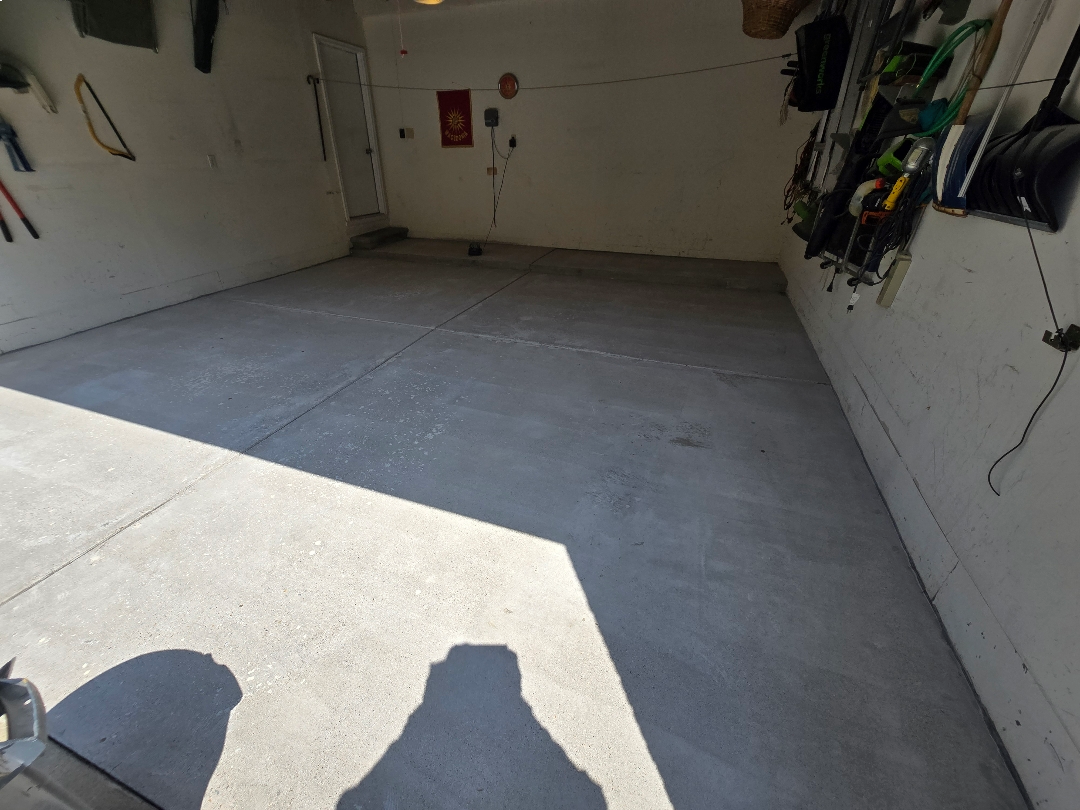
By the time the prep was complete, the surface visible in the other “before” images had been transformed: clean, uniformly profiled concrete with the open texture required for the 24-grit shark grip and polyurea system to bond to permanently.
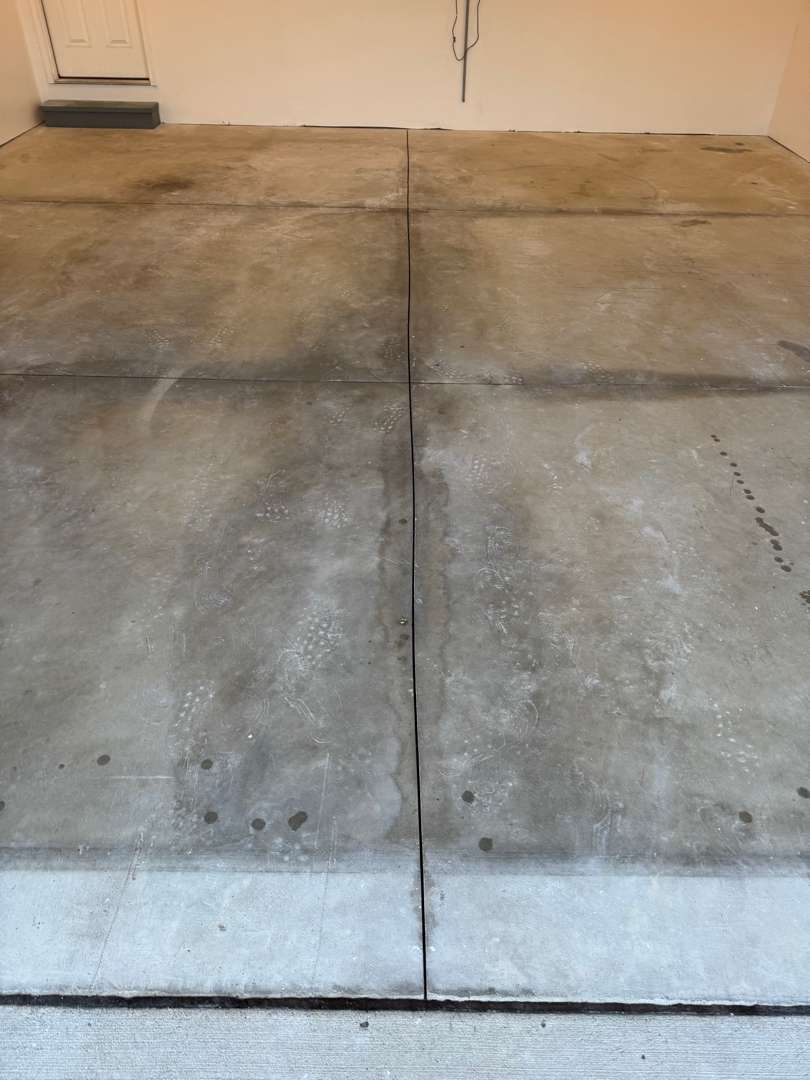
Moisture at the Seams
New concrete brings another challenge that older slabs typically don’t: residual moisture. The seams in this garage were showing moisture — a common situation with recently poured slabs that haven’t fully off-gassed. Applying the coating over active moisture vapor at the seams risks trapping it beneath the film, which can cause bubbling, adhesion failure, or discoloration.
Our crew addressed it directly: the seams were dried with a blow torch before the coating went down. It’s not a workaround but a proper field technique for managing localized moisture that would otherwise compromise the installation. Dry the seam, coat the seam, move on.
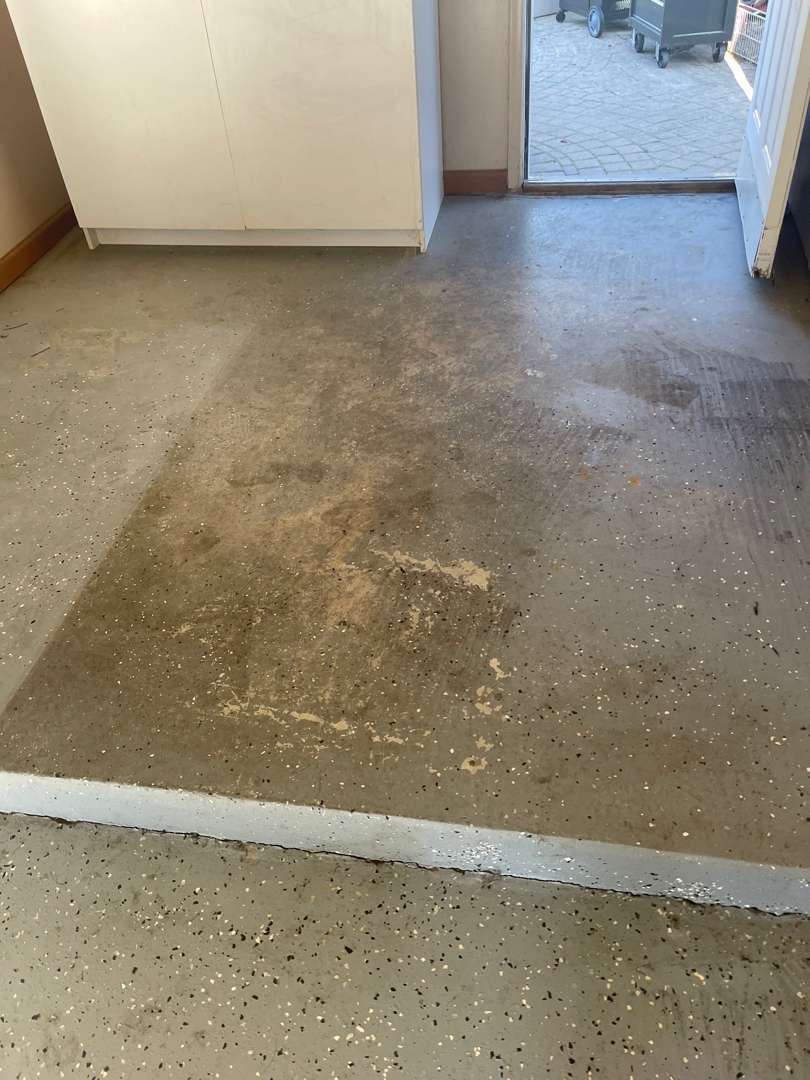
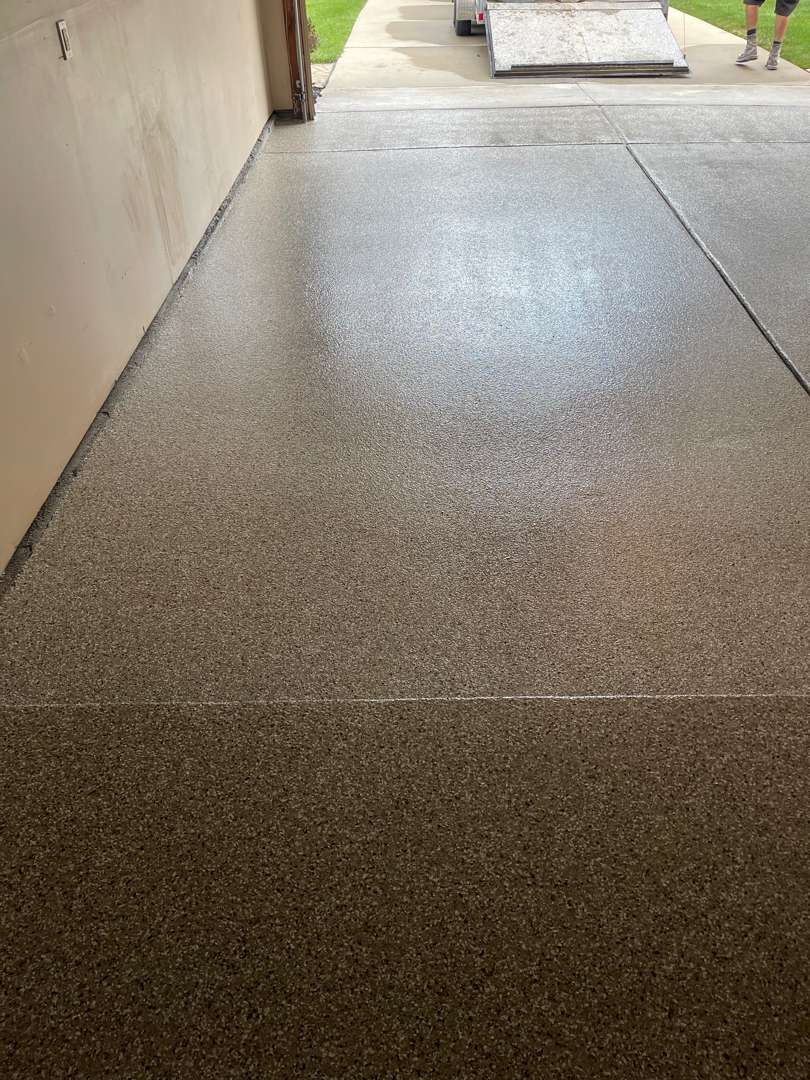
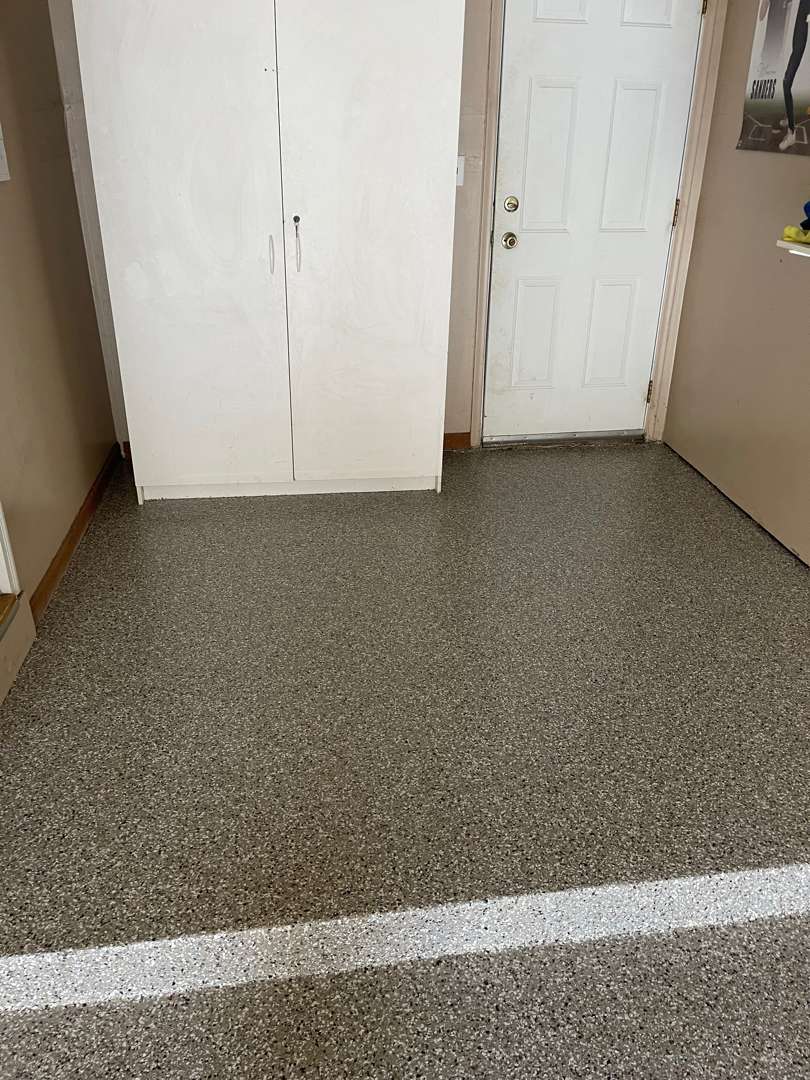
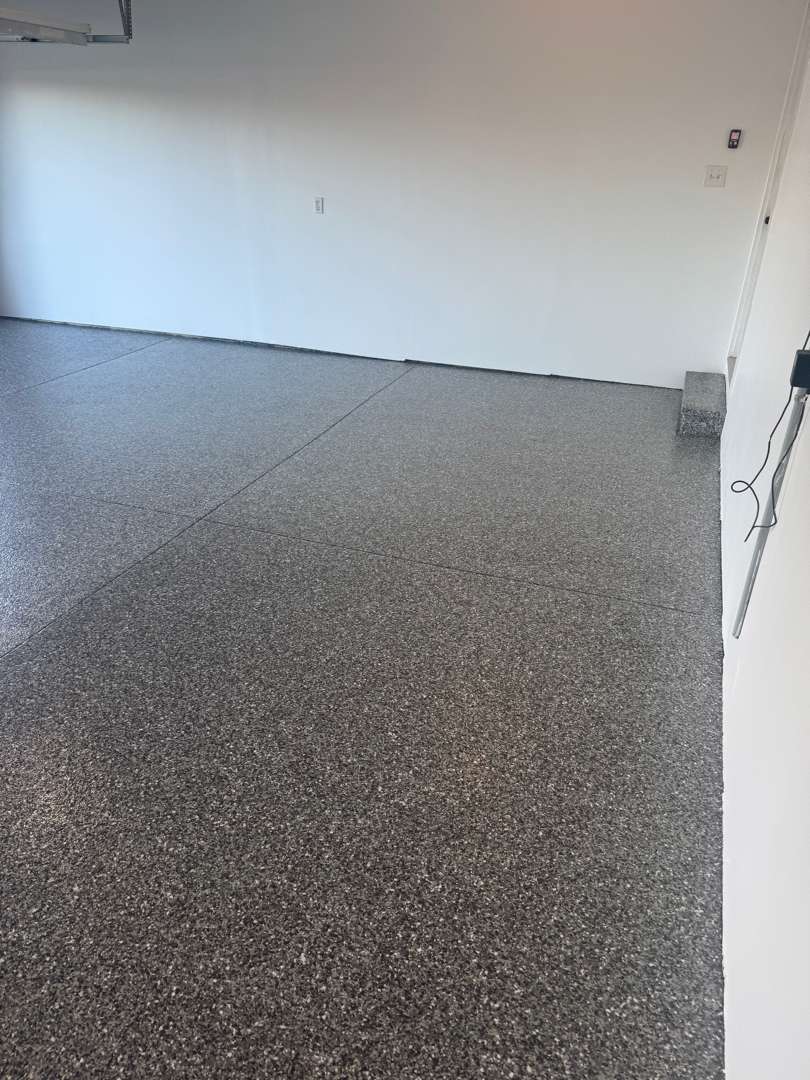
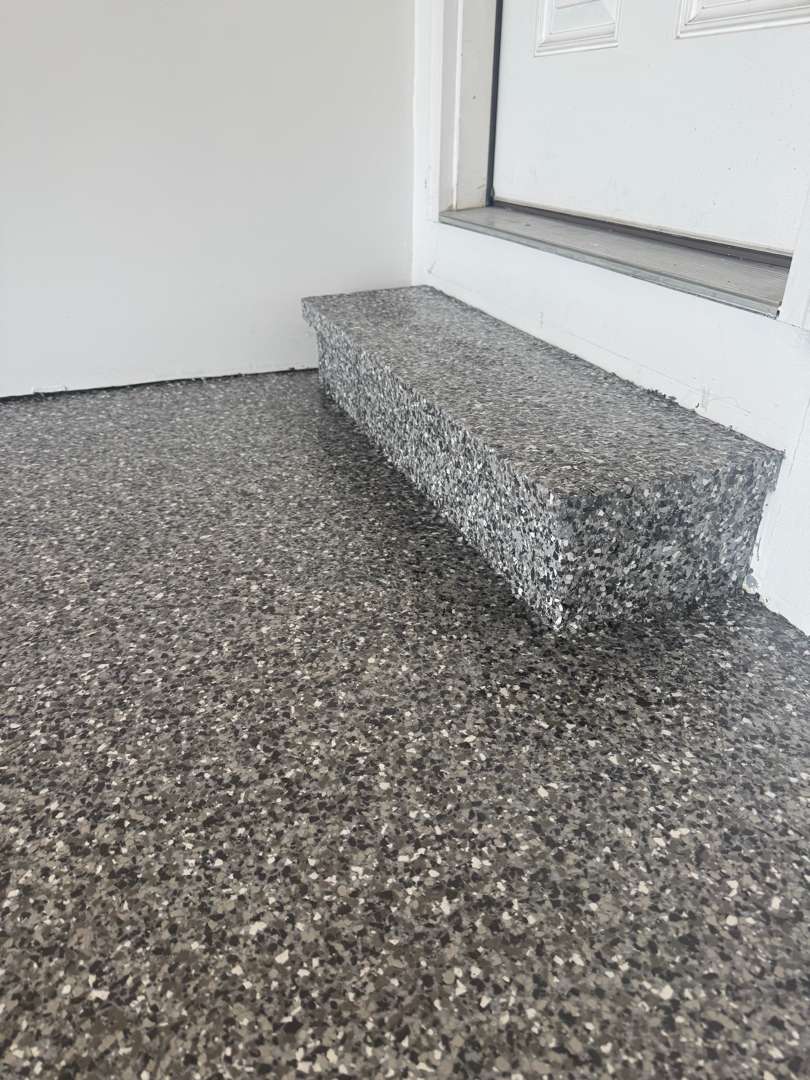
The Step
The entry step at the interior door was included in the scope and coated to match the floor in the same Slate Stone system. The before image of the step area shows the same sealer-affected surface as the main slab — and the after images confirm the step was brought into the finished installation seamlessly, the chip blend carrying across the riser and tread in uniform coverage.
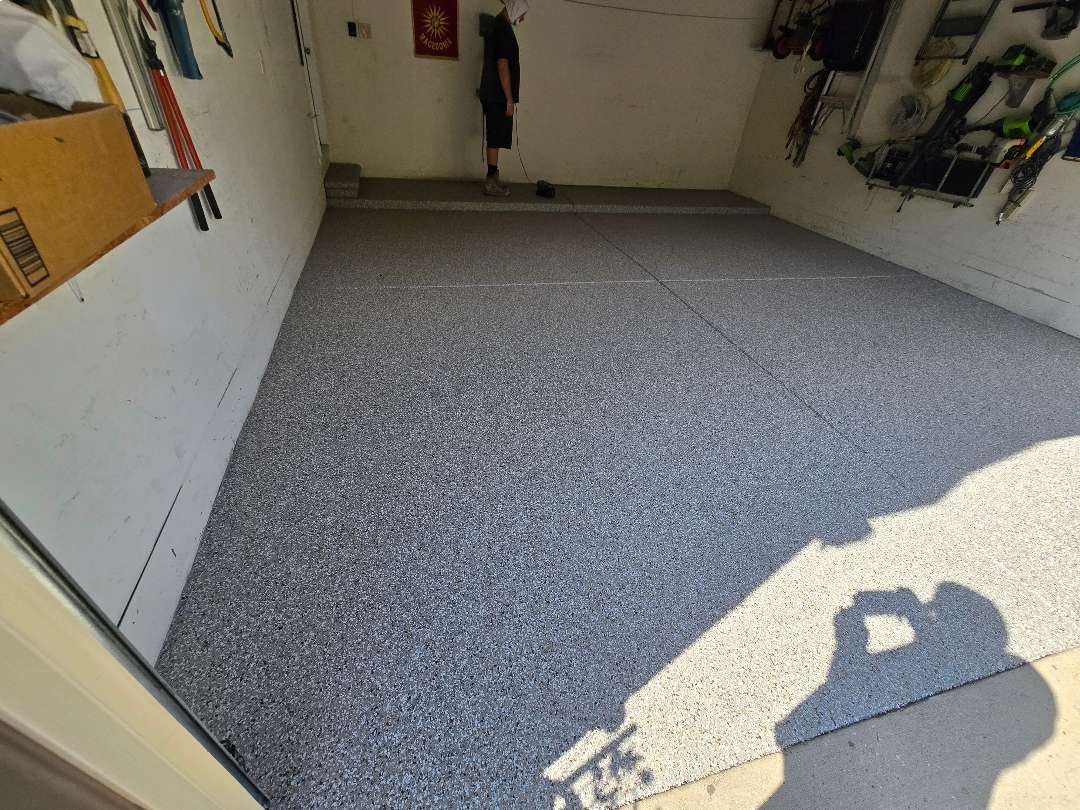
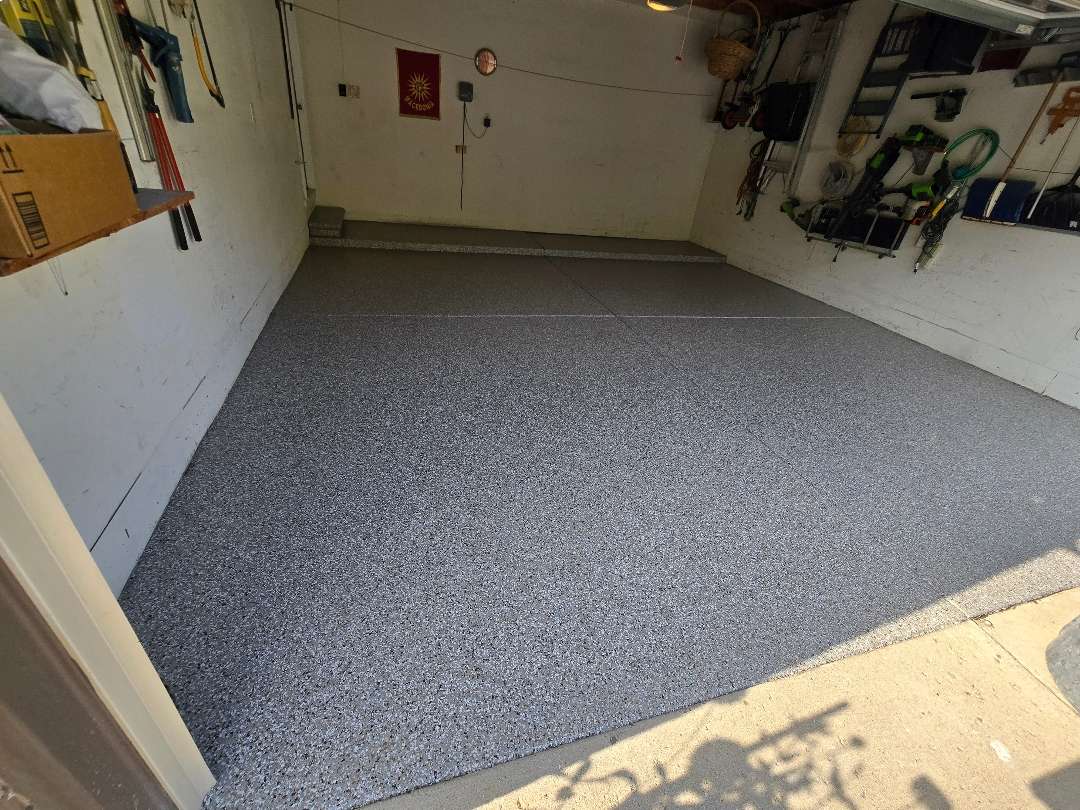
Slate Stone
Slate Stone is a darker chip blend — charcoal, grey, and black tones with flashes of white and light grey that catch the light. It’s a more dramatic color choice than the warm neutrals of Pebble Beach, and it reads differently depending on lighting conditions: cooler and architectural under natural light, deeper and richer under artificial light. The after photos from Blue Skies Street were shot at night with interior lighting, and the floor shows Slate Stone at its most striking — high-contrast, substantial, and sharp against the white walls of the garage.
The system applied was the full Penntek/MotorCity stack: grey Penntek base coat with hardener, Slate Stone decorative chip broadcast by hand, chip scraping and vacuuming after cure, and the UV-stable MotorCity clear coat to seal and protect. Shark grip traction additive was blended into the clear coat for slip resistance.
The Result
A 387-square-foot garage that arrived with new concrete — and all the hidden prep challenges that come with it — finished with a full Slate Stone polyurea/polyaspartic system that’s bonded to the actual concrete, not to a curing compound that was never meant to be a permanent part of the floor.
The sealer is gone. The seam moisture was managed. The step matches the floor. The coating will hold.
Blue Skies Street, Livonia. New concrete done right.
Click on the photos to enlarge them
Garage Floor Coating
on Bretton Drive
The Condition of the Concrete
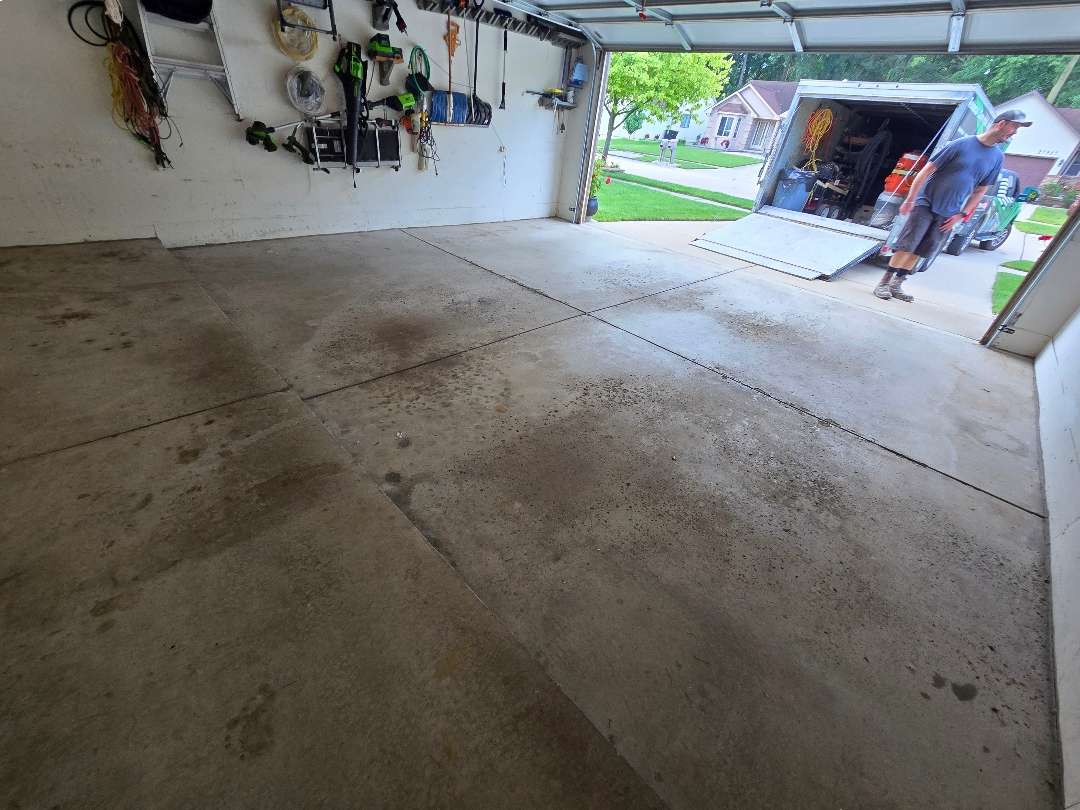
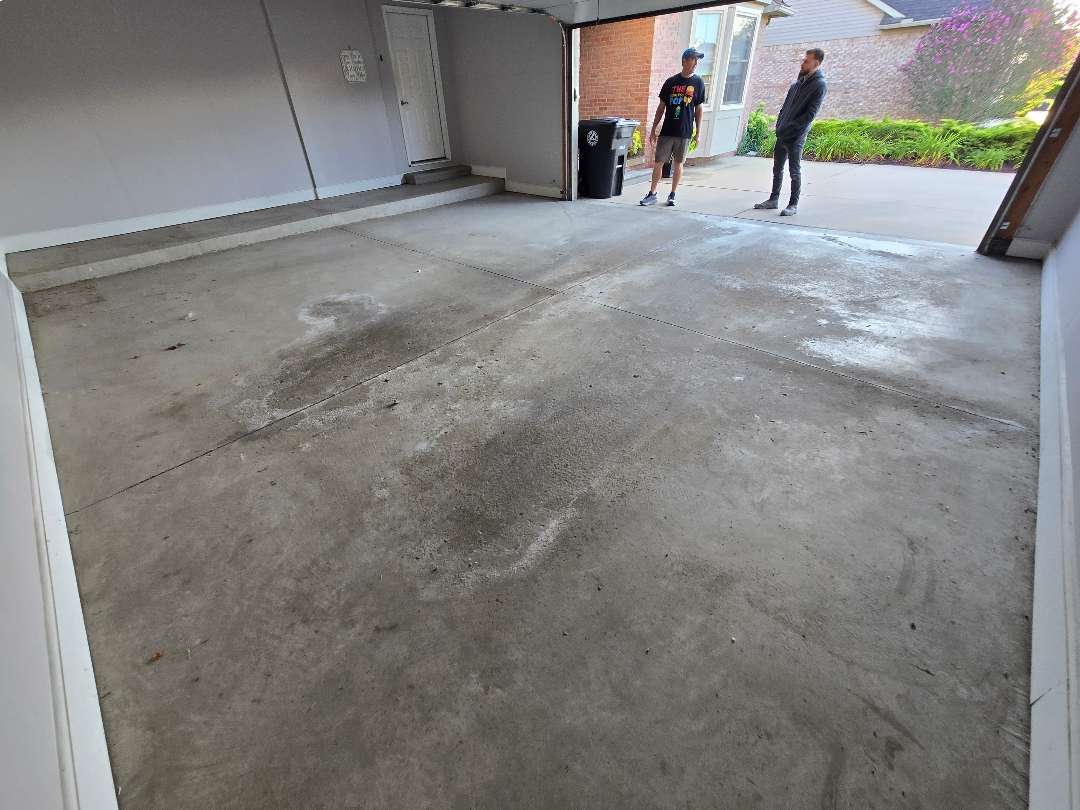
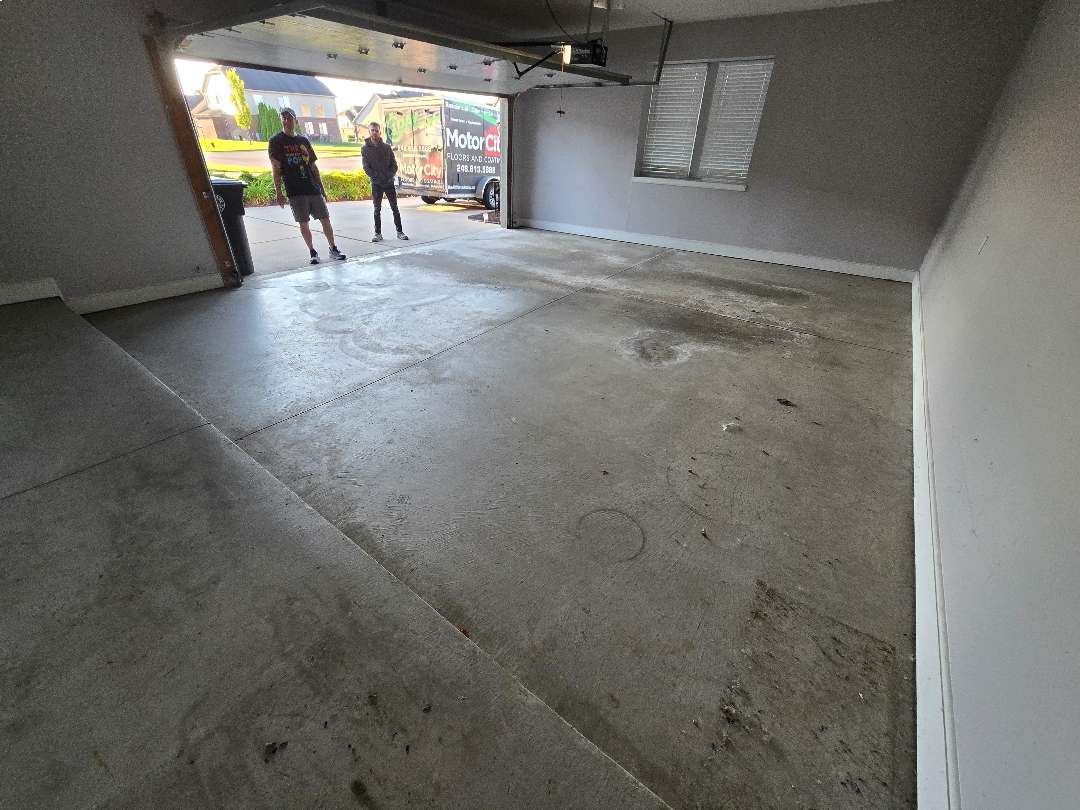
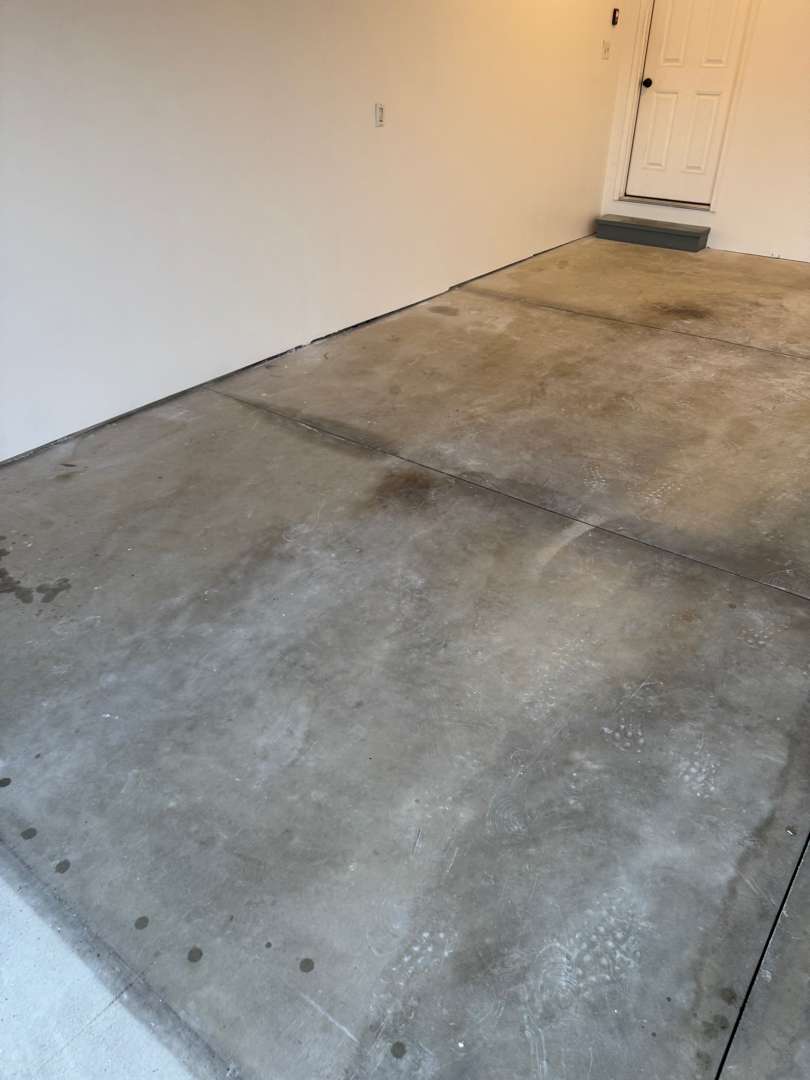
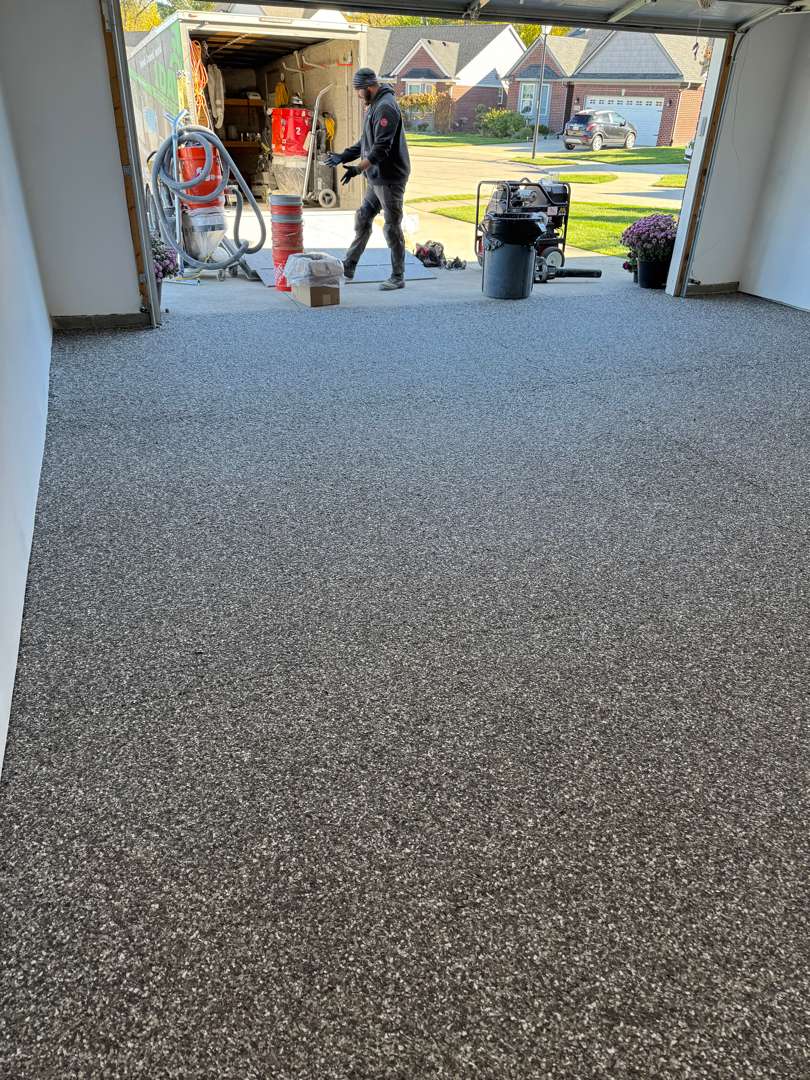
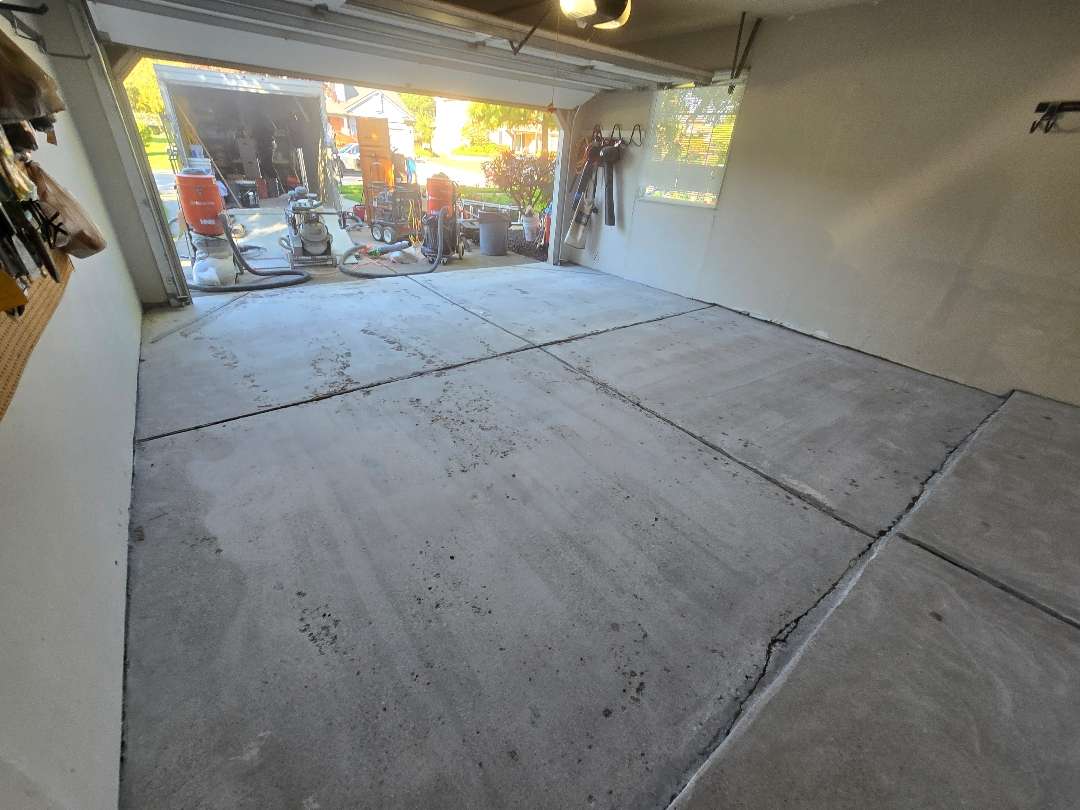
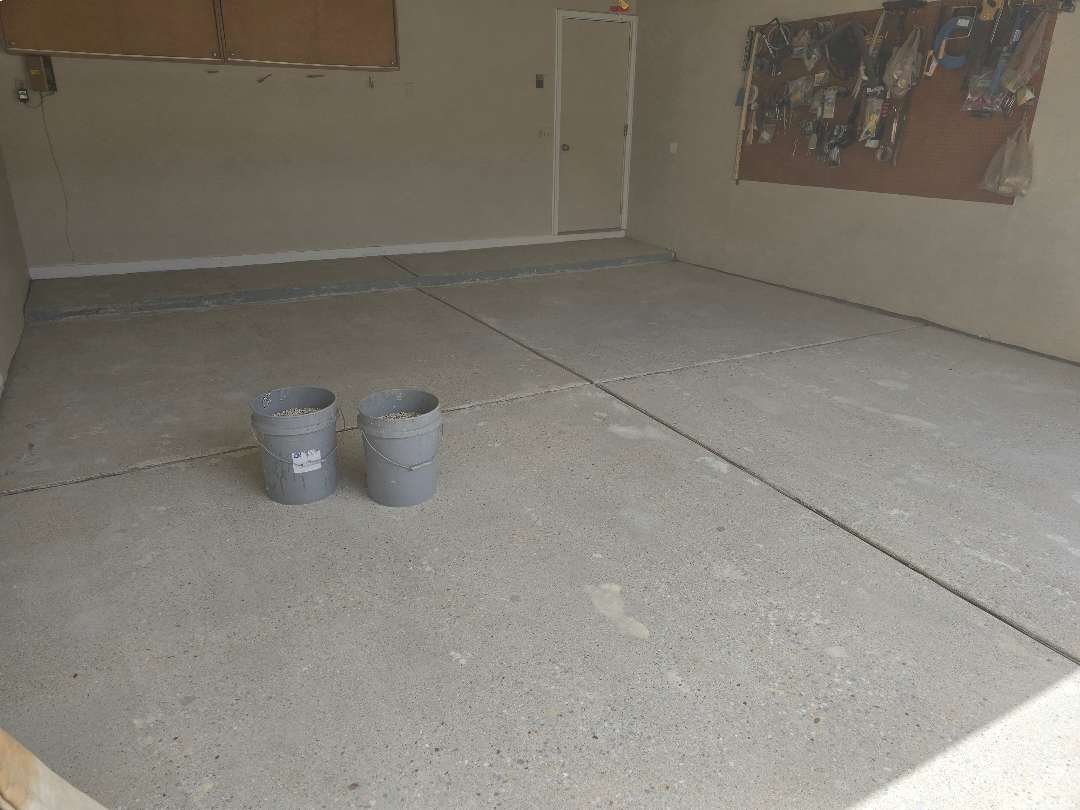
The 467-square-foot garage on Bretton Drive arrived with a combination of damage that’s common in Michigan slabs of a certain age: heavy pitting spread across large sections of the floor, light cracking working through the slab, oil staining in the vehicle parking zones, and a front seam that had been previously filled with caulk — which had since cracked, separated, and needed to come out entirely before any new work could begin.
The pitting on this floor was substantial. The before photos document it clearly: cratered, rough surface texture covering significant portions of the slab, the kind of spalling that results from years of freeze-thaw cycling, road salt tracked in from Michigan winters, and surface moisture working into the concrete. The pits ranged from shallow depressions to deeper voids that would need to be properly filled and leveled before the coating system could go down.
Caulk Removal and Joint Work
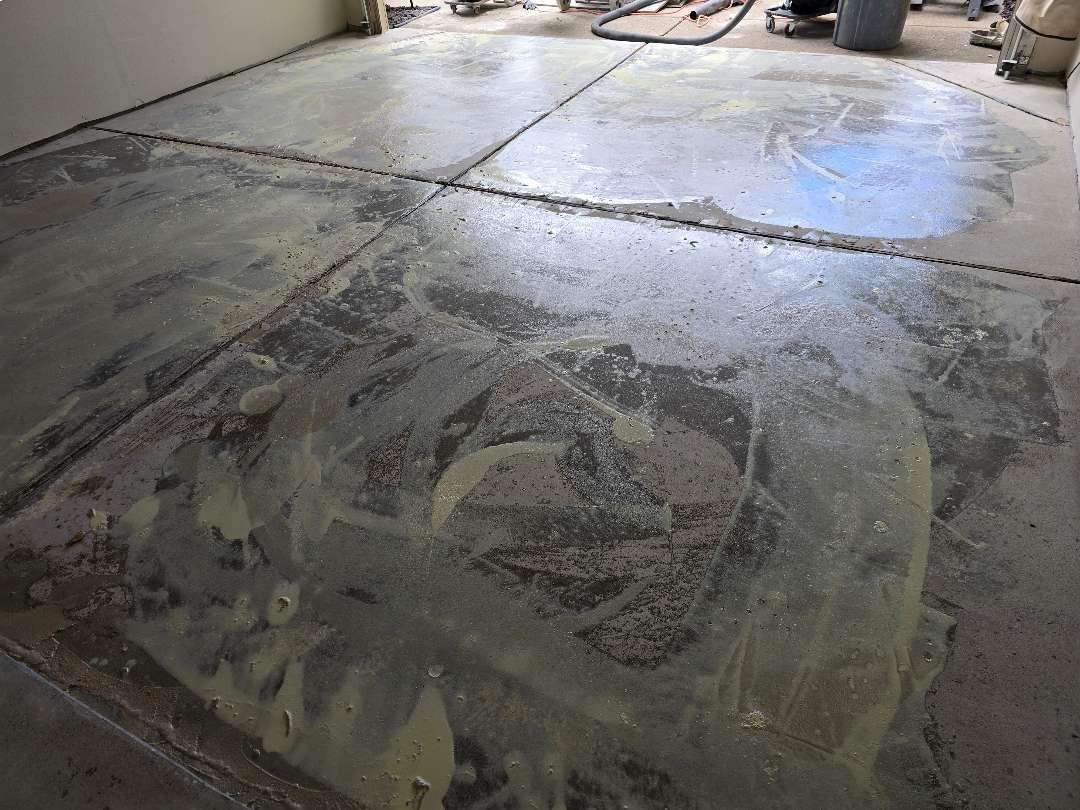
Patching the Pits
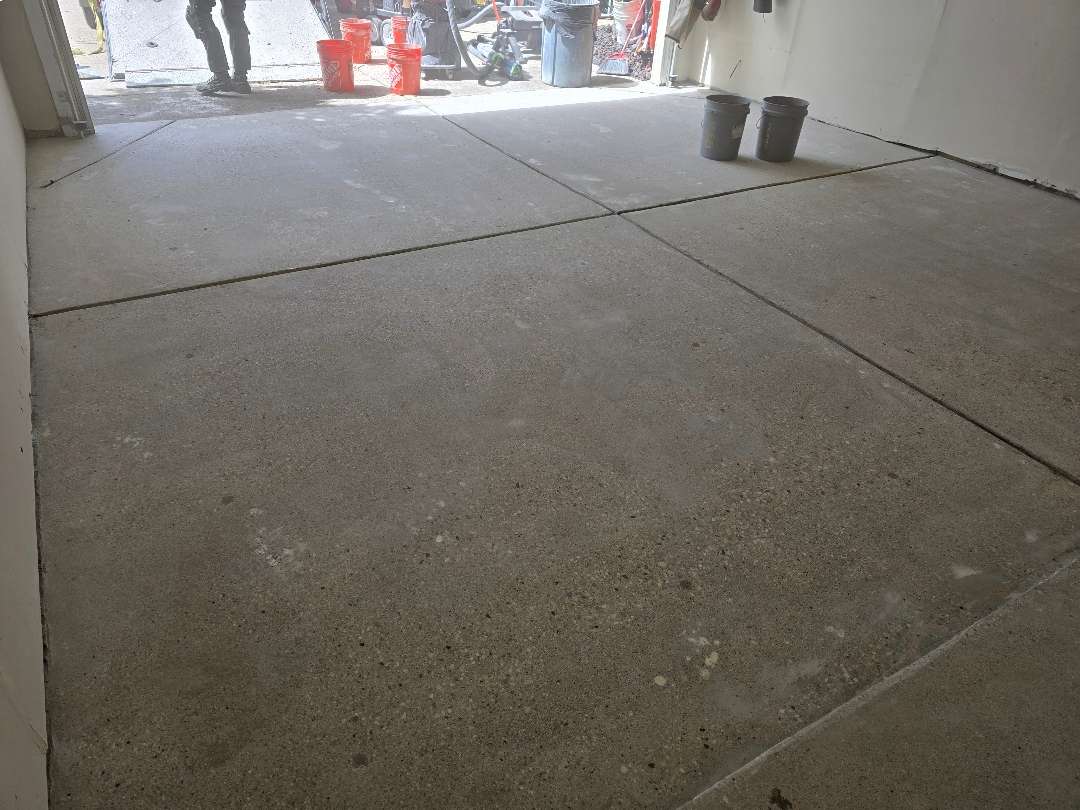
The patch and flood stage is well-documented in the prep photos. After the diamond grind opened the surface profile and cut through contamination, repair compound was worked into the pitting across the floor — filling the voids, building the surface back up to a workable level, and giving the coating a uniform substrate to bond to rather than a cratered landscape of varying depths.
A flood coat of repair material was applied to address the broader surface condition, flowing into the remaining micro-pits and surface irregularities that individual spot patching would miss. The photos of the floor mid-repair show the compound spreading across the slab in a thin, even layer — the yellow-toned repair material visible against the opened concrete. Once cured and ground back, the surface was ready.
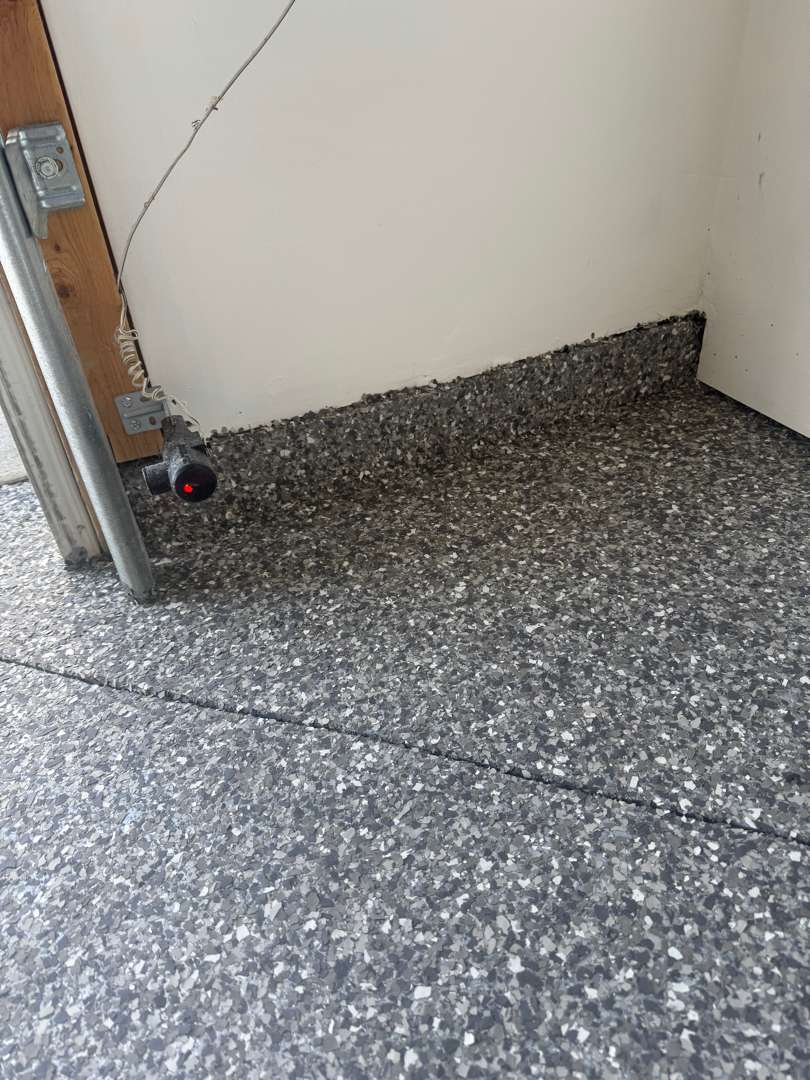
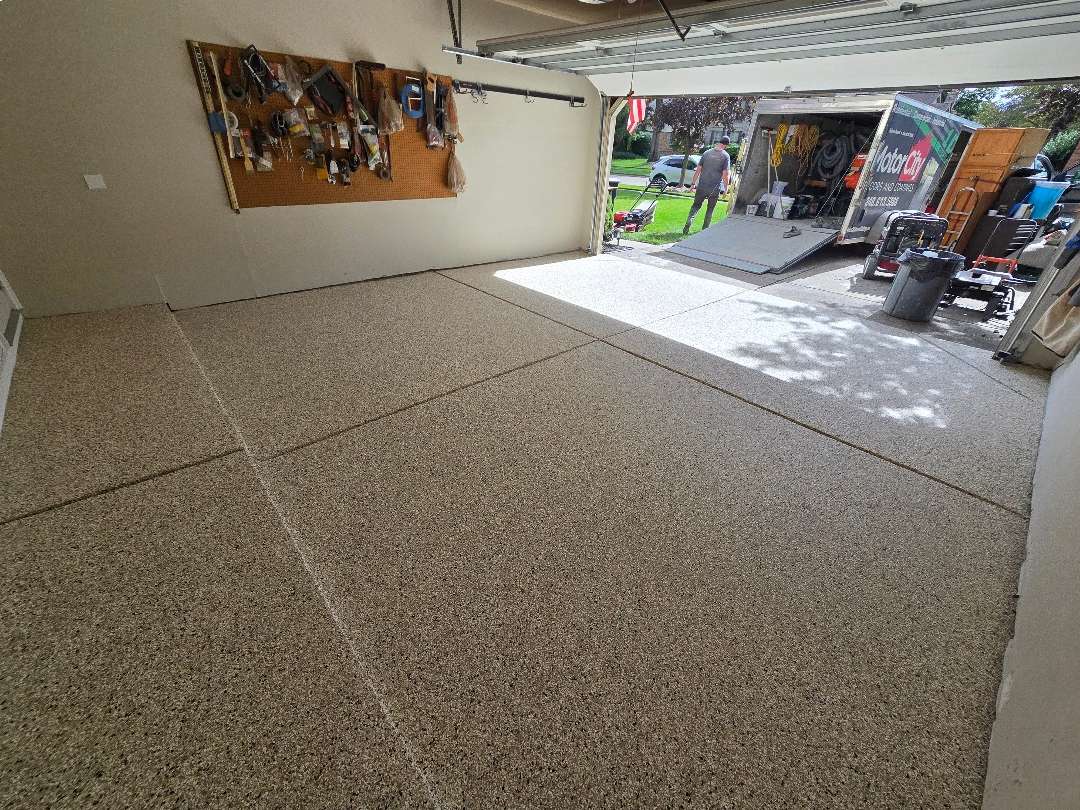
21 Linear Feet of Verticals
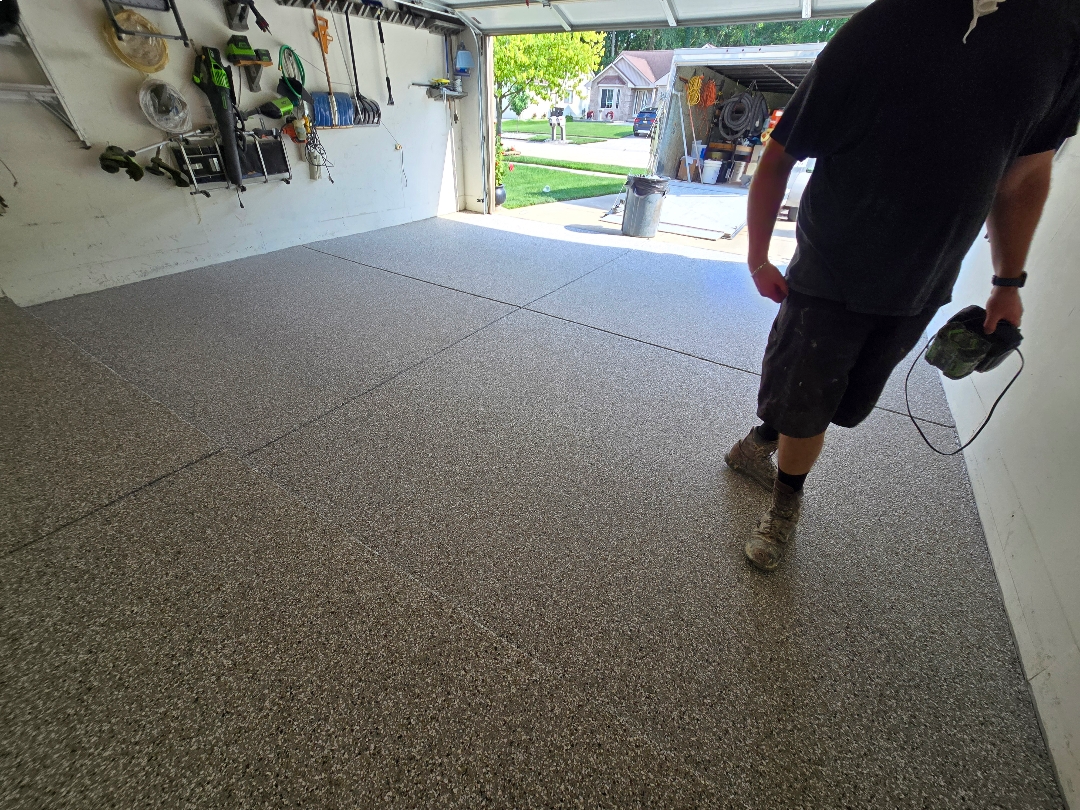
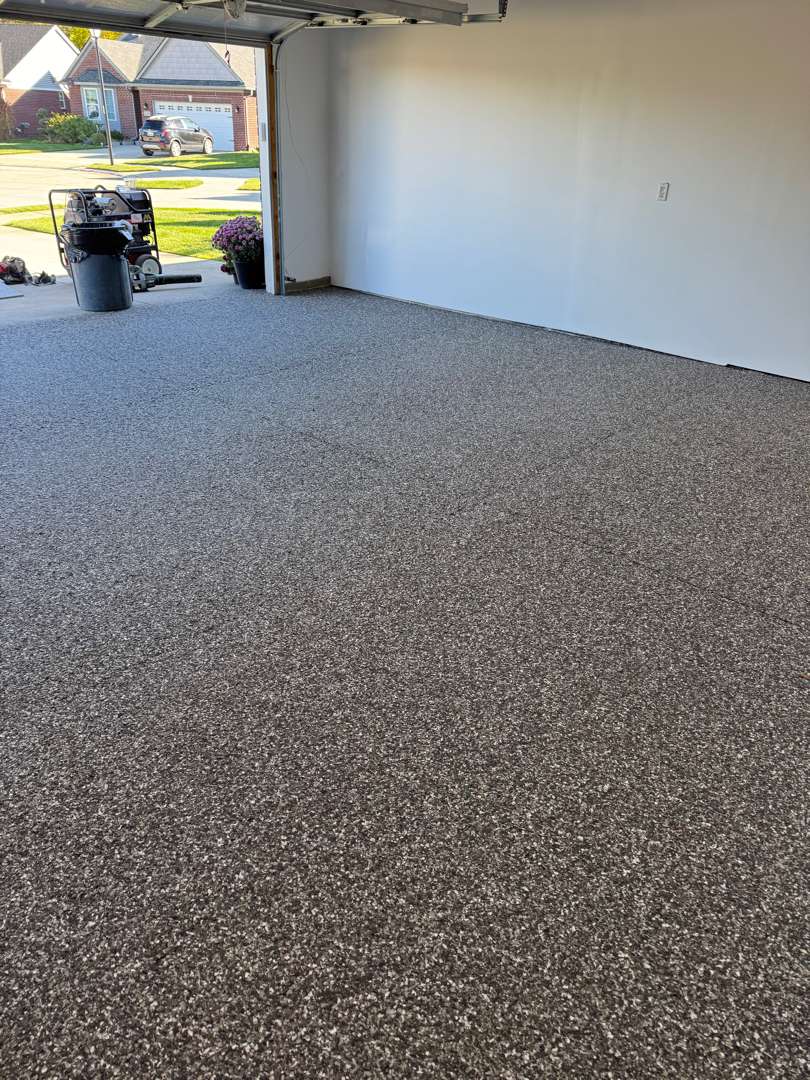
Twenty-one linear feet of vertical lip work is a meaningful scope addition — more than three times what many residential jobs include. On Bretton Drive, the verticals run along the base of the walls, carrying the Silver Creek system up off the floor plane and creating a clean, sealed transition between the slab and the wall surfaces. The after photos show the result: the chip broadcast and clear coat carrying continuously from the floor up onto the vertical faces, with no color break or raw concrete edge exposed.
The one concrete step at the entry door was coated to match, completing the full scope of horizontal and vertical surfaces in a single unified finish.
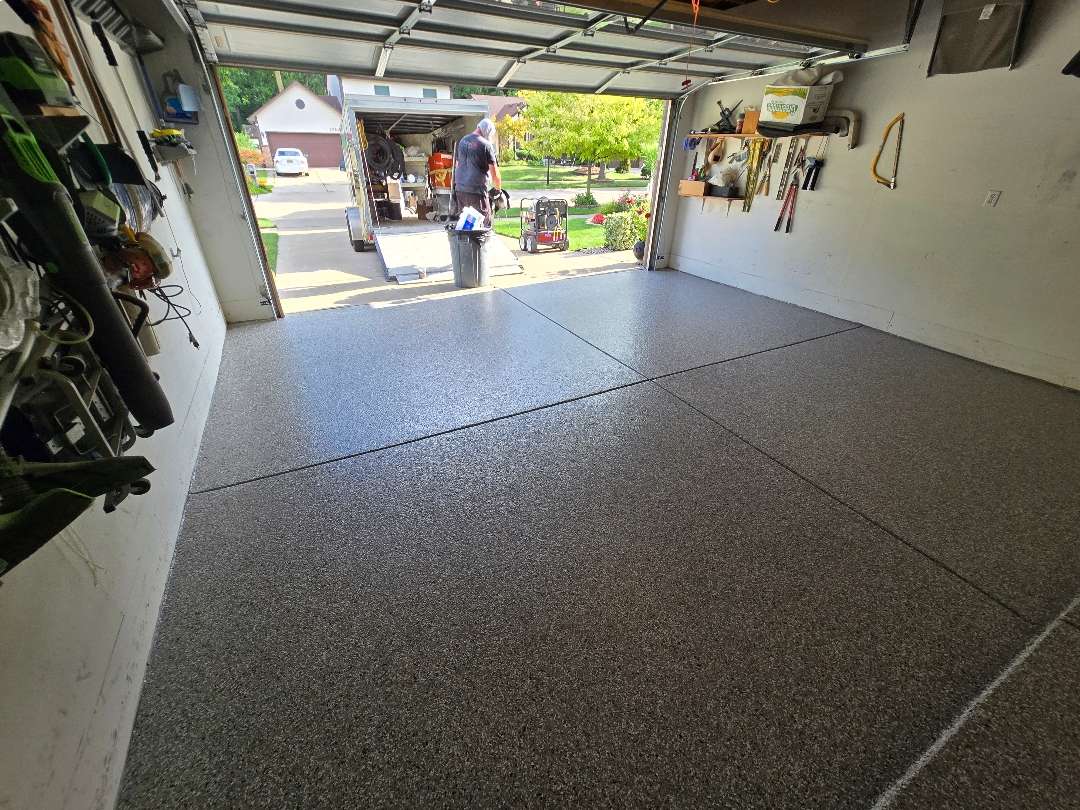
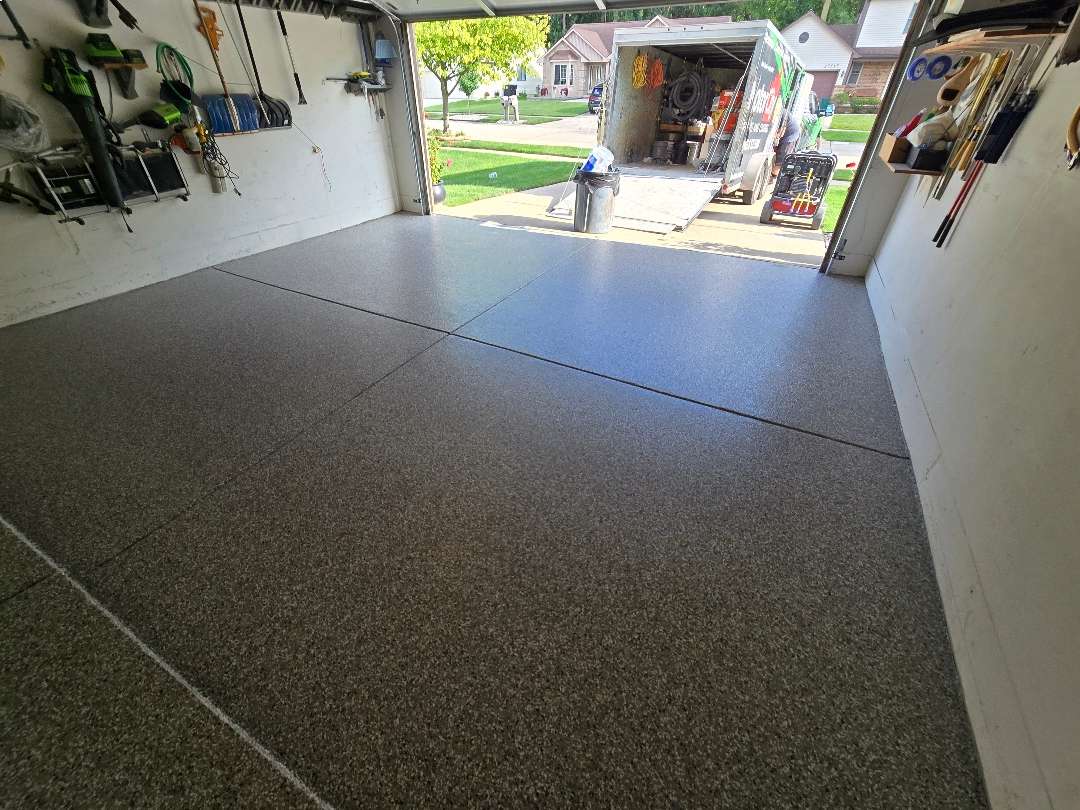
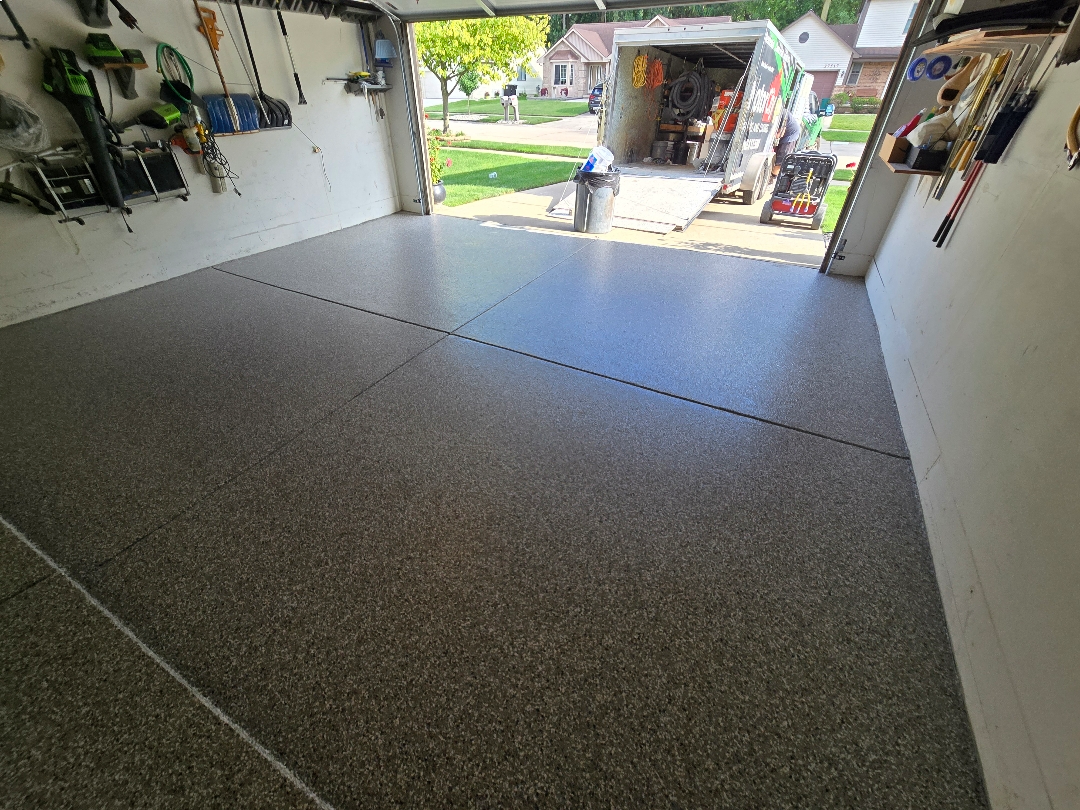
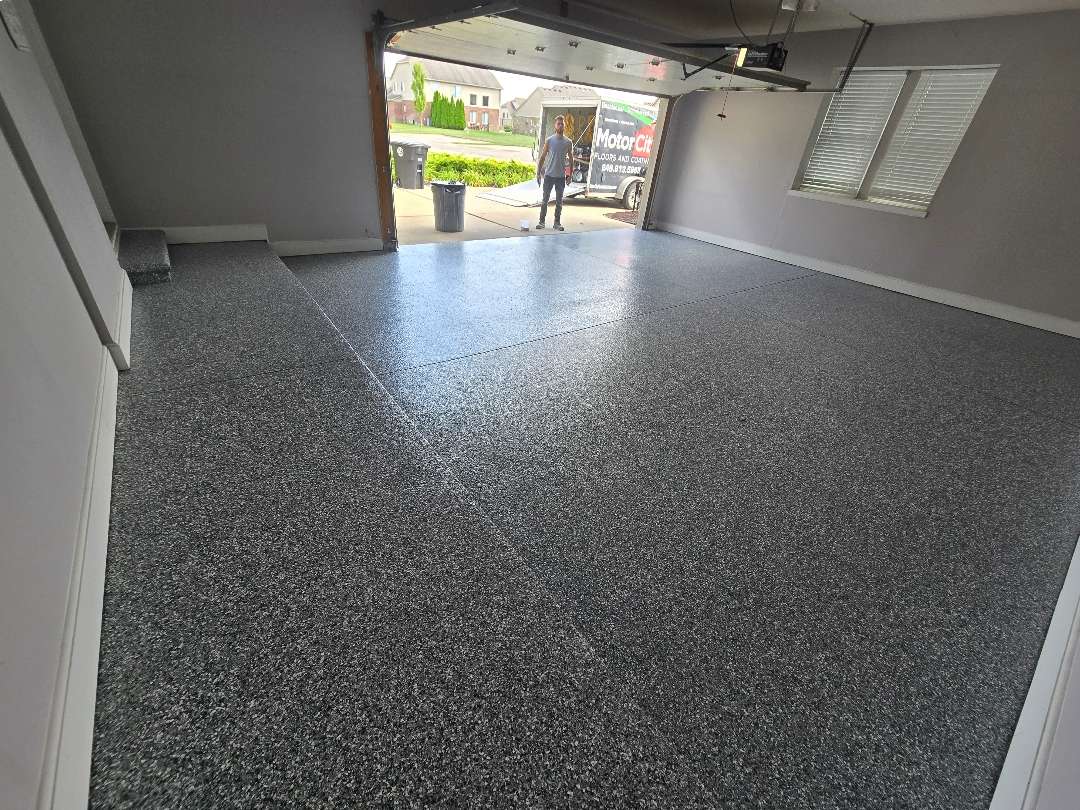
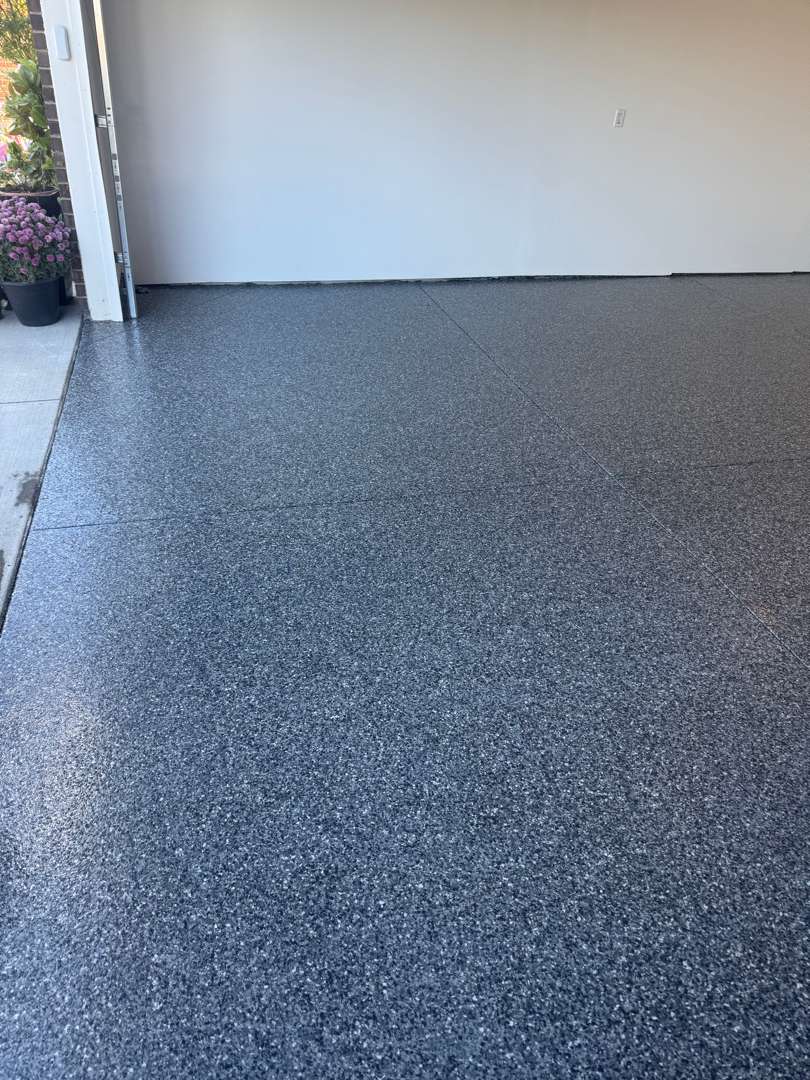
Silver Creek and 16-Grit Traction
Silver Creek is a dark, dramatic chip blend — deep charcoal and black tones with flashes of silver and white that catch the light. On the Bretton Drive floor, photographed in natural daylight through the open garage door, it reads as a rich, almost graphite finish that shifts in character depending on where the light hits. It’s a bolder color choice than the warmer neutrals, and it suits a garage with serious intentions.
Traction on this floor was specified at 16-grit — a coarser aggregate than the standard shark grip application. The result is a more pronounced texture underfoot, increasing slip resistance for a floor that will see vehicle traffic, foot traffic, and whatever Michigan weather decides to track in. On a floor with 21 feet of verticals and a full repair scope, specifying coarser traction is the right call.
The Result
A 467-square-foot garage that arrived with heavy pitting, light cracking, oil staining, and a failed front seam, finished with a full Silver Creek polyurea/polyaspartic system across the floor, 21 linear feet of verticals, and one concrete step — the repairs underneath doing as much work as the coating above them.
The pits are filled. The caulk is gone. The joints are clean. The verticals are coated.
Bretton Drive, Livonia. Heavy pitting, properly handled.
Click on the photos to enlarge them
Garage Floor Coating
on Dover Avenue
What Was Under There
The 379-square-foot garage on Dover Avenue arrived with a problem that’s harder to work with than bare concrete: paint. At some point — years, possibly decades back — someone had applied a floor paint to this garage. Over time, the bond between that paint and the concrete had deteriorated. The result was a floor that looked deceptively intact in photos but was a textbook adhesion failure waiting to happen. You can’t coat over a surface like that. The new system is only as good as what it bonds to, and bonding to a failing paint layer is bonding to nothing.
The concrete underneath had also accumulated years of oil staining — the kind that soaks into open pores and leaves dark, irregular patches across the slab. The surface needed a full reset, not a patch-and-go.
The Paint Removal: Where the Real Work Happened
The prep photos from this job tell the story more clearly than any description could. Once the process of lifting the old paint began, the floor revealed just how badly the coating had lost its bond. Entire sheets peeled back in dramatic sweeping waves, the paint separating in large, cohesive slabs from the concrete beneath. What looked like a coated floor was, in reality, a floor with a coating that had nothing holding it down.
This kind of paint removal is labor-intensive. The process requires mechanical grinding to cut through whatever remains bonded, removing the paint down to clean concrete. Sections that have already delaminated have to be cleared without damaging the slab surface beneath. By the end of the removal phase, the floor that had been hidden under years of paint was fully exposed — stained in spots, bearing the marks of decades of vehicle use, but clean and ready for proper preparation.
Surface Prep and Repairs
With the paint gone, the 24-grit diamond grind could do its job on the actual concrete — opening the surface profile, removing contamination, and creating the mechanical tooth the polyurea basecoat needs for a permanent bond. HEPA vacuums ran throughout, keeping dust minimized.
Crack and surface repairs were completed before coating, with menders and fillers worked into the damage and allowed to cure. The second-grind photos show the result: a clean, uniformly profiled slab with no paint, no peeling, no contamination. From that surface, the coating system can perform the way it was designed to.
Read More
One Step, No Verticals
The scope included one concrete step at the house entry door — coated to match the floor in the same Pebble Beach system. No vertical lip work was required on this job, keeping the application focused on the horizontal surfaces.
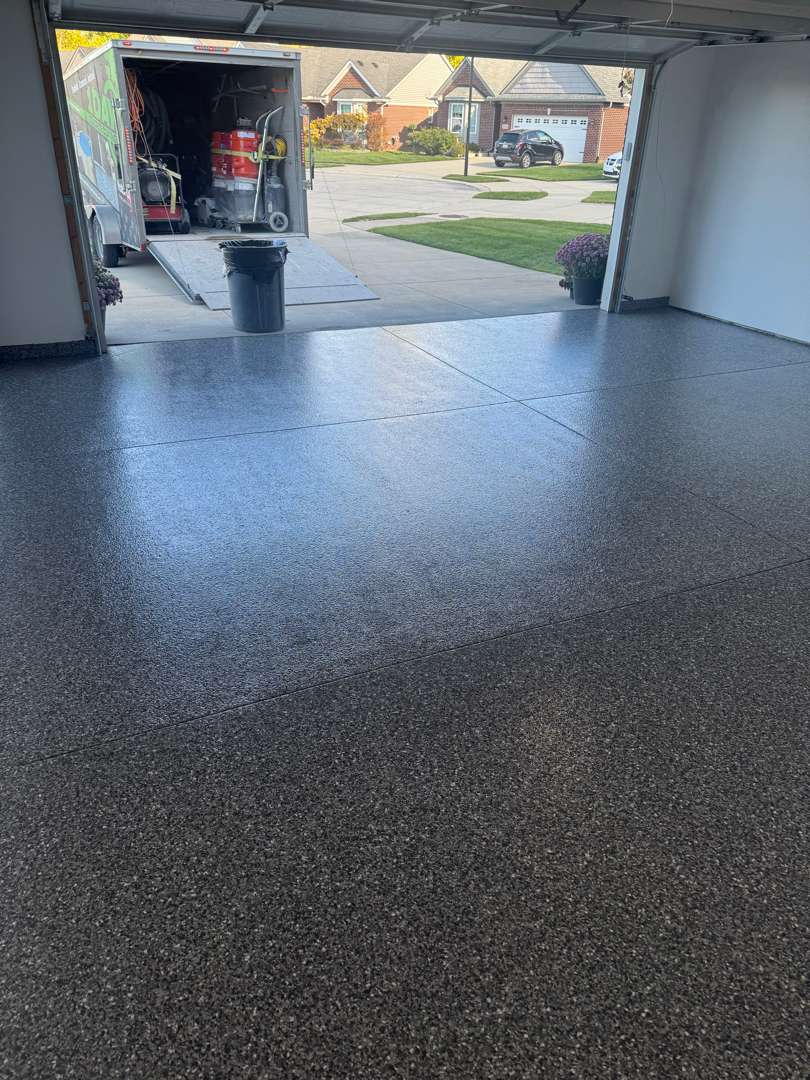
Pebble Beach on Dover
Pebble Beach is a warm, light grey chip blend with subtle tan and beige tones in the mix. On the Dover Avenue job it landed well — the color reads cleanly under both natural and artificial light, and the contrast between the finished floor and the white-painted walls of the garage is sharp and professional.
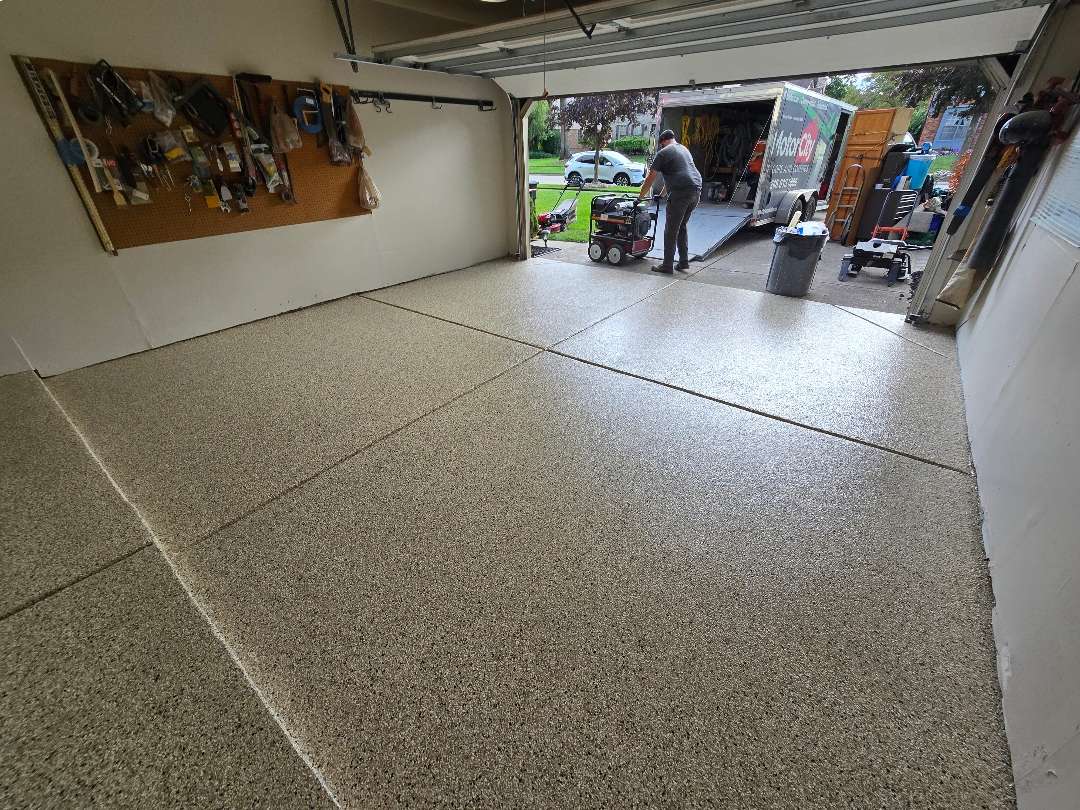
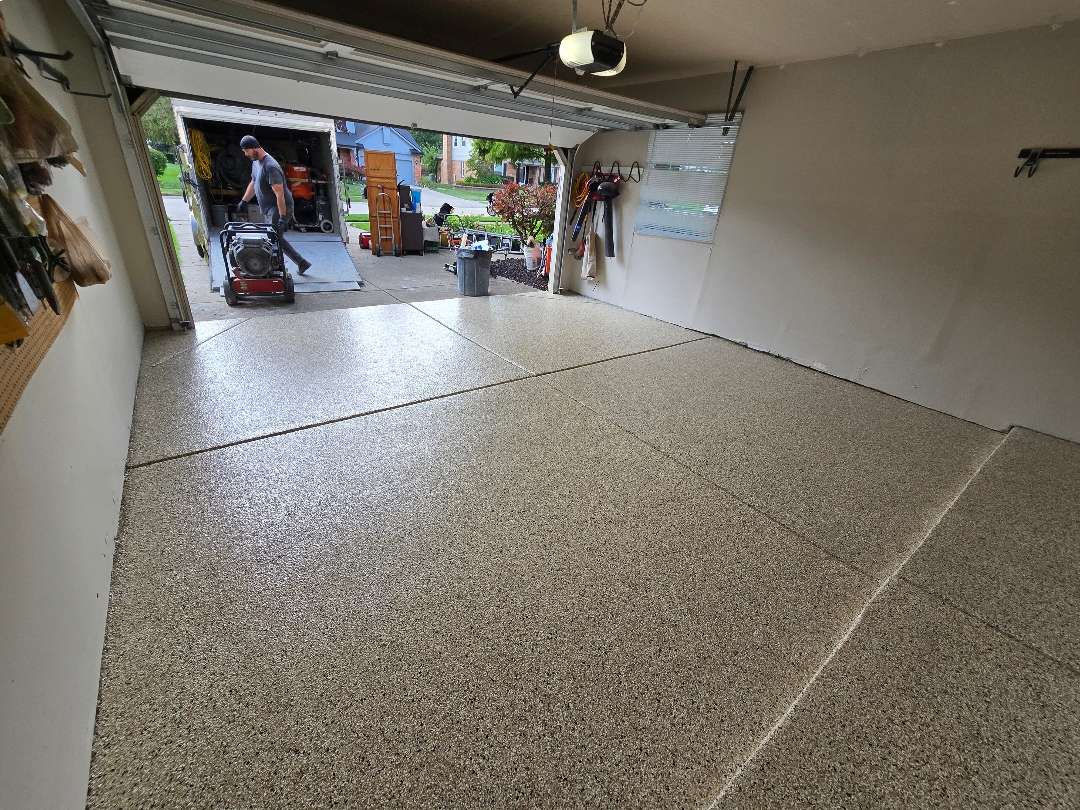
The polyurea basecoat went down first, the decorative chips were broadcast by hand for even coverage, the floor cured and was scraped and vacuumed clean, and the UV-stable polyaspartic clear coat sealed the system. The crew’s equipment — fully loaded in the MotorCity trailer visible in the after photos — was staged on the driveway throughout, keeping the garage clear and accessible as the floor cured.
The Result
A 379-square-foot garage that went from peeling paint and oil-stained concrete to a clean, durable Pebble Beach surface — one that’s bonded to the actual concrete, not to a failing intermediate layer.
The paint removal is what made this job work. Skip that step and the whole installation fails eventually. Do it right, and the floor performs the way it should — which is the only way MotorCity does it.
Dover Avenue, Livonia. Clean concrete. Permanent bond.
Click on the photos to enlarge them
Garage Floor Coating
on Fairway Drive
The Biggest Floor in the Series
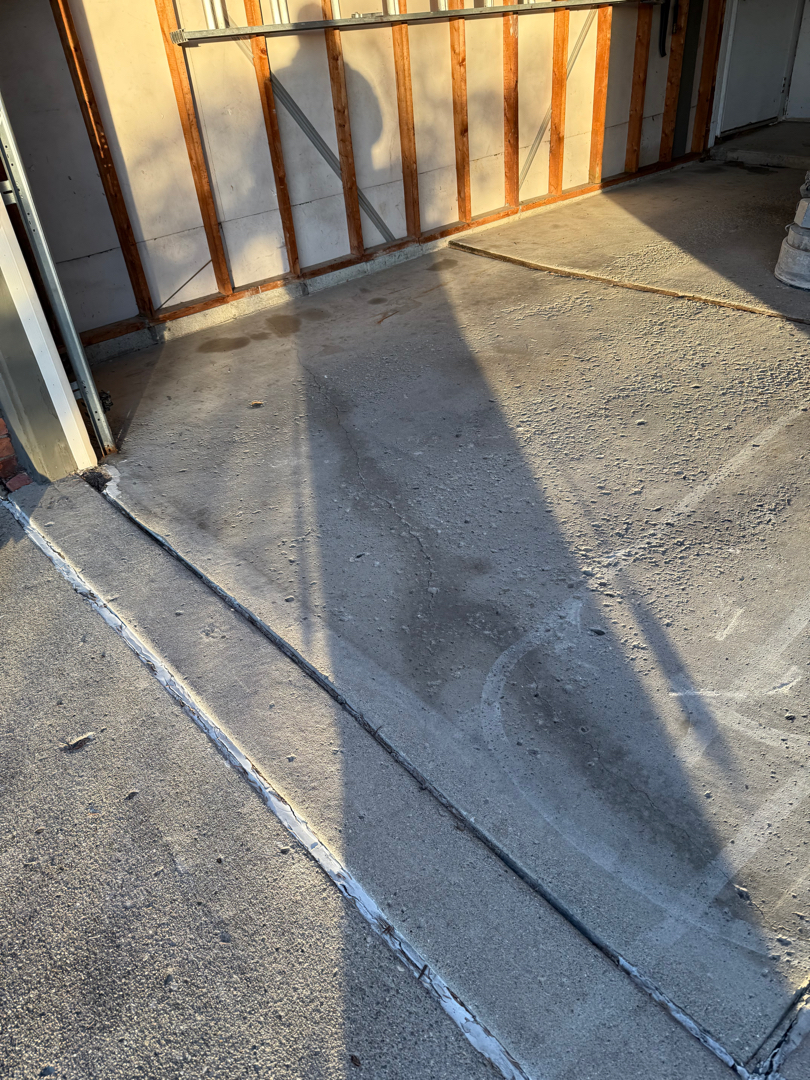
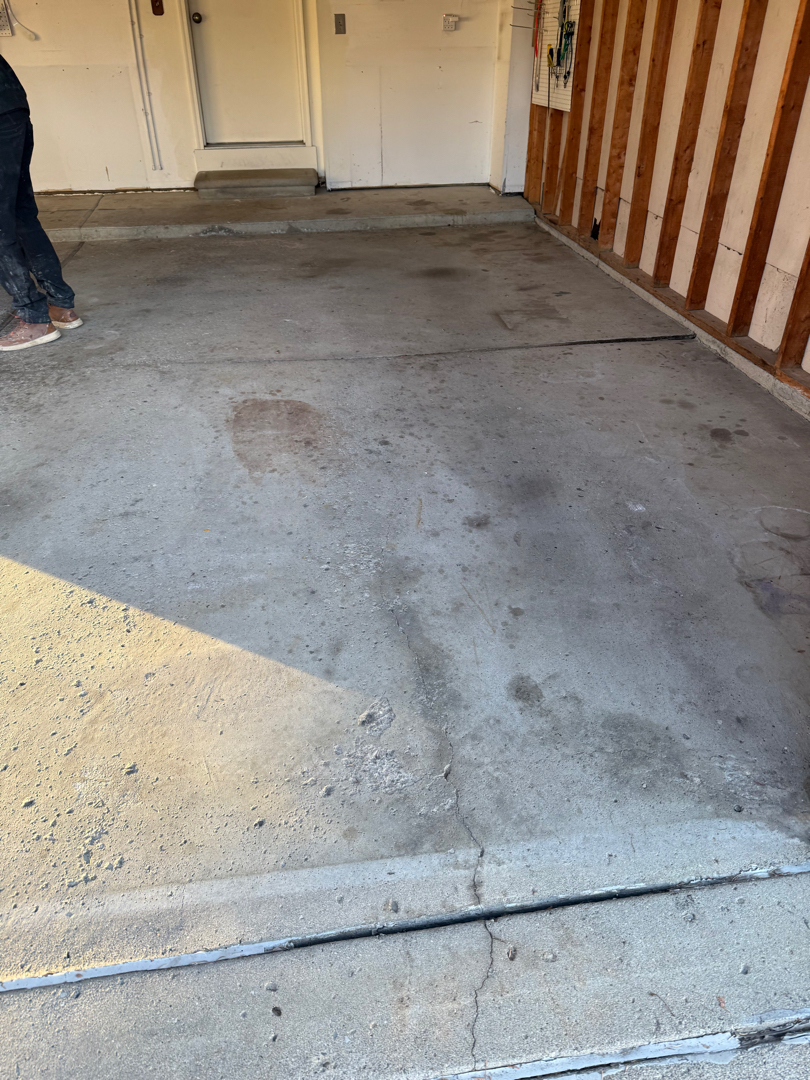
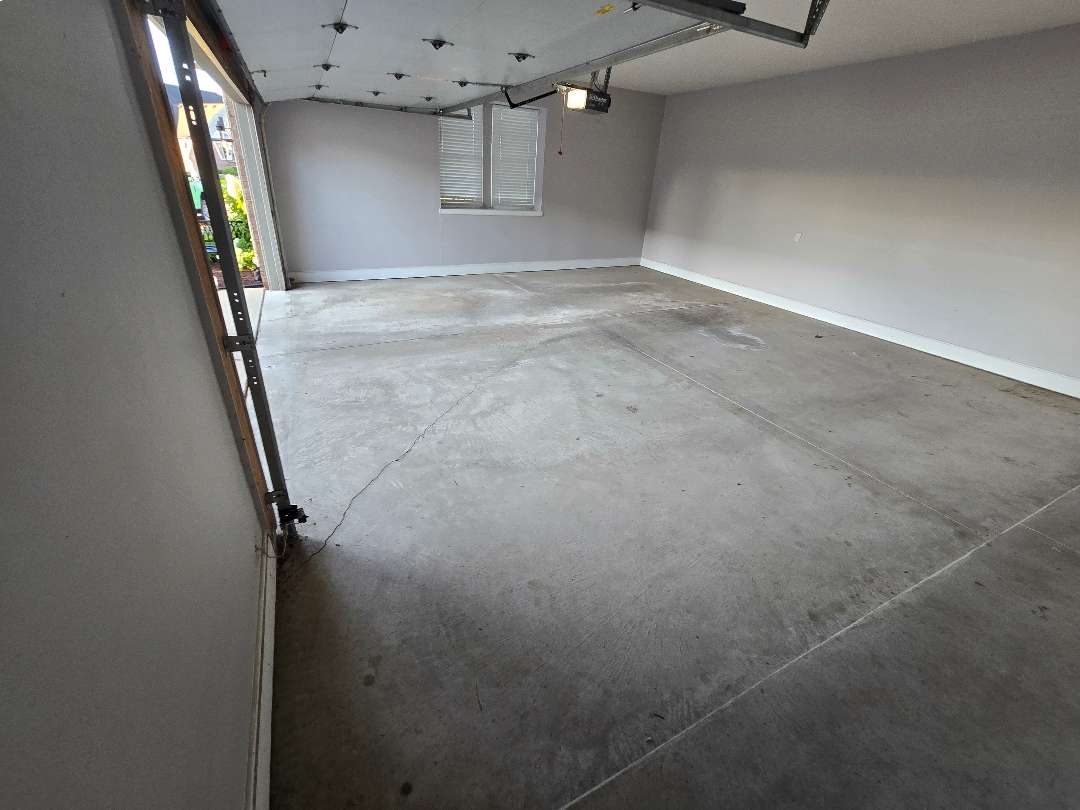
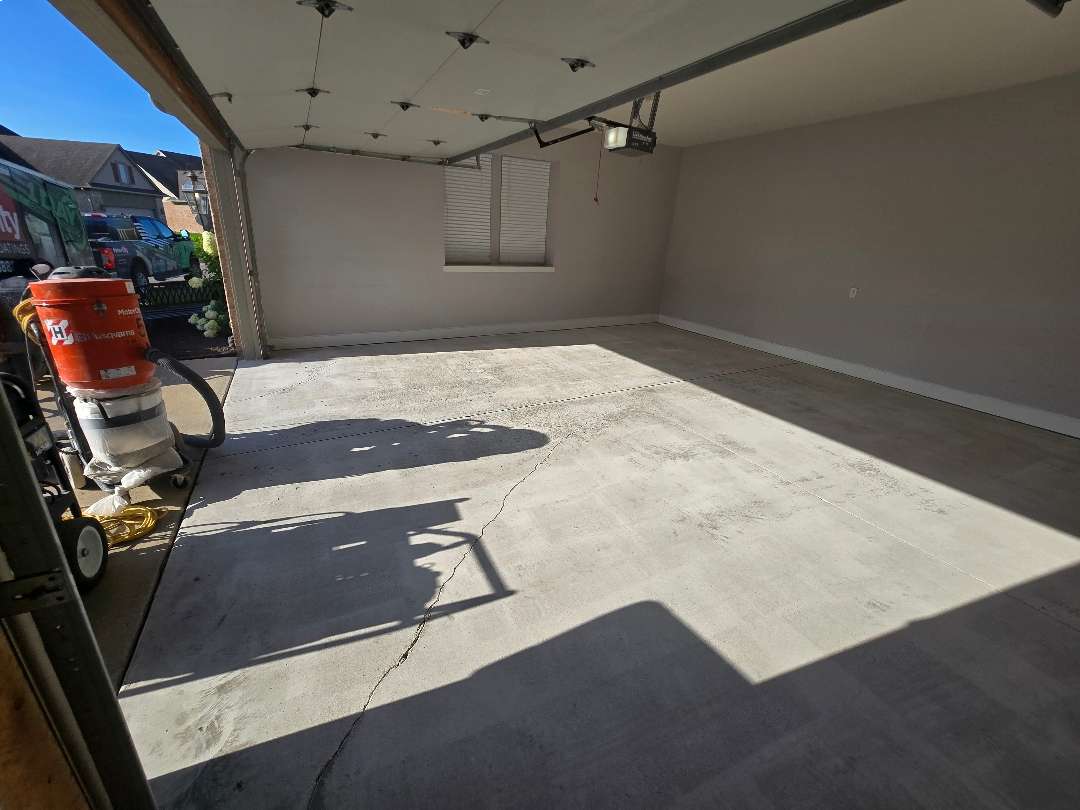
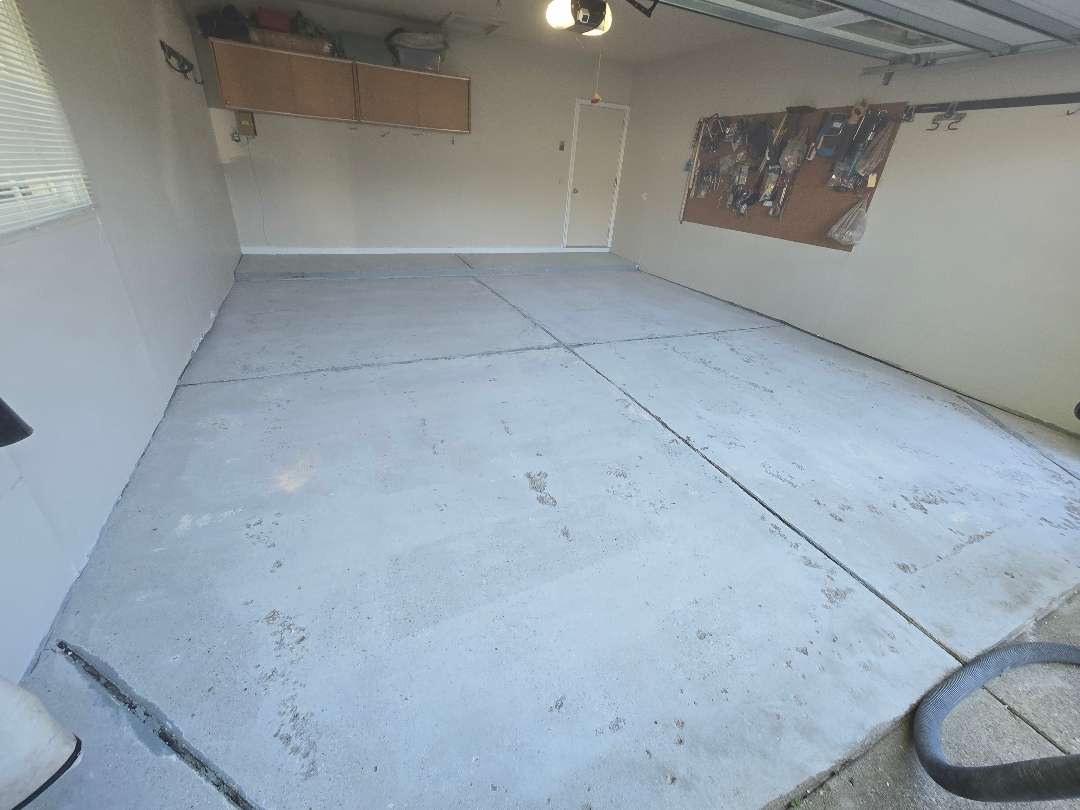
At 540 square feet, the garage on Fairway Drive is the largest in this collection of Livonia jobs — a two-car space with grey-painted walls, a finished ceiling, and the kind of clean, well-maintained interior that makes the condition of the concrete beneath stand out by comparison. The slab itself wasn’t catastrophically damaged, but it arrived with a combination of issues that required more than a simple grind-and-coat approach: hairline cracking across sections of the floor, pitting concentrated along one side of the slab, oil contamination in the vehicle parking zones, and moisture content reading at 2.1 — the lowest in this series, meaning vapor transmission wasn’t a concern on this job.
The before photos capture a garage that looks relatively presentable from a distance — cleared out, grey walls, no visible clutter. Look at the floor and the story changes: oil staining mapped to the tire and drip zones, surface pitting visible on the near side of the slab, hairline cracks threading through several of the concrete panels. A floor that a homeowner might describe as “not that bad” but that a coating crew reads as a substrate requiring prep investment to perform.
First Grind, Patch, Flood, Second Grind
The prep sequence on Fairway Drive followed the full two-pass protocol. The first grind opened the surface profile and cut through the oil contamination and the outer concrete skin, exposing what was underneath. The mid-grind photo shows the grinder moving through the garage with HEPA vacuum hoses trailing — the floor surface transitioning in real time from the closed, contaminated slab to the open, bondable concrete the system needs.
After the first grind, the pitted section was patched and the full floor was flood-coated with repair compound — the material filling the pitting and hairline cracks and flowing into the surface variation across the slab. Once cured, the second grind knocked the repaired surface back to a clean, uniform plane. The second-grind photo shows the result: a floor that has been through the full remediation sequence and is ready for basecoat, with no raw damage or surface irregularity remaining.
21 Linear Feet of Verticals and One Step
The 21 linear feet of vertical coverage runs along the wall-floor junctions, sealing the perimeter and carrying the Slate Stone system off the floor plane. On a 540-square-foot garage with finished grey walls, the verticals matter aesthetically as well as functionally — they eliminate the raw concrete line at the base of the wall and create a clean transition between the floor coating and the wall surface. The single step at the interior entry door was coated to match, completing the installation across every concrete surface in the space.
Slate Stone Against Grey
Slate Stone in the Fairway Drive context creates a different visual effect than it does in garages with white or cream walls. The grey walls — a cooler, modern interior finish — pair with Slate Stone’s dark charcoal and black chip tones in a way that reads as intentionally designed rather than incidentally matched. The floor doesn’t contrast against the room; it deepens it. The after photos shot in natural daylight capture this well: the chip blend holds its character across the full 540 square feet, and the scale of the floor gives it a presence that smaller garages can’t produce.
H-4 hardener was used in the coating formulation — a denser film appropriate for a high-use two-car garage at this square footage. Traction was specified at 36-grit, the coarsest available, ensuring that a floor this large provides consistent slip resistance in wet conditions without compromise.
The Result
A 540-square-foot garage that arrived with oil staining, hairline cracking, one-sided pitting, and a floor that had seen years of vehicle use without protection — finished with a full Slate Stone polyurea/polyaspartic system across the floor, 21 linear feet of verticals, and one concrete step, after a two-pass prep sequence that rebuilt the substrate from the ground up.
The cracks are filled. The pitting is gone. The oil contamination is under the coating where it can no longer matter. The floor is as good as the room around it.
Fairway Drive, Livonia. Five hundred and forty square feet, done right.
Click on the photos to enlarge them
Garage Floor Coating
on Levan Road
The Problem with the Previous Coating
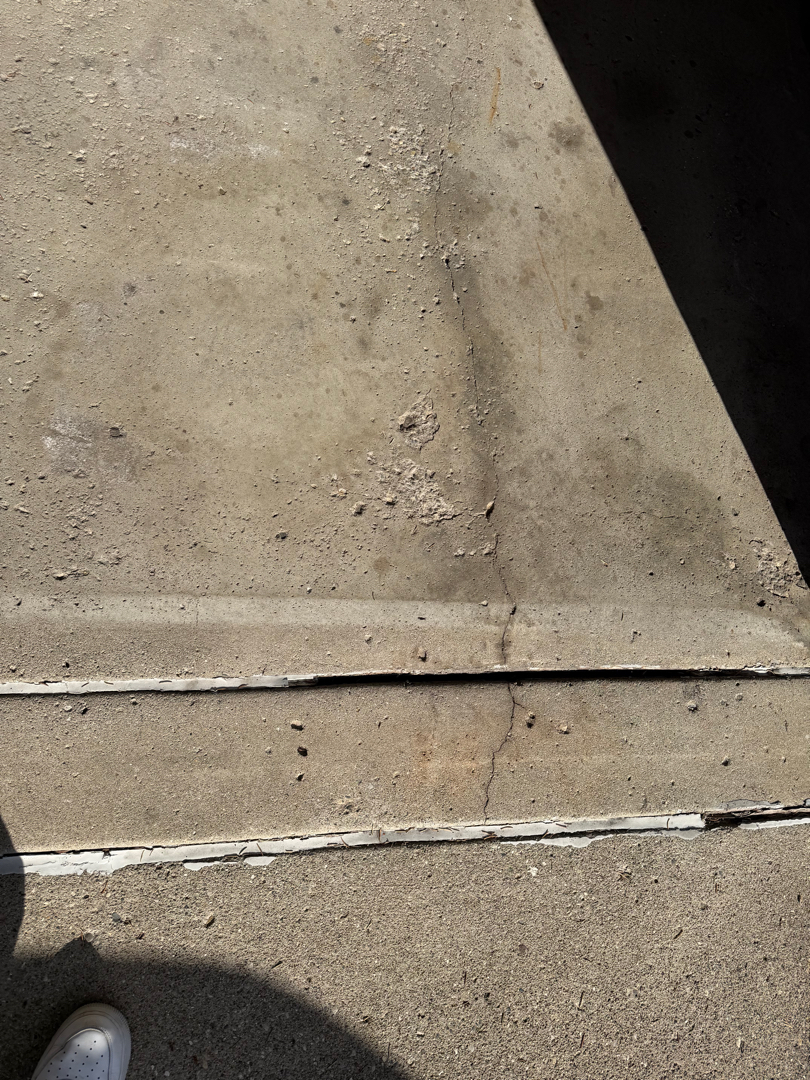
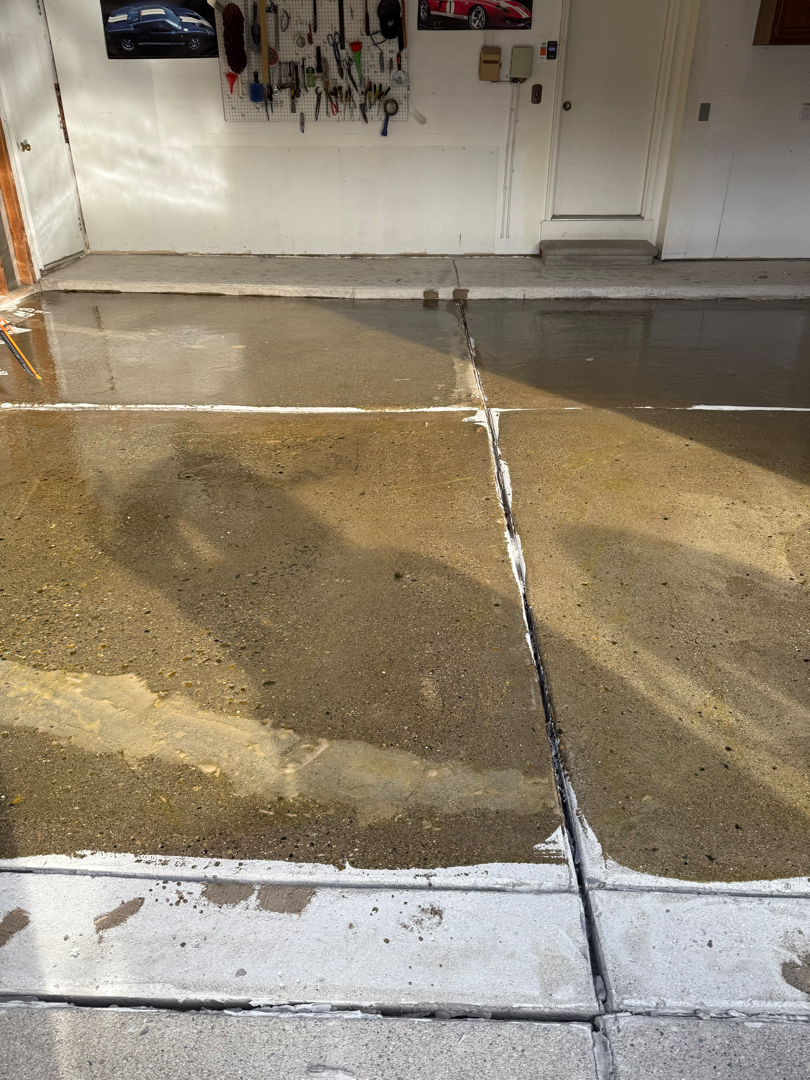
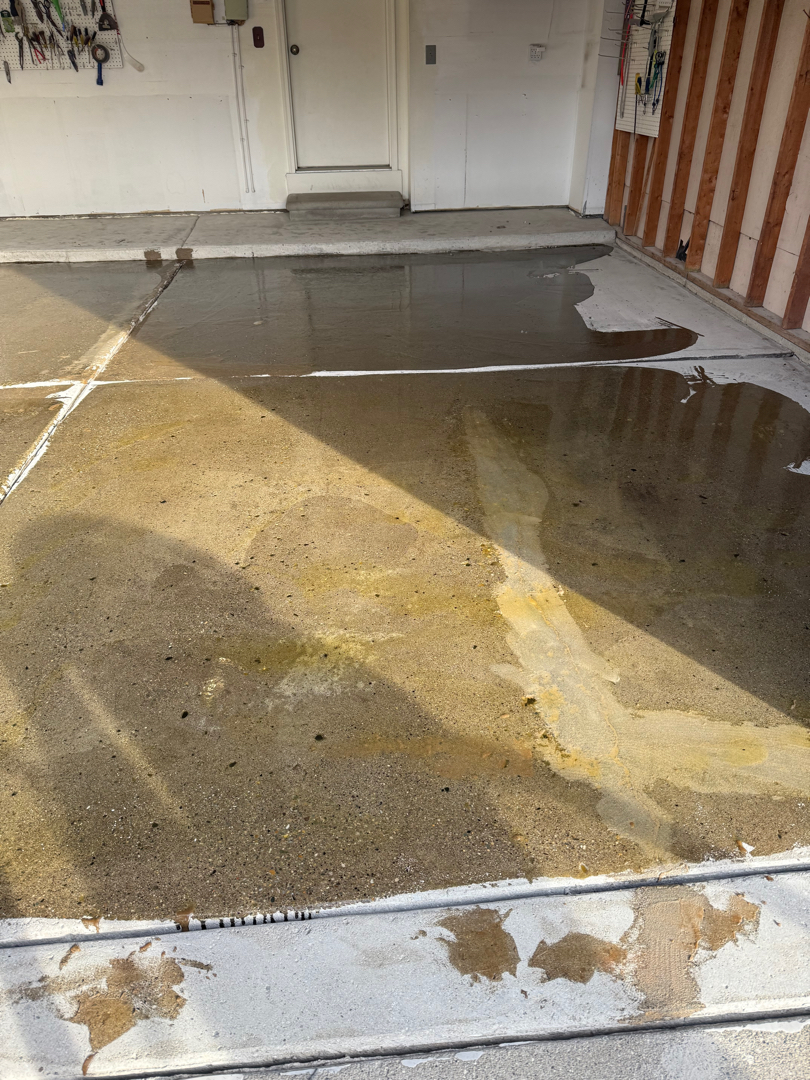
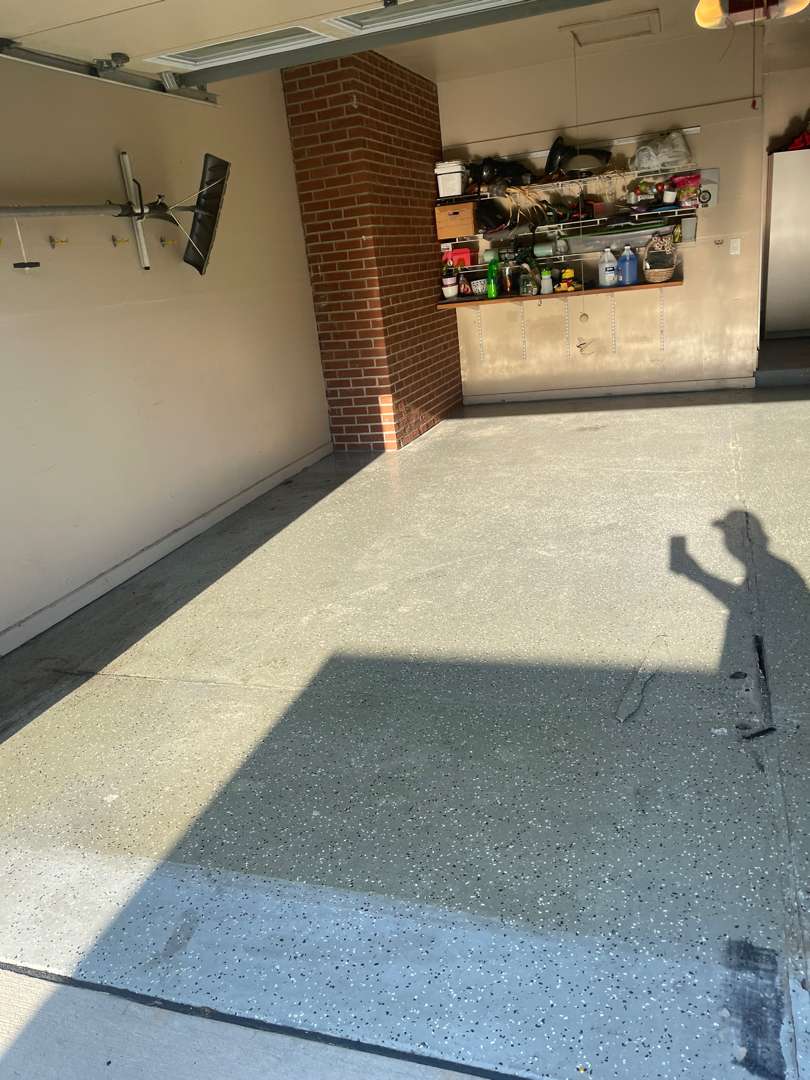
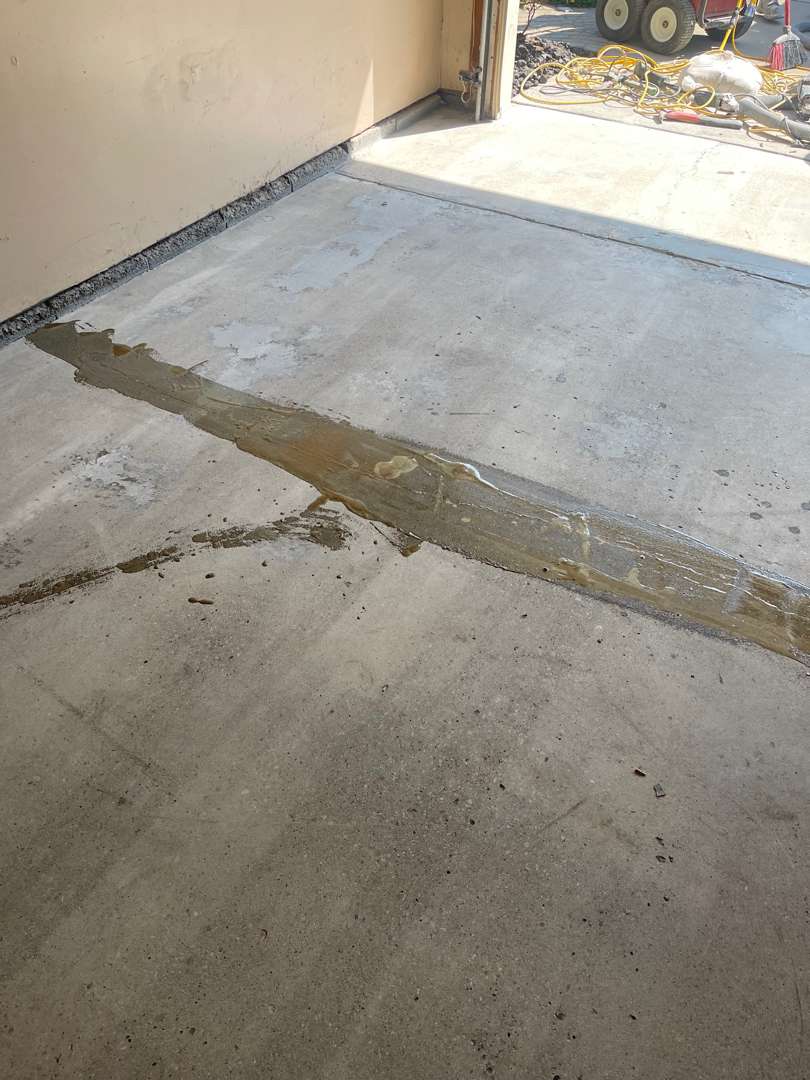
The homeowner on Levan Road had already been down this road before — literally. A prior epoxy coating had been applied to the 468-square-foot garage floor at some point, and it had run its course. The floor told the story plainly: the existing coating was staining, degrading, and failing to protect the concrete underneath. In the small anteroom off the main garage, the situation was worse — oil contamination had soaked through and left dark, spreading stains across the surface that no amount of cleaning would fix.
Moisture content came in at 3.8, and the concrete itself had developed cracking that needed to be addressed before any new coating could go down. The main seam in the floor had been previously filled with caulk — that would need to come out too.
This wasn’t a first-time coating job. It was a rescue operation.
Starting Over: Removing What Was There
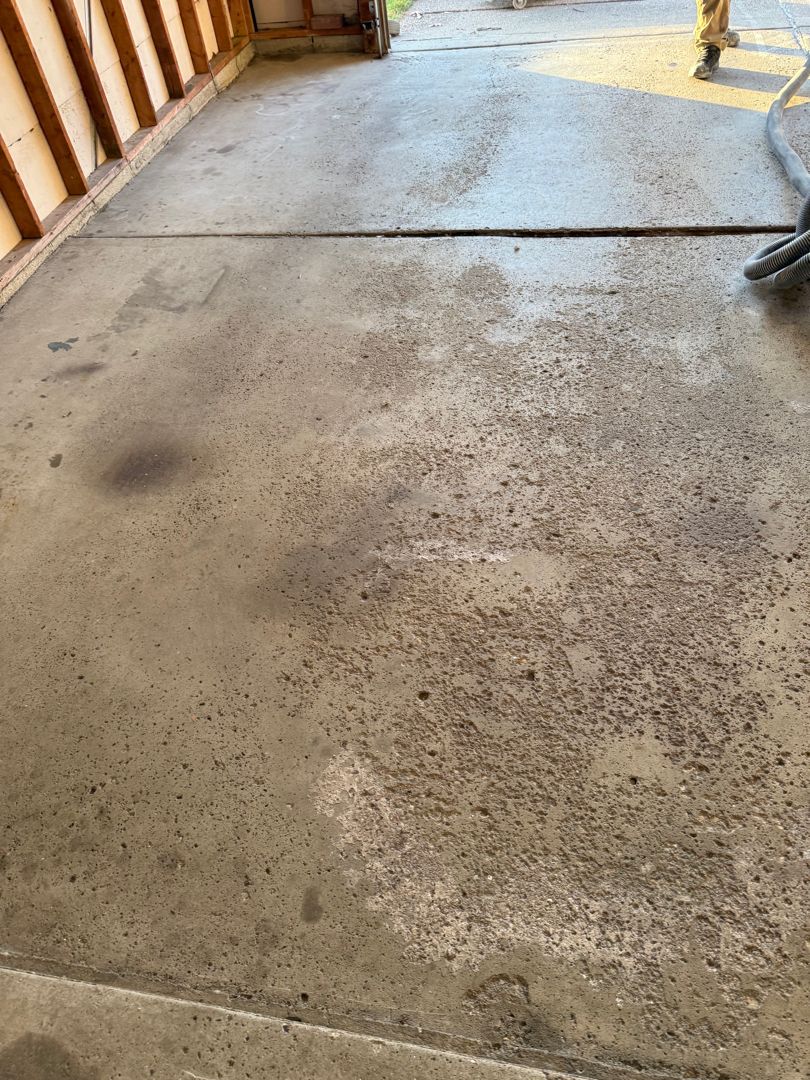
The first challenge was the existing epoxy. Getting rid of a failed coating is a different animal from prepping bare concrete. The crew had to grind aggressively enough to pull the old material off the surface and expose clean, bondable concrete underneath — which is why 36-grit diamond tooling was called for here, rather than the 24-grit used on untreated slabs.
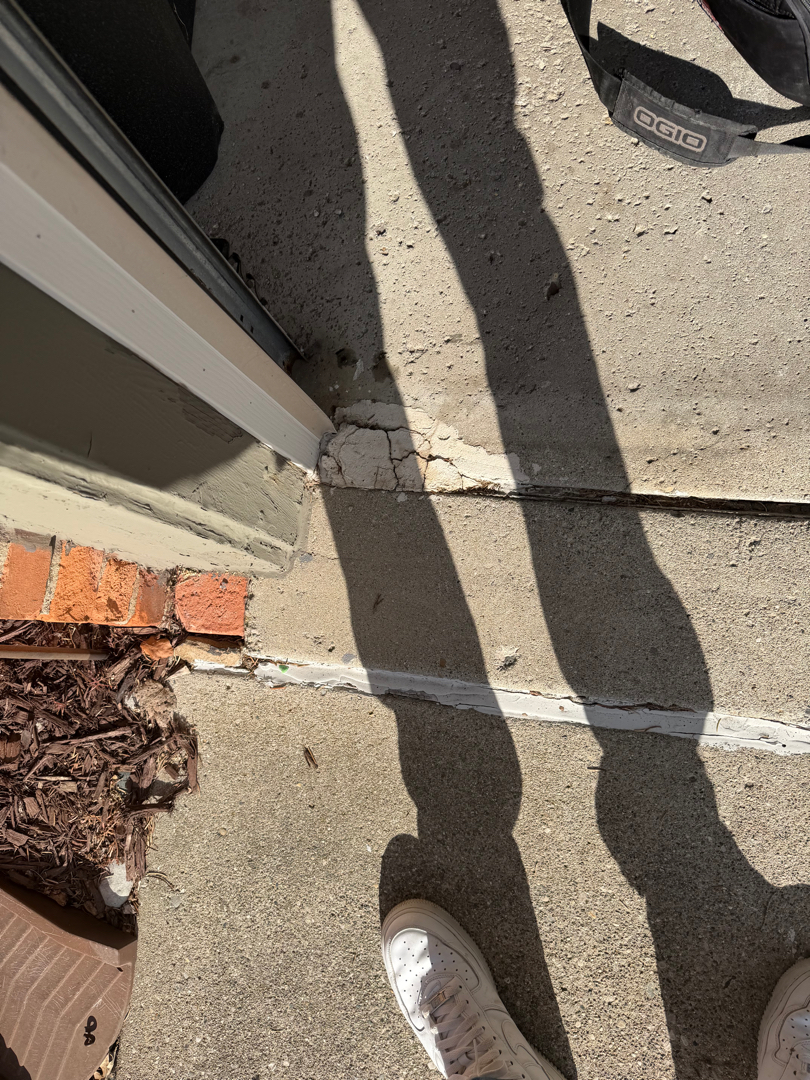
The old caulk in the main seam was dug out completely. Leaving failed sealant in place would have created a bond-line weakness — a guaranteed problem point. Clean concrete in the seam, not deteriorating caulk.
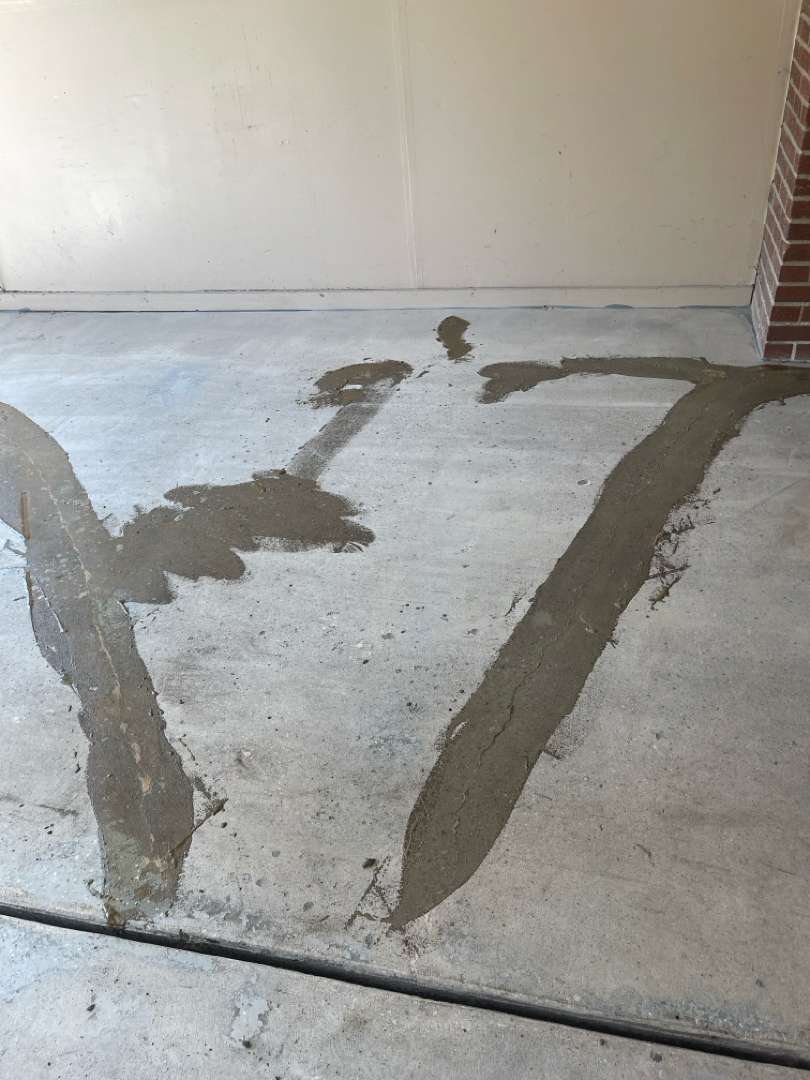
With the old coating stripped and the surface prepared, the extent of the crack damage became clear. Multiple cracks had developed across the floor — including a significant diagonal crack running across the main parking area — along with smaller fractures near the base of the brick column. Each crack was opened, cleaned, and filled with appropriate repair material, then feathered flush with the surrounding concrete.
The large anteroom area, with its oil-contaminated concrete, required particular attention during the grinding phase to ensure the contamination was mechanically removed rather than simply coated over.
8 Inches Up
The scope called for 8 linear inches of vertical lip coating — bringing the polyurea/polyaspartic system up onto the base of the walls to create a clean, finished transition between floor and vertical surfaces. No steps were involved, keeping that aspect of the application straightforward.
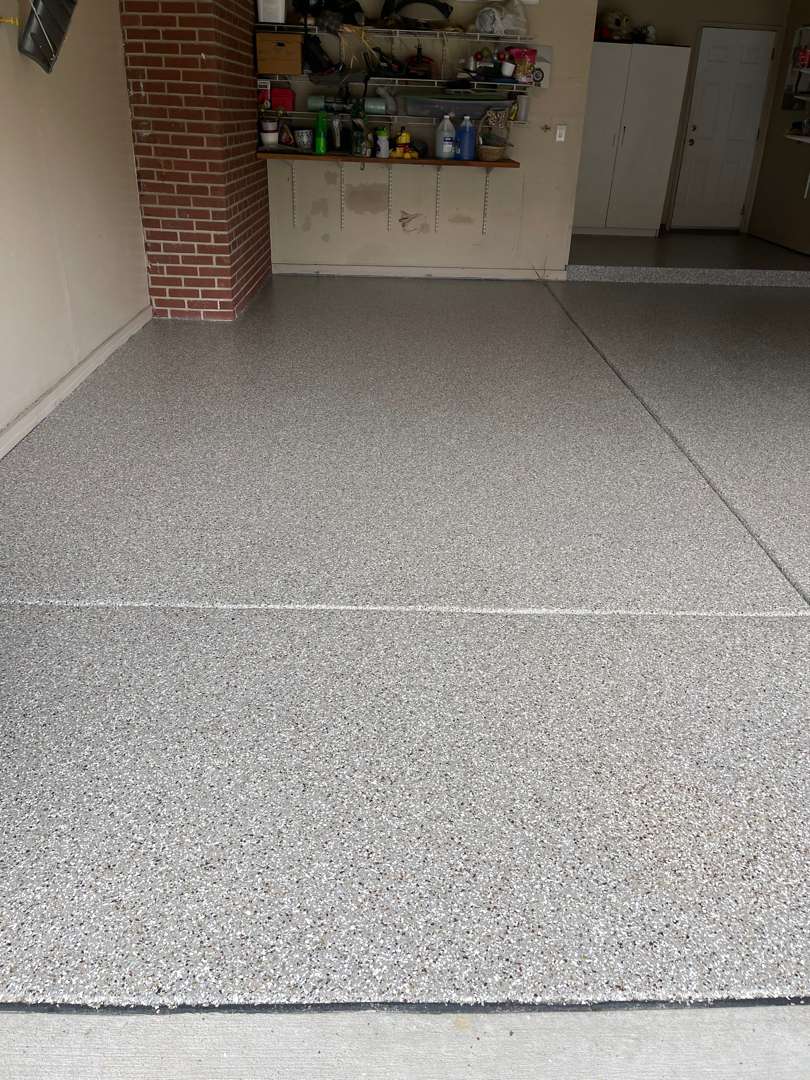
Pebble Beach
Color selection: Pebble Beach. It’s a warm, light grey with subtle beige undertones — a chip blend that photographs well and works with a wide range of vehicle colors and garage aesthetics. The decorative chip broadcast went down over the polyurea basecoat, followed by the UV-stable polyaspartic clear topcoat to lock everything in.
The same Pebble Beach system was taken into the anteroom, unifying the small side space with the main garage and — more importantly — sealing the oil-contaminated concrete underneath a durable, impermeable surface that won’t absorb future spills.
The Result
From a failing epoxy coating with cracked concrete and an oil-stained anteroom, to a clean, uniform Pebble Beach surface covering every square foot of the space — including the verticals and the side room.
The 36-grit grind ensured the new system has a mechanical bond to clean concrete, not to remnants of a prior coating. The crack repairs are structural, not cosmetic. The caulk is gone from the seam and replaced with a proper approach. The anteroom problem is solved.
468 square feet on Levan Road. Done right this time.
Click on the photos to enlarge them
Garage Floor Coating
on Liberty Court
The Starting Point
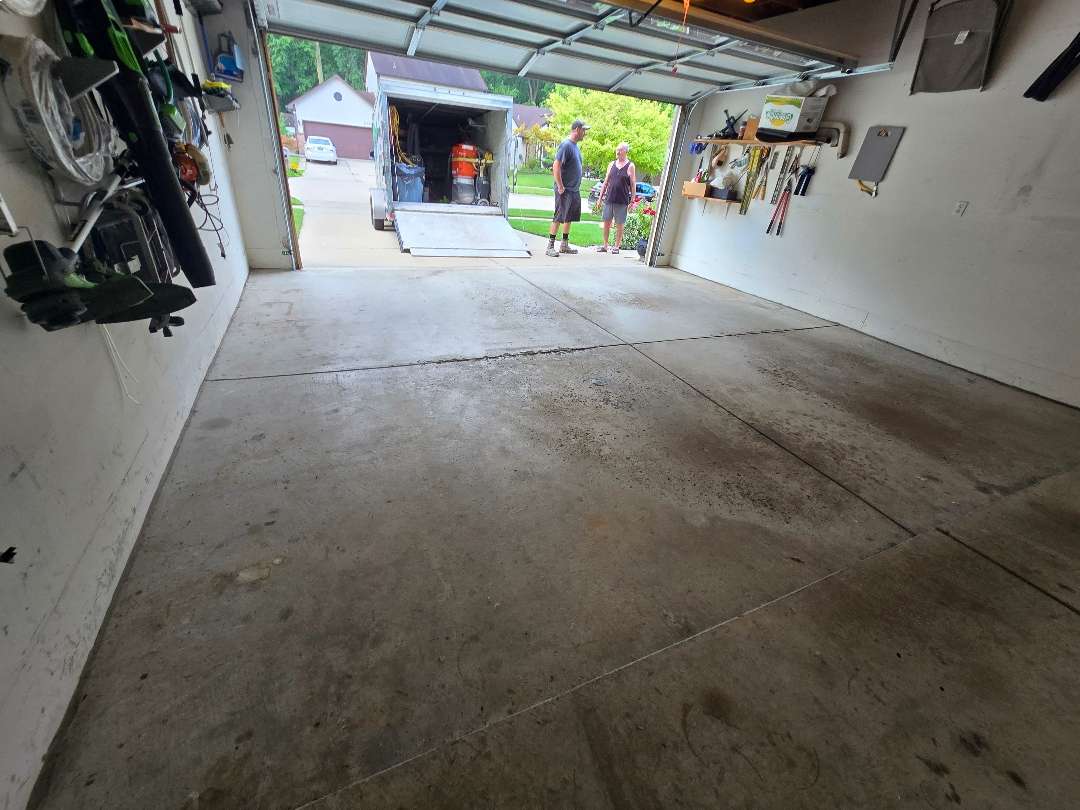
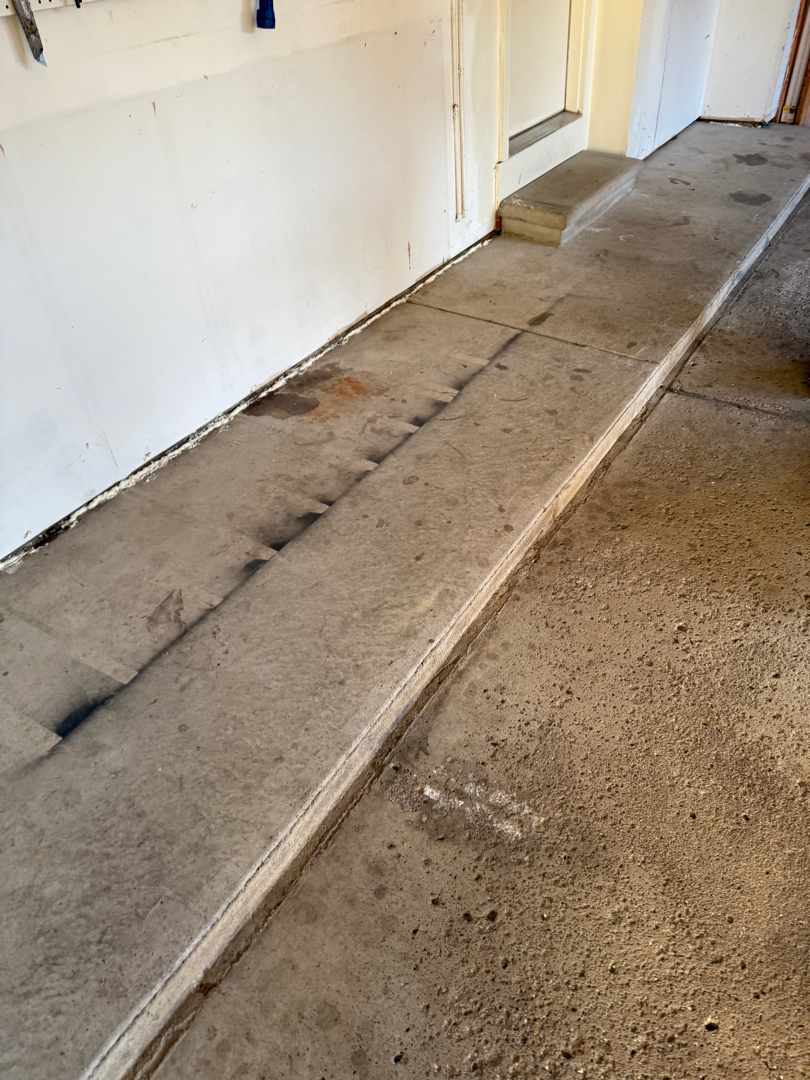
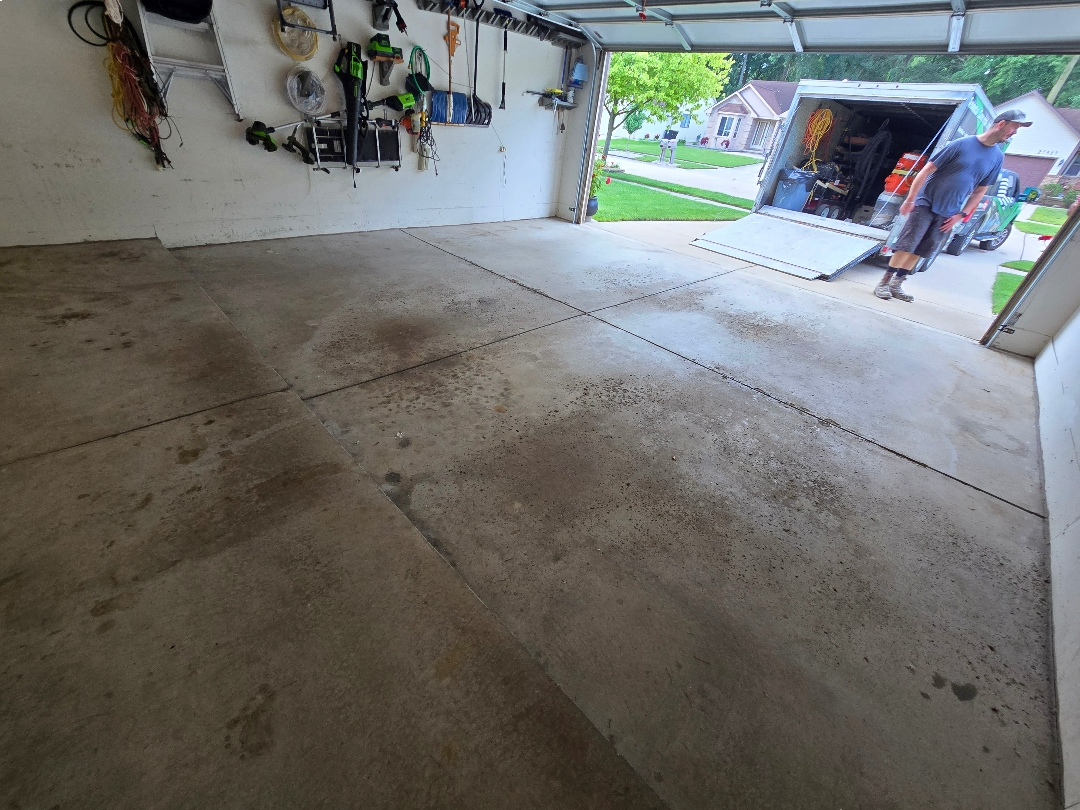
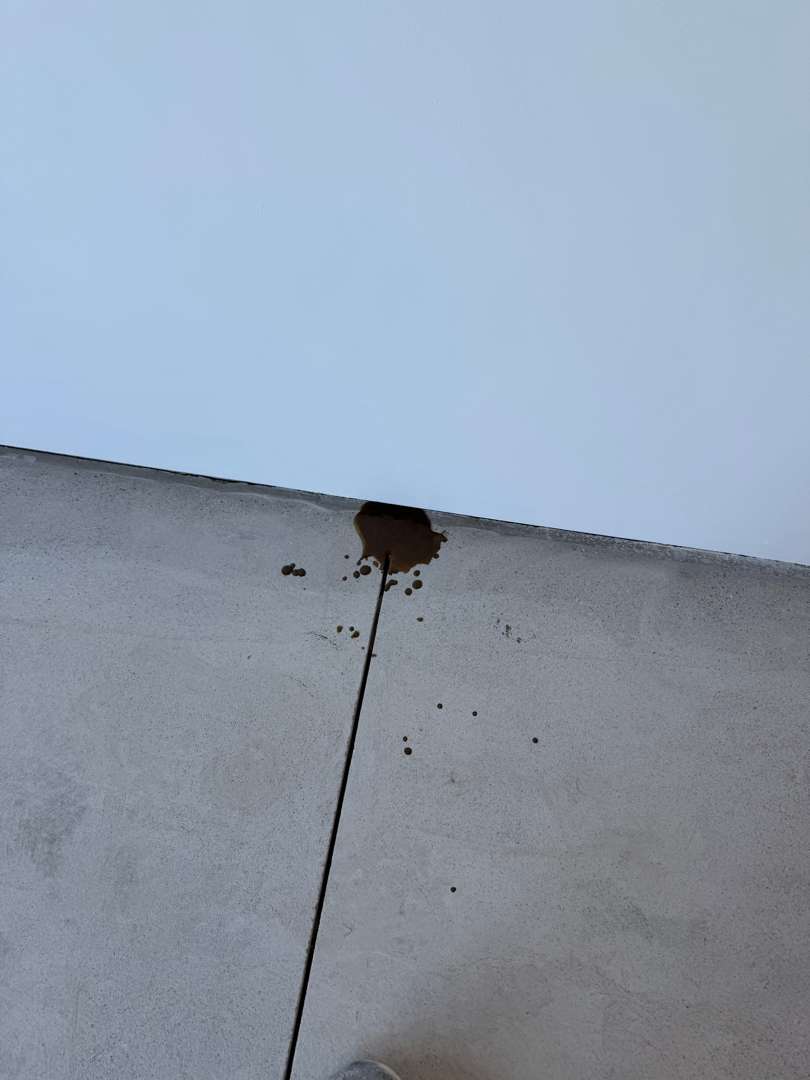
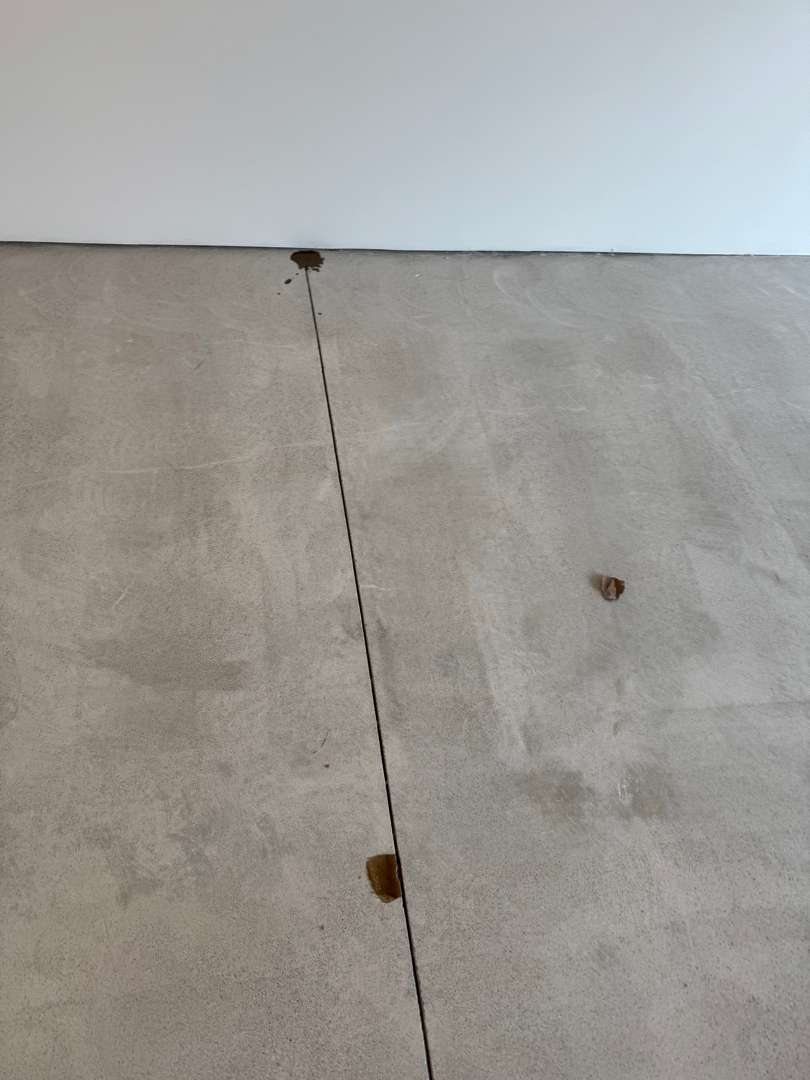
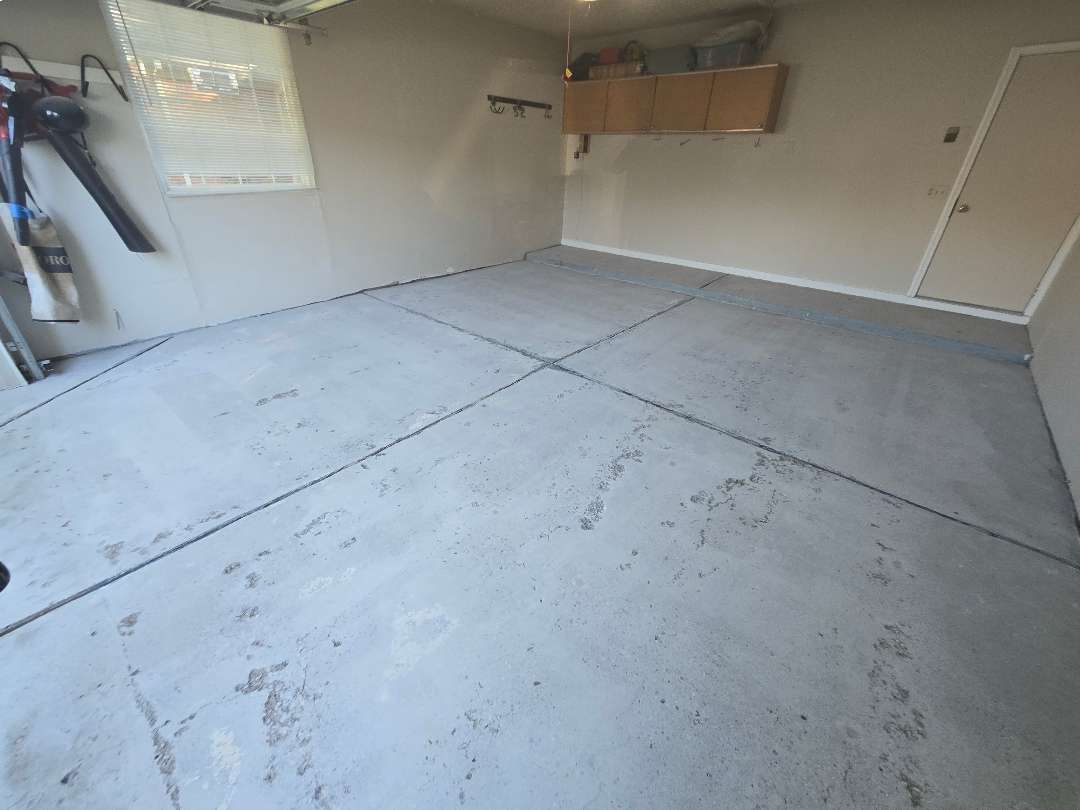
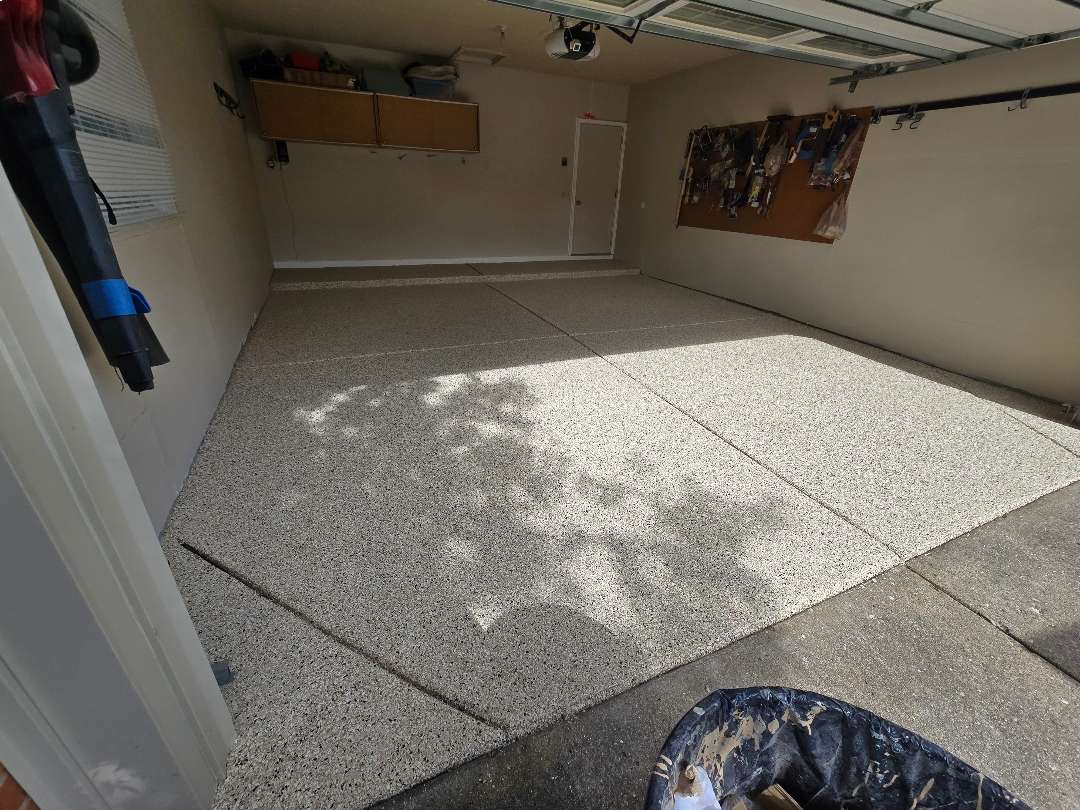
The 485-square-foot garage on Liberty Court arrived in relatively sound structural condition — no prior coating to remove, light repairs needed rather than heavy, cracking minimal. What it did have was what nearly every working garage accumulates over time: oil contamination. The before photos document it with the kind of close-up detail that explains why proper surface prep matters. Oil pooled at the seam and bled along the wall-floor junction, with satellite drops scattered across the surrounding concrete. This isn’t surface contamination that grinding alone resolves — oil that has soaked into open concrete pores needs to be mechanically cut out, not just passed over.
Moisture content read at 3.8 — within acceptable range. No removal work required. The path forward was straightforward: prep the concrete properly, address the oil contamination and light repairs, and give the coating system a clean surface to bond to.
Prep and Repairs
The Step
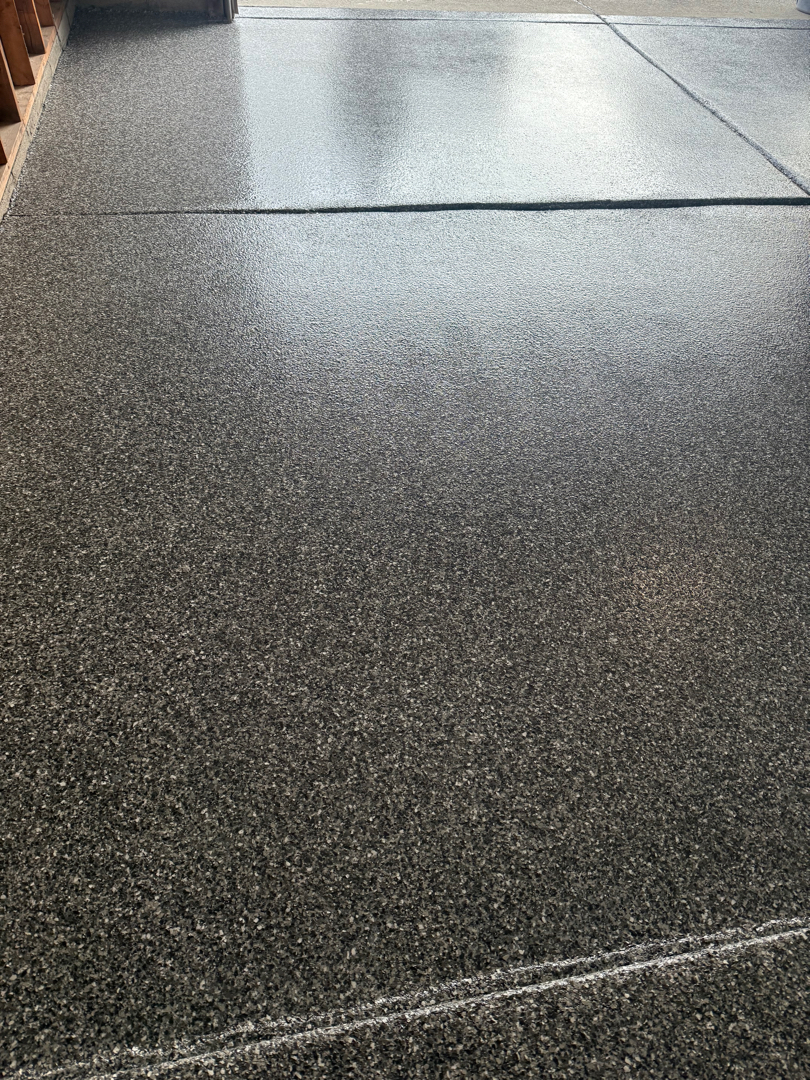
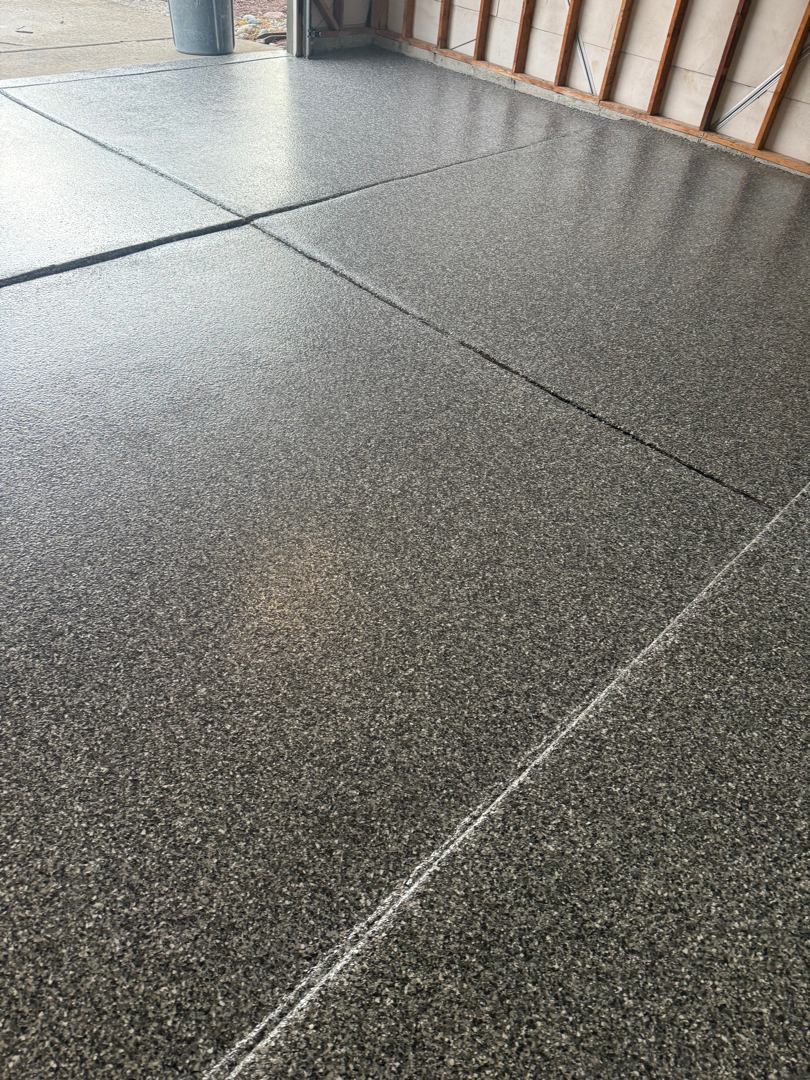
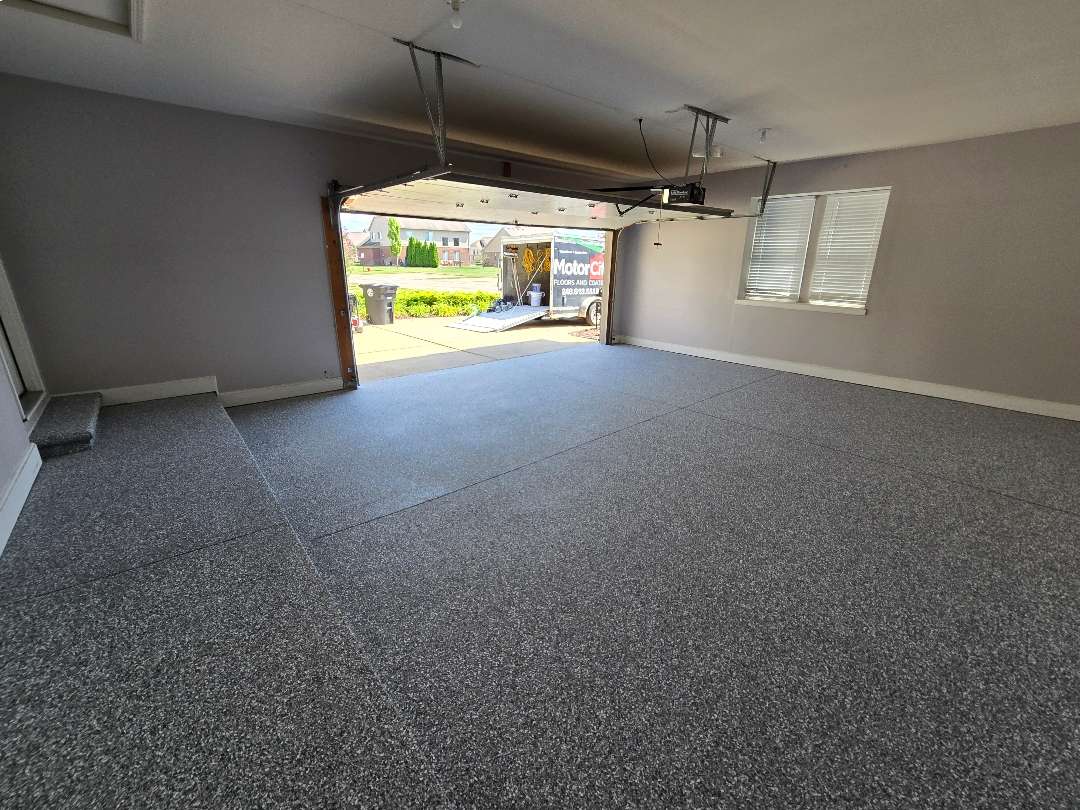
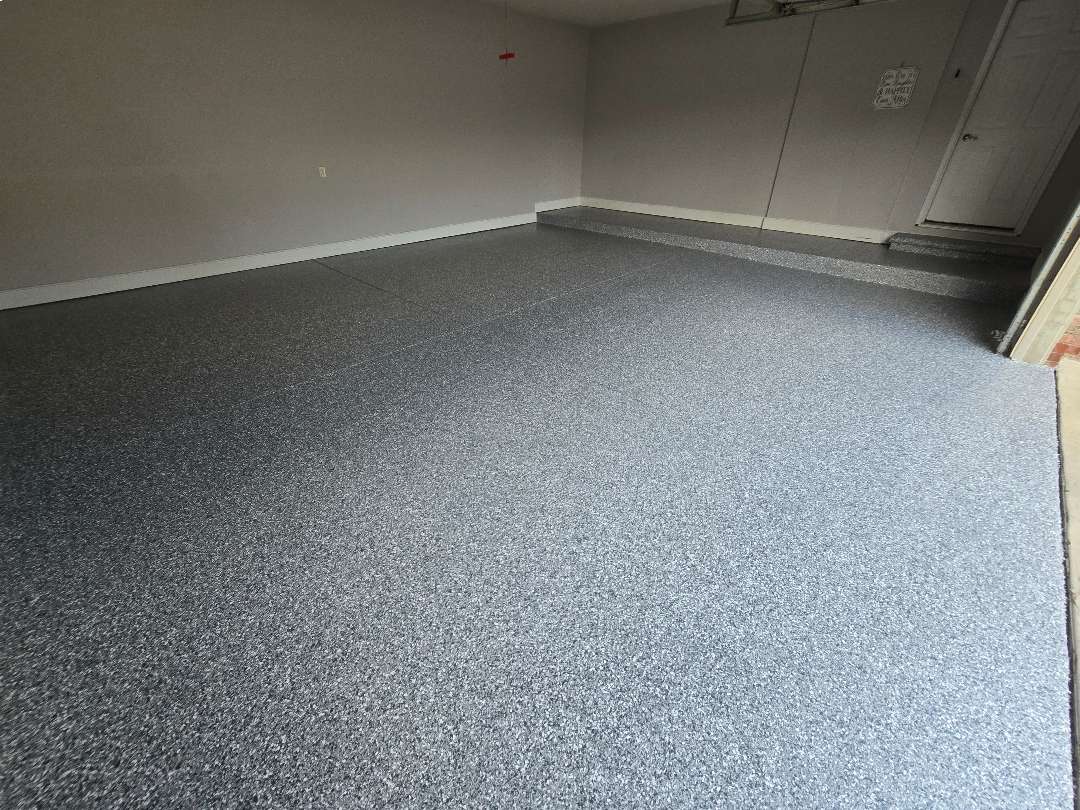
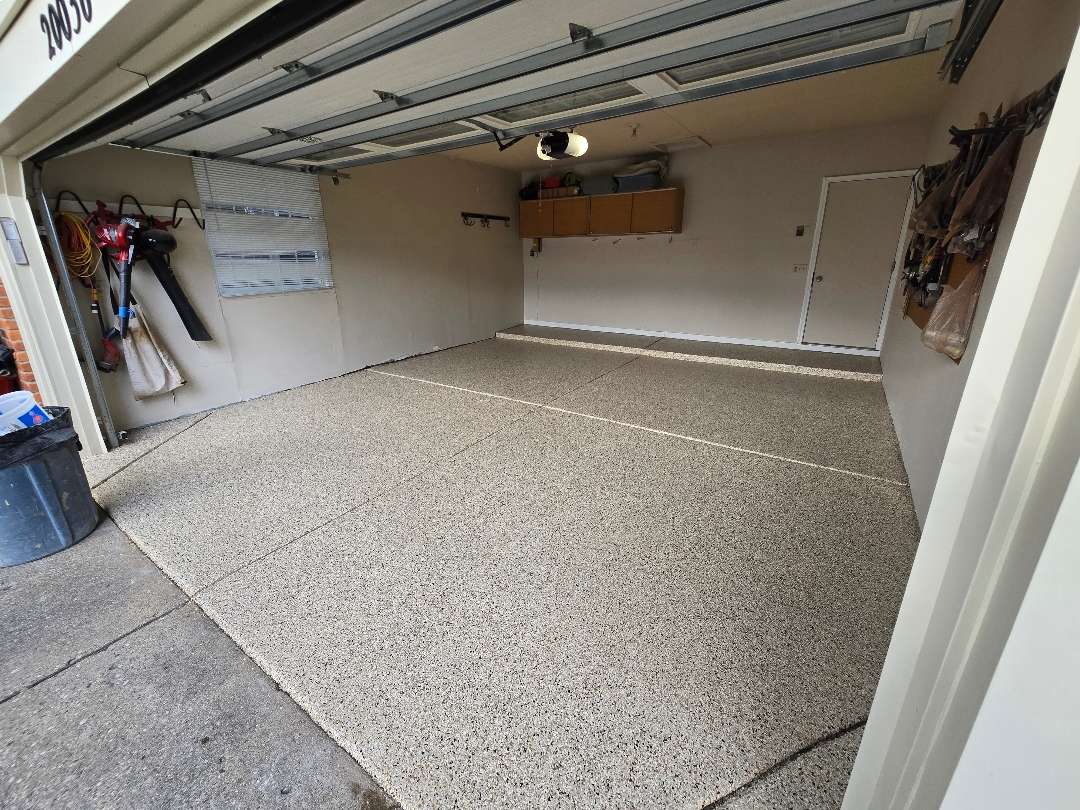
The single concrete step at the interior entry door was coated as part of the full scope. The after-photo dedicated to the step is worth noting: the Silver Creek chip blend wraps the tread, the riser, and the nosing in continuous coverage — no raw concrete edges, no color break between the floor and the step. It reads as part of the installation rather than an add-on, which is exactly what it should be.
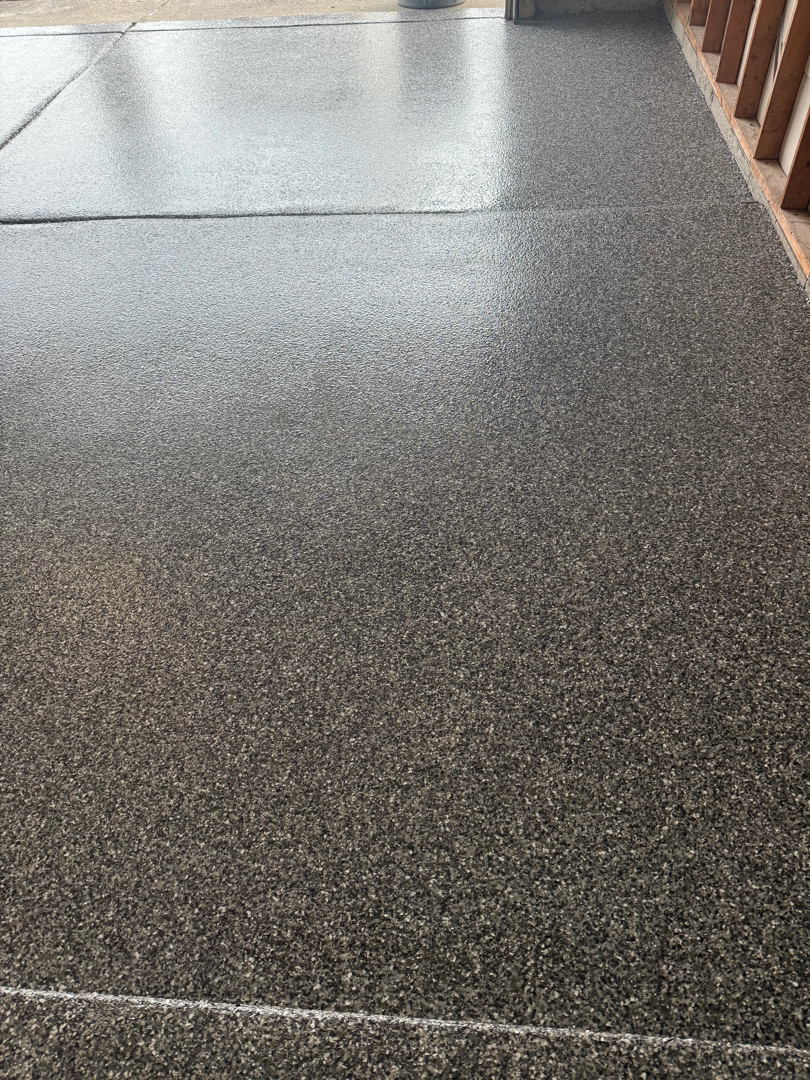
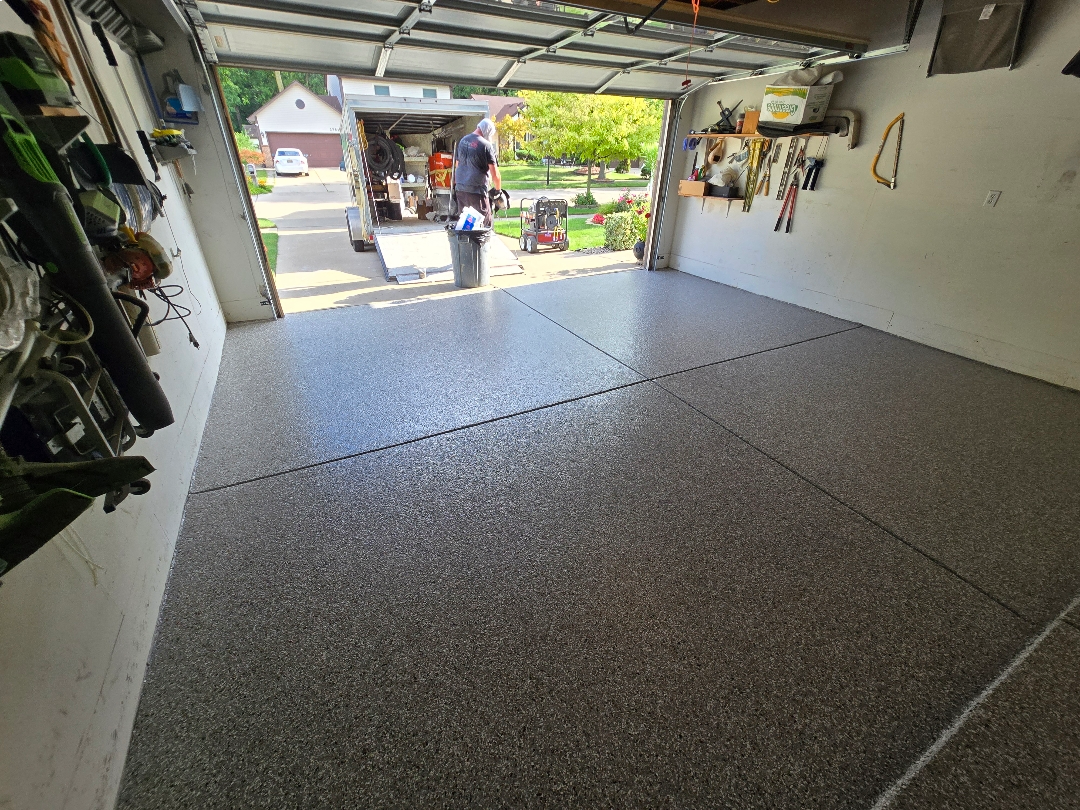
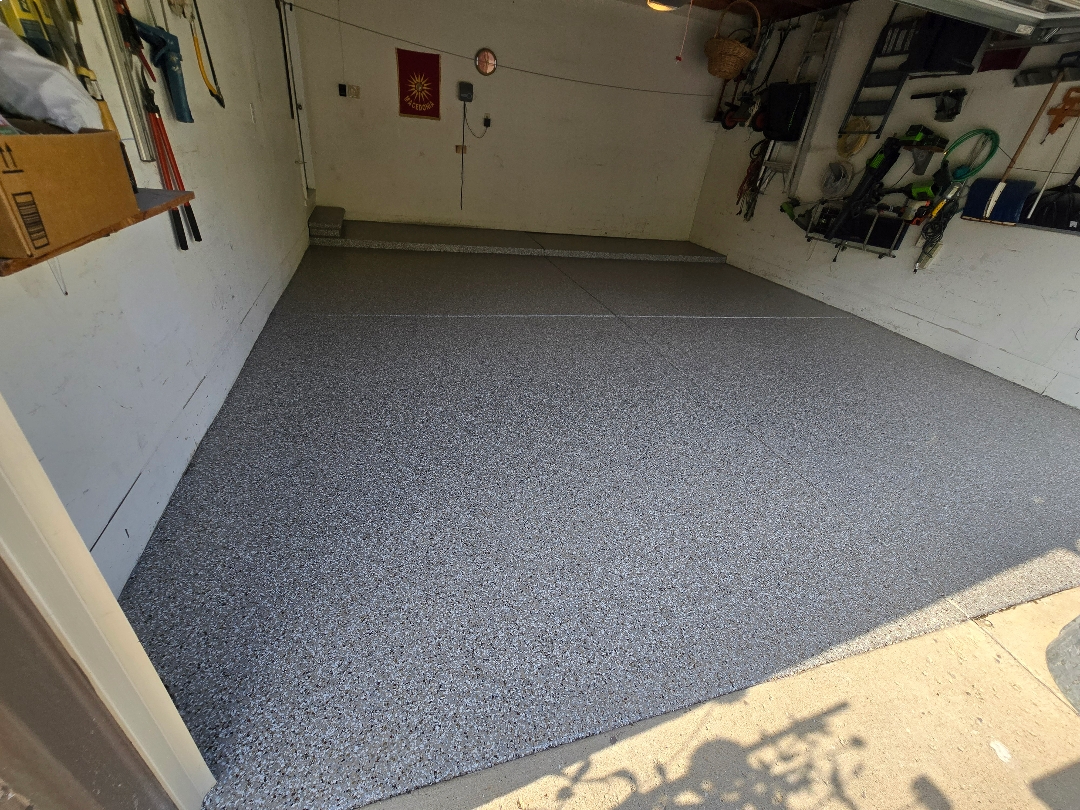
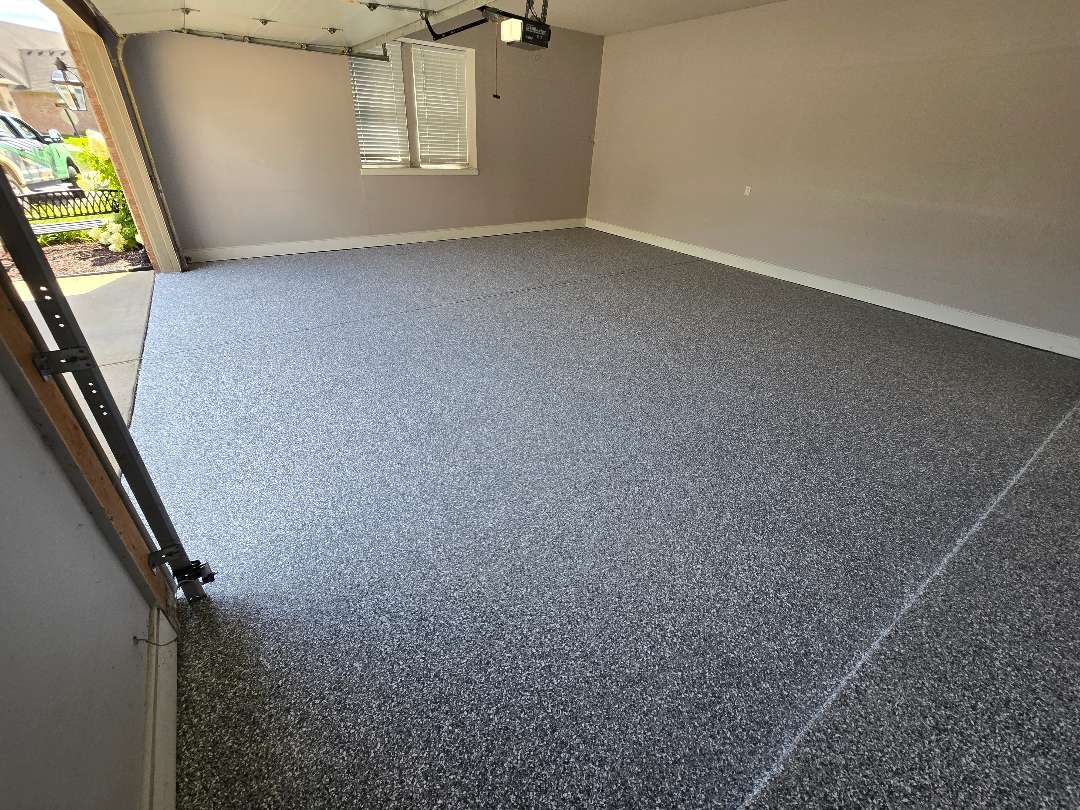
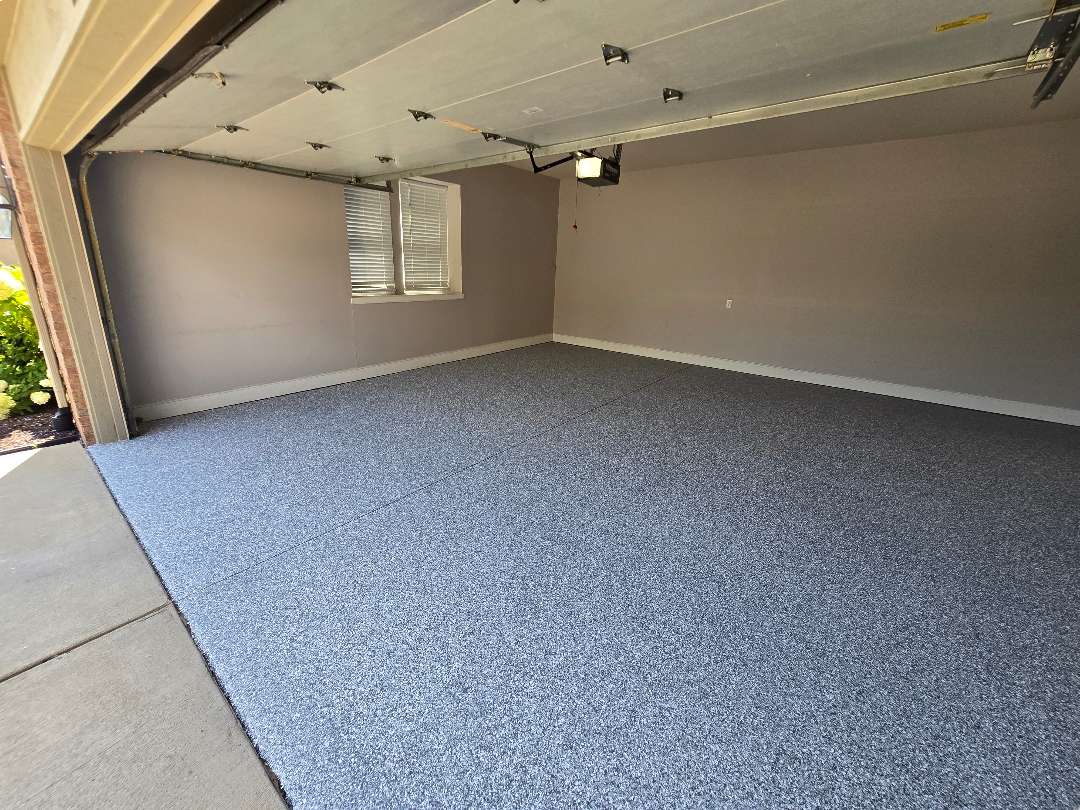
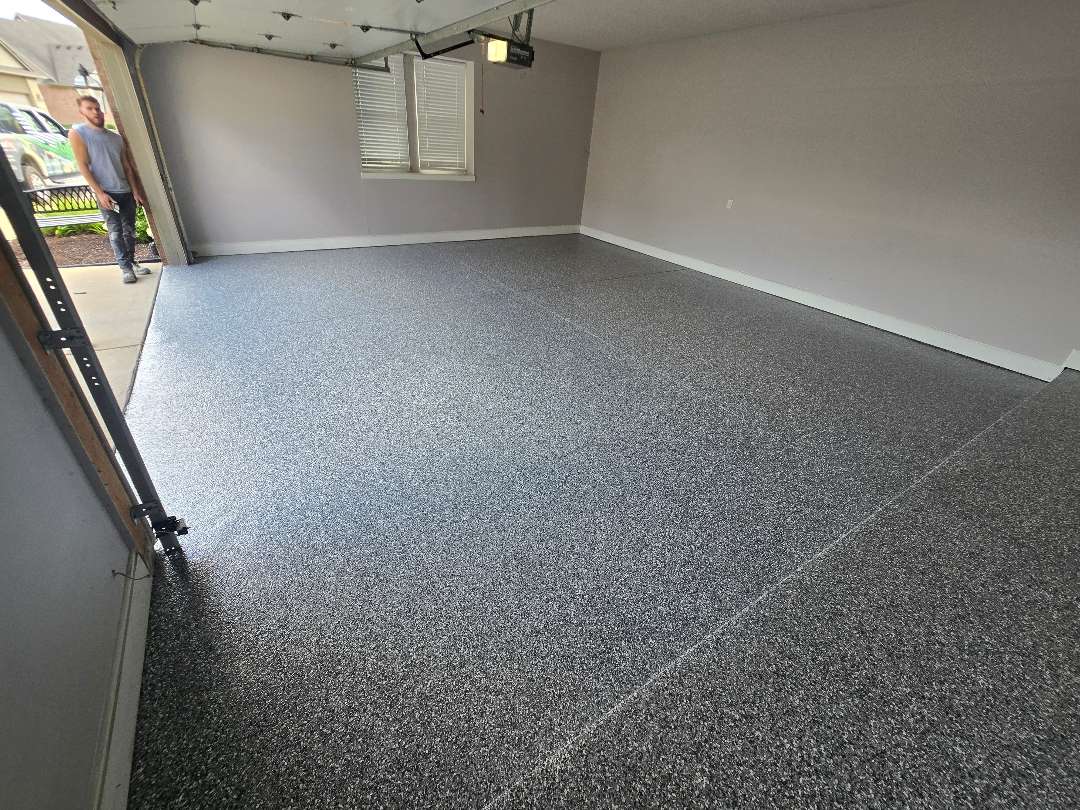
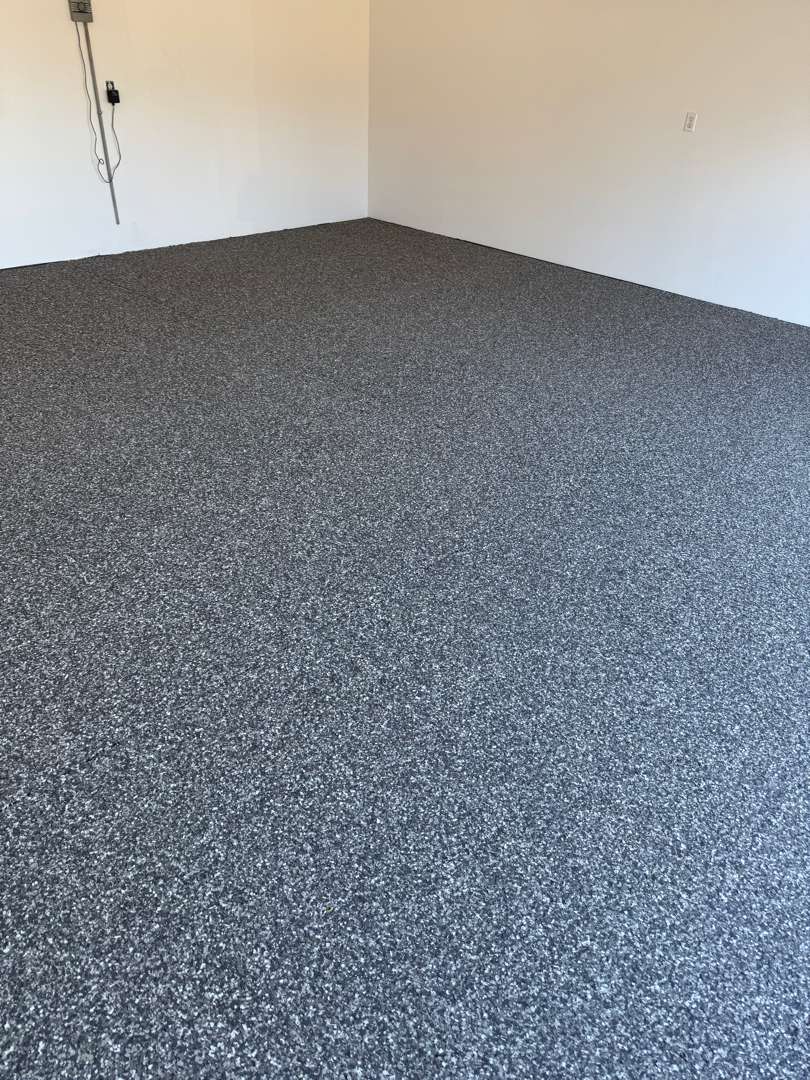
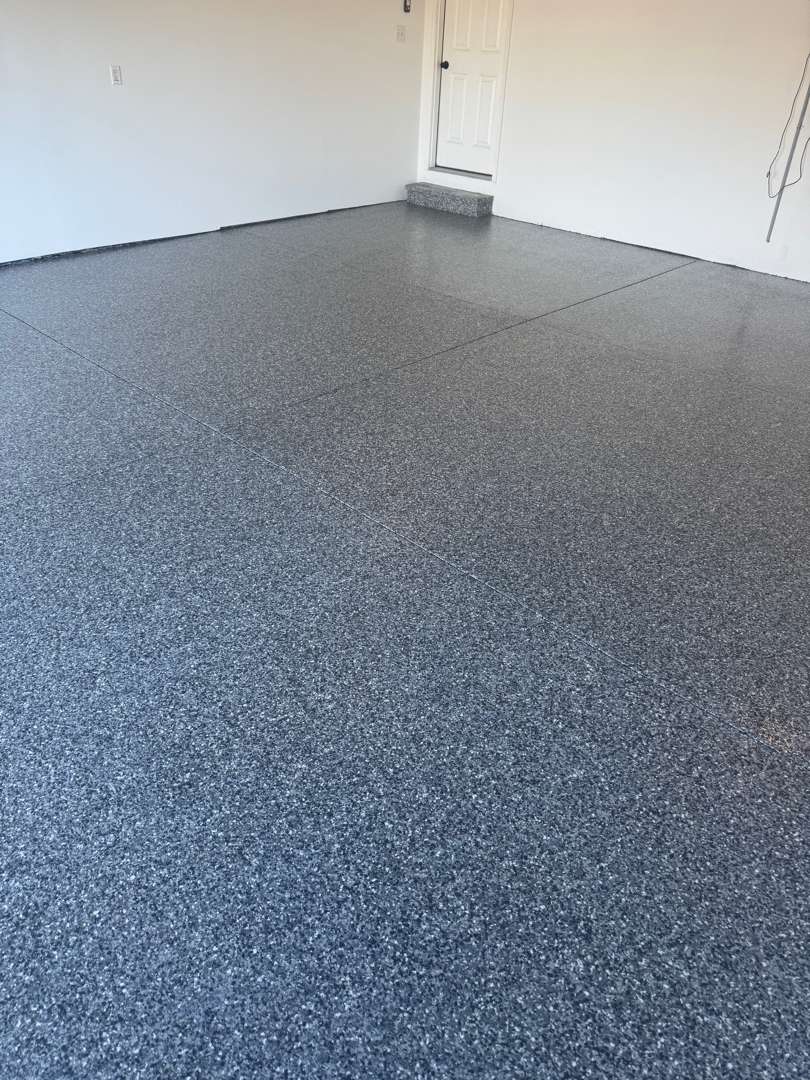
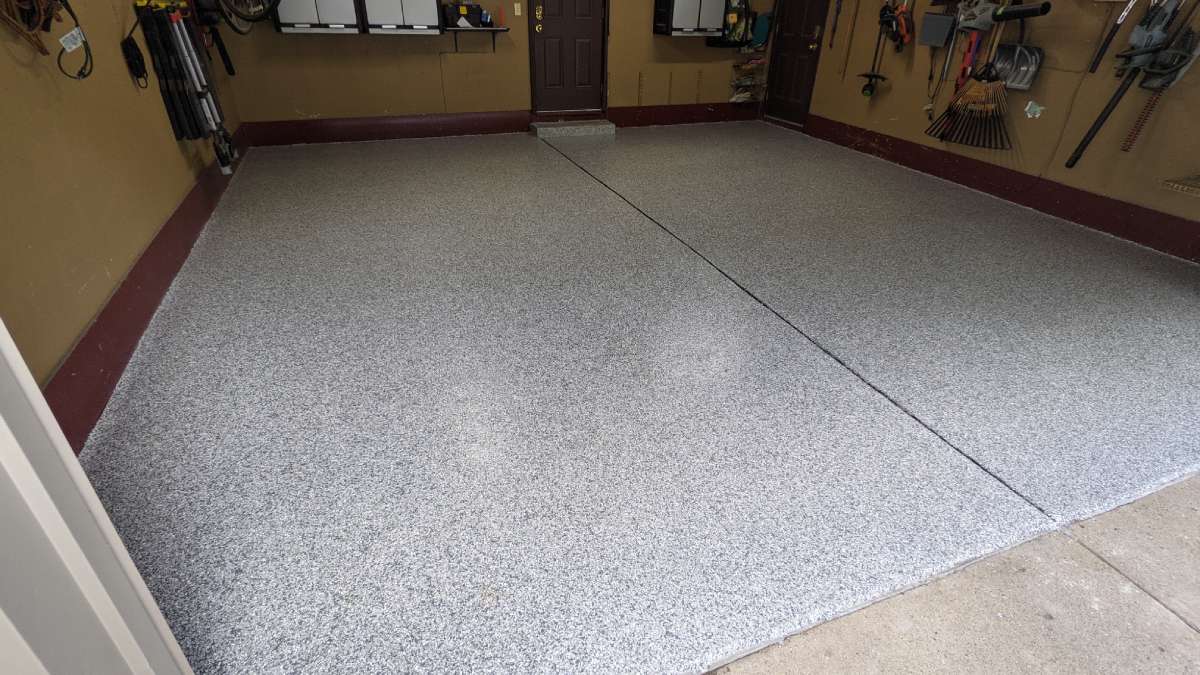
Silver Creek Against White
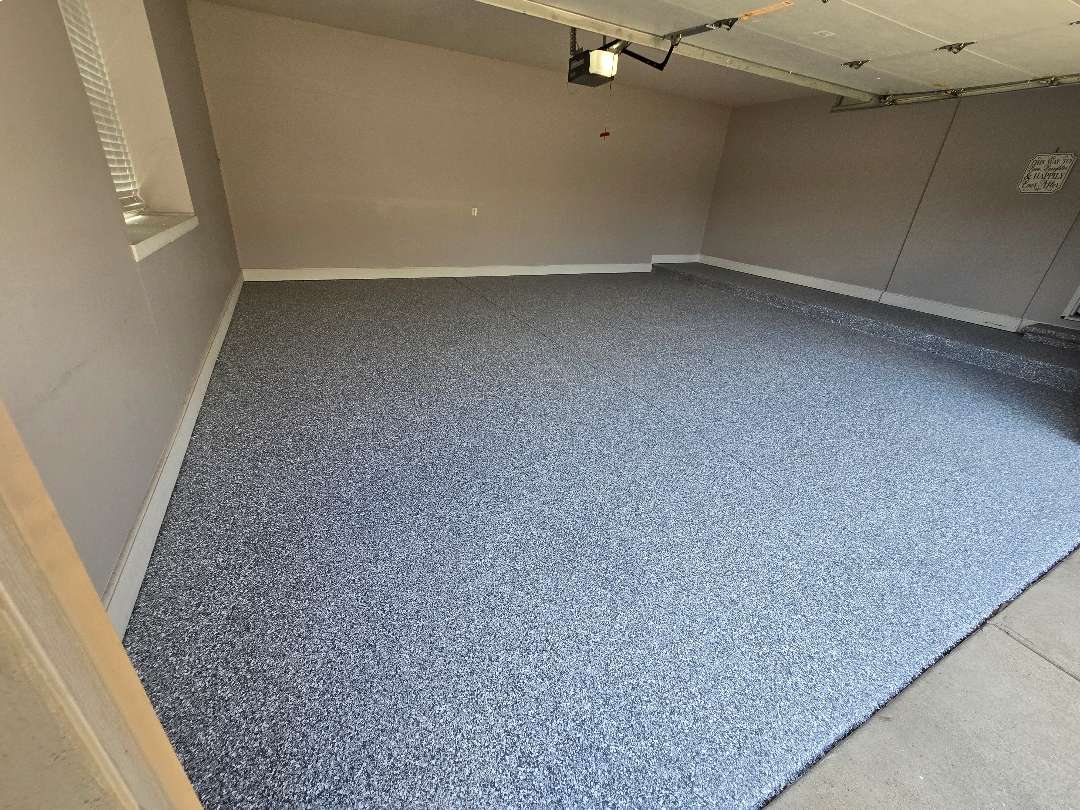
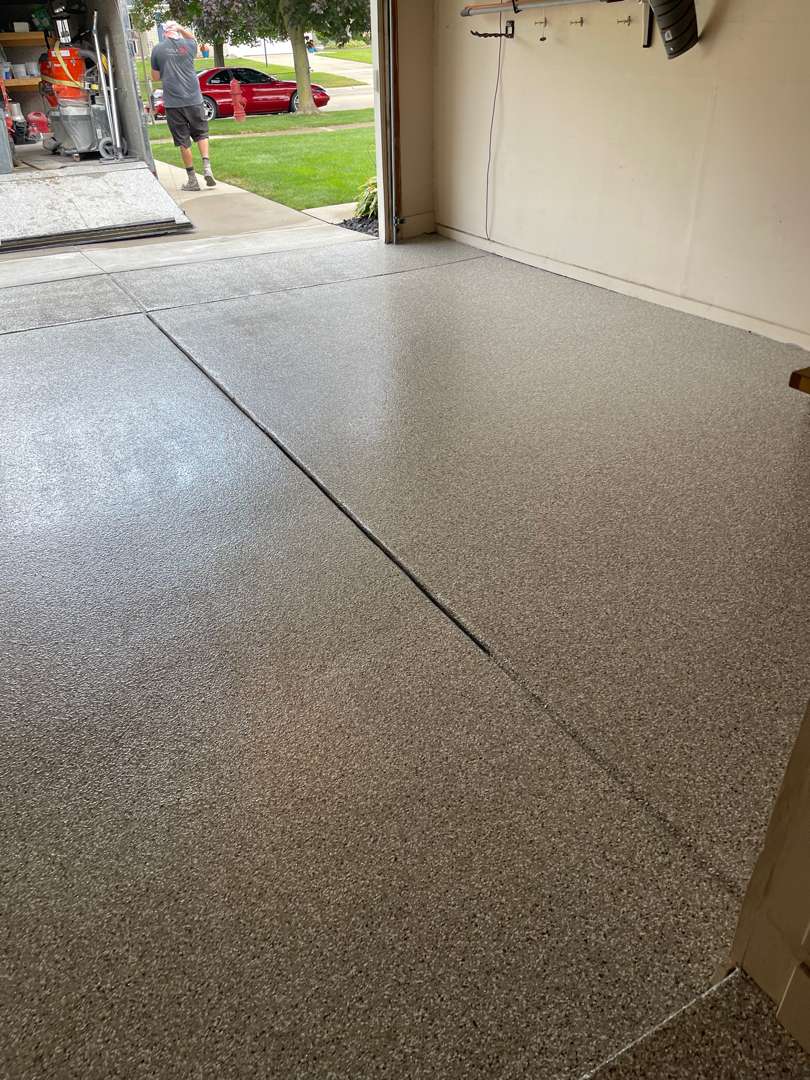
The Liberty Court garage has freshly painted white walls with no built-in shelving or wall-mounted storage to interrupt the sight lines — a clean, open space that turns the floor into the visual centerpiece. Silver Creek in that context is a strong choice. The deep charcoal and black chip tones with flashes of silver and white create a high-contrast pairing with the white walls that makes the floor look deliberately designed rather than incidental. Several of the after photos capture this: the floor fills the frame edge to edge, the control joints providing the only interruption to what is otherwise an unbroken plane of dark, textured coating.
Traction was specified at 16-grit — the coarser aggregate used on jobs where slip resistance needs to be more pronounced. On a floor this size, with a clean white environment that’s clearly intended to be well-maintained, matching the traction specification to the actual use case rather than defaulting to a lighter application is the right approach.
The Result
A 485-square-foot garage that started with oil-stained concrete and modest surface damage, finished with a full Silver Creek polyurea/polyaspartic system — floor, step, and all — in a space that now looks the way a serious garage should look.
The oil contamination is gone. The repairs are underneath the coating where they belong. The step matches the floor.
Liberty Court, Livonia. Clean walls, clean floor, clean installation.
Click on the photos to enlarge them
Garage Floor Coating
on Pollyanna Street
When the Floor Needs a Specialist First
Most garage floor coating projects follow a predictable sequence: inspect, grind, repair, coat. The 386-square-foot garage on Pollyanna Street required an extra step that doesn’t appear on most job sheets — a call to a floor leveling specialist before any coating work could begin.
The slab arrived with two overlapping problems. The first was a layer of paint that had been applied to the concrete at some point and had since deteriorated. The second, exposed once that paint was cut through, was severe pitting — and beneath the pitting, a floor that was significantly out of level. Not the kind of variation that patching compounds and a careful grind can address. The kind that requires A-1 Specialists, a concrete leveling contractor, to bring the slab back to a plane that a coating system can be applied over without telegraphing the underlying topography through to the surface.
Paint Removal and First Grind
The first grind photos document the scale of what the crew was working through. The before images show the slab contaminated with oil, surface debris, and the remnants of floor paint across large sections of the garage. As the diamond grinder passed through the paint layer, it broke the surface coating into chunks and smears visible in the mid-grind images — the floor looking progressively worse as the failing material was lifted, before the concrete beneath could be assessed.
What the first grind revealed confirmed the leveling call was the right one. The pitting was severe enough, and the surface variation pronounced enough, that proceeding directly to coating without remediation would have produced an unacceptable result.
Leveling, Flood Coat, and Second Grind
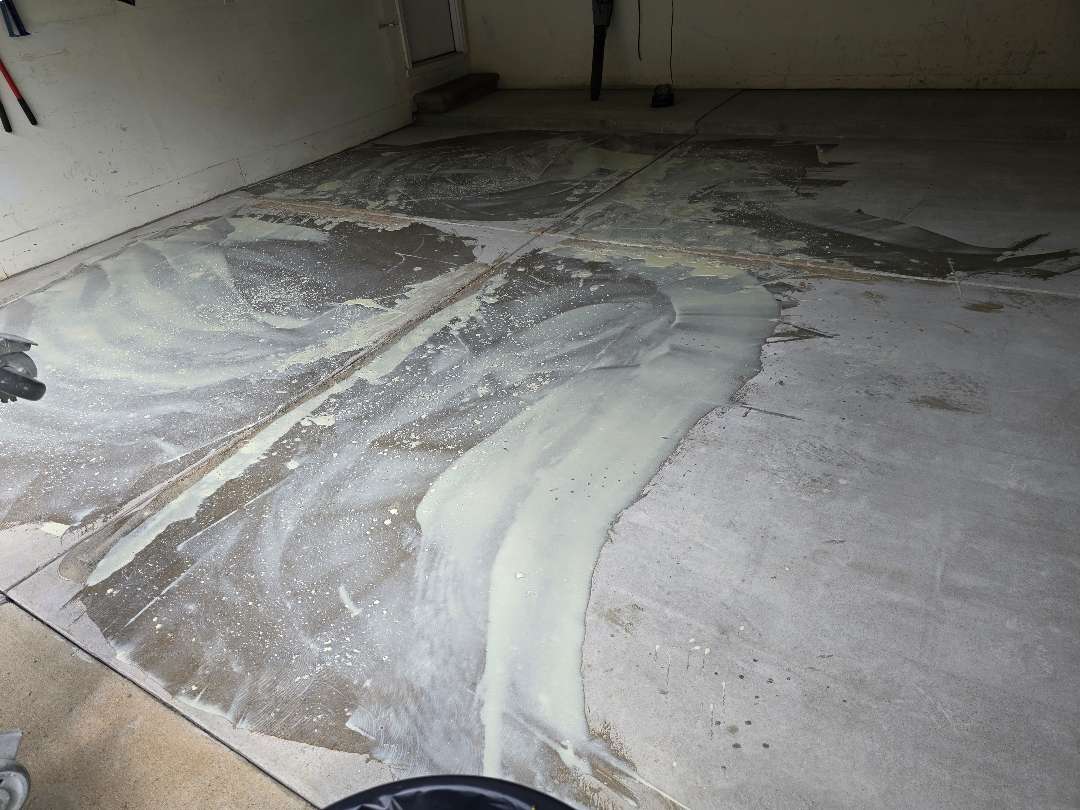
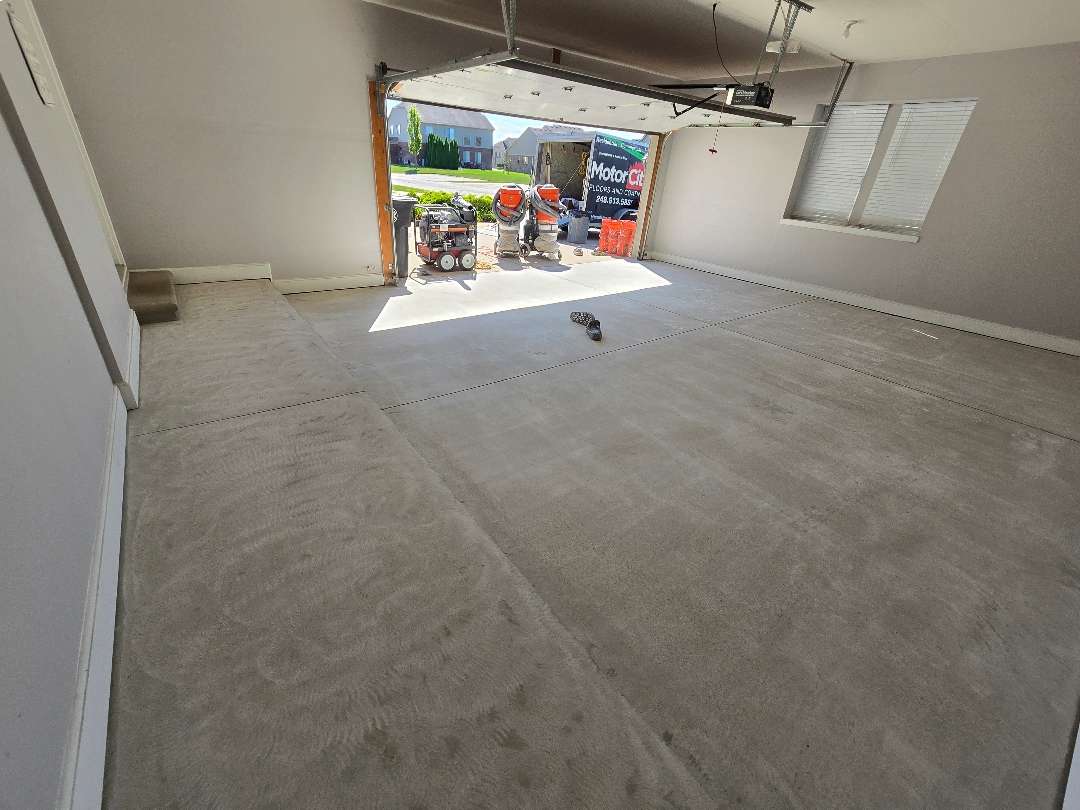
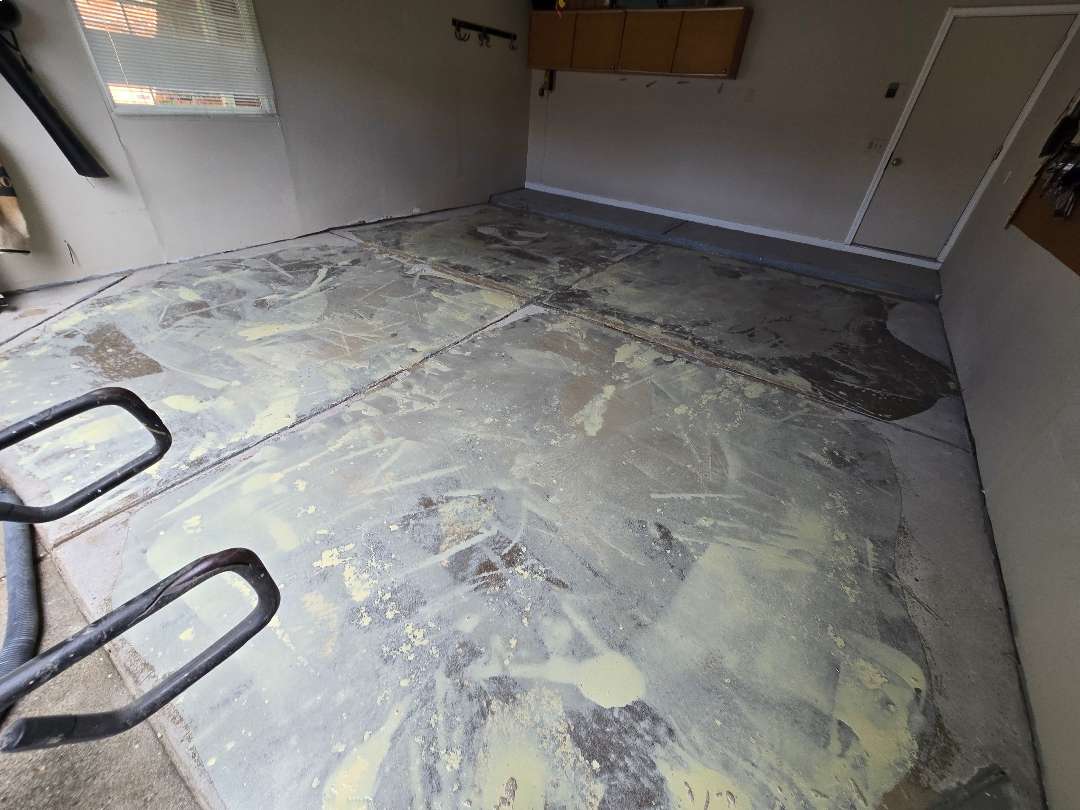
After A-1 Specialists completed the floor leveling work, the slab was flood-coated with repair compound — the images of this stage show the material spread in large, overlapping applications across the full floor plane, filling the pitting and evening the surface at a scale that spot patching alone cannot achieve. The flood coat photos show a floor in the middle of transformation: the grey-yellow repair compound layered across the concrete, the surface uneven and raw-looking but on its way to becoming workable.
Once the leveling compound cured, a second diamond grind knocked the repaired surface back to a flat, open-pore profile. The second grind photos show the result: a clean, uniformly profiled slab with the surface variation resolved and the pitting filled — a floor finally ready for primer and coating.
17 Linear Feet of Verticals
The 17 linear feet of vertical lip coating on this job carries the Driftwood system up off the floor plane and seals the wall-floor junction along the full perimeter scope. On a floor that took this much prep work to bring to a coatable condition, the vertical coverage is a finishing detail that matters — it closes out the installation and eliminates the raw concrete edge that would otherwise draw attention to itself.
Driftwood and 36-Grit Traction
Driftwood is a warm-toned chip blend — sandy tans, light browns, and soft greys with occasional darker flecks that give the floor texture without weight. It reads as warm and natural in the after photos, particularly in daylight: a floor that feels inviting rather than industrial, which is a different character than the dark Silver Creek and Slate Stone installs in this series but equally deliberate. Against the warm-toned walls of the Pollyanna Street garage, Driftwood sits in harmony rather than contrast.
Traction was specified at 36-grit — the coarsest aggregate in the system. On a floor that went through this level of remediation and leveling work, and on a slab that had already shown evidence of paint deterioration and severe surface damage, specifying maximum traction is a statement about how seriously the finished floor is meant to perform. H-4 hardener was used in the coating formulation, providing a denser, harder film than standard — appropriate for a substrate that needed every advantage to perform long-term after the damage it arrived with.
The Result
A 386-square-foot garage that arrived with failed floor paint, severe pitting, oil contamination, and a slab out of level — finished with a full Driftwood polyurea/polyaspartic system across the floor and 17 linear feet of verticals, after a scope of prep work that included outside specialist intervention, two grind stages, and a full flood coat.
The paint is gone. The pits are filled. The floor is level. The coating is bonded to concrete that was rebuilt to hold it.
Pollyanna Street, Livonia. The hardest kind of job, done properly.
Click on the photos to enlarge them
Garage Floor Coating
on Summers Street
Summers Street, Livonia, MI
When the Old Coating Has to Go
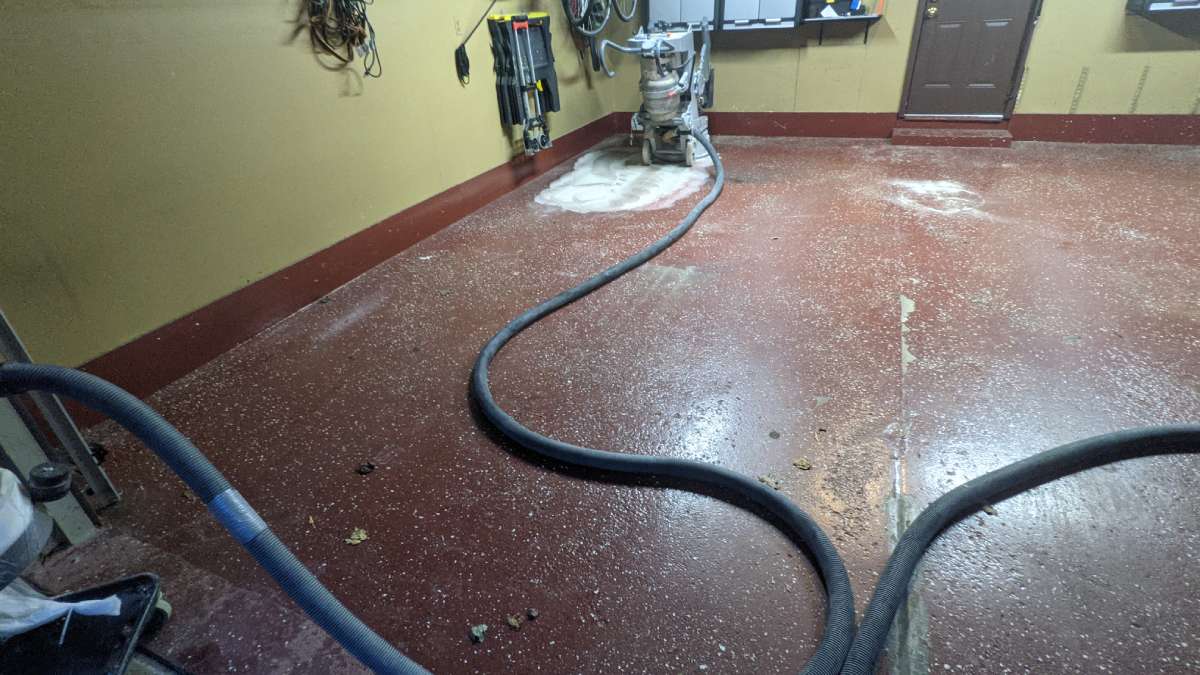
The 420-square-foot garage on Summers Street arrived with an existing floor coating — a red flake epoxy system installed at some earlier point. It was failing.
The red base coat had separated in areas. White flake chips from the original installation had lifted and scattered across the surface. The coating was no longer bonded. It was no longer functional.
The decision to recoat rather than coat over it was the right one. Applying polyurea over a delaminating epoxy means bonding to the old coating, not to concrete. Our crew removed it entirely.
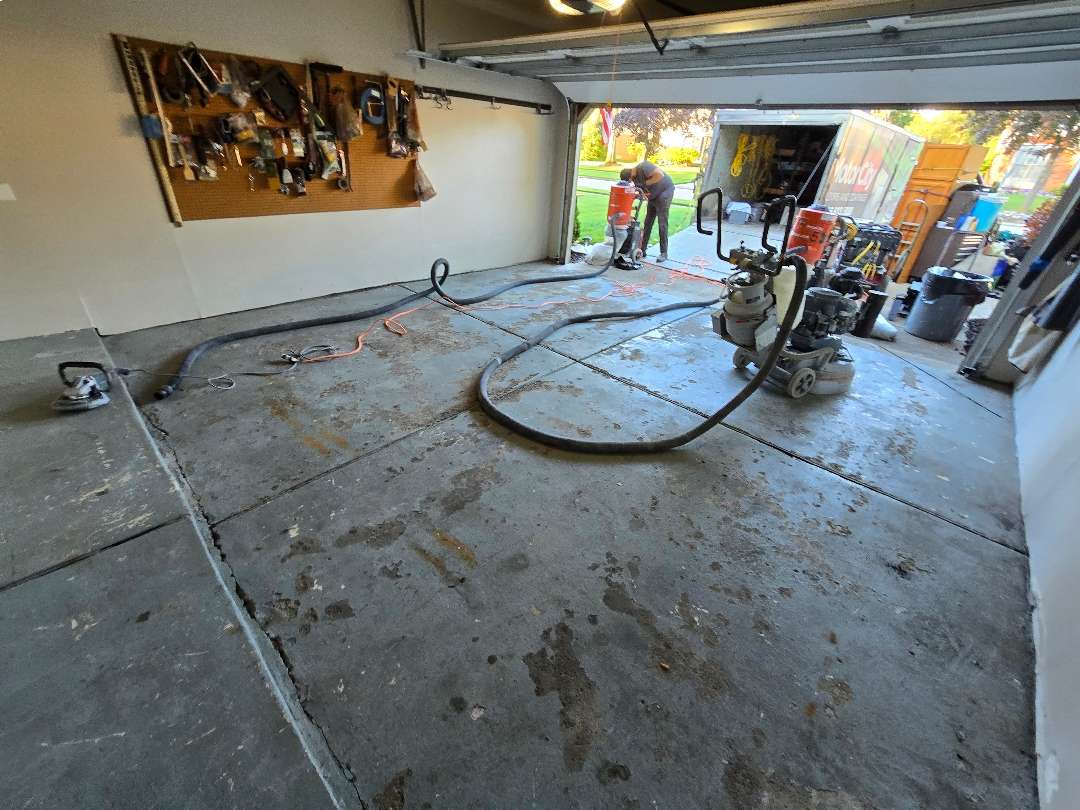
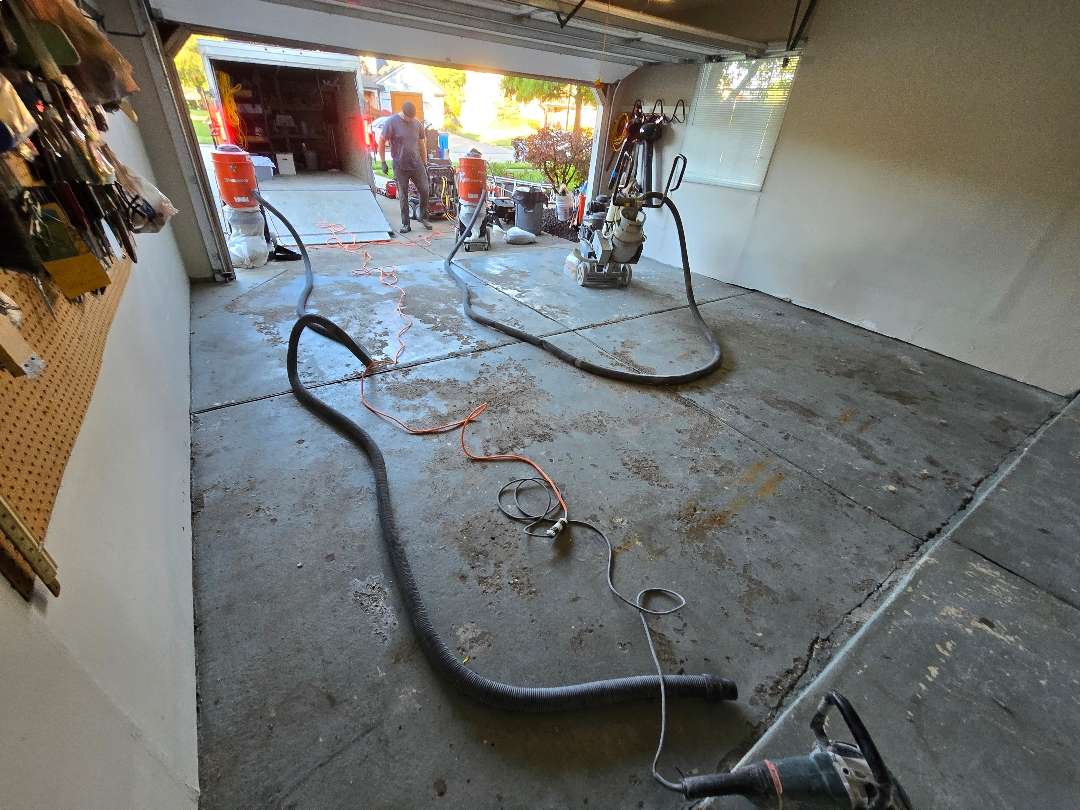
Epoxy Removal and Surface Preparation
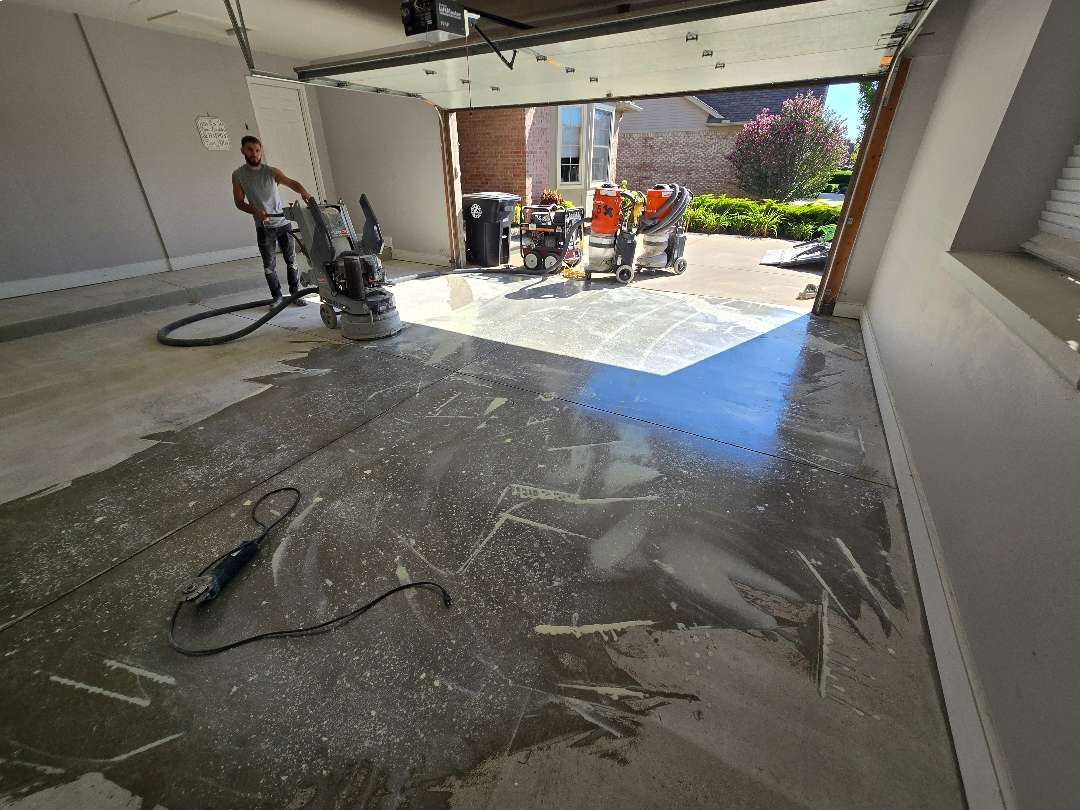
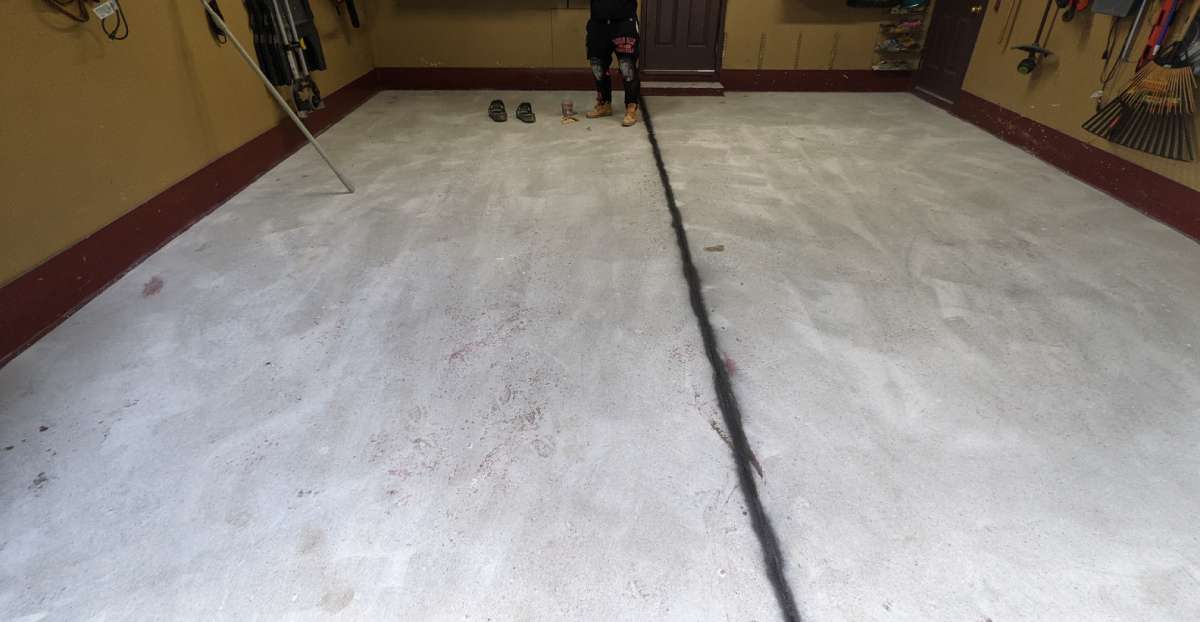
Our crew ran a diamond grinder across the full 420 square feet. The grinder cut through the epoxy layer and lifted it off the concrete.
The vacuum system captured the debris as the tooling worked. The before-and-after of the grinding stage is visible in the two process photos.
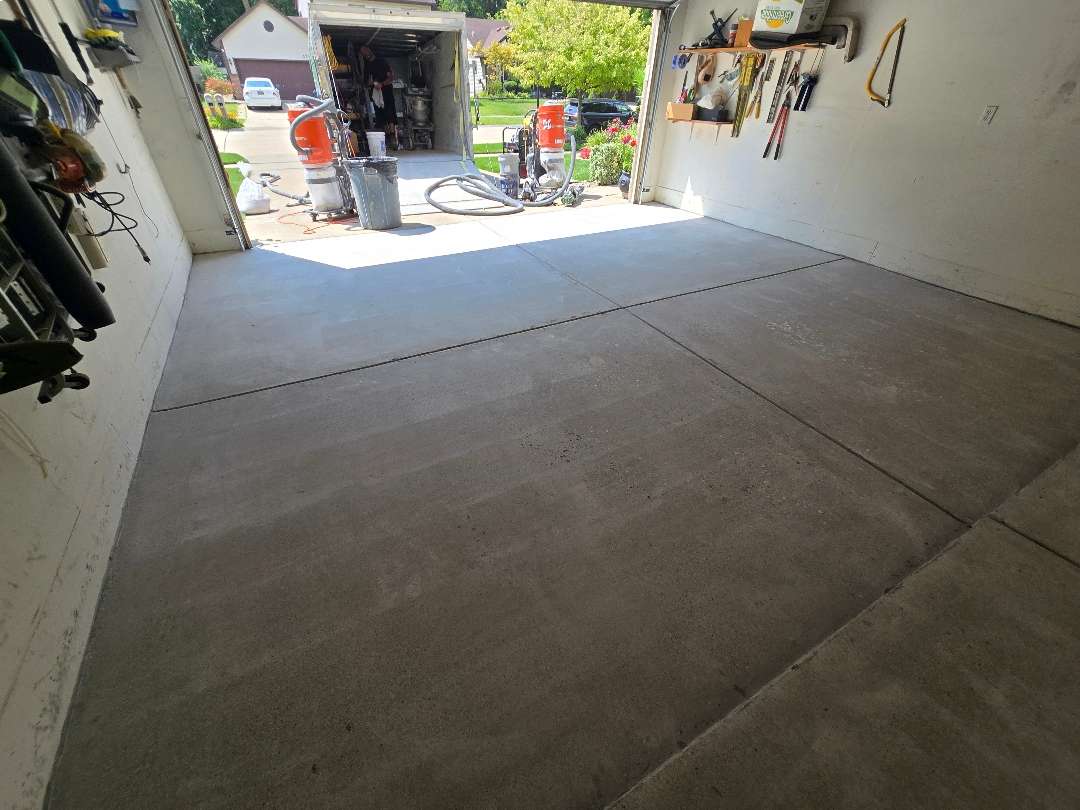
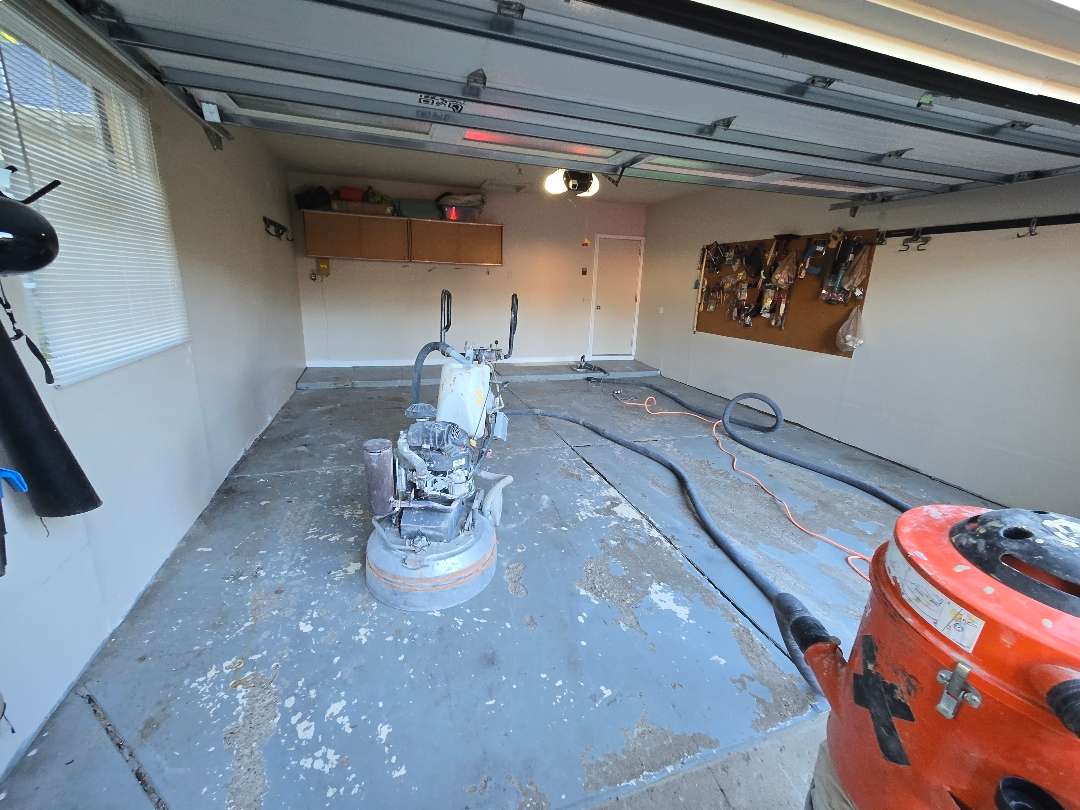
The in-progress shot shows the grinder working the rear of the garage. Red epoxy residue still covers most of the slab. The machine moves systematically across the floor, section by section.
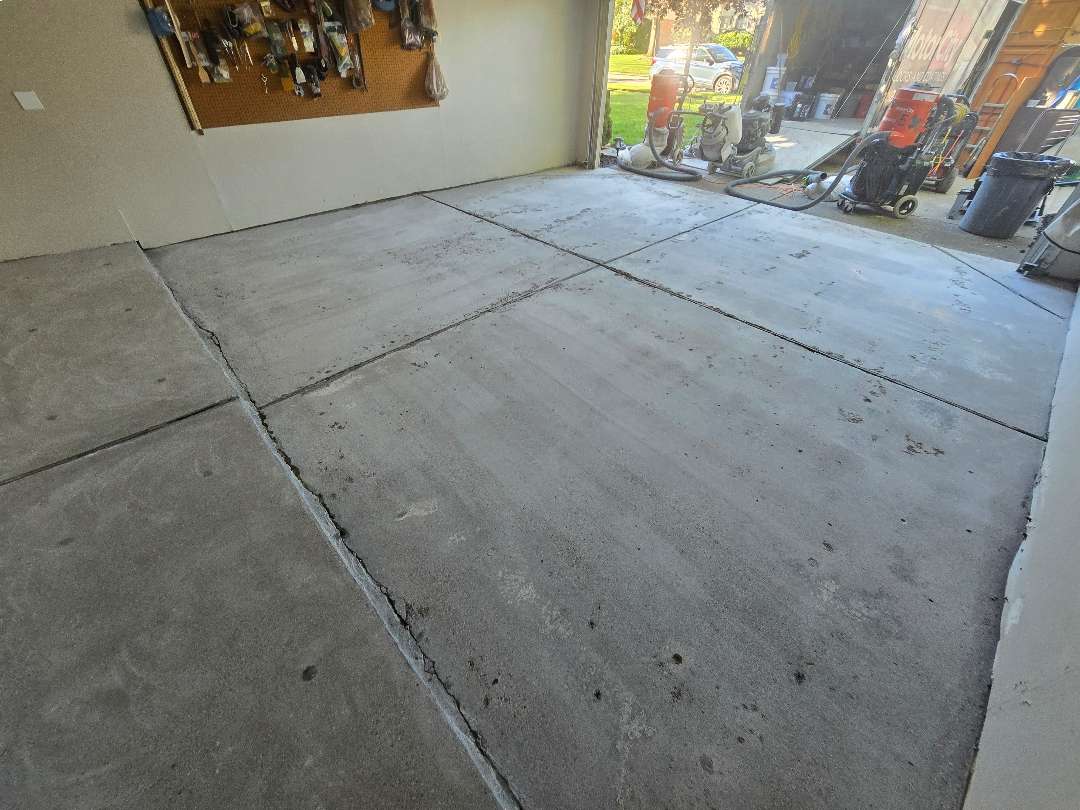
The completed-grind shot shows the result: grey, uniformly profiled concrete across the full floor. The slab is clean and open-pored. One control joint crack runs the length of the floor — visible and accounted for.
Light Surface Repairs
The floor was in good structural condition once the epoxy was off. Our crew identified areas of light surface damage and addressed them before coating.
The control joint crack received polyurea filler. Polyurea bonds to concrete and flexes under load without cracking back out. Our crew feathered the fill flush with the surrounding slab.
The repairs were limited in scope. No flood coat, no leveling work — just targeted fills and a clean, profiled surface ready for the base coat.
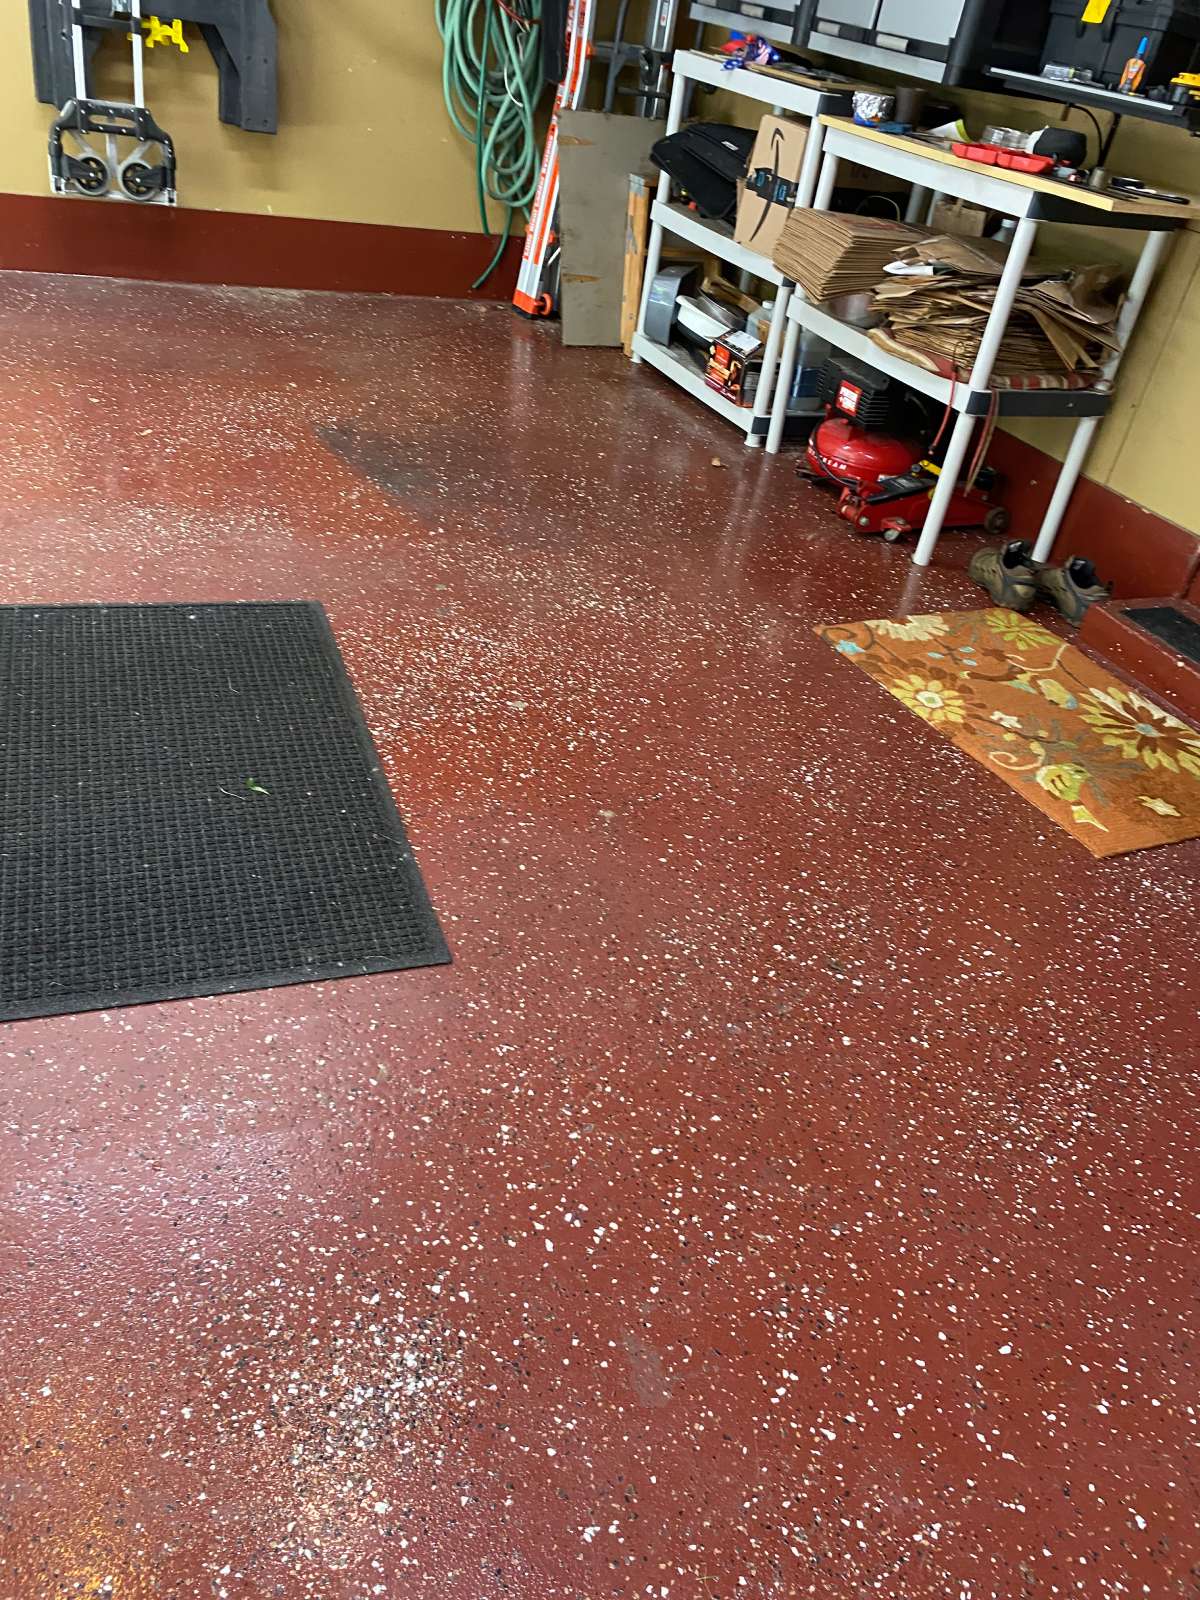
Slatestone on a Grey Base
The homeowner selected Slatestone on a grey base — a cooler, more architectural tone than the warm-colored coating it replaced.
Slatestone is a grey-dominant chip blend. The flakes carry charcoal, white, and mid-grey tones that read as uniform and textured across a large floor area.
Our crew applied the MR 50 base coat, broadcast the Slatestone flake blend into the wet film, and finished with a polyaspartic clear coat. The system went down in a single coating day.
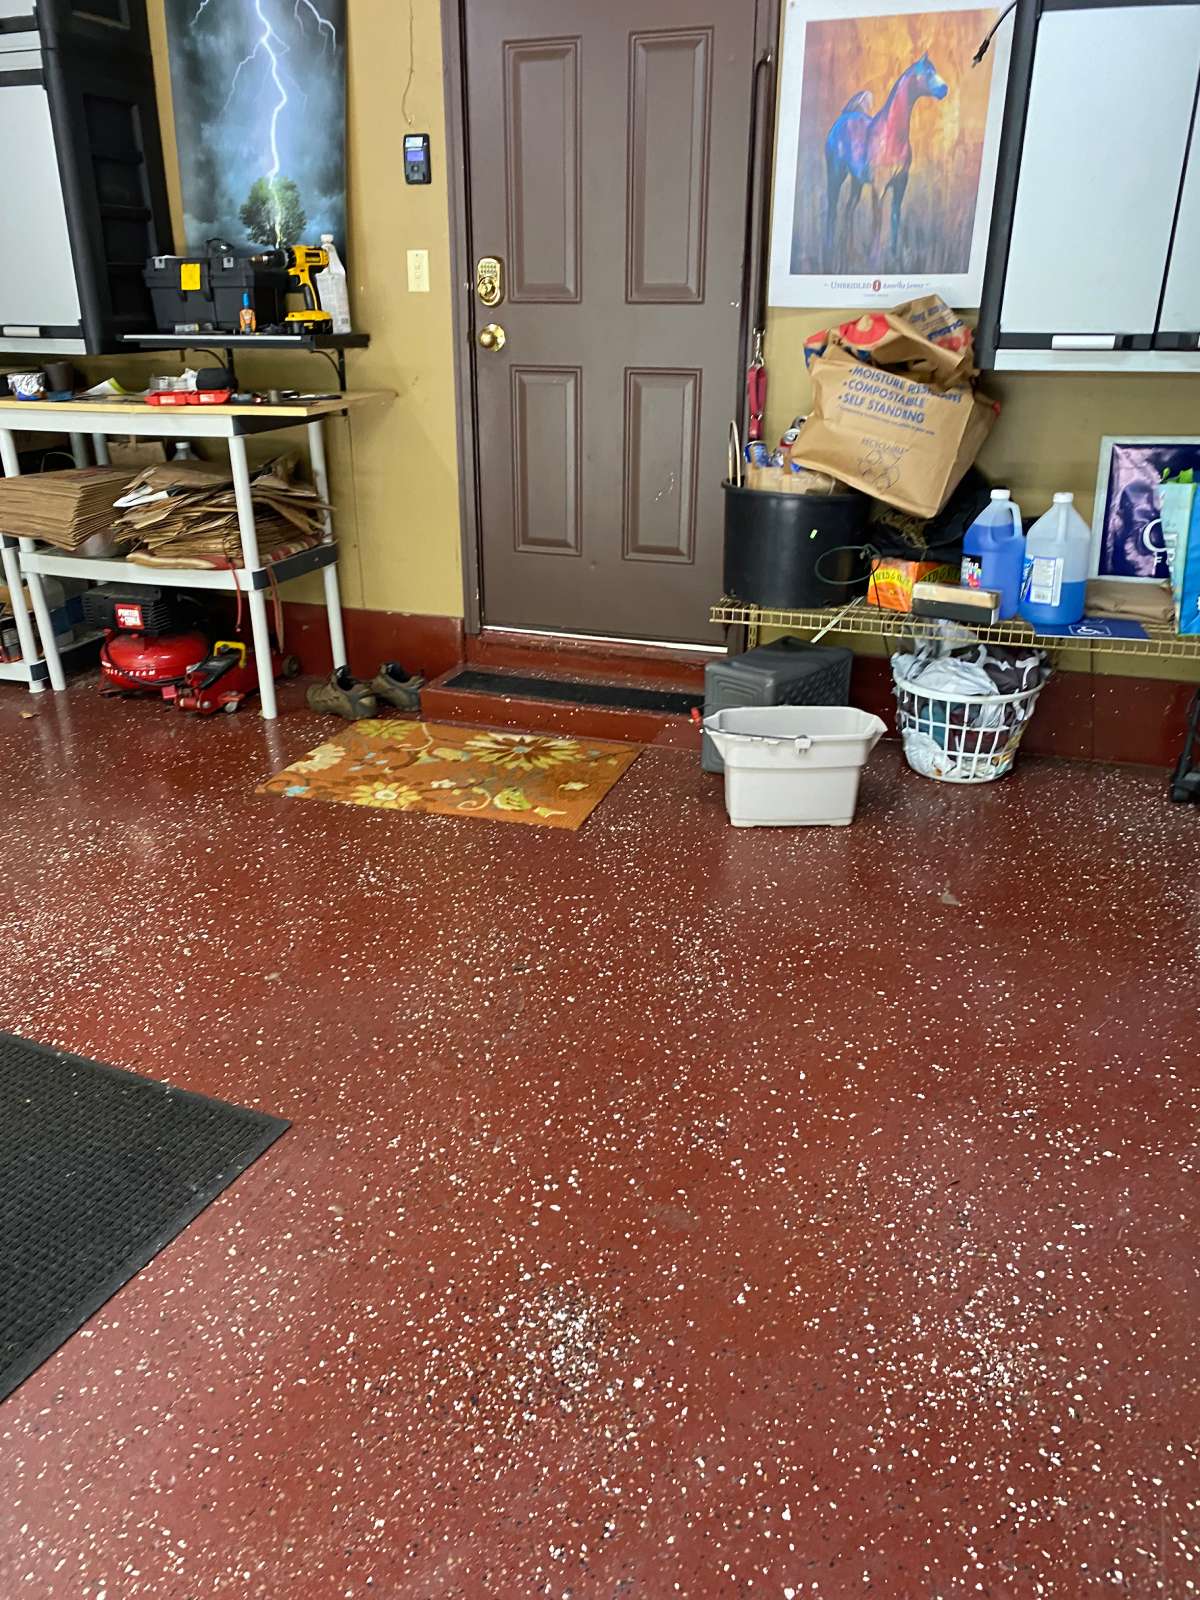
The after photos show the floor under interior lighting. The Slatestone blend is dense and even. The control joint is visible as a seam in the surface — correct. Joints are filled and sealed, not hidden.
The Result
A 420-square-foot garage that arrived with a failing red epoxy coating — delaminating, chipping, no longer bonded to the concrete beneath it.
Our crew removed the old system entirely, profiled the slab to bare concrete, addressed light surface damage, and applied a full Slatestone polyurea/polyaspartic system.
The epoxy is gone. The surface is clean. The new coating is bonded to concrete, not to the remains of what came before it.
Summers Street, Livonia. A failed epoxy floor, removed and replaced properly.
Click on the photos to enlarge them
