
Polyurea-Polyaspartic Garage Floor Coating in Royal Oak, Mi
QUESTIONS? NEED A QUOTE?
Polyurea-Polyaspartic Garage Floor Coating in Royal Oak, Mi
New Garage Floor Coating in Royal Oak Homes: Transforming a Garage Into a Living Space
The 5 examples of garage floor coating in Royal Oak documented on this page show before/after photos and a full explanation of the installation process and challenges. You will discover how our dual-layer polyurea-polyaspartic floor coating system transforms a garage into a nice, functional, family-friendly space.
MotorCity Floors and Coatings has been installing garage floor coating systems in Royal Oak for several years, and our crews met a wide variety of situations with the concrete slab that forms the base of a garage. Each garage has its own story, and we have developed a real expertise in assessing the condition of the concrete to prep it up correctly before installing the floor coating system.
Professional Garage Floor Coatings
Our Michigan climate subjects garage floors to significant stress. Winter road salt and freeze-thaw cycles combine with automotive fluids and -in-and-out traffic to degrade unprotected concrete progressively. Typically, surfaces are stained, pitted, oily, and generally looking poor. Professional polyurea-polyaspartic coating systems provide a long-lasting, comprehensive protection. They also deliver an aesthetic appeal that bare concrete or older epoxy products can’t rival.
The MotorCity Advantage
MotorCity Floors and Coatings specializes exclusively in professional-grade polyurea-polyaspartic systems. We don’t compromise with inferior epoxy products. Our advanced coatings deliver superior chemical resistance, exceptional durability, rapid cure times, and UV stability that maintains color for decades. We also back up our work with an industry-leading warranty.
Every installation includes comprehensive diamond grinding preparation, flexible polyurea crack repair, and meticulous application ensuring uniform coverage. This quality commitment has built our reputation in Royal Oak as a trusted garage floor coating contractor. Proof of the pudding? In these case studies, you will see two jobs we did in the same street: a neighbor checked out our work and the result impressed him. He ordered the same floor coating for his own garage.
Royal Oak Case Studies
These case studies document actual jobs of garage floor coating in Royal Oak. Look at the photo galleries to see how the garage concrete slabs looked before, and how they were progressively transformed during our work.
From a modern detached garage on E. Harrison Ave. with an extensive cove base, to a new construction project on Glenview Ave., from an oil-stained restoration on Woodsboro Dr. to an epoxy removal job followed by a two-tone design in on Hendrie Blvd., These projects illustrate the versatility of polyurea-polyaspartic systems. They also show that MotorCity Floors and Coatings is consistently commited to delivering quality garage floor coatings.
Each case study provides detailed documentation of substrate conditions, preparation protocols, repair procedures, and finished results. We want to show why our dual-lyer garage floor coating systems have become the preferred choice for Royal Oak homeowners. They enhance the value and looks of a property for decades to come.
Polyurea Garage Floor Coating on Woodsboro Drive, in Royal Oak
Project Overview
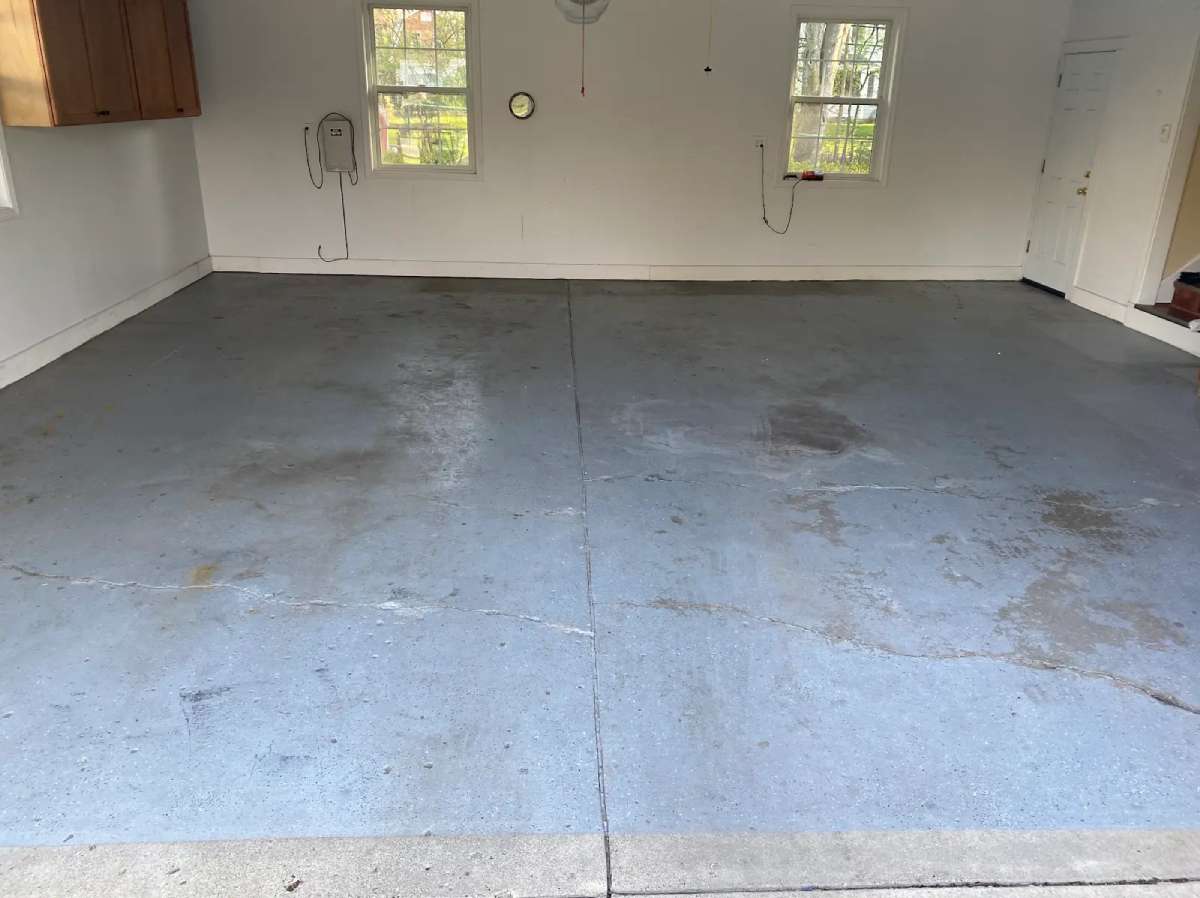
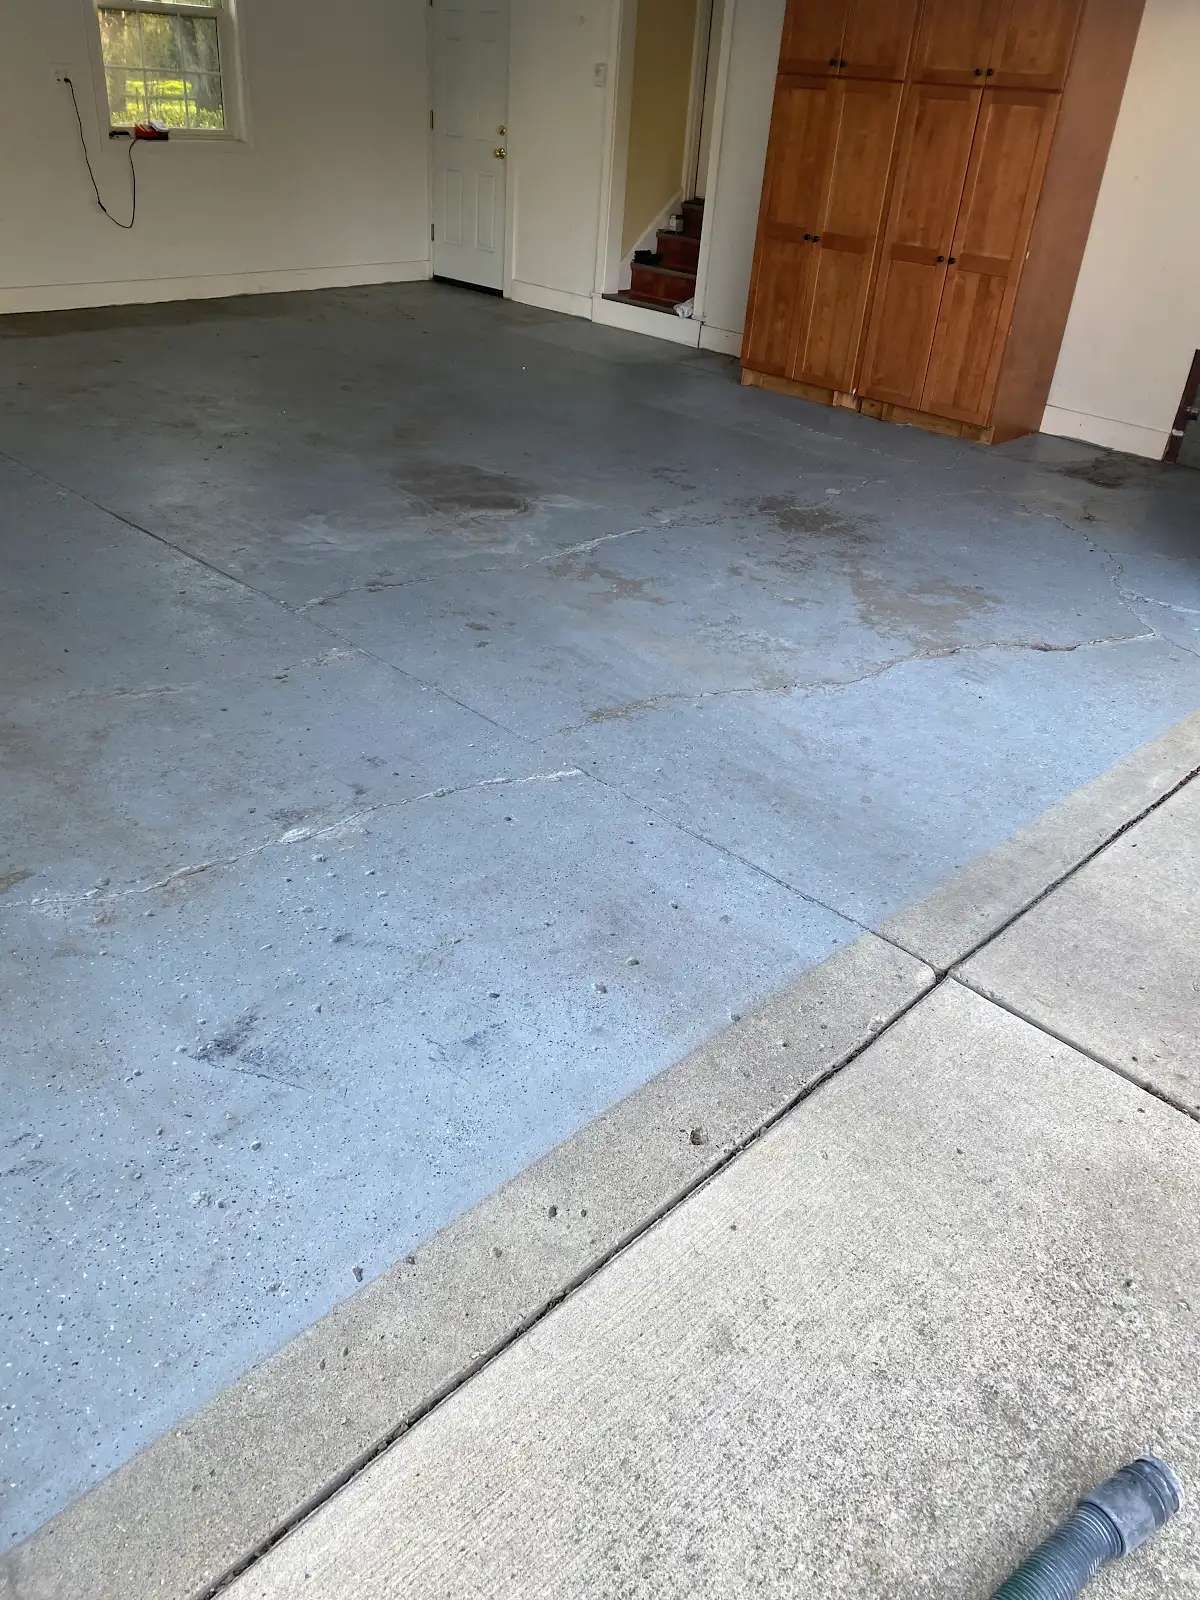
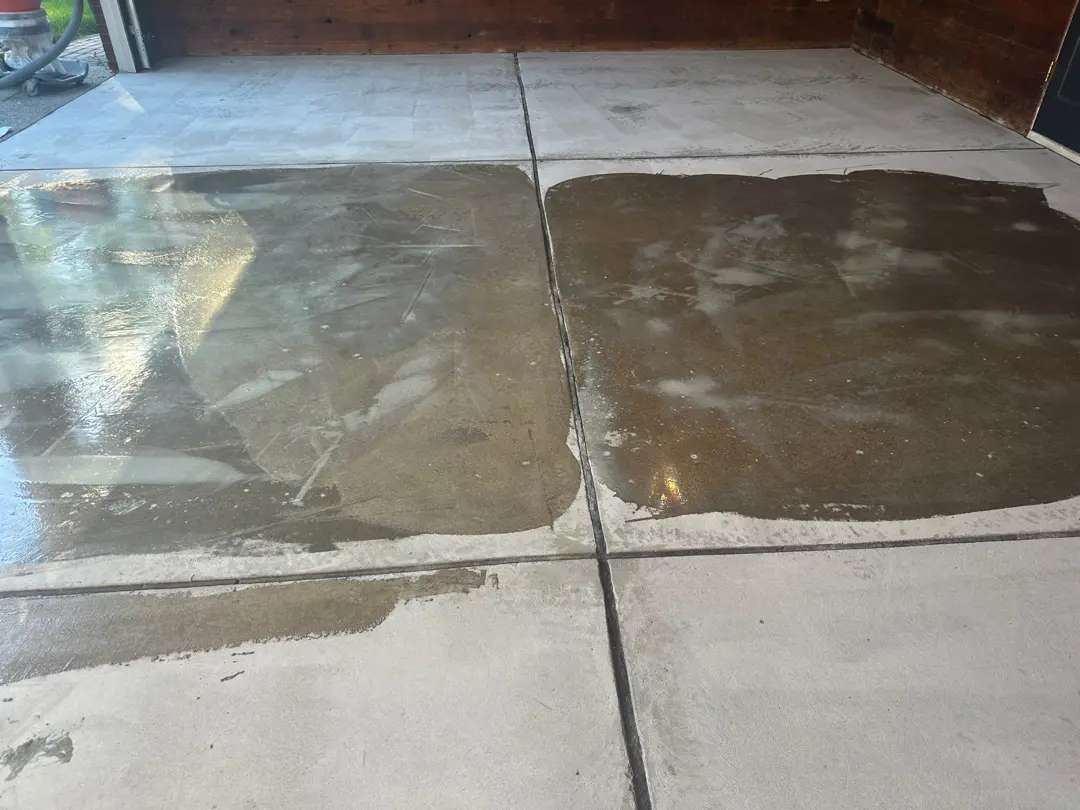
The homeowners at this Royal Oak residence contacted MotorCity Floors and Coatings to address a severely deteriorated garage floor. The 600-square-foot detached garage featured concrete in advanced stages of distress, with extensive structural cracking, widespread surface pitting, and a failing epoxy coating requiring complete removal. This project was a very challenging substrate that required comprehensive concrete repair, multiple preparation phases, and meticulous structural integrity restoration.
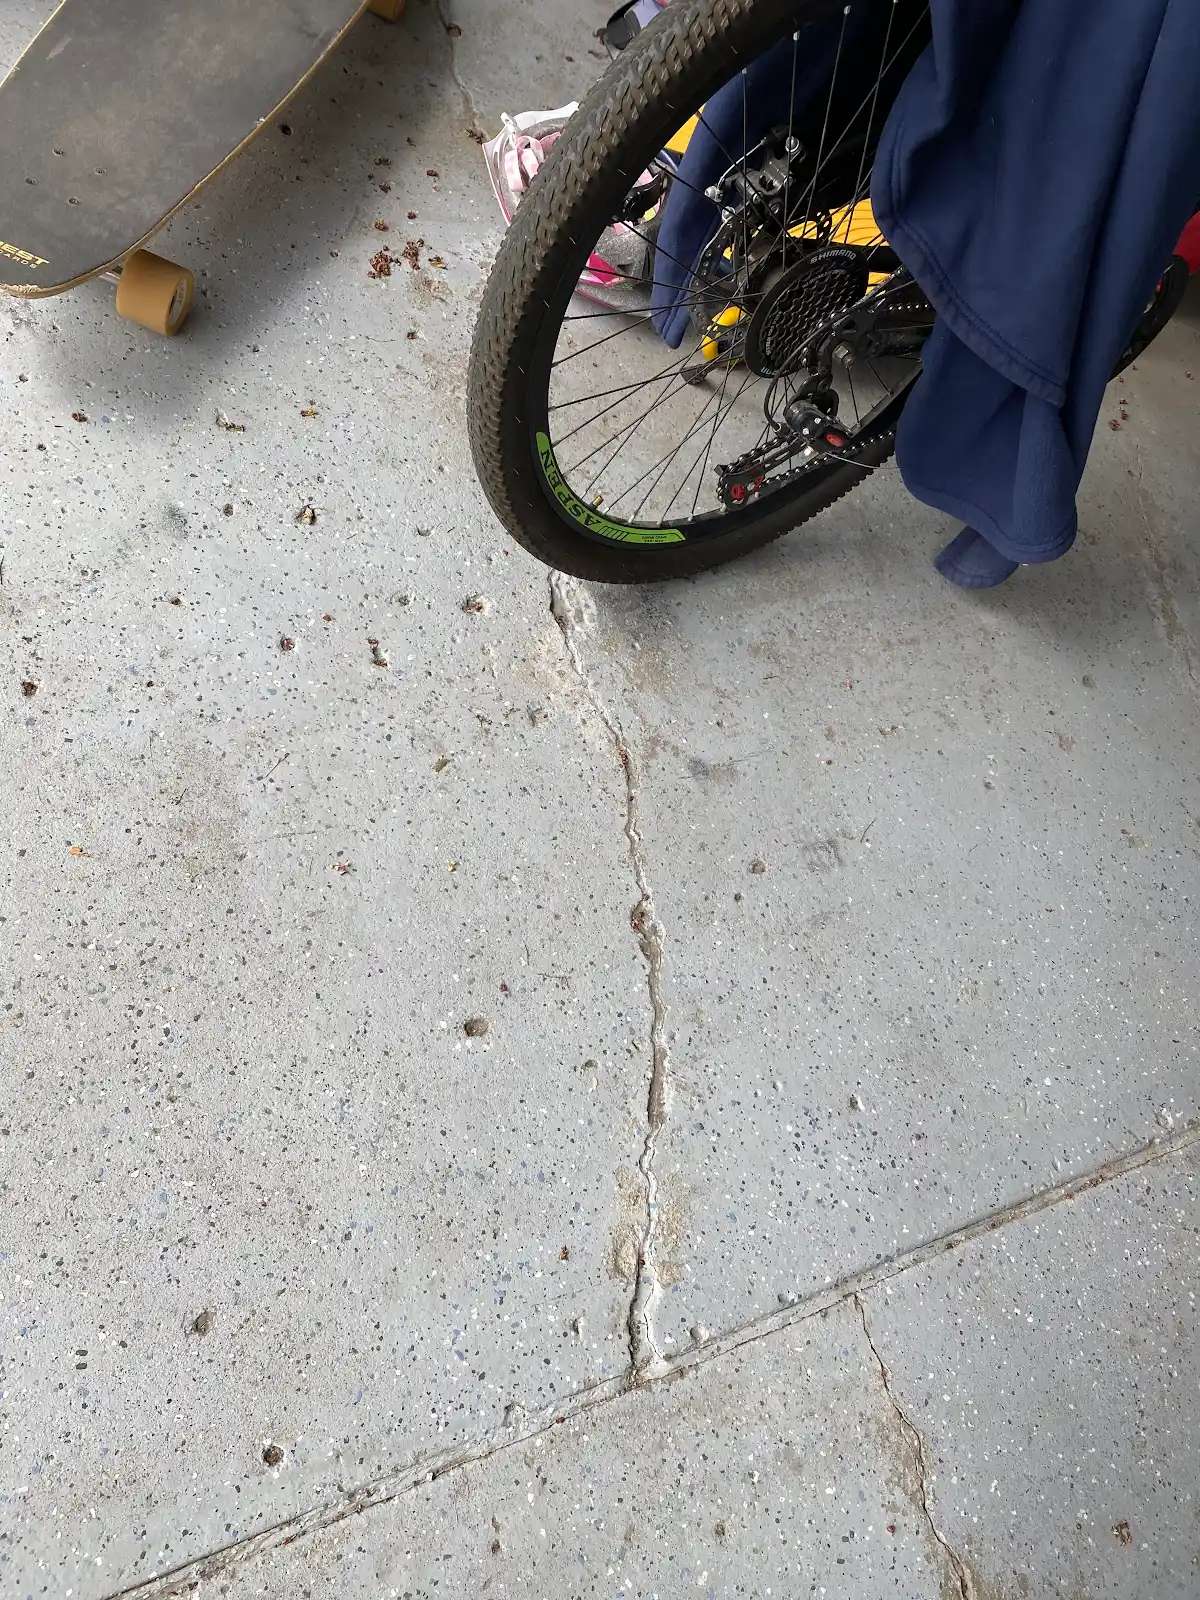
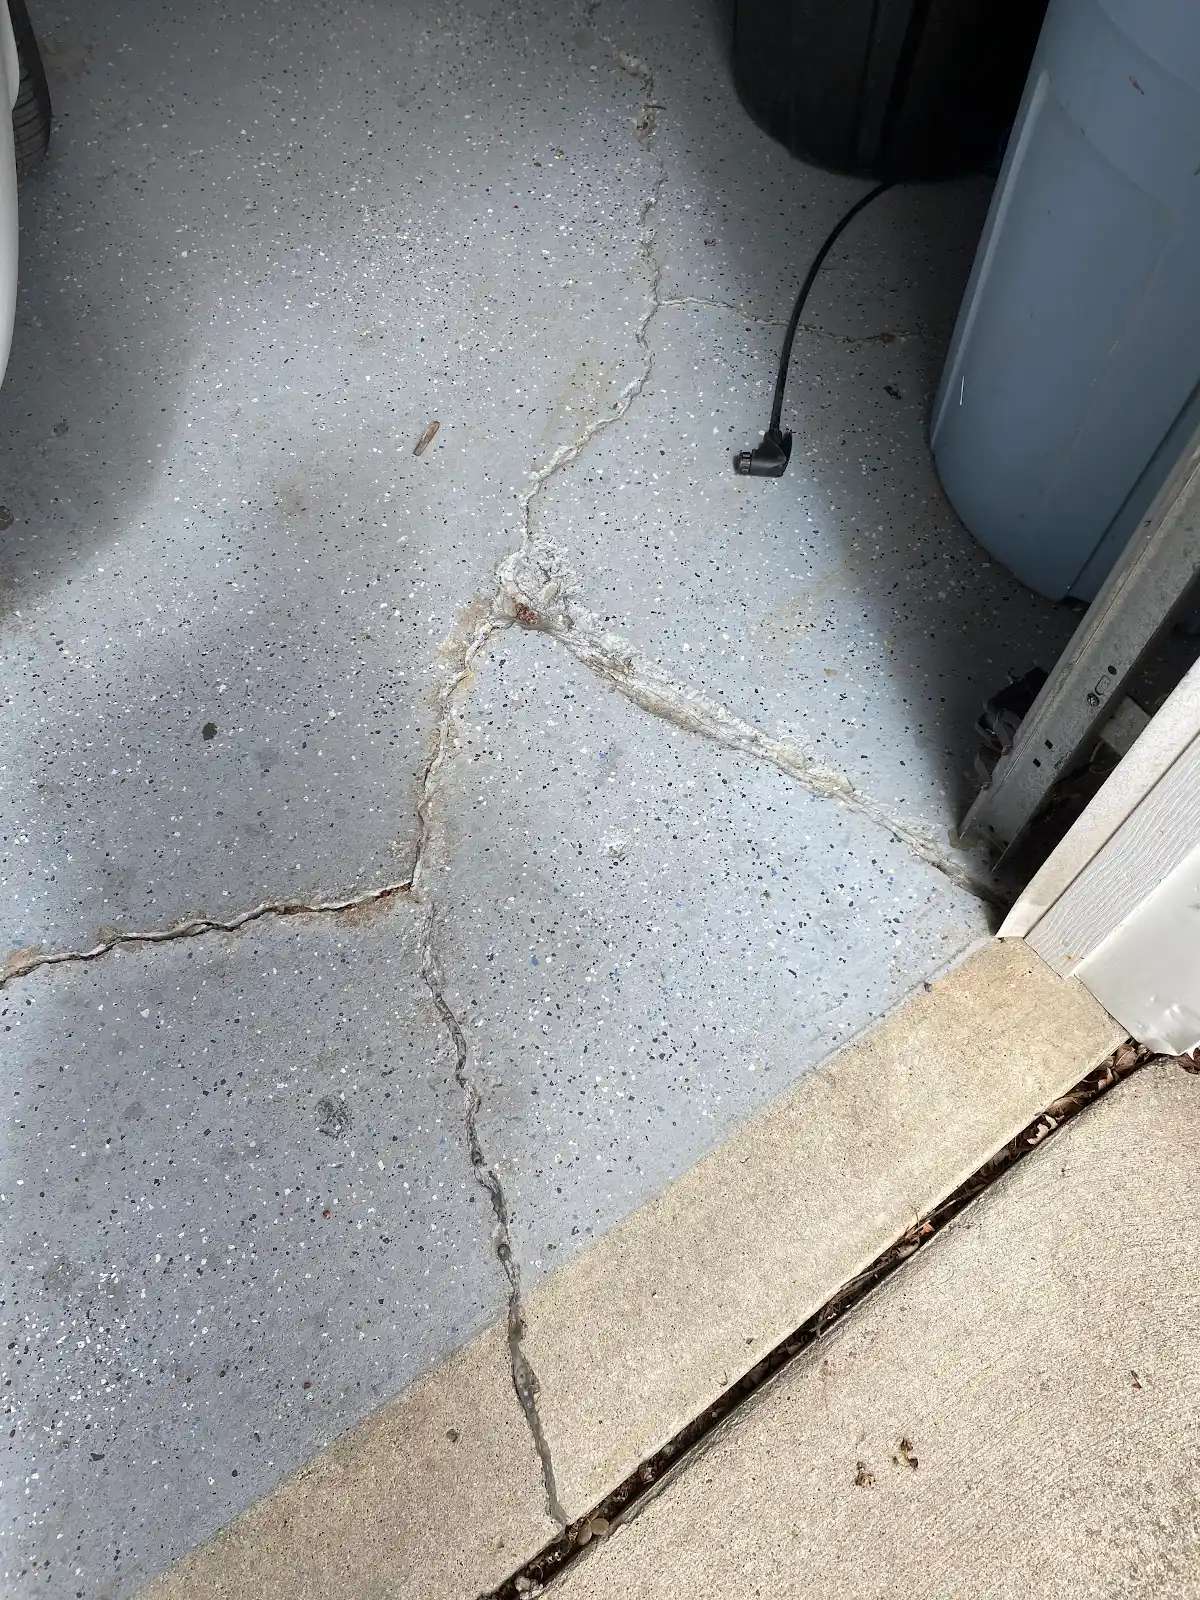
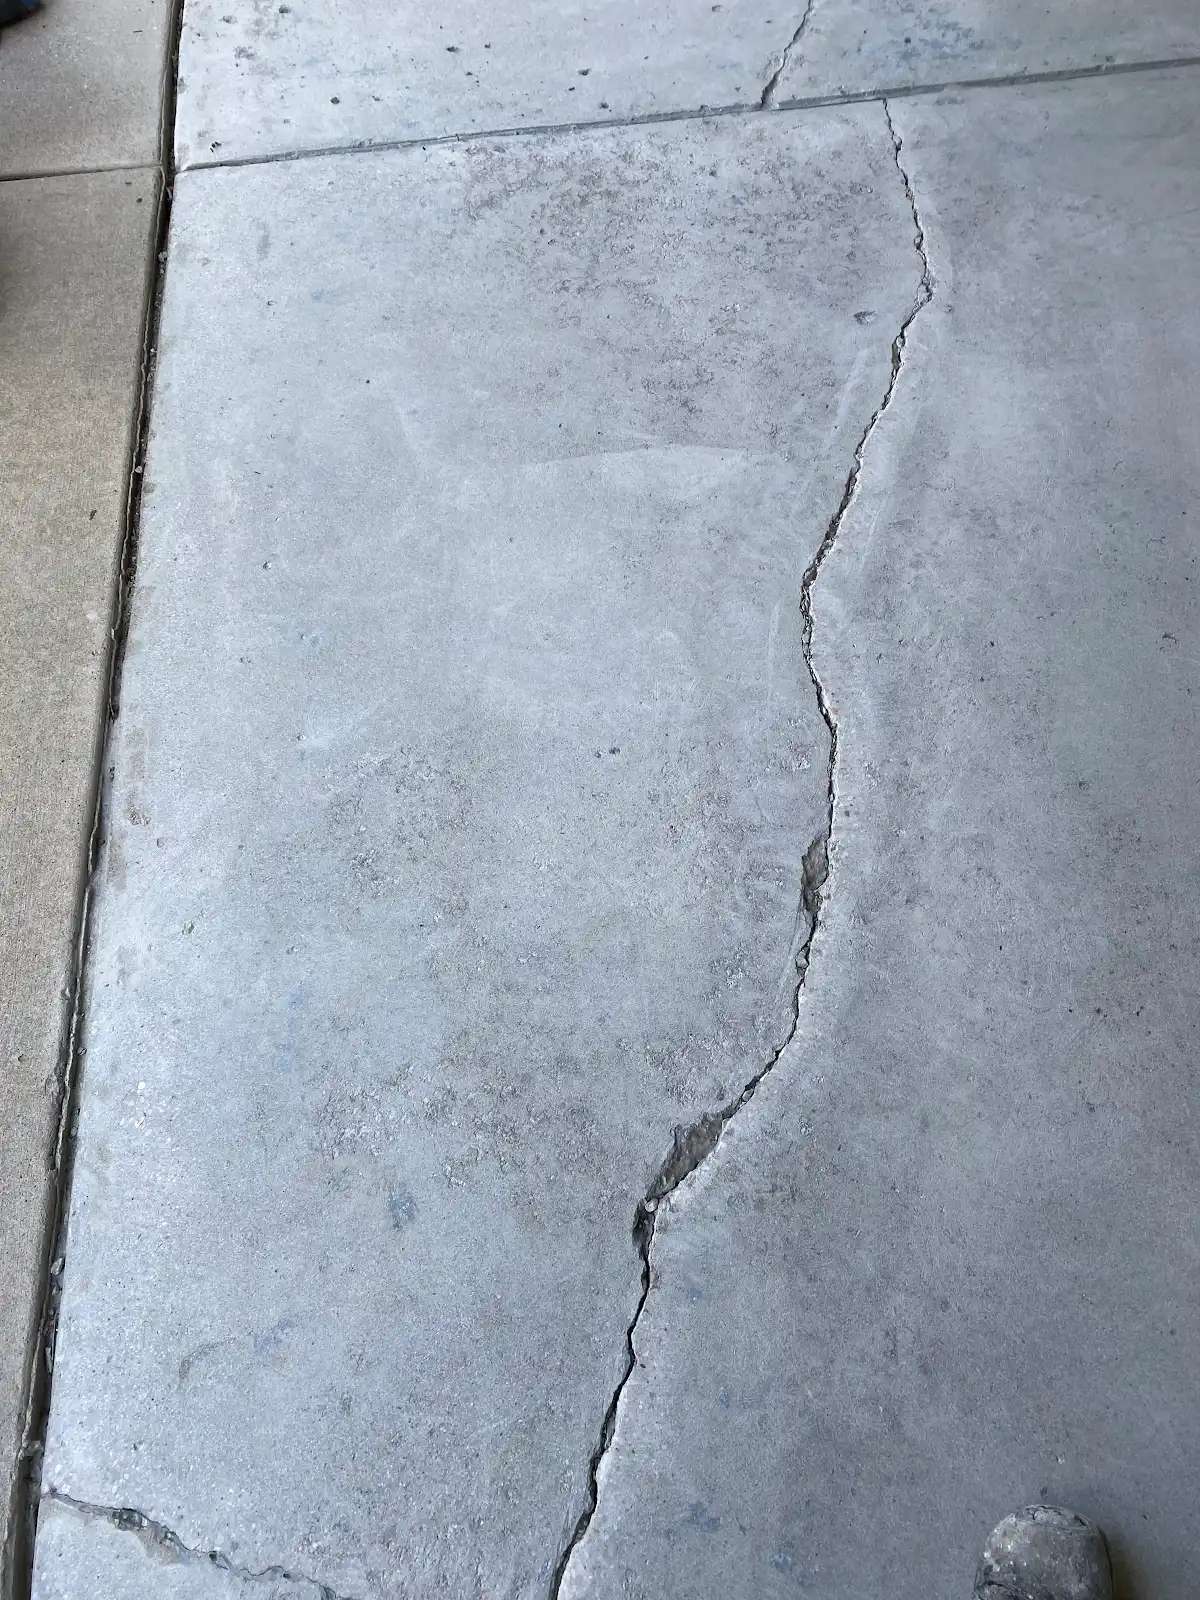
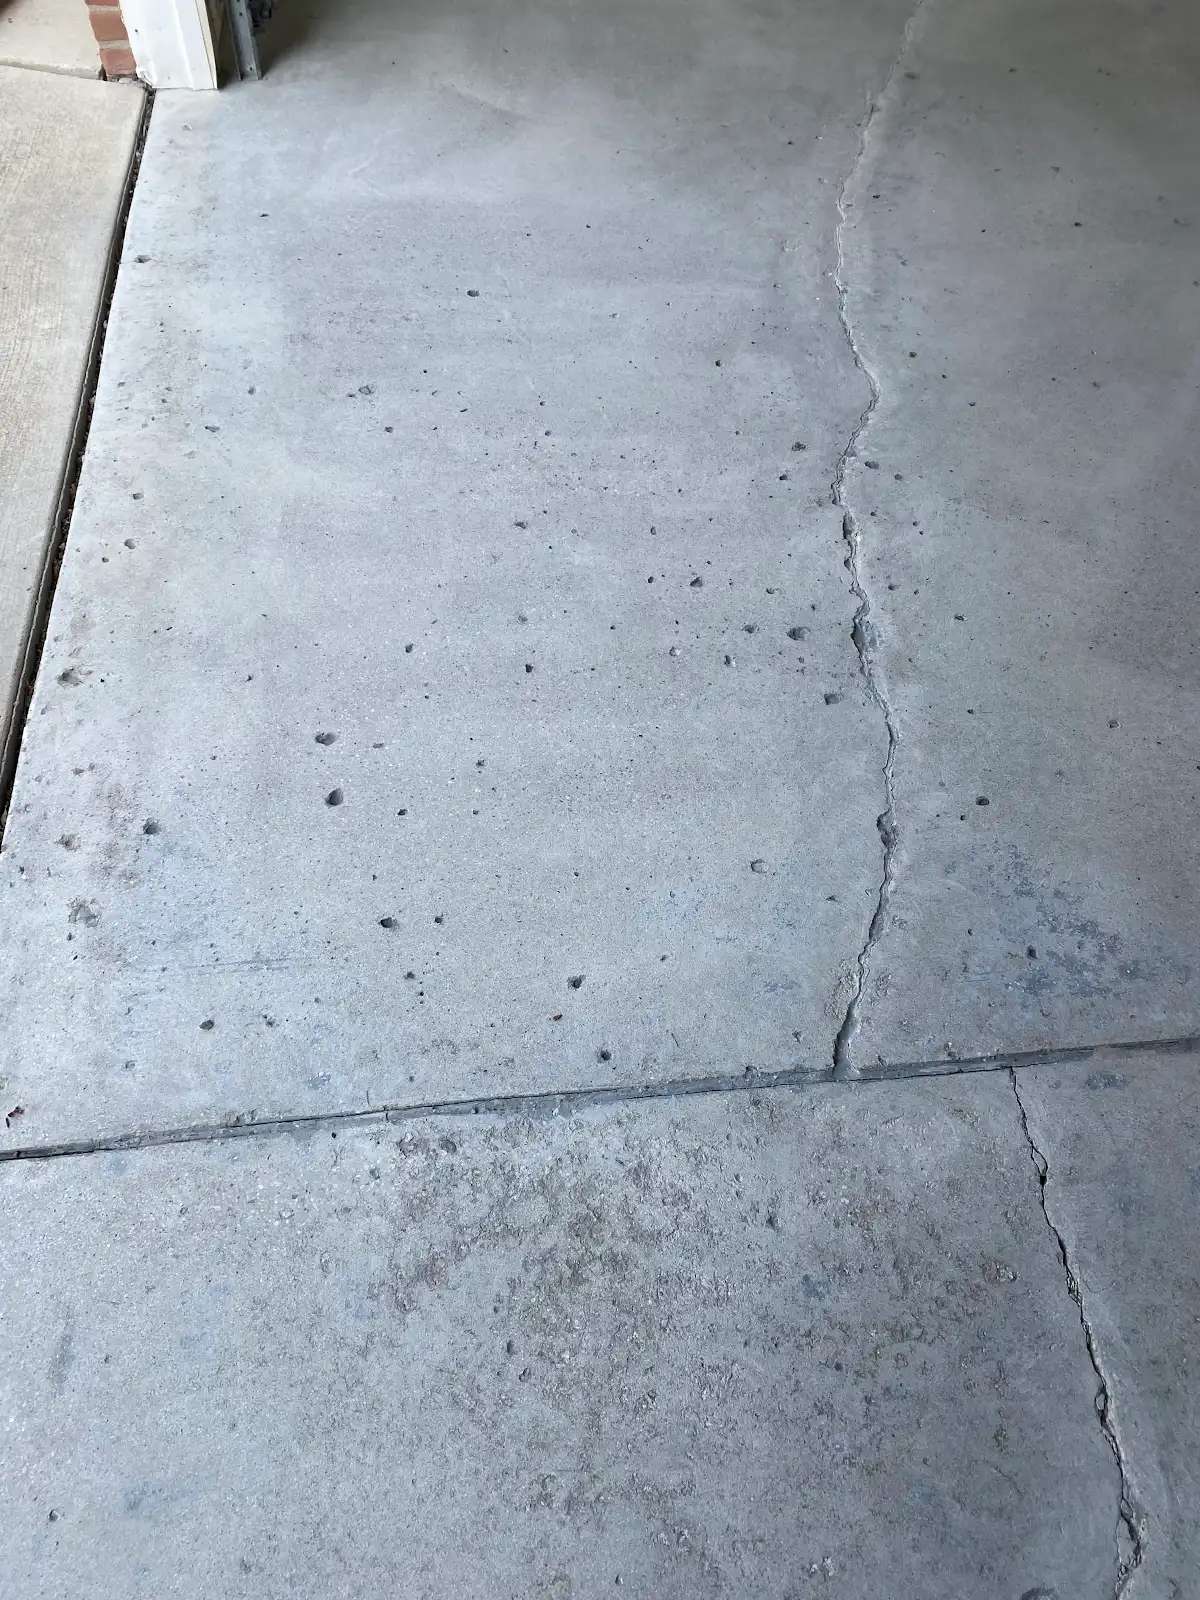
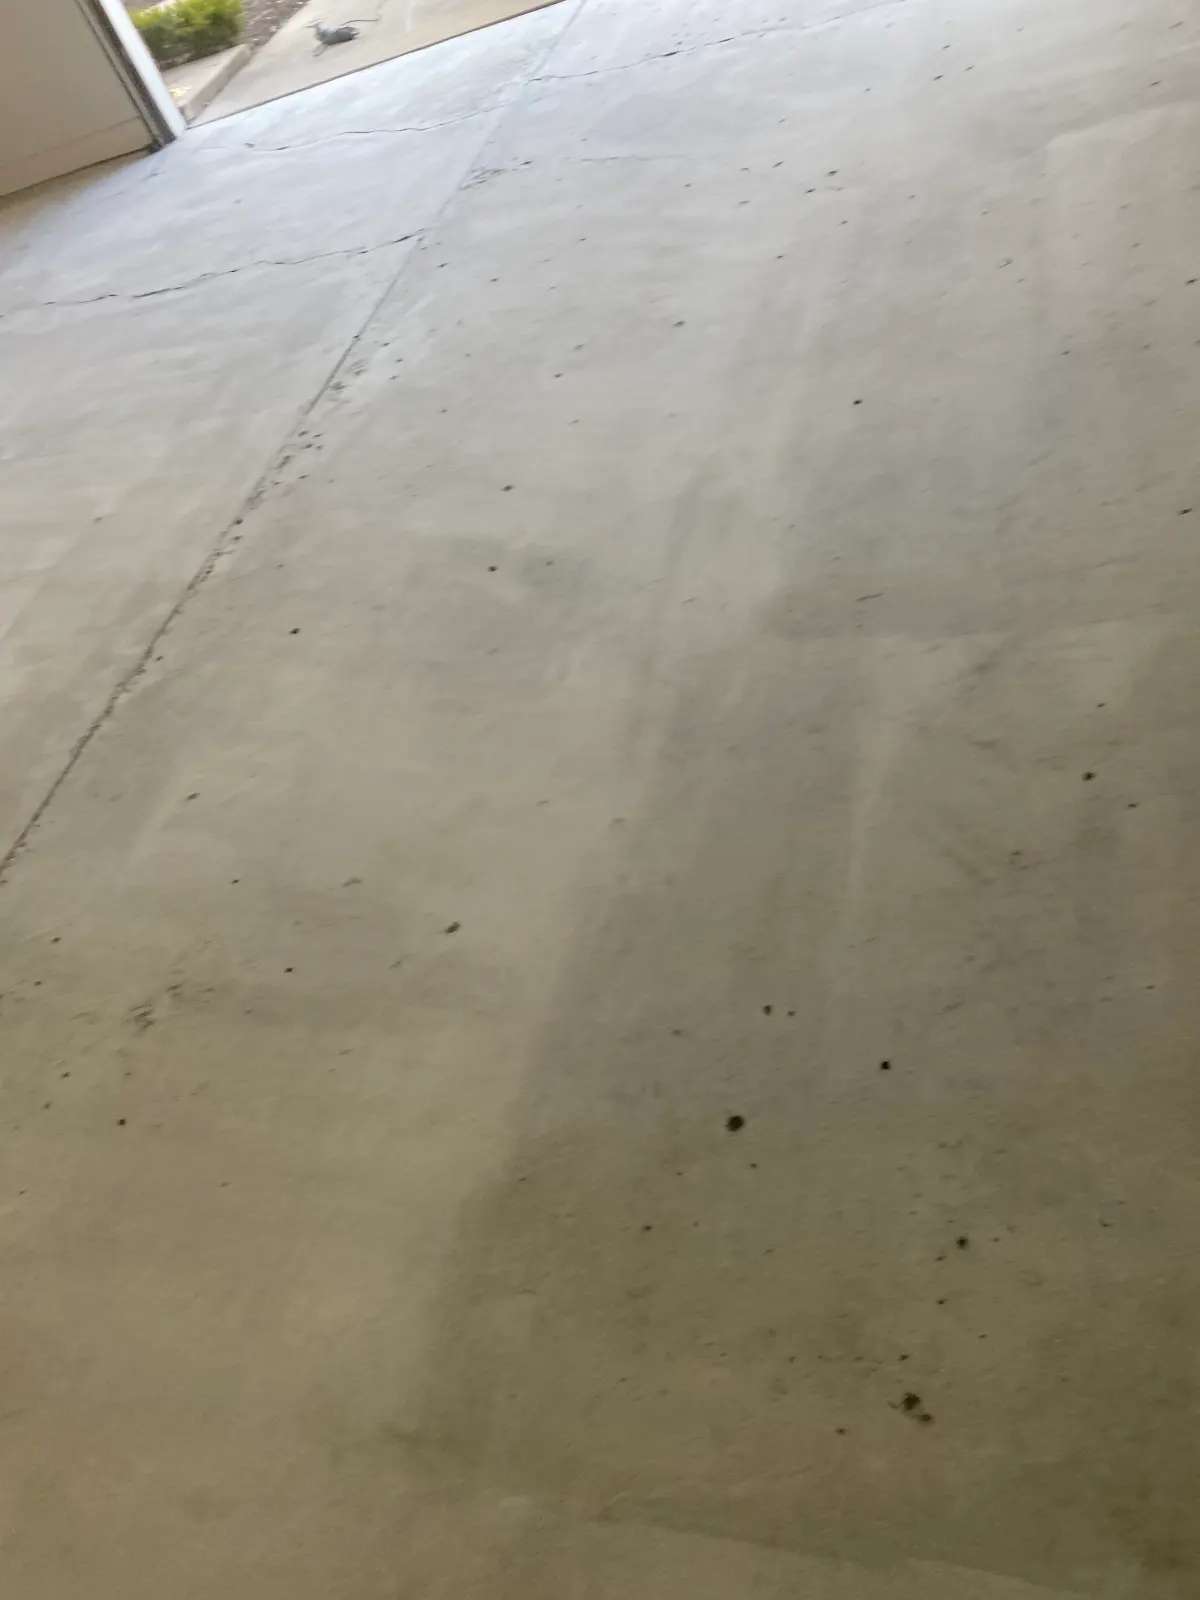
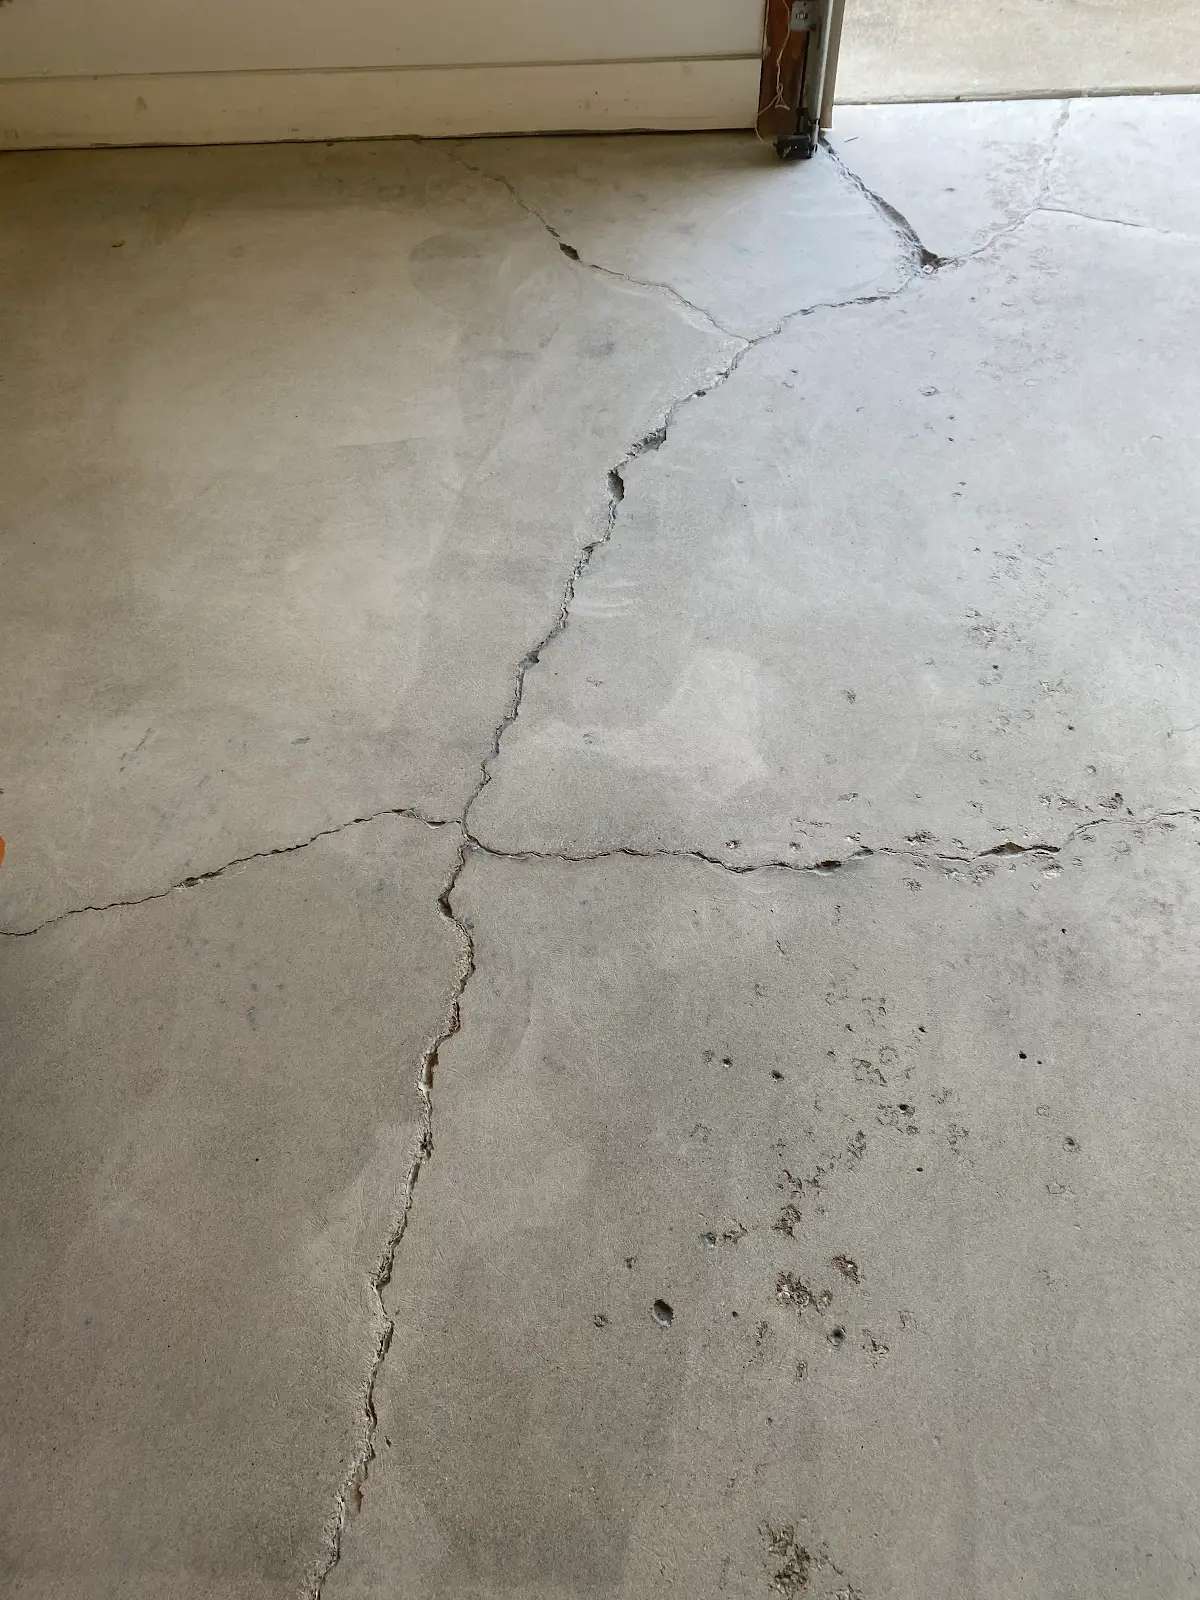
Initial Substrate Condition
This garage floor presented exceptional structural and surface challenges. Multiple structural cracks traversed the slab, several extending across the full garage width. These weren’t hairline fissures but substantial cracks exceeding 1/8 inch in width, some approaching 1/4 inch at their widest points. The crack patterns suggested both settlement movement and thermal stress cycling, with jagged propagation indicating tension failure in the concrete matrix.
Beyond major structural cracks, the floor exhibited widespread surface pitting across approximately 40% of the slab area. These pits ranged from shallow surface voids to deeper depressions penetrating well into the concrete cross-section, suggesting freeze-thaw damage exacerbated by deicing salt exposure—a common deterioration mechanism in our local climate.
The floor also bore remnants of a previously applied epoxy coating that had failed through multiple mechanisms: delamination where coating separated from concrete, wear-through in high-traffic zones, and general degradation creating an unsightly patchwork appearance. Coating residue varied in thickness, with some areas showing heavy accumulations while others retained only thin traces.
Epoxy Removal and Initial Surface Preparation
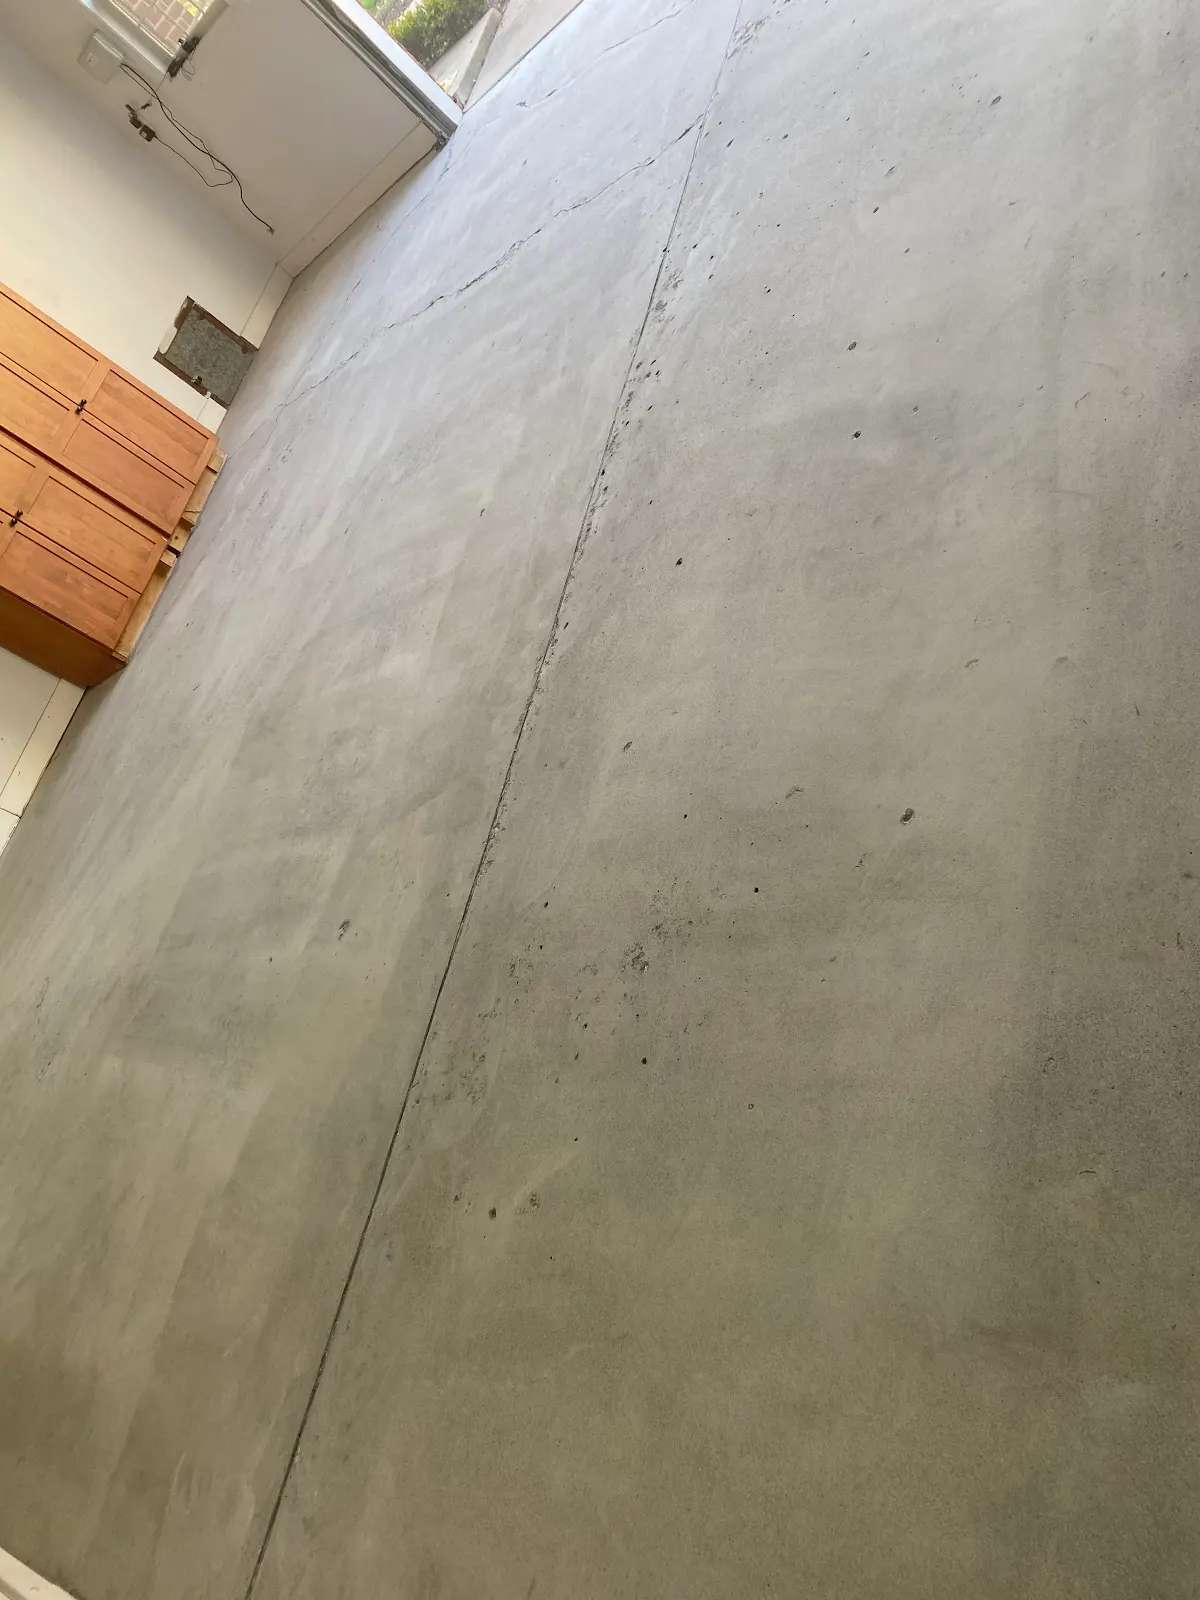
Installation started with epoxy removal. We used professional-grade diamond grinding equipment with aggressive grit sequences. This labor-intensive phase proved particularly challenging due to the variable thickness of the epoxy layer and tenacious adhesion in certain areas. The grinding process uncovered the full extent of concrete deterioration previously masked by the opaque coating.
The exposed concrete surface revealed the true condition of the substrate. Structural cracks stood out prominently, their depth and width clearly visible. Pitted areas showed their full extent, creating surface texture ranging from relatively smooth in protected areas to heavily textured in severely deteriorated zones. Concrete color varied from typical gray aggregate to darker zones where years of oil contamination had penetrated the porous substrate.
We removed the old coating completely after multiple grinding passes with progressively finer diamond segments. Simultaneously, the process opened the pore structure of the concrete. This is an important step to ensure optimal adhesion of the polyurea material. Our team worked methodically across the entire 600-square-foot area, ensuring no epoxy residue remained that could compromise the bonding of the new garage floor coating or create visible artifacts.
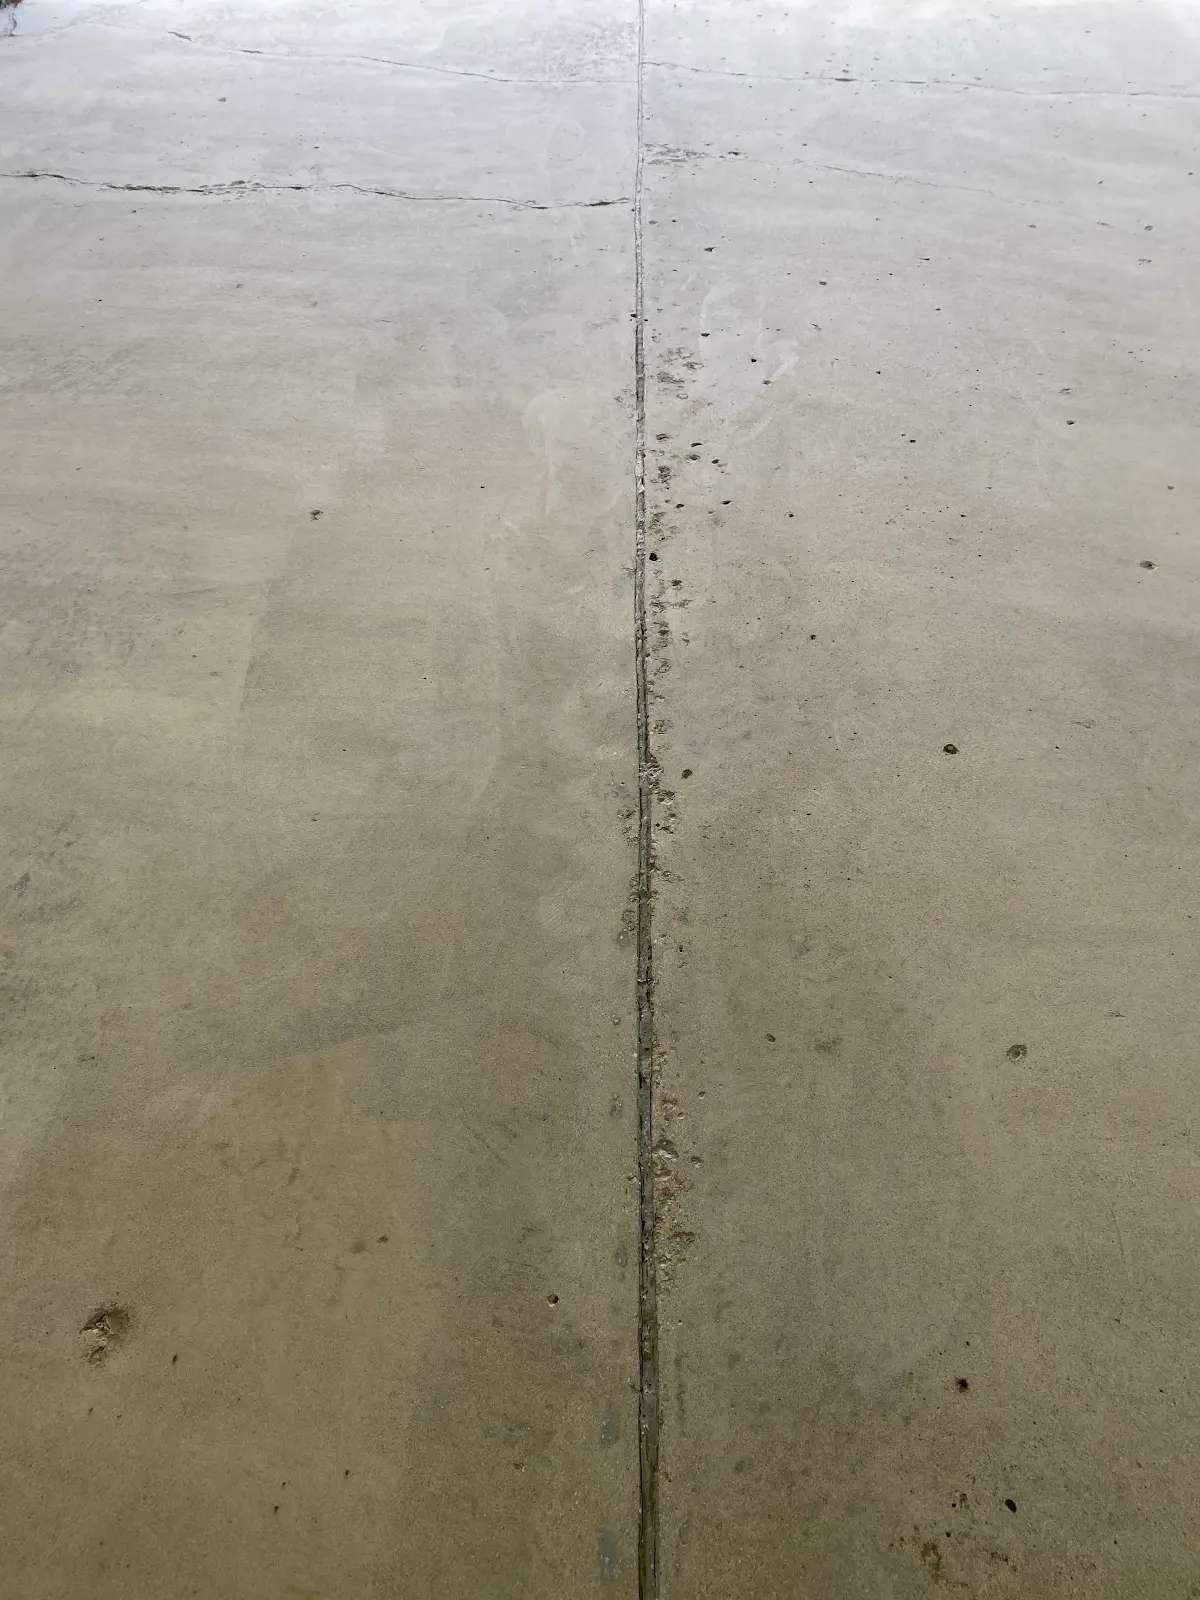
Comprehensive Crack Repair Process
This project required a very extensive crack repair protocol, utilizing approximately 4 liters of our two-part polyurea crack mender. The process began with thorough crack preparation using diamond grinding wheels and crack chasing equipment to create clean, profiled channels along the full length of each crack. This served multiple purposes: removing weak or friable concrete, creating uniform channel width for adequate repair material volume, and establishing mechanical “keys” along crack walls for physical engagement. For the widest cracks exceeding 3/16 inch, our team routed channels to depths approaching 1/2 inch.
The first mender application consumed 2 liters of Part A base resin and 2 liters of Part B hardener. The team filled each crack from its deepest point outward, ensuring complete void penetration without trapping air pockets. To enhance mechanical properties and reduce material consumption in wider cracks, approximately 1/2 bag of silica sand was incorporated. This created a reinforced matrix with improved compressive strength.
After initial cure, several areas required additional material to bring repair surfaces flush with surrounding concrete. The second mender phase consumed an additional 1 liter each of Part A and Part B, focusing on areas where initial application had settled or deeper crack geometries required supplemental material. This two-stage approach ensured all cracks received adequate structural reinforcement while maintaining surface profile consistency.
Surface Pitting Remediation
The polyurea mender system addressed both linear cracks and three-dimensional voids created by surface pitting. Each pit received individual attention, with mender material worked into voids to eliminate air entrapment while slightly overfilling to account for cure shrinkage. Following mender cure, additional diamond grinding achieved uniform surface profile across both repaired and virgin concrete areas, removing excess mender while blending repair zones seamlessly into surrounding substrate.
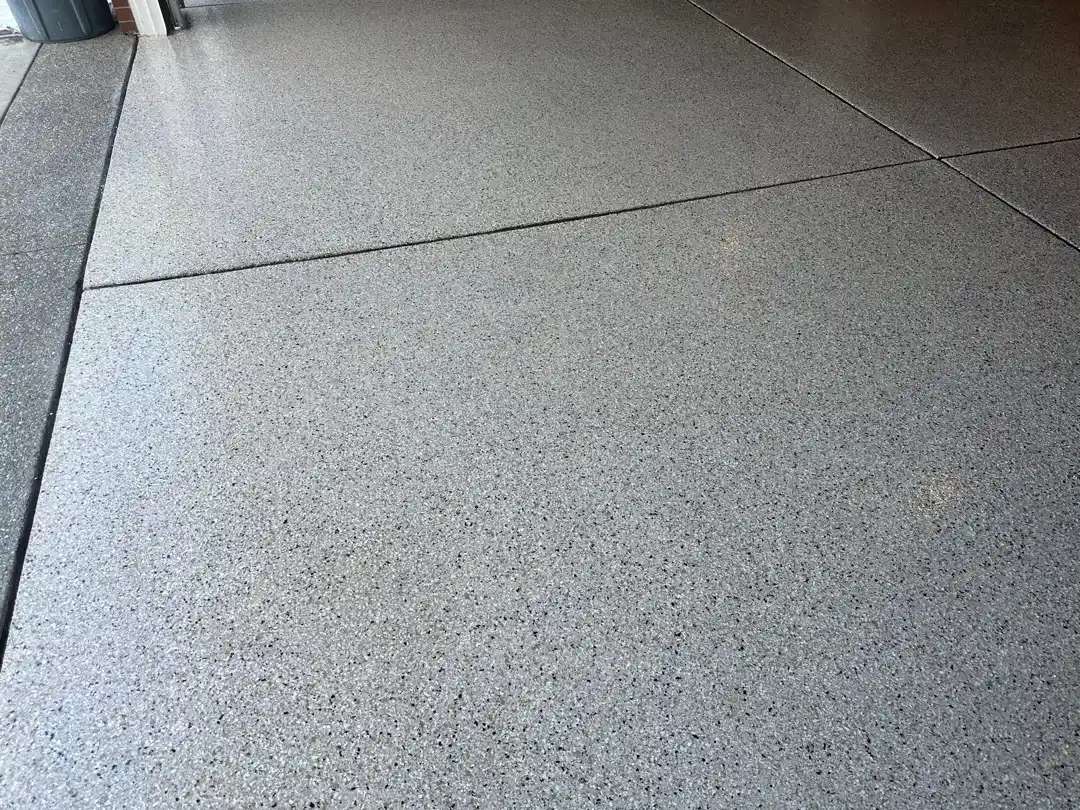
Base Coat Application
The base coat application utilized 5 liters of gray polyurea base resin mixed with 2.5 liters of hardener and 1.25 liters of xylene for viscosity adjustment. The base coat sealed the porous concrete substrate, provided color foundation for the decorative flake system, and created the chemical bond layer anchoring the entire coating assembly.
The gray base color was specifically selected to complement the Silver Creek decorative flake blend, creating depth and visual richness. The team applied base coat using professional-grade roller techniques, working material into the concrete surface profile while maintaining a consistent film thickness. We paid particular attention to the areas we had repaired. This ensured full coverage over mender-filled cracks and pits without differential absorption creating color variation.
Decorative Flake Application
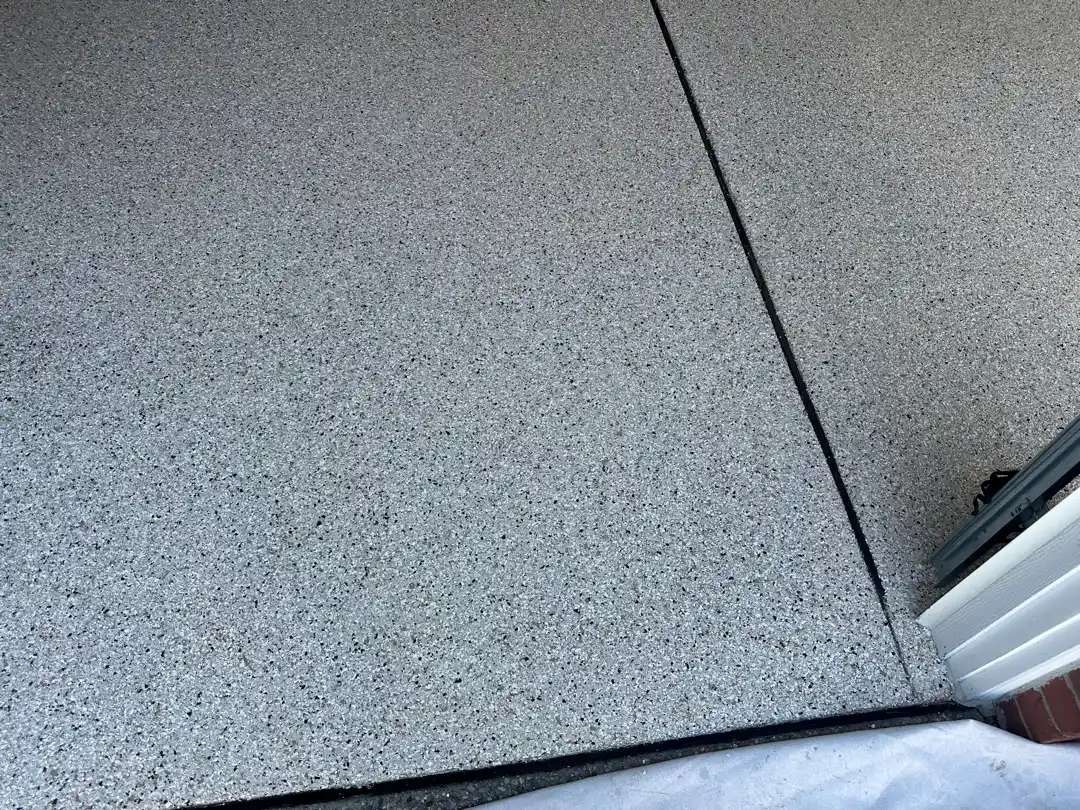
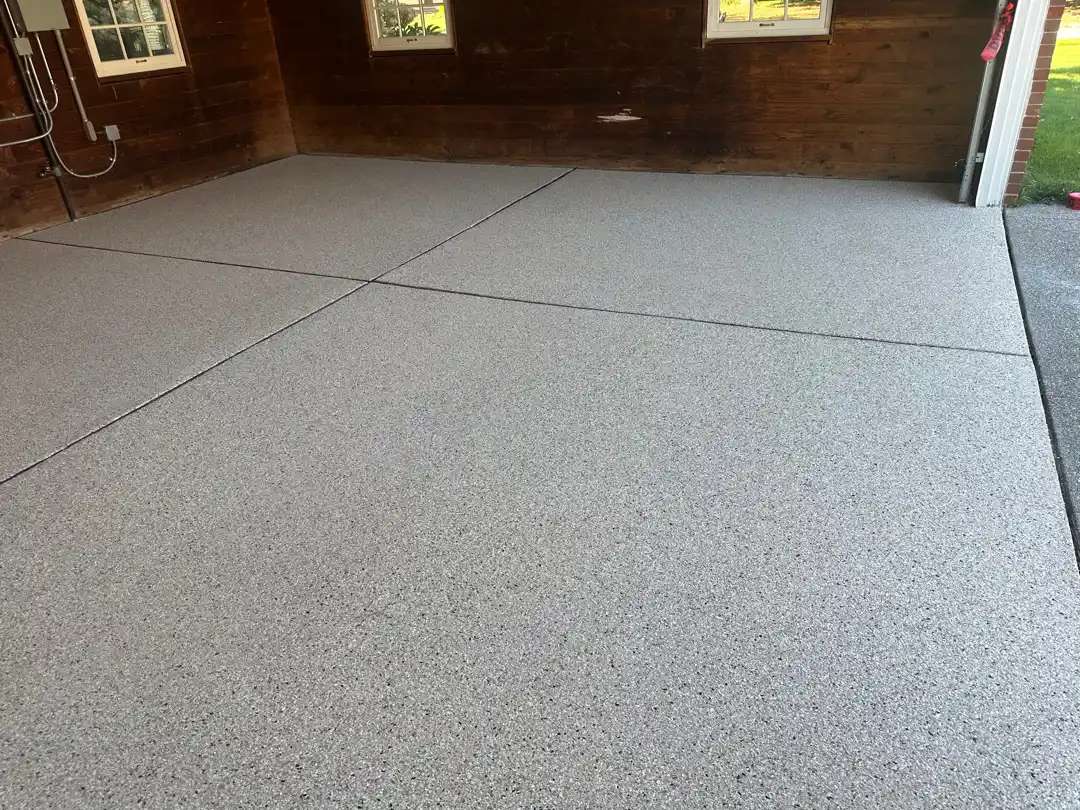
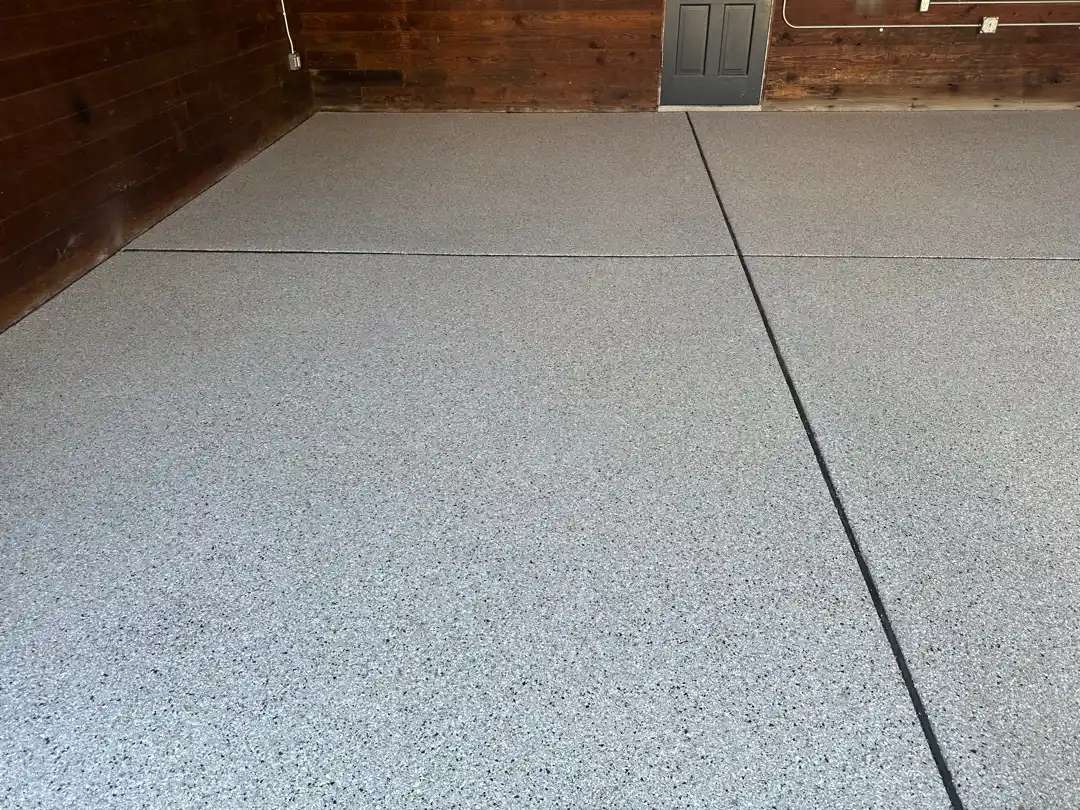
While the base coat remained in optimal open time, the team proceeded to decorative flake broadcast. The Silver Creek flake blend features a lovely palette of silver, gray, white, and subtle darker tones. It creates a contemporary aesthetic reminiscent of natural stone. This color combination provides visual interest without overwhelming the space. It complements the white walls and natural wood cabinetry of this garage.
The initial flake broadcast consumed 3 boxes of Silver Creek blend, applied to approximately 85-90% coverage density. This coverage provides optimal balance between visual impact, material economy, and surface texture management. Following cure, flake scraping removed loose or vertically oriented flakes, recovering approximately 2.25 boxes of material—representing excellent broadcast efficiency.
Clear Coat and Texture Application
In the final phase we applied a clear polyaspartic top coat with integrated texture additive. This installation consumed 10 liters of clear coat base mixed with 5 liters of activator and 2.5 liters of xylene. The substantial volume reflects both the 600-square-foot area and the need for adequate film build to encapsulate fully the decorative flake layer.
Our team incorporated Shark Grip texture additive at 2 caps per mix batch, totaling 5 caps across the entire application. This created a matte surface finish with enhanced traction properties when prevents the floor from becoming slippery when wet while keeping it easy to-clean.
Two-Tone Design Implementation
The completed installation features a distinctive two-tone design enhancing visual appeal and spatial definition. With the Silver Creek flake blend, the main garage floor coating took on a gray-silver palette: it is visually sophisticated and its hides dirt and tire marks. The approach area near the garage door received a complementary lighter flake blend, creating natural transition that distinguishes the entry area from the main parking and storage space.
Technical Specifications
- Square Footage: 600 sq ft
- Coating System: Professional polyurea/polyaspartic
- Primary Color: Silver Creek (gray/silver blend)
- Accent Color: Light tan/beige blend
- Texture Additive: Shark Grip (matte finish)
- Surface Profile: CSP-2 (diamond ground)
- Crack Repair: Two-stage polyurea mender system
- Epoxy Removal: Complete mechanical removal
- Material Consumption:
- Crack Mender: 4 liters total (two applications)
- Base Coat: 5 liters resin + 2.5 liters hardener
- Decorative Flake: 3 boxes (0.75 boxes net after reclaim)
- Clear Coat: 10 liters base + 5 liters activator
- Texture Additive: 5 caps Shark Grip
Performance Characteristics
This garage floor coating system delivers comprehensive performance across all critical criteria. The polyurea chemistry provides good chemical resistance to automotive fluids, road salts, and household chemicals. The non-porous surface prevents spills from penetrating into the concrete substrate. It makes it easy to wipe them clean. No permanent stains.
The matte texture from Shark Grip ensures safe footing even when wet. The coating system is UV-stable: its chemistry prevents yellowing and color shift. The Silver Creek blend will maintain its pristine appearance throughout years of sunlight exposure. The flexible polyurea base coat accommodates the natural thermal expansion of the concrete slab without cracking. The hard polyaspartic top coat provides superior abrasion resistance.
Transformation Impact
The contrast between the original condition of the garage floor and its transformed look is certainly one of MotorCity Floors and Coatings’ very dramatic renovation project. What began as a severely deteriorated concrete slab riddled with structural cracks, surface pitting, and failing coating emerged as a “showroom-quality” floor. The appearance and functionality of this garage are most definitely improved.
Most significantly, the comprehensive structural repairs and protective coating system have extended the service life of this concrete slab by decades. What might have required a complete slab replacement due to deterioration severity has instead been restored to better-than-new condition. This equates to substantial cost savings and delivers a superior performance compared to bare concrete.
Maintenance and Longevity
The new garage floor coating requires minimal maintenance. Regular dust mopping will remove loose debris, and an occasional damp mopping with pH-neutral cleaners will be enough to maintain appearance. The Silver Creek color blend offers a variegated pattern that naturally camouflages minor dirt and scuffing.
The structural reinforcement created with the mendering process prevents repaired cracks from reopening. Flexible coating layers accommodate normal concrete movement without failure. The chemical-resistant properties of the dual blend of polyurea and polyaspartic material ensure automotive fluids, deicing salts, and other garage contaminants won’t degrade the coating and penetrate to concrete substrate.
We think this example of garage floor coating in Royal Oak exemplifies MotorCity Floors and Coatings’ commitment to quality workmanship, comprehensive problem-solving, and customer satisfaction. By addressing every structural and surface issue through proper repair protocols, our installation team delivered a floor system providing reliable service and aesthetic appeal for years to come.
Click on the photos to enlarge them
Polyurea Garage Floor Coating on East Harrison Avenue, in Royal Oak, MI
Project Overview
The owners of this residence contacted MotorCity Floors and Coatings to install a professional-grade garage floor coating system in their modern detached garage. The 257-square-foot space featured relatively new concrete in good condition, making it a good candidate for a comprehensive coating installation including extensive vertical wall coverage. This project showcases MotorCity’s ability to deliver a multi-zone color design with extensive cove base detailing.
Initial Substrate Condition
The existing concrete slab presented a best-case scenario for coating installation. The floor was in excellent structural condition with no significant cracking, spalling, or surface deterioration. The concrete exhibited typical light surface staining from minimal use, with control joints cleanly cut and properly positioned throughout the slab. The relatively new appearance of the floor suggested the concrete had properly cured and stabilized, eliminating concerns about excessive moisture vapor transmission or ongoing curing-related movement.
The natural gray color of the concrete showed minimal variation across the floor area, indicating consistent mixing and placement during the original pour. Small surface blemishes and minor discoloration were present but these were cosmetic concerns rather than structural issues. The flatness and level characteristics of the slab met professional standards, requiring no remedial grinding beyond standard surface preparation for coating adhesion.
Surface Preparation Process
Despite the excellent condition of the concrete, the installation team conducted a thorough mechanical surface preparation using professional-grade diamond grinding equipment. This critical phase serves to open the pore structure of the concrete, creating the proper concrete surface profile (CSP) required for optimal polyurea coating adhesion. The grinding process removed the surface laitance—the weak, porous layer that naturally forms during concrete finishing—exposing the denser aggregate structure beneath.
The team worked systematically across the 257-square-foot area using progressive diamond grit sequences. The initial grinding pass with coarser diamonds created the primary mechanical profile, while subsequent passes with finer grits refined the surface texture to the target CSP-2 specification. This surface profile provides the combination of mechanical tooth for coating adhesion while maintaining sufficient smoothness for uniform coating application.
Particular attention was paid to the wall-to-floor junction around the perimeter of the garage. This 59-linear-foot transition zone required detailed preparation to ensure proper adhesion for the vertical cove base application. Our team ground the lower wall surface and floor edges to create a continuous profile that would accept coating material across the 90-degree angle without weak spots or inadequate coverage.
Following mechanical preparation, comprehensive dust extraction and surface cleaning ensured a contamination-free substrate. Both dry vacuuming and damp mopping techniques removed all residual grinding dust, leaving the concrete clean and ready for coating application.
Cove Base Installation
One of the defining features of the project was the extensive cove base installation—59 linear feet of vertical wall coverage creating a seamless transition from floor to wall. This professional detail creates both aesthetic appeal and practical benefits. It eliminates the difficult-to-clean wall-to-floor junction where dirt and moisture typically accumulate.
The cove base installation required specialized application techniques. Our team applied the MC3.9 polyurea coating material in a continuous bead along the wall-to-floor junction, then used specialized tooling to shape the material into a smooth, radiused cove profile. This curved transition eliminates the sharp 90-degree angle, creating a surface that coating material can bridge without forming weak spots or thin areas.
The 59 linear feet of cove base coverage represented substantial work, requiring meticulous attention to consistency in height, radius, and profile uniformity. The team maintained a consistent cove height of approximately 3-4 inches up the wall surface, creating a visually uniform detail that enhances the finished appearance of the new garage floor coating. The cove base coating extended slightly beyond the polyurea floor coating.
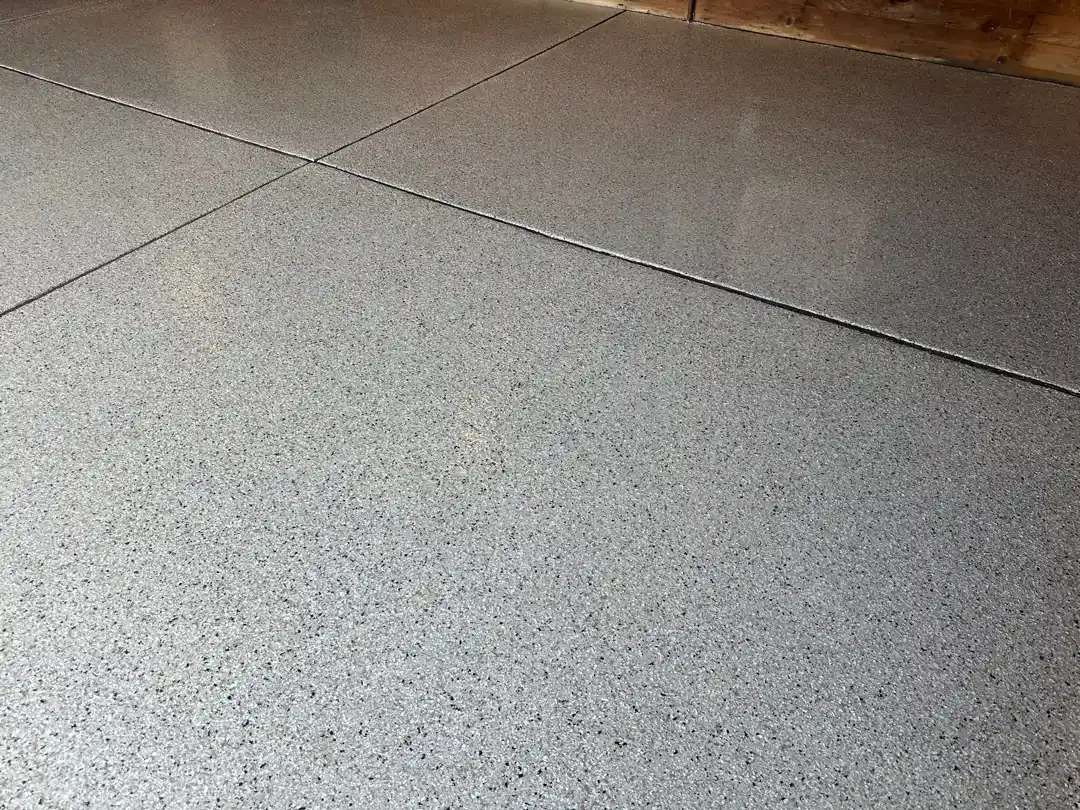
Base Coat Application
Our team applied the MC3.9 polyurea coating system in a two-tone design that creates visual interest and spatial definition. The main garage area received a dark charcoal base coat that would serve as the foundation for the Silver Creek flake blend. This deep, neutral tone provides excellent contrast for the decorative flakes.
Our team then proceeded with the base coat application systematically, using professional roller techniques. They worked the material into the prepared concrete surface profile, ensuring complete wetting and penetration into the pore structure of the concrete. Consistent film thickness across the entire floor area ensured uniform color depth and proper coating performance. The base coat also sealed the porous concrete substrate, preventing moisture vapor transmission and creating the chemical bond layer anchoring the entire garage floor coating system.
Decorative Flake Application
While the base coat remained in optimal open time, our team broadcast the Silver Creek decorative flake blend. This color palette features silver, gray, white, and charcoal tones that create a contemporary appearance reminiscent of natural granite or terrazzo. The varied tones add depth and visual complexity while maintaining a cohesive color story that complements the charcoal base.
The flakes were broadcast to approximately 85-90% coverage density, creating the appearance of a fully flaked surface while allowing subtle glimpses of the base coat color through small interstices between flakes. This coverage density creates visual impact while managing material costs and surface texture. Following cure, our team scraped the floor to remove loose or vertically oriented flakes, ensuring a consistent surface for top coat application.
Two-Tone Design Implementation
The completed installation features a two-tone design that enhances the visual appeal and functionality of the garage. The main parking and storage area showcases the dark charcoal Silver Creek combination, creating a great-looking backdrop for vehicles and equipment. Near the garage door, a lighter gray section creates natural spatial definition, distinguishing the entry zone from the main garage area.
This two-tone approach serves both aesthetic and practical purposes. The lighter entry zone naturally defines the transitional space where homeowners step from driveway to garage, while the darker main area provides ideal visual contrast for vehicles and storage systems. The color transition between zones was executed with precise edge control, creating a clean demarcation line that adds architectural interest.
Clear Coat and Texture Application
The final phase of this garage floor coating project was the appolication of a clear polyaspartic top coat with integrated 36-grit aluminum oxide texture additive. This relatively coarse texture creates substantial slip resistance—more aggressive than the 16-grit specification common in standard installations. The 36-grit texture ensures confident traction even under wet conditions while maintaining the easy-clean properties of the coating system.
The clear coat fully encapsulates the decorative flake layer. It creates the smooth, continuous surface characteristic of professional installations. The polyaspartic chemistry provides exceptional chemical resistance, UV stability, and abrasion resistance. The fast cure properties of the top coat allowed the homeowners to resume using their garage quickly after installation was completed.
Technical Specifications
- Square Footage: 257 sq ft
- Coating System: MC3.9 polyurea/polyaspartic
- Primary Color: Charcoal/Silver Creek
- Accent Color: Light gray/Silver Creek
- Cove Base: 59 linear feet
- Texture Additive: 36-grit aluminum oxide
- Surface Profile: CSP-2 (diamond ground)
- Repairs: None required
- Removal: None required
- Additional Surfaces: 59 LF vertical wall cove base
Performance Characteristics
The new garage floor coating system delivers comprehensive performance across all critical criteria. The polyurea chemistry provides excellent chemical resistance to automotive fluids, road salts, and household chemicals. The non-porous surface of the polyaspartic top coat prevents spills from penetrating into the concrete substrate, and allow easy cleanup rather than permanent staining.
The 36-grit texture ensures good traction under all conditions. This coarser texture creates a more aggressive grip than standard residential installations. This is needed in environments like ours, where wet conditions are common and enhanced safety features are a priority. Despite its texture, the coating remains easy to clean. The smooth polyaspartic surface makes it a breeze to sweep or mop dirt and debris.
The cove base installation eliminates the traditional wall-to-floor junction, creating a seamless, hygienic surface that is easier to maintain. This detail prevents dirt, moisture, and debris from accumulating in the corner where floor meets wall, making routine cleaning more effective and less time-consuming.
Transformation Impact
The contrast between bare concrete and the new garage floor coating system demonstrates the transformative power of quality floor coatings. The Silver Creek color palette elevates the garage from utilitarian space to an extension of the living areas of this residence. The two-tone design adds architectural interest and spatial definition. The extensive cove base detailing provides a finished, professional appearance typically reserved for commercial or high-end residential installations.
The dark charcoal Silver Creek blend creates strong visual impact while maintaining practical functionality. The variegated flake pattern naturally camouflages minor dirt and tire marks, reducing the frequency of cleaning required to maintain a presentable appearance. The smooth, sealed surface makes the garage significantly easier to maintain, with spills wiping clean and dust sweeping effortlessly across the non-porous coating.
Maintenance and Longevity
Regular dust mopping is enough to remove loose debris, while occasional damp mopping with pH-neutral cleaners will maintain a clean appearance.
The chemical-resistant properties of the new coating system ensure automotive fluids, deicing salts, and household chemicals won’t degrade the coating or penetrate all the way to the concrete below. The 36-grit texture maintains its slip resistance characteristics throughout the service life of the coating, providing consistent traction without degradation from wear or cleaning. The UV-stable polyaspartic chemistry prevents yellowing and color shift typical of traditional epoxy floors subjected to years of sunlight exposure.
This garage floor coating exemplifies MotorCity Floors and Coatings’ commitment to quality workmanship and attention to detail. We transformed the raw space into a clean environment that enhances the overall value and livability of this home.
Click on the photos to enlarge them
Professional Polyurea Garage Floor Installation - Woodsboro Drive, Royal Oak, MI
Project Overview
The homeowners needed a professional-grade garage floor coating system for their home in Royal Oak. They contacted MotorCity Floors and Coatings to ensure this transformation. The 587-square-foot space was built on a concrete slab in good structural condition but marred by years of oil staining and minor surface deterioration. The distinctive rustic wood-paneled walls provided a good backdrop for the warm, natural tones of the Driftwood flake blend.
Initial Substrate Condition
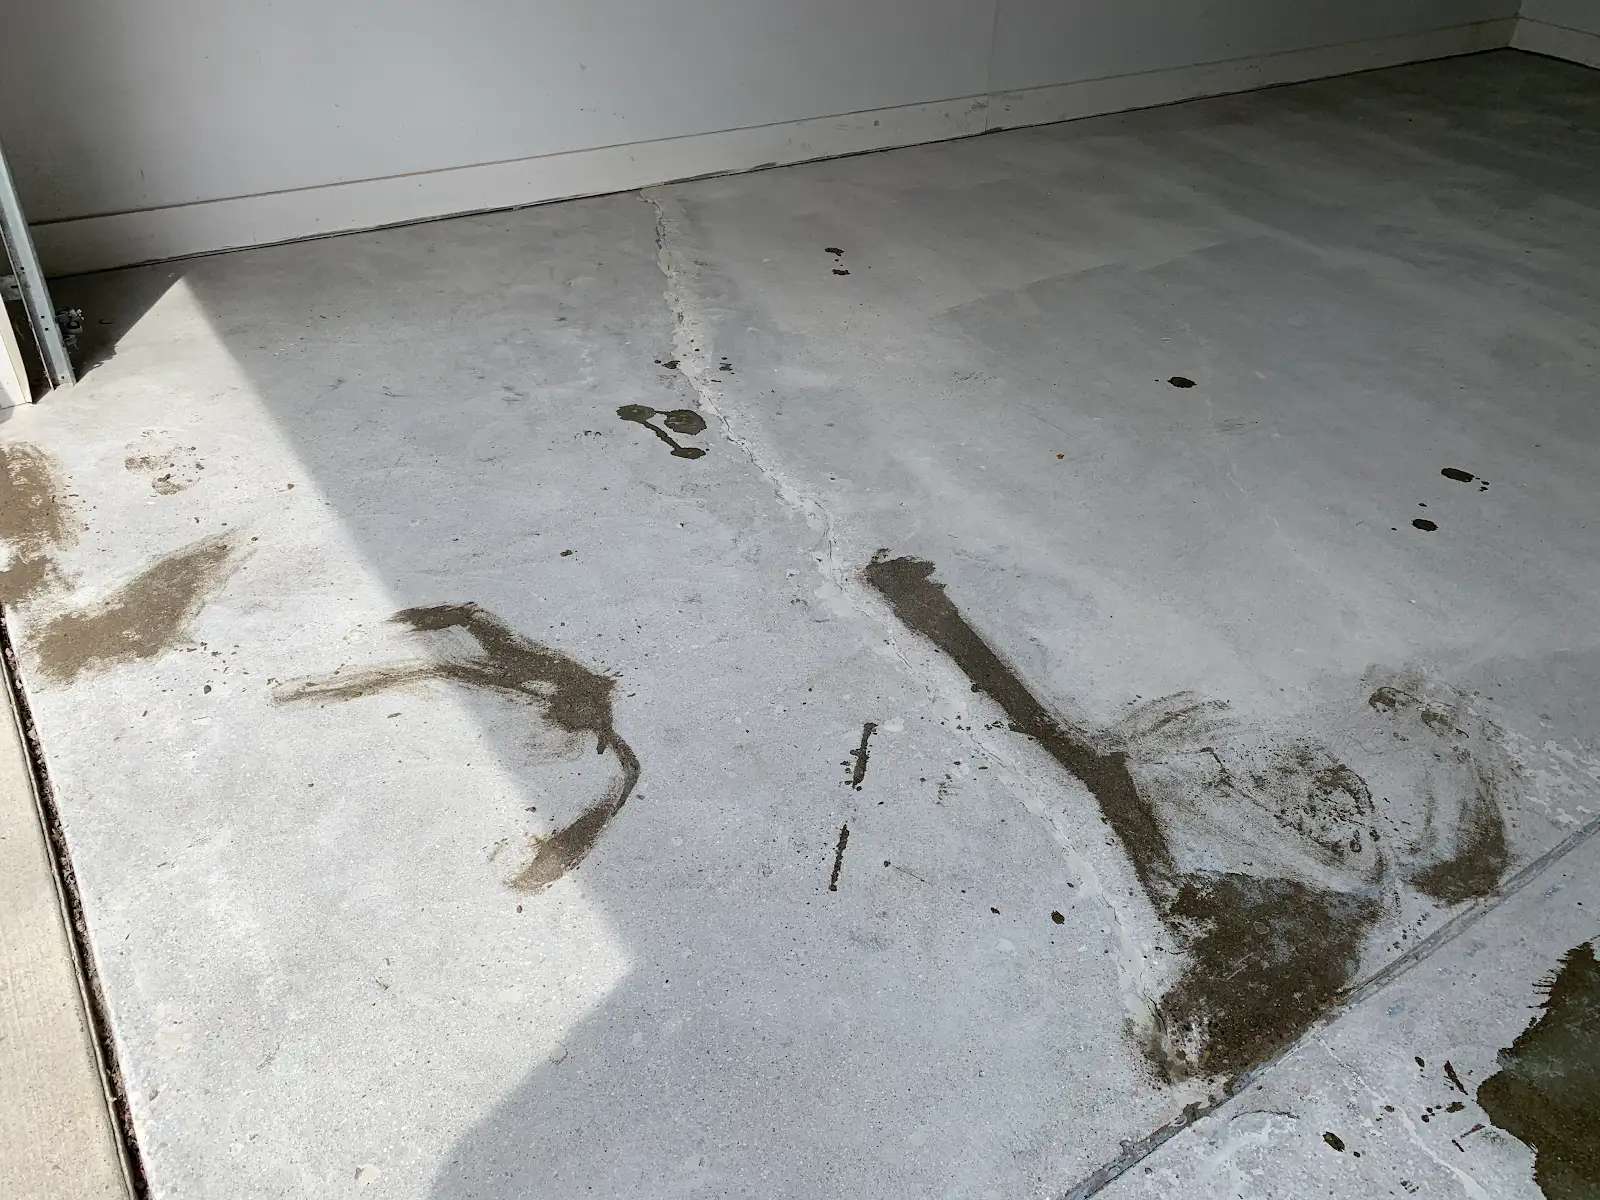
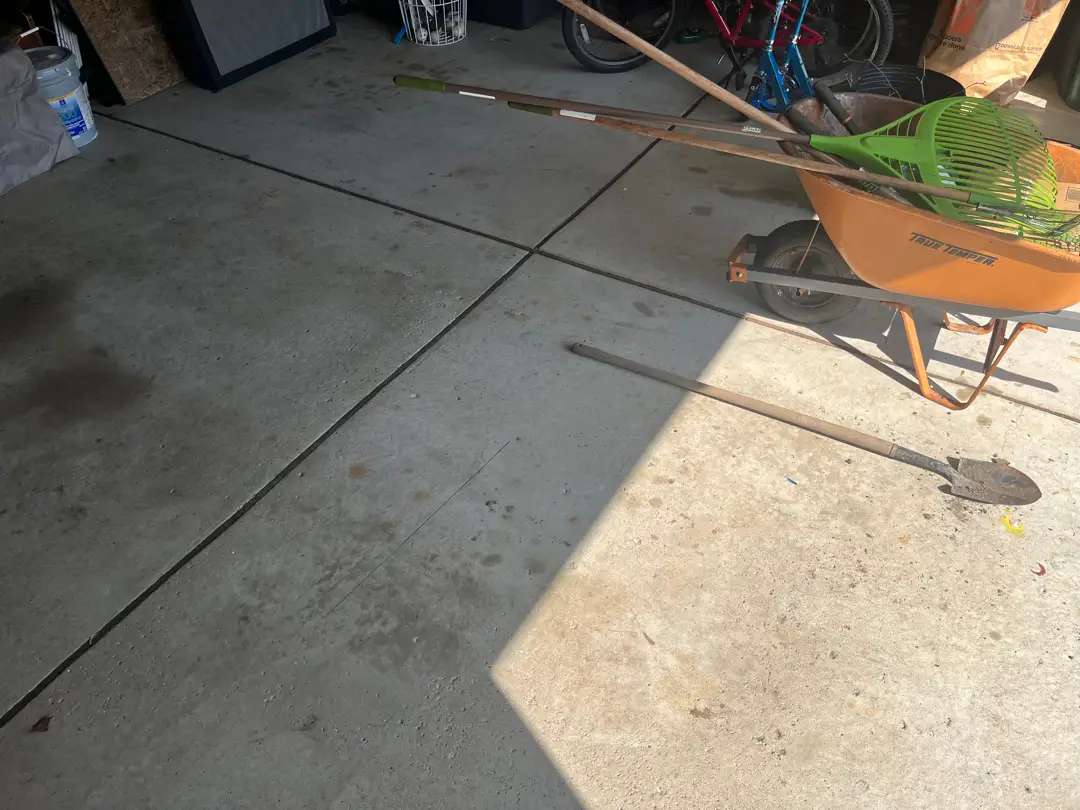
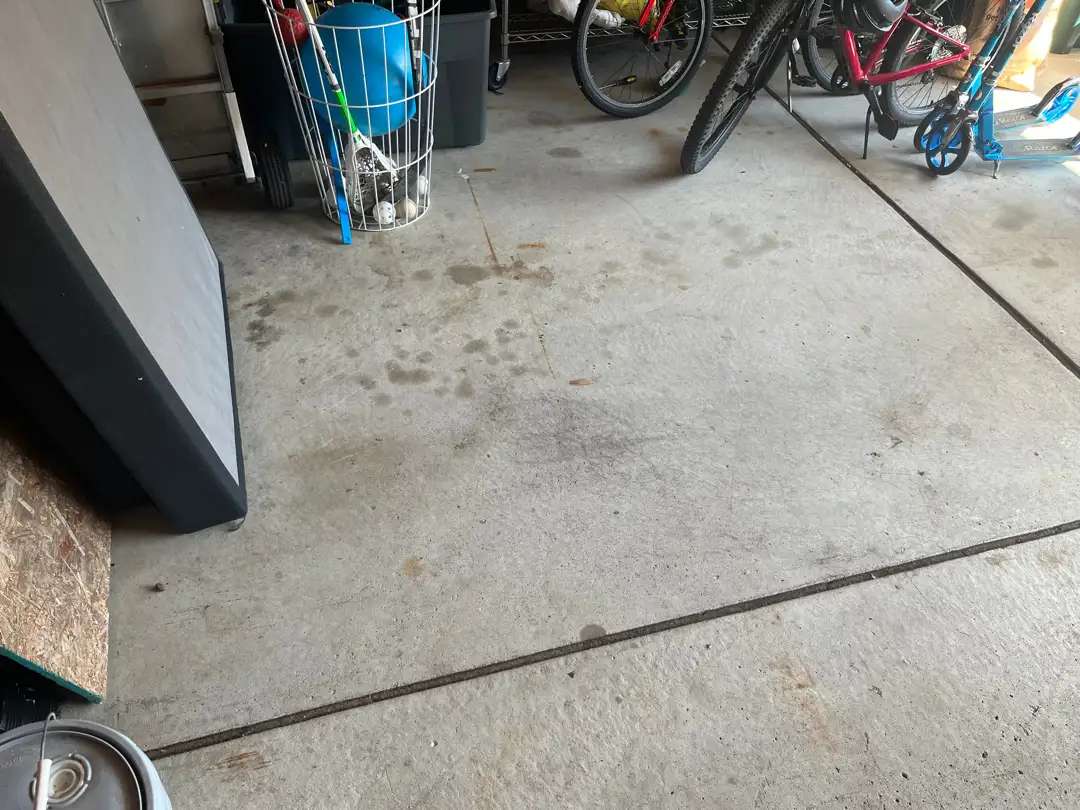
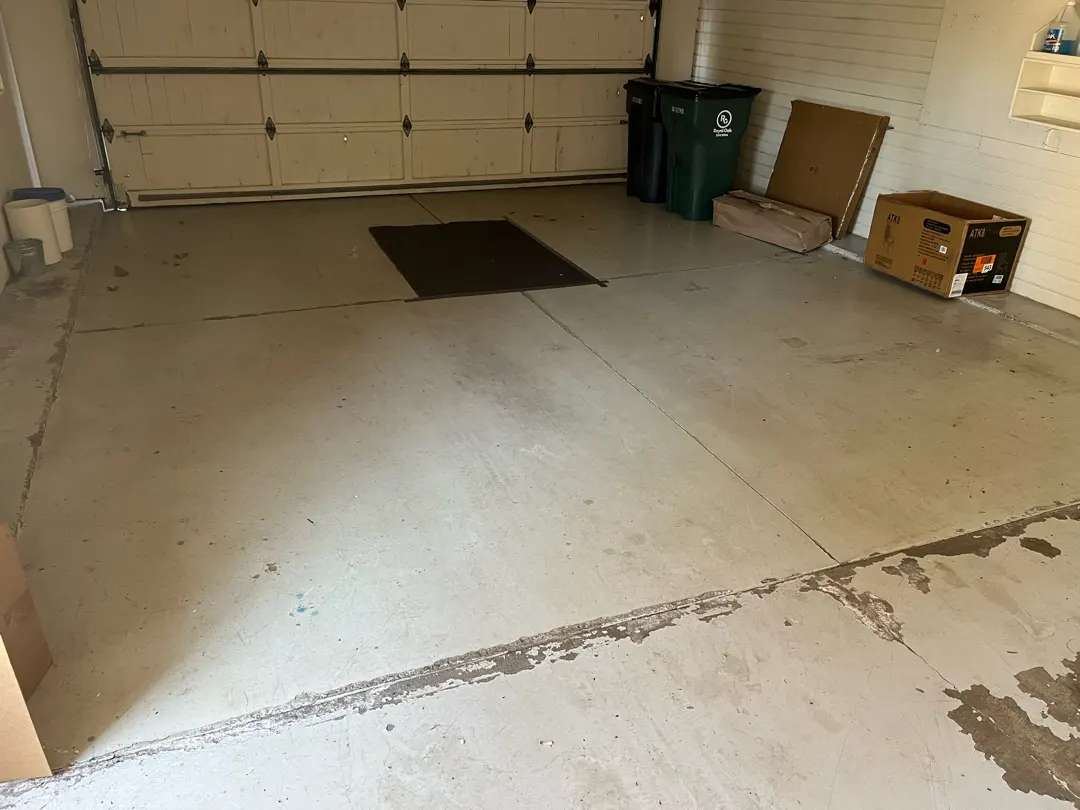
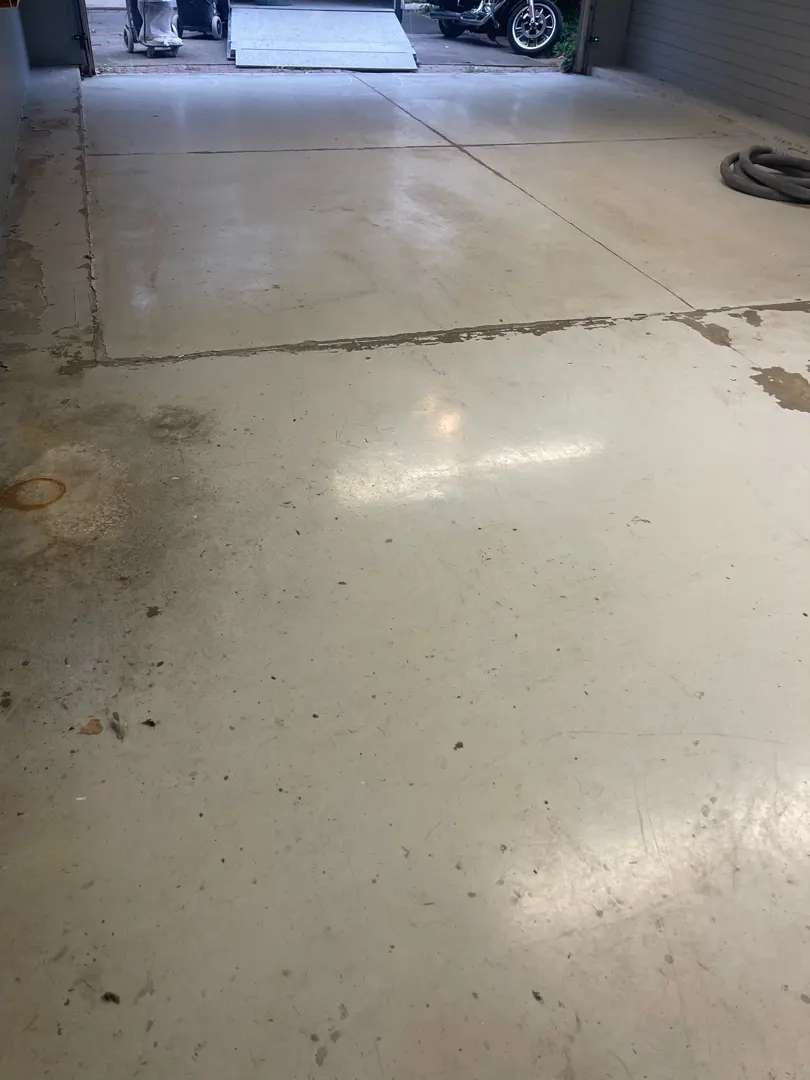
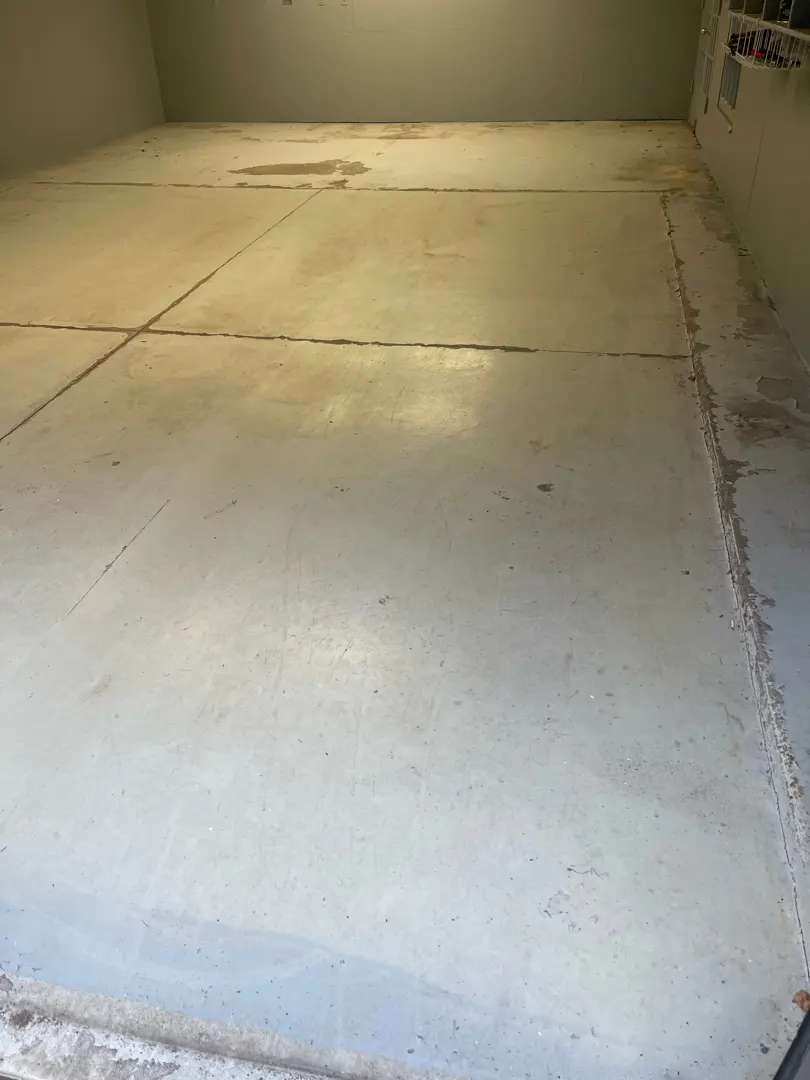
The existing concrete slab presented typical garage floor conditions accumulated over years of vehicle parking and general use. The most prominent issues were widespread oil and fluid stains concentrated in the primary vehicle parking areas. These petroleum-based contaminants had penetrated the porous concrete surface, creating dark patches ranging from light discoloration to deeply saturated spots where repeated fluid contact had occurred.
Beyond the staining, the floor exhibited scattered surface pitting—small voids and depressions created by surface spalling, minor impact damage, or aggregate pop-outs during the service life of the concrete. These pits ranged from shallow surface dimples to deeper voids of about 1/4 inch in depth. Several hairline cracks radiated from control joints or traversed portions of the slab, representing typical concrete shrinkage and minor settlement movement.
The natural gray color of the concrete showed considerable variation due to the staining patterns, creating a mottled appearance that detracted from the overall look of the house. Control joints were cleanly cut and properly positioned throughout the slab. Despite the cosmetic issues, the structural integrity of the slab remained sound with no significant spalling, major cracking, or surface delamination requiring extensive remediation.
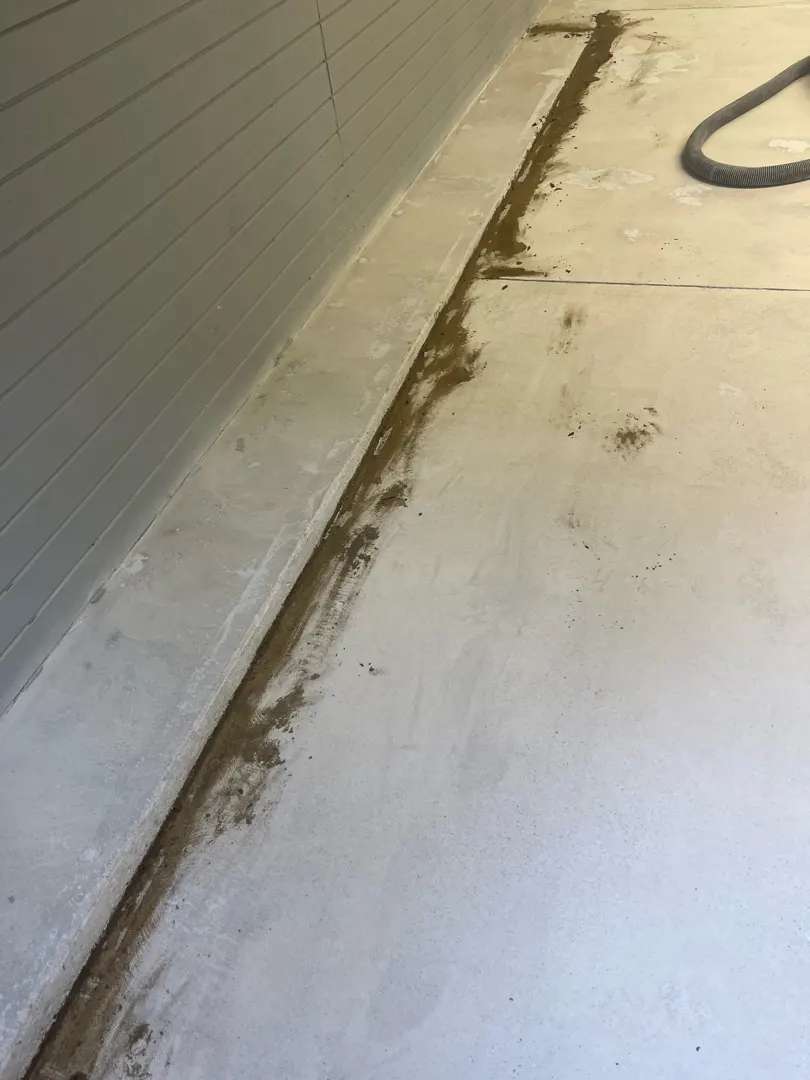
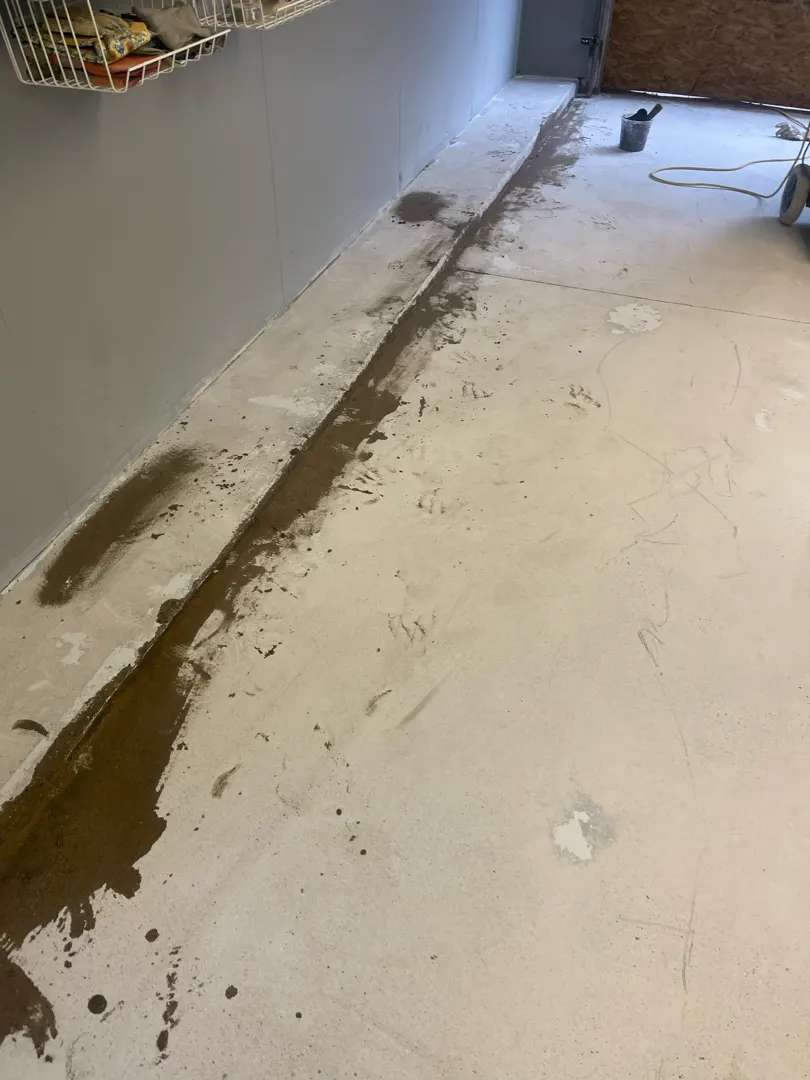
Surface Preparation Process
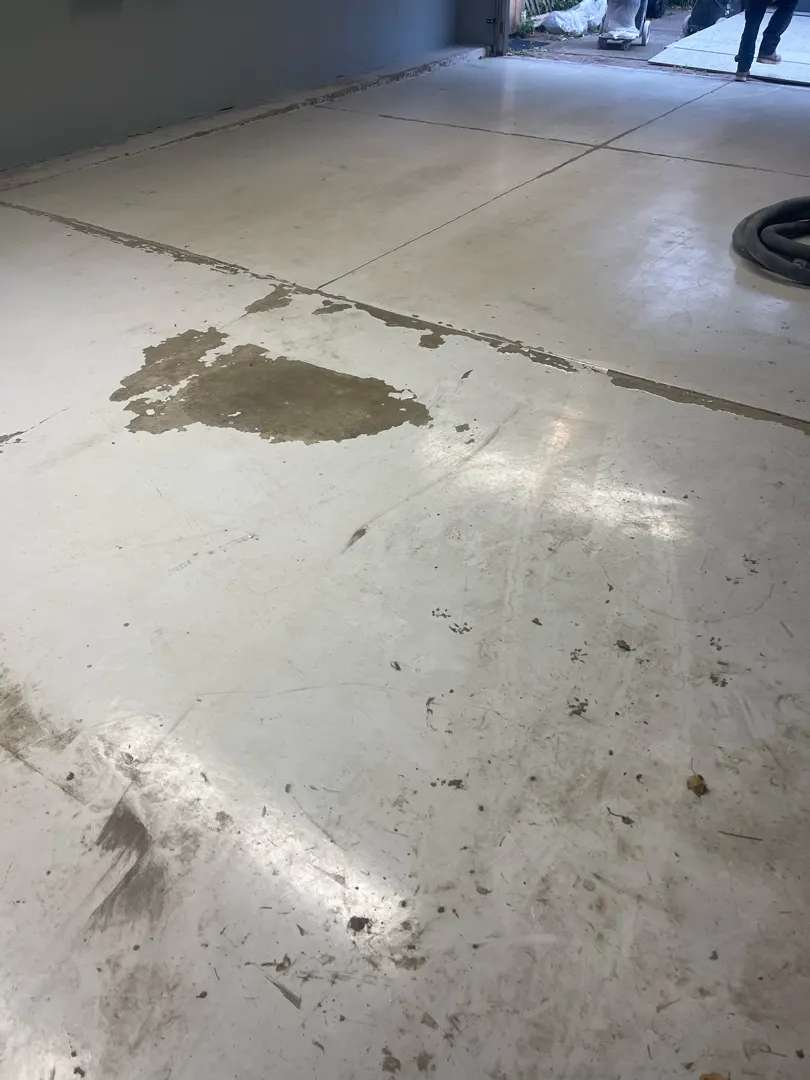
Installation commenced with comprehensive mechanical surface preparation using professional-grade diamond grinding equipment. This critical phase serves multiple purposes: removing the surface layer where oil contaminants had penetrated; opening the pore structure of the concrete for coating adhesion; and creating the proper concrete surface profile (CSP) required for polyurea systems.
The grinding process proved particularly important for this project due to the extensive oil staining. Petroleum-based contaminants create a hydrophobic barrier that prevents proper coating adhesion. It was absolutely necessary to completely remove the contaminated concrete layer. Our team made multiple grinding passes over the heavily stained areas, progressively removing material until reaching clean, uncontaminated concrete beneath.
The control joints received detailed attention during grinding. Our team worked the grinding equipment into the joint channels to ensure proper profile and cleanliness for coating coverage. Following the mechanical preparation, thorough dust extraction and surface cleaning removed all grinding residue through both dry vacuuming and damp mopping procedures.
Crack and Pit Repair Process
With the substrate fully prepared, our team proceeded to crack and pit repair using our two-part polyurea mender system. The repair process began with detailed crack preparation, using crack chasing tools to create clean channels along the length of each fissure. This created uniform width for adequate repair material volume while establishing mechanical keys along crack walls for physical engagement.
The polyurea mender was mixed in proper ratios and applied systematically, filling each crack from its deepest point outward to ensure complete void penetration without air entrapment. The flexible mender chemistry allows repairs to accommodate minor concrete movement without re-cracking, while the chemical bond between mender and concrete ensures long-term integrity.
Surface pitting received similar attention, with each void individually filled using the mender system. Our team worked material into each pit to eliminate air pockets while slightly overfilling to account for cure shrinkage. Following mender cure, additional diamond grinding leveled the repairs flush with surrounding concrete, creating a uniform surface profile that would prevent visible telegraphing through the coating layers.
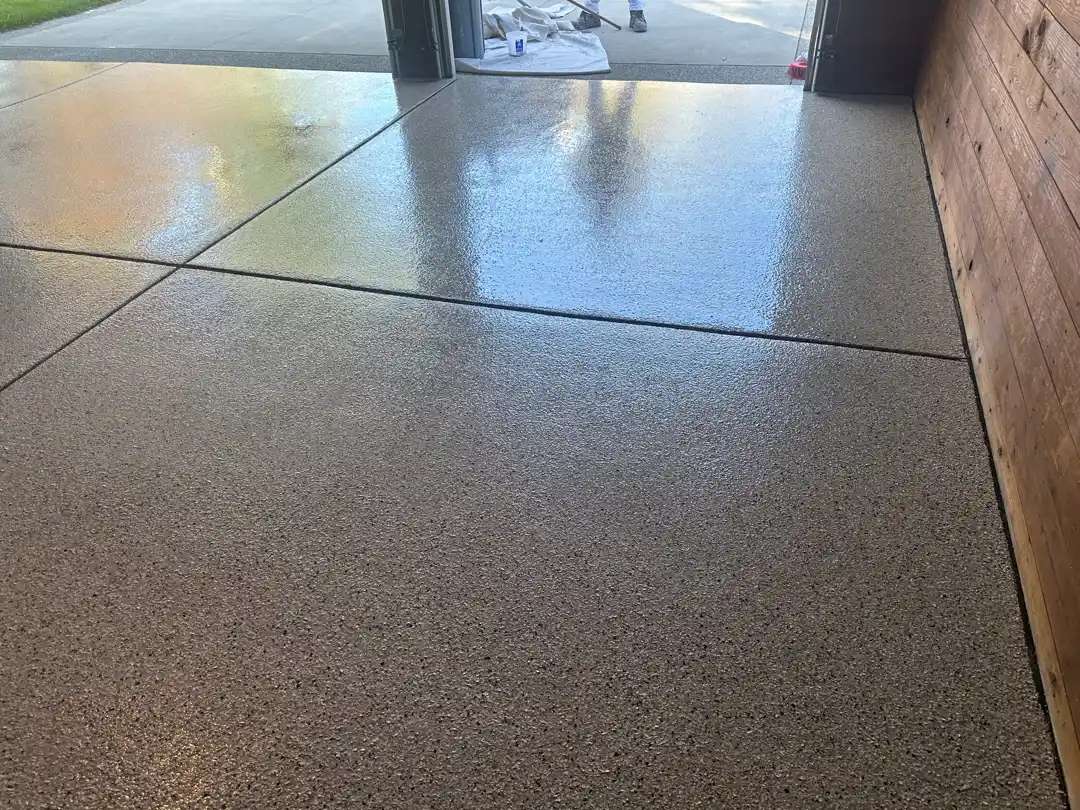
Base Coat Application
Our applied the MC3.6 polyurea coating system with a base coat color specifically selected to complement the Driftwood decorative flake blend. The base coat serves multiple critical functions: sealing the porous concrete substrate; providing color foundation for the decorative system; and creating the chemical bond layer anchoring the entire coating assembly.
Our team applied the base coat using professional roller techniques, working material into the concrete surface profile while maintaining a consistent film thickness across the entire 587-square-foot area. They paid particular attention to previously repaired areas, ensuring full coverage over mender-filled cracks and pits without differential absorption that could create color variation in the finished floor.
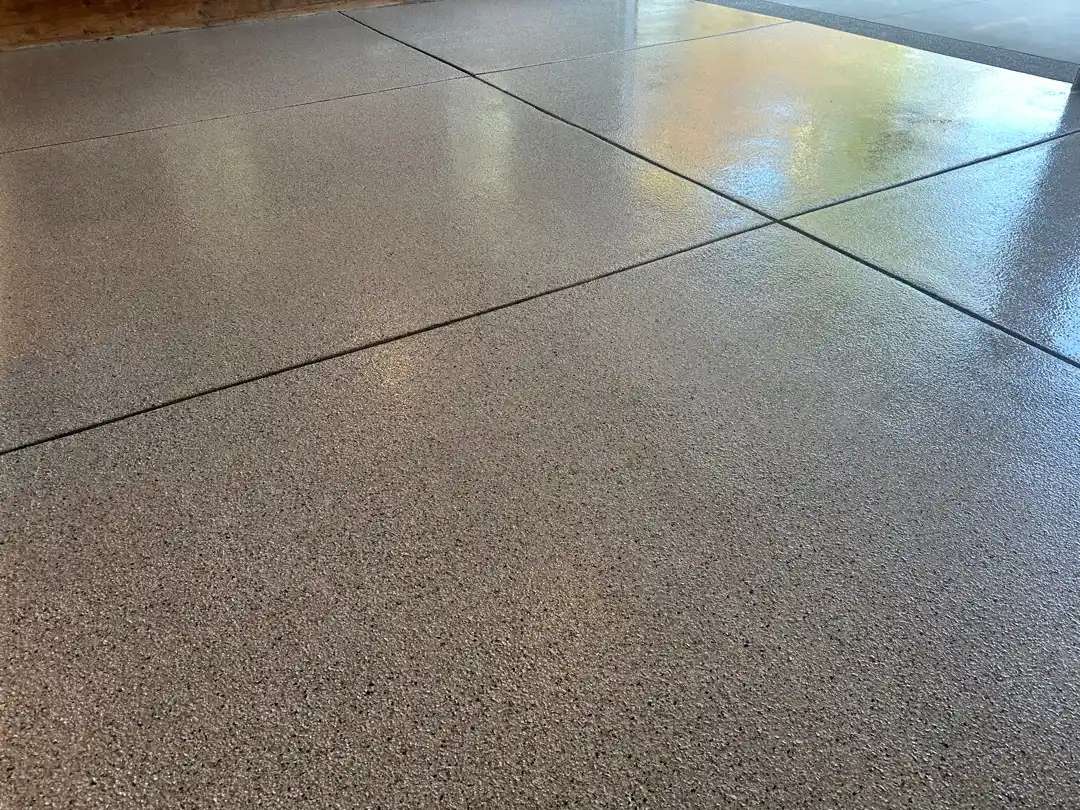
Decorative Flake Application
While the base coat remained in optimal open time, our team proceeded immediately with the decorative flake broadcast step. The Driftwood flake blend offers a palette of light gray, tan, cream, and subtle brown tones that create a warm, natural aesthetic reminiscent of weathered wood or beach sand. This color combination ensures visual interest and complemented the rustic wood-paneled walls of the garage, creating a cohesive design continuity.
The flakes were broadcast to approximately 85-90% coverage density, allowing the base coat to show through in small interstices between flakes while creating the perception of full coverage. This density provides optimal visual impact while managing material costs and surface texture. Following base coat cure, our team conducted the flake scraping phase to remove loose or vertically oriented flakes that could compromise the top coat appearance.
Clear Coat and Texture Application
The final phase of our garage floor coating process involves laying down a clear polyaspartic top coat with integrated 16-grit aluminum oxide texture additive. This standard residential texture creates a moderate slip resistance without the aggressive grip of coarser textures. This is enough to offer safe footing when wet while maintaining comfortable barefoot feel and easy-cleaning characteristics.
The clear coat fully encapsulates the decorative flake layer, creating the smooth, continuous surface characteristic of professional installations. The polyaspartic chemistry provides great chemical resistance to automotive fluids, road salts, and household chemicals. The UV stability of the coating prevents yellowing and color shift: the Driftwood blend will maintain its warm, natural appearance throughout years of sunlight exposure from the garage door opening.
Technical Specifications
- Square Footage: 587 sq ft
- Coating System: MC3.6 polyurea/polyaspartic
- Color: Driftwood (light gray/tan blend)
- Texture Additive: 16-grit aluminum oxide
- Surface Profile: CSP-2 (diamond ground)
- Crack Repair: Polyurea mender system
- Pit Remediation: Polyurea mender fill
- Removal: None required
- Additional Surfaces: None (no steps or verticals)
Performance Characteristics
The completed floor system delivers comprehensive performance across all critical criteria. The non-porous surface of the coating prevents spills from penetrating into the concrete substrate. The 16-grit texture ensures safe footing under wet conditions. The smooth polyaspartic surface allows dirt and debris to be swept or mopped away without lodging in surface irregularities.
The flexible polyurea base layers accommodate the natural thermal expansion and contraction cycles f the concrete without cracking or delaminating. The hard polyaspartic top coat provides superior abrasion resistance for long-term appearance retention. The comprehensive crack and pit repair work ensures that substrate issues won’t telegraph through the coating or compromise system integrity.
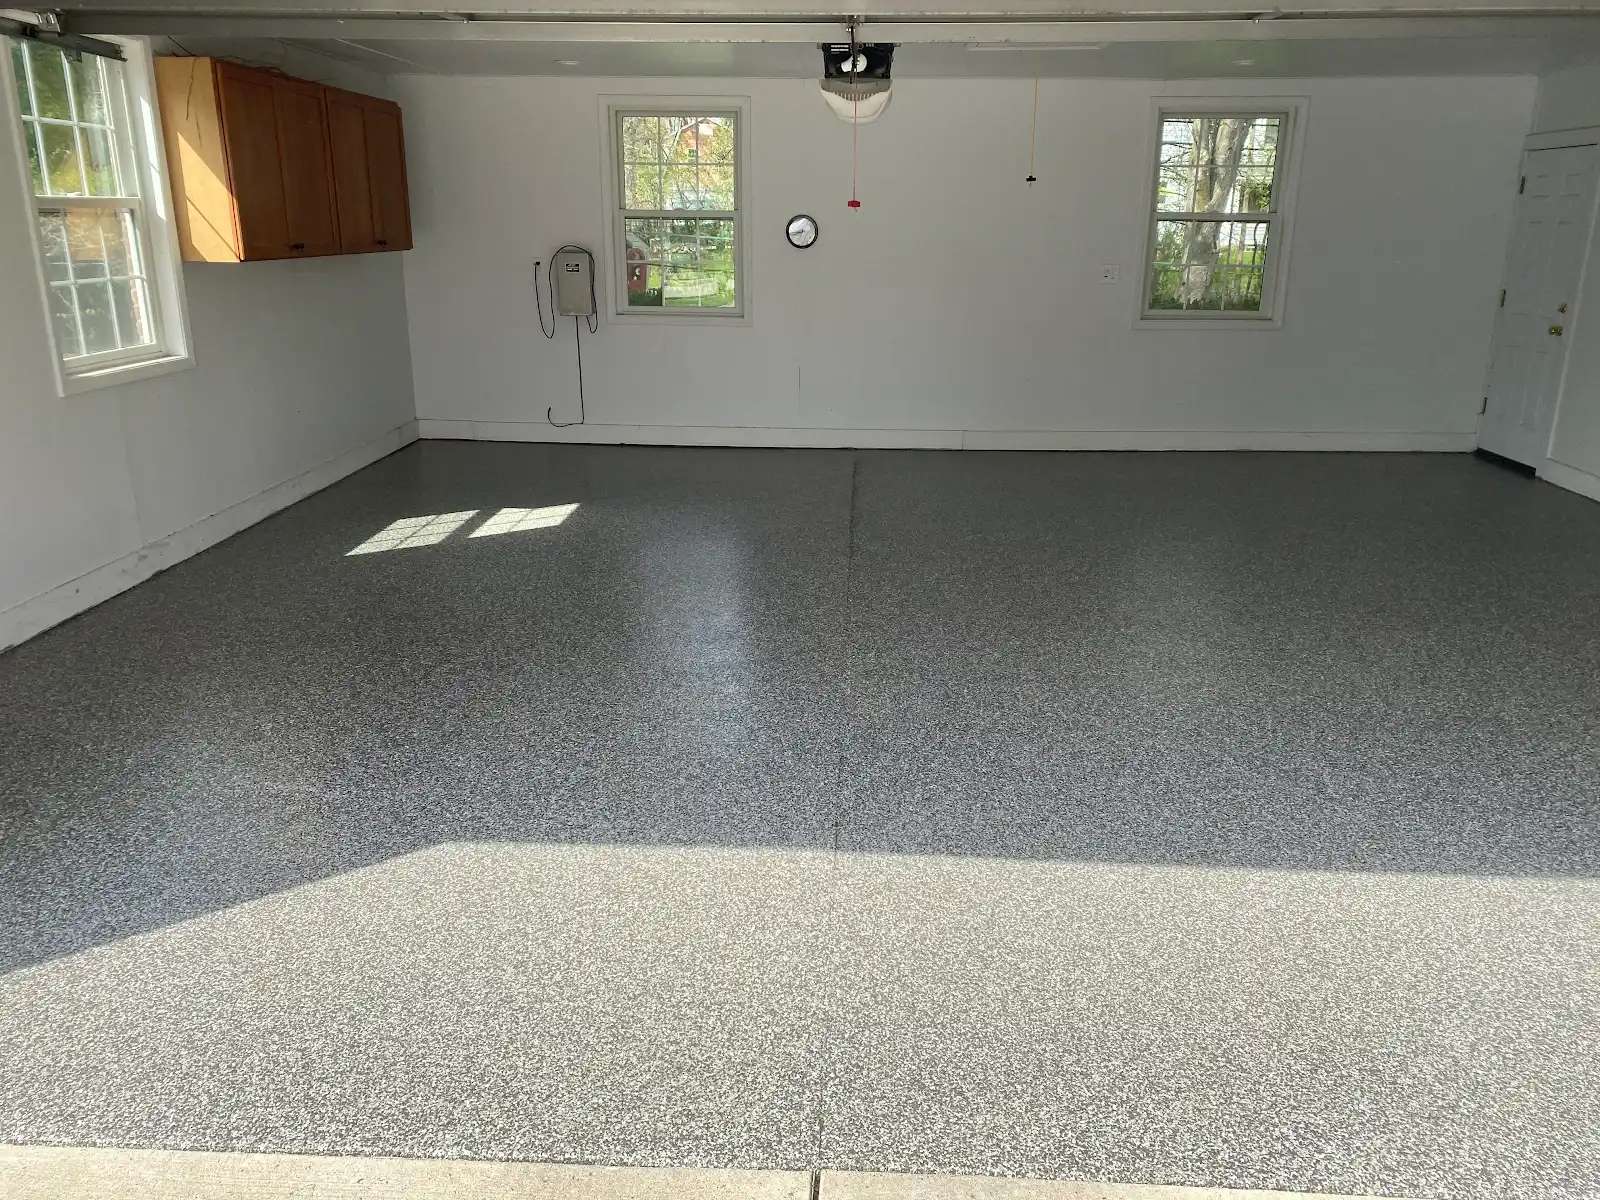
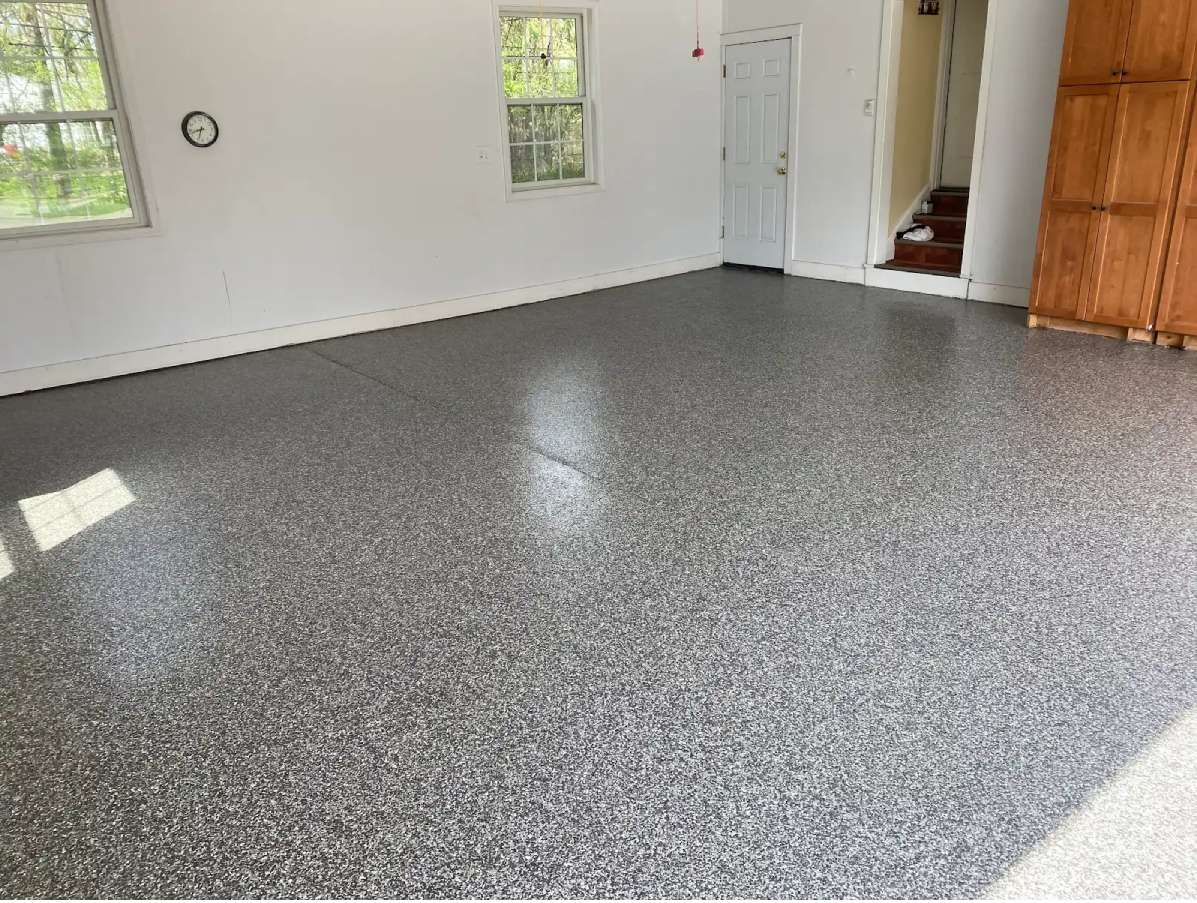
Transformation Impact
The new garage floor coating presents a clear contrast between the stained, deteriorated original concrete… and the professional appearance of the new coating. The Driftwood color palette creates a warm, inviting aesthetic that elevates the garage from a purely utilitarian space to a refined extension of the living areas of this home.
The variegated flake pattern naturally camouflages minor dirt and tire marks, reducing cleaning frequency required to maintain a presentable appearance. The smooth, sealed surface makes the garage significantly easier to maintain, with spills wiping clean and dust sweeping effortlessly across the non-porous coating. And most significantly, the coating system has sealed and protected the concrete substrate, preventing further oil penetration and surface deterioration while extending the serviceable life of the slab by decades.
Maintenance and Longevity
The new gaage floor coating requires minimal maintenance. Regular dust mopping removes loose debris, while occasional damp mopping with pH-neutral cleaners maintains appearance. The Driftwood blend naturally camouflages minor dirt while the 16-grit texture maintains slip resistance throughout the life of the coating.
The extensive substrate preparation and repair work ensures decades of reliable service. The polyurea mender system structural reinforcement prevents repaired cracks from reopening, while flexible coating layers accommodate normal concrete movement without failure. The chemical-resistant properties ensure that automotive fluids, deicing salts, and other garage contaminants won’t degrade the coating or penetrate to concrete below.
This Royal Oak installation exemplifies MotorCity Floors and Coatings’ commitment to quality workmanship and customer satisfaction. By addressing every substrate issue through proper preparation and repair protocols… while delivering a sophisticated color design and professional coating application, Our team created a floor system that transformed the garage into a beautiful, functional space.
Click on the photos to enlarge them
Garage Floor COATING with Paint Removal - Hendrie Boulevard, Royal Oak, MI
The Challenge
The homeowners contacted MotorCity Floors and Coatings to address a severely failing floor paint system and transform their 604-square-foot garage with a professional-grade polyurea garage floor coating system. This project offered challenging substrate conditions, requiring complete removal of a deteriorated paint coating, comprehensive crack repair, and meticulous surface preparation before installing a sophisticated two-tone floor design with vertical cove base detailing.
Initial Substrate Condition
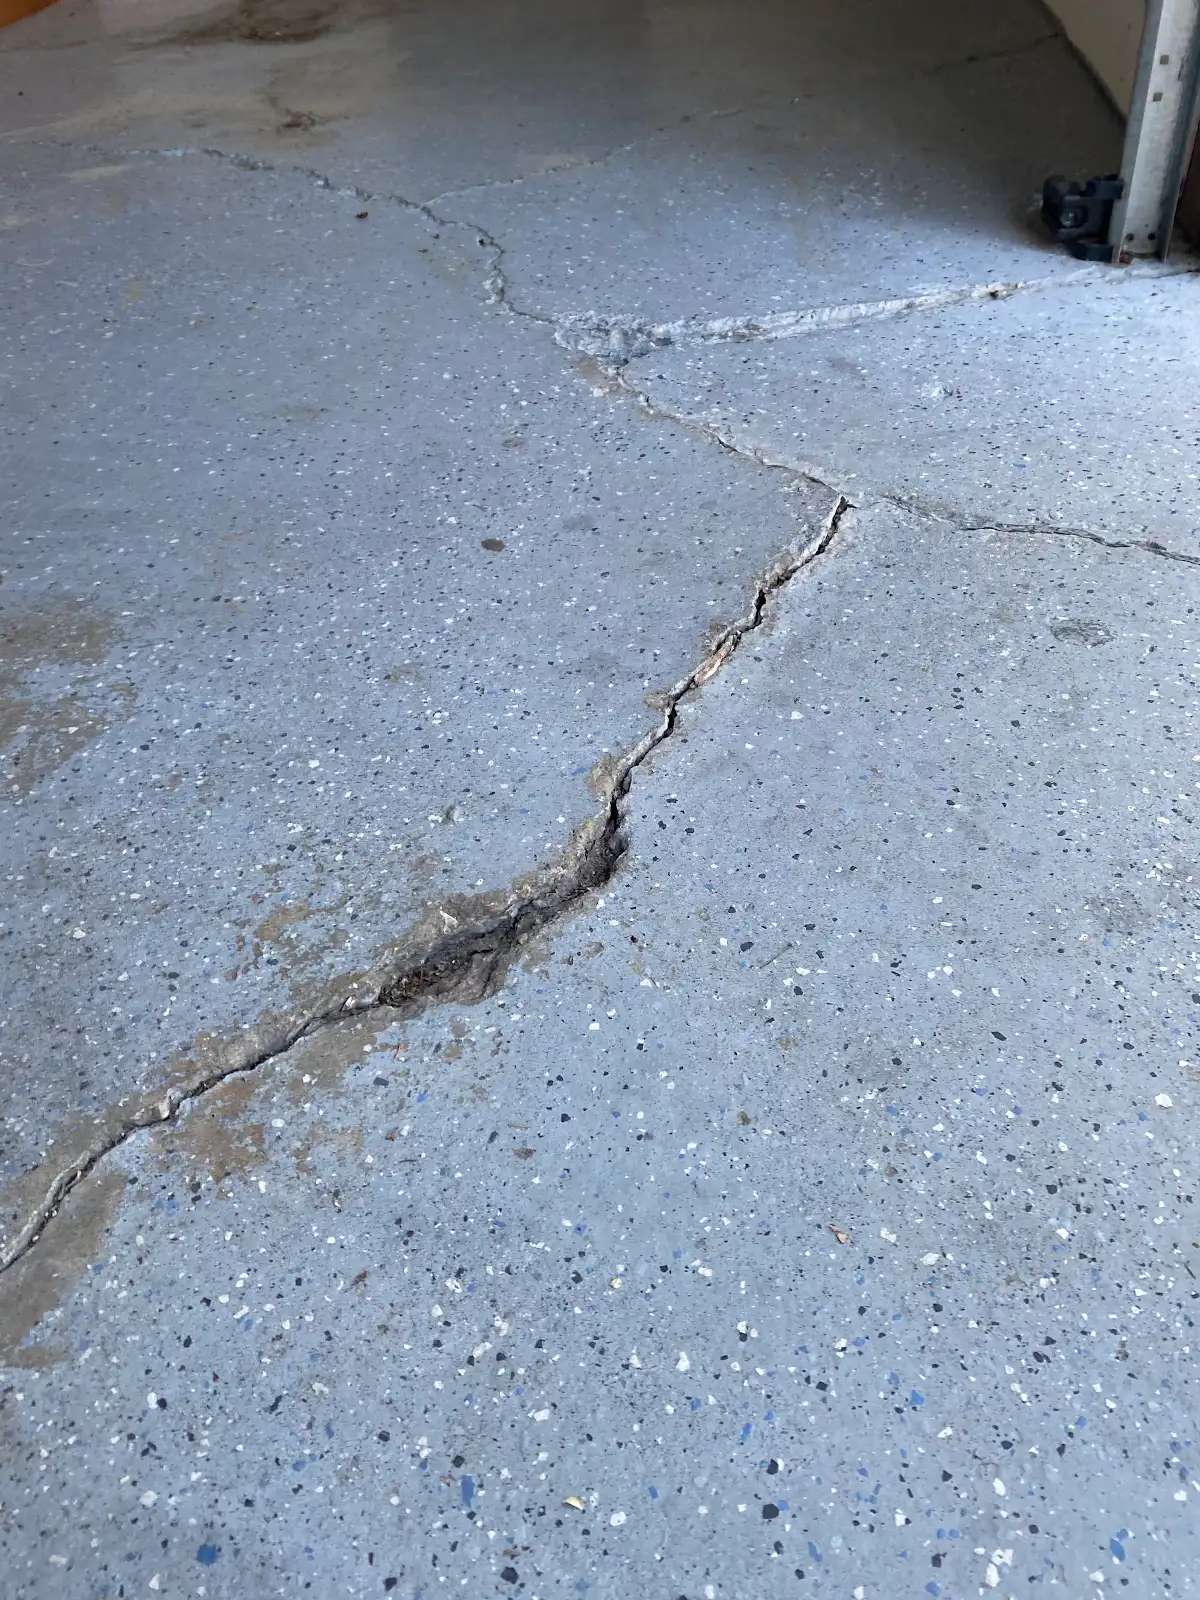
The existing garage floor presented a textbook case of failed paint coating application. The floor had been previously coated with a consumer-grade paint product that had degraded through multiple failure mechanisms. Extensive delamination zones showed where the paint had separated from the concrete substrate, creating large patches of loose, peeling material. Along the perimeter walls, the coating had failed completely, with paint curling away from the concrete in sheets and flakes.
In areas where the paint remained adhered, the coating showed severe surface wear, with high-traffic zones worn through to bare concrete. The inability of the paint to bond properly to the concrete had created a hydrophobic barrier that actually accelerated substrate deterioration beneath the coating by trapping moisture against the concrete surface.
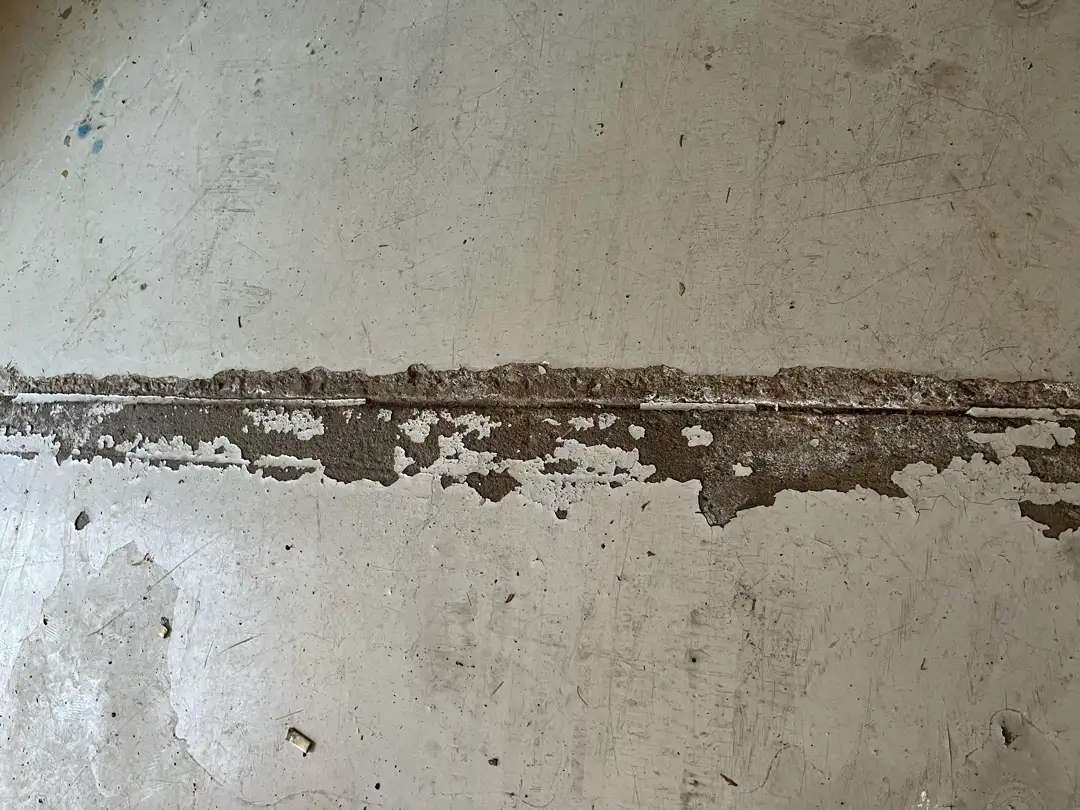
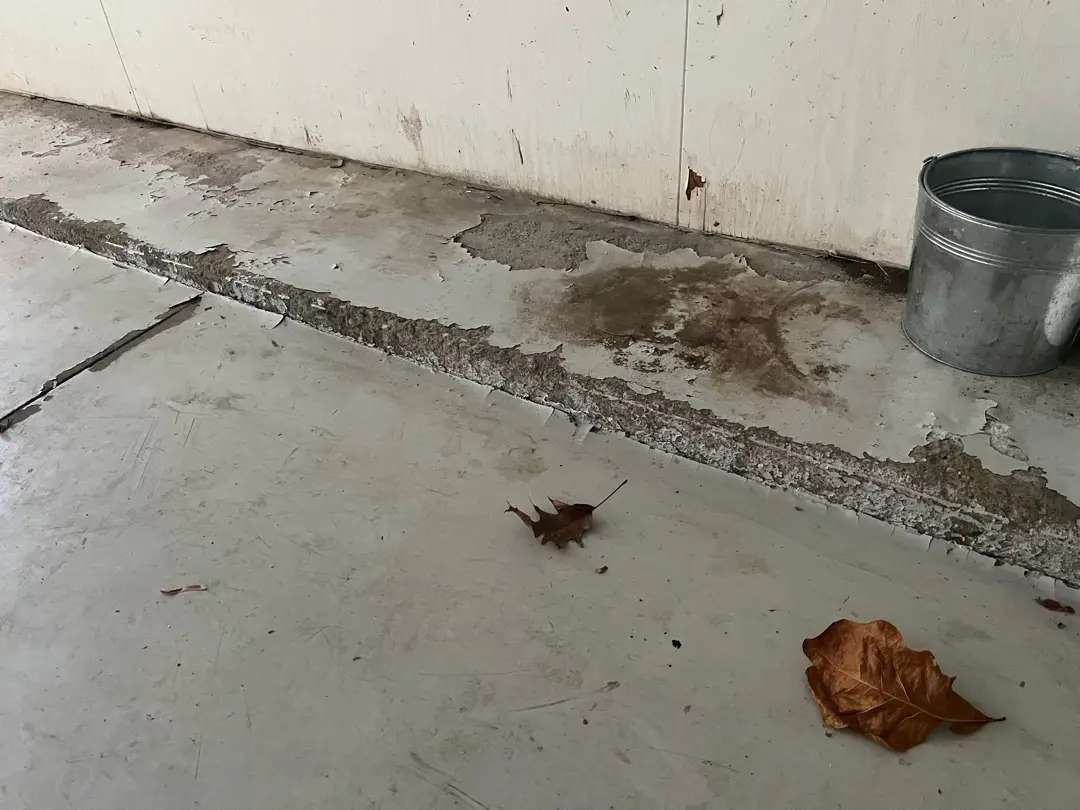
Beyond the coating failure, the concrete substrate exhibited structural issues requiring remediation. Several cracks traversed the slab, representing typical concrete shrinkage and minor settlement movement. Surface pitting was scattered throughout the floor—small voids and depressions created by various deterioration mechanisms. The combination of failed coating, cracks, and surface pitting created an unsightly, non-functional floor surface that detracted from the use and look of this garage.
Paint Removal Process
The installation commenced with the labor-intensive process of complete paint removal. This critical phase required aggressive mechanical methods using professional-grade diamond grinding equipment with coarse grit sequences specifically designed for coating removal. Our team systematically ground away all traces of the failed paint system, working across the entire 604-square-foot area to achieve complete removal down to bare concrete.
The paint removal phase proved particularly challenging due to the differences of adhesion of the old coating from place to place. Areas where the paint had delaminated required less aggressive grinding, but zones where the coating remained stubbornly adhered demanded multiple passes with progressively coarser diamonds. The perimeter areas where paint had failed most dramatically required additional attention to remove paint residue from concrete pores and surface irregularities.
There are multiple reasons why it is necessary to remove the previous paint coat fully. Any paint residue left on the concrete would create weak spots where the new polyurea coating would delaminate. The chemical composition of the paint was incompatible with polyurea systems, so even trace amounts could compromise adhesion. Additionally, the grinding process needed to penetrate beyond the paint layer to remove any concrete surface layer that had been weakened or contaminated by the failure mechanisms of the paint.
Surface Preparation and Profiling
Following complete paint removal, the team continued with comprehensive surface preparation to create the proper concrete surface profile. This involved additional diamond grinding with progressively finer grit sequences to achieve the target CSP-2 specification. The grinding opened the concrete’s pore structure, creating mechanical tooth for polyurea coating adhesion while removing any remaining contaminated concrete surface layer.
The control joints received detailed attention, with grinding equipment worked into joint channels to ensure proper profile and cleanliness. The 12 linear feet of vertical wall surface that would receive cove base treatment also required careful preparation, with the team grinding the lower wall surface to create proper adhesion for the vertical coating application.
Thorough dust extraction and surface cleaning followed mechanical preparation. Both dry vacuuming and damp mopping techniques removed all grinding residue, leaving the concrete clean and ready for crack repair and coating application.
Crack and Pit Repair Process
With the substrate fully prepared, the installation team proceeded to crack and pit repair using MotorCity’s two-part polyurea mender system. The repair process began with detailed crack preparation using crack chasing tools to create clean, profiled channels along each fissure’s length. This created uniform width for adequate repair material volume while establishing mechanical keys along crack walls.
The polyurea mender was mixed in proper ratios and applied systematically, filling each crack from its deepest point outward to ensure complete void penetration without air entrapment. The flexible mender chemistry allows repairs to accommodate minor concrete movement without re-cracking, while the chemical bond between mender and concrete ensures long-term integrity.
Surface pitting received similar attention, with each void individually filled using the mender system. The team worked material into each pit to eliminate air pockets while slightly overfilling to account for cure shrinkage. Following mender cure, additional diamond grinding leveled the repairs flush with surrounding concrete, creating a uniform surface profile that would prevent visible telegraphing through the coating layers.
Cove Base Installation
One of this project’s defining features was the 12 linear feet of vertical cove base installation along a designated wall section. This professional detail creates a seamless transition from floor to wall, eliminating the difficult-to-clean junction where dirt and moisture typically accumulate. The cove base installation required specialized application techniques, with the team applying polyurea coating material in a continuous bead along the wall-to-floor junction, then using specialized tooling to shape the material into a smooth, radiused profile.
The vertical lip creates both aesthetic appeal and practical functionality, protecting the wall-to-floor junction while providing a finished, professional appearance. The cove base extended approximately 3-4 inches up the wall surface, creating a gentle curve that coating material could bridge without forming weak spots or thin areas.
Two-Tone Base Coat Application
MotorCity Flooring applied their MC3.9 polyurea coating system in a sophisticated two-tone design featuring Smoke as the primary color with Smoke with Red as the accent color. The Smoke color provides a clean, contemporary gray that serves as the main garage floor tone. The Smoke with Red blend incorporates subtle red flake accents into the gray base, creating a darker, more dynamic zone that adds visual interest and spatial definition.
The base coat application proceeded systematically using professional roller techniques. The team worked material into the prepared concrete surface profile, ensuring complete wetting and penetration into the concrete’s pore structure. Consistent film thickness across the entire floor area ensured uniform color depth and proper coating performance. The base coat sealed the porous concrete substrate, preventing moisture vapor transmission while creating the chemical bond layer anchoring the entire coating system.
Decorative Flake Application
While the base coat remained in optimal open time, the team broadcast decorative flakes across each color zone. The Smoke areas received a gray flake blend that complements the neutral base tone, while the Smoke with Red zones received a blend incorporating red, charcoal, and gray flakes that create visual depth and dynamic contrast.
The flakes were broadcast to approximately 85-90% coverage density, creating the appearance of full coverage while allowing subtle glimpses of base coat color through small interstices. This density provides optimal visual impact while managing material costs and surface texture. Following base coat cure, the team scraped the floor to remove loose or vertically oriented flakes, ensuring a consistent surface for top coat application.
Clear Coat and Texture Application
The final phase of this garage floor coating installation job involved applying the clear polyaspartic top coat with integrated 16-grit aluminum oxide texture additive. This standard residential texture creates moderate slip resistance without aggressive grip, providing safe footing when wet while maintaining comfortable barefoot feel and easy cleaning characteristics.
The clear coat fully encapsulates the decorative flake layer, creating the smooth, continuous surface characteristic of professional installations. The polyaspartic chemistry provides strong chemical resistance to automotive fluids, road salts, and household chemicals. The UV stability of the top coat prevents yellowing and color shift, ensuring both color zones maintain their appearance throughout years of sunlight exposure.
Technical Specifications
- Square Footage: 604 sq ft
- Coating System: MC3.9 polyurea/polyaspartic
- Primary Color: Smoke (gray)
- Accent Color: Smoke with Red (gray with red flakes)
- Cove Base: 12 linear feet
- Texture Additive: 16-grit aluminum oxide
- Surface Profile: CSP-2 (diamond ground)
- Paint Removal: Complete mechanical removal
- Crack Repair: Polyurea mender system
- Pit Remediation: Polyurea mender fill
- Additional Surfaces: 12 LF vertical lip
Performance Characteristics
The completed floor system delivers comprehensive performance across all critical criteria. The polyurea chemistry provides exceptional chemical resistance, with the non-porous surface of the top coat preventing spills from penetrating. The 16-grit texture ensures safe footing under wet conditions while the smooth polyaspartic surface allows easy maintenance.
The flexible polyurea base layers accommodate the natural thermal expansion of the concrete without cracking, while the hard polyaspartic top coat provides superior abrasion resistance. The comprehensive paint removal, crack repair, and pit remediation ensure that substrate issues won’t telegraph through the coating or compromise system integrity.
Transformation Impact
The contrast between the severely deteriorated painted floor and the completed professional coating represents one of the most dramatic transformations in MotorCity’s portfolio. The two-tone Smoke and Smoke with Red design creates visual sophistication that elevates the garage from a space marred by coating failure to a refined, contemporary environment. The darker Smoke with Red accent zone adds architectural interest and spatial definition, while the lighter Smoke main area provides a clean, neutral backdrop.
The 12 linear feet of vertical cove base adds a professional finishing touch, creating seamless transition from floor to wall that enhances both aesthetics and functionality. The smooth, sealed surface makes the garage significantly easier to maintain, with the variegated flake pattern naturally camouflaging minor dirt while spills wipe clean effortlessly.
Maintenance and Longevity
The completed floor requires minimal maintenance. Regular dust mopping removes loose debris, while occasional damp mopping with pH-neutral cleaners maintains appearance. The varied tones of the two-tone design naturally camouflage minor dirt, while the 16-grit texture maintains slip resistance throughout the service life of the coating.
The extensive substrate preparation, complete paint removal, and comprehensive repair work ensure decades of reliable service. The polyurea mender creates a structural reinforcement that prevents repaired cracks from reopening, while flexible coating layers accommodate normal concrete movement without the risk of failure typical of traditional epoxy coating. The chemical-resistant properties ensure automotive fluids, deicing salts, and household chemicals won’t degrade the coating or penetrate to the concrete slab below.
This Royal Oak installation exemplifies MotorCity Floors and Coatings’ commitment to quality workmanship and problem-solving expertise. By refusing to take shortcuts around the severely failed paint system and instead addressing every substrate issue through proper removal and repair protocols, the installation team delivered a floor system that transforms this garage into a beautiful, functional space that enhances the overall value and livability of this residence for years to come.
Click on the photos to enlarge them
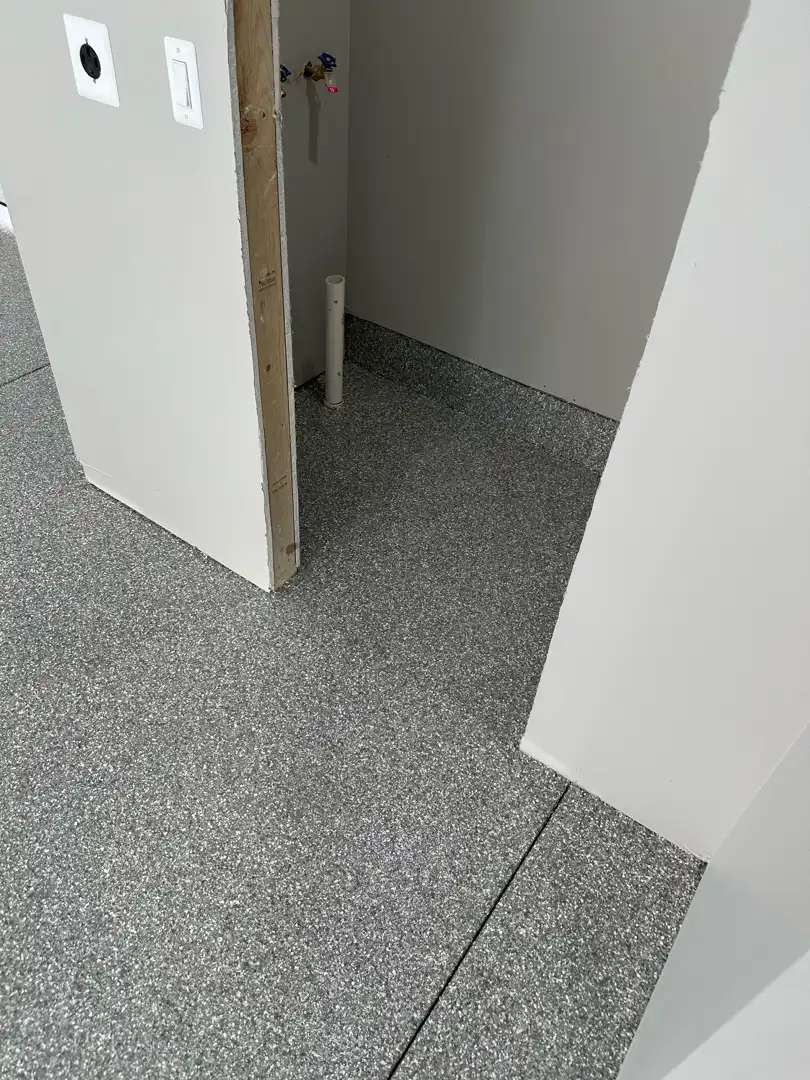
Polyurea Garage Floor Coating on New Construction - Glenview Avenue, Royal Oak, MI
Project Overview
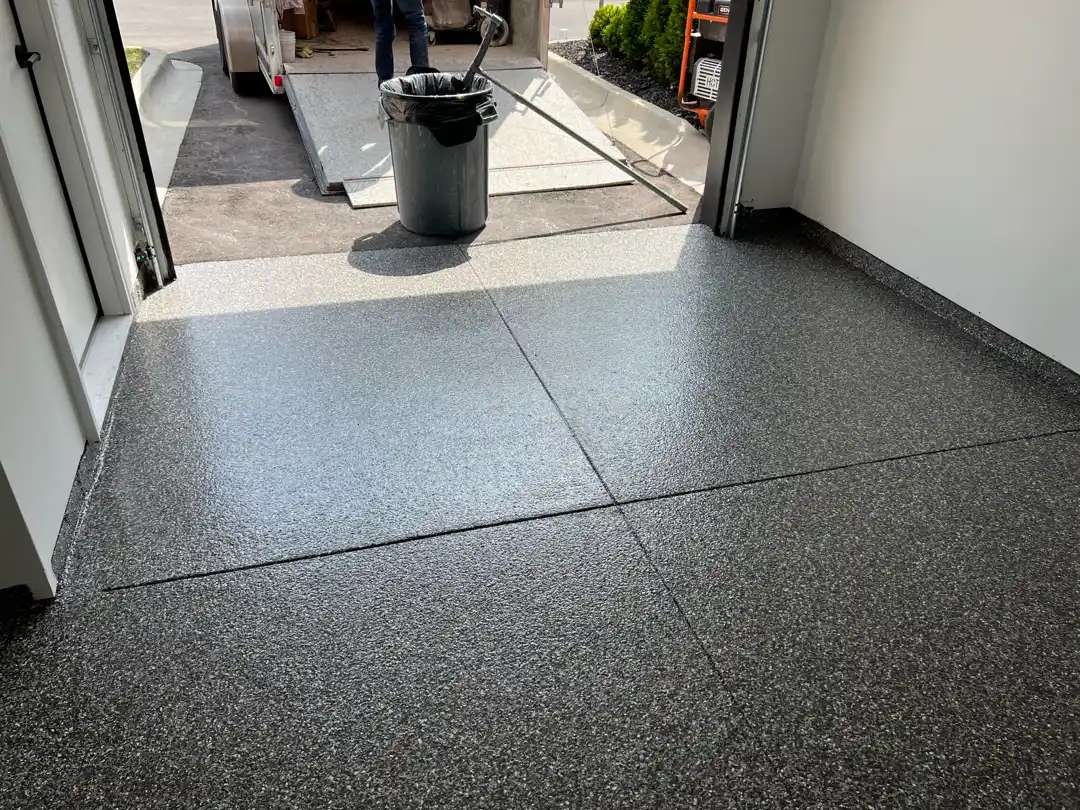
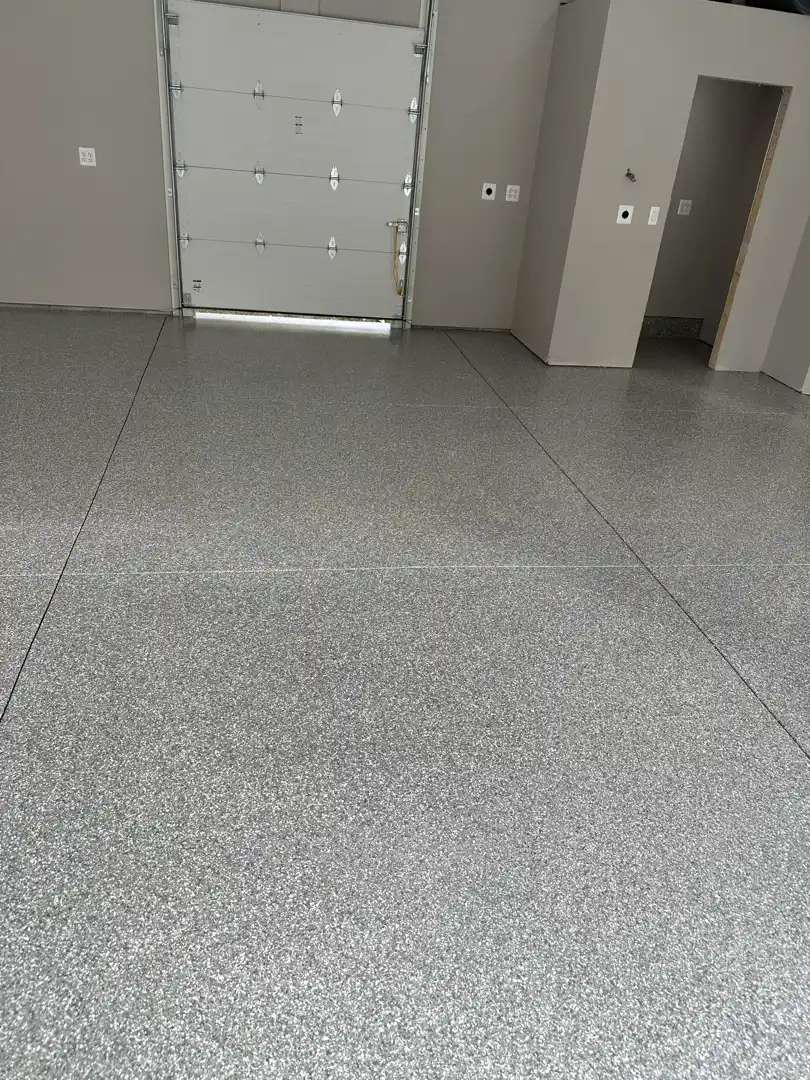
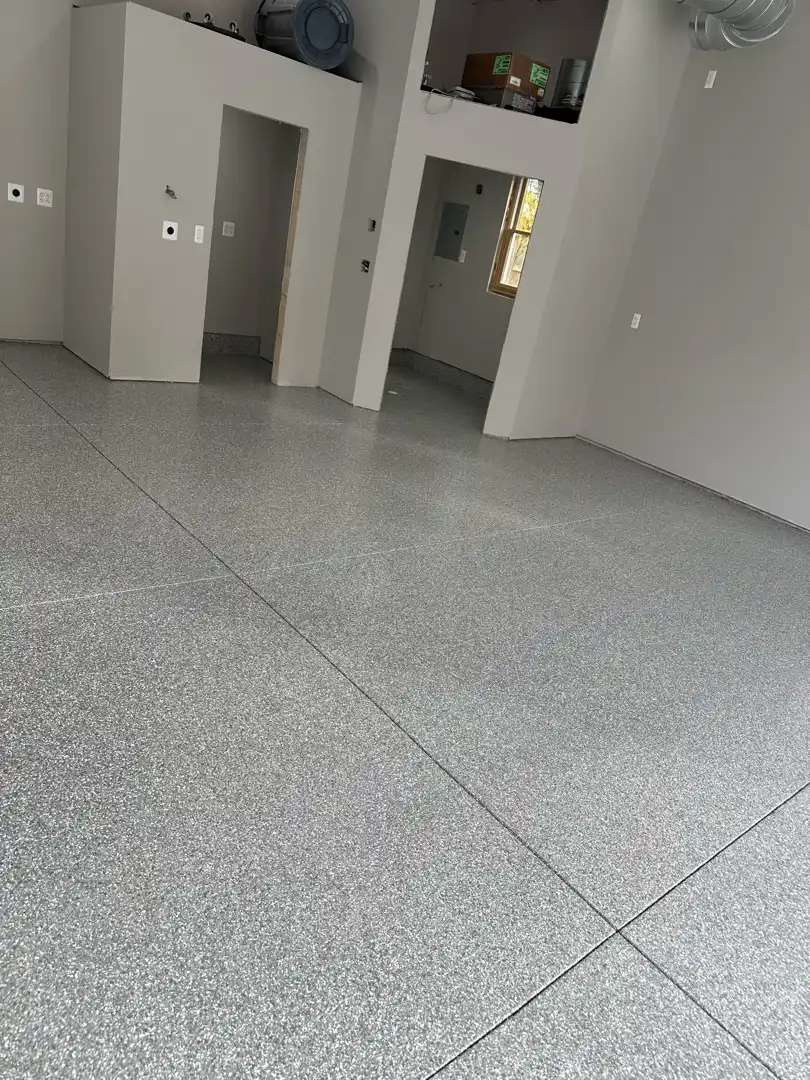
The homeowners contacted MotorCity Floors and Coatings to install a professional-grade floor coating system in their 1,090-square-foot detached garage. This project presented a great installation scenario: brand-new concrete in pristine condition, allowing MotorCity to showcase our dual-blend garage floor coating system, its aesthetic and performance potential, without the complications of substrate repair or remediation. The multi-room layout included two dedicated back rooms receiving 20 linear feet of vertical block wall coating, creating a comprehensive flooring solution for this impressive workshop and storage facility.
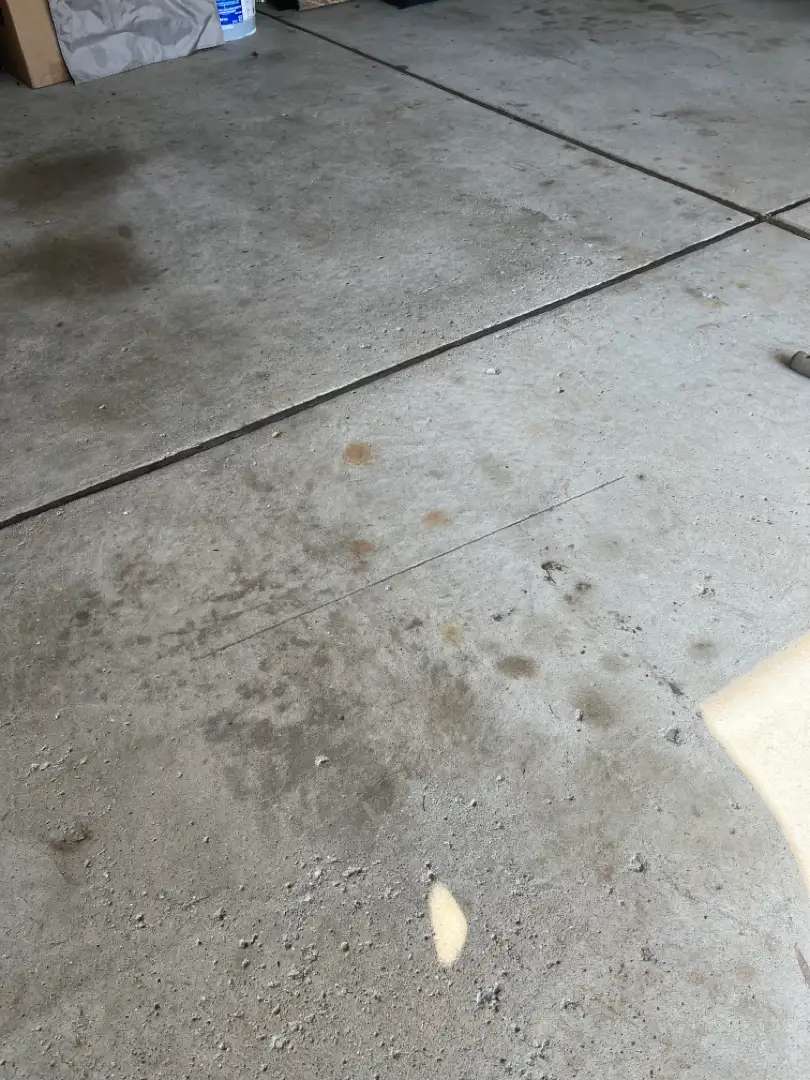
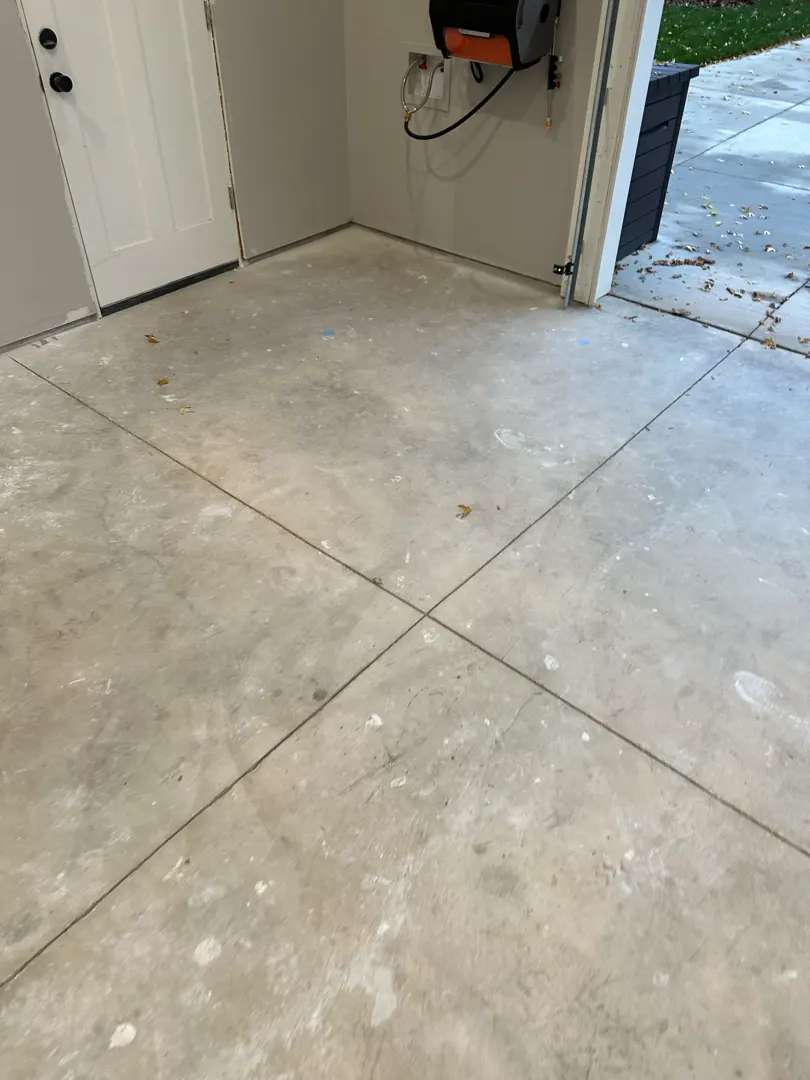
Initial Substrate Condition
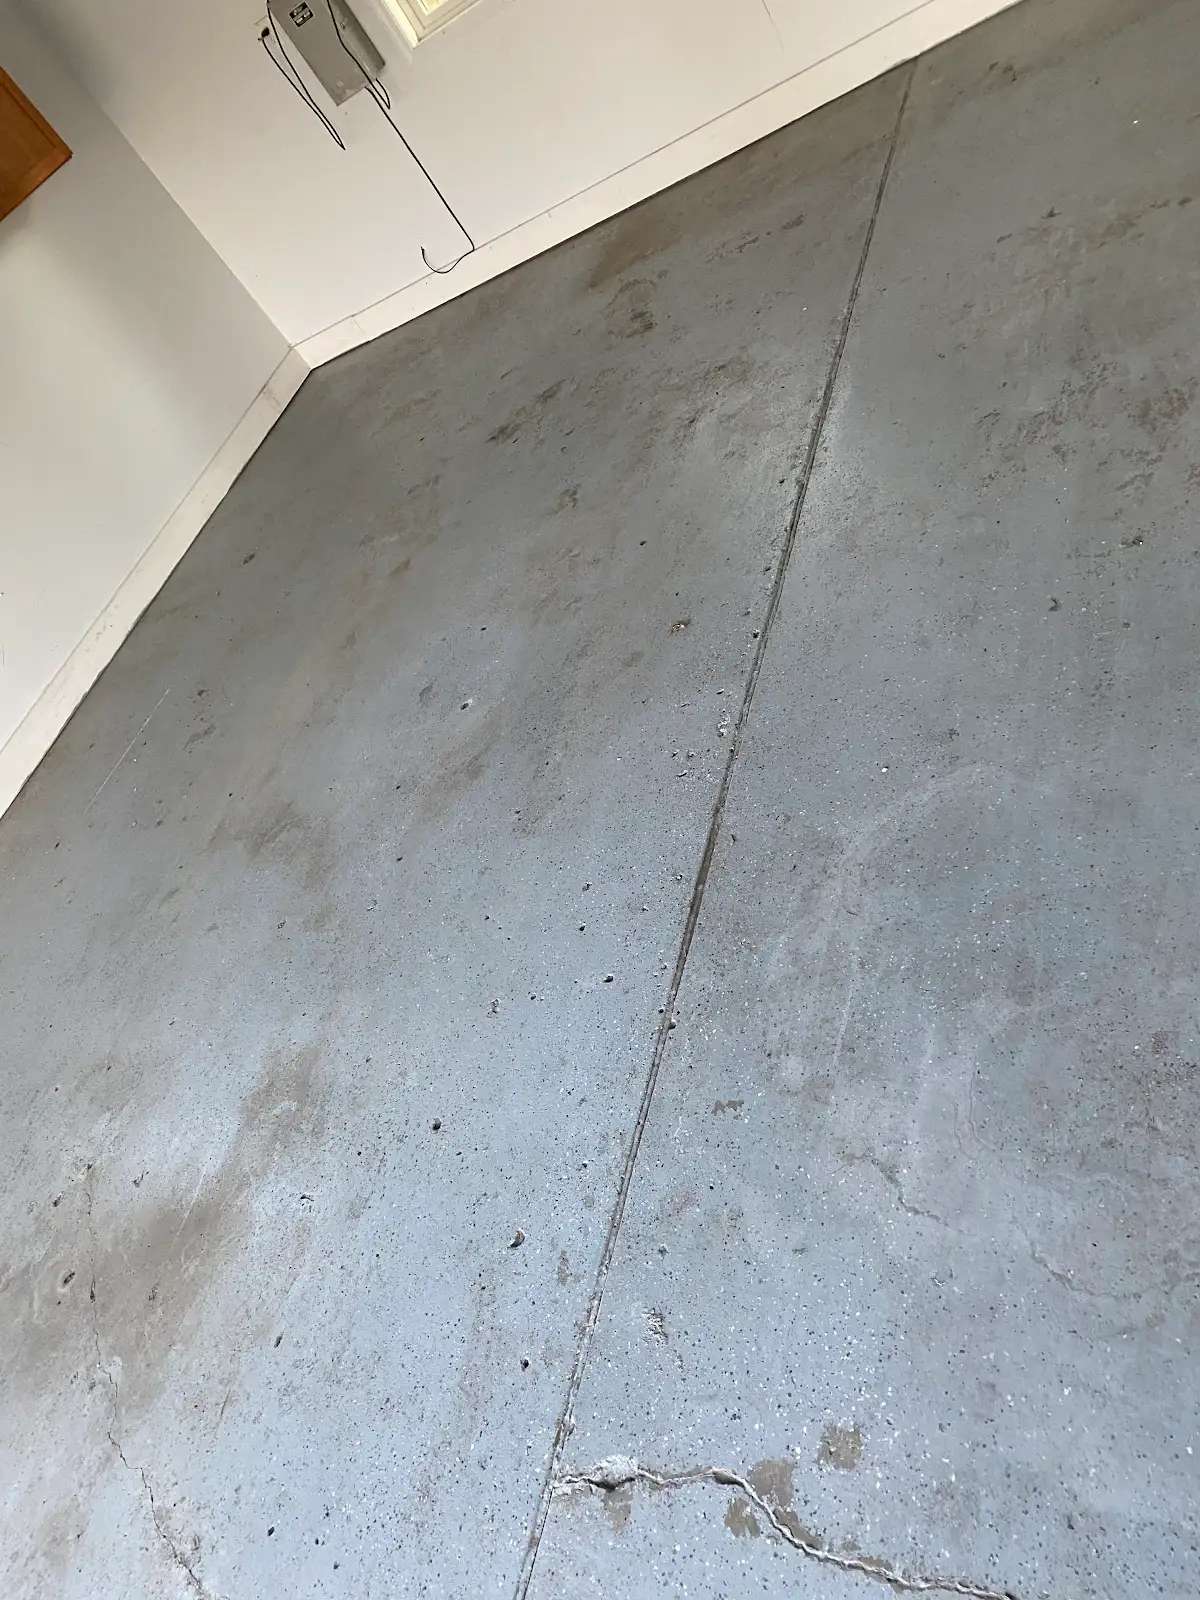
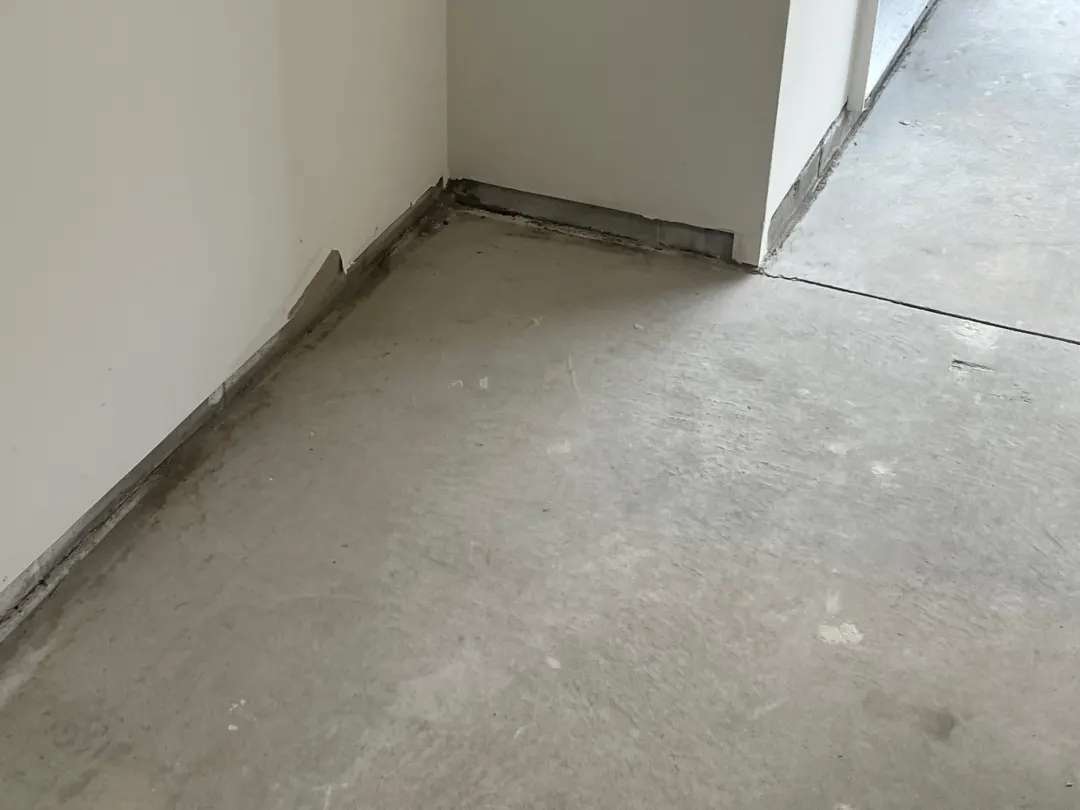
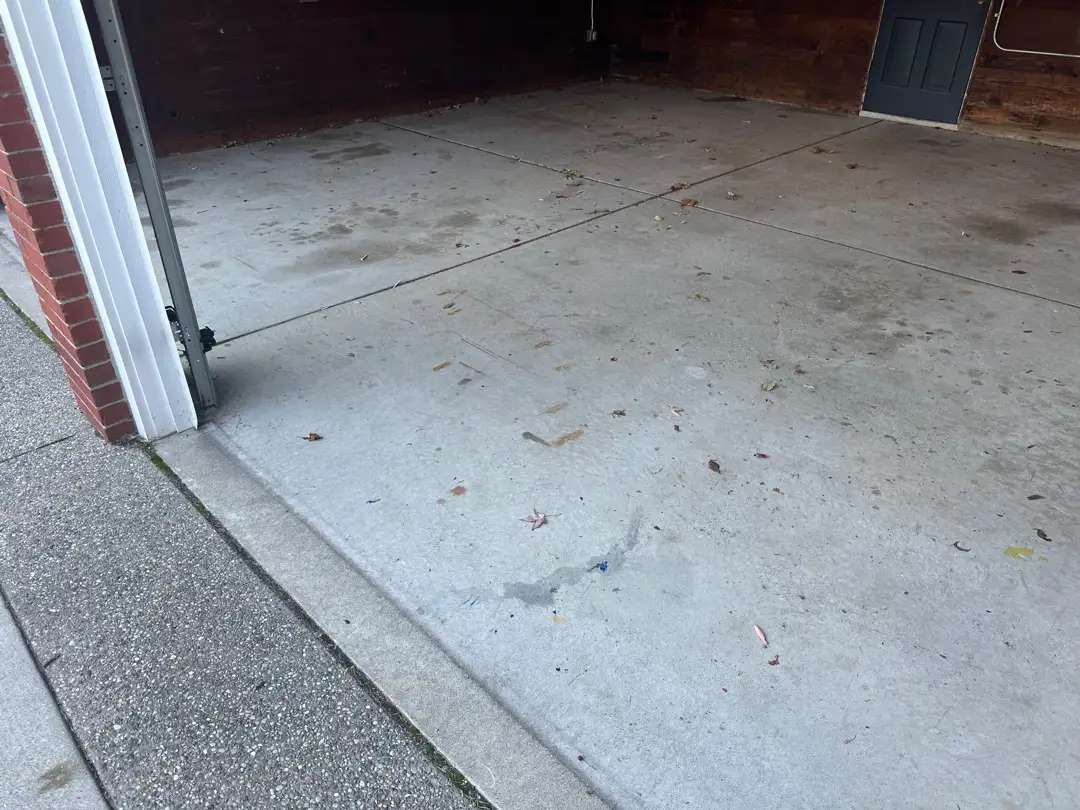
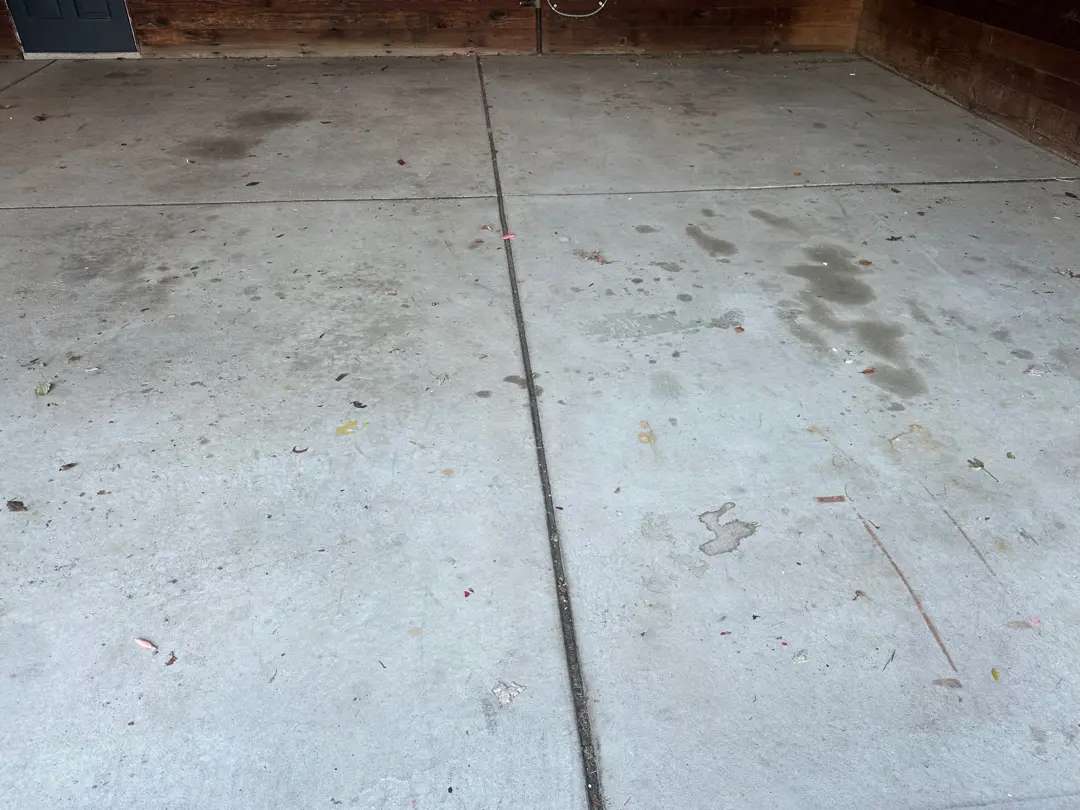
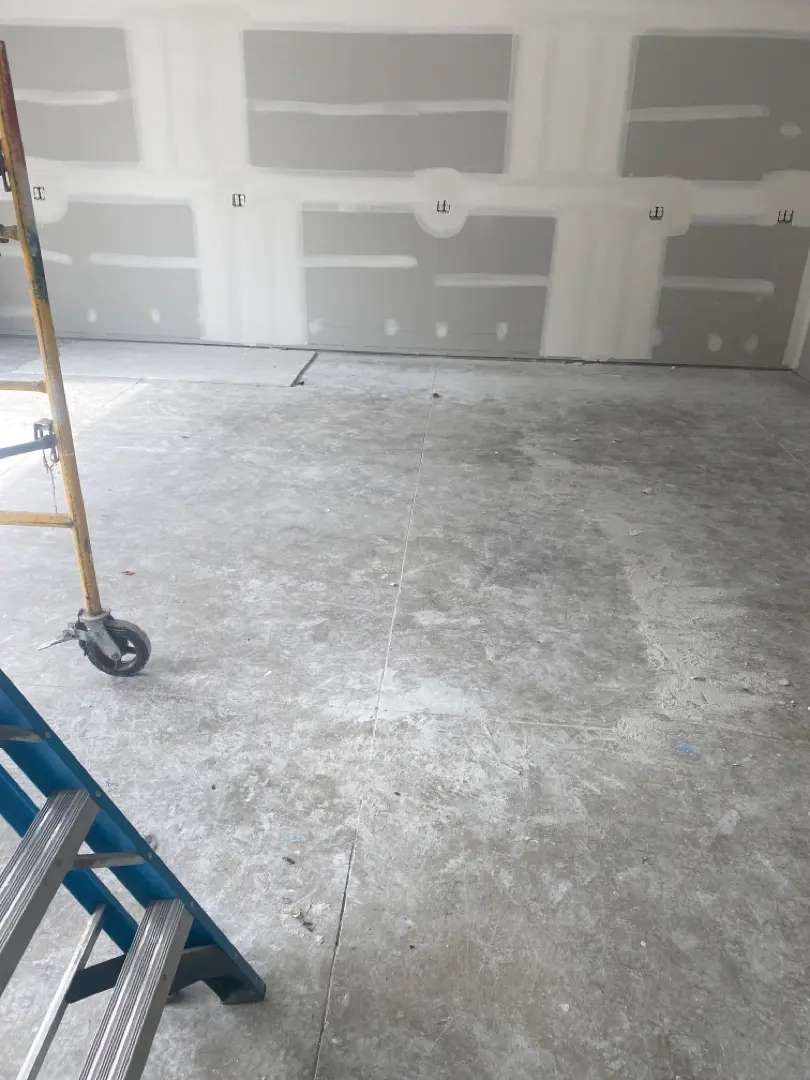
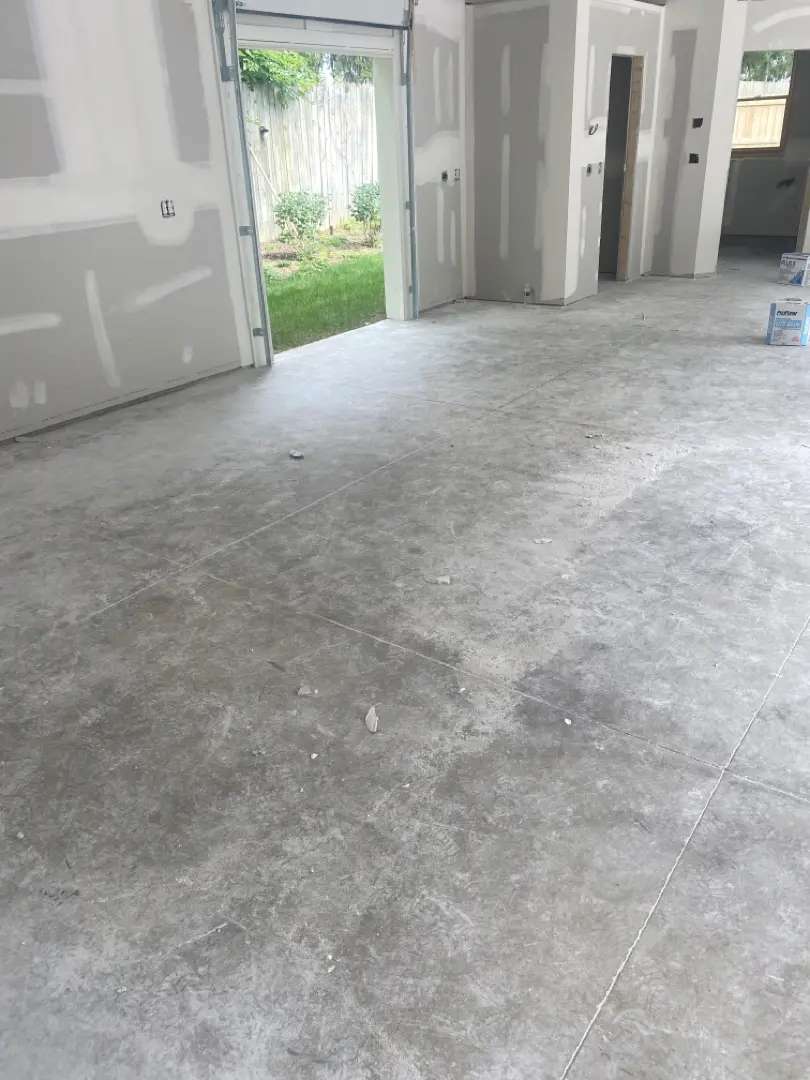
The concrete substrate represented a coating applicator’s ideal starting point—newly poured concrete that had properly cured but not yet accumulated the staining, cracking, or surface deterioration typical of garage floors in service. The slab exhibited uniform gray coloration across all 1,090 square feet, indicating consistent concrete mixing, placement, and finishing techniques during the original pour.
The control joints were precisely saw-cut with professional equipment, creating clean, straight demarcation lines that would enhance rather than detract from the appearance of the finished floor. These joints showed no spalling, chipping, or edge deterioration—common issues with older concrete where joint edges have been damaged by thermal cycling, impact, or moisture intrusion.
The concrete surface displayed the characteristic texture of properly finished new concrete—smooth enough for comfortable foot traffic but not over-troweled to the point of creating a dense, impermeable surface layer that could interfere with coating adhesion. The floor’s flatness and level characteristics met professional standards throughout all rooms, with no significant high spots, low areas, or drainage concerns requiring remediation.
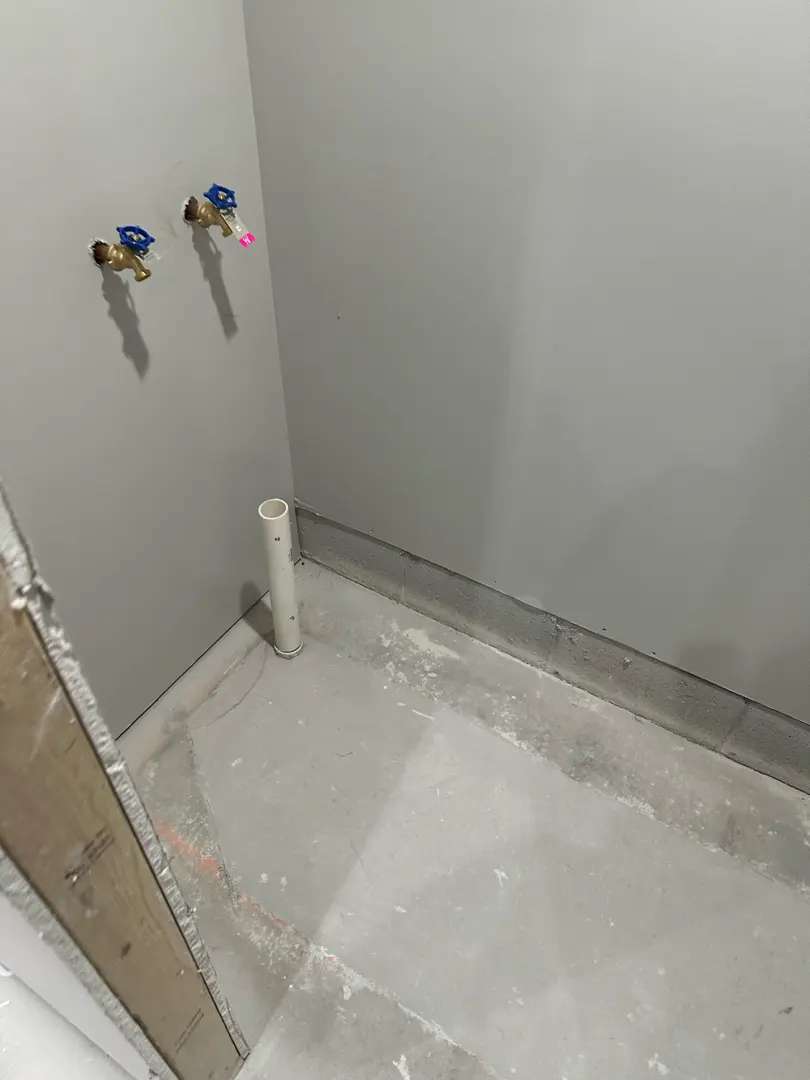
Minor drywall compound residue and construction debris were present—typical cosmetic issues from a recently completed home rather than substrate defects requiring repair. The concrete showed no moisture-related discoloration, efflorescence, or other indicators of hydrostatic pressure concerns that could compromise coating adhesion or long-term performance.
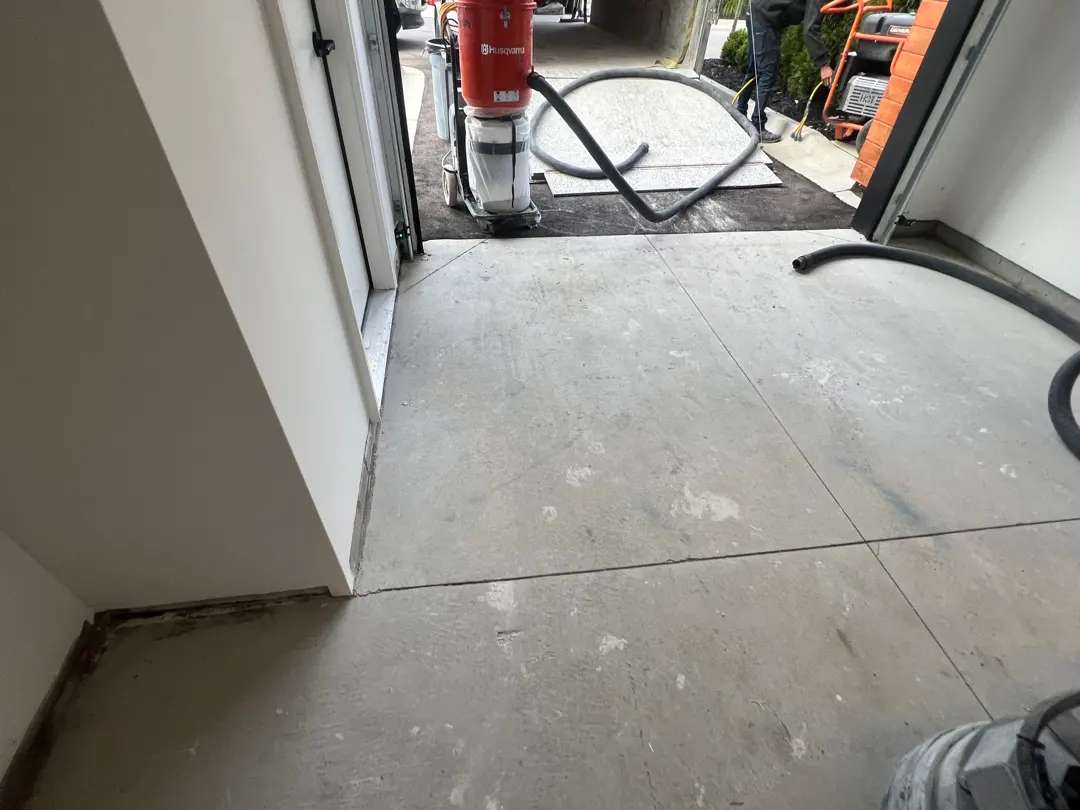
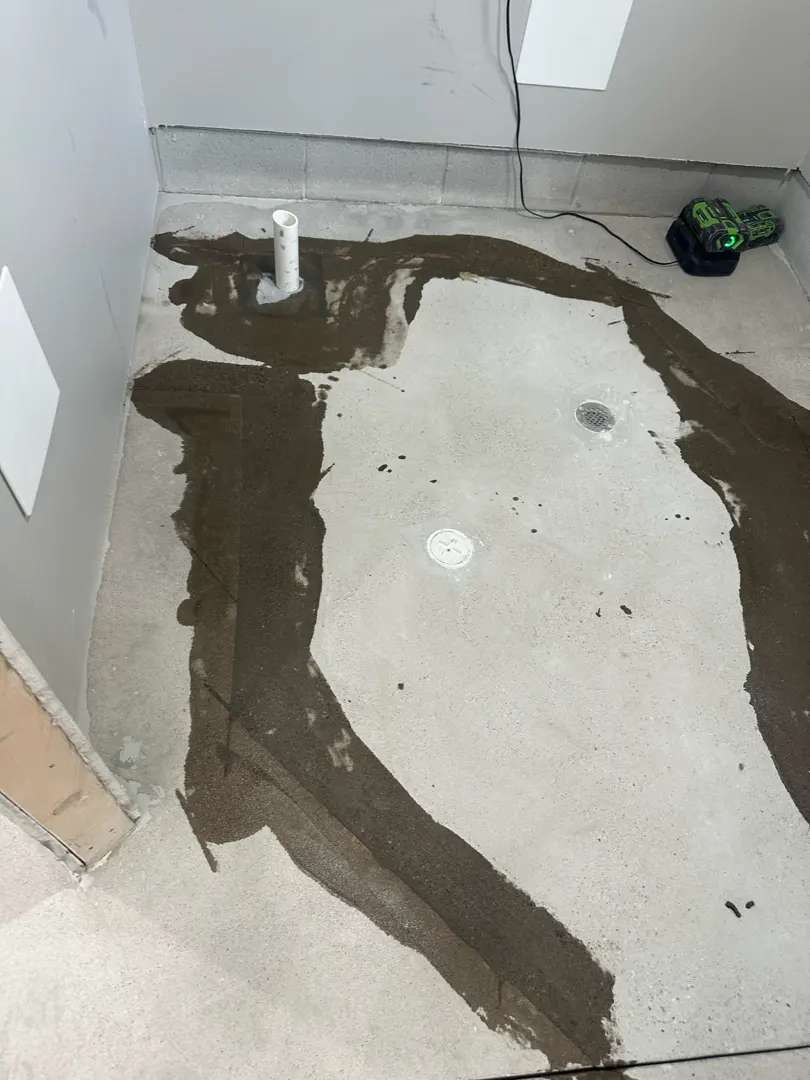
New Concrete Preparation Protocols
Despite the excellent condition of the substate, there was a need to have proper surface preparation for optimal coating adhesion. New concrete presents preparation requirements that are different from aged concrete. The surface layer that forms during concrete finishing—composed of cement paste, fine particles, and residual moisture—creates a weak, porous zone that must be removed to expose the denser concrete structure beneath.
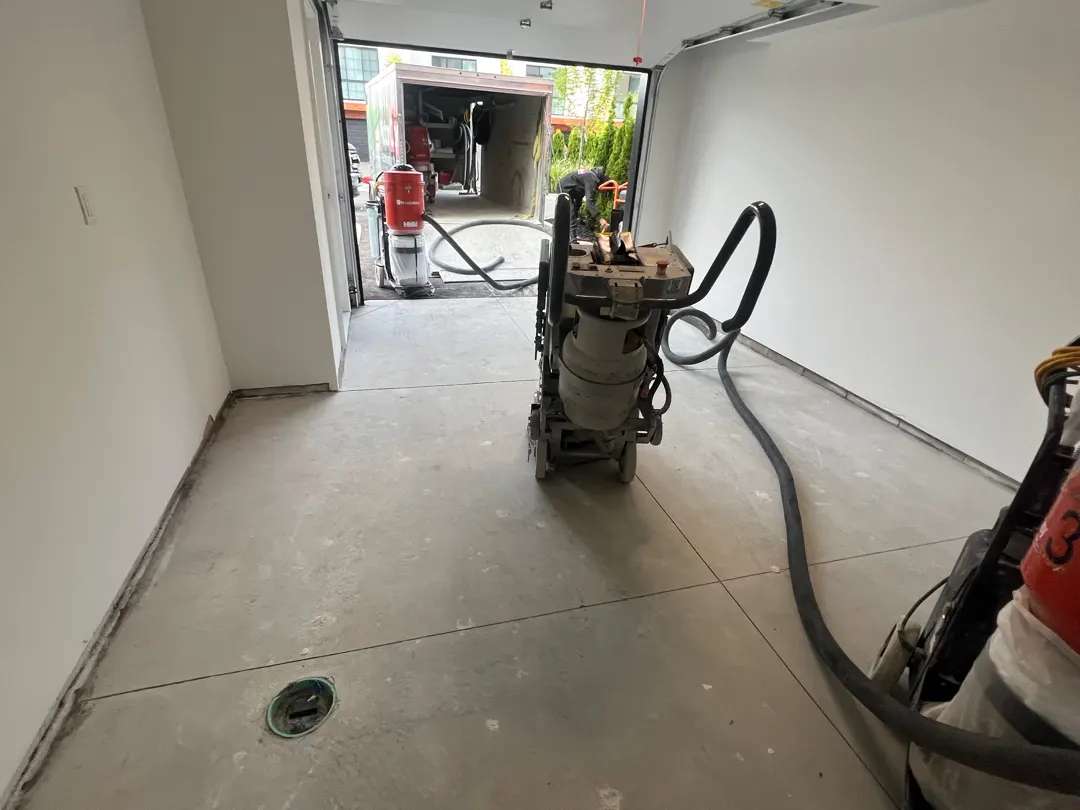
Our installation crew conducted comprehensive mechanical surface preparation using professional-grade diamond grinding equipment. This process served multiple critical functions: removing the surface laitance layer, opening the concrete pore structure to accept coating penetration, and creating the proper concrete surface profile (CSP-2) specification required for polyurea systems.
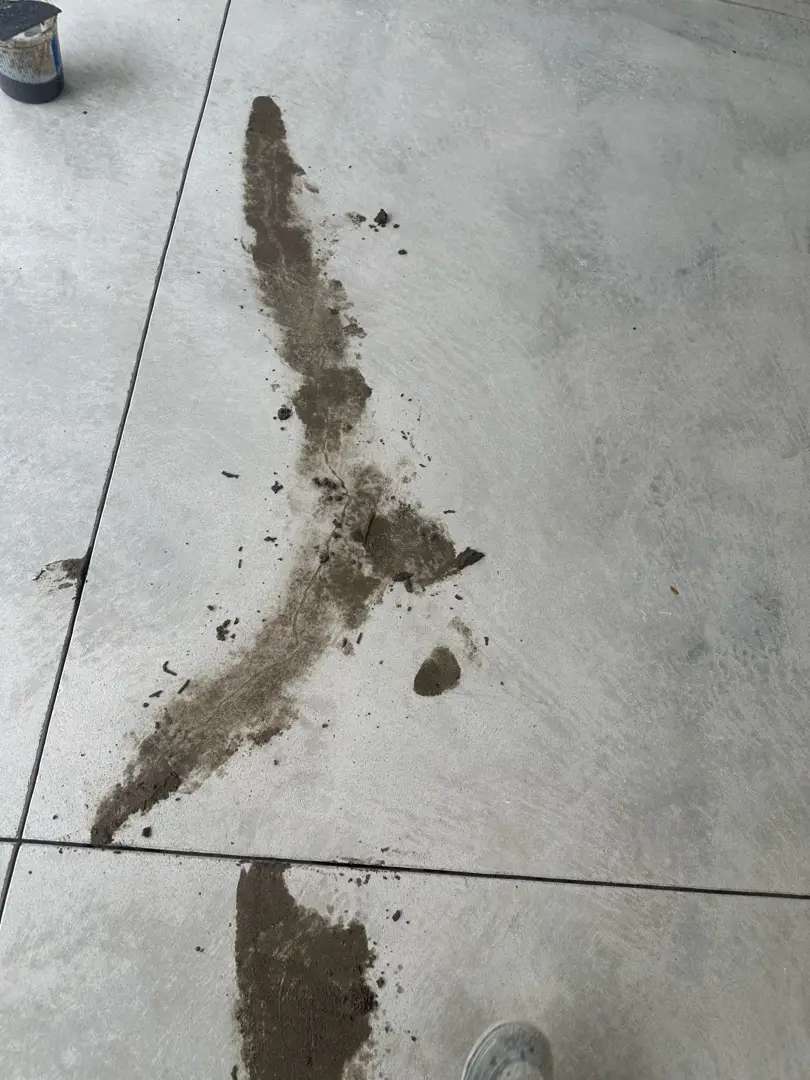
The grinding process proceeded systematically across all 1,090 square feet, with the team working in overlapping passes to ensure uniform profile depth and complete laitance removal. The control joints received detailed attention, with grinding equipment worked into joint channels to ensure proper profile and cleanliness for coating coverage. The absence of cracks, pits, or significant surface defects allowed our team to focus entirely on creating an optimal surface profile rather than dividing attention between preparation and repair work.
The 20 linear feet of concrete block wall surface in the two back rooms also required preparation. Our crew used specialized grinding techniques adapted for vertical surfaces, creating proper mechanical profile on the block face while removing any surface contaminants or weak material that could compromise vertical coating adhesion.
Following mechanical preparation, thorough dust extraction and surface cleaning removed all grinding residue. Both dry vacuuming and damp mopping techniques ensured a contamination-free substrate ready for coating application.
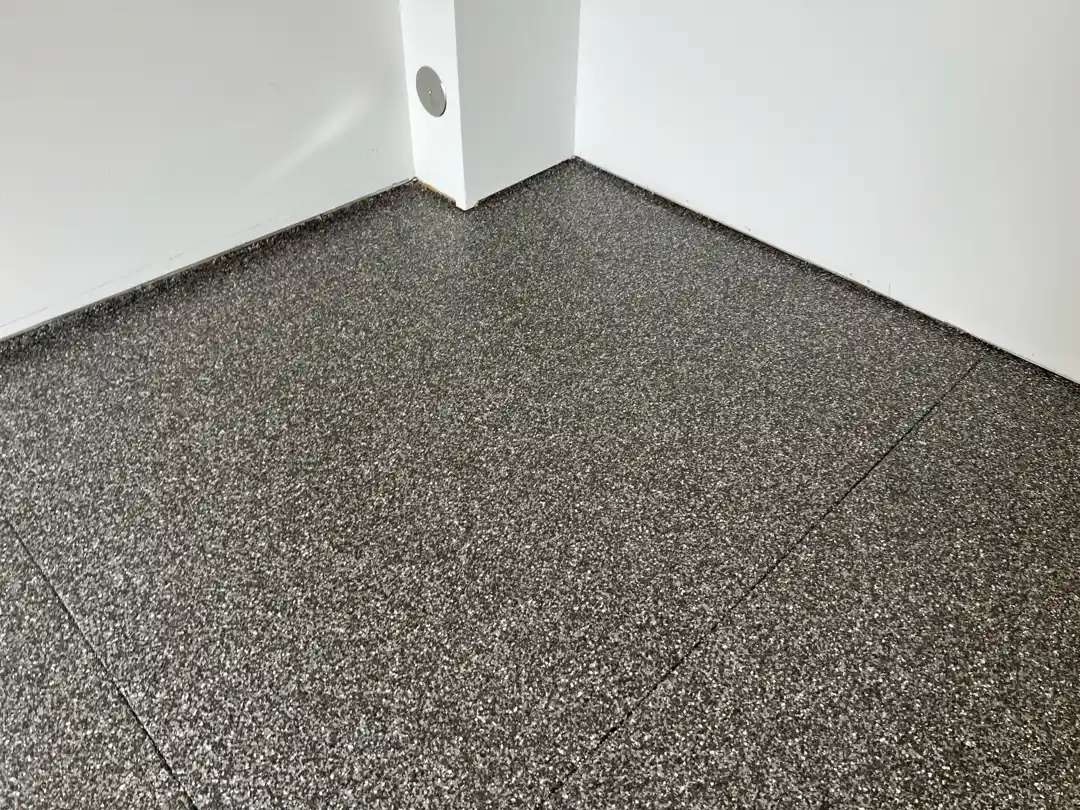
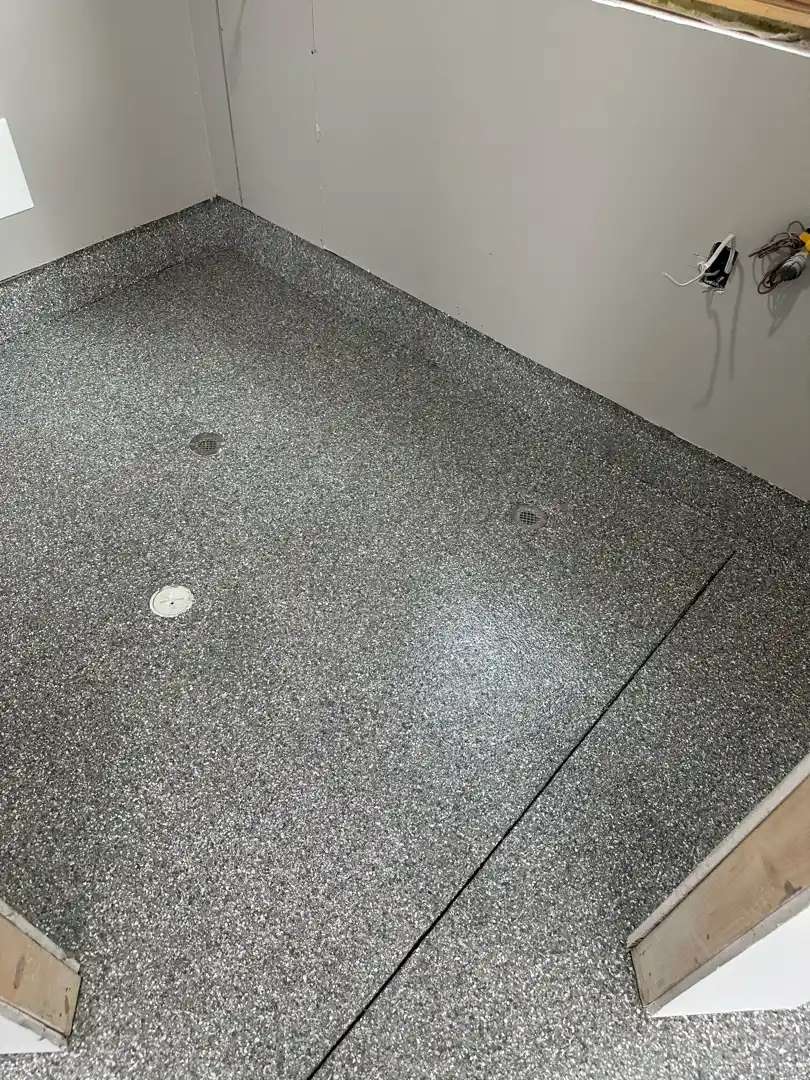
Vertical Block Wall Coating
The two back rooms featured 20 linear feet of vertical concrete block wall coating, creating durable, easy-to-clean surfaces that complement the floor system while protecting the porous block structure. Concrete block walls in garage environments typically accumulate dirt, absorb moisture, and collect dust in the block’s textured surface—issues completely eliminated by professional coating application.
The team applied polyurea coating material directly to the prepared block surface using specialized roller techniques adapted for vertical application. The coating penetrated into the block’s porous structure, creating mechanical and chemical bonds that anchor the coating system. Multiple coats built proper film thickness across the textured block surface, ensuring complete coverage without thin spots or holidays that could compromise protection.
The vertical coating extended from floor level to approximately 4-5 feet up the wall, creating substantial protective coverage across the areas most subject to impact, moisture contact, and surface wear. The coating’s flexibility accommodates the minor dimensional changes concrete block experiences with temperature and humidity fluctuations, preventing the cracking or delamination that can occur with rigid coating systems.
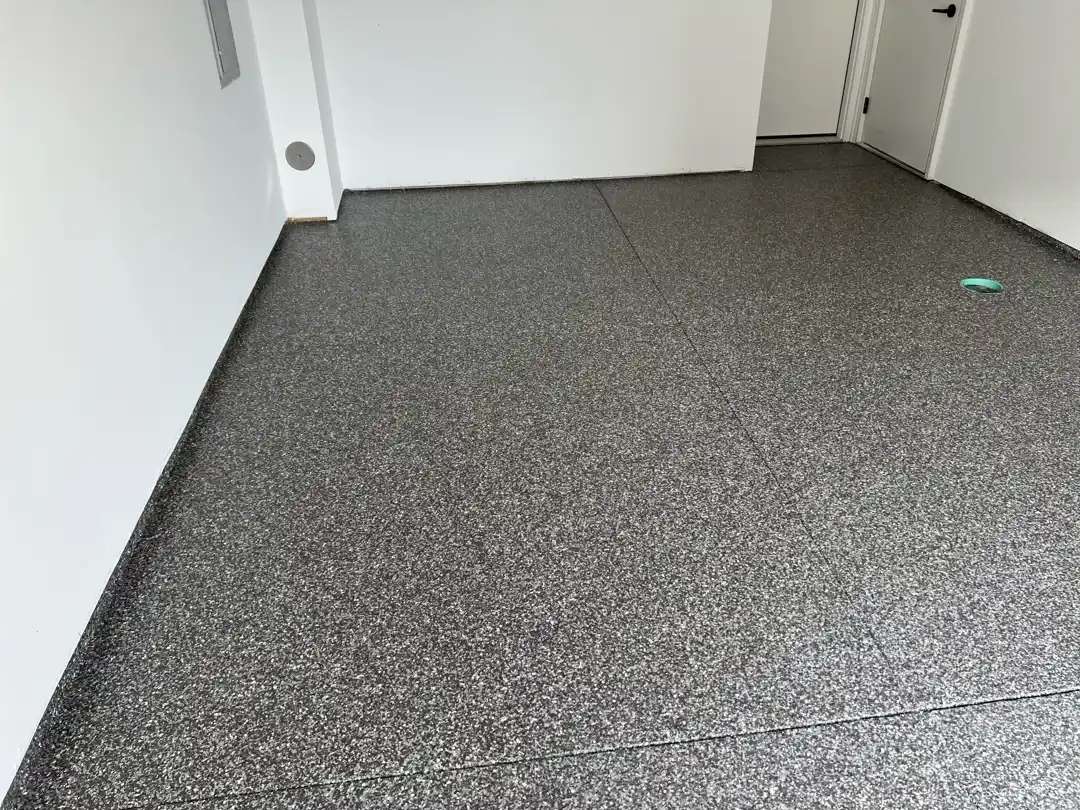
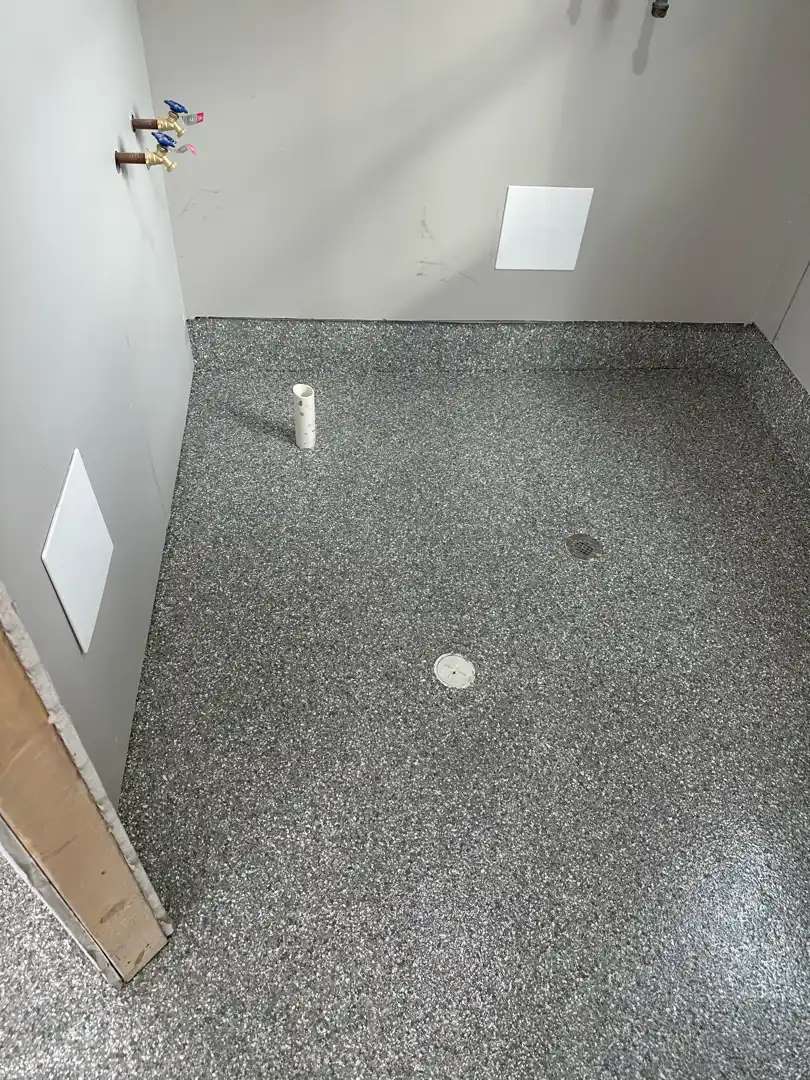
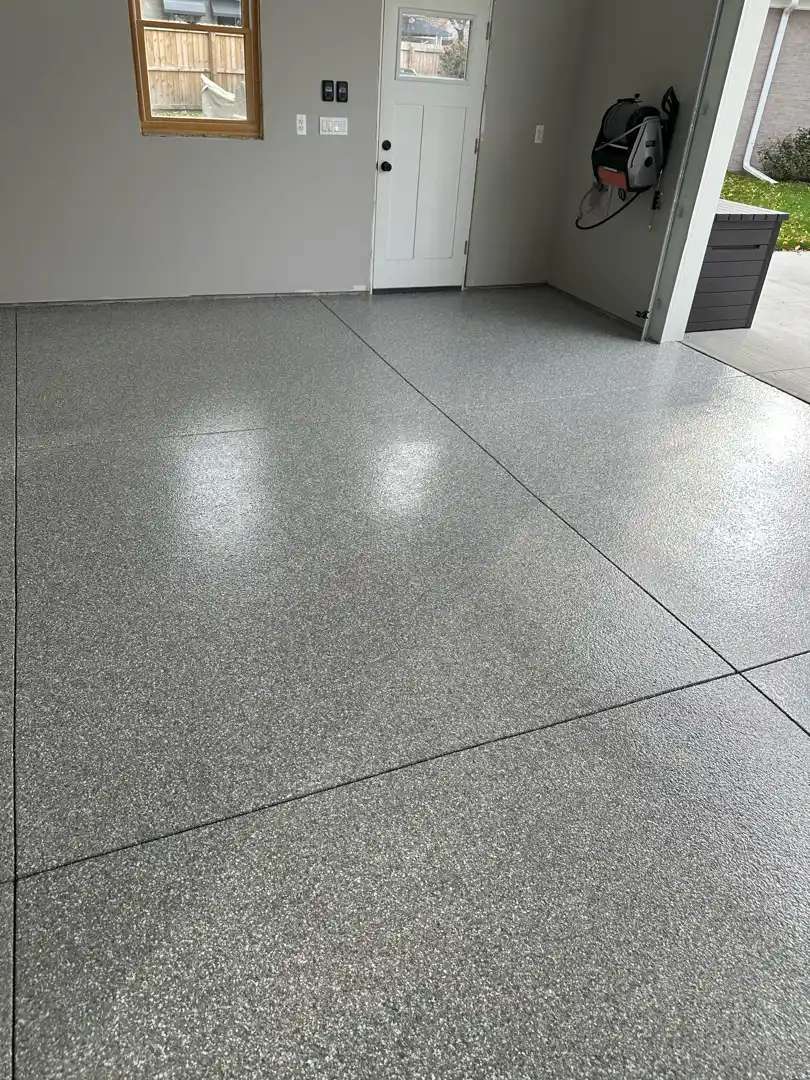
Base Coat Application
MotorCity Flooring applied their MC4 polyurea coating system with Stoney Creek as the color selection. The Stoney Creek palette features a sophisticated blend of gray, taupe, and subtle earth tones that create a refined, natural aesthetic reminiscent of weathered stone or river rock. This color combination provides visual interest while maintaining a neutral foundation that complements virtually any garage décor or vehicle color scheme.
The base coat application proceeded systematically using professional roller techniques. The team worked material into the prepared concrete surface profile, ensuring complete wetting and penetration into the concrete’s pore structure. Consistent film thickness across the entire 1,090-square-foot area ensured uniform color depth and proper coating performance. The multiple rooms were coated in sequence, with careful attention to maintaining consistent coverage and color across room transitions.
The base coat sealed the porous concrete substrate, preventing moisture vapor transmission while creating the chemical bond layer anchoring the entire coating system to the concrete below.
Decorative Flake Application
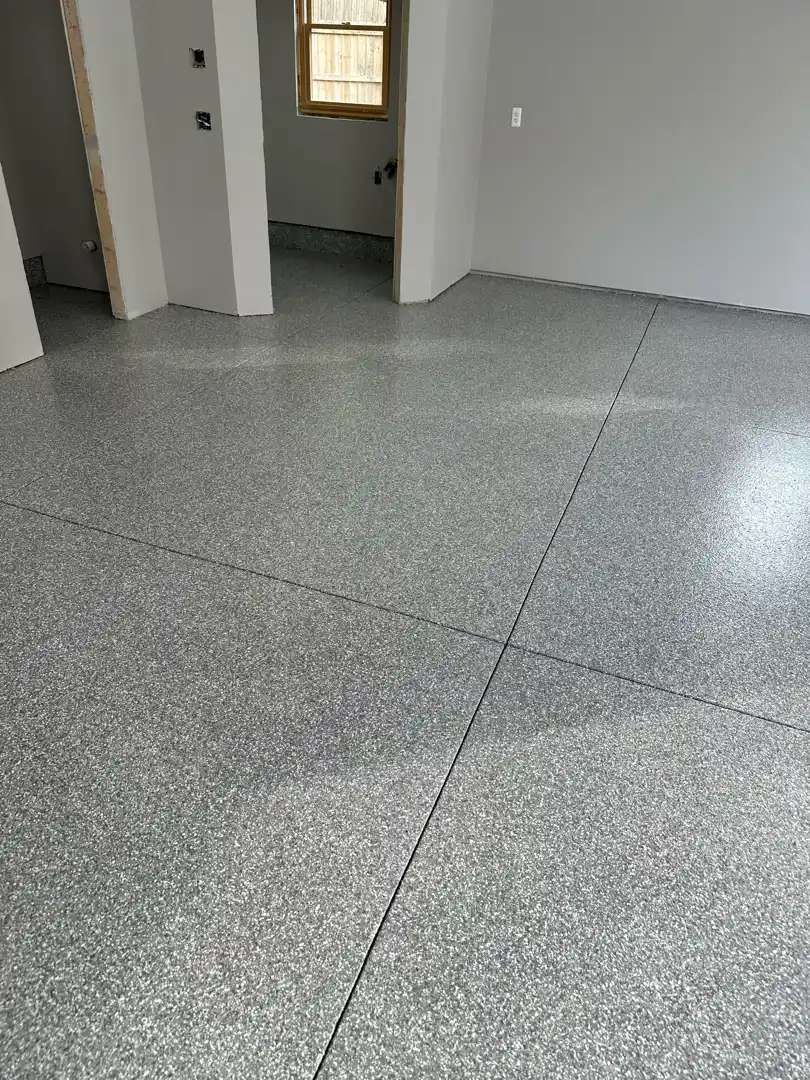
While the base coat remained in optimal open time, the team proceeded immediately to decorative flake broadcast. The Stoney Creek flake blend features gray, beige, taupe, and subtle brown tones that create depth and visual complexity while maintaining the color palette’s sophisticated, neutral character. The varied tones mimic natural stone patterns, adding organic visual interest without creating a busy or overwhelming appearance.
The flakes were broadcast to approximately 85-90% coverage density across all floor areas, creating the appearance of full coverage while allowing subtle glimpses of base coat color through small interstices between flakes. This density provides optimal visual impact while managing material costs and surface texture. The consistent flake coverage across all 1,090 square feet creates visual continuity throughout the multiple rooms, unifying the space into a cohesive whole.
Following base coat cure, the team conducted the flake scraping phase to remove loose or vertically oriented flakes that could compromise top coat appearance. This process also knocked down any flake edges standing perpendicular to the floor, creating a more uniform surface profile for clear coat application.
Clear Coat and Texture Application
The final phase of the garage floor coating system installation involved applying the clear polyaspartic top coat with an integrated 16-grit aluminum oxide texture additive. This standard residential texture creates moderate slip resistance without aggressive grip, providing safe footing when wet while maintaining comfortable barefoot feel and easy cleaning characteristics.
Our crew proceeded with the clear coat application across all floor areas and the vertical block walls using professional techniques adapted for each surface. On horizontal floors, the team used roller application to achieve uniform film thickness and complete flake encapsulation. The vertical walls required specialized application methods to prevent sagging or running while building adequate film thickness for protection and gloss.
The polyaspartic chemistry provides exceptional chemical resistance to automotive fluids, road salts, and household chemicals. The UV stability of the aspartic material prevents yellowing and color shift, ensuring the Stoney Creek blend maintains its appearance throughout years of sunlight exposure from garage windows and door openings. The fast cure properties allowed the homeowners to begin using their new garage space quickly following installation completion.
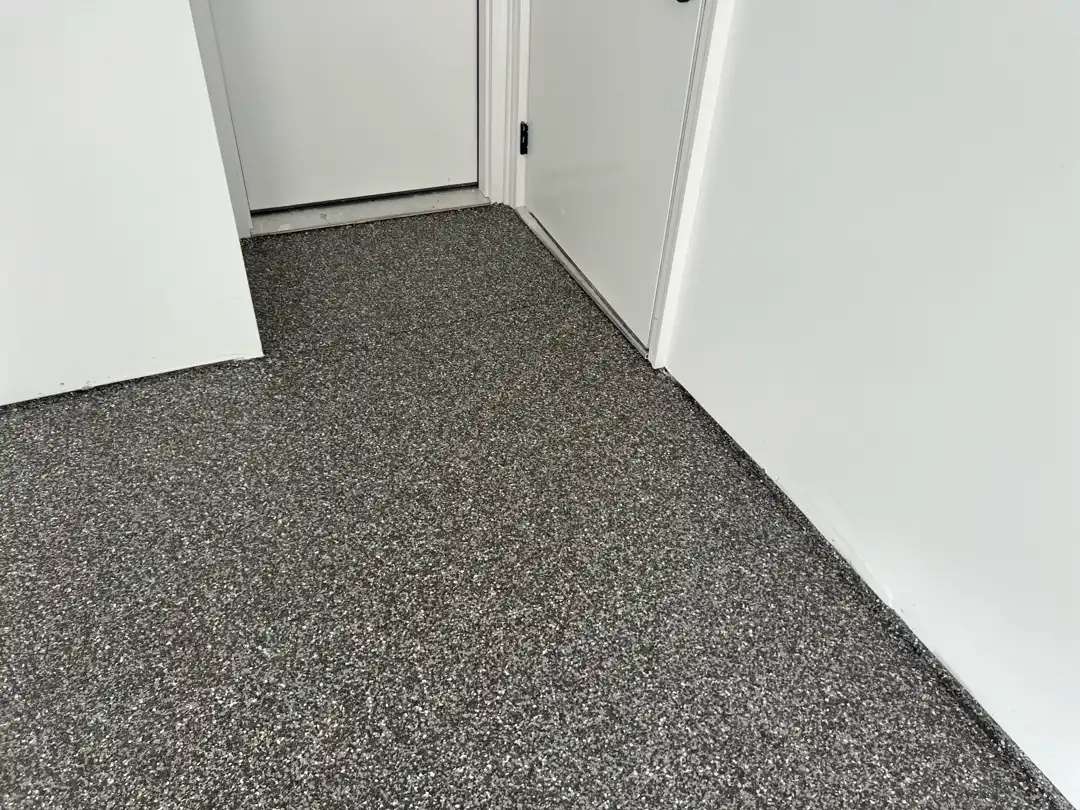
Multi-Room Functionality
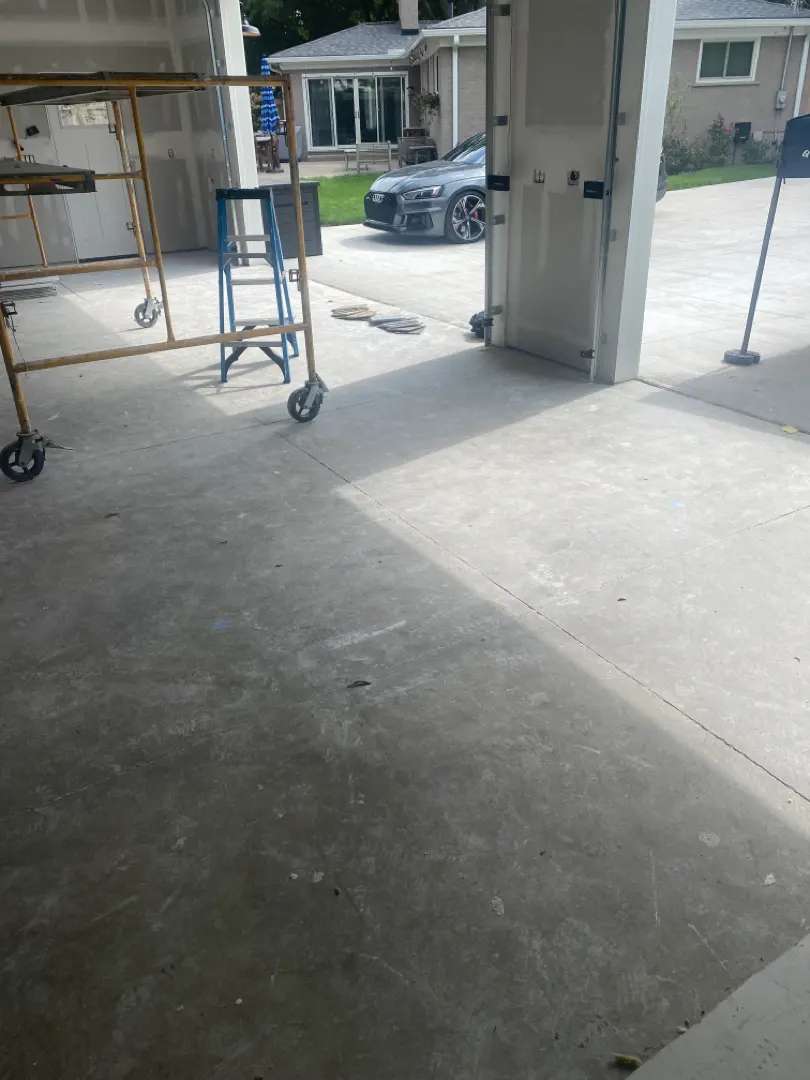
The 1,090-square-foot space comprises multiple distinct areas serving different functions. The main garage area provides vehicle parking and general storage, while the two back rooms—distinguished by their vertical block wall coating—create dedicated workshop, hobby, or specialized storage spaces. The continuous floor coating throughout all areas creates visual unity while the coated block walls in back rooms add professional detailing that enhances the functionality of these spaces.
The detached garage location behind the main house creates a private workshop environment separated from living spaces. This configuration allows for projects, maintenance work, and hobbies without impacting the main home while the professional floor coating ensures the space maintains a finished, refined appearance worthy of the investment in this substantial outbuilding.
Technical Specifications
- Square Footage: 1,090 sq ft
- Location: Detached garage behind main house
- Coating System: MC4 polyurea/polyaspartic
- Color: Stoney Creek (gray/taupe blend)
- Vertical Surfaces: 20 linear feet concrete block wall coating
- Texture Additive: 16-grit aluminum oxide
- Surface Profile: CSP-2 (diamond ground)
- Substrate Condition: New concrete
- Repairs: Minimal saw cut touch-ups only
- Additional Surfaces: 20 LF vertical block walls (back rooms)
Performance Characteristics
The completed floor system delivers comprehensive performance optimized by the great condition of the concrete substrate. The polyurea chemistry provides great chemical resistance, with the non-porous surface of the top coat preventing spills from penetrating into the concrete. The 16-grit texture ensures safe footing under wet conditions while keeping it easy to clean the floor.
The flexible polyurea base layers accommodate the minor dimensional changes new concrete experiences during its first years of service—continued hydration, thermal cycling, and structural settlement—without cracking or delaminating. The hard polyaspartic top coat provides superior abrasion resistance for long-term appearance retention.
The vertical block wall coating transforms porous, dirt-collecting surfaces into smooth, sealed walls that wipe clean with minimal effort. The coating prevents moisture absorption into the block structure, eliminating the musty odors and efflorescence that can develop in uncoated block walls exposed to garage humidity.
New Construction Advantage
Installing professional coating systems on new concrete offers significant advantages compared to retrofit applications on aged substrates. The absence of oil staining eliminates the need for aggressive contamination removal that can require multiple grinding passes. The lack of cracks and surface deterioration means no time-consuming repair work that extends project schedules and increases costs.
Most importantly, coating new concrete before it enters service prevents the substrate degradation that would otherwise occur. Automotive fluids, road salts, and moisture that would normally penetrate and damage unprotected concrete are instead repelled by the impervious coating surface. This preservation of the concrete substrate extends the serviceable life of the slab by decades while maintaining the aesthetic appeal of the garage floor from day one.
Transformation Impact
While the substrate transformation from bare concrete to coated floor is less dramatic than projects involving stained, damaged slabs, the aesthetic upgrade remains substantial. The Stoney Creek color palette elevates the space from a utilitarian concrete box to a refined, finished space that complements the main home. The sophisticated neutral tones create a backdrop that enhances rather than competes with vehicles, equipment, and storage systems.
The multi-room layout benefits particularly from the continuous coating system. The Stoney Creek finish creates visual flow and spatial unity, while the coated block walls in back rooms add professional detailing that distinguishes these dedicated workshop spaces from the main garage area.
Maintenance and Longevity
The completed floor requires minimal maintenance. Regular dust mopping removes loose debris, while occasional damp mopping with pH-neutral cleaners maintains appearance. The varied tones of the Stoney Creek blend naturally camouflage minor dirt, while the 16-grit texture maintains slip resistance throughout the service life of the garage floor coating without degradation from wear or cleaning.
The chemical-resistant properties ensure automotive fluids, deicing salts, and household chemicals won’t degrade the coating or penetrate to the concrete below. The UV-stable polyaspartic chemistry prevents yellowing and color shift, ensuring the Stoney Creek blend maintains its appearance throughout years of service.
Starting with new concrete in pristine condition, properly prepared and professionally coated, this floor system should deliver decades of reliable service with minimal maintenance and no substrate-related failures.
This Royal Oak installation exemplifies MotorCity Flooring and Coatings’ expertise in both new construction and retrofit applications. By applying proper preparation protocols to this ideal substrate and installing their MC4 coating system with meticulous attention to detail, the installation team created a garage floor that maximizes both aesthetic appeal and functional performance, transforming this substantial detached garage into a refined, professional-grade workspace that enhances the property’s overall value and utility for years to come.
Click on the photos to enlarge them