 Skip to content
Garage Floor Coating in Plymouth, MI
QUESTIONS? NEED A QUOTE?
Why Plymouth Homeowners Choose MotorCity
★ 4.9 rating · 488 Google reviews
- ✓ Lifetime warranty
- ✓ One-day installation
- ✓ BBB accredited (since 2020)
- ✓ Licensed & insured
Upgrading Garage Floor Coating in Plymouth with Polyurea-Polyaspartic Coatings
Last updated: July 28, 2026
On this page, we document 8 projects of garage floor coating in Plymouth, MI. Our dual-coating systems have converted worn concrete slabs into durable, attractive garage floors. Plymouth is a Wayne County city known for its well-kept downtown, active community, and a residential housing stock that ranges from historic homes near the city center to newer construction on the surrounding streets. Beyond Plymouth, we install garage floor coatings across Michigan, including nearby Northville.
Many of the properties where we apply our polyurea-polyaspartic floor coating systems had accumulated the wear and tear of the harsh Michigan climate. As you will see in these 8 case studies, our garage floor coating specialists work with concrete slabs in a wide variety of conditions: some needed only standard surface preparation. Others required significant remediation — old coating removal, crack filling, moisture barrier application, and oil extraction — before the polyurea and polyaspartic coats could go down. We describe the process and results, and include the before-and-after photos for each job.
Plymouth Garage Floor Coating Case Studies
Quality Garage Floor Coatings
Winter road salt, freeze-thaw cycles, automotive fluids, and daily vehicle traffic degrade unprotected garage concrete over time. The damage typically appears as oil staining, cracking, surface pitting, and adhesion failure in previously coated floors.
Plymouth garages sit in a climate that cycles through hard freezes and thaw periods every season. Each cycle expands and contracts the concrete, working cracks wider and driving moisture deeper into the slab. Polyurea-polyaspartic systems are engineered to flex with that movement — a critical advantage over rigid epoxy products that crack and delaminate under the same stress. Our systems provide reliable, long-term protection and deliver a finished appearance that bare concrete or epoxy products cannot match.
For a side-by-side look using the Plymouth Ridge Drive and River Bend Drive projects as evidence, see our epoxy concrete floor coating in Plymouth, compared.
Garage Floor Coating on Beacon Hill Drive
Beacon Hill Drive, Plymouth, MI
The Starting Point
Surface Preparation
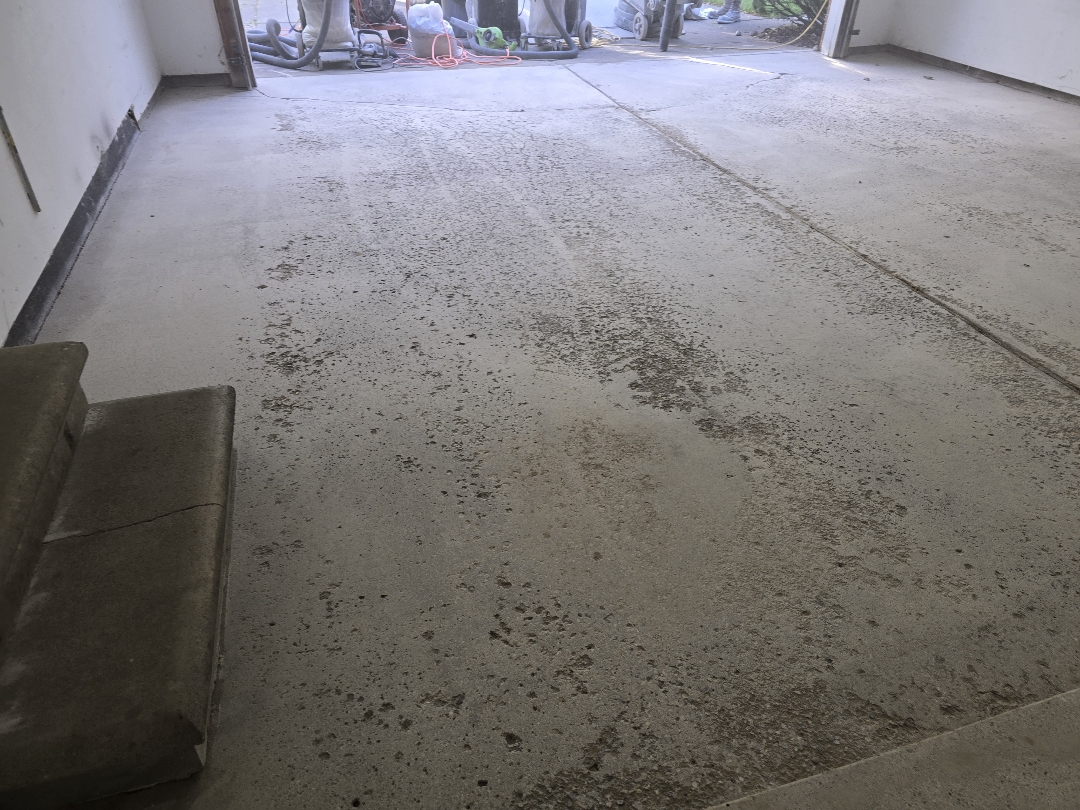
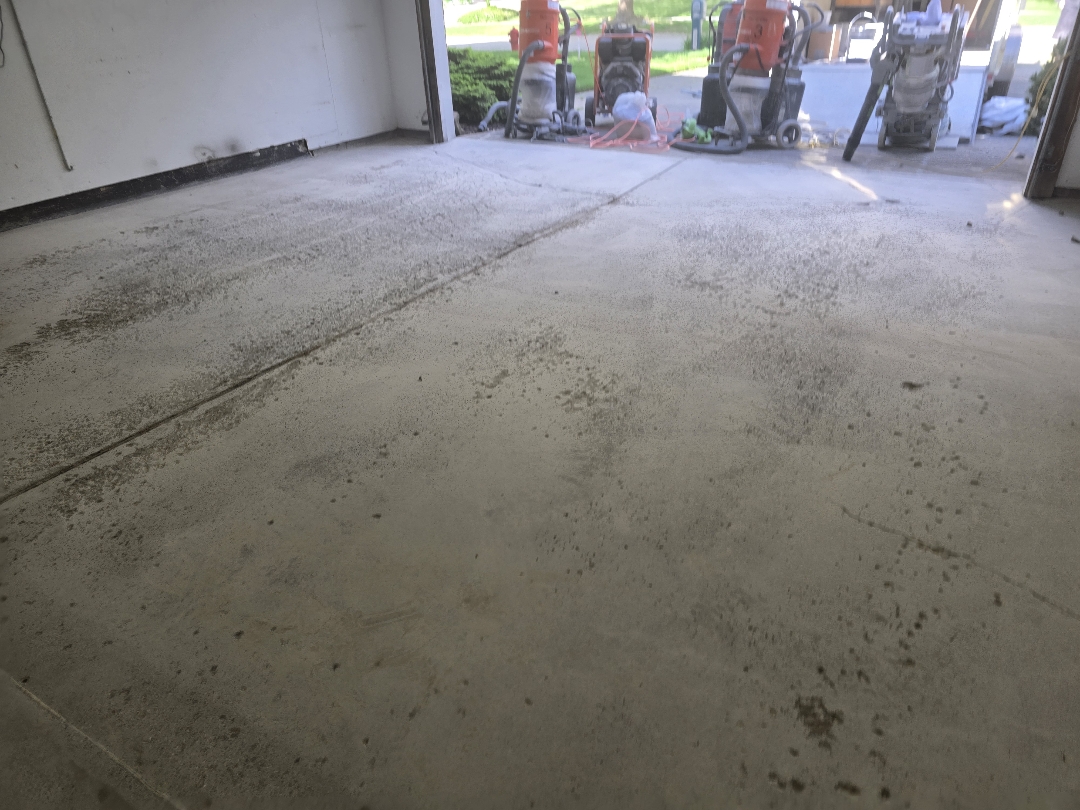
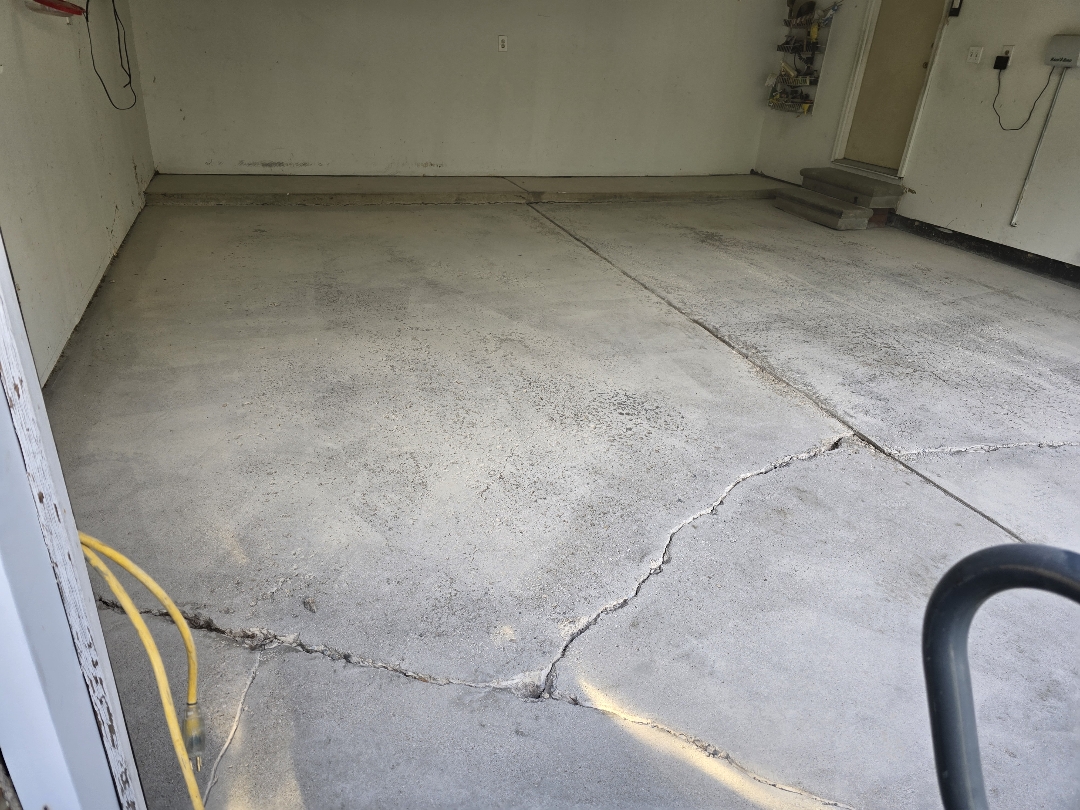
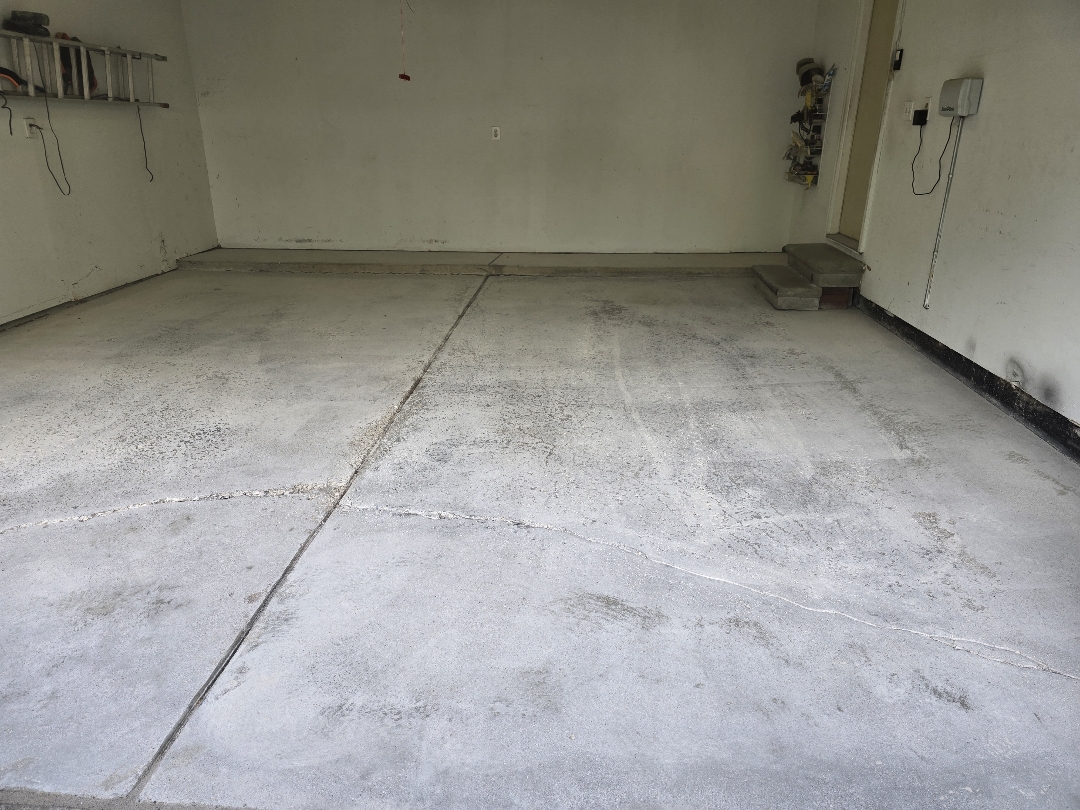
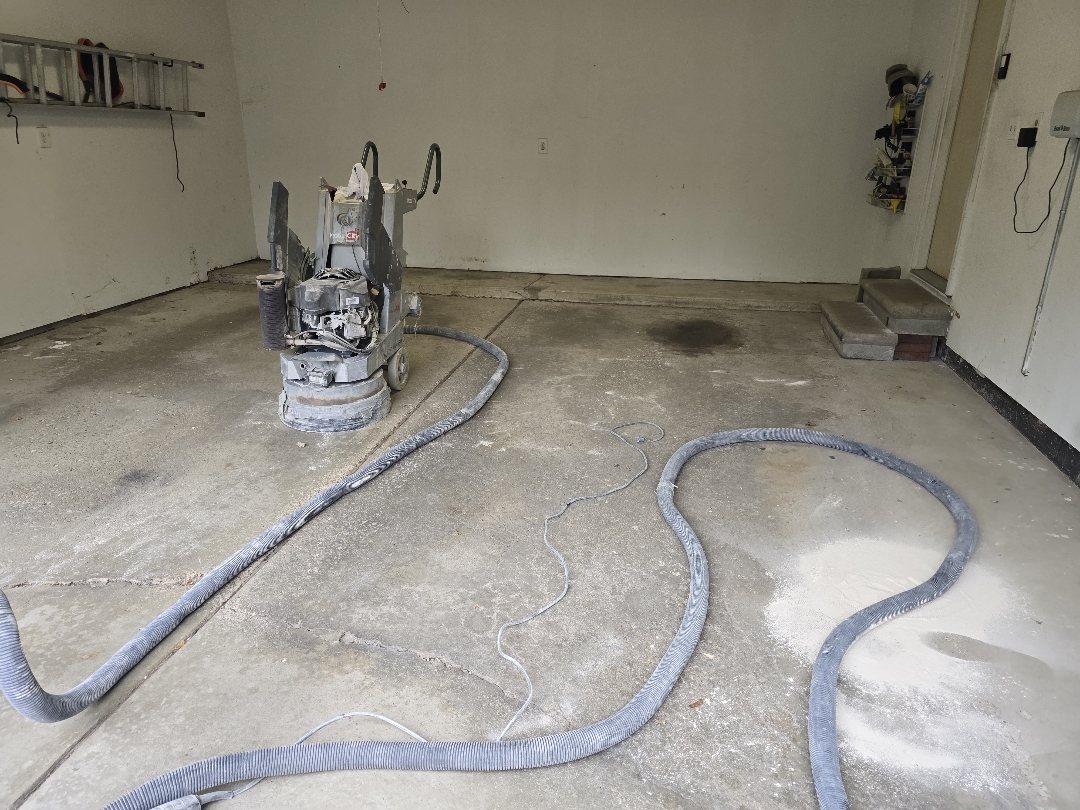
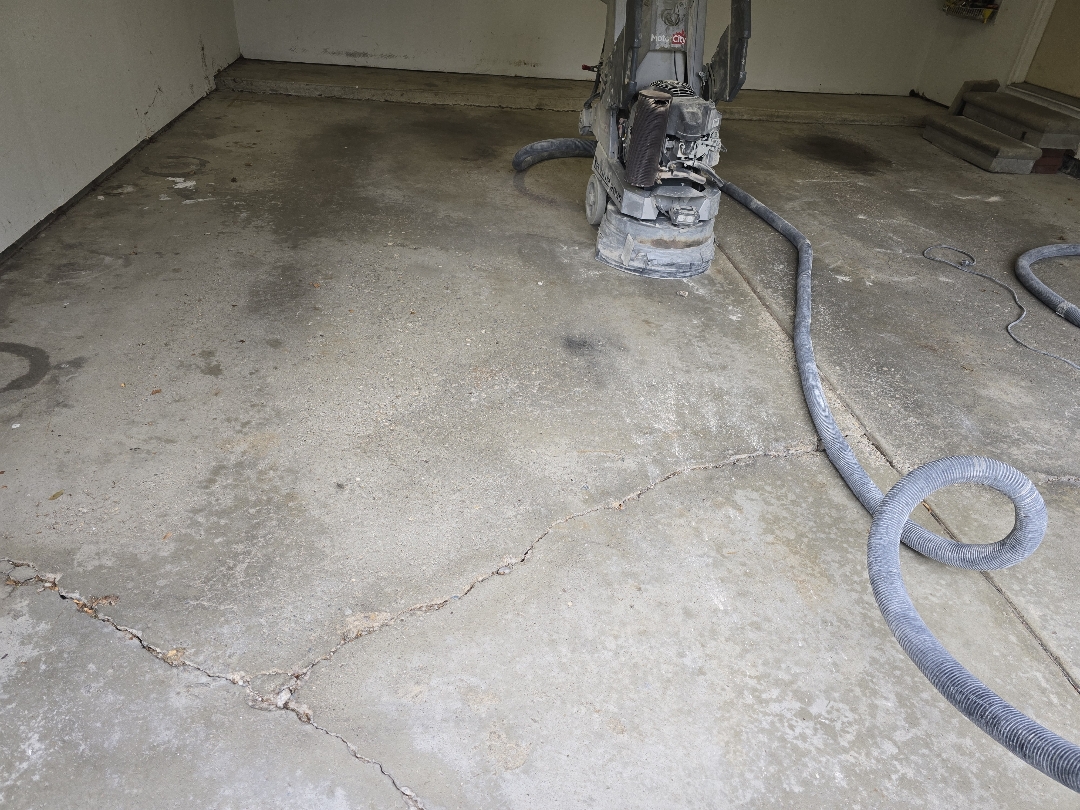
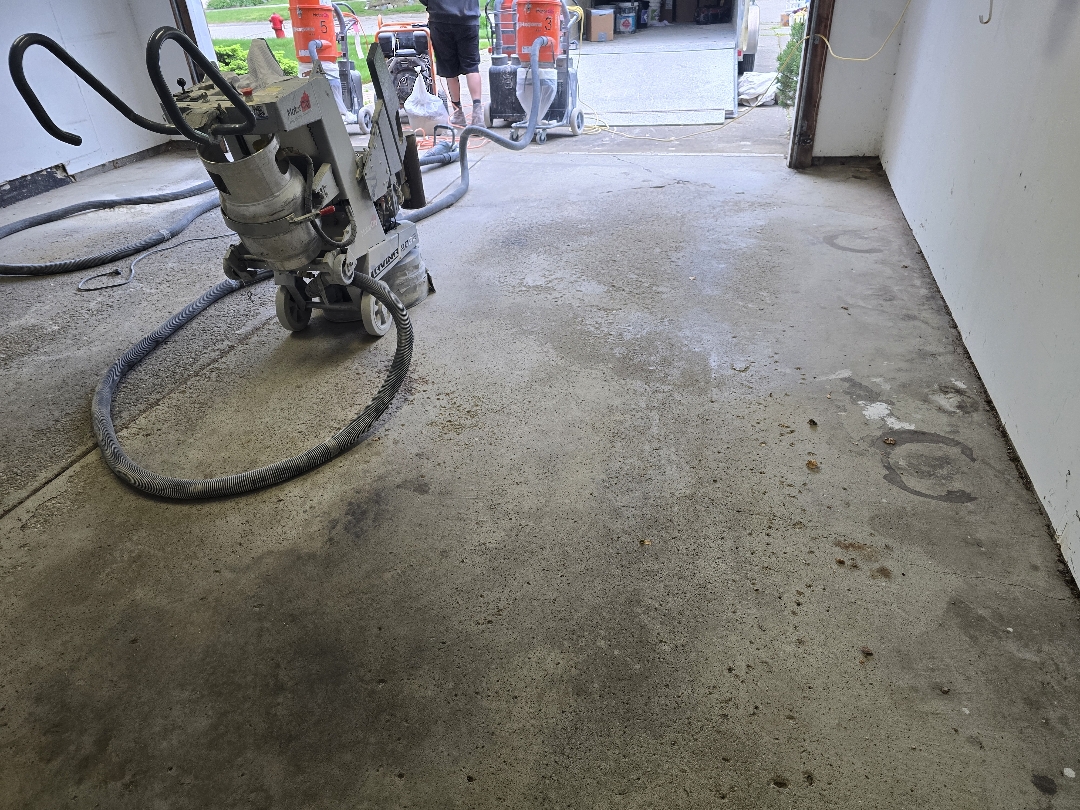
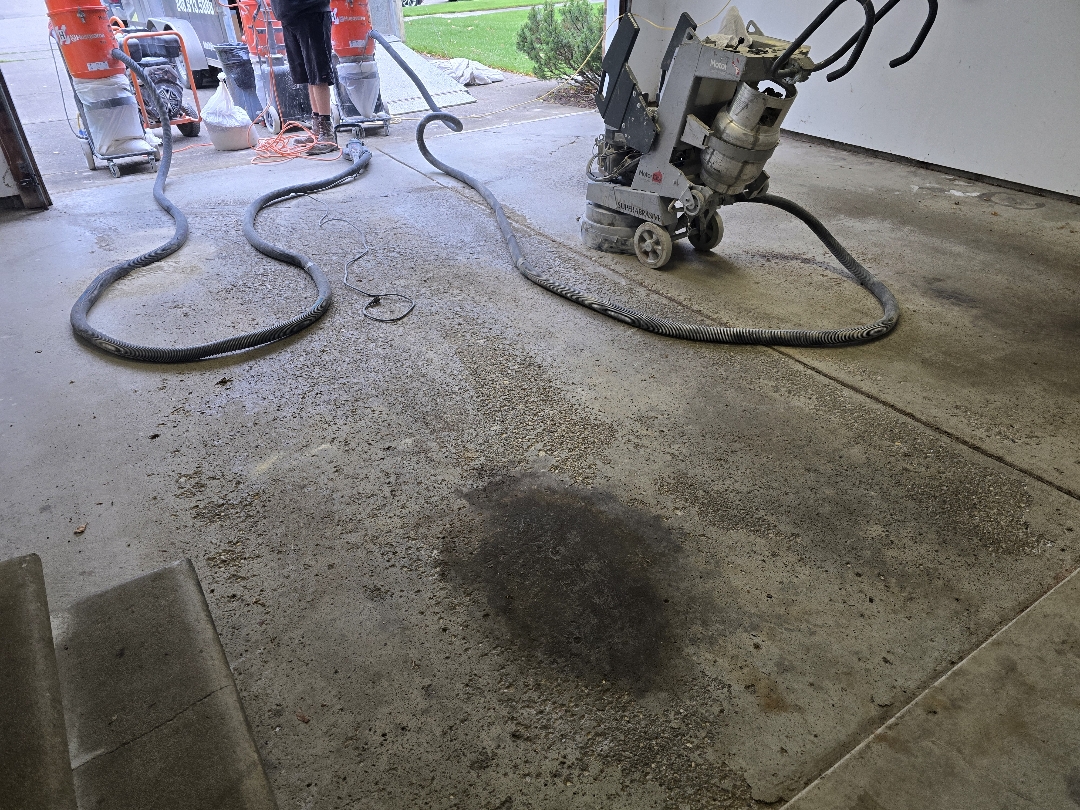
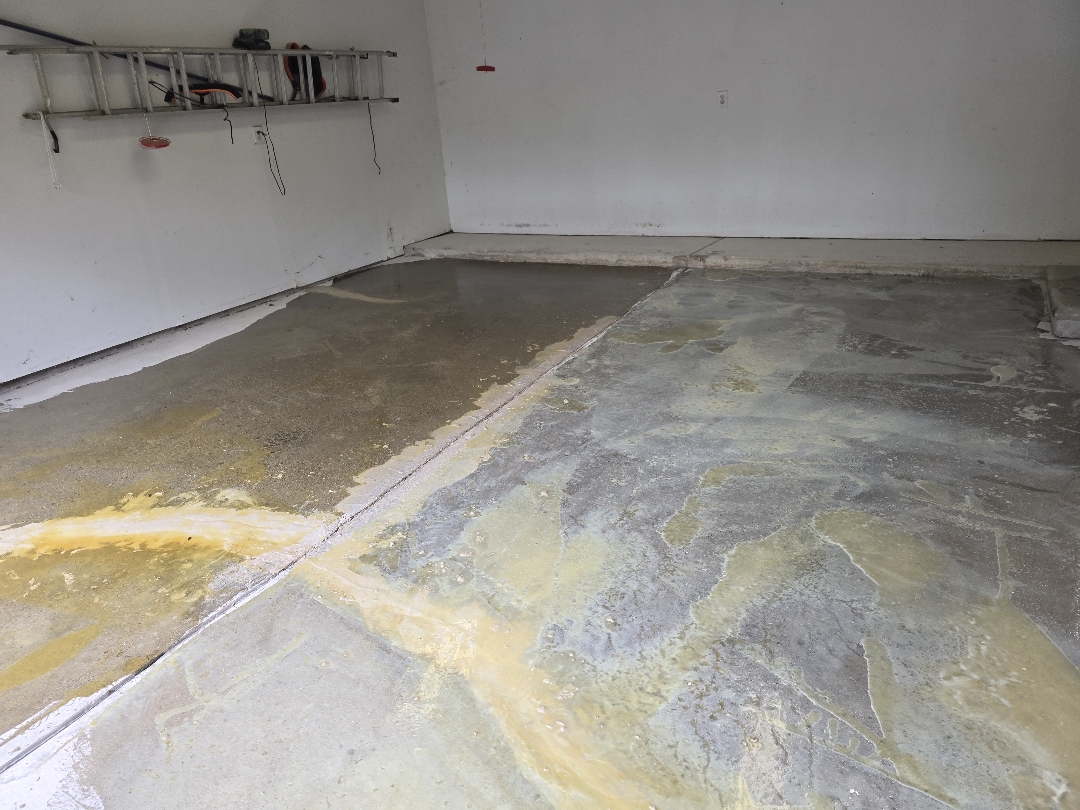
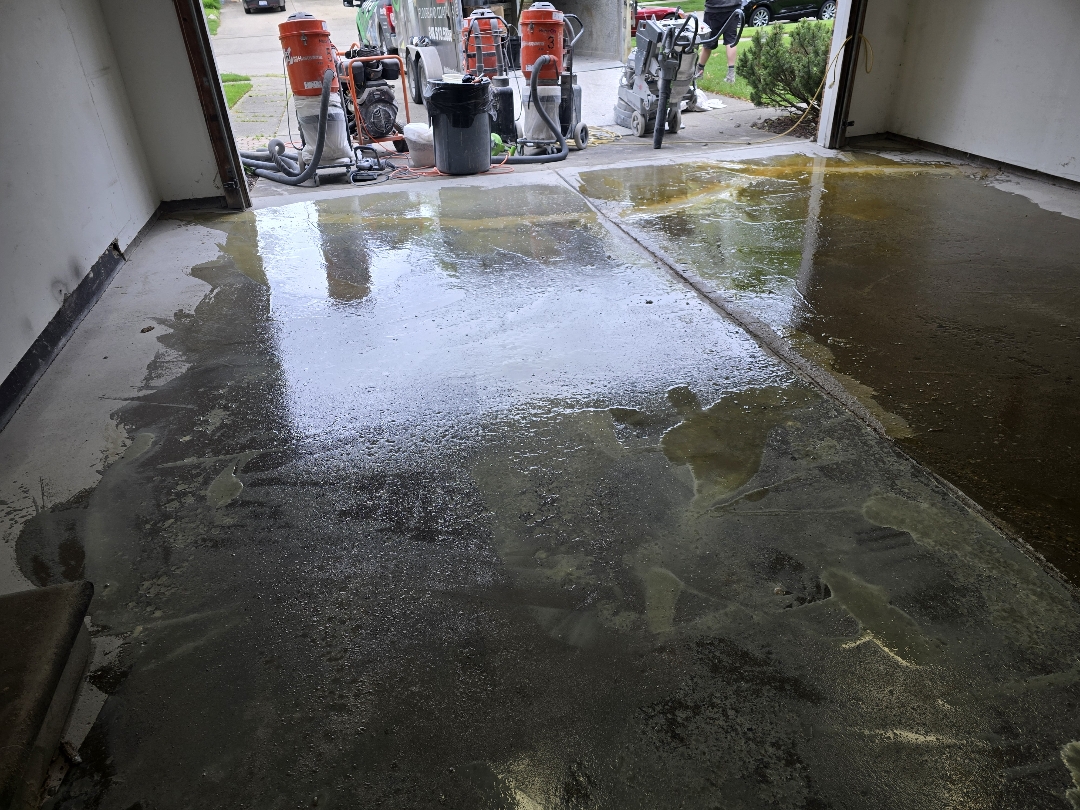
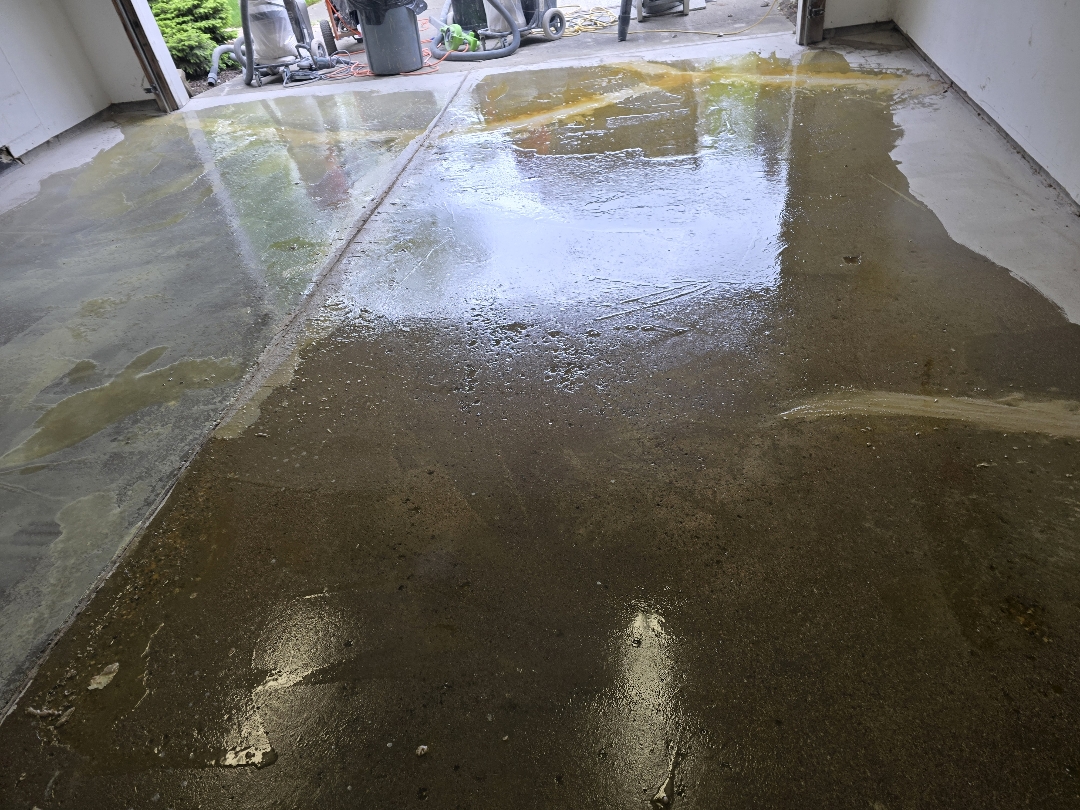
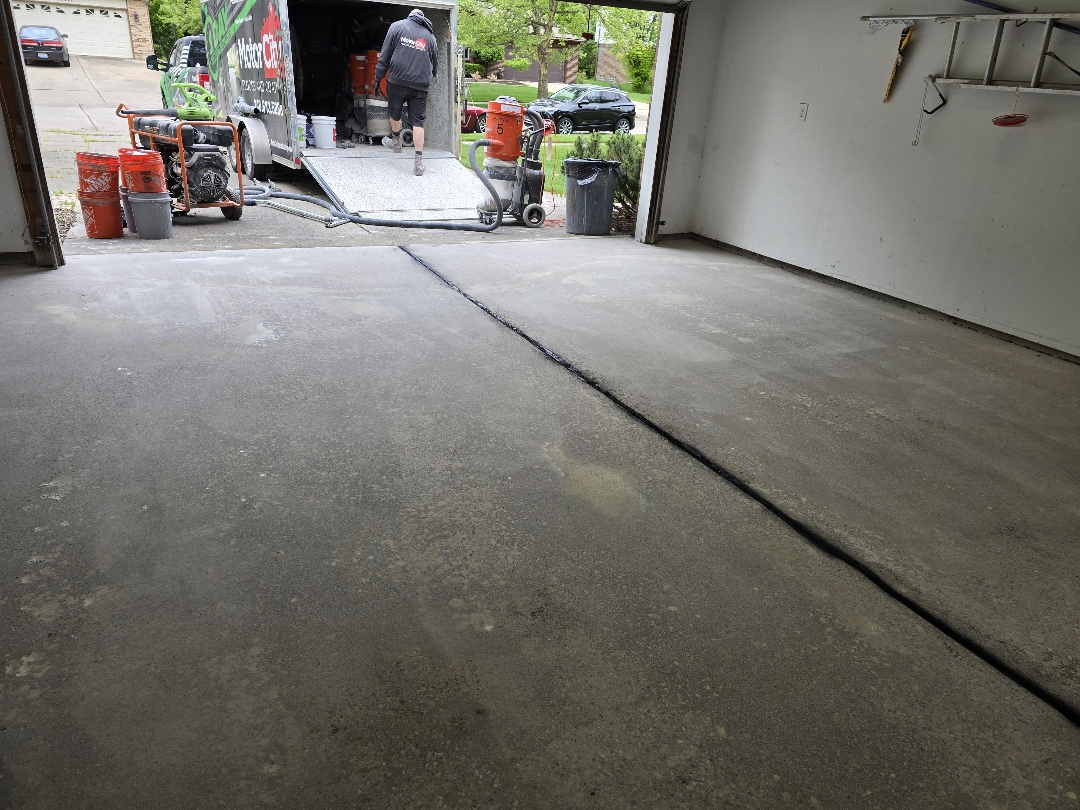
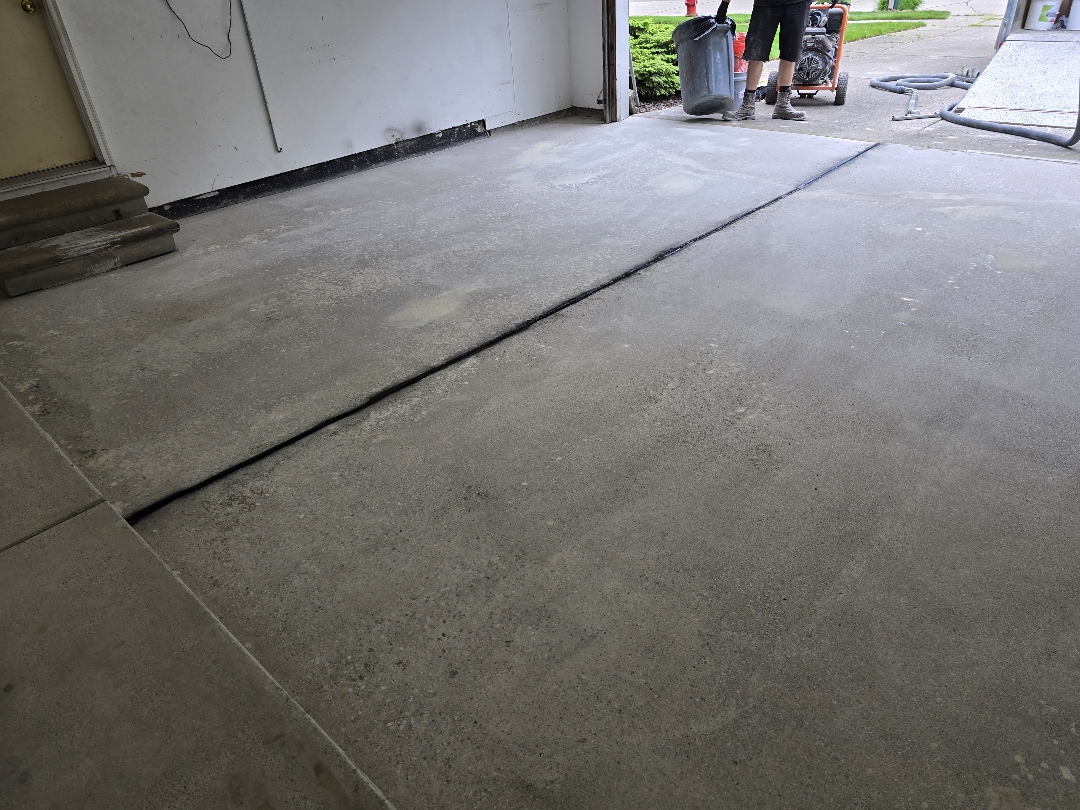
Our crew diamond-ground the full 427 square feet with grinding equipment. The grinding removed the laitance layer and opened the surface of the concrete throughout. Our team worked across all zones, including the heavily pitted and contaminated areas. Our crew vacuumed the full surface thoroughly before moving to the repair phase.
Crack and Pitting Repair
Vertical and Step Preparation
The Coating System
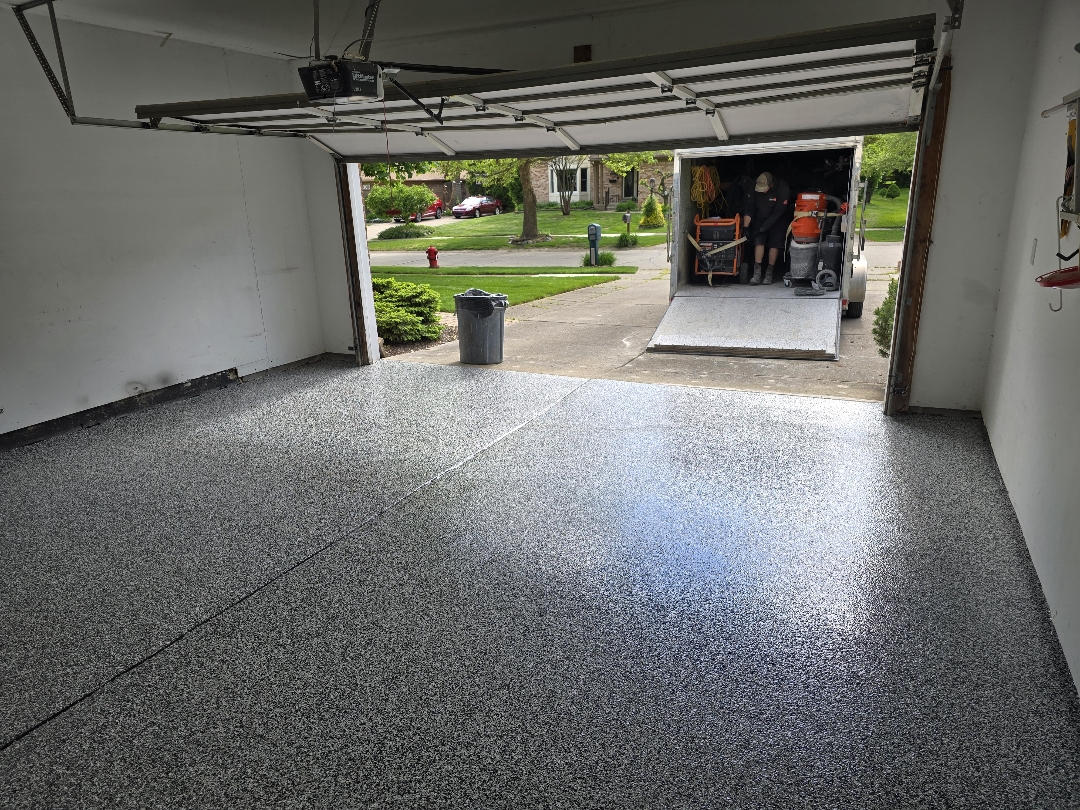
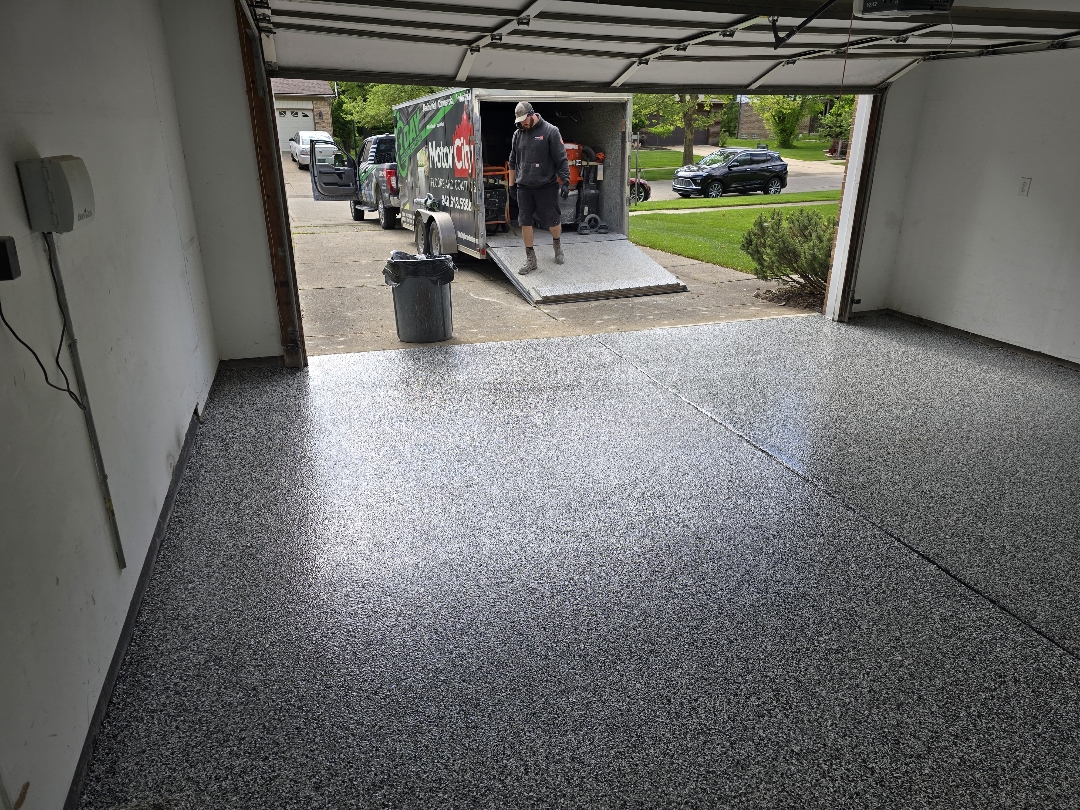
The Result
Testimonials
Herb Schulke
James Doe
Garage Floor Coating on Carol Avenue
Carol Avenue, Plymouth, MI
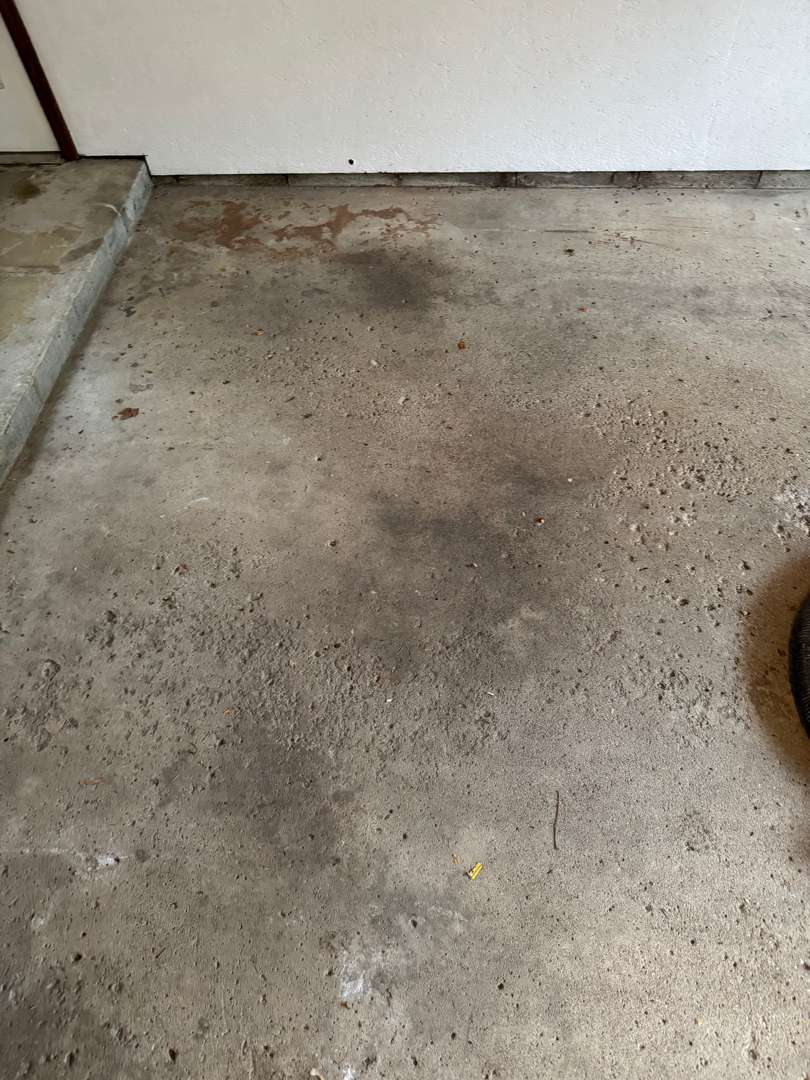
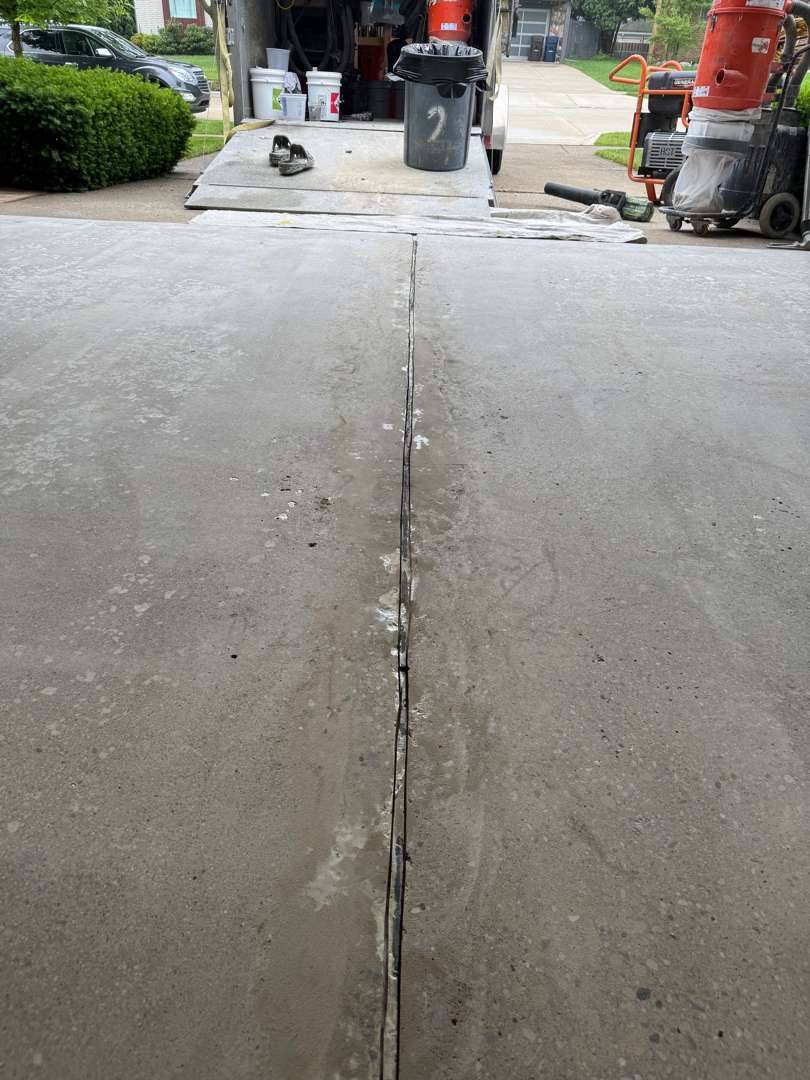
The Starting Point
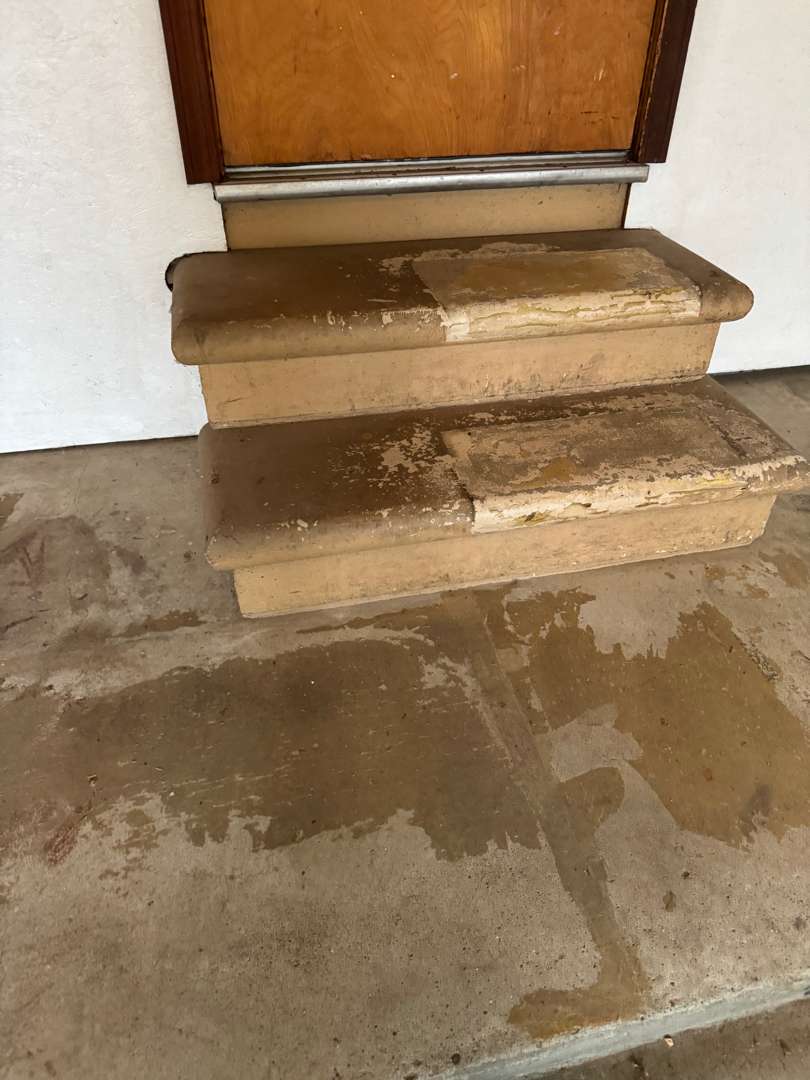
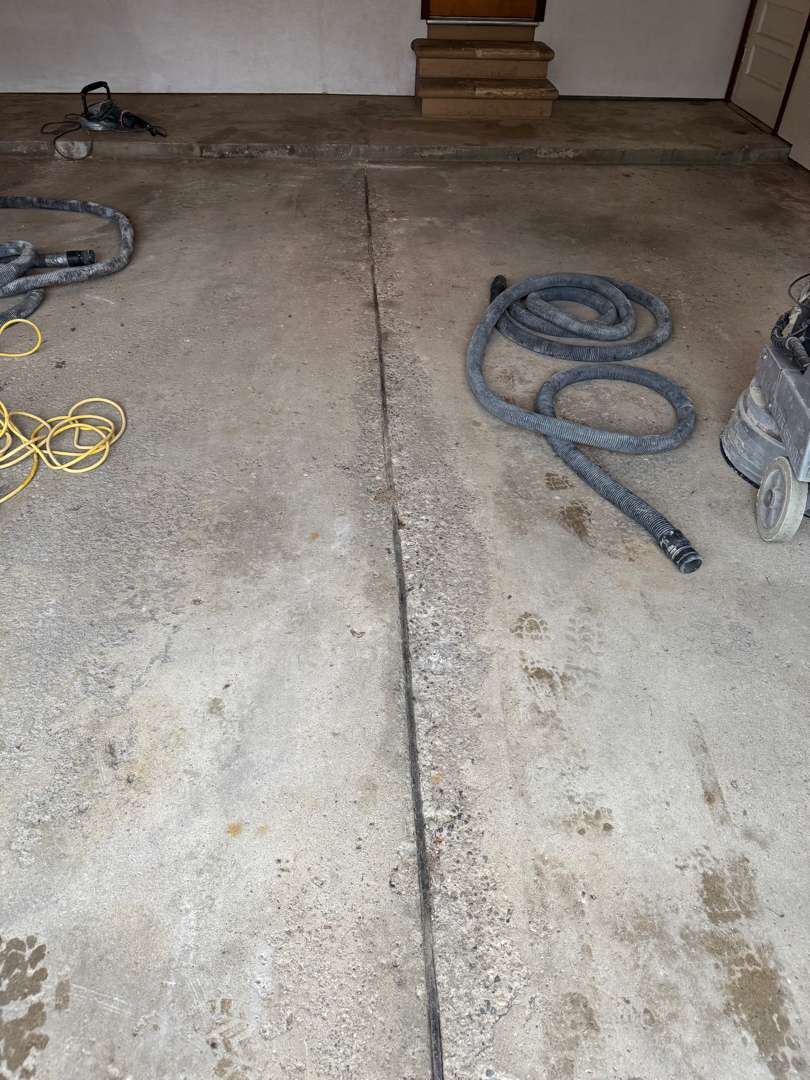
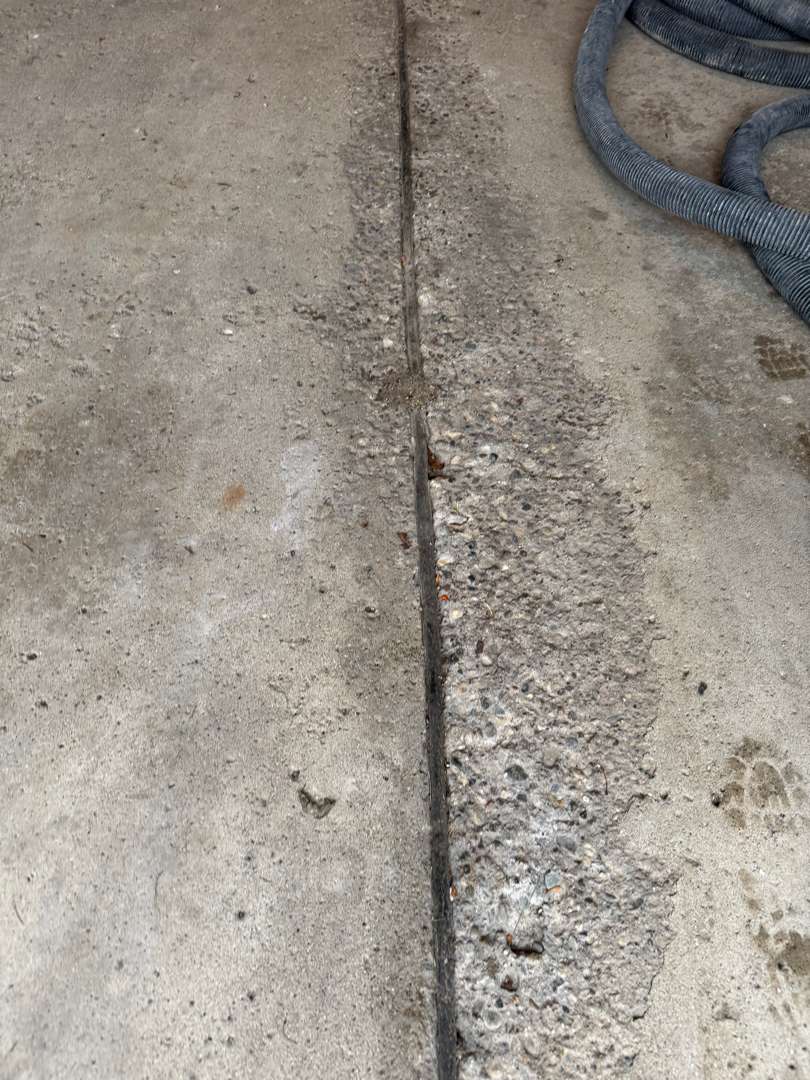
Surface Preparation
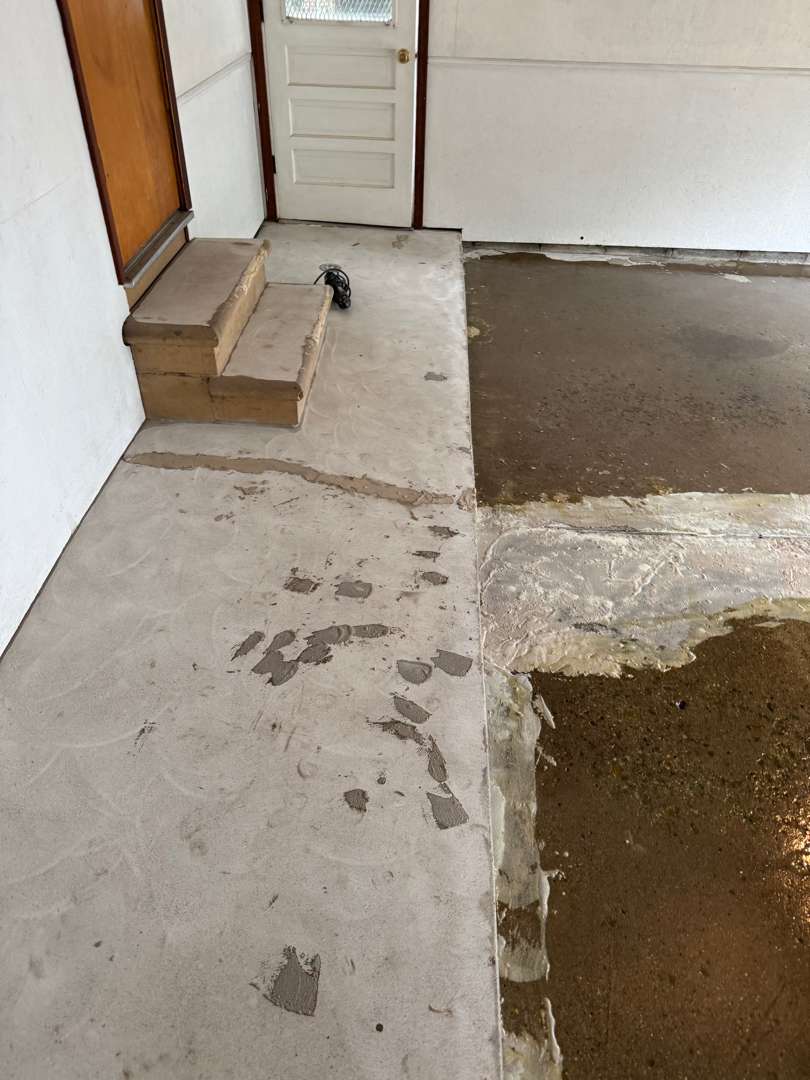
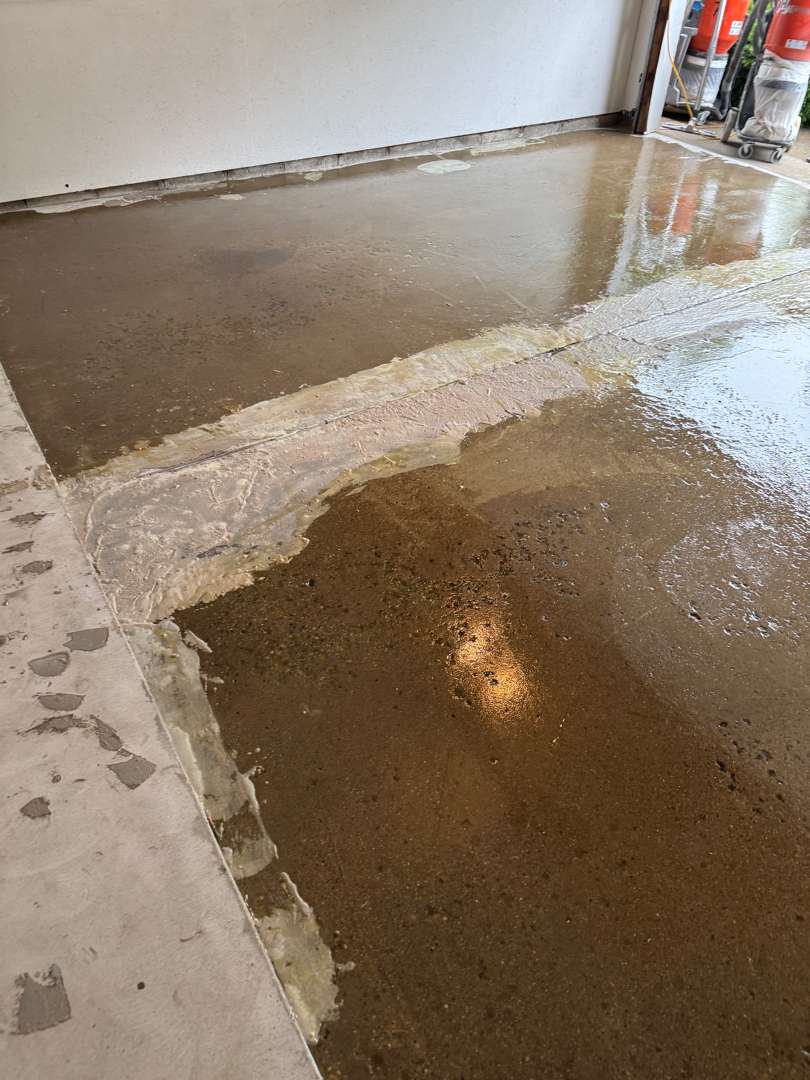
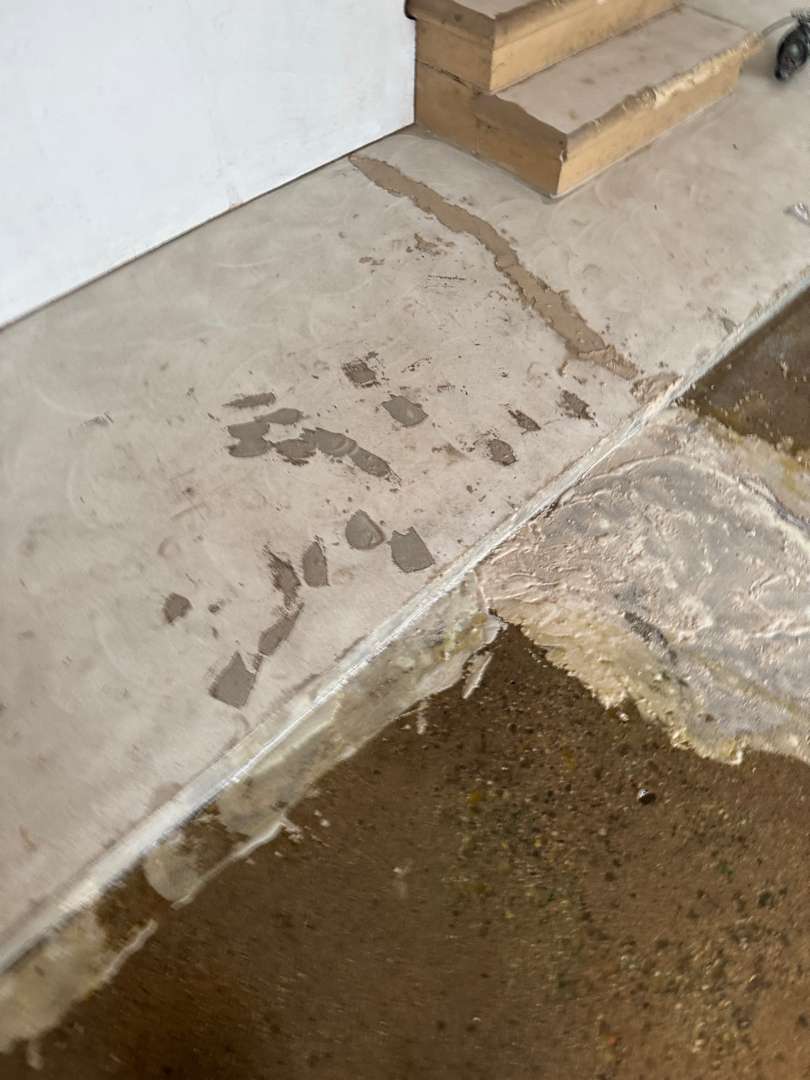
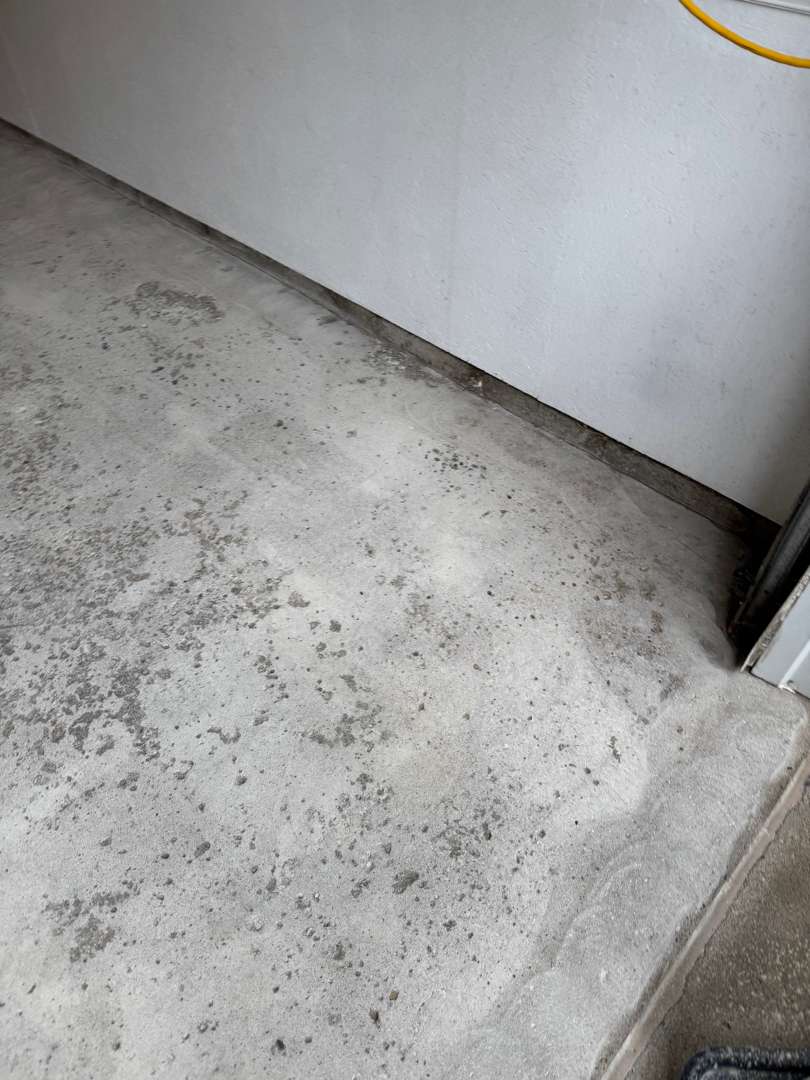
Pitting Repair
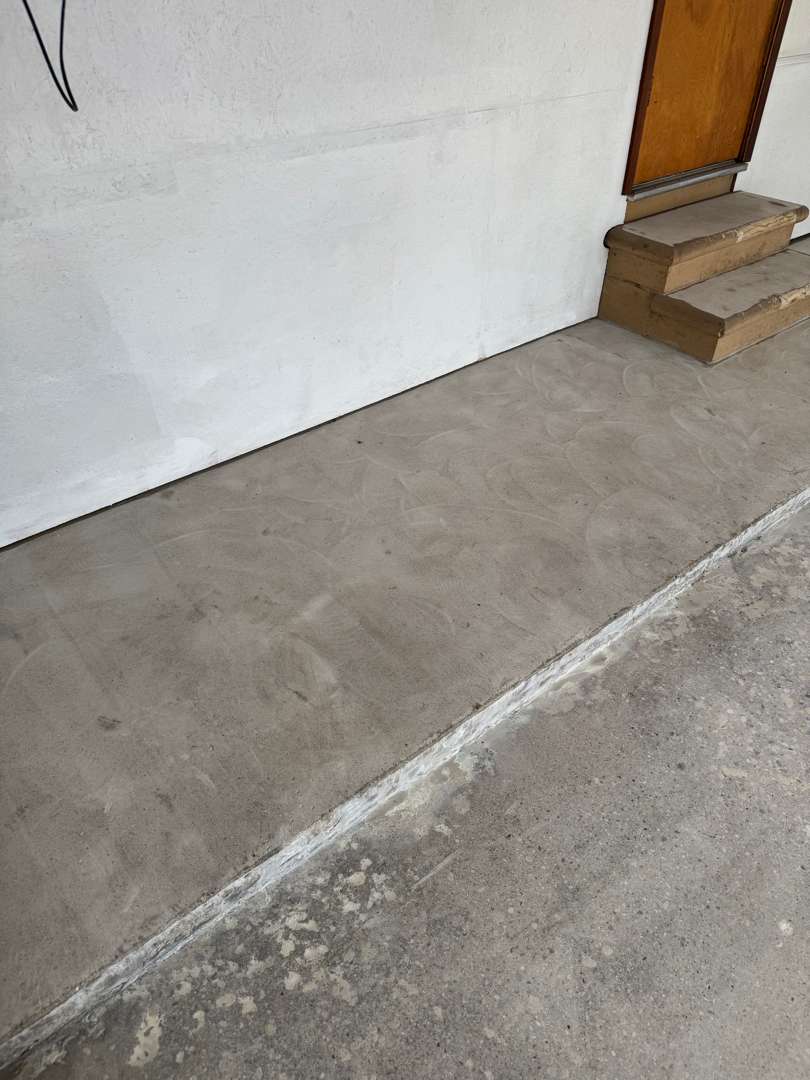
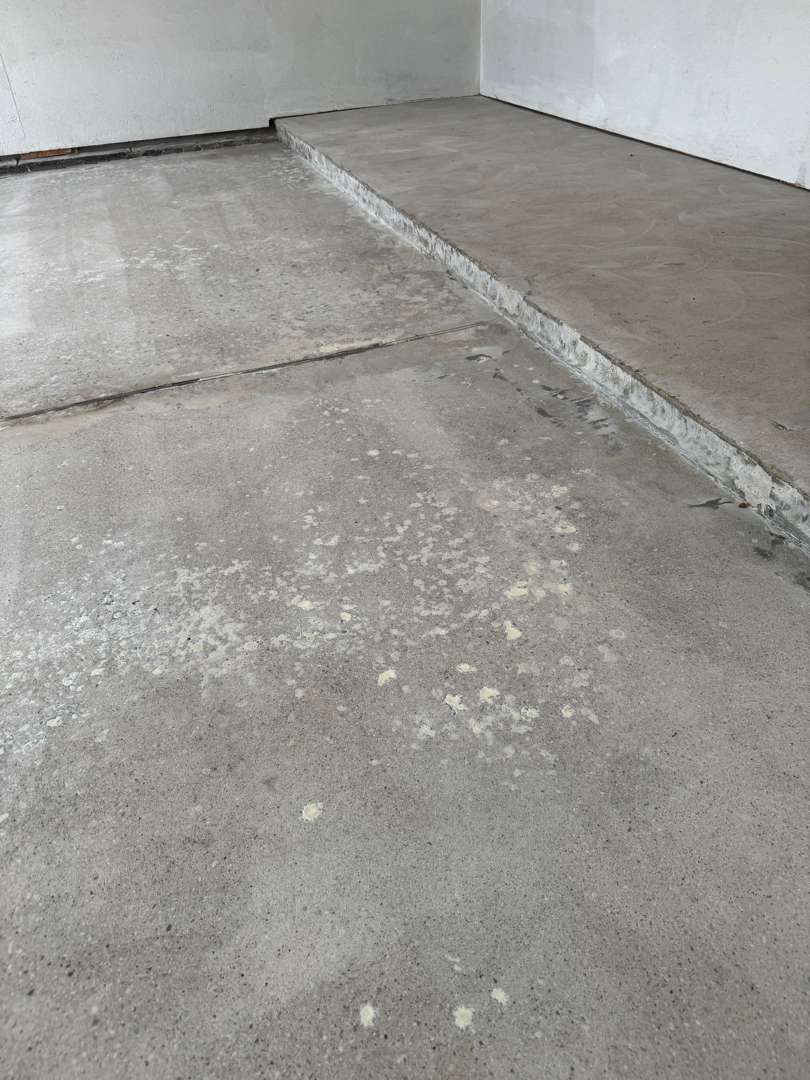
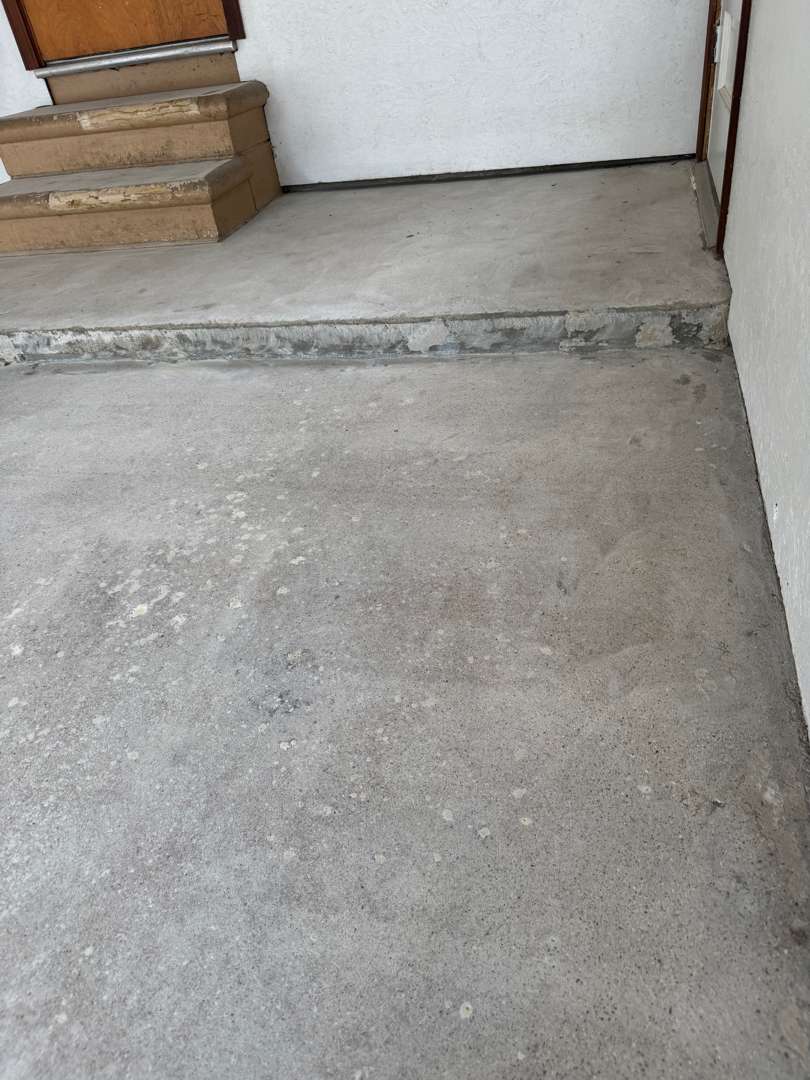
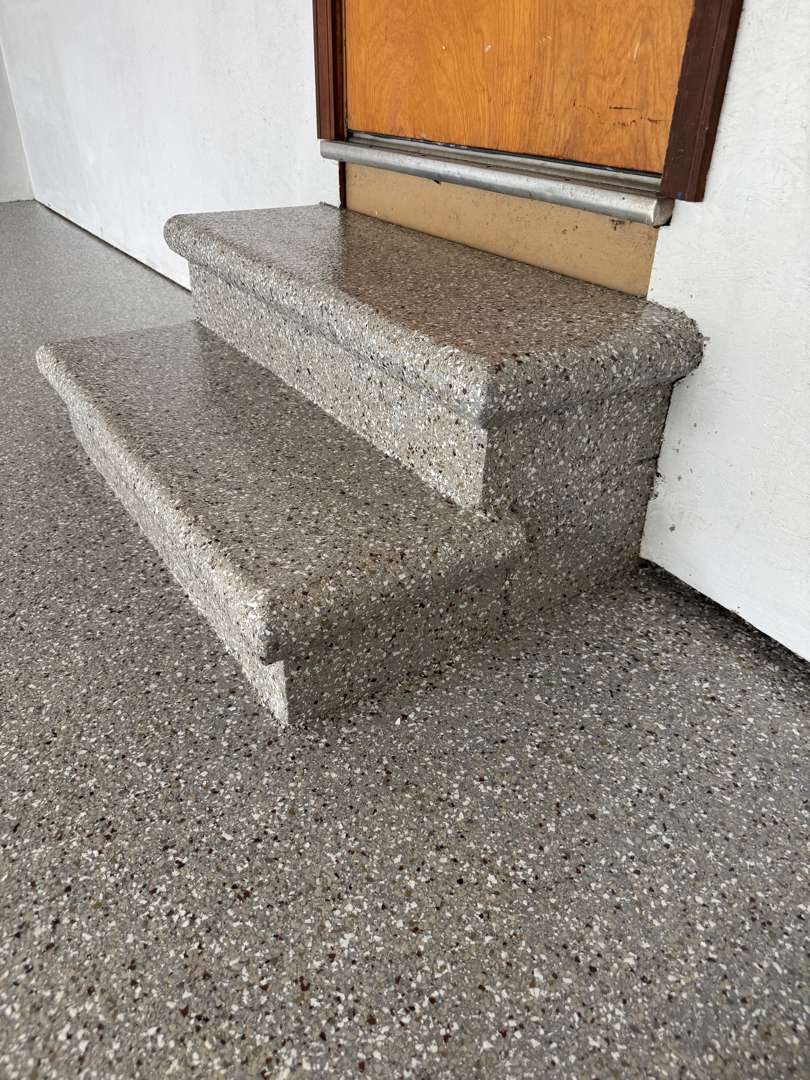
Step Repair and Preparation
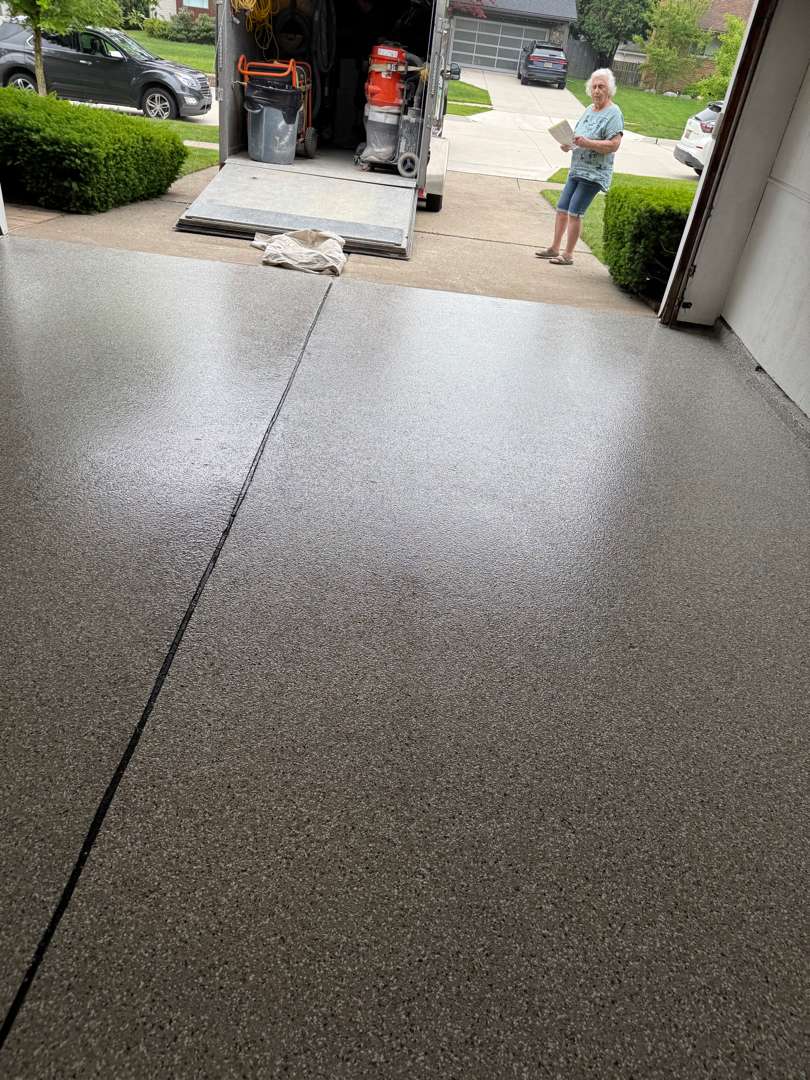
The Coating System
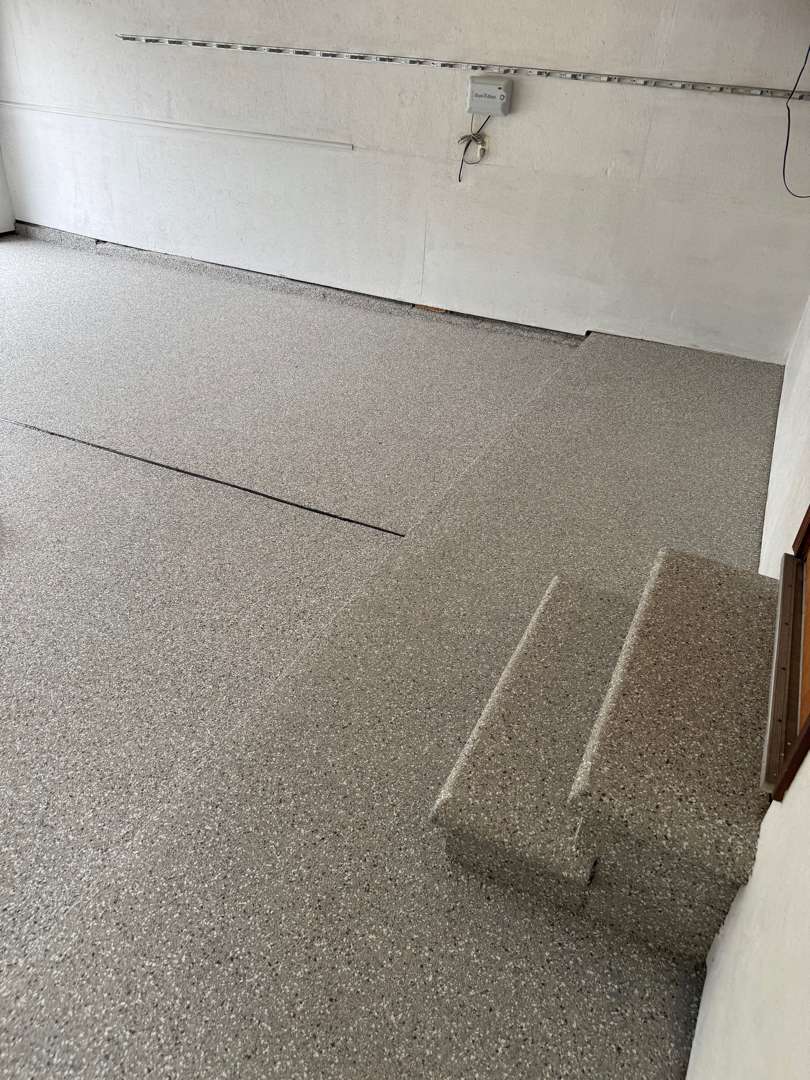
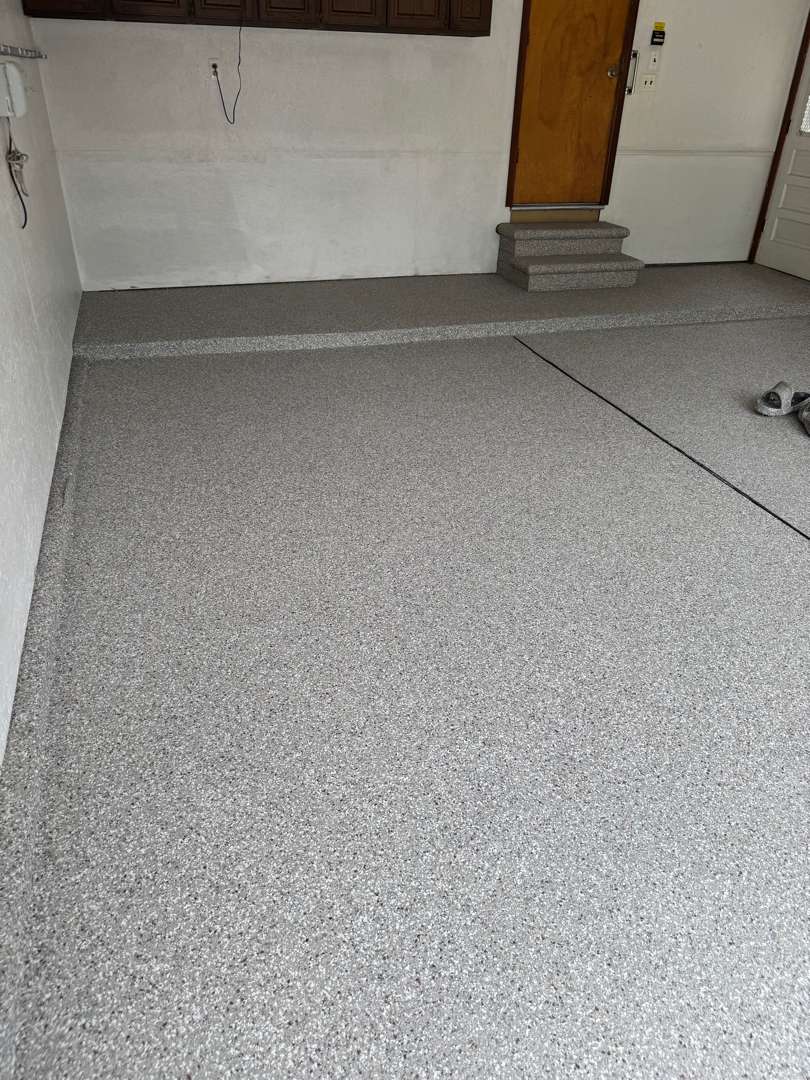
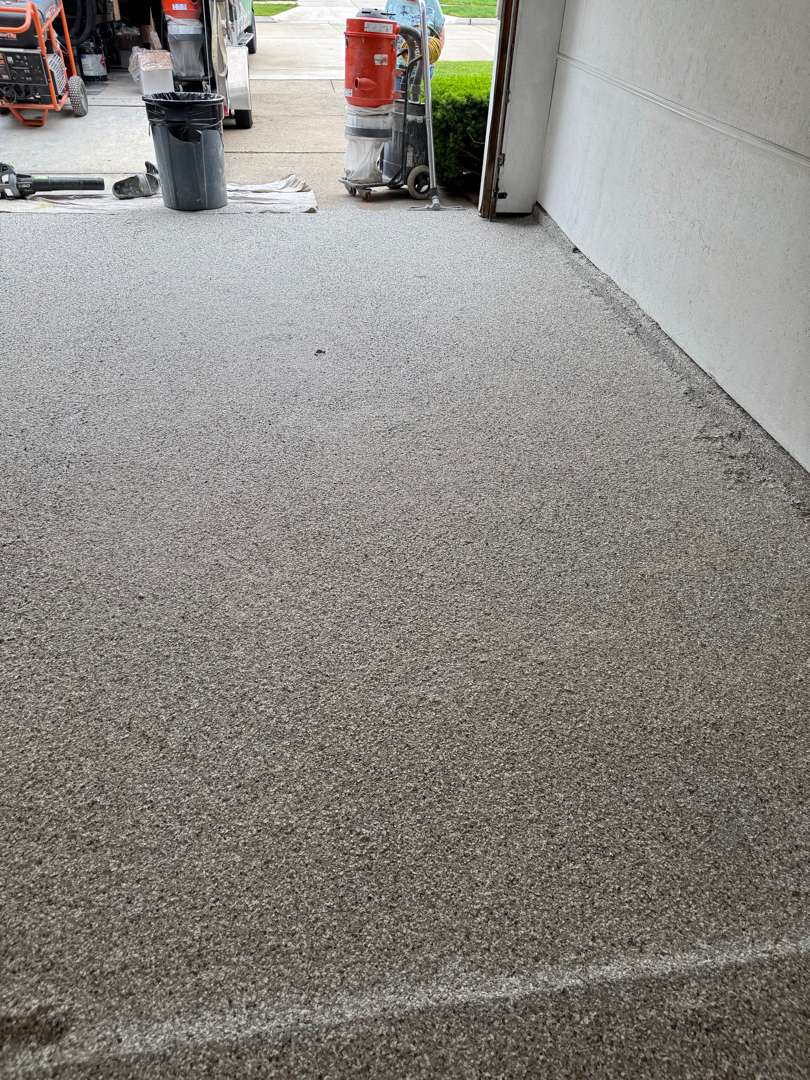
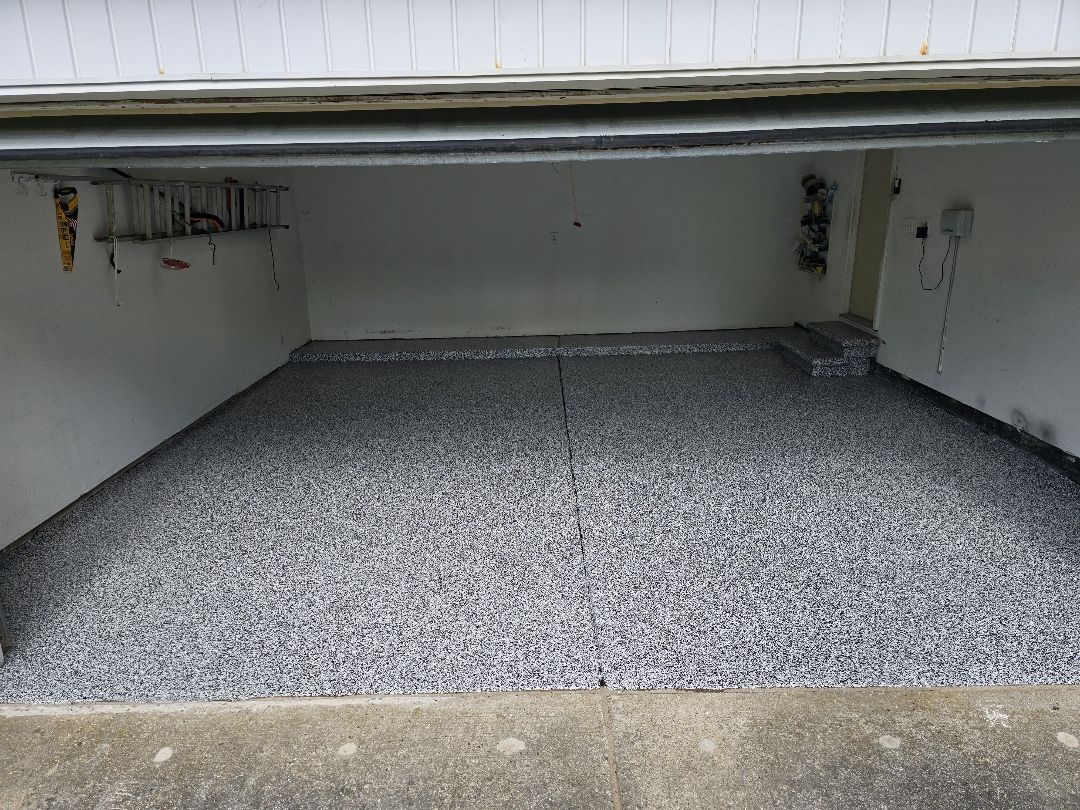
The Result
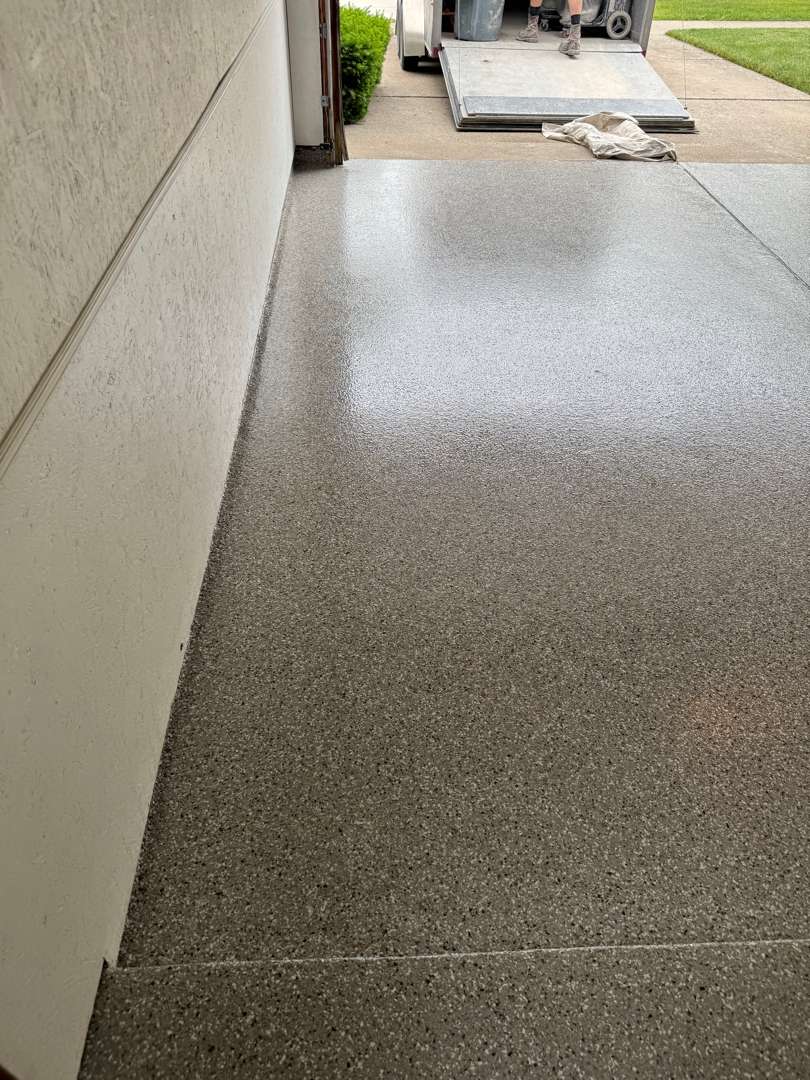
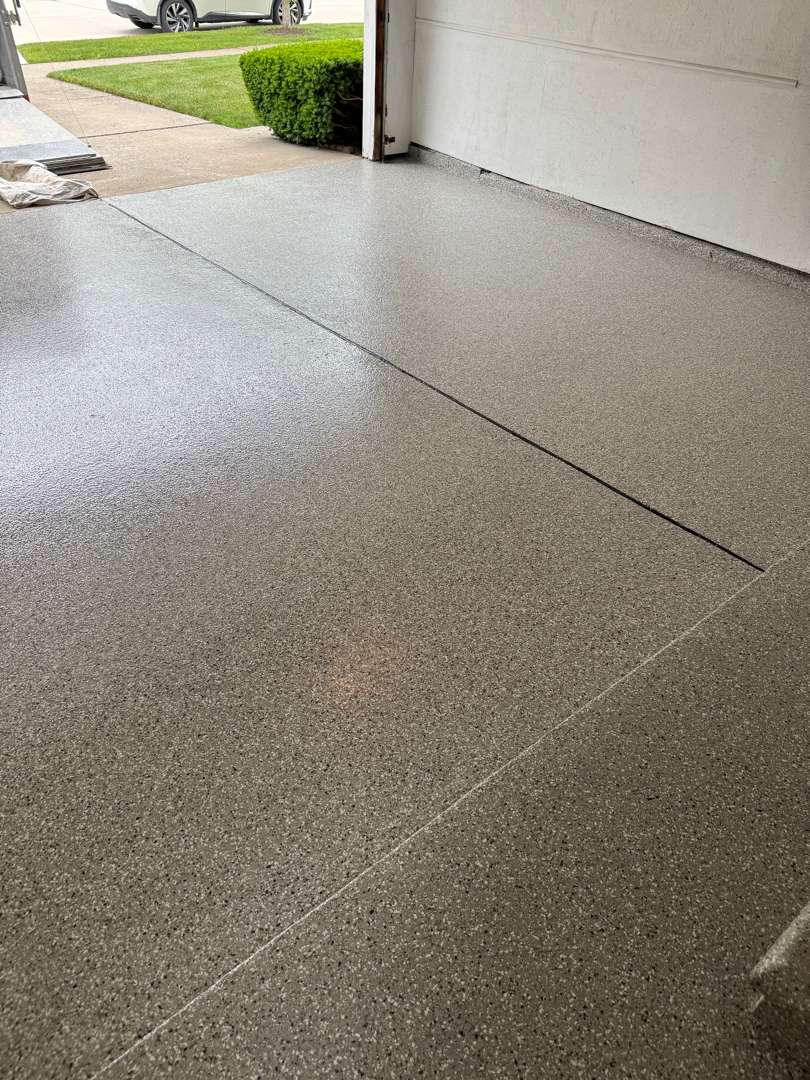
Testimonials
Anna Janik-Shaw
Pamela Stevens
Garage Floor Coating on Latheron Drive
Latheron Drive, Plymouth, MI
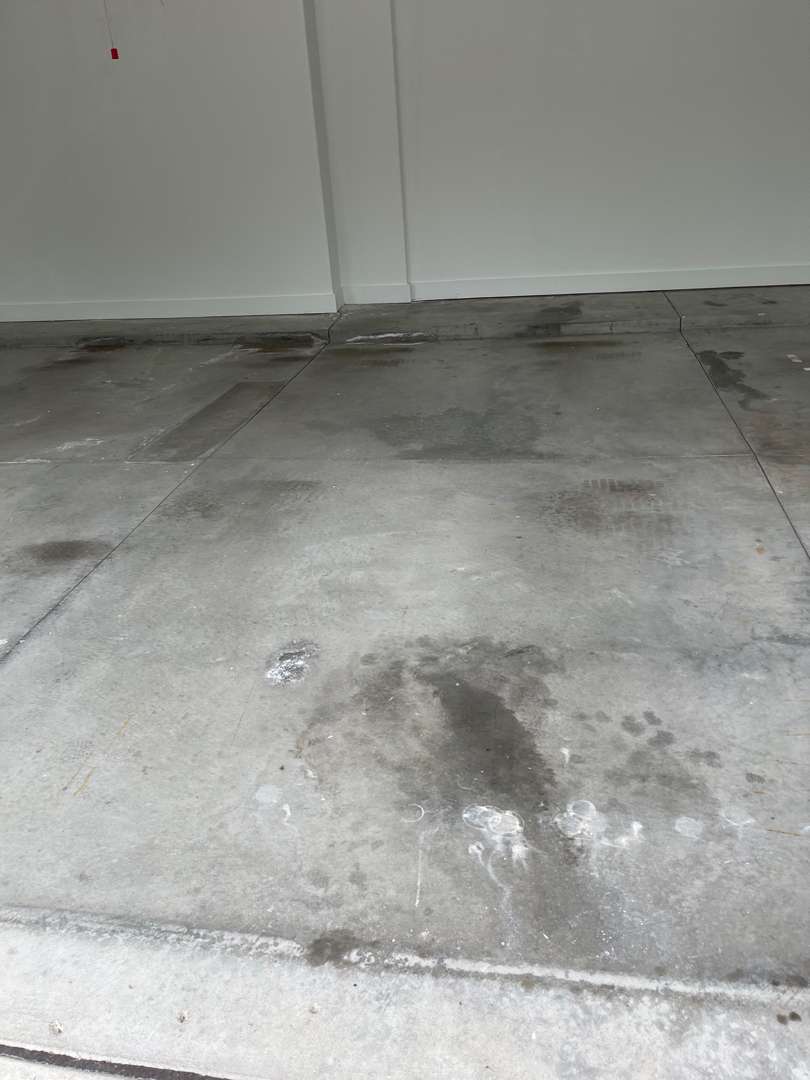
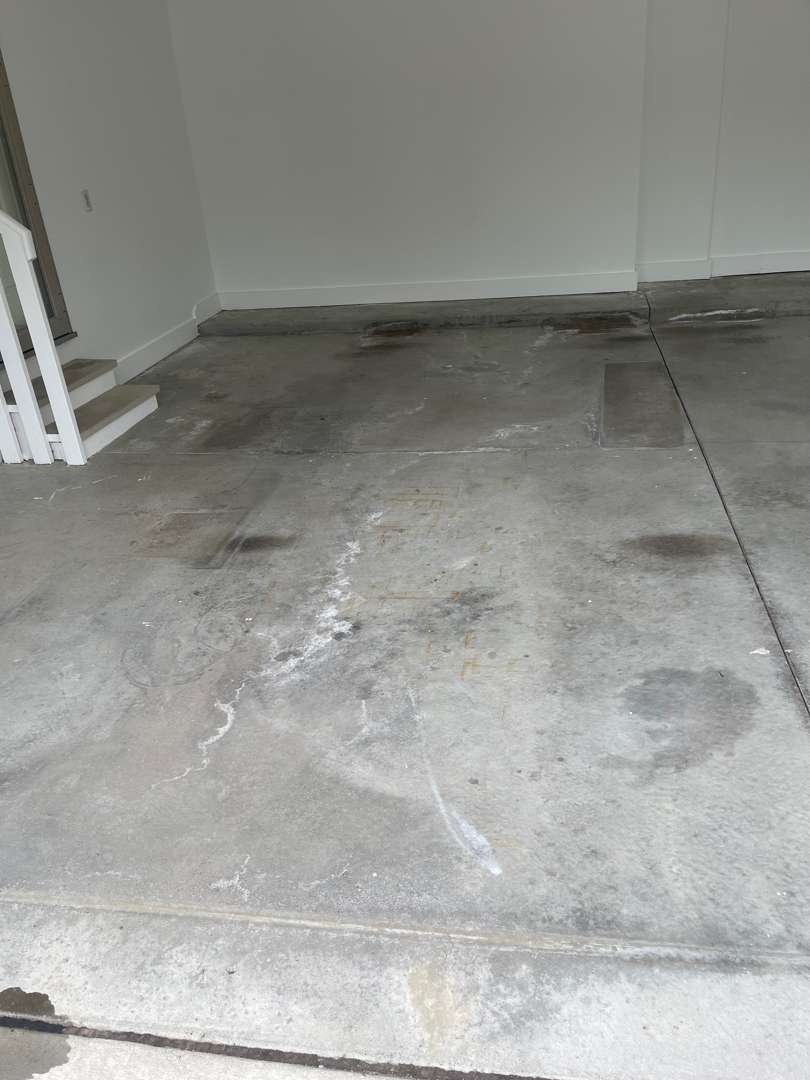
The Starting Point
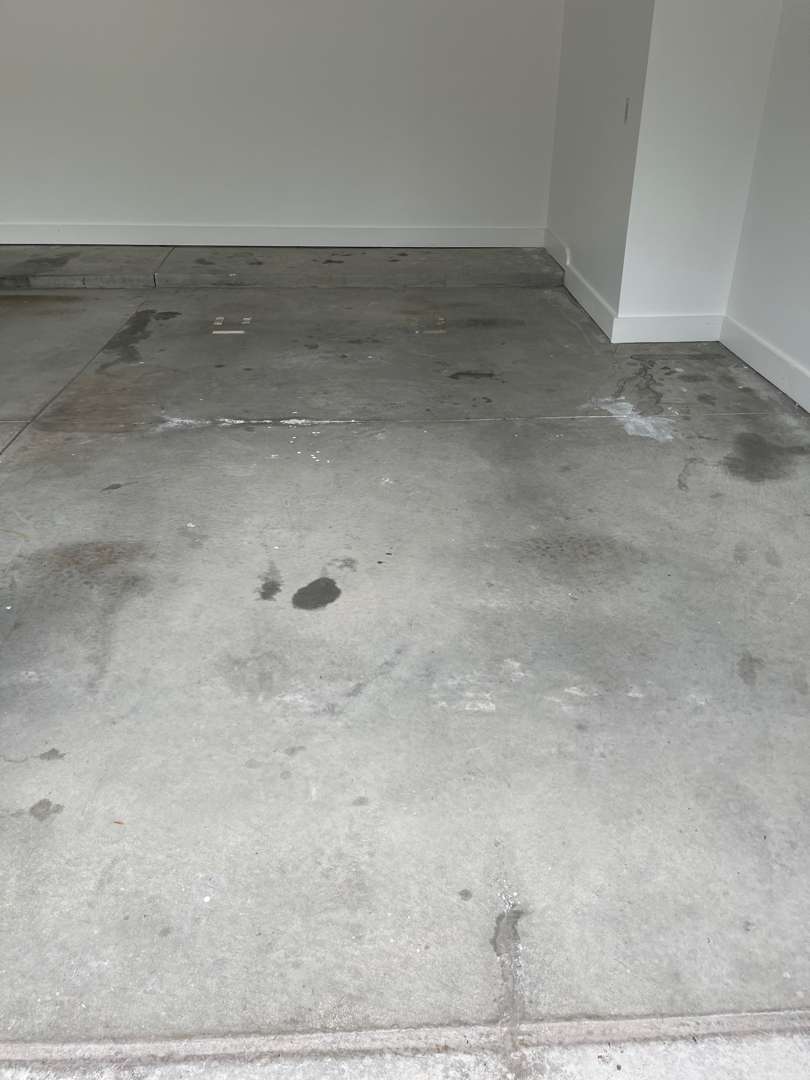
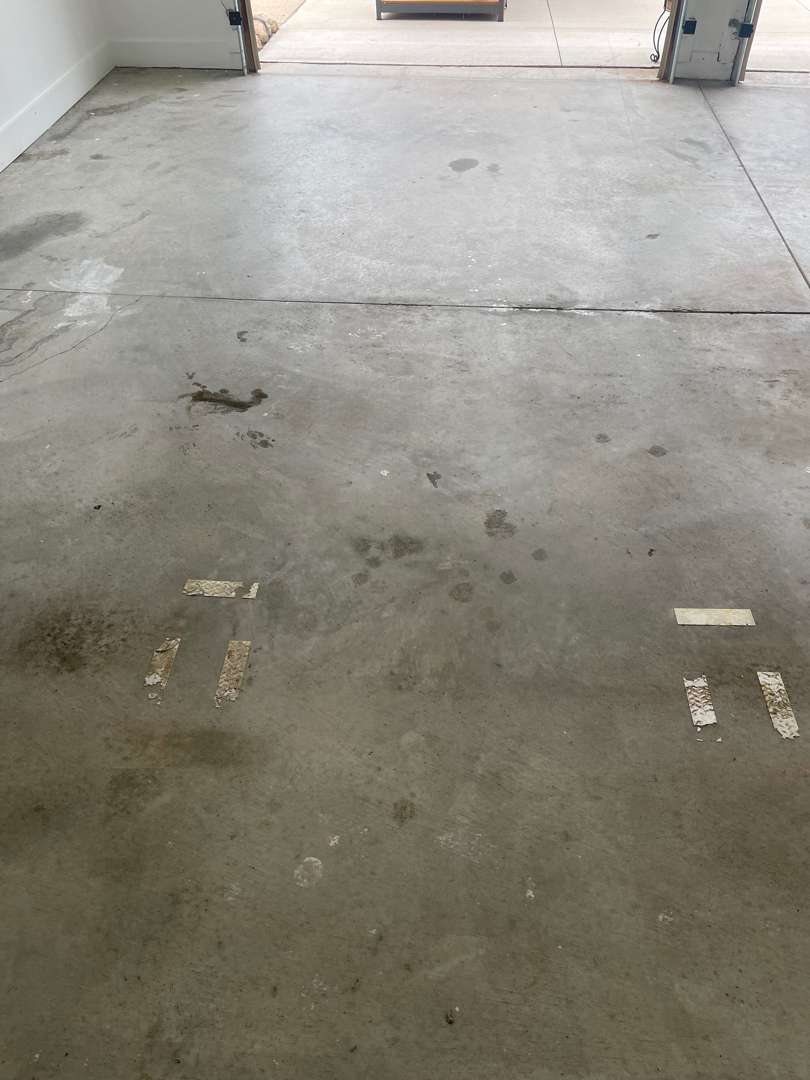
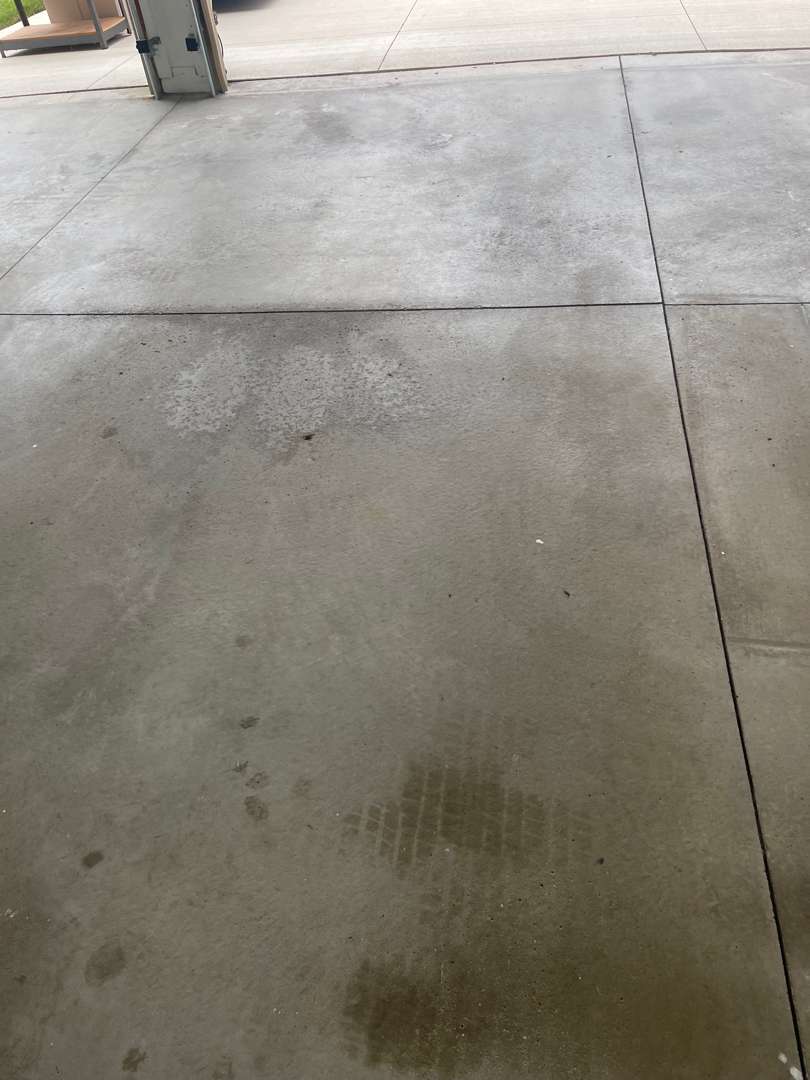
Surface Preparation
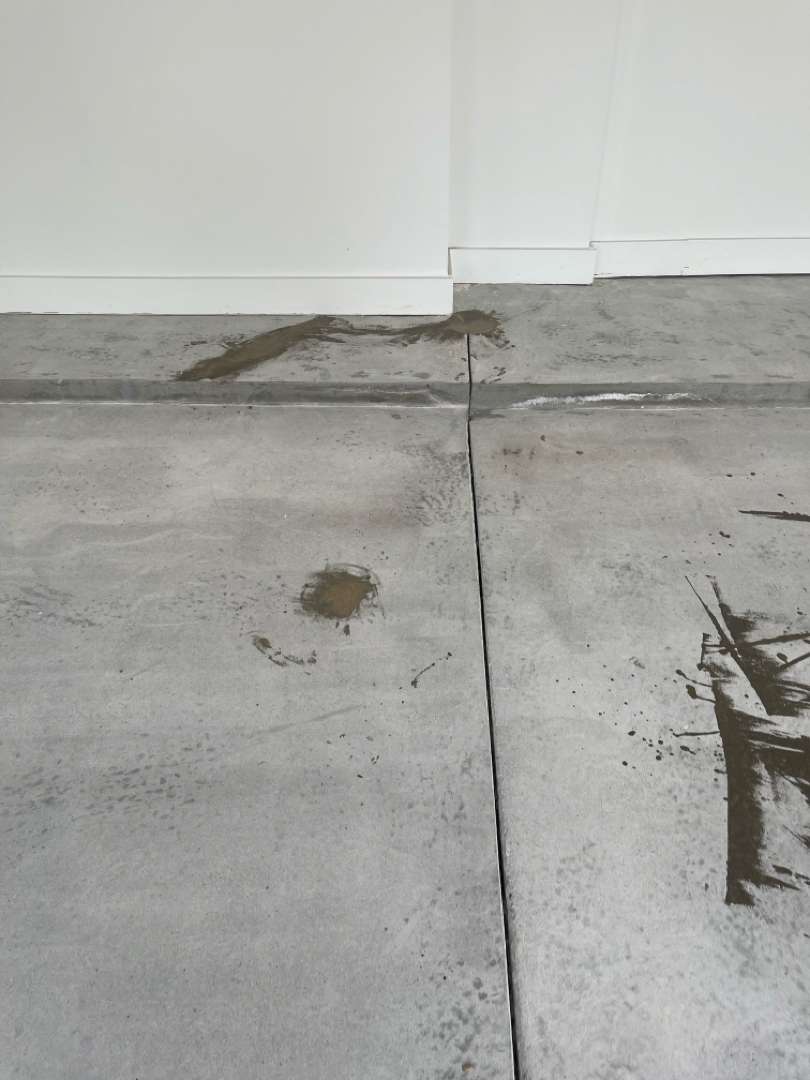
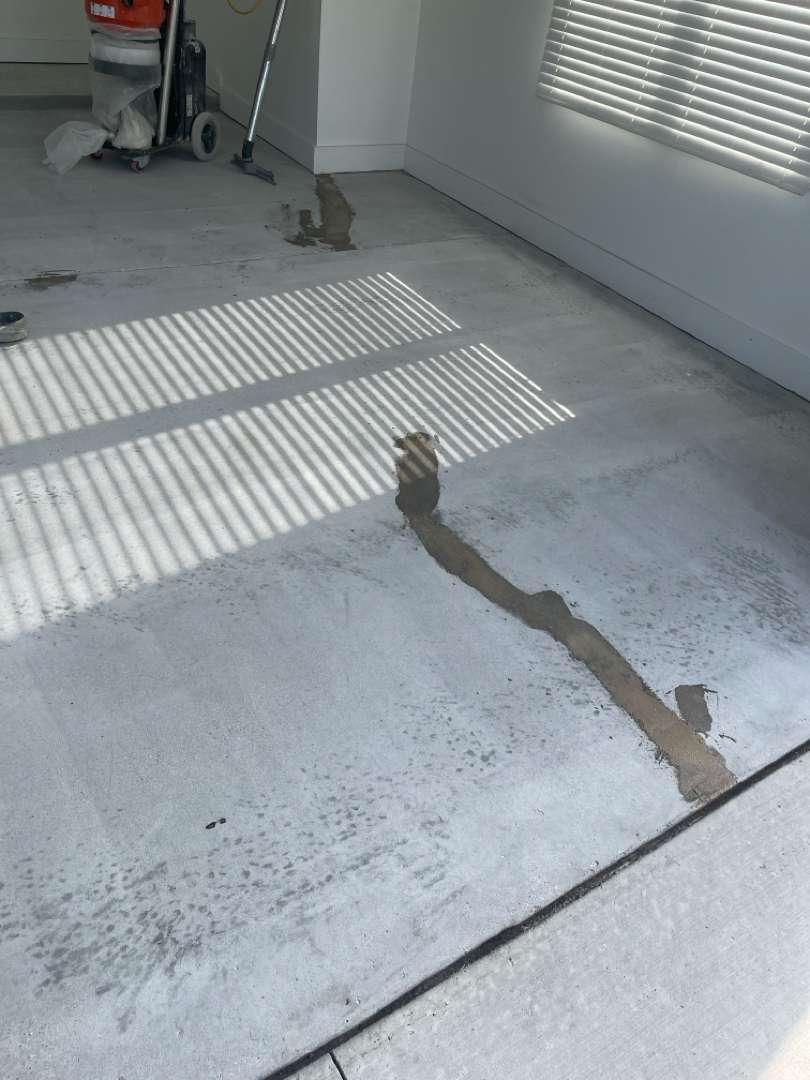
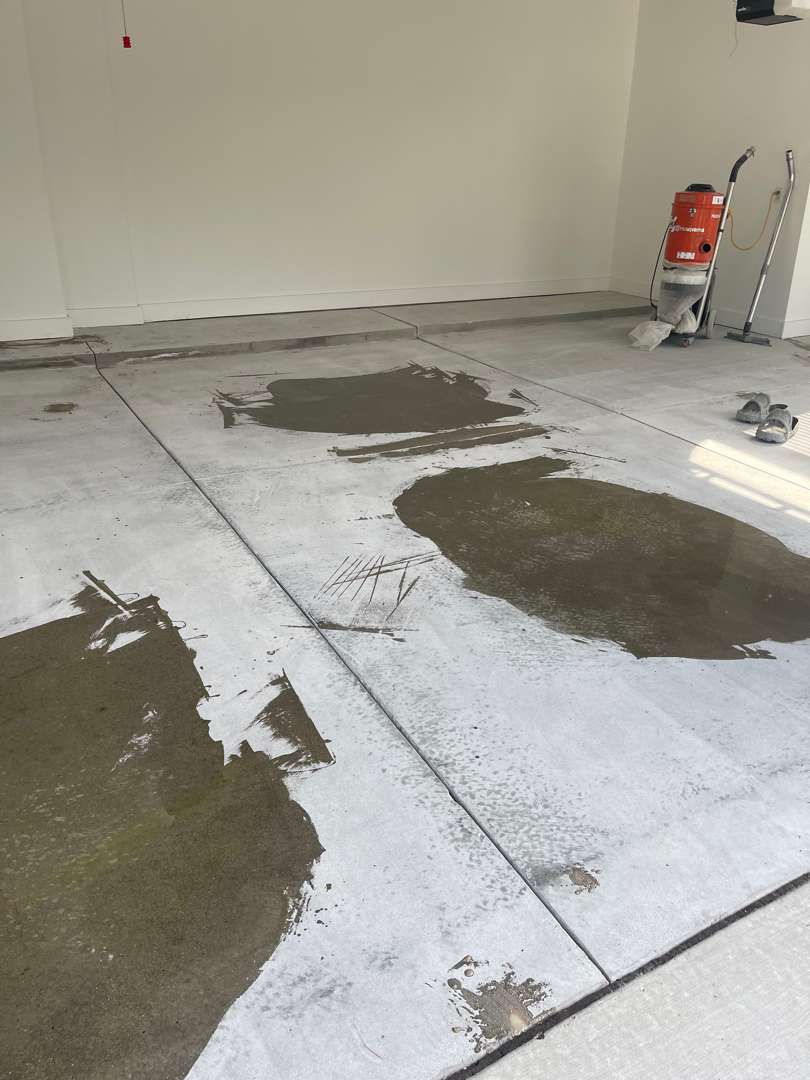
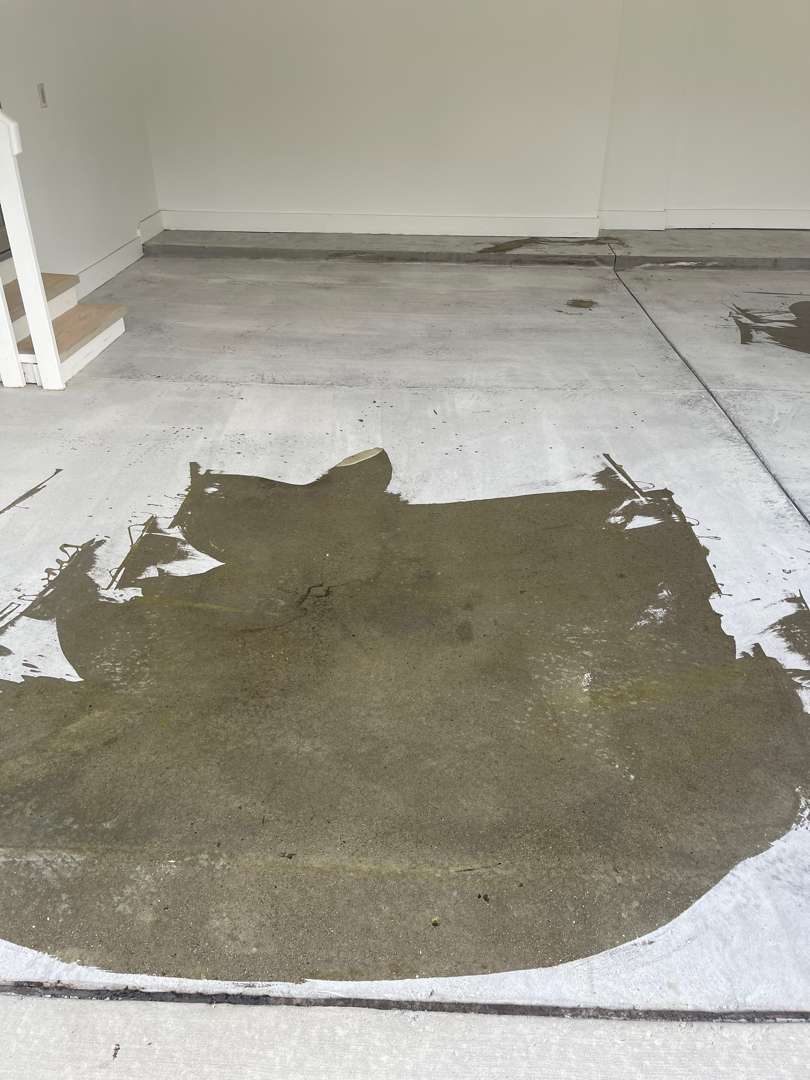
Crack and Pitting Repair
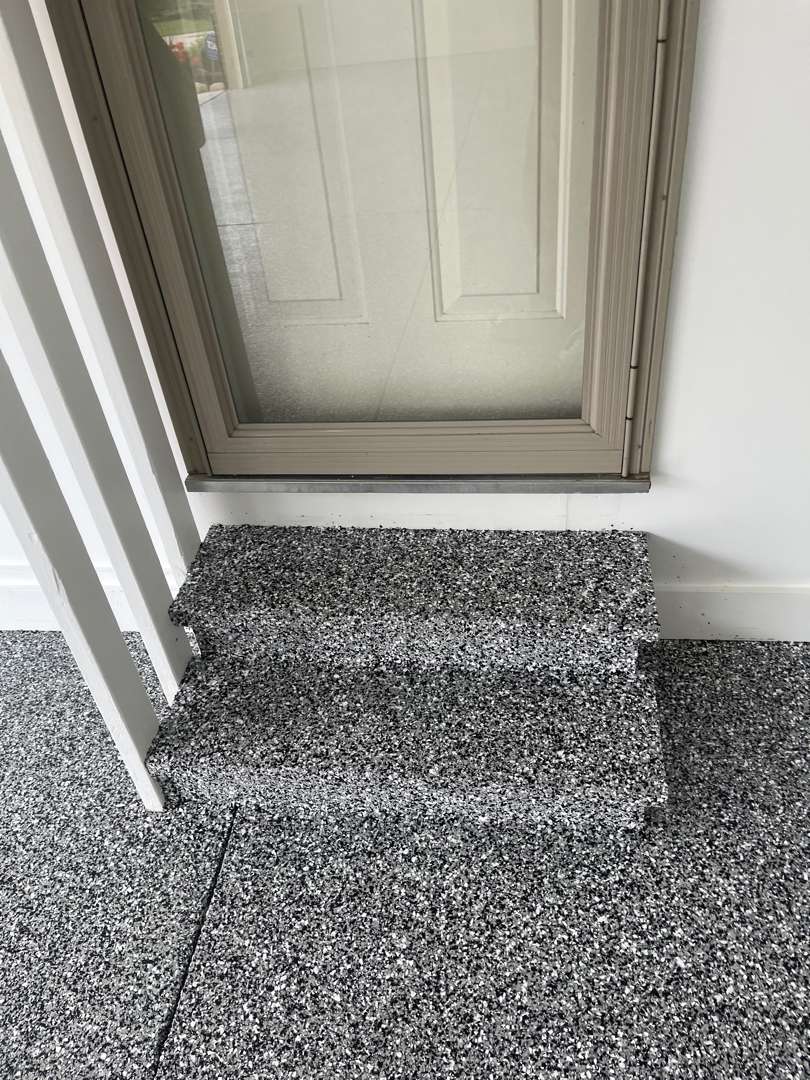
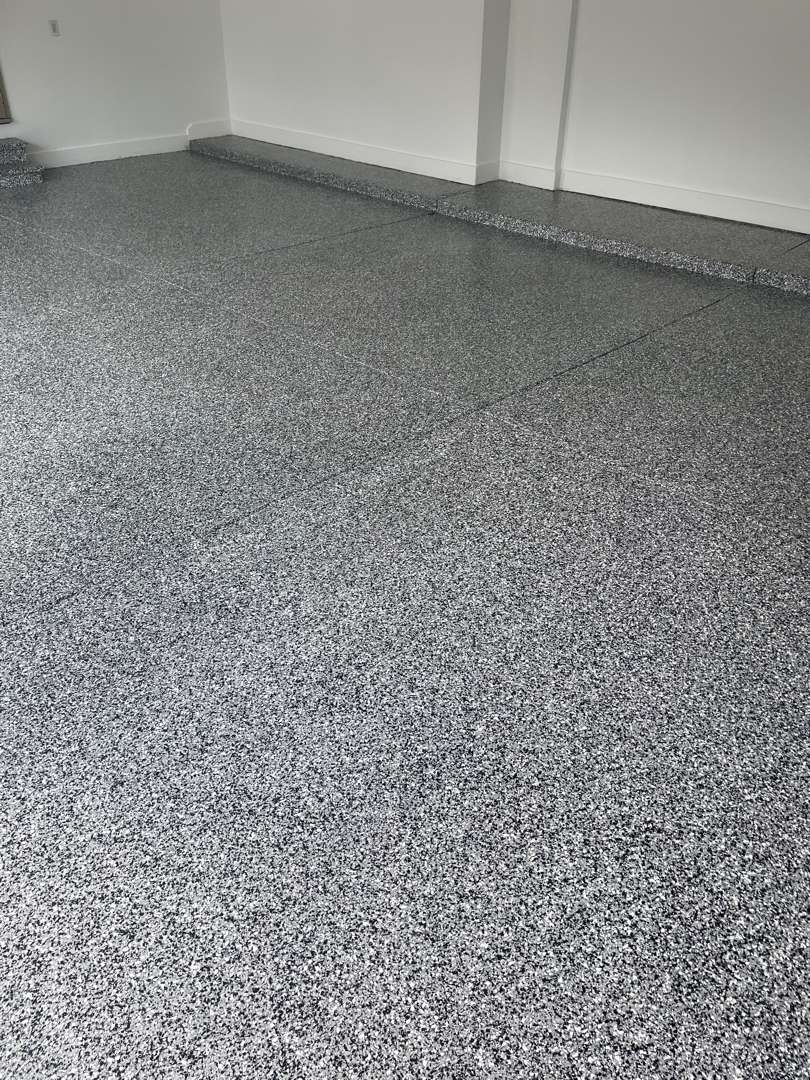
Wood Steps and Vertical Surfaces
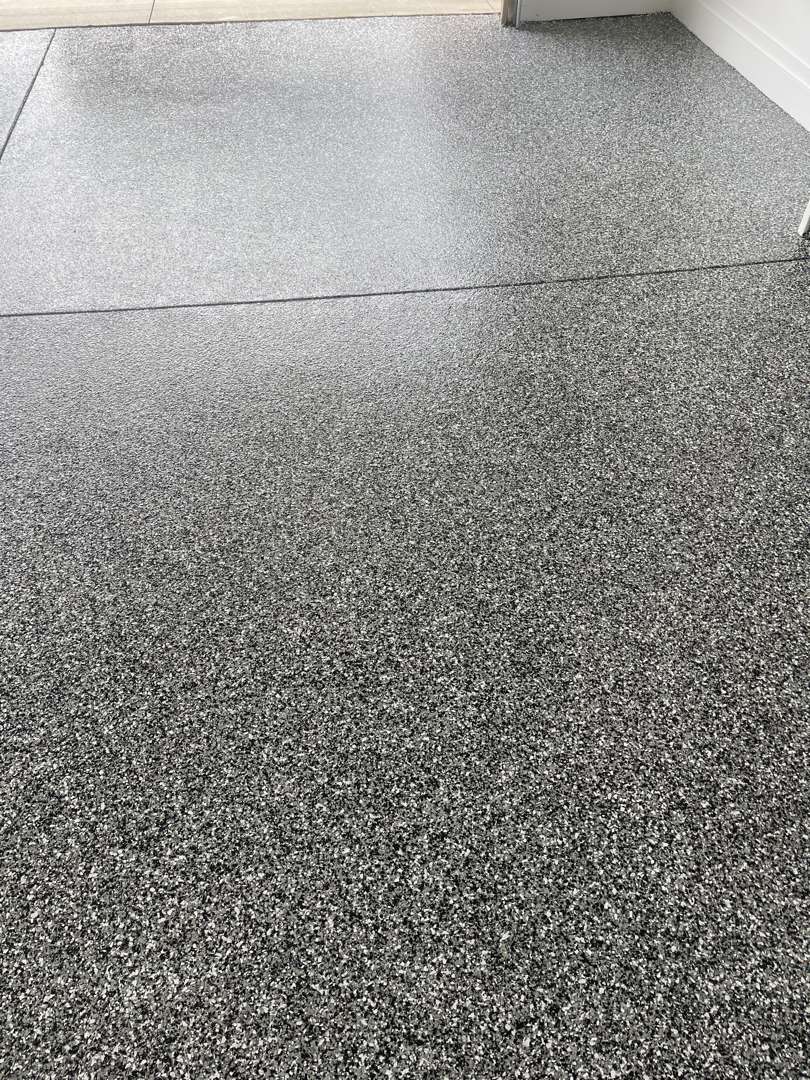
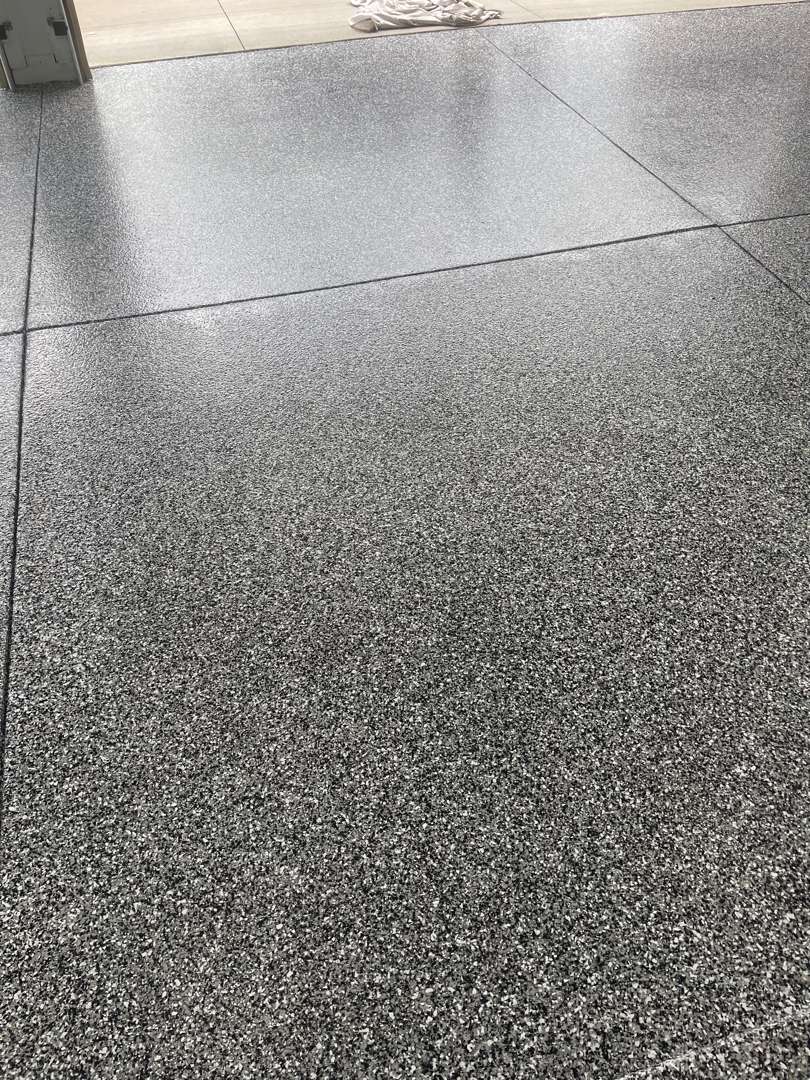
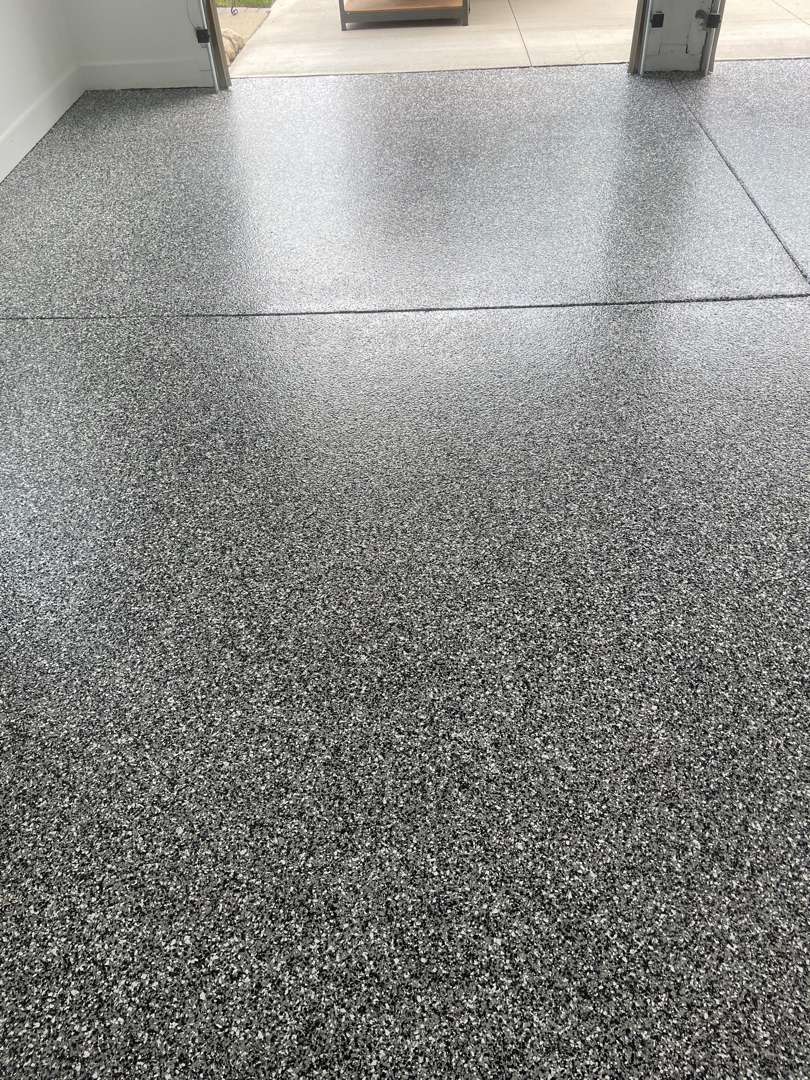
The Coating System
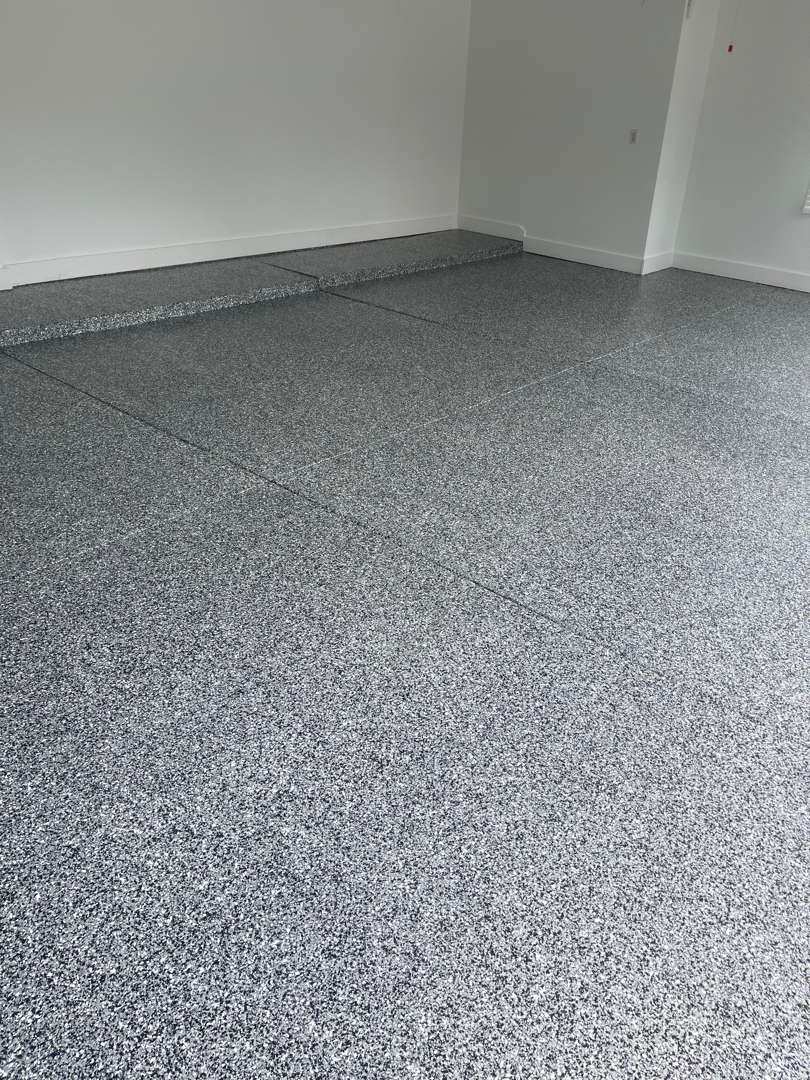
The Result
Testimonials
Ann Collver
My garage was built in the early 1950s. Over the years it had become pitted and collected dirt that easily got tracked into the house.
I am absolutely thrilled with the job MotorCity Floors and Coatings did for me. From the day of contact until today I have greatly appreciated their open,honest, and no-pressure discussion of what I needed and what they could AND DID for my garage.
I would highly recommend them to anyone.
It’s really difficult to get good pictures but it’s beautiful. The advantage of the ease of cleaning will make a huge difference in my life.
Debra Snyder
Garage Floor Coating on Portis Road
Portis Road, Plymouth, MI
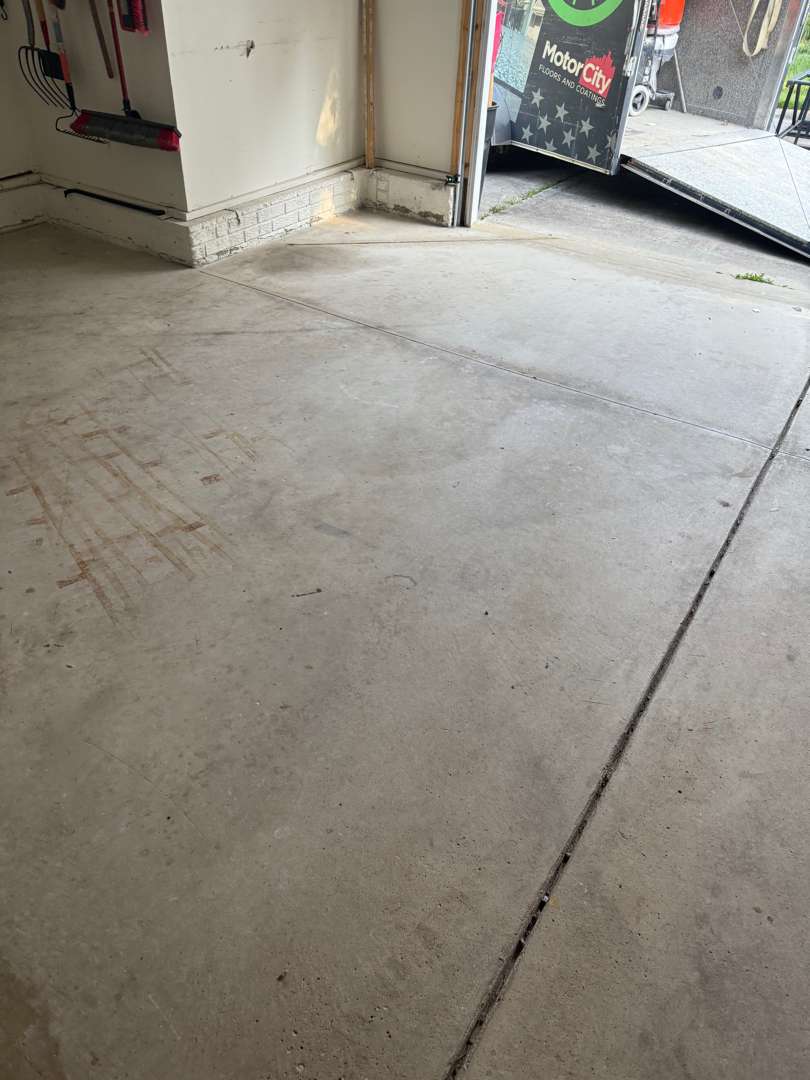
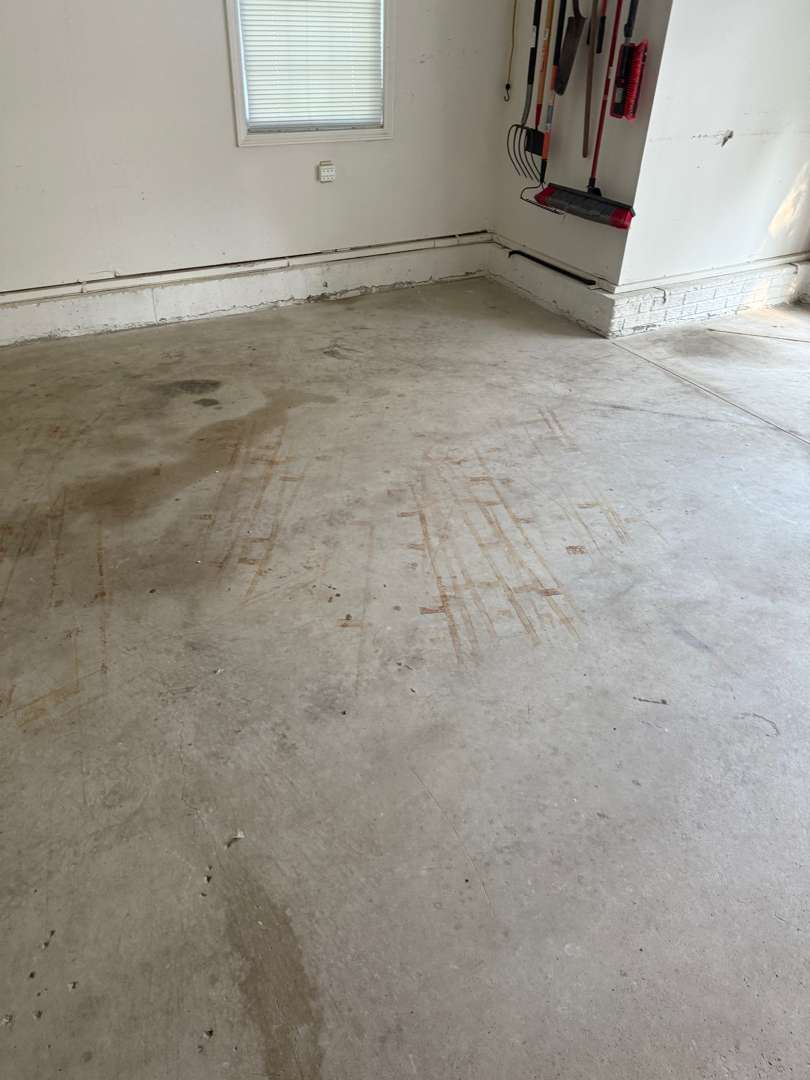
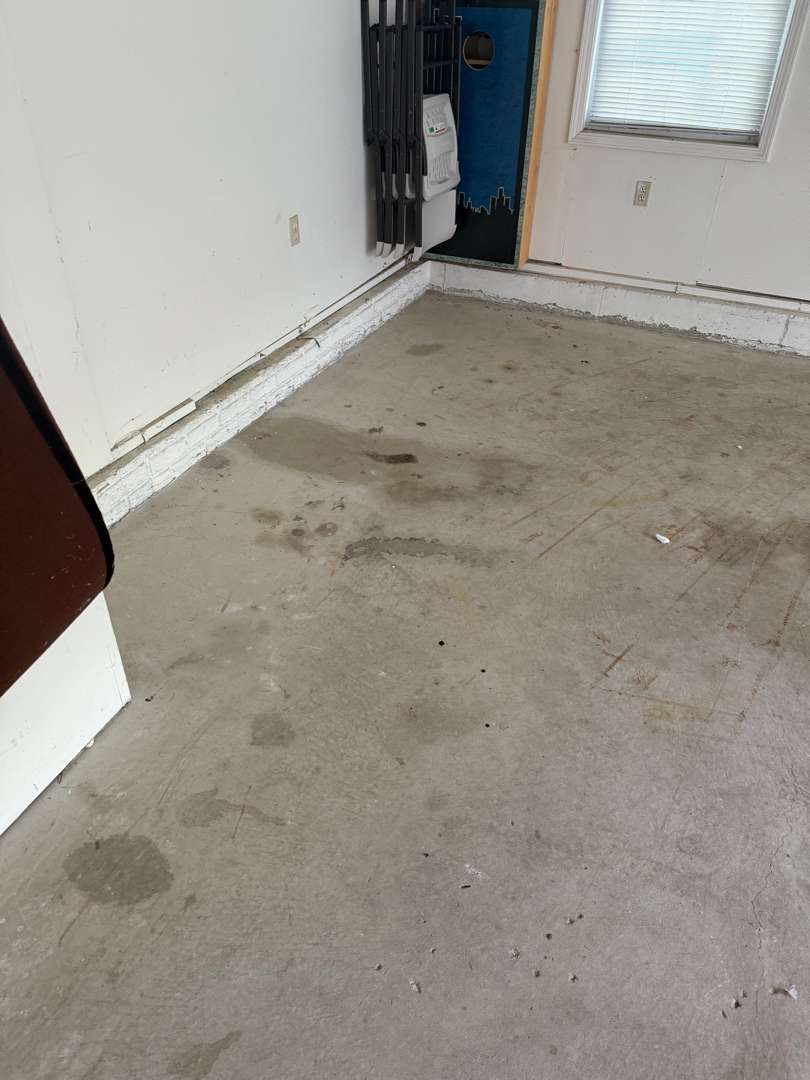
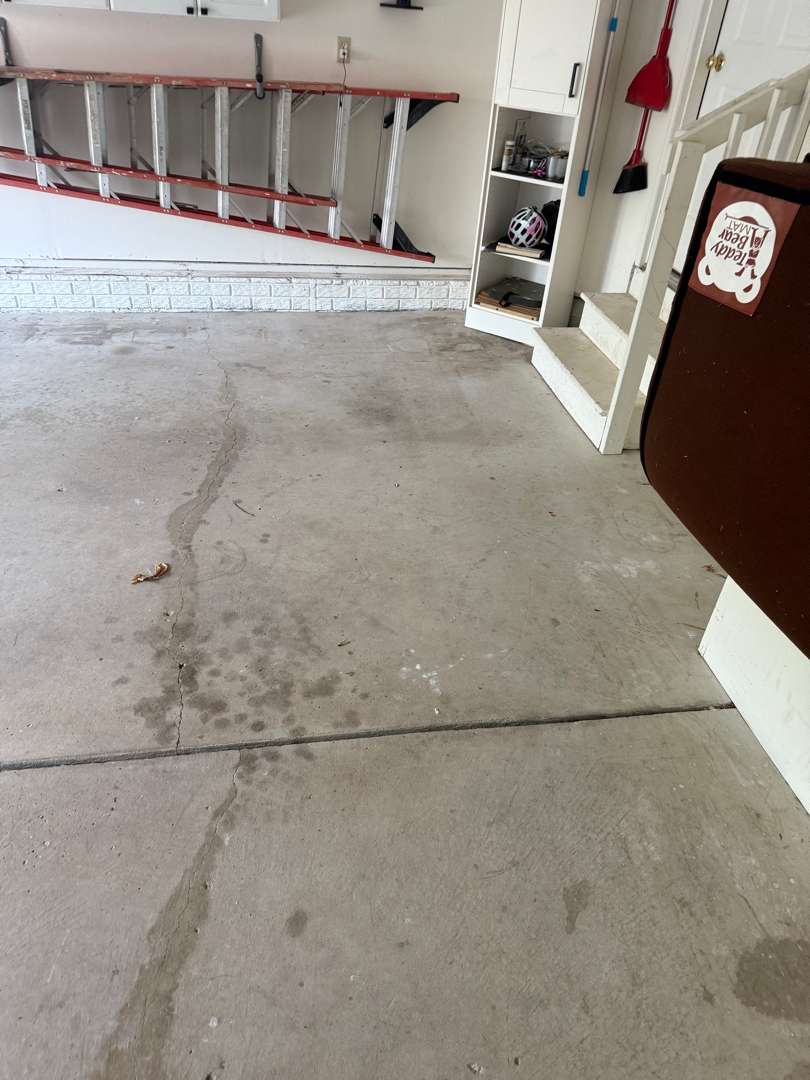
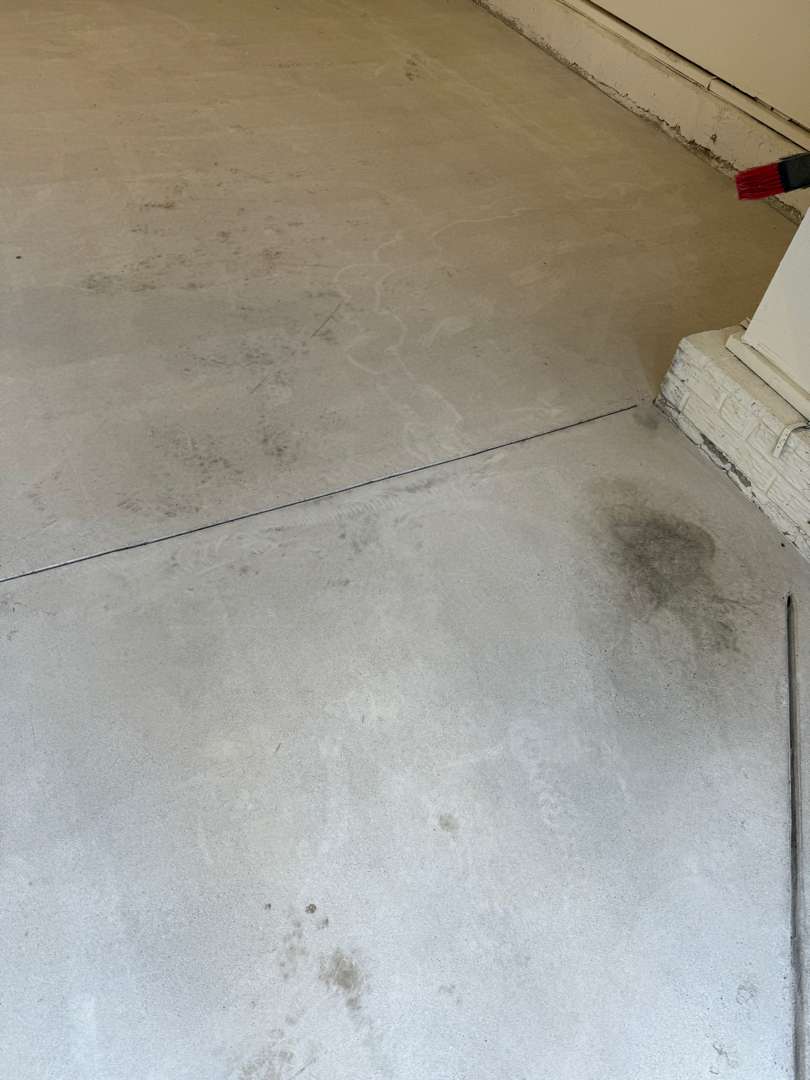
The Starting Point
Grinding
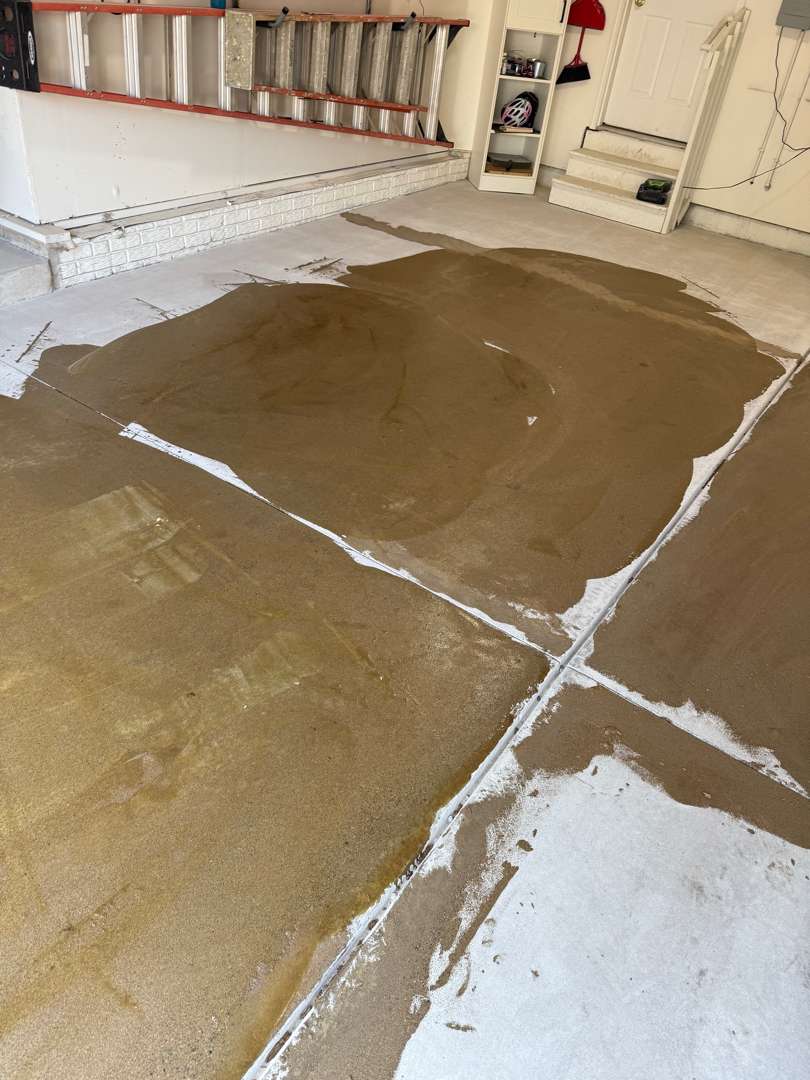
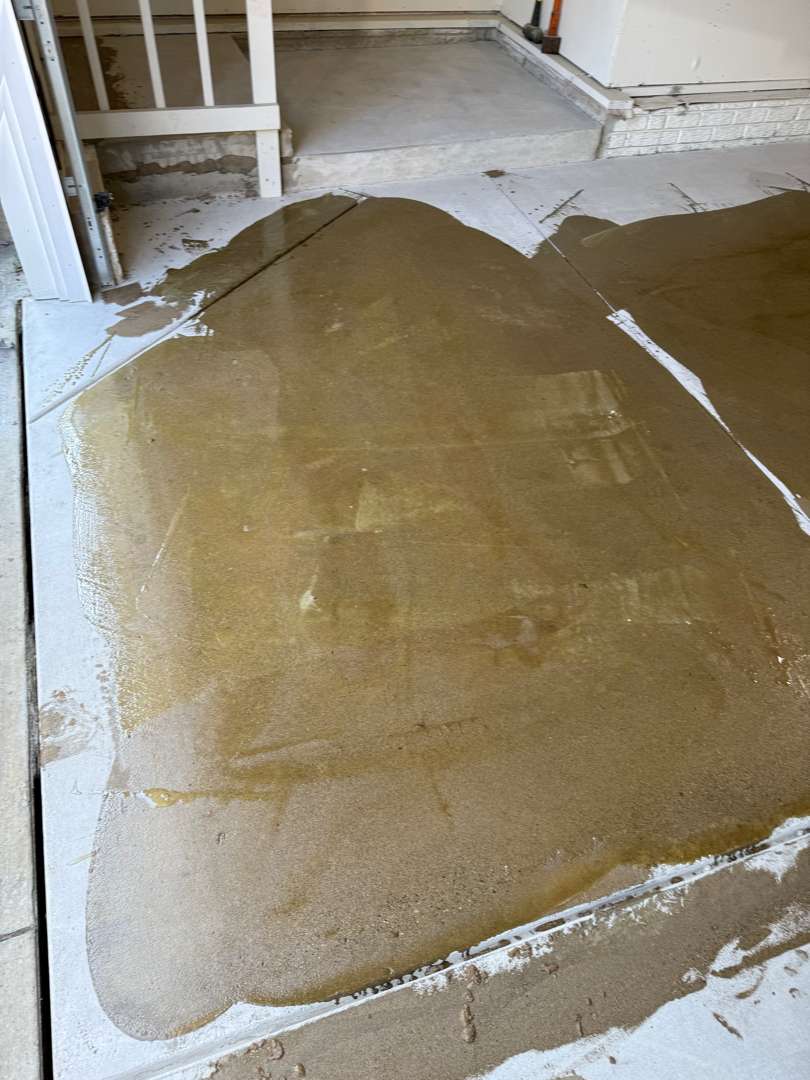
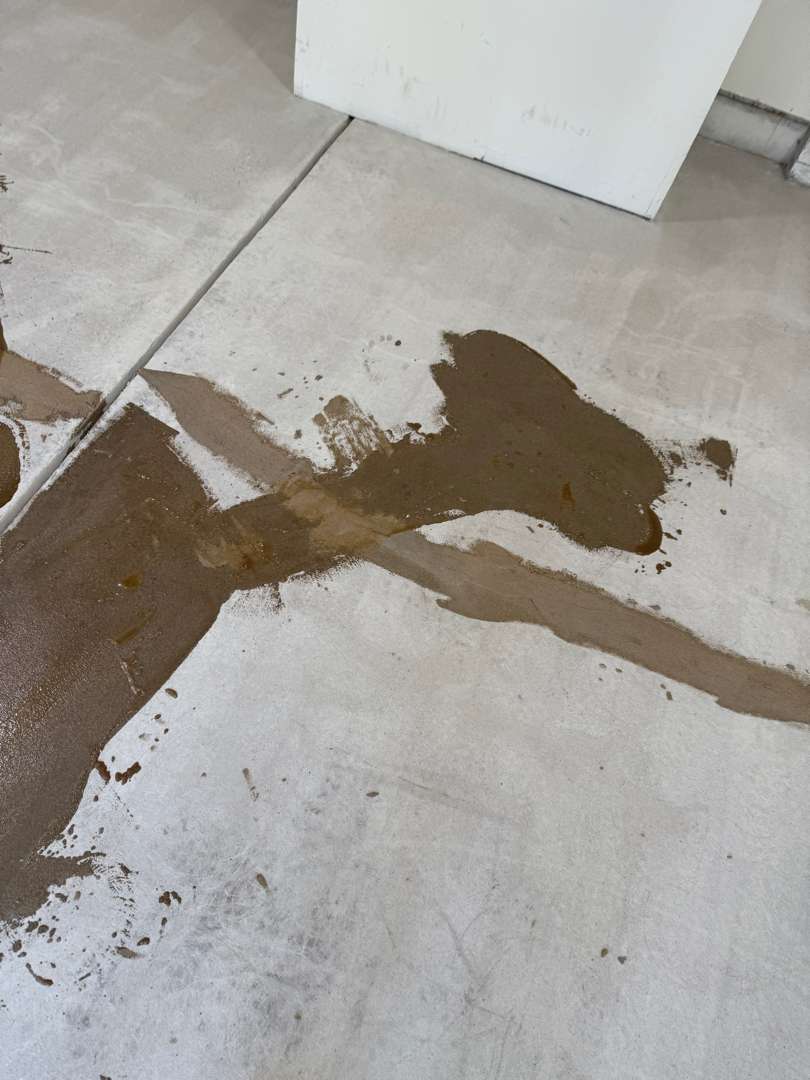
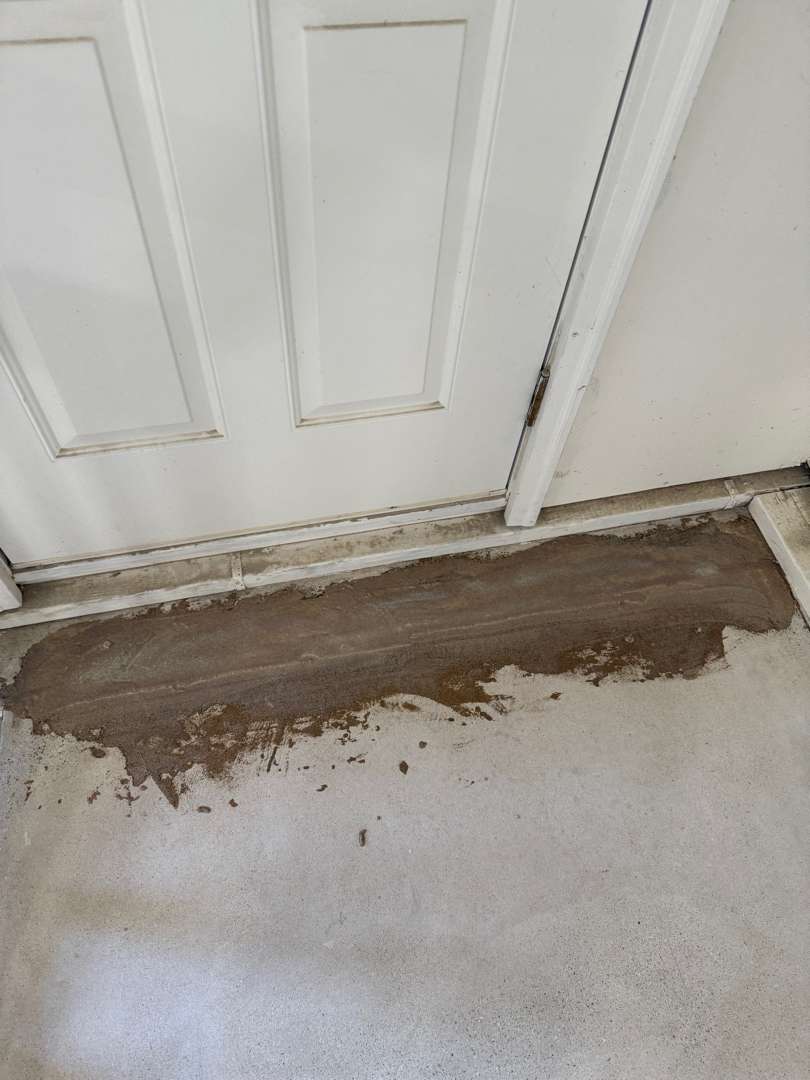
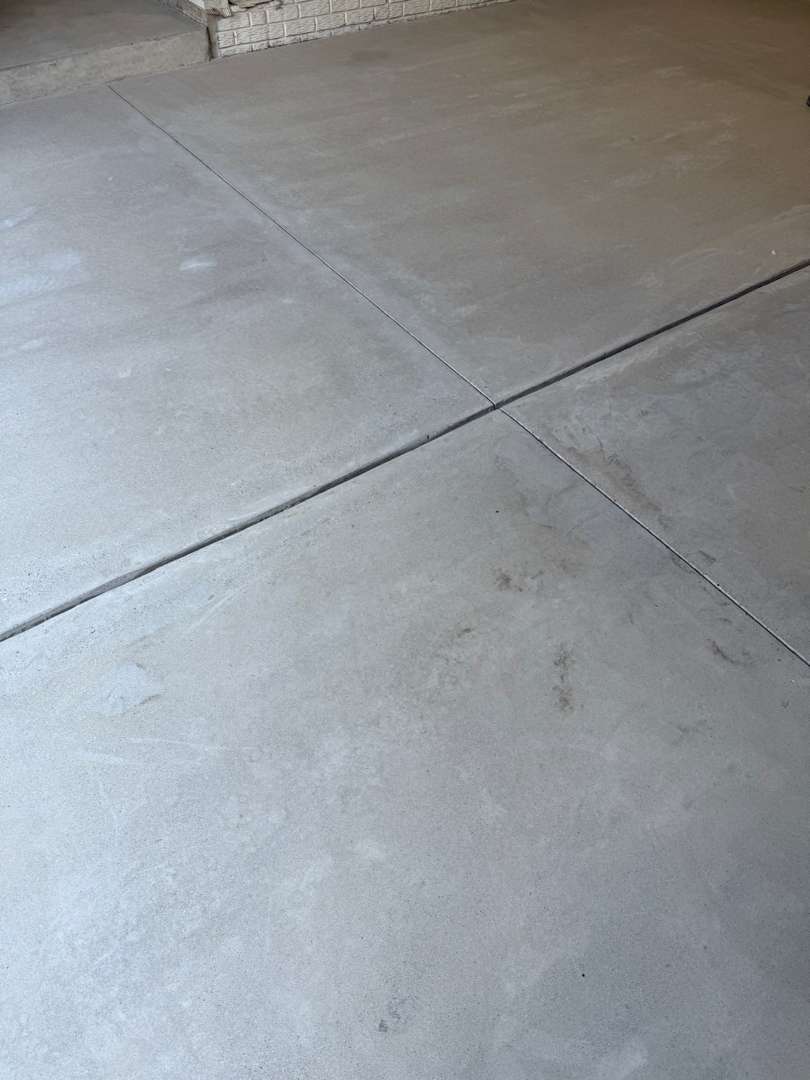
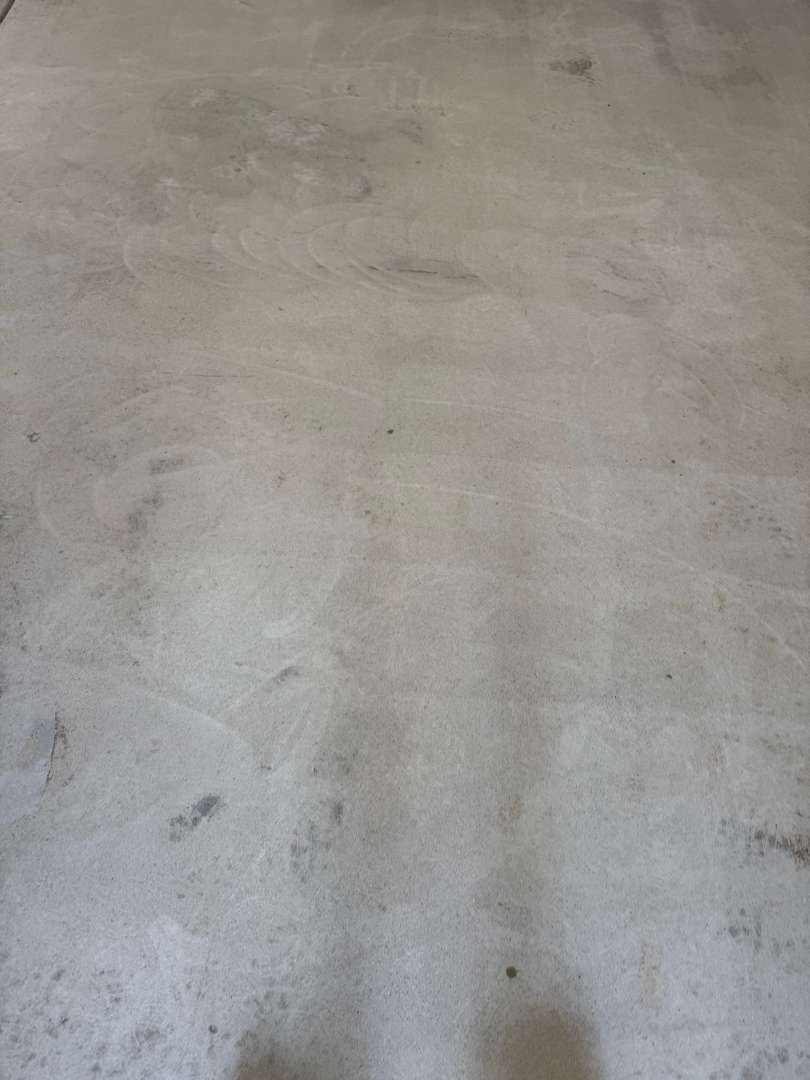
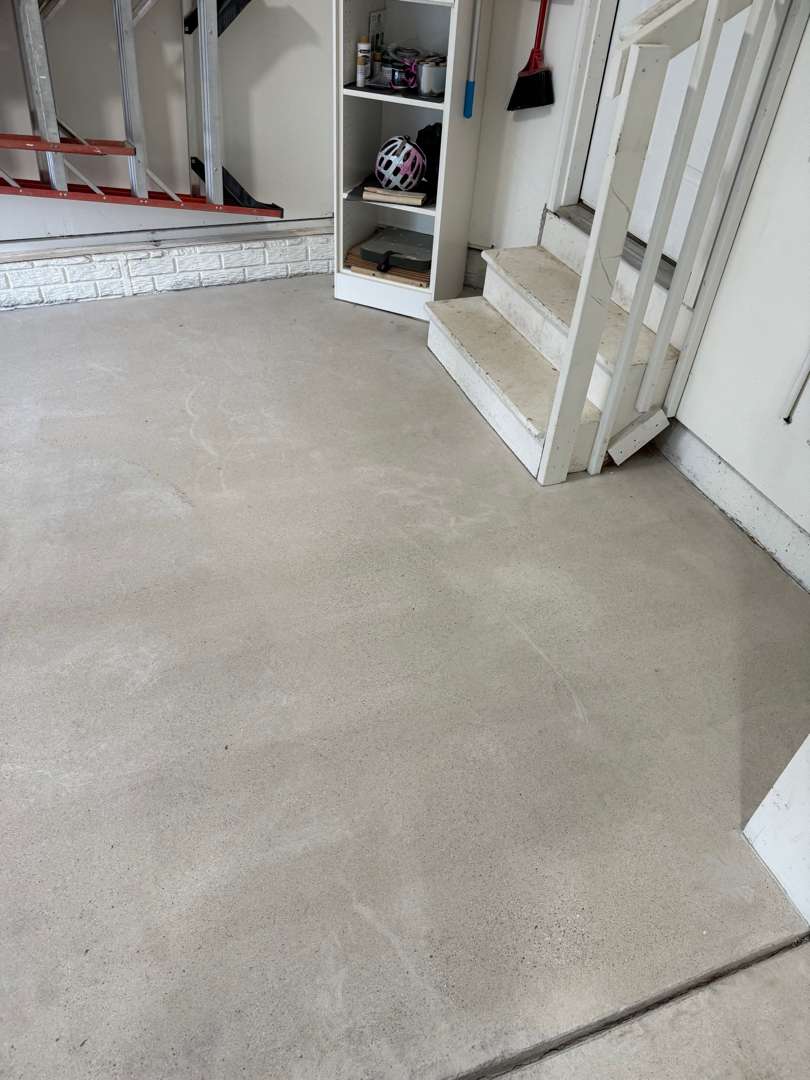
Our crew diamond-ground the entire 646 square feet. The grinding removed the laitance layer, lifted the oil contamination, and cleared the adhesive residue from the affected zone. Our team worked across each panel of the slab methodically. Our crew worked the perimeter along the 19 linear feet of vertical lip. Our team vacuumed the full surface before moving to repair.
With the grind complete, the slab was clean and open across all 646 square feet. The adhesive residue that had covered a large zone was gone. The control joints were clear. Minor pitting remained in spots and required attention before the coating could go down.
Surface Repair
Step and Vertical Preparation
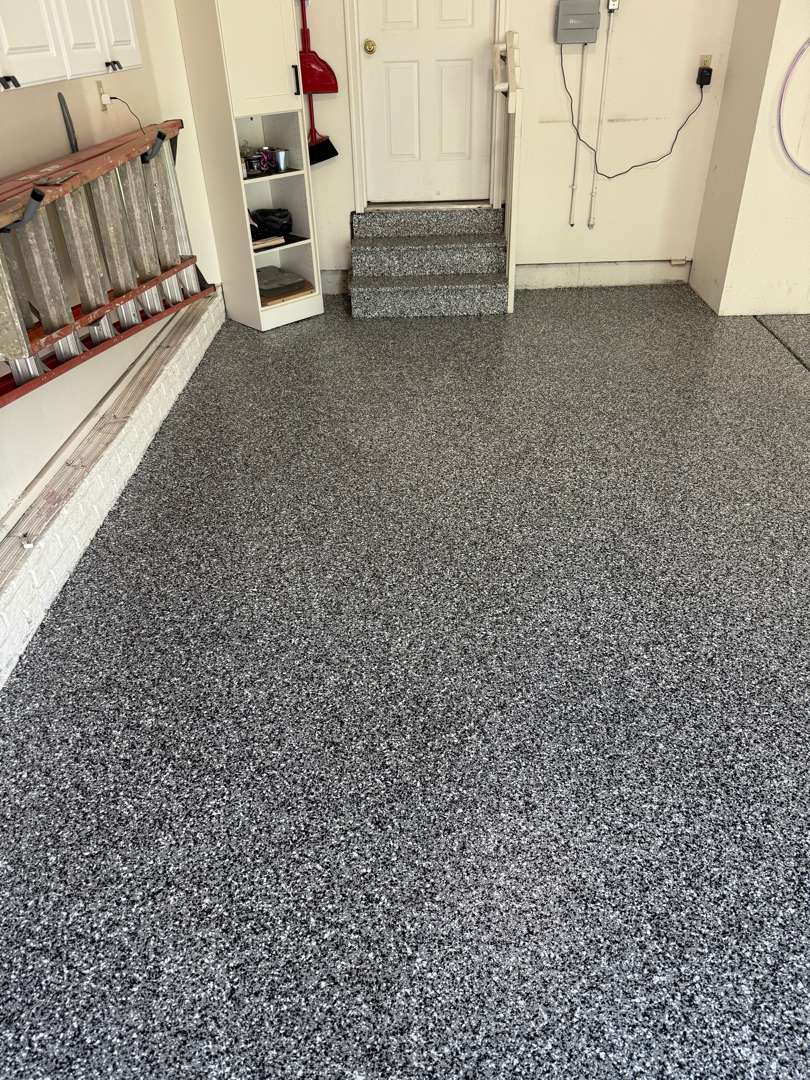
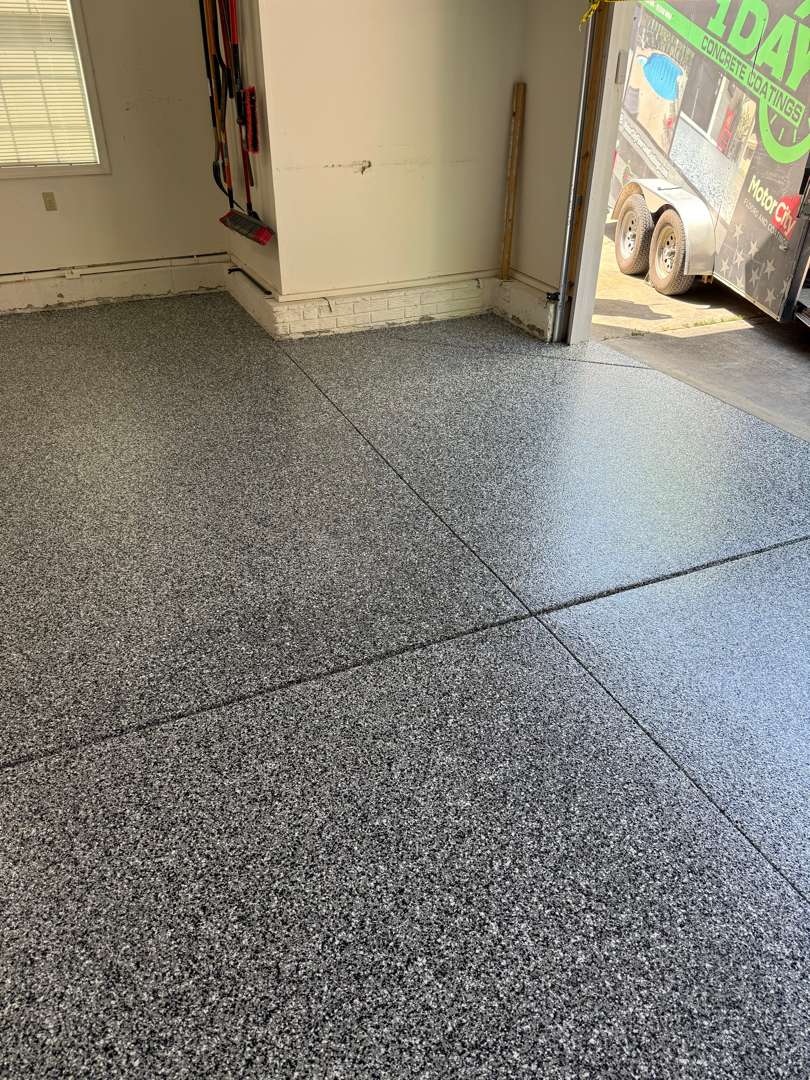
The Coating System
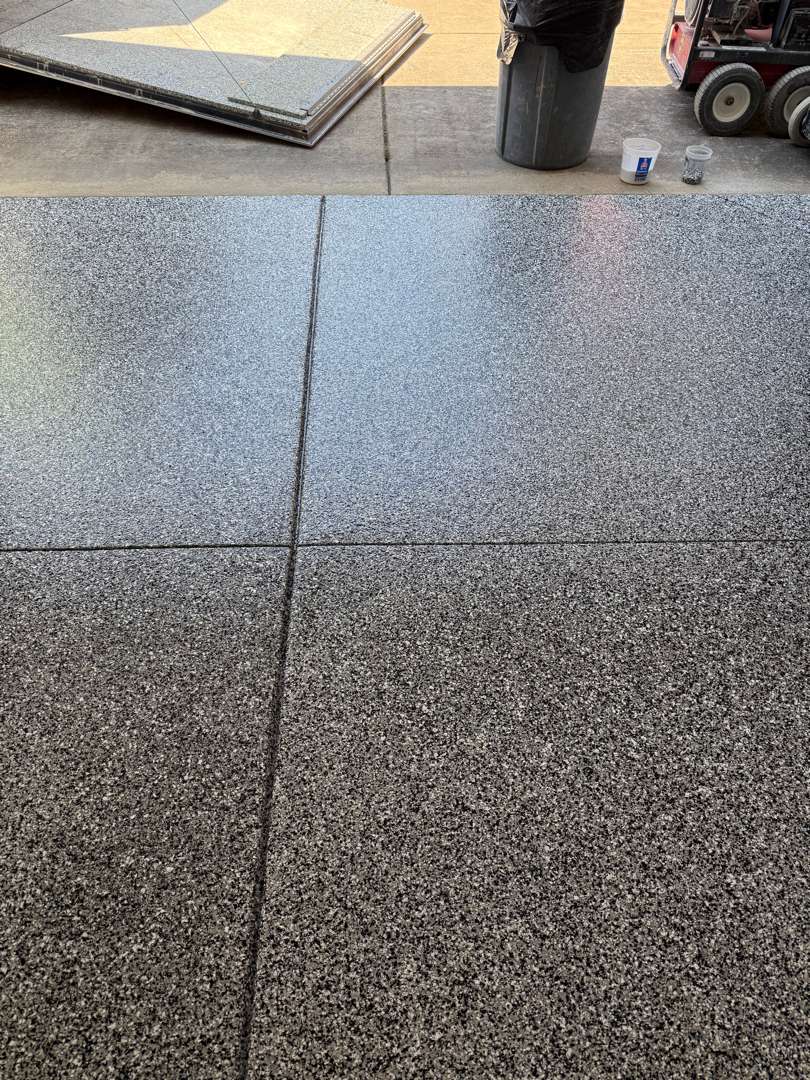
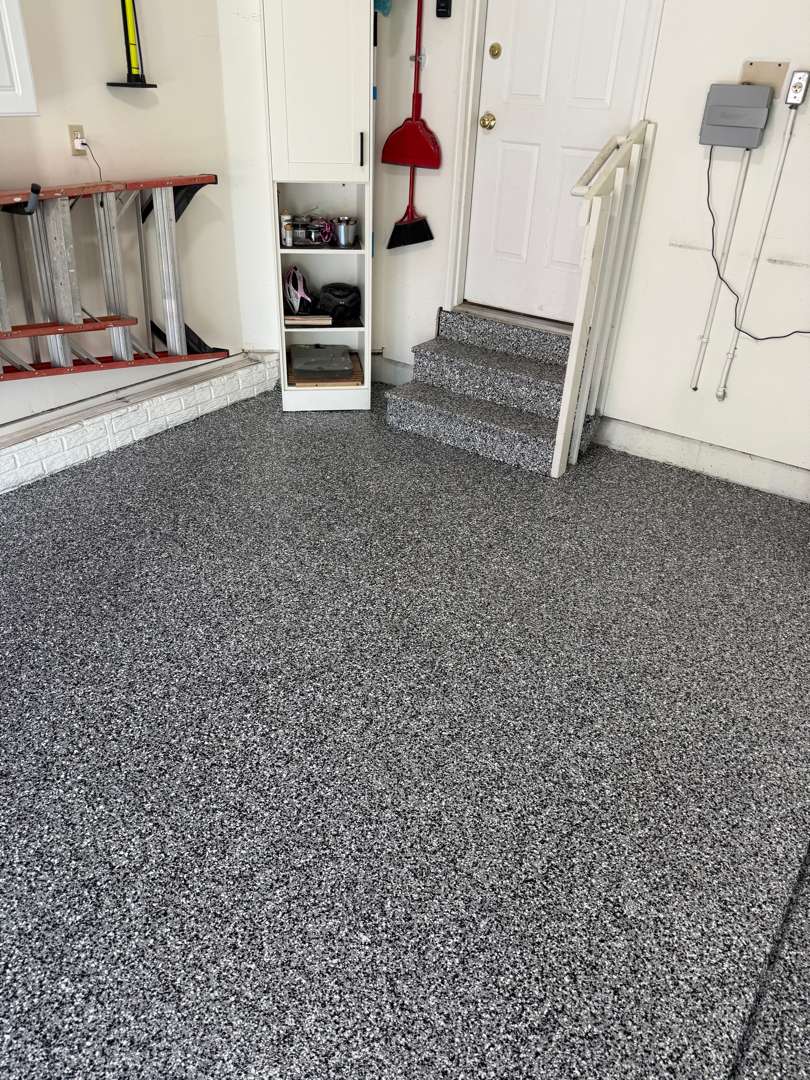
The Result
Testimonials
Raquel Casey
Omar Arabi
Garage Floor Coating on Plymouth Ridge Drive
Plymouth Ridge Drive, Plymouth, MI
The Starting Point
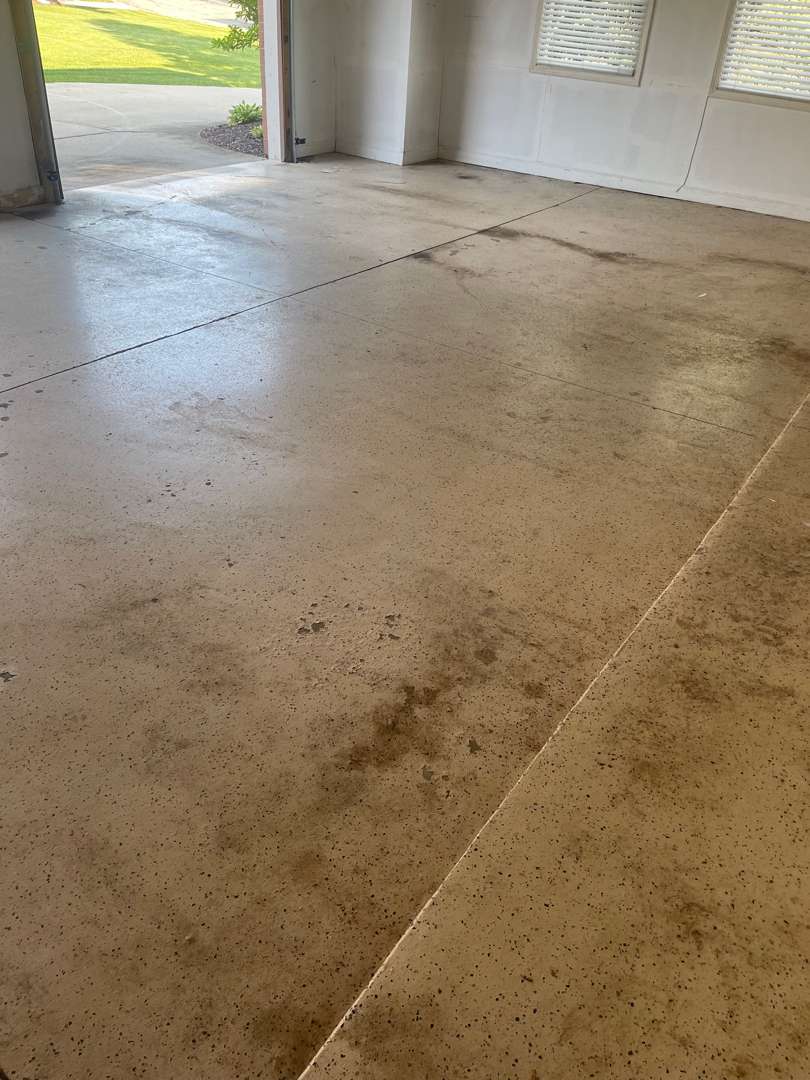
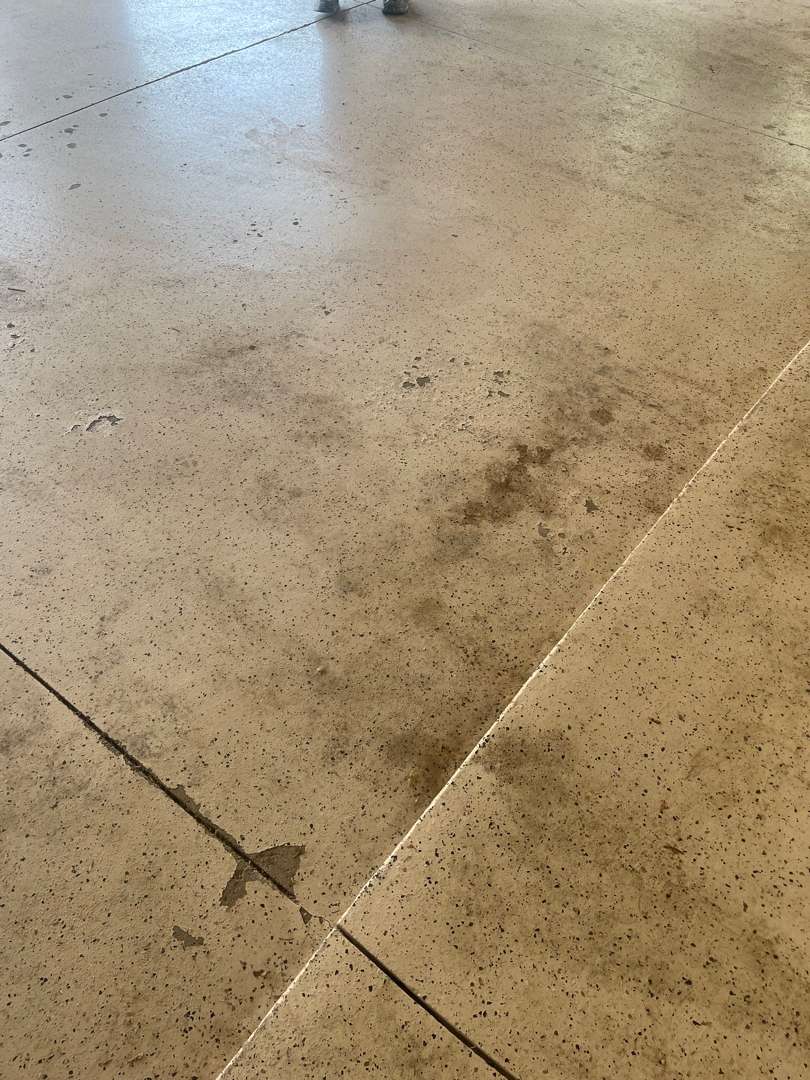
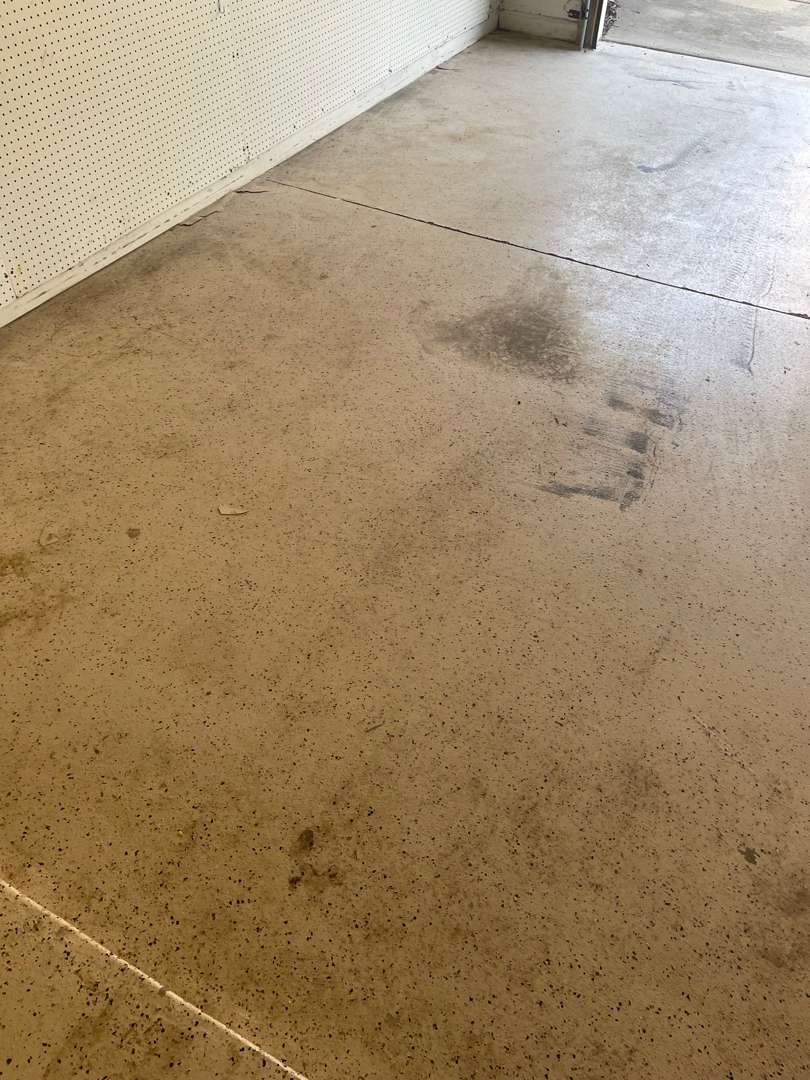
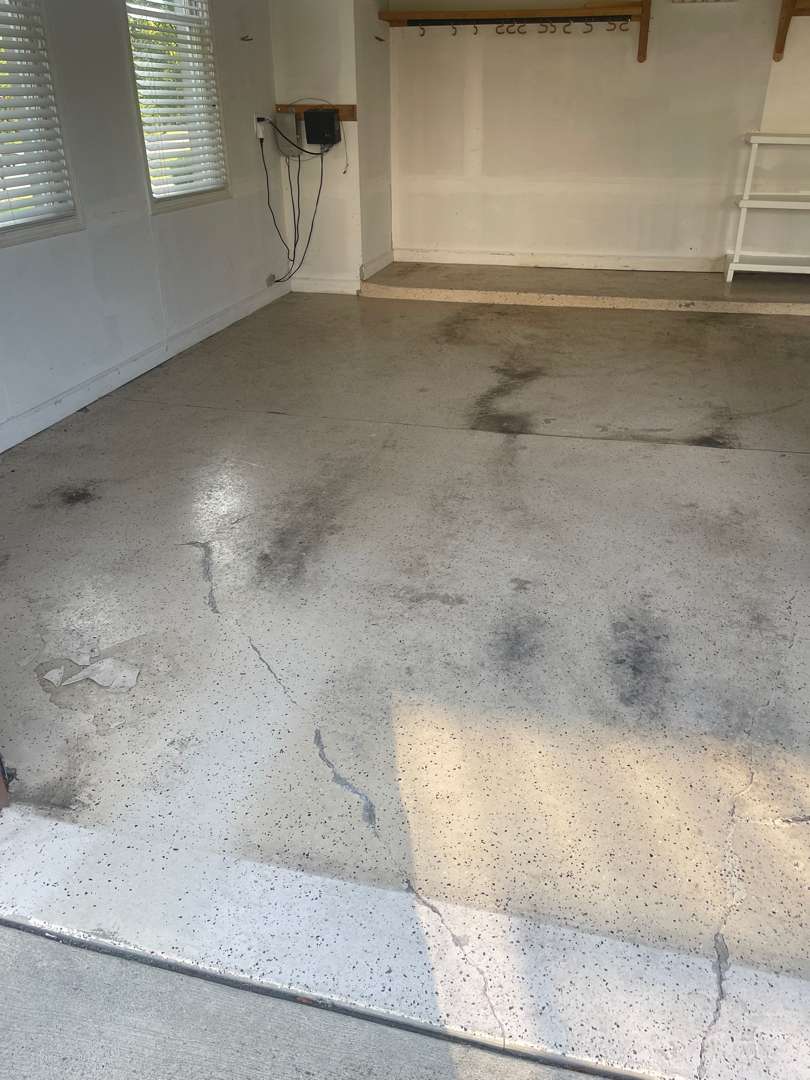
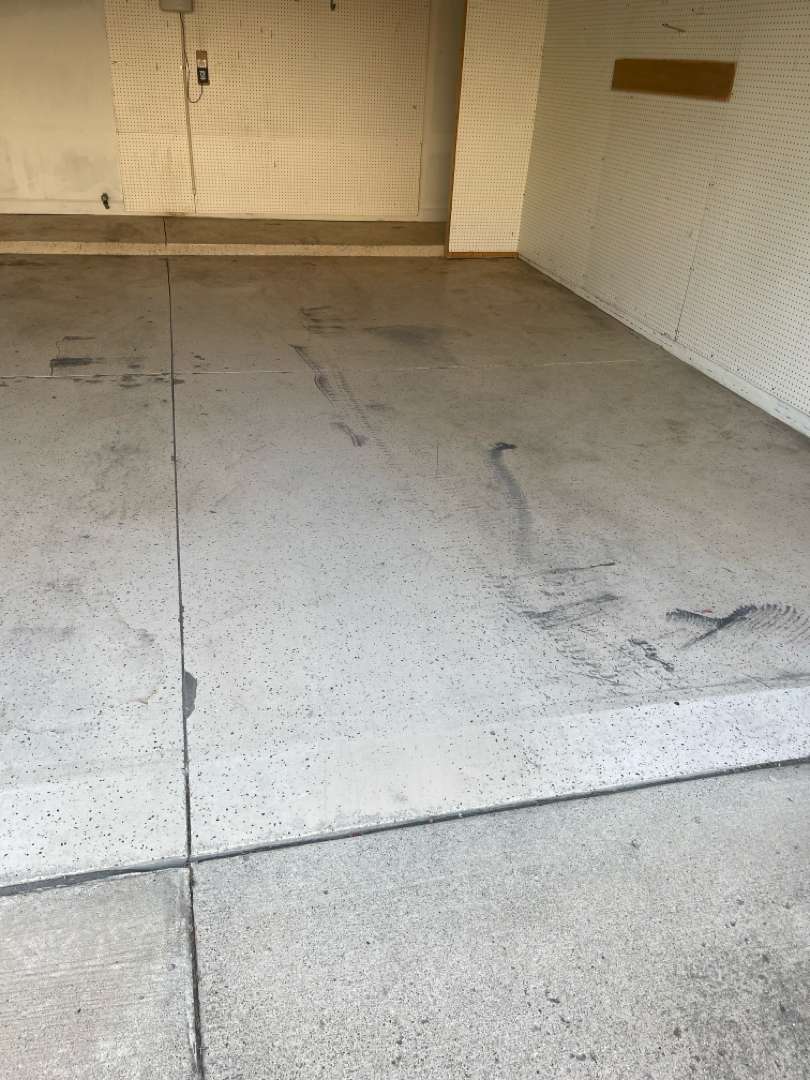
Two things stood out when our crew arrived at this Plymouth Ridge Drive property. First, the scale: 679 square feet of garage floor split across two bays, with 11 steps connecting the garage to the house interior. Second, the existing coating. A prior epoxy system had been applied to the slab. It was failing — delaminating in areas and no longer bonded consistently to the concrete beneath. That coating had to come off before any preparation work could begin.
Oil had worked its way into the slab in multiple zones across both bays. Tire marks ran through the main parking areas. A crack cut diagonally across one panel. Pitting was present throughout — concentrated in spots but distributed across the full surface. The 29 linear feet of vertical surfaces ran along the slab perimeter.
Epoxy Removal and Surface Preparation
Our crew stripped the failing epoxy from the surface before grinding began. The removal exposed the concrete beneath — stained, pitted, and in need of full preparation. Our team then diamond-ground the entire 679 square feet. The grinding removed the contamination layer, opened the concrete, and cleared the residual epoxy bond coat from the surface. Our crew worked across both bays and along the 29 linear feet of vertical perimeter. Our team vacuumed the full surface when the grind was complete.
With the epoxy gone and the concrete ground open, the condition of the slab was clear across every panel. The oil staining, pitting zones, and crack were all fully exposed and ready for repair.
Crack and Pitting Repair
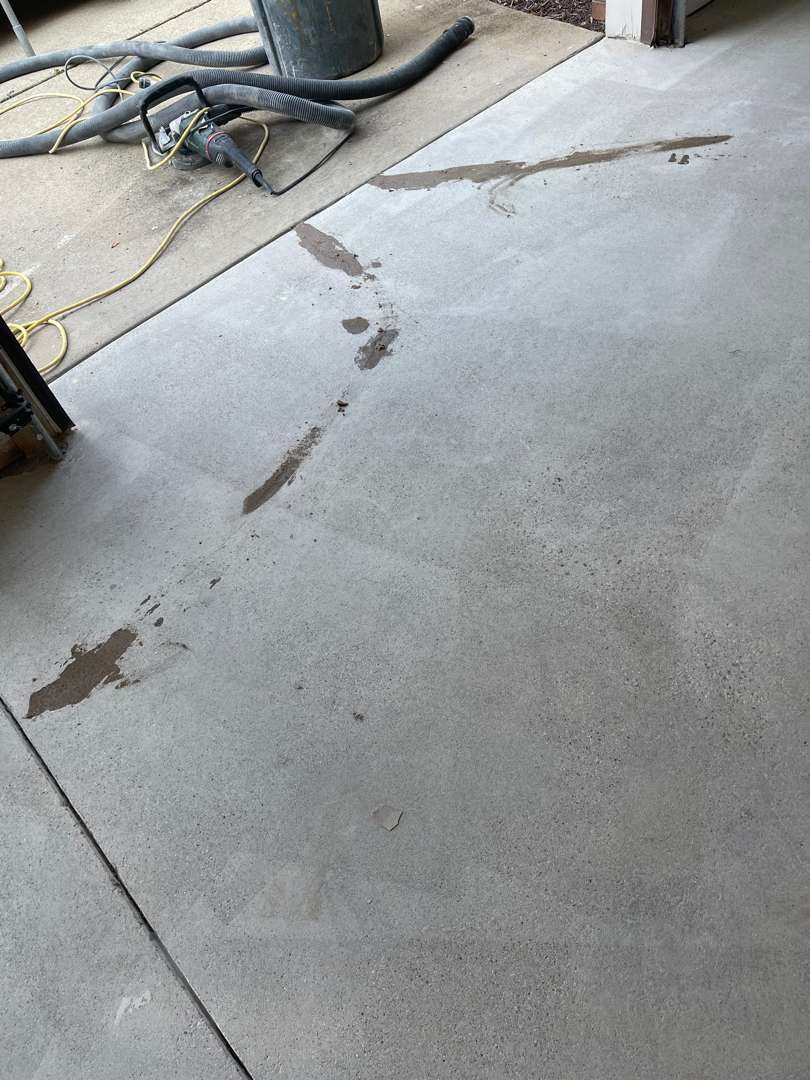
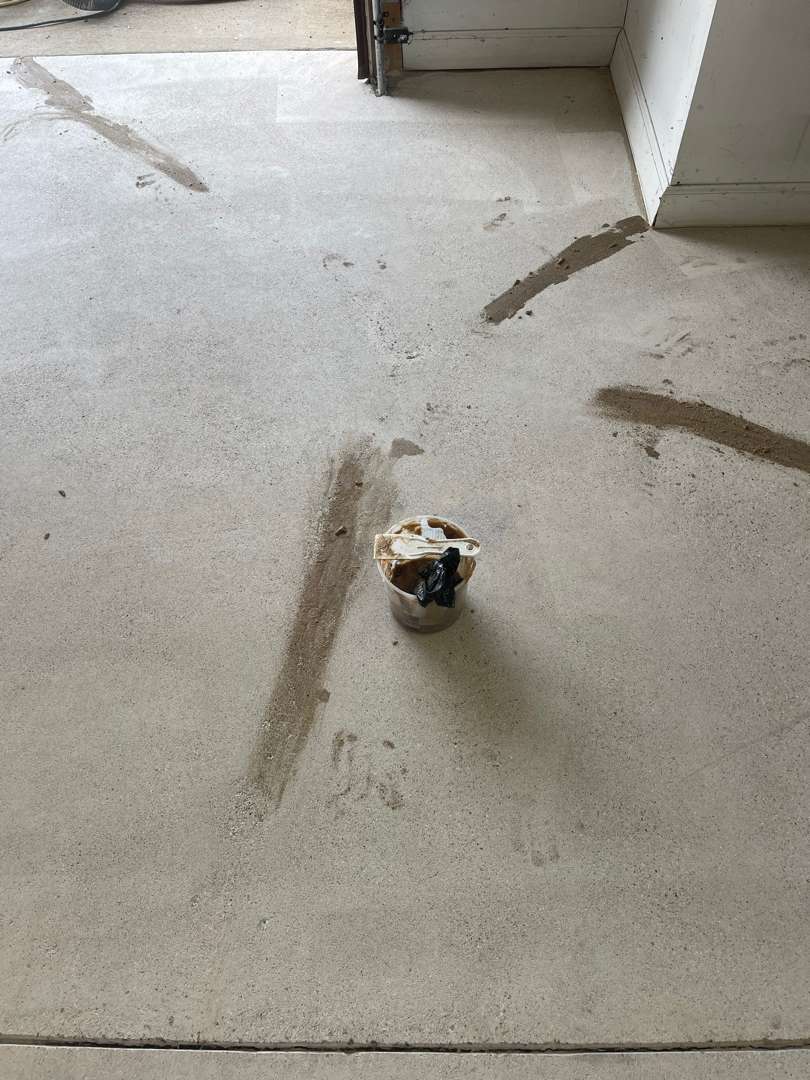
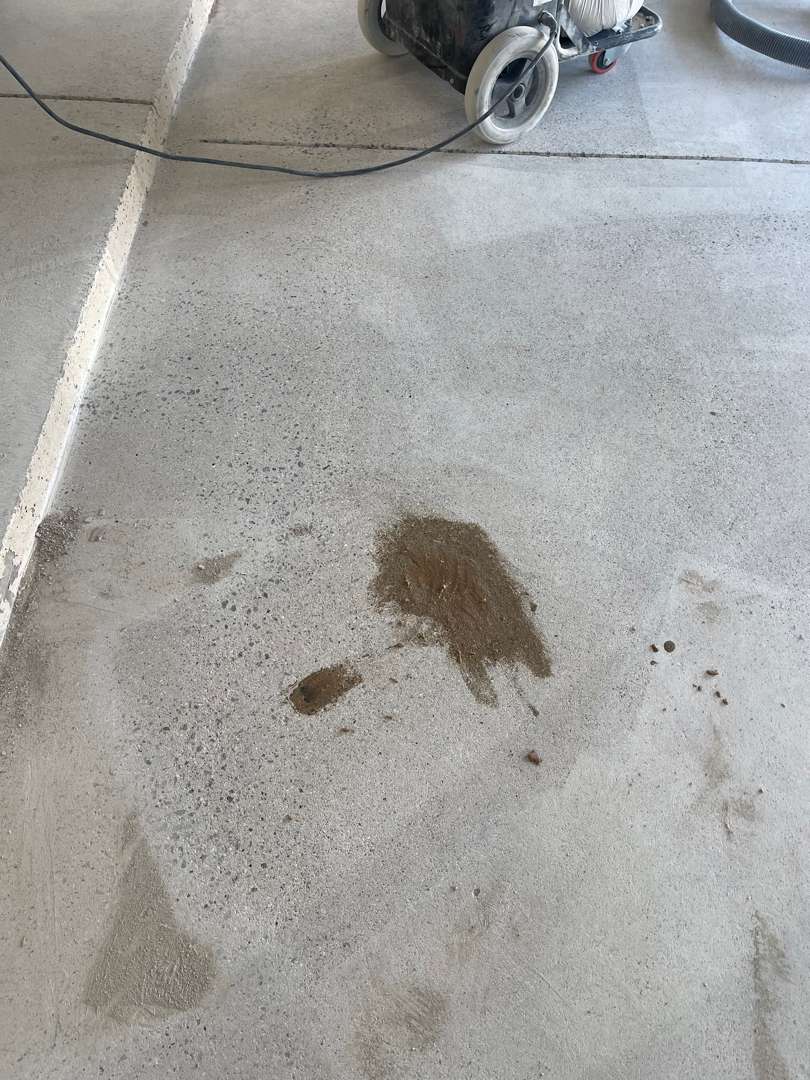
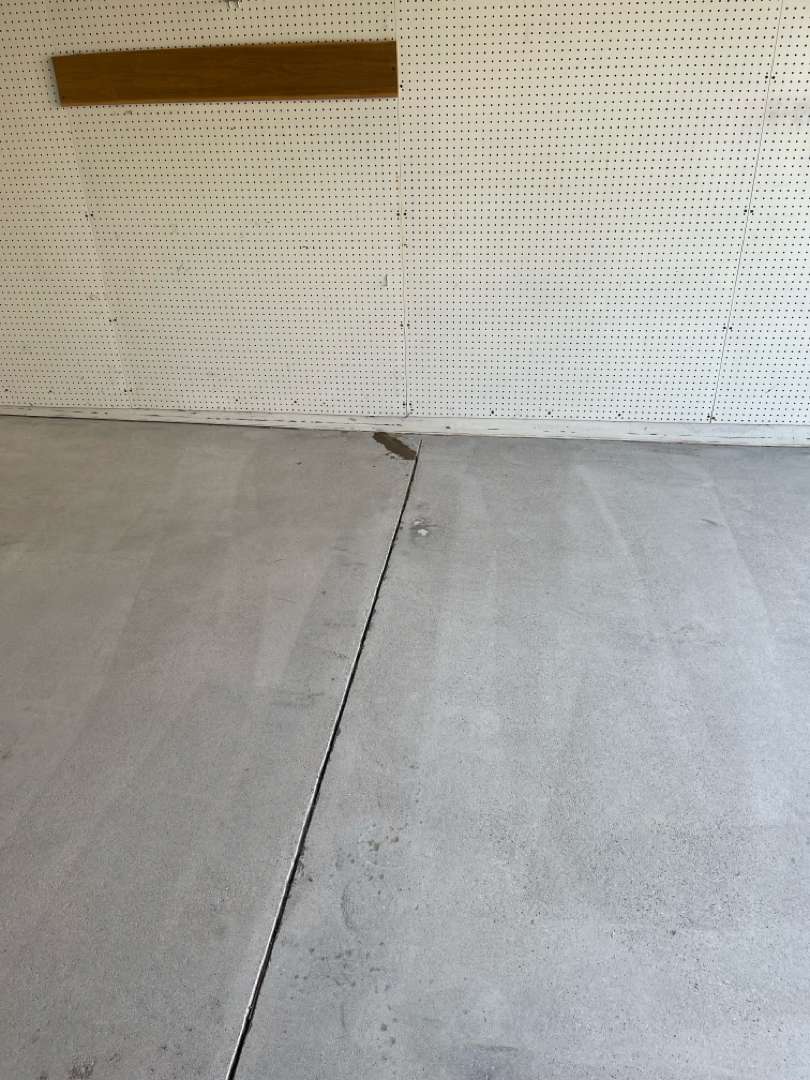
The crack running across the panel received mender compound along its full length. Our crew worked the material into the seam and troweled it flush with the surrounding surface. Pitting zones across both bays required the same targeted attention.
Our team applied mender compound across each pitted area, filling the voids and bringing the surface level. The repairs were distributed across the floor — not concentrated in one zone. Our crew allowed full cure time across all repaired areas before proceeding.
With the mender cured and ground back, the slab was flat and consistent across all 679 square feet. The crack, the pitting, and the epoxy bond coat were gone. Every panel was in the same condition — open, clean, and ready for the coating system.
The 11 Steps
Coating Application
The Result
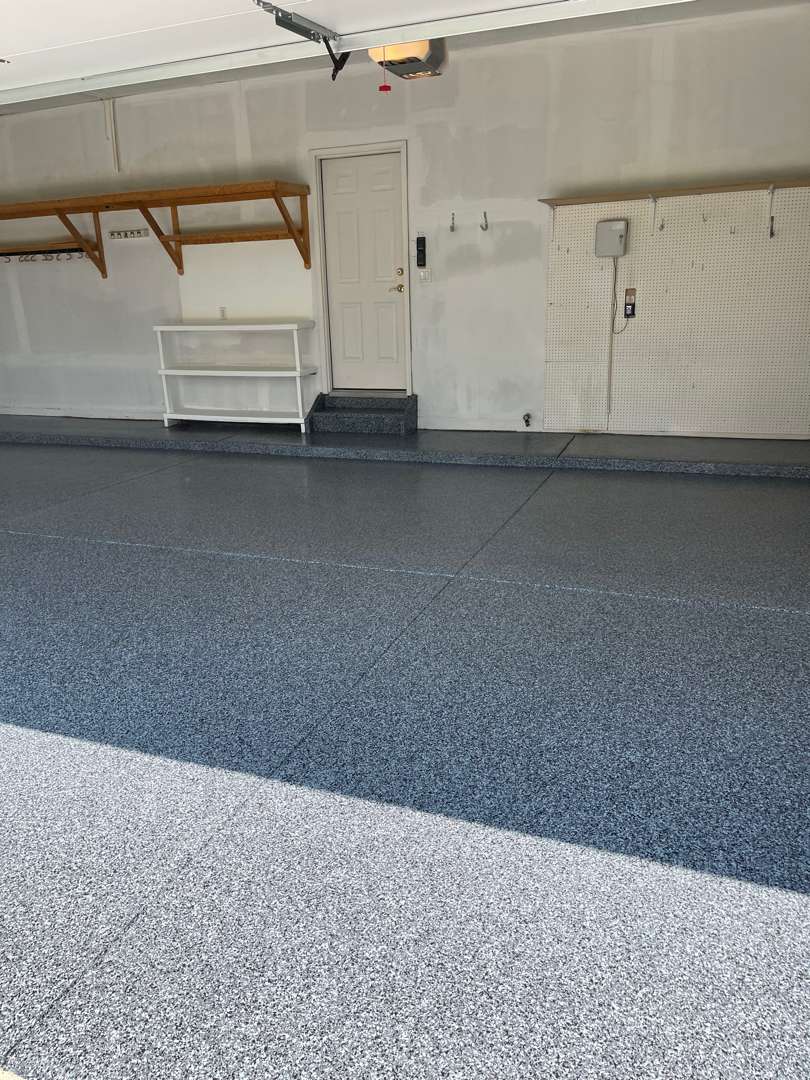
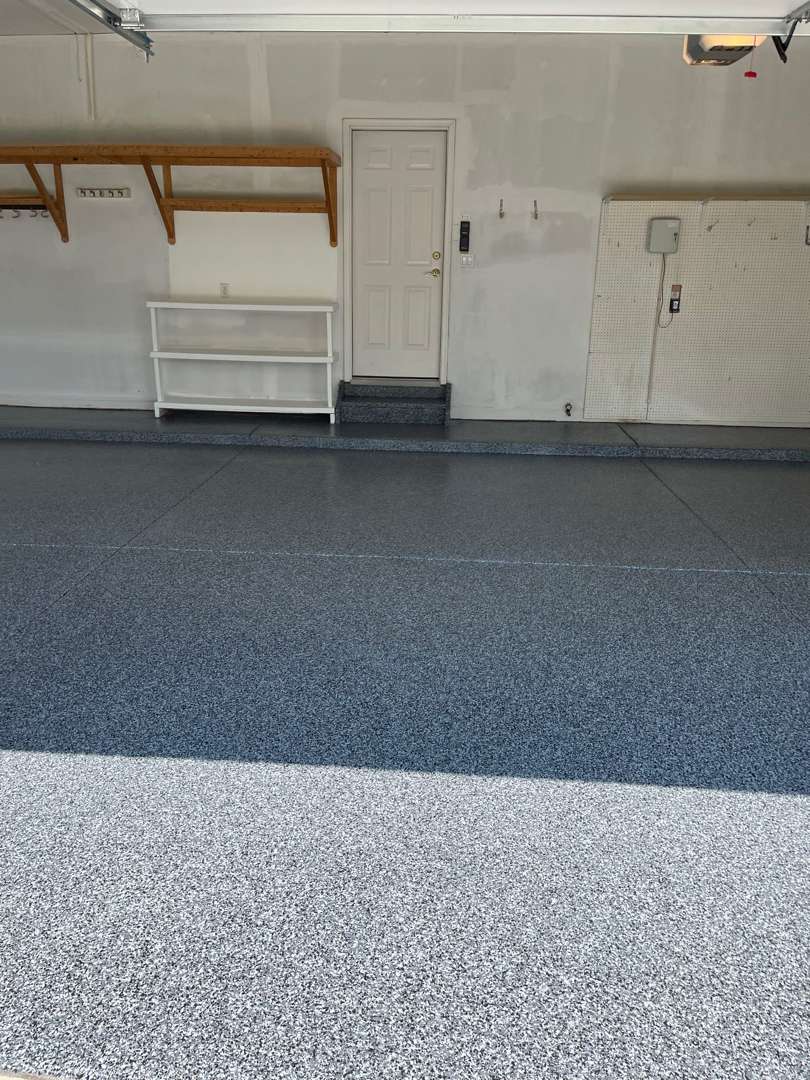
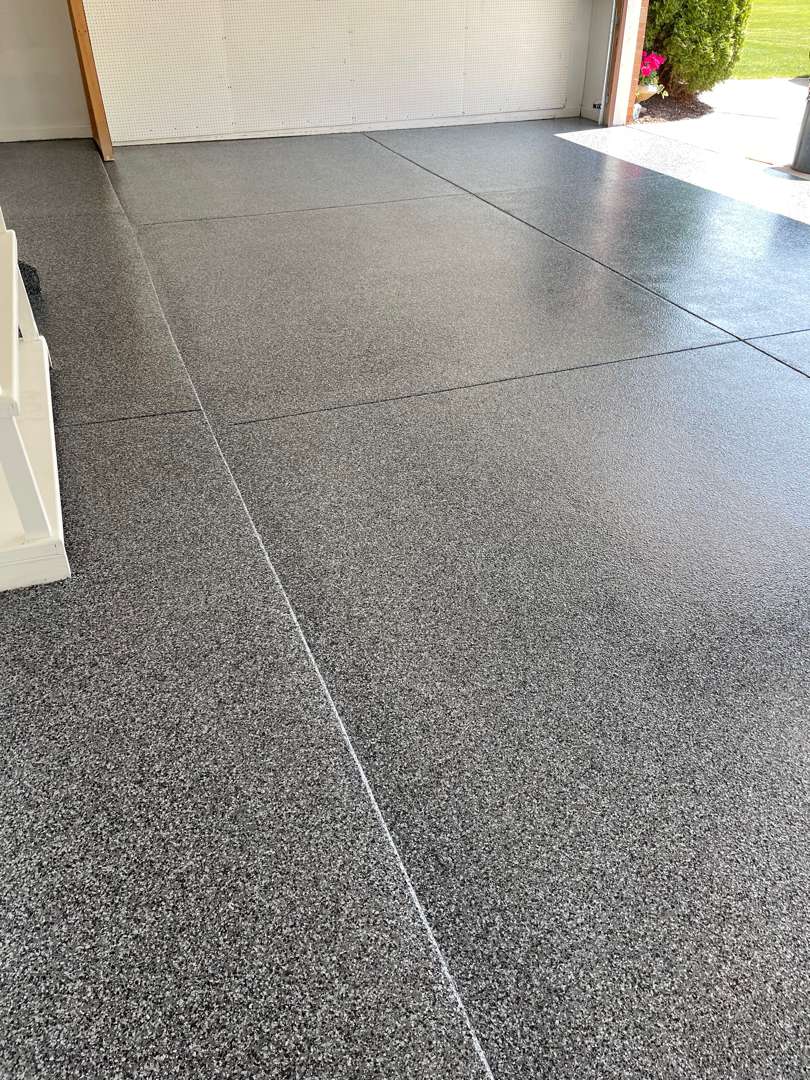
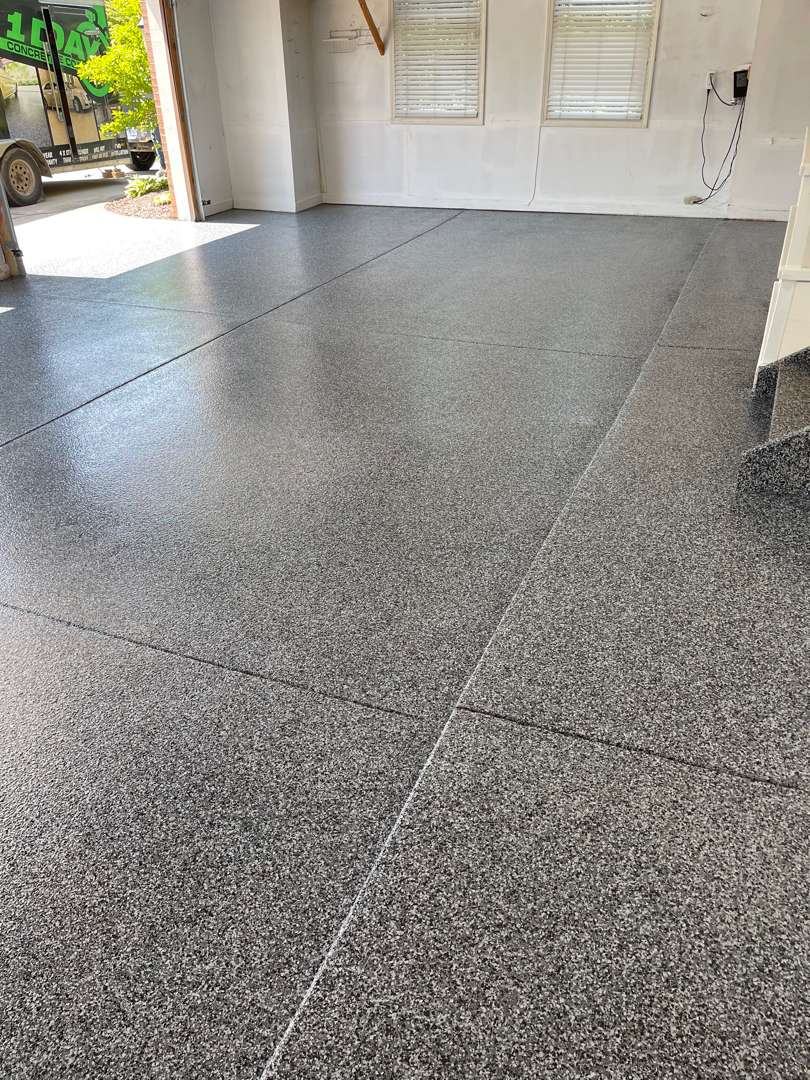
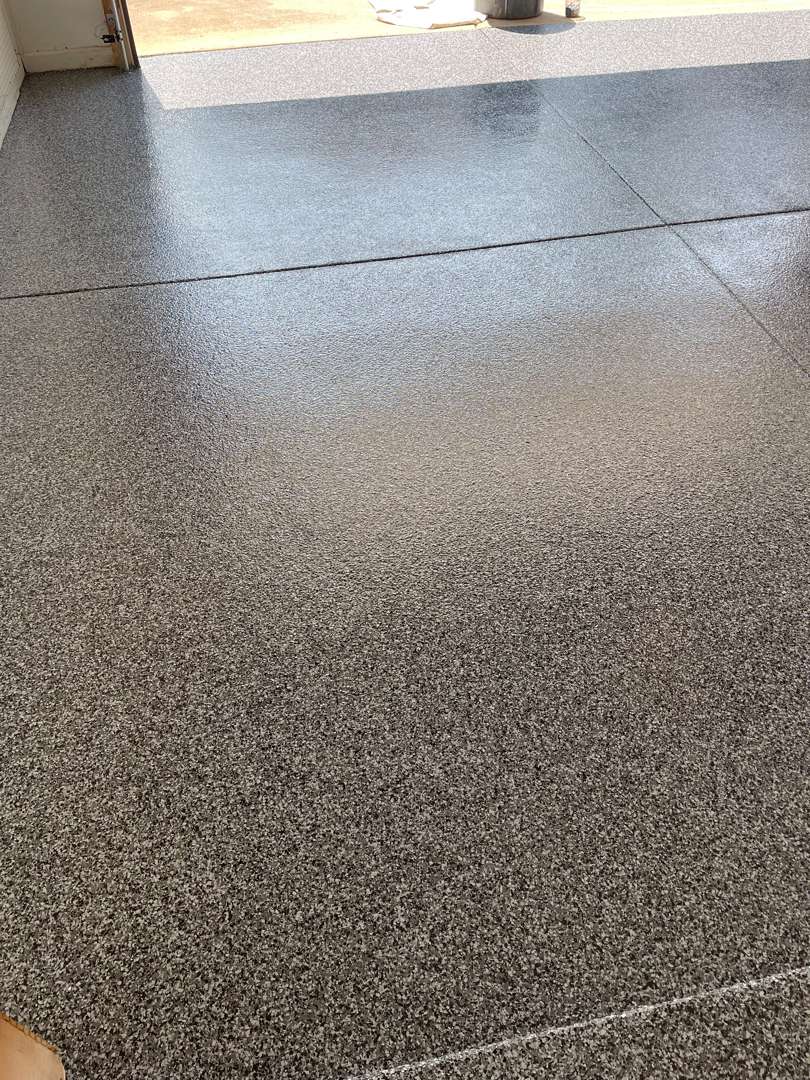
Glacier runs wall to wall across all 679 square feet. The cool blue-grey tone shifts subtly between direct sunlight and shade — reading darker and richer toward the interior, lighter near the garage door opening. The control joints cut cleanly through the finished surface without interrupting the pattern. Every panel reads the same color and flake density.
All 11 steps carry the Glacier finish on every face. The staircase reads as part of the floor — the same color, the same flake, the same topcoat. The 24-grit traction provides consistent grip across the full surface, from the garage door threshold to the top step.
Testimonials
John Mullane (GorillaSports)
Mike Bambini
Garage Floor Coating on Blairwood Circle
Blairwood Circle, Plymouth, MI
The Starting Point
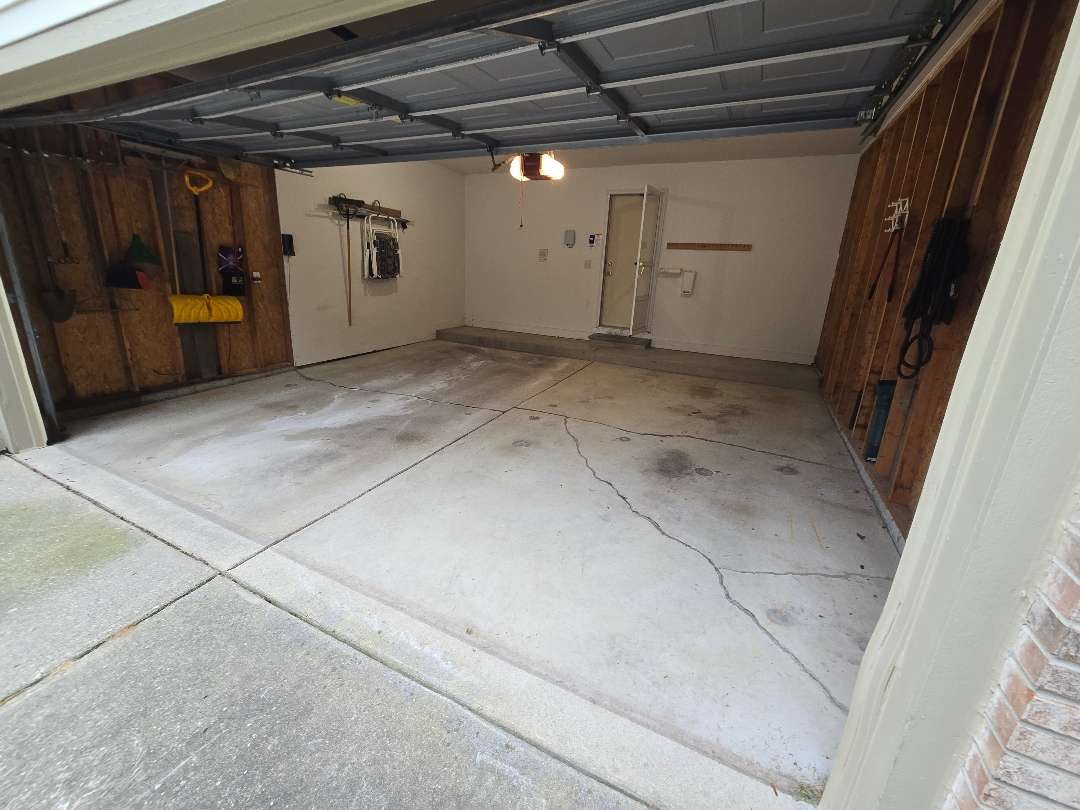
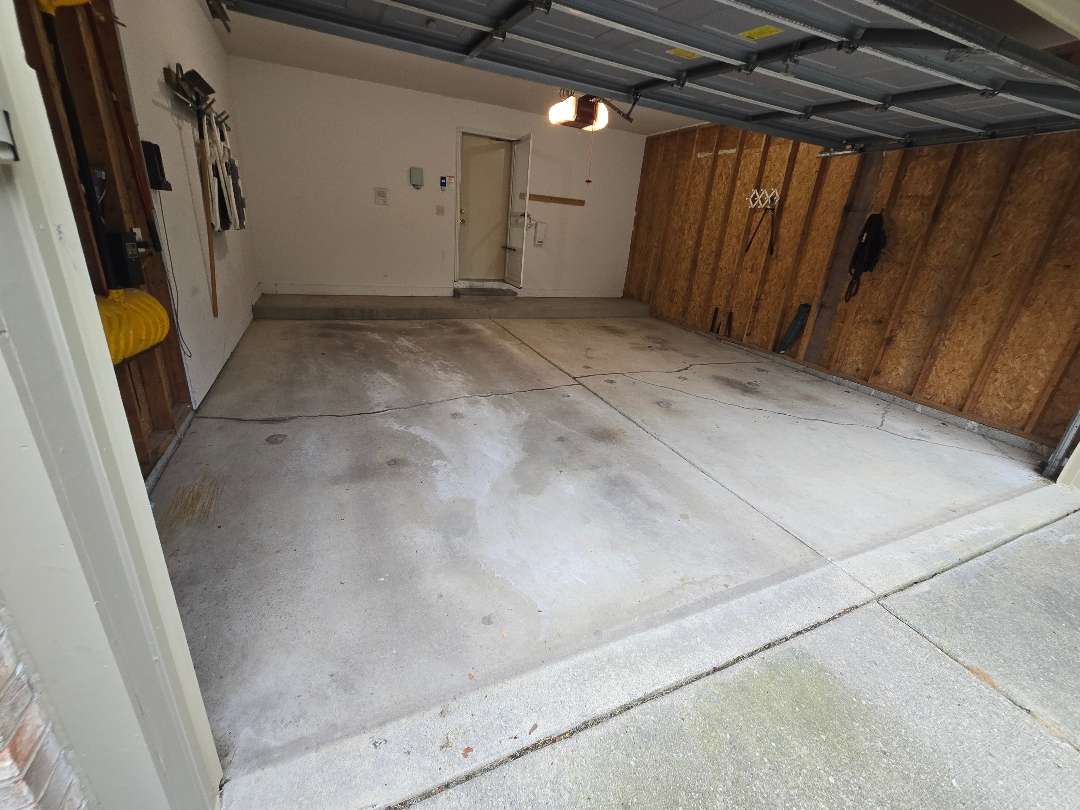
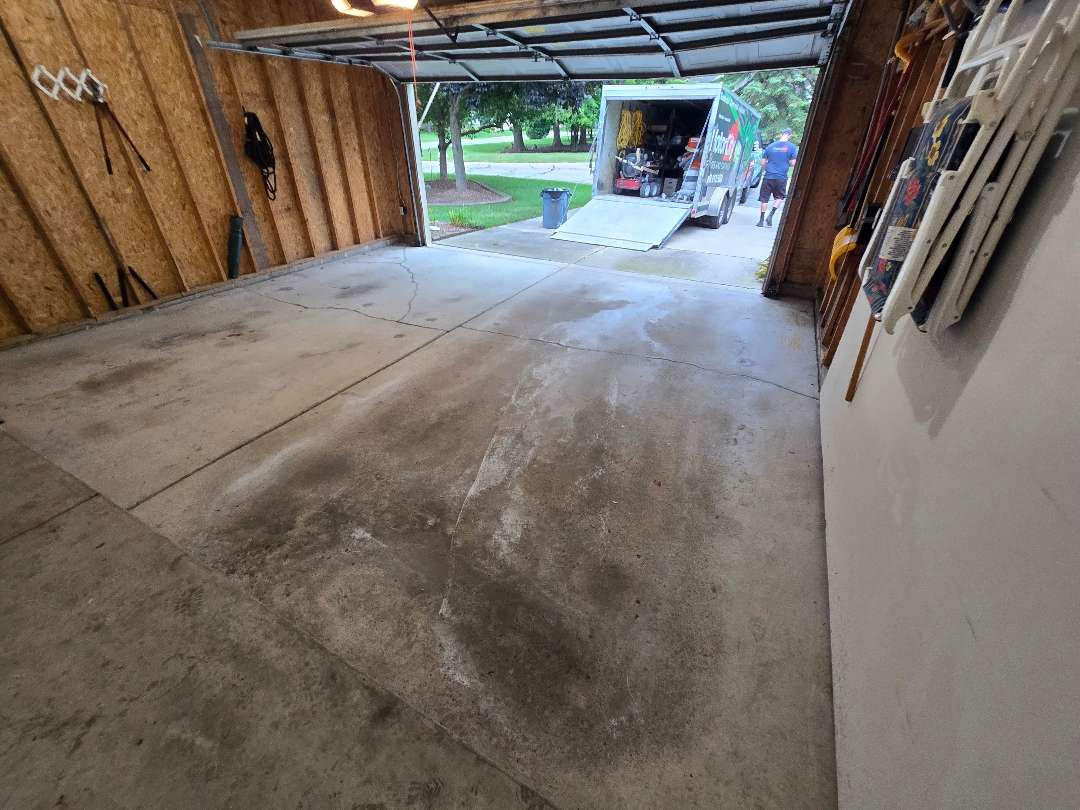
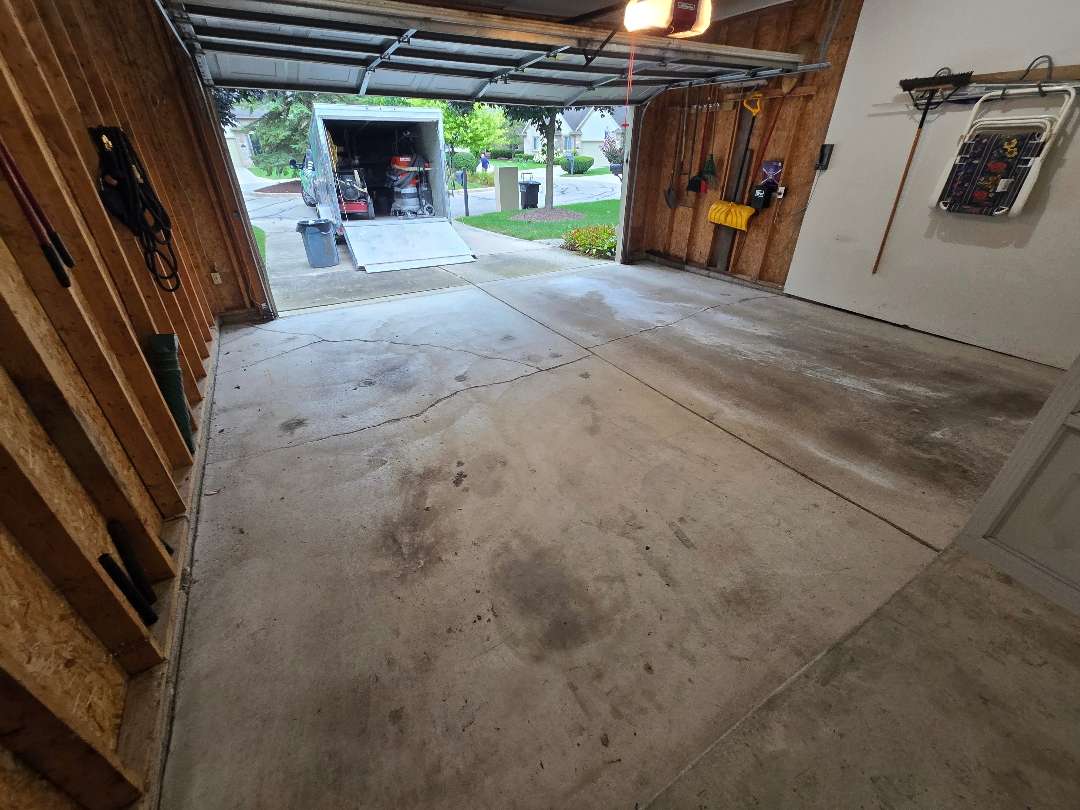
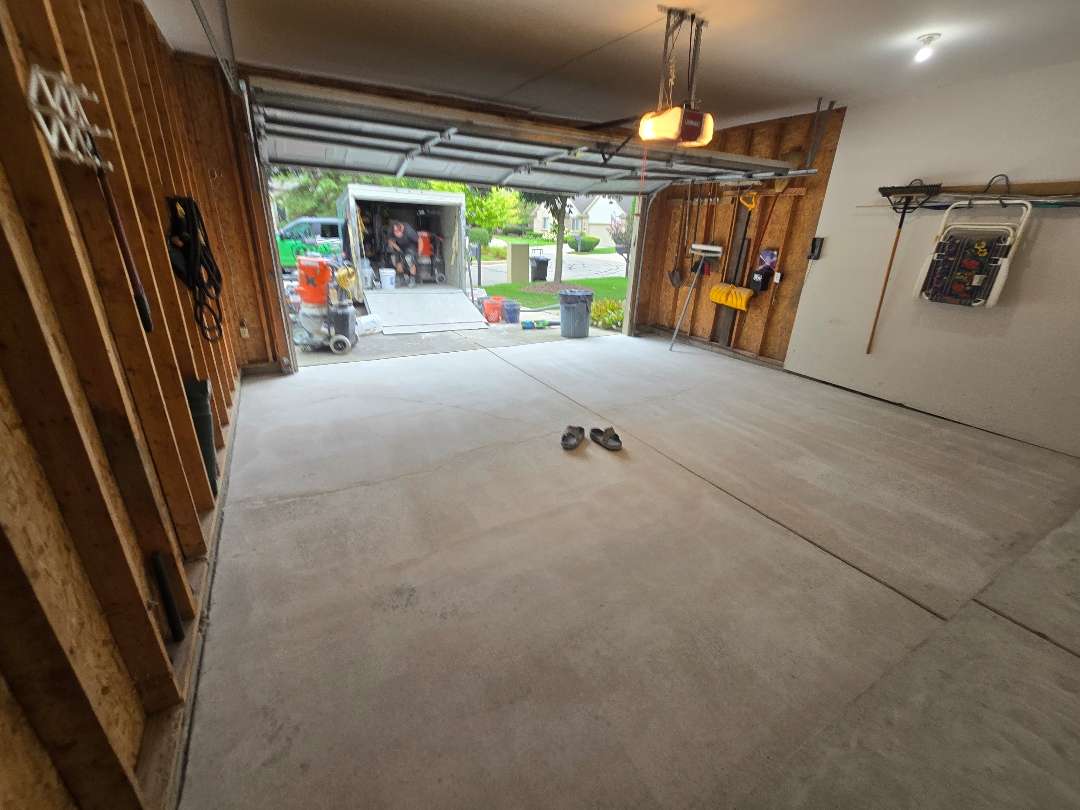
The cracks at this Blairwood Circle property had already been addressed — but not in a way that would hold under a polyurea-polyaspartic system. Caulk had been applied into the crack lines at some point before our arrival. It sat proud of the surface in several places and had no bond compatibility with the coating system. Before any repair work could begin, the caulk had to come out entirely.
Beyond the cracks, pitting was present across the surface of the 391-square-foot slab. Oil staining marked the concrete in spots. One concrete step connected the garage floor to the house entry. No vertical surfaces were included in the scope.
Our crew ran diamond grinding equipment across the full 391 square feet. The grind served two purposes here — opening the concrete surface and removing the caulk from each crack. Our team worked along every crack line until the caulk was gone and the concrete was exposed and profiled throughout. Our crew vacuumed before moving to the repair phase.
Mender Flood and Crack Repair
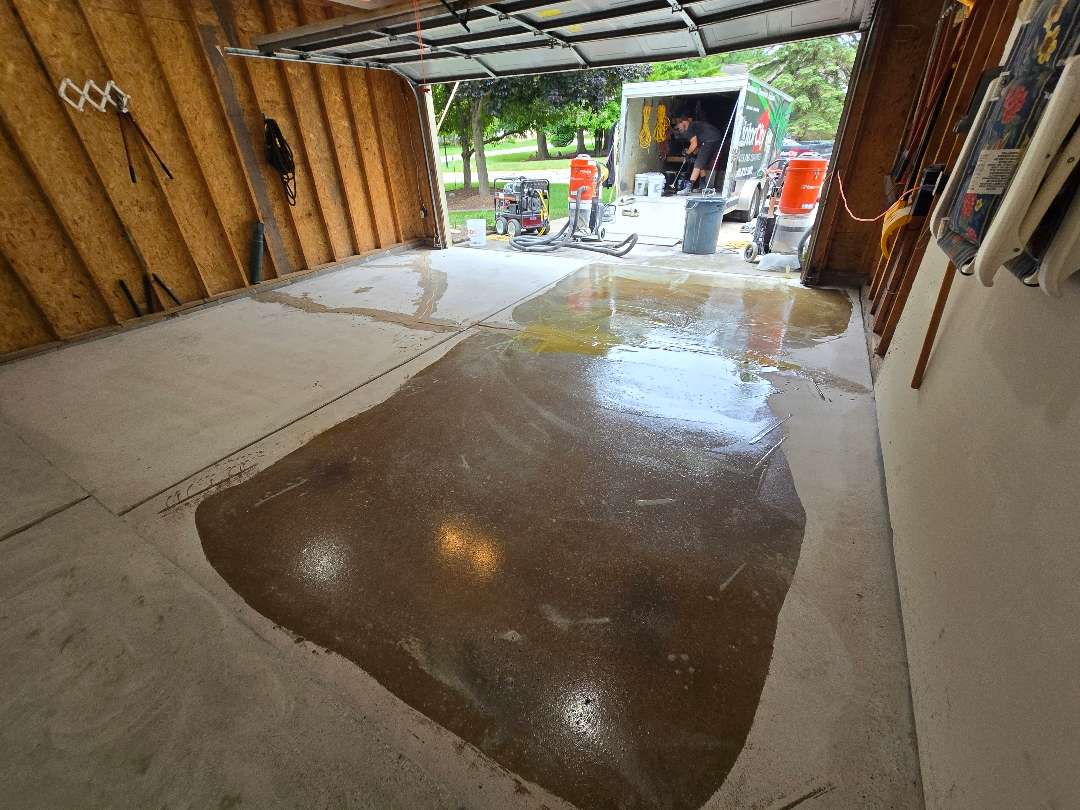
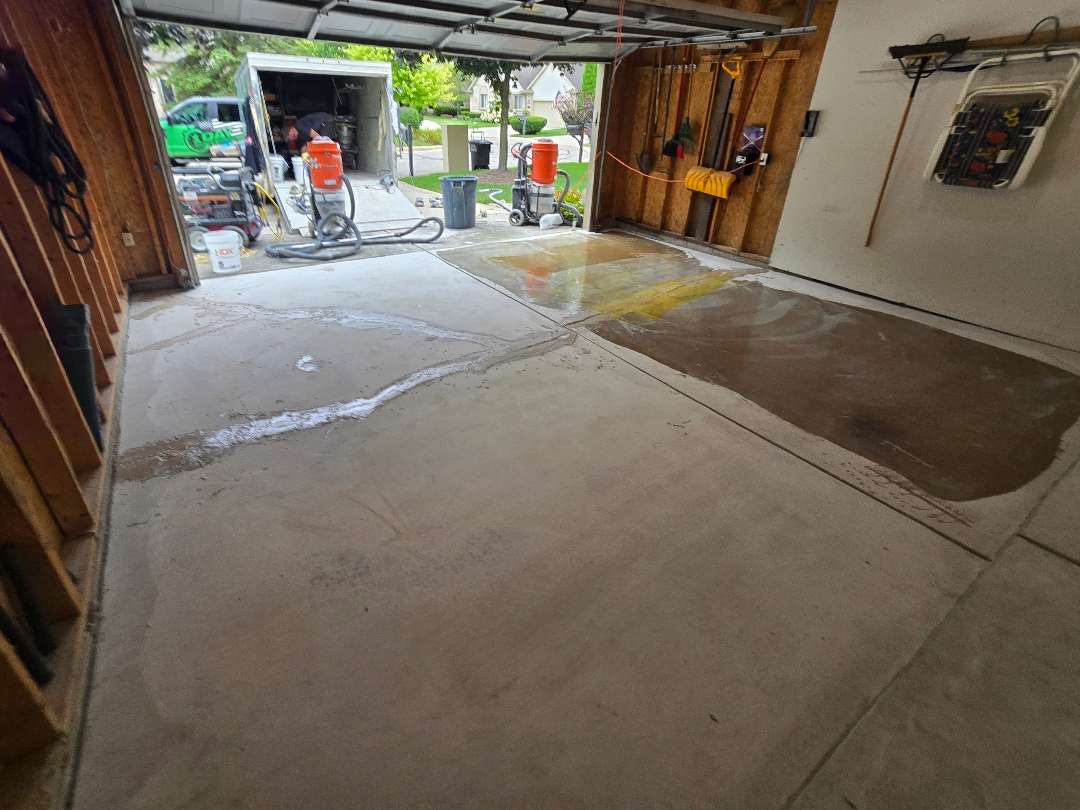
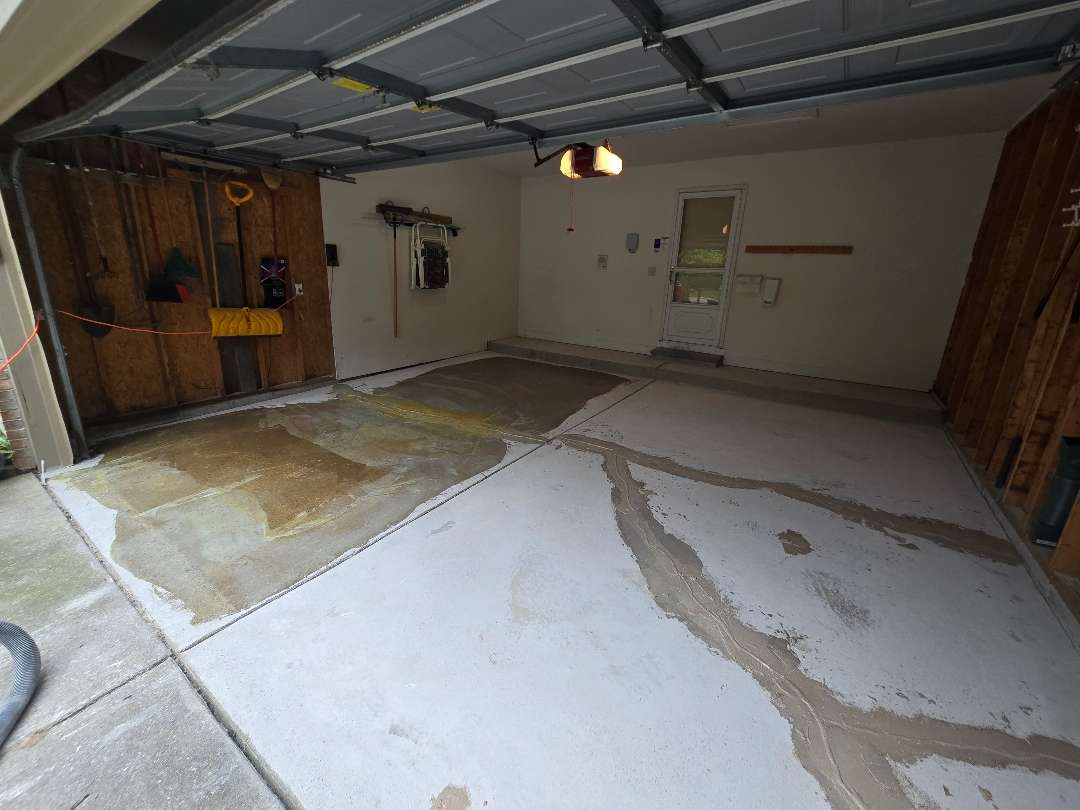
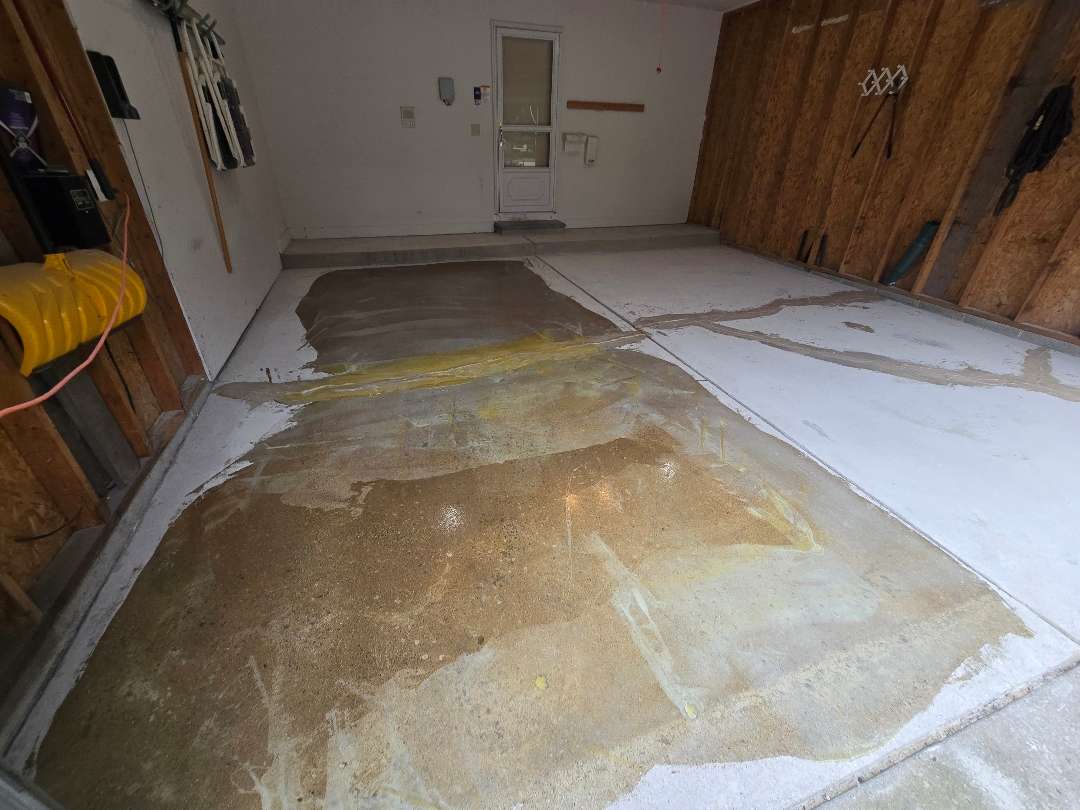
With the caulk removed and the surface open, the cracks were ready for proper repair. Our crew applied mender compound along each crack line and into the pitting zones across the slab. The damage was distributed broadly enough that the mender application covered large zones rather than isolated spots.
Our team spread the compound to consistent coverage across all affected areas and troweled it flat. The original crack lines and pitting voids disappeared beneath the mender. Our crew allowed full cure time across the full repair zone before the second grind began.
Second Grind — Mender Flush
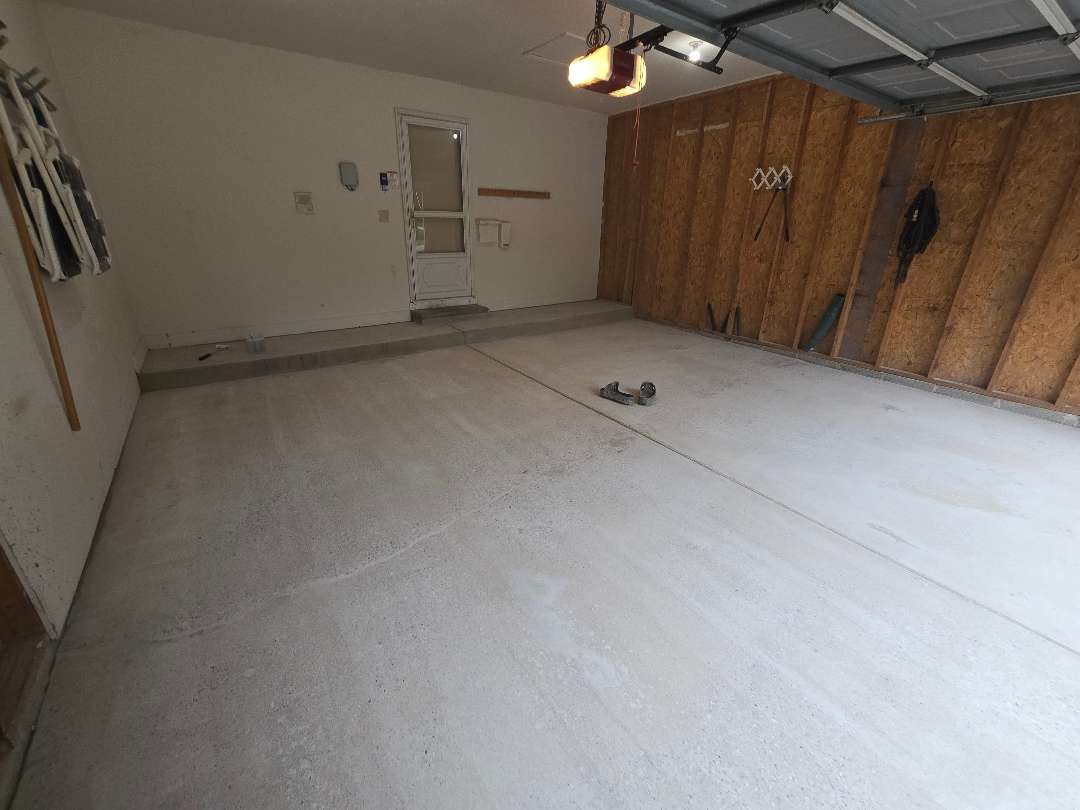
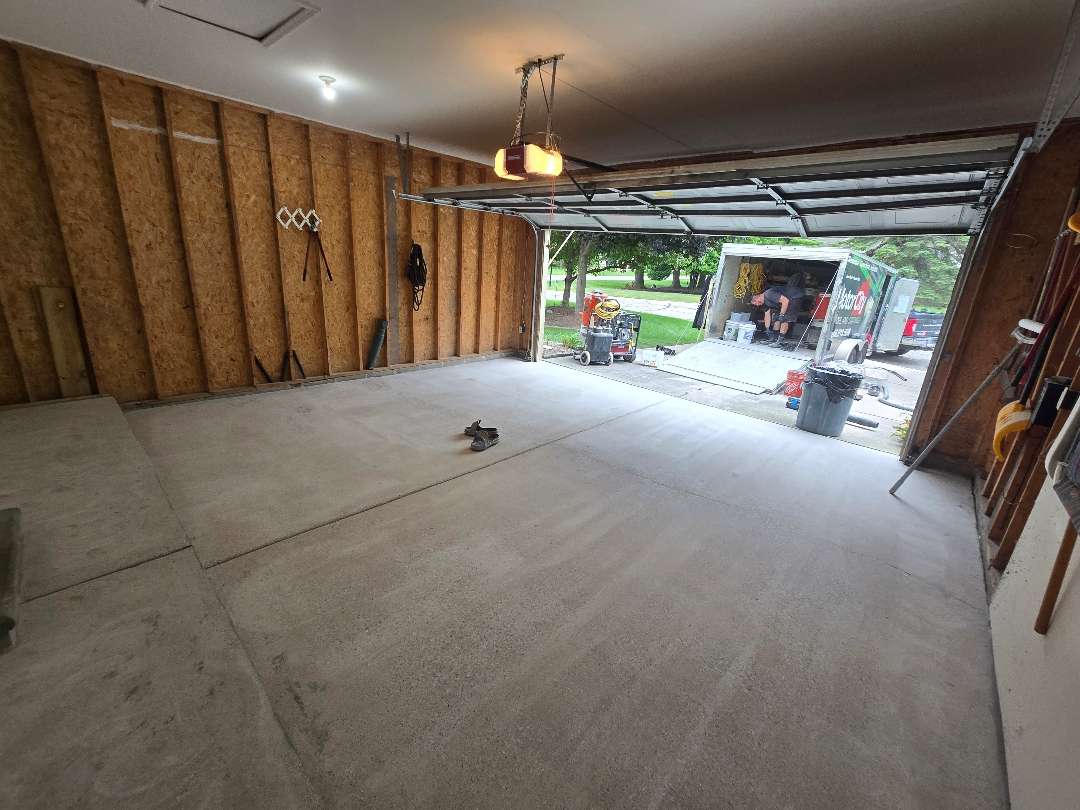
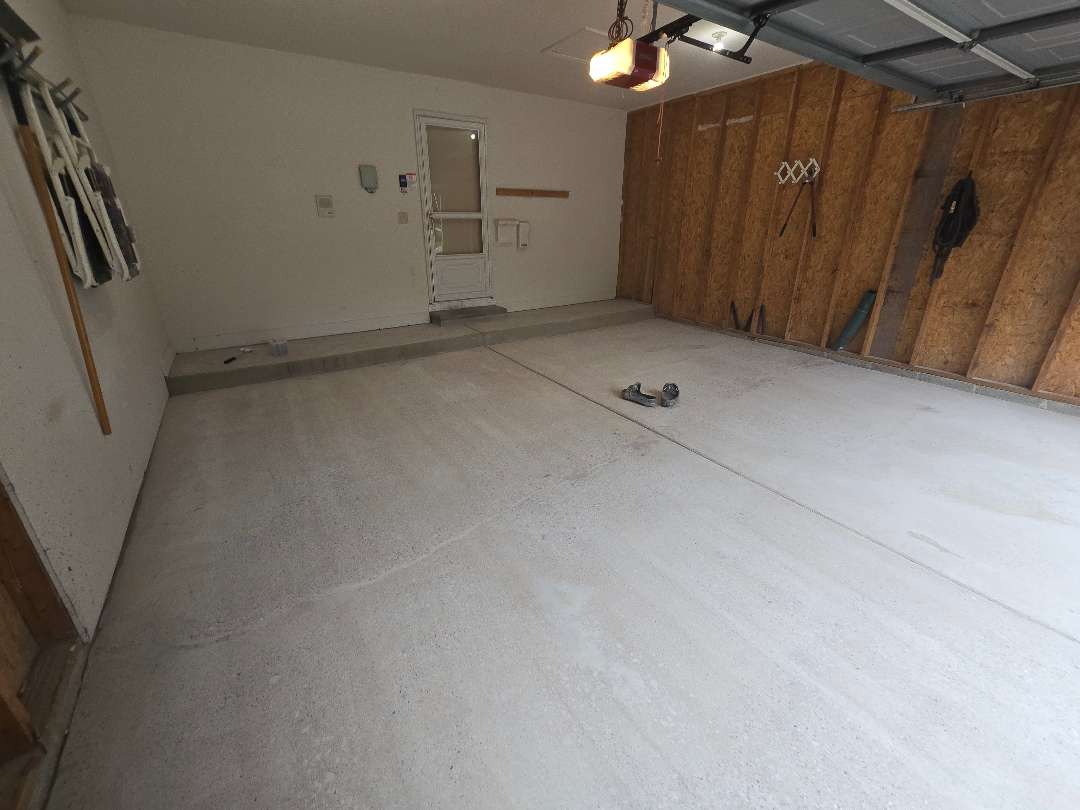
Our crew ran the diamond grinder across the full slab a second time. This pass brought the cured mender flush with the surrounding concrete across every panel. The crack lines, the caulk, and the pitting were all gone. The surface was flat and consistent from wall to wall.
The step at the house entry received hand abrasion to create mechanical adhesion for the coating. With the floor and the step both prepared, every surface was in consistent condition before the coating went down.
Coating Application
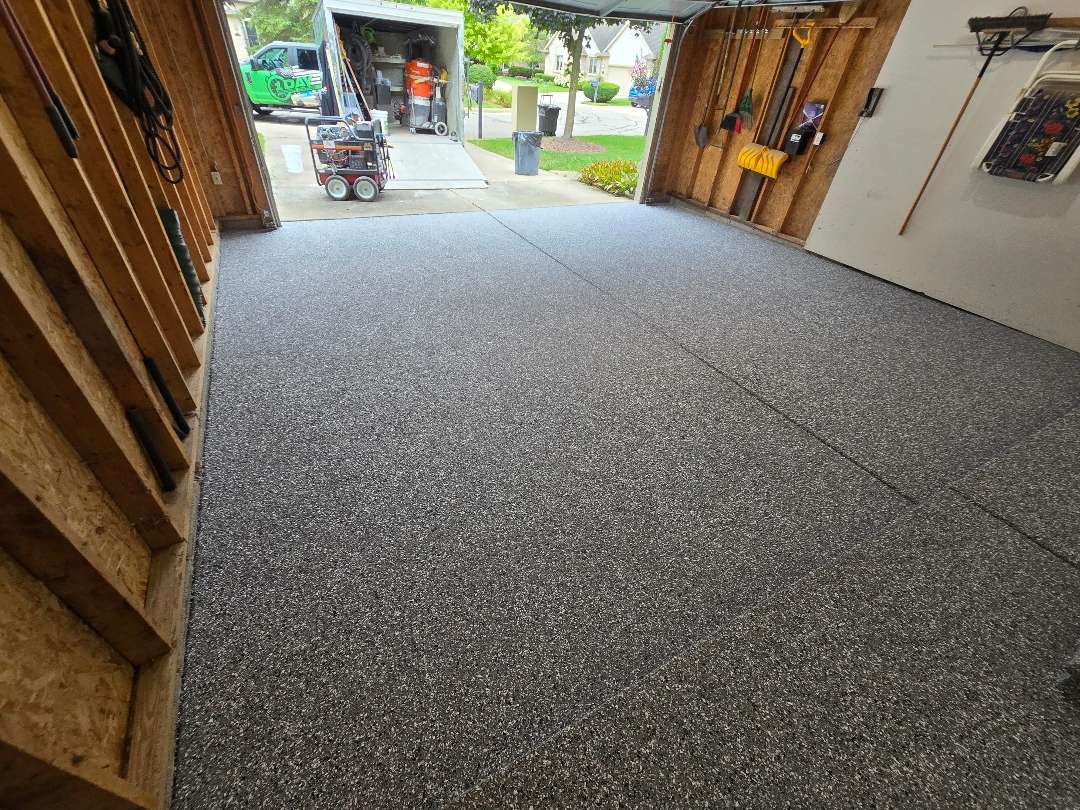
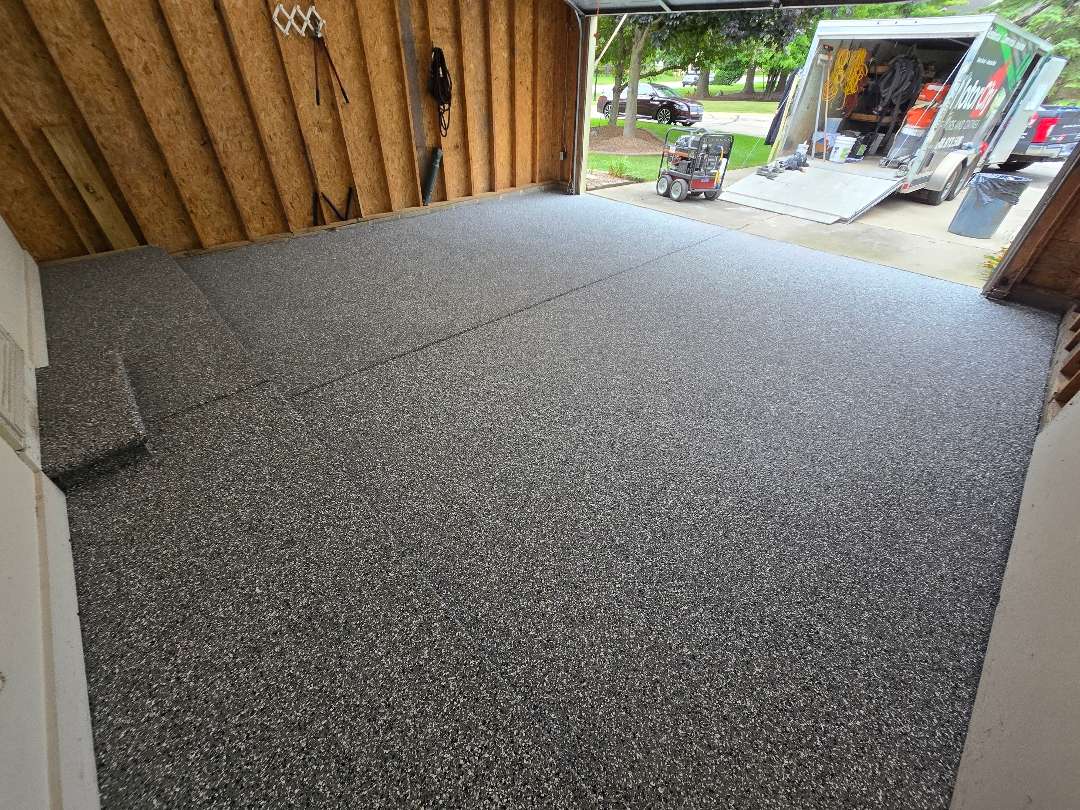
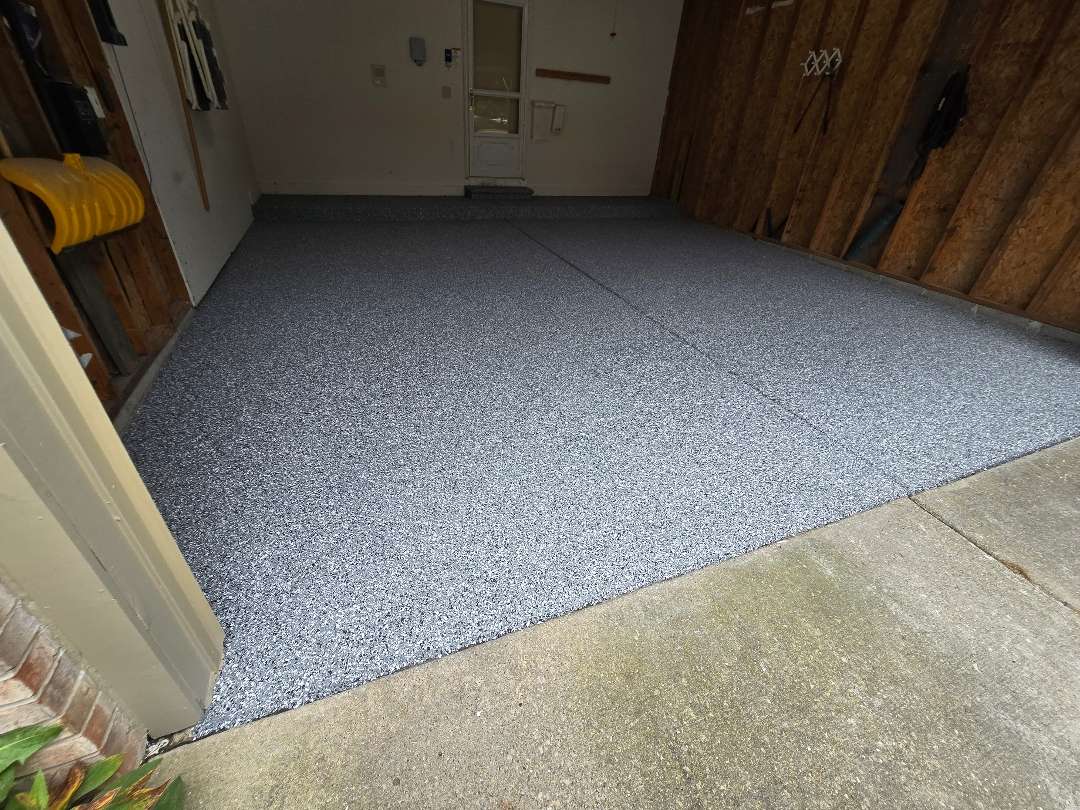
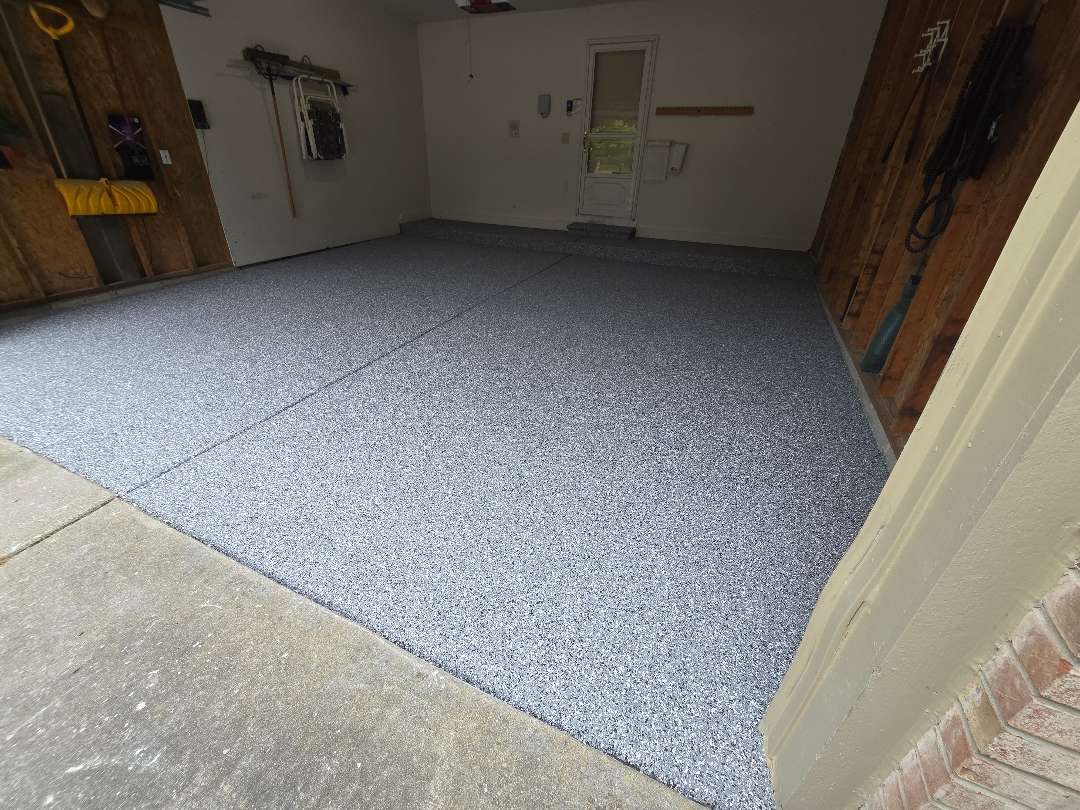
The homeowner selected Smoke — a dark charcoal blend with mid-grey and white accent flecks. Our crew applied the MC-3.2 polyurea-polyaspartic coating system across the prepared 391 square feet. Our team broadcast Smoke flakes into the wet base coat in full, dense coverage across every panel.
Our crew carried the same Smoke color across the single step — tread, riser, and face. Our team then applied the clear topcoat with 24-grit traction additive throughout the floor and step.
The Result
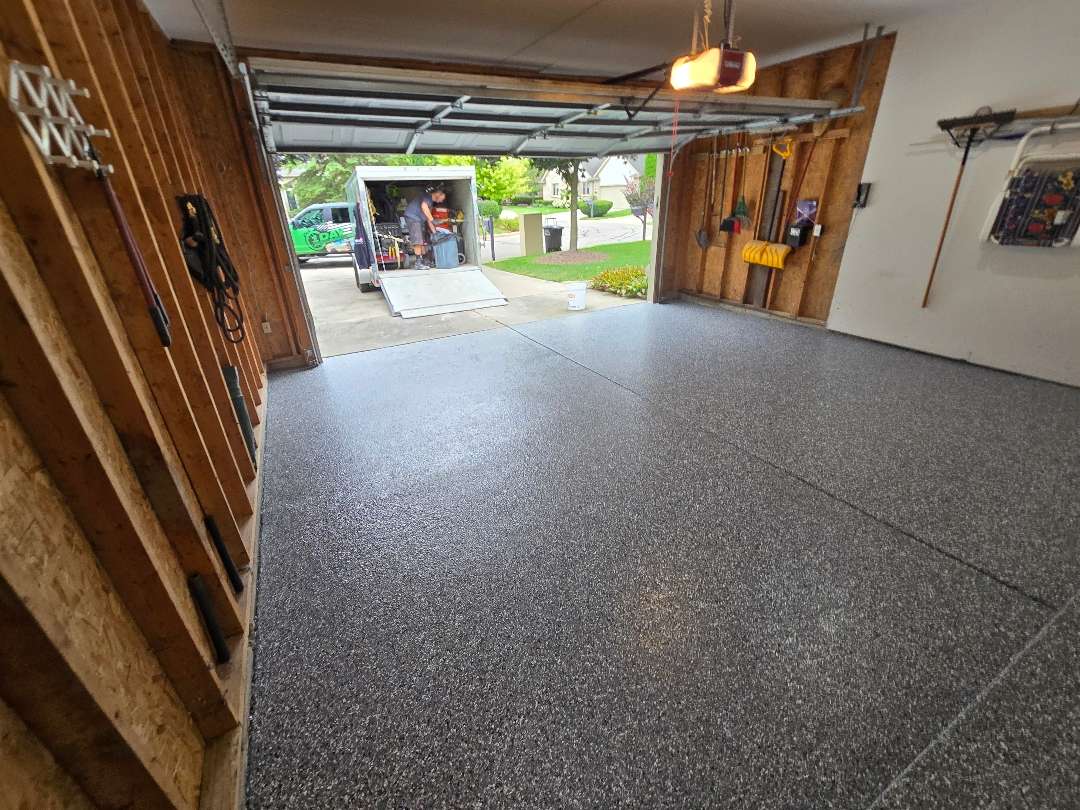
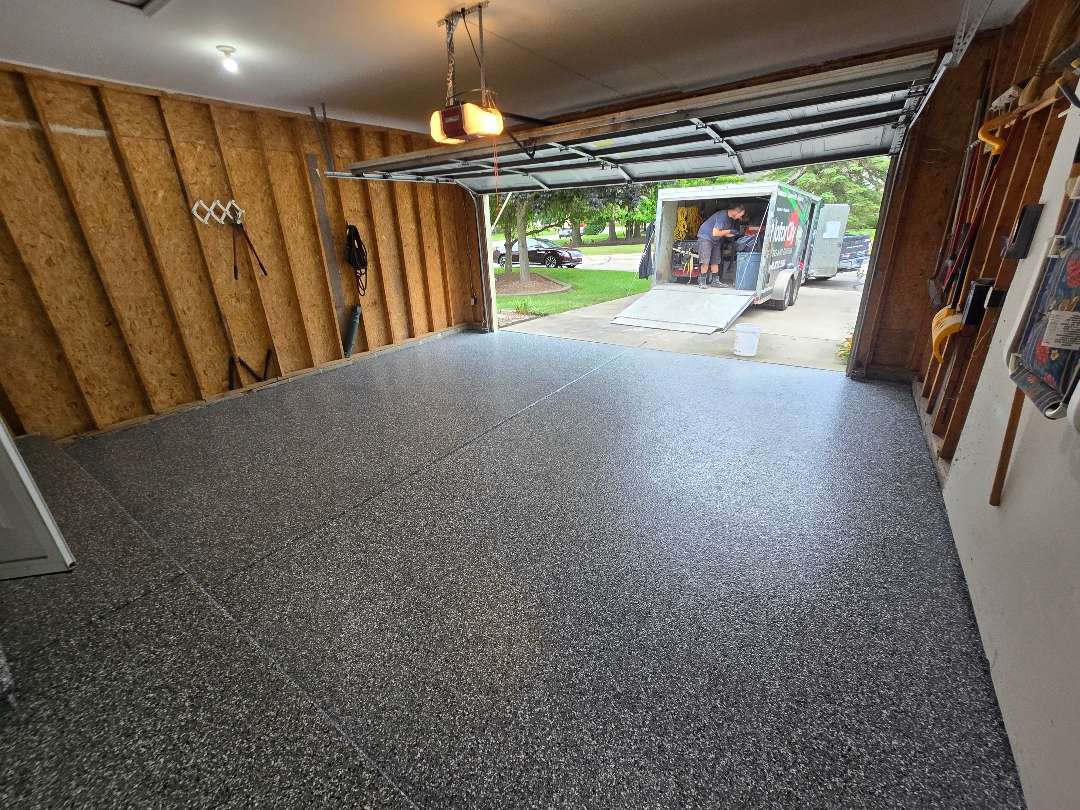
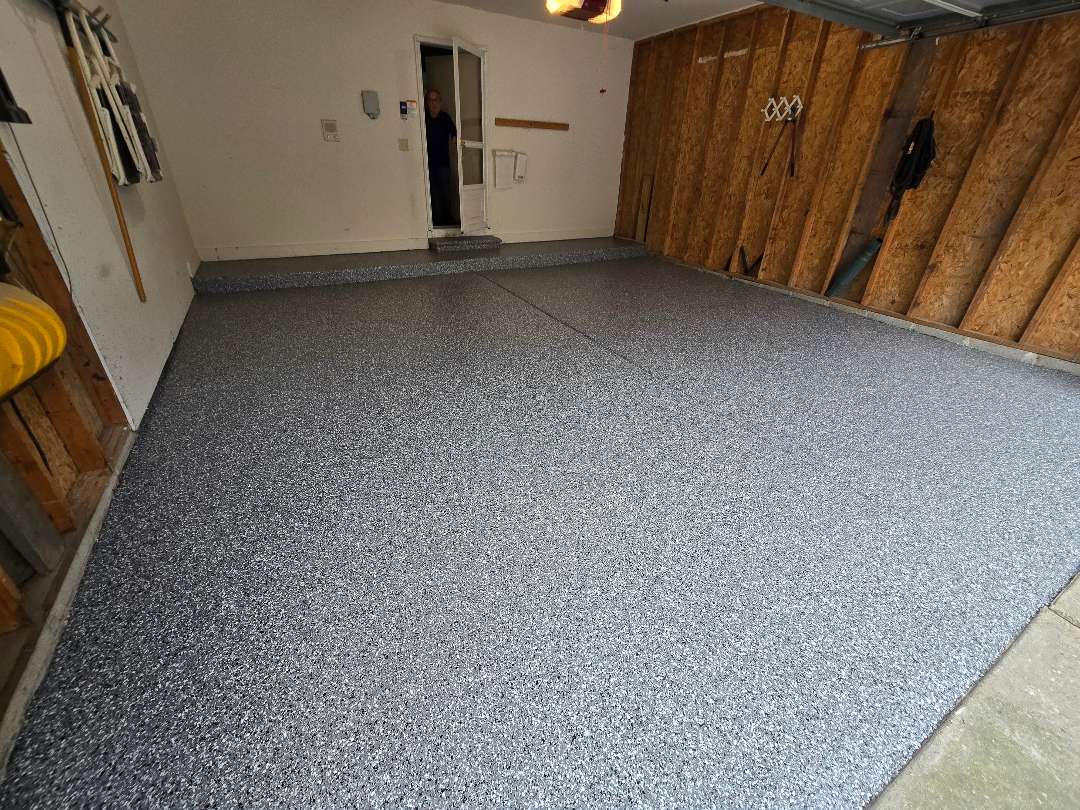
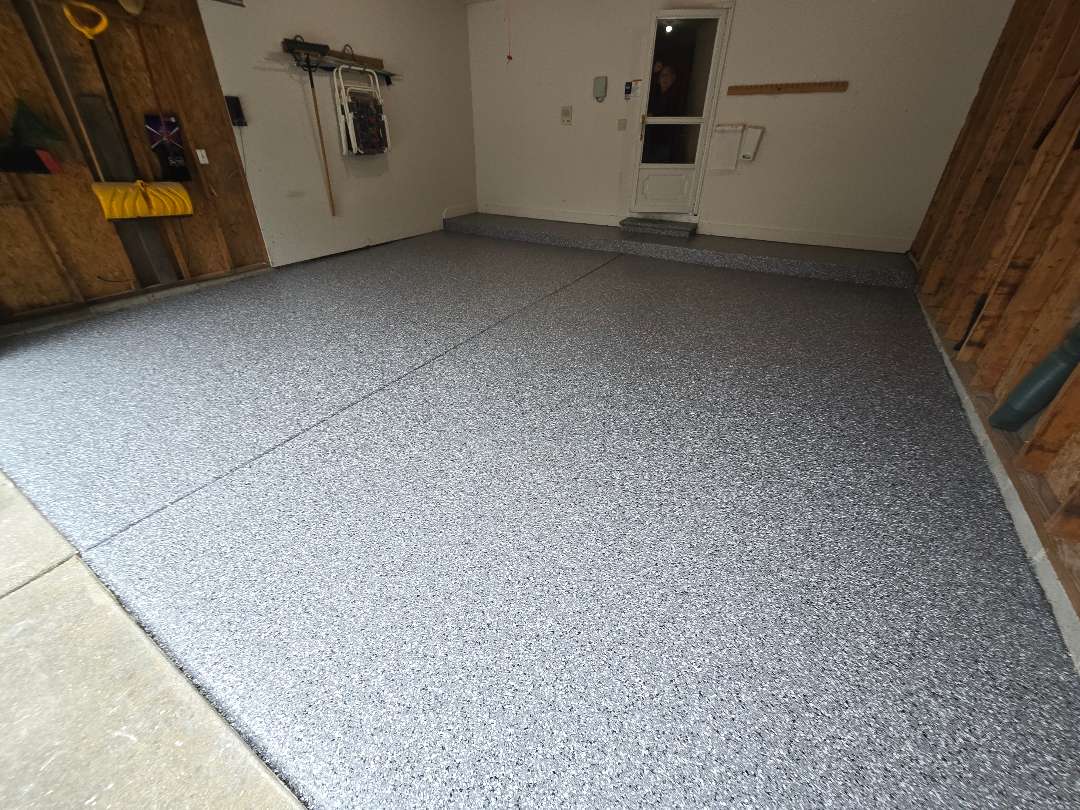
Smoke covers all 391 square feet. The dark charcoal tone reads differently depending on the light — deep and rich from the interior, shifting toward mid-grey near the garage door opening where daylight crosses the surface.
The control joints run cleanly through the finished surface. Every crack, every caulk line, every pit — gone entirely beneath the MC-3.2 system. The single step carries the Smoke finish on every face and sits flush within the floor as a continuous surface. The 24-grit traction provides grip underfoot from the threshold to the step.
Testimonials
Donald O'Guinn
William Kent
Garage Floor Coating on River Bend Drive
River Bend Drive, Plymouth, MI
The Starting Point
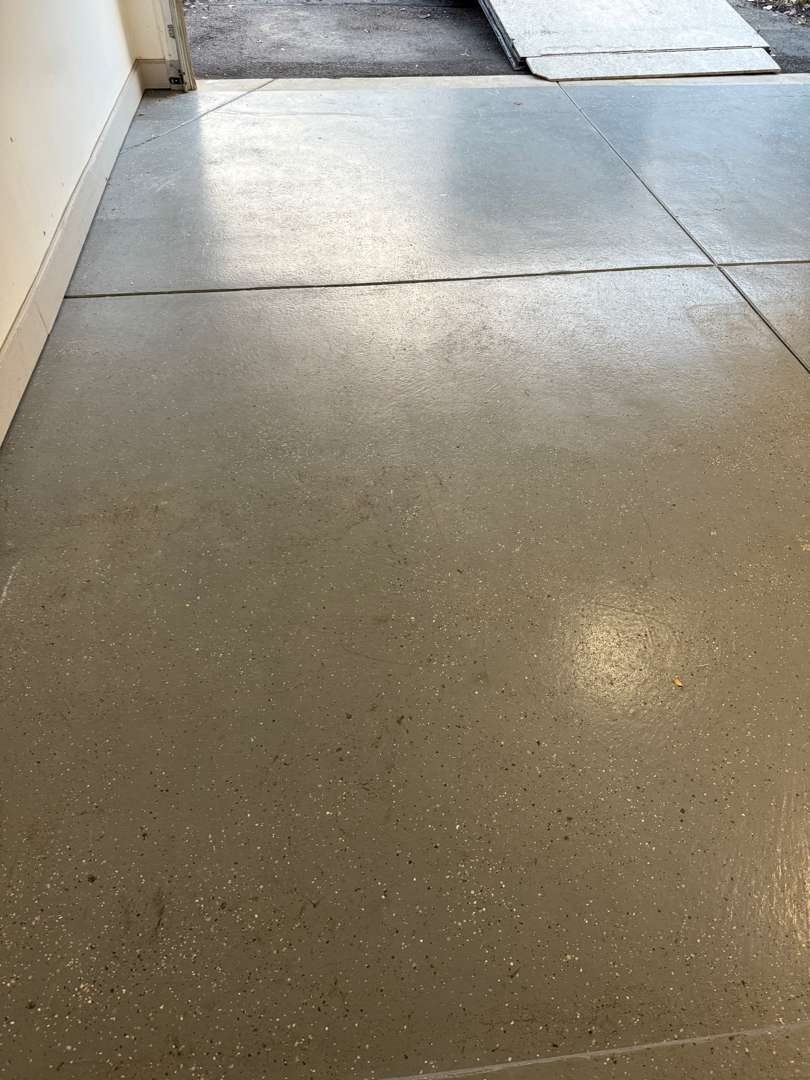
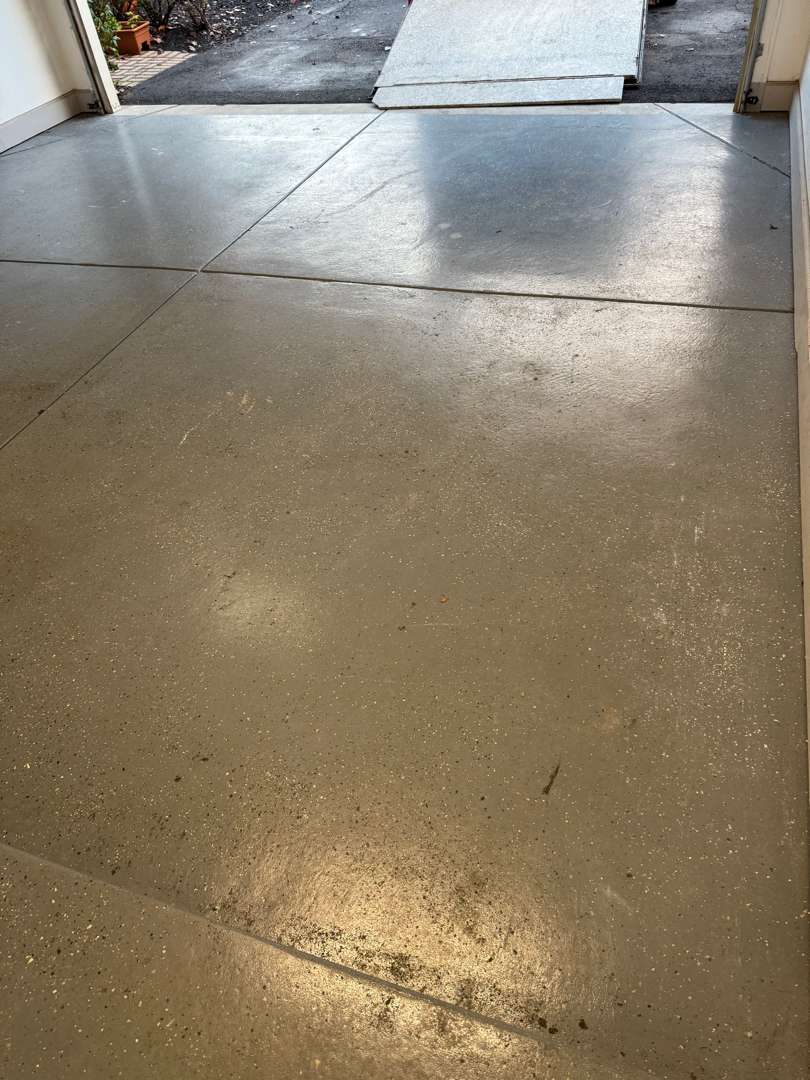
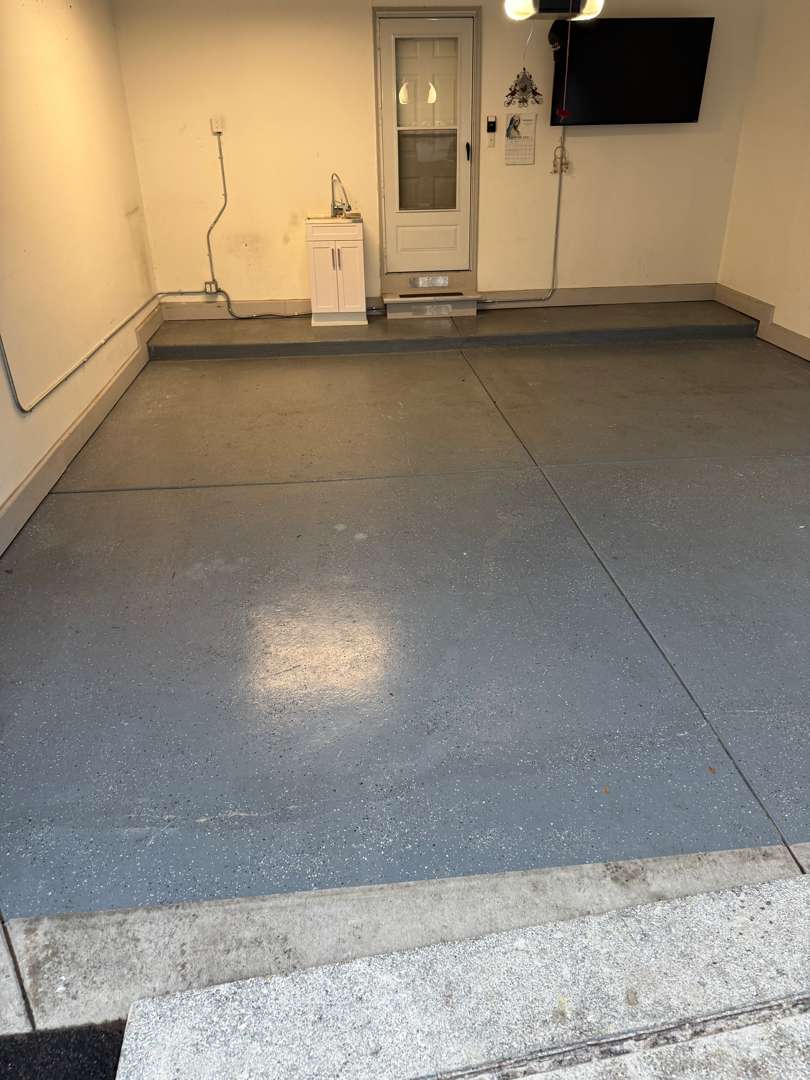
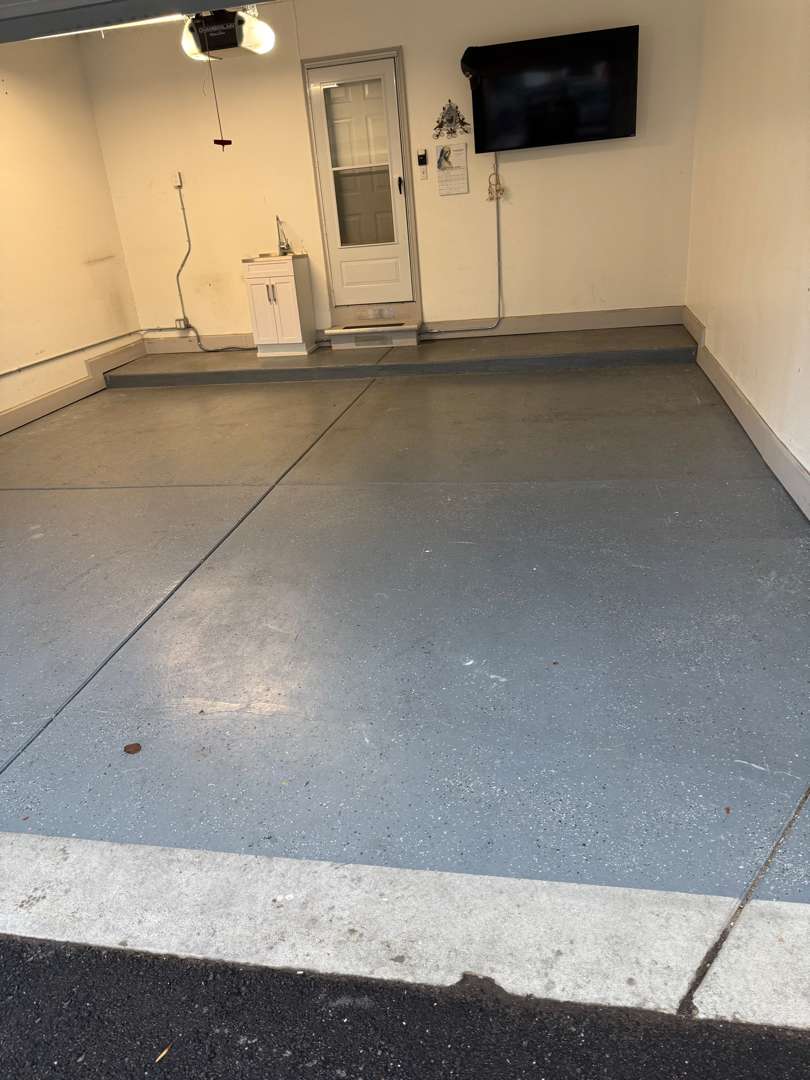
The floor at this River Bend Drive garage already had a coating on it — a solid blue-grey epoxy applied at some earlier point. By the time our crew arrived, the epoxy had run its course. Scuff marks and scratches crossed the surface. The coating had dulled across large zones and lost its bond in others. What sat beneath it was unknown until the grind began.
The garage measured 385 square feet. The existing epoxy covered the full slab and extended onto a narrow ledge along the back wall. No steps and no vertical surfaces were in scope. The job was straightforward in layout — but the old coating had to come off before anything else could happen.
What the Grind Revealed
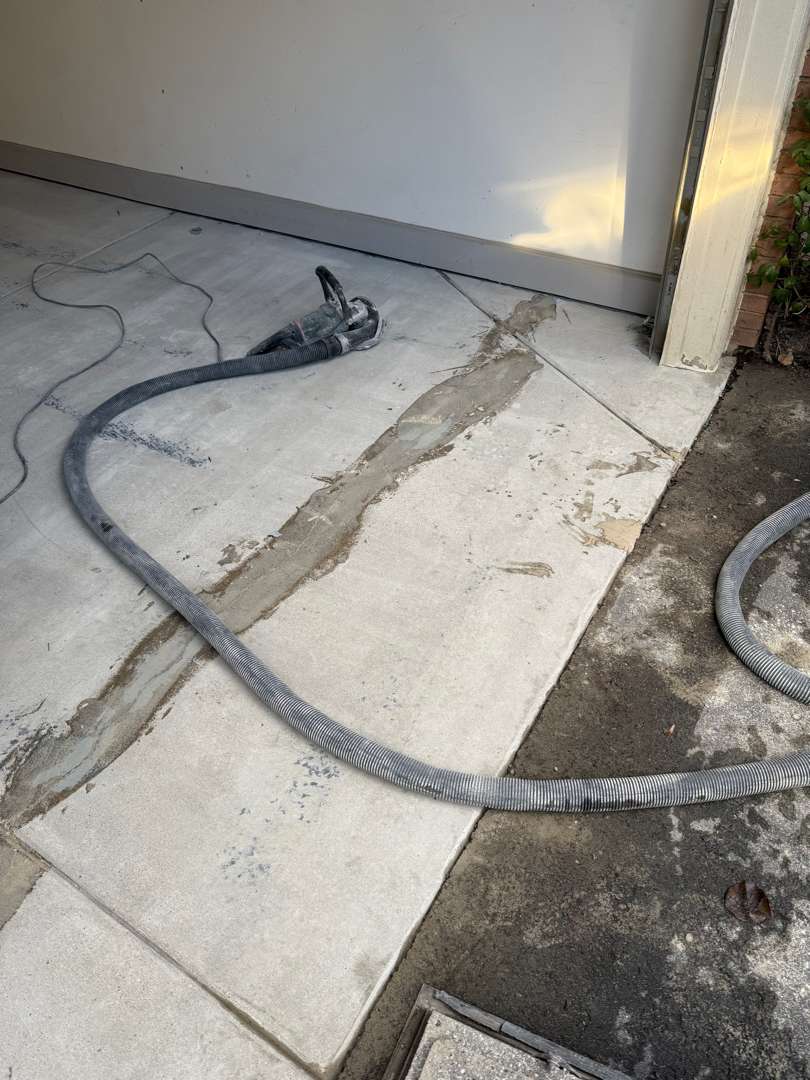
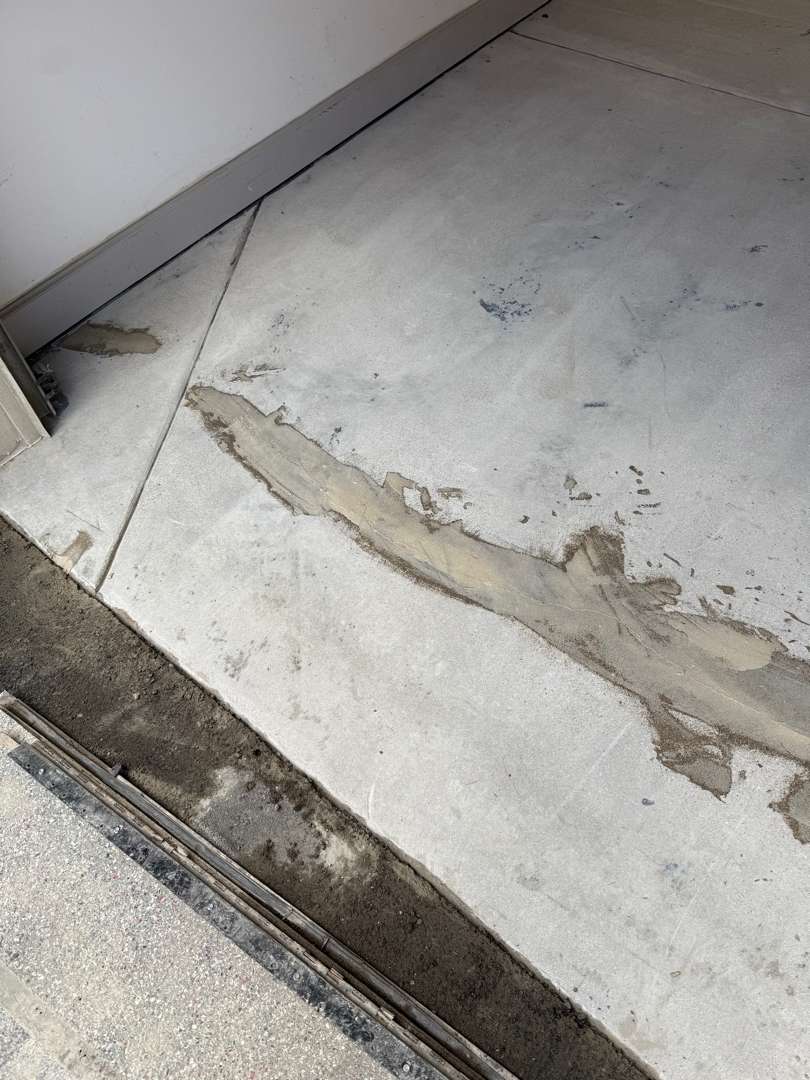
Our crew diamond-ground the full 385 square feet to strip the epoxy and open the concrete beneath. The grind removed the old coating panel by panel. Near the garage door threshold, the grind exposed what the epoxy had been concealing: a wide crack running along the control joint at that edge of the slab. The crack had not been visible from the surface — the old coating had bridged over it.
This was the defining repair on this job. The crack was wider and more irregular than the control joint alone — movement at the threshold had opened it over time beneath the old coating. Our crew applied mender compound along the full length of the crack and into the surrounding zone. Our team worked the material into the seam and spread it to even coverage across the affected area.
The mender filled the crack and leveled the surface at the threshold. Our crew allowed full cure time before proceeding. After cure, our team ground the mender back flush with the surrounding concrete — bringing the threshold zone into the same plane as the rest of the slab.
A Clean Slate
Coating Application
The Result
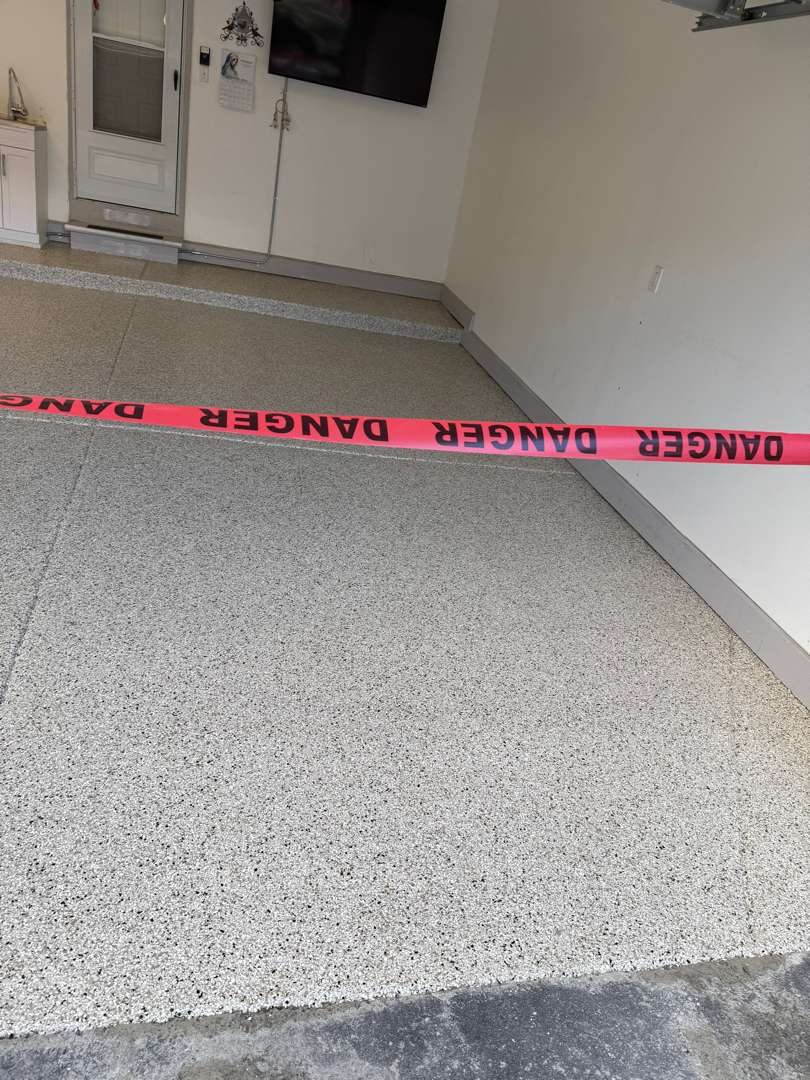
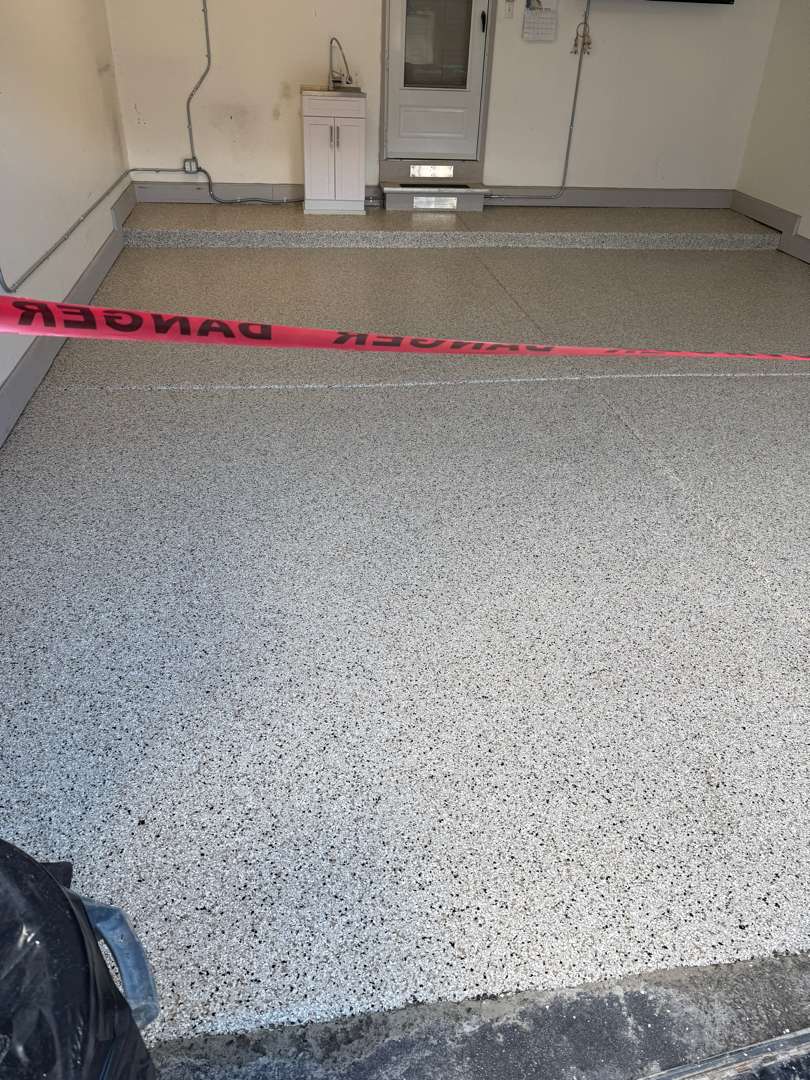
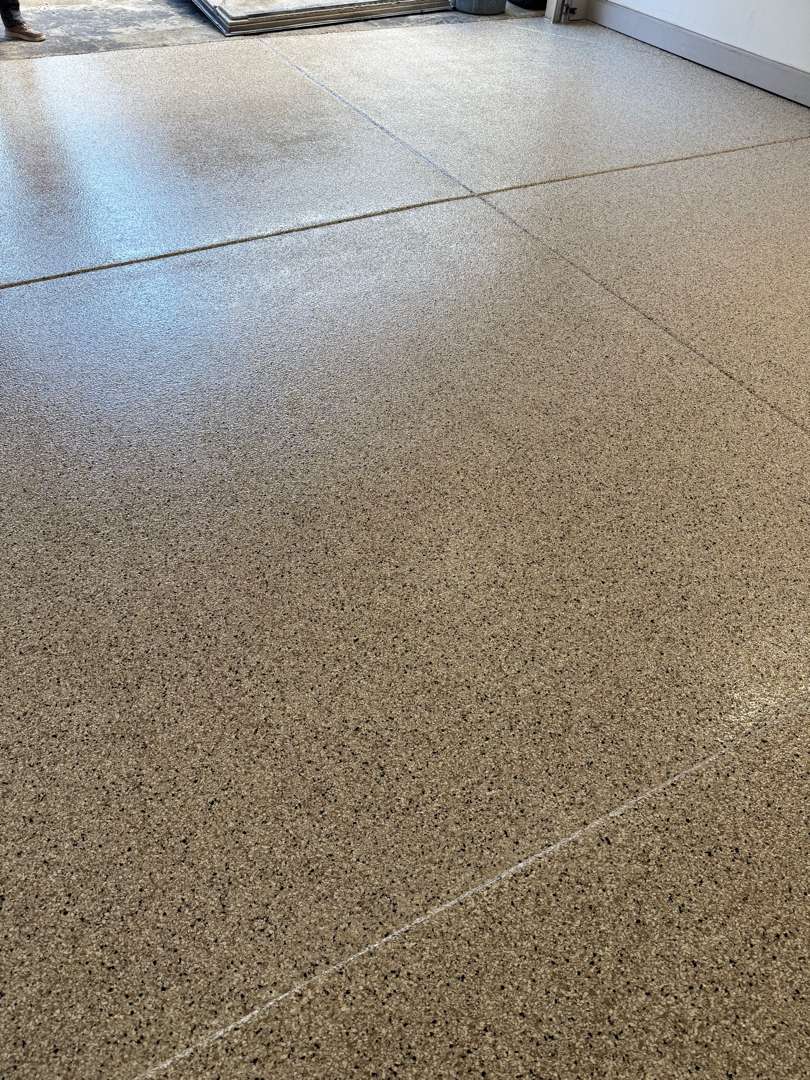
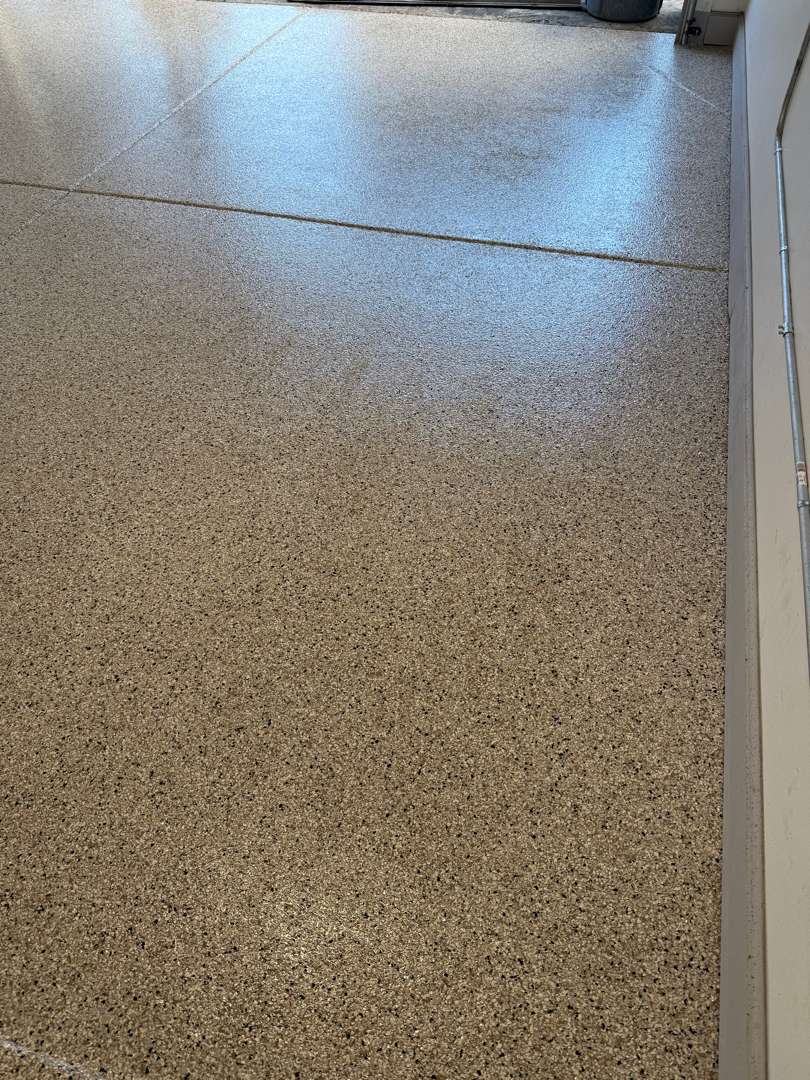
Driftwood reads with a warmth that sets this floor apart from every other job on this page. The tan and brown flecks read earthy and natural from the interior, shifting slightly cooler near the garage door where daylight crosses the surface. The ledge along the back wall carries the same Driftwood finish and ties the coating to the wall line cleanly.
The control joints run cleanly through the finished surface. The crack at the threshold — the one the old epoxy had been hiding — is gone entirely beneath the mender and topcoat. All 385 square feet are sealed, protected, and covered in a floor that looks nothing like what our crew found on arrival.
Testimonials
Elizabeth Caverly
Chris Whiteman
Garage Floor Coating on Saint Andrews Drive
Saint Andrews Drive, Plymouth, MI
The Starting Point
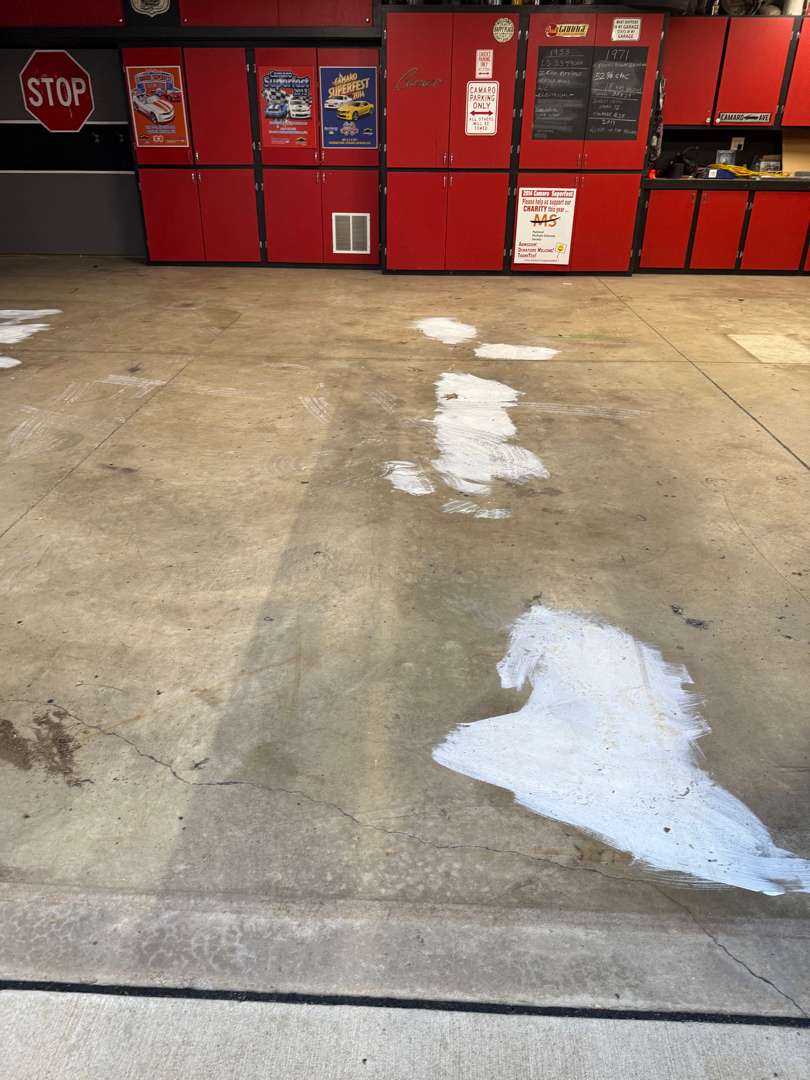
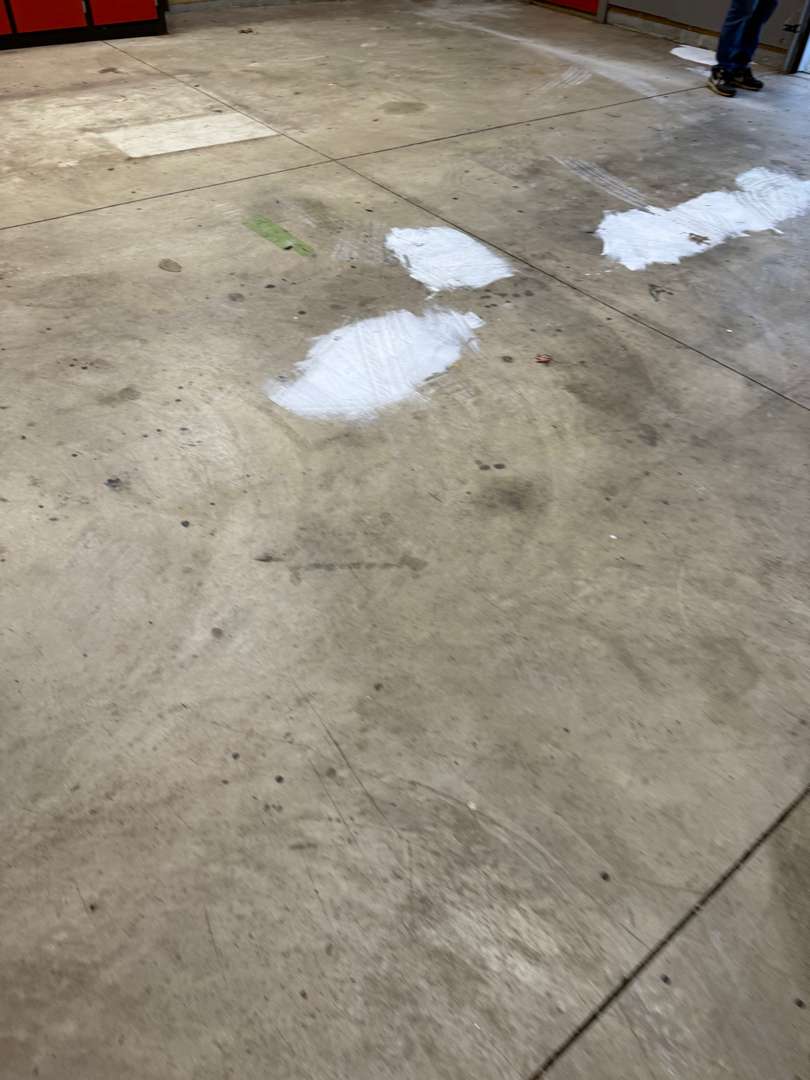
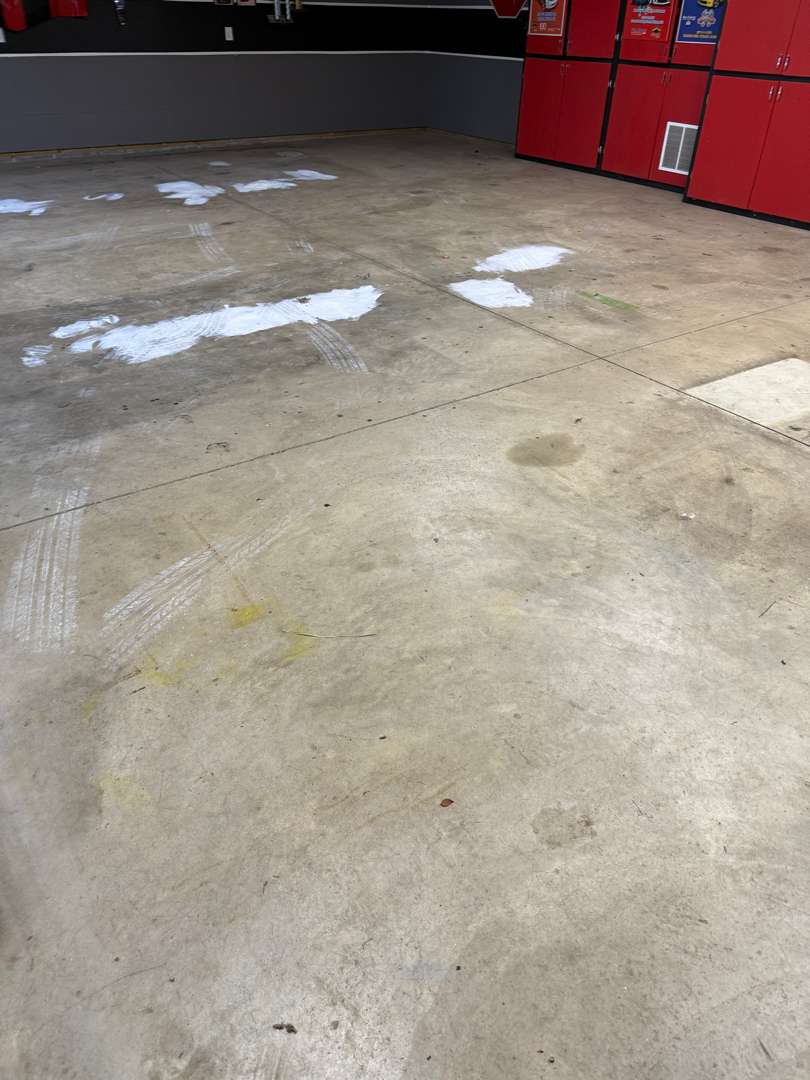
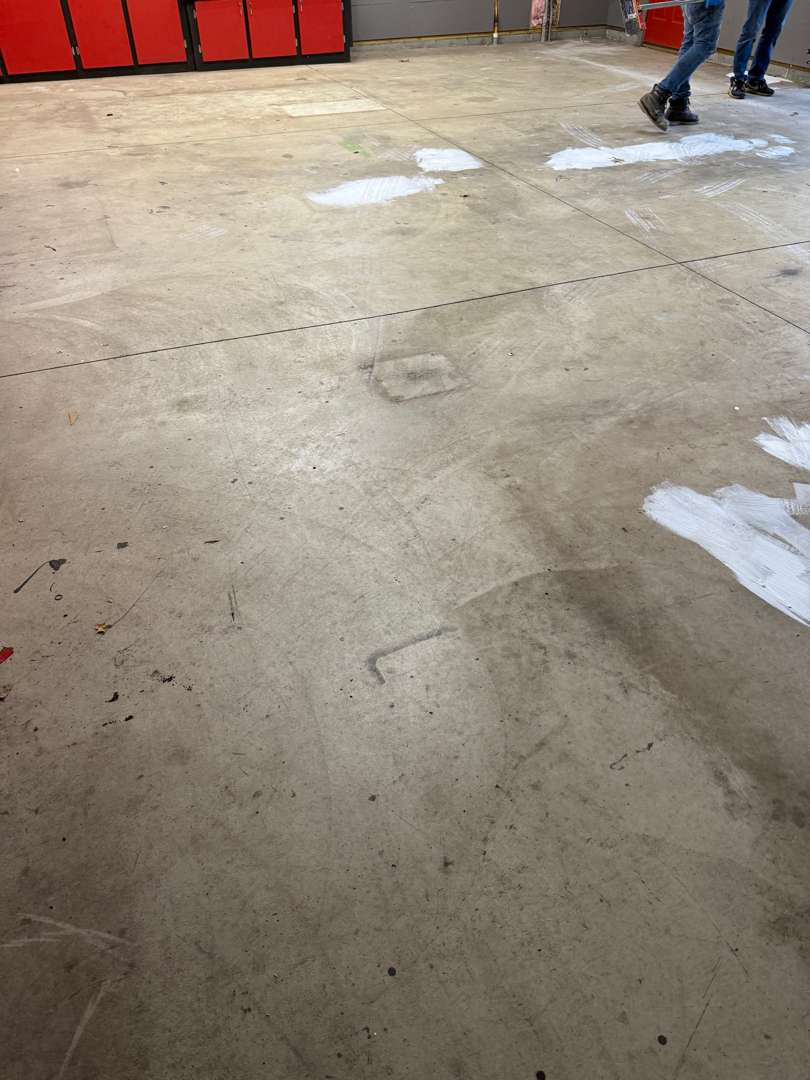
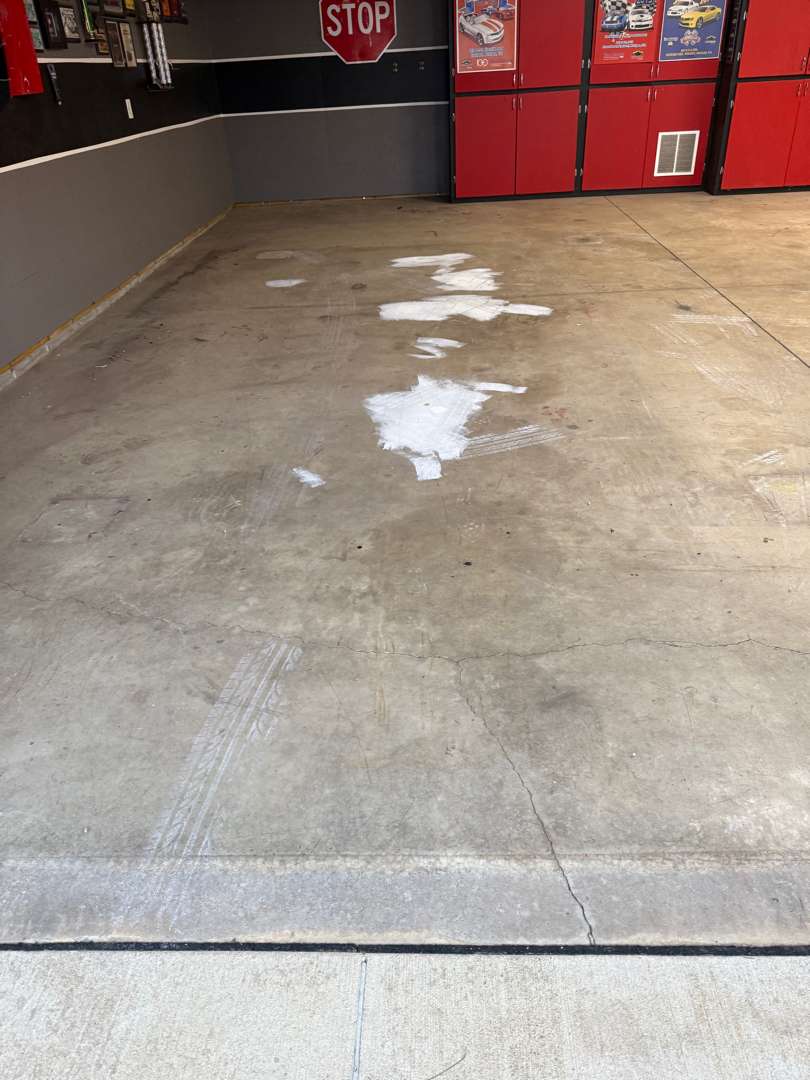
This Saint Andrews Drive garage is a purpose-built Camaro space. Red cabinets line the walls, Camaro posters and memorabilia cover every surface, and a vehicle lift occupies the center of the floor. The owner uses this garage seriously — and the 580-square-foot slab showed it. Oil had soaked into the concrete in multiple zones. Tire marks from vehicle maneuvering crossed the surface. Green fluid staining from a coolant spill spread across one area.
White paint had been applied directly to the slab in an attempt to address some of the staining — blobs and brush strokes across several areas. The paint sat on top of the contaminated concrete without bonding properly and had to come off with everything else. A crack ran across the slab. The scope included 10 linear feet of vertical surfaces and 11 steps with 2 landings connecting the garage to the house interior.
Oil Extraction and Surface Preparation
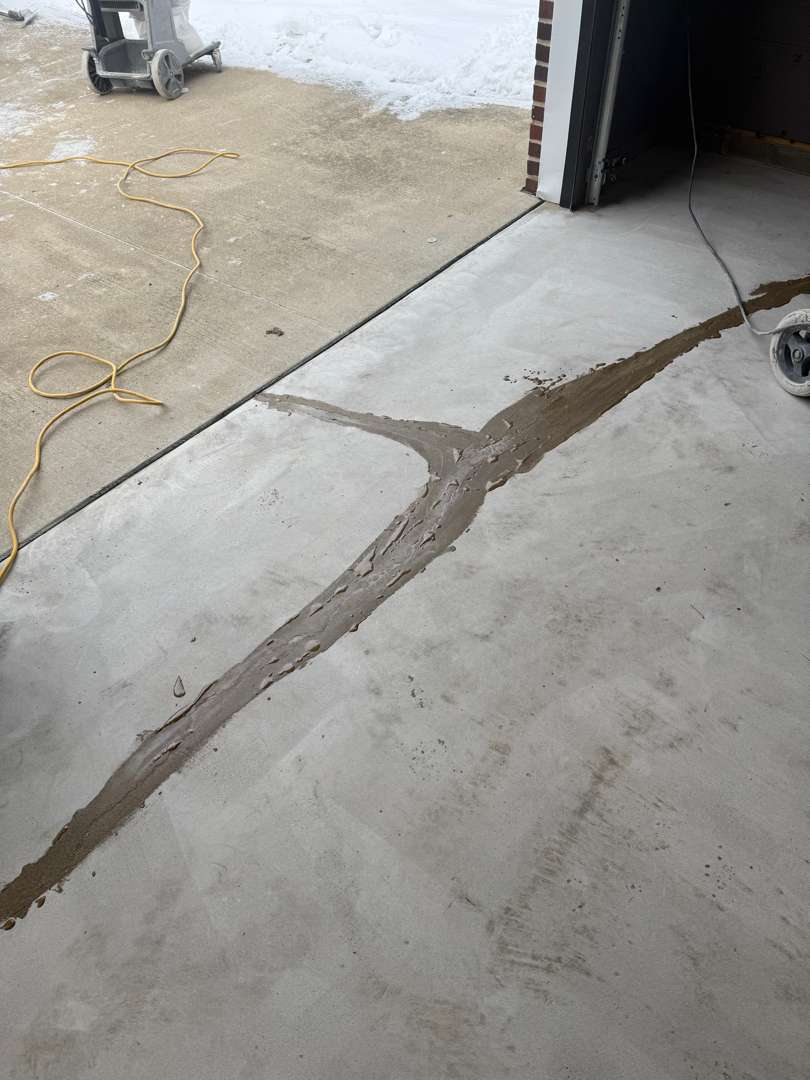
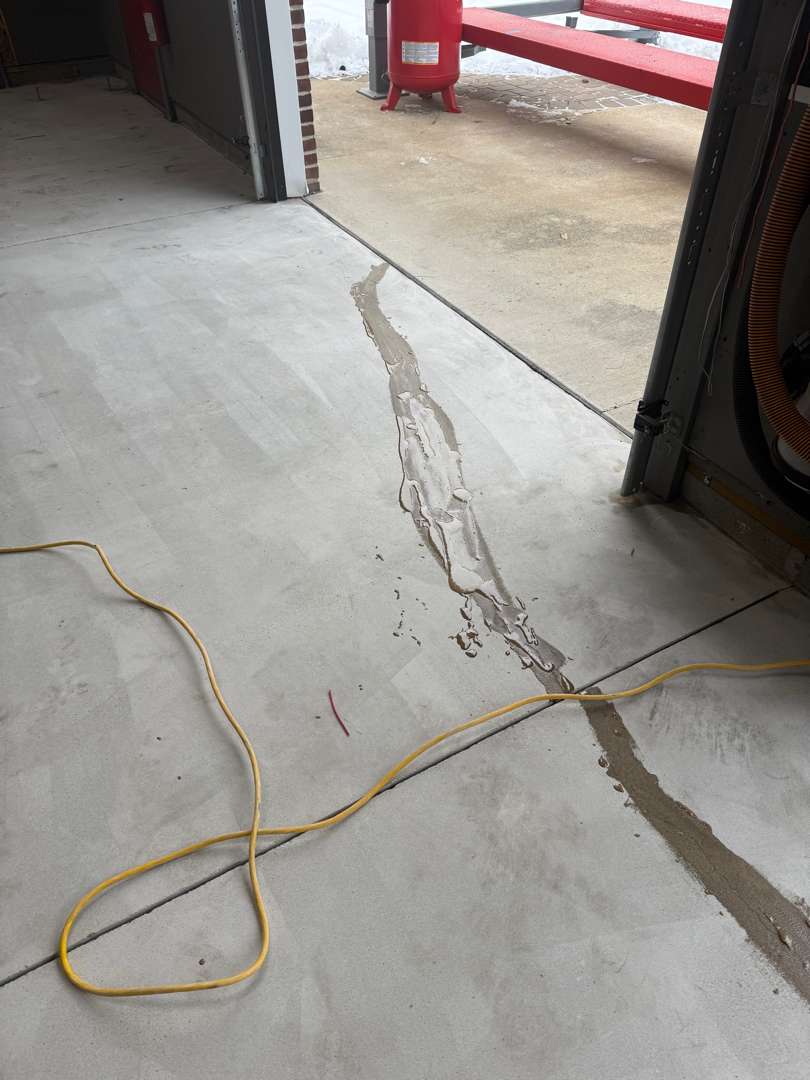
Crack Repair
Steps, Landings, and Verticals
The staircase at this property was the most involved step scope on this installation. Eleven steps and two landings connected the garage floor to the house entry. Our crew hand-abraded every tread, riser, face, and landing surface to create mechanical adhesion for the coating. The 10 linear feet of vertical surfaces along the slab perimeter received the same preparation. Every surface — floor, steps, landings, and verticals — was brought to consistent condition before any coating went down.
A specific traction requirement drove the spec for this job. Traction on the steps was a safety concern — 36-grit additive was selected for the topcoat to provide firm, reliable grip on every coated surface.
Coating Application
The Result
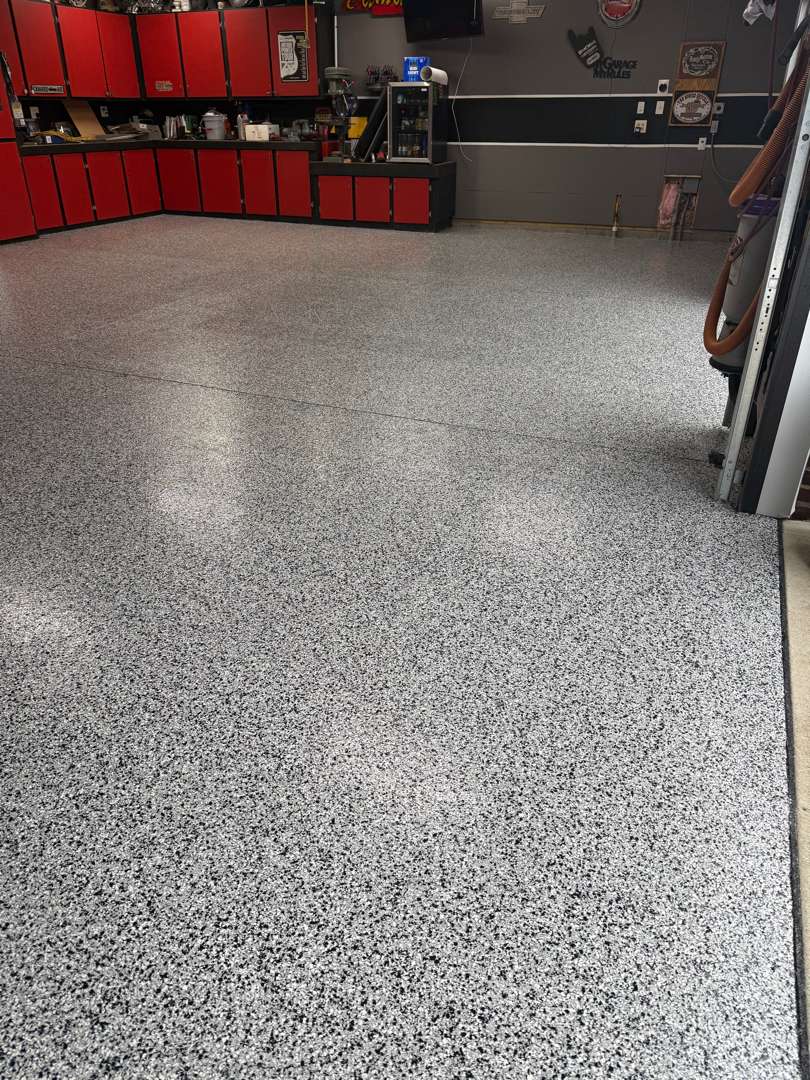
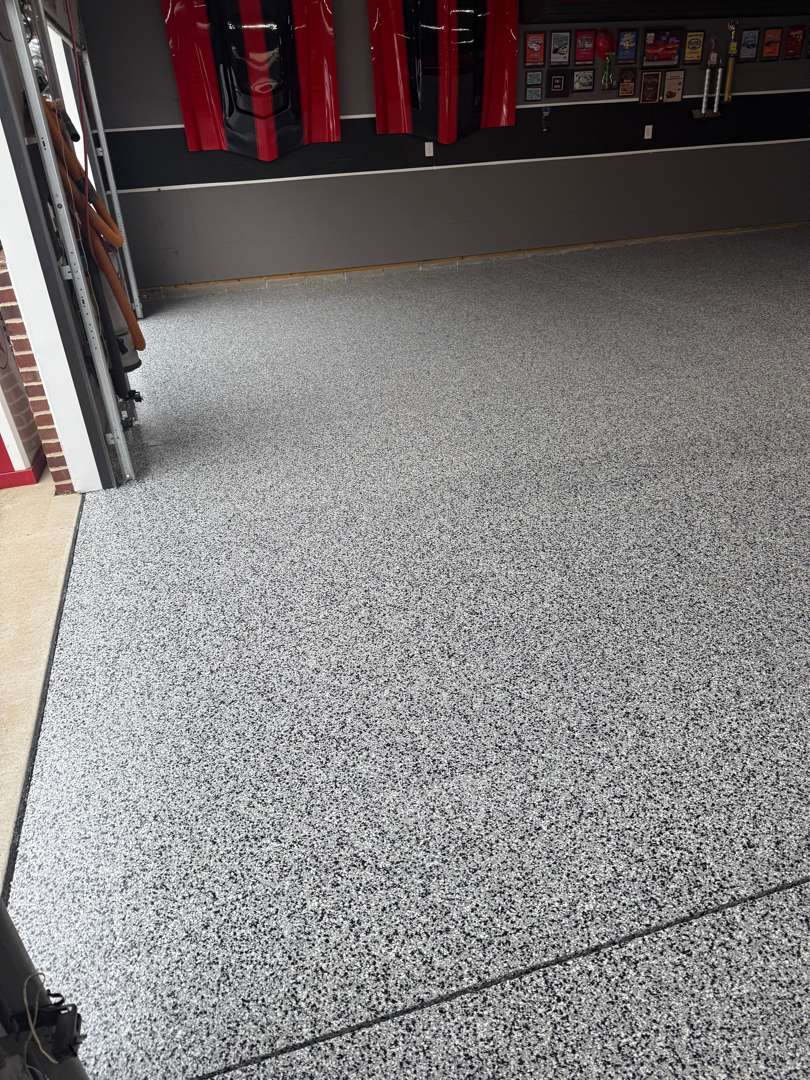
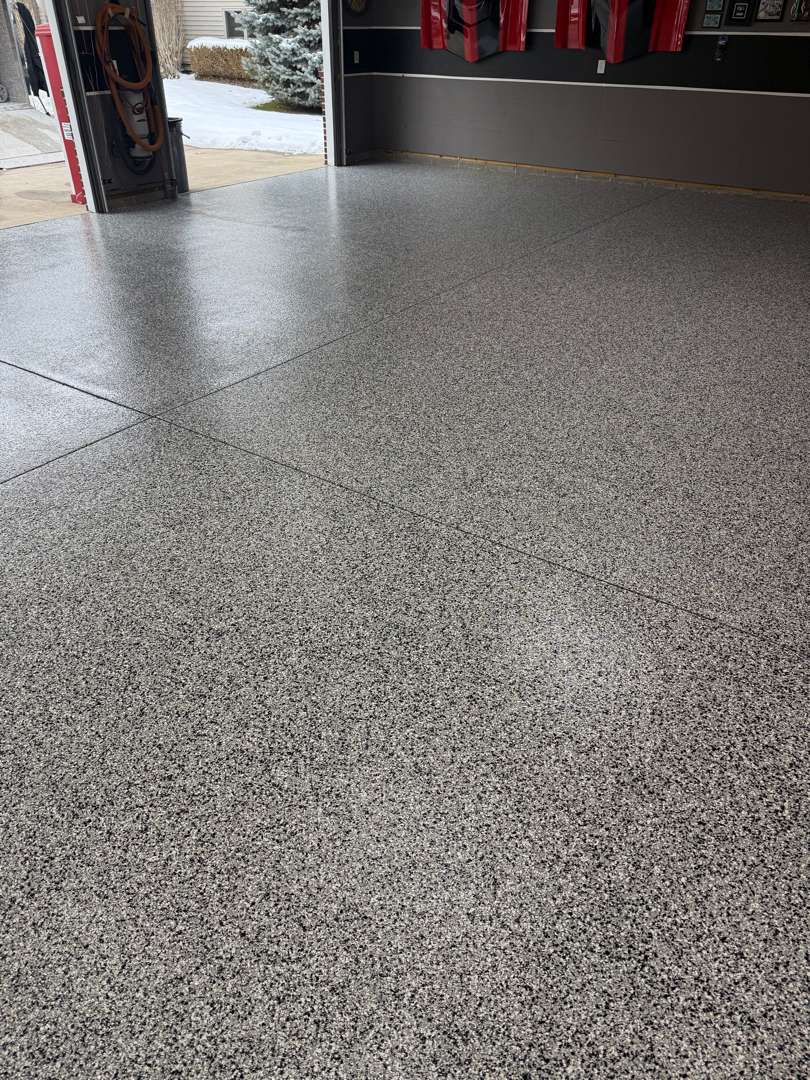
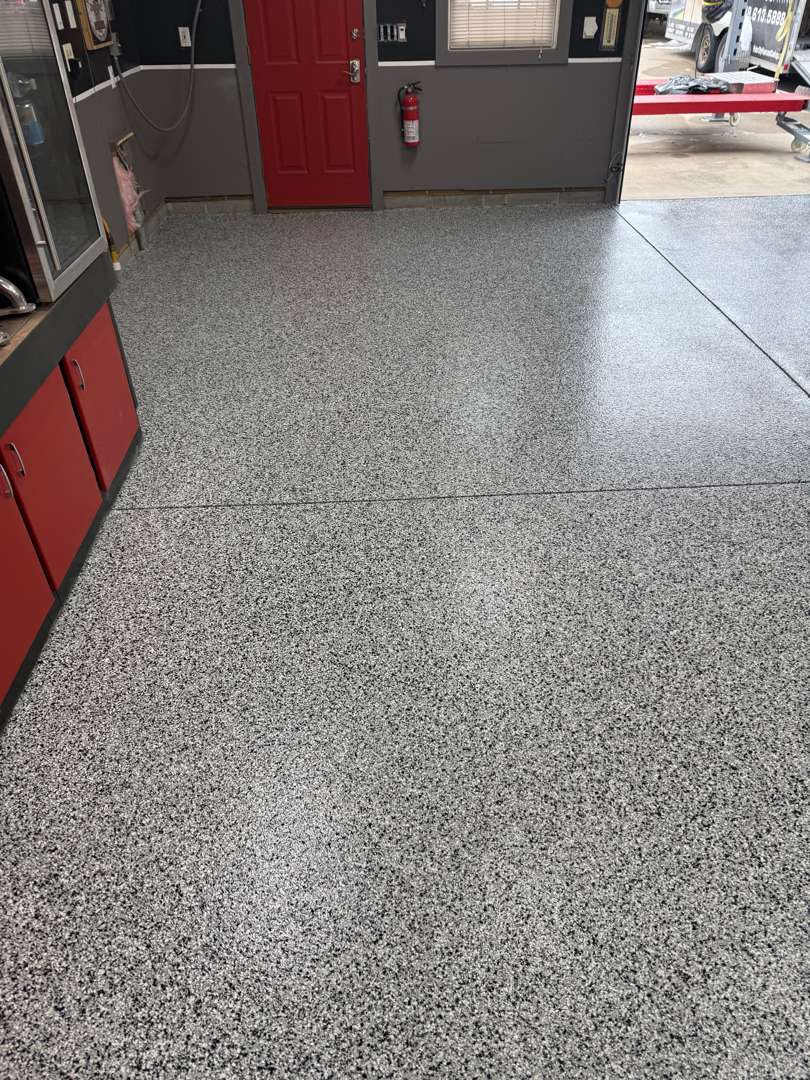
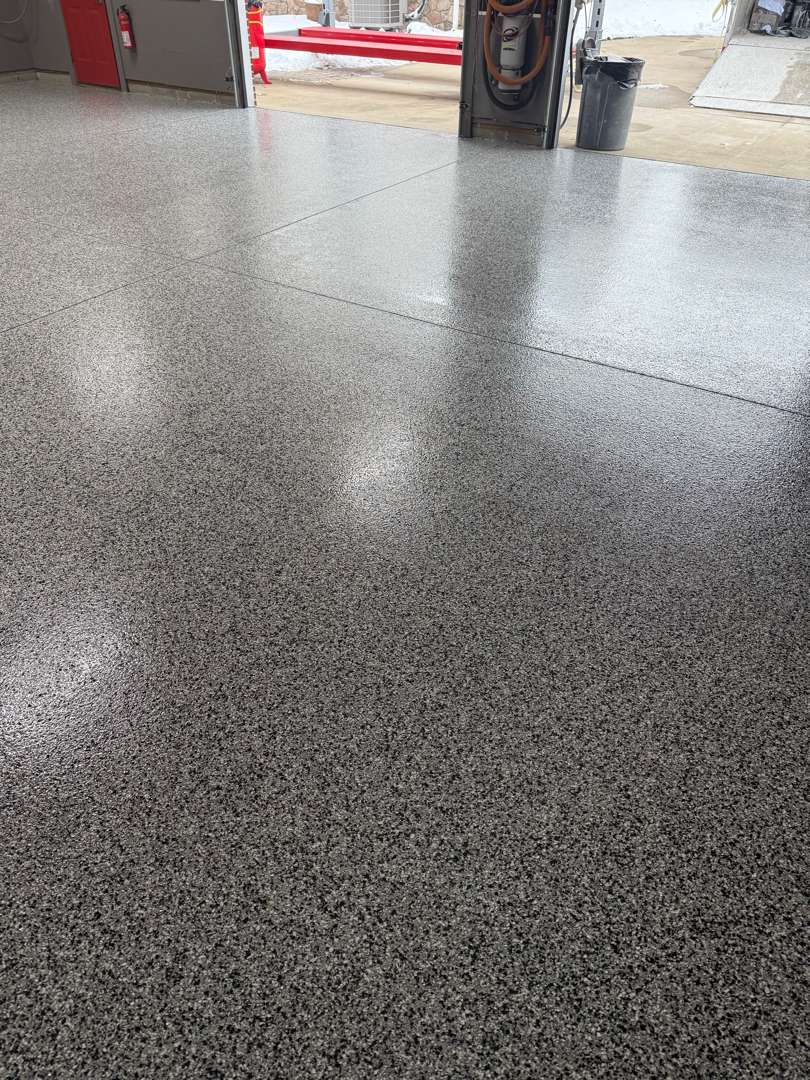
The finished floor transforms the space. Autumn Brown at H-7 density reads as a rich, full-coverage surface — the dense flake pattern leaves no bare base coat visible and gives the floor a depth that suits the character of this garage well. The red cabinets and grey walls frame the floor on every side.
The 11 steps and 2 landings carry the same Autumn Brown finish on every face. The staircase reads as a continuation of the floor — the same color, the same H-7 density, the same topcoat. The 36-grit traction provides firm grip across every step and landing.
The lift column base sits cleanly within the coated surface. The crack at the threshold, the oil zones, the paint spatter, and the coolant stain are gone entirely beneath the MC-3.1 system. All 580 square feet are sealed and protected — a floor that matches the seriousness of the space it serves.
Testimonials
Cynthia Canty
We discovered Motor City Floors and Coatings at the 2021 Builders Show in Novi. Our garage floor had been finished w/epoxy before we moved in 8 years ago and it was worn off & terrible looking. We had Motor City & a competitor come out to give us a quote. Went with Motor City because we liked the team, the price was competitive & we were impressed that it’s a veteran-owned company.
Could not be more satisfied: pre-installation communication was great, the 3 installers arrived exactly on time, they were friendly & efficient and the final result is fantastic.
We highly recommend Motor City Floors and Coatings.
Ken Rosengren
What These Plymouth Slabs Actually Needed
Heavy pitting, oil that had soaked deep into the concrete, and cracks hidden under old failing epoxy — the case studies on this page trace back to garages that had gone years without attention, typical of Plymouth’s mix of historic near-downtown homes and established residential streets. Here’s what that kind of slab requires, from diagnosis through the finished coat:
If you want the details before deciding, these guides below break it down:
Why the old epoxy was failing in the first place — at River Bend Drive, grinding off a dulled, delaminating epoxy coat exposed a wide crack at the garage door threshold that the old finish had been masking; this breaks down the prep shortcuts and product limits that cause that kind of failure.
Why the prep work matters more than the coating itself — our CFO Jake Lowry walks through the diamond-grinding and crack-repair process behind every job on this page, from the mender flood at Beacon Hill Drive to the control-joint crack at Latheron Drive.
Recognizing when a slab needs recoating — cracks and an uneven surface are two of the three signs covered here, both present at Beacon Hill Drive before our crew got to it.
Serving Plymouth & Wayne County
We install polyurea-polyaspartic garage floor coatings across Plymouth and throughout Wayne County — including Northville, Canton, Livonia, and Novi. No matter where your garage sits, you get the same durable dual-coat system, one-day installation, and lifetime warranty.
FAQ
Find answers to your technical questions about polyurea-polyaspartic garage floor coatings.
A sunken, heavily pitted slab requires mender flood because broadcast or roller-applied coatings cannot fill deep voids or correct an uneven surface profile. At the Beacon Hill Drive property in Plymouth, our crew found heavy pitting spread across multiple zones of the 427-square-foot slab, along with a slab that had sunk and created an uneven surface, plus a prominent crack running down the center. Our crew flooded mender compound across the deteriorated areas, filled the crack, and allowed full cure time before grinding the repair flat to achieve a consistent, level profile. Coating applied over unfilled pitting or an uneven slab telegraphs through the finished system. MotorCity Floors and Coatings floods mender across pitted or sunken zones whenever the damage requires it.
Heavy oil contamination requires oil extraction before grinding because oil that has soaked deep into the concrete cannot be removed by grinding alone — grinding only addresses the surface layer, while petroleum can penetrate well below it. At the Saint Andrews Drive property in Plymouth, oil had saturated multiple zones of the 580-square-foot slab from years of vehicle use in a working garage. Our crew performed oil extraction on the affected areas before any grinding began, drawing the oil out of the concrete from depth, then ran diamond grinding equipment across the full slab. Coating applied over residual oil contamination risks adhesion failure over time. MotorCity Floors and Coatings performs oil extraction whenever saturation extends below the surface.
Grinding sometimes reveals hidden cracks because an old coating can bridge over a crack and conceal it from view, even as the crack continues to move underneath. At the River Bend Drive property in Plymouth, the garage had an existing blue-grey epoxy coating that had dulled and lost its bond in places. When our crew diamond-ground the slab to strip the epoxy, the grind exposed a wide, irregular crack along the control joint at the garage door threshold — movement at the threshold had opened it over time while the old coating masked it. Our crew applied mender compound along the full length of the crack, allowed it to cure, then ground it flush before coating. This is why MotorCity Floors and Coatings always grinds fully before assessing a slab’s true condition, rather than coating over what the old finish appears to show.
Plymouth’s freeze-thaw climate requires polyurea-polyaspartic systems because epoxy products are rigid and crack under the same seasonal stress that flexes concrete slabs. Each Michigan freeze-thaw cycle expands and contracts the slab, working existing cracks wider and driving moisture deeper into the concrete. Polyurea-polyaspartic systems are engineered to flex with that movement and maintain bond through repeated cycles, while epoxy products applied in the same conditions crack and delaminate as the substrate moves beneath them. MotorCity Floors and Coatings applies polyurea-polyaspartic systems specifically because they hold up to Michigan winters where rigid coatings fail.
For deeper technical questions about our surface preparation methods, moisture diagnostics, and material science, visit our Garage Floor Coating Technical Guide
The MotorCity Advantage
MotorCity Floors and Coatings specializes in professional-grade polyurea-polyaspartic systems. These dual-coating systems are replacing epoxy products constrained by older chemistry. Our systems deliver strong chemical resistance, superior durability, greater flexibility, shorter cure times, and proven UV stability that maintains color for decades. We back every installation with an industry-leading warranty.
Each project includes thorough diamond grinding preparation, flexible polyurea crack repair, and careful application to ensure consistent coverage across the full slab. When we encounter oil contamination, we extract it before grinding. When prior coatings have failed, we strip them completely. When moisture readings exceed acceptable thresholds, we apply a barrier primer before the base coat goes down. Every condition Plymouth slabs present gets addressed at the root — not covered over.
