 Skip to content
Polyurea-Polyaspartic Garage Floor Coating in Rochester Hills, MI
QUESTIONS? NEED A QUOTE?
Welcome to MotorCity Flooring and Coatings’ showcase of garage floor coating projects in Rochester Hills, MI. On this page, you’ll find detailed project stories from locations throughout Rochester Hills—real installations that demonstrate our commitment to quality, durability, and professional craftsmanship.
Our specialist teams serve every neighborhood in Rochester Hills with comprehensive garage floor coating services. Each project begins with thorough concrete preparation: diamond grinding to remove old coatings and contaminants, repairing cracks and pitting, and addressing moisture concerns. We then apply our advanced polyurea-polyaspartic coating system—a hybrid technology that combines the incredible durability of polyurea with the UV stability and fast cure times of polyaspartic coating.
This dual-component system creates floors that withstand Michigan’s harsh weather cycles—from sub-zero winters to humid summers—without cracking, peeling, or yellowing. The chemical-resistant surface repels oil, salt, and automotive fluids while standing up to constant pressure from vehicle tires and foot traffic.
Every installation includes decorative flakes for professional appearance and customizable traction levels for safety. The result? A garage floor coating with exceptional UV resistance, reduced hot tire pickup, greater flexibility, excellent chemical resistance, superior abrasion resistance, wide temperature application range, and better temperature cycling than epoxy. Our system cures in hours rather than days and comes with our industry-leading warranty.
For ultimate convenience, we complete installations in just one day. We arrive early and work efficiently to minimize disruption to you and your neighbors. You don’t need to be home if you have other commitments.
Explore our projects in Rochester Hills to see our process, results, and the difference a professional installation of a polyurea garage floor coating system makes.
Polyurea Garage Floor Coating
on Maplehill Rd
Maplehill Road, Rochester Hills, Michigan 48306
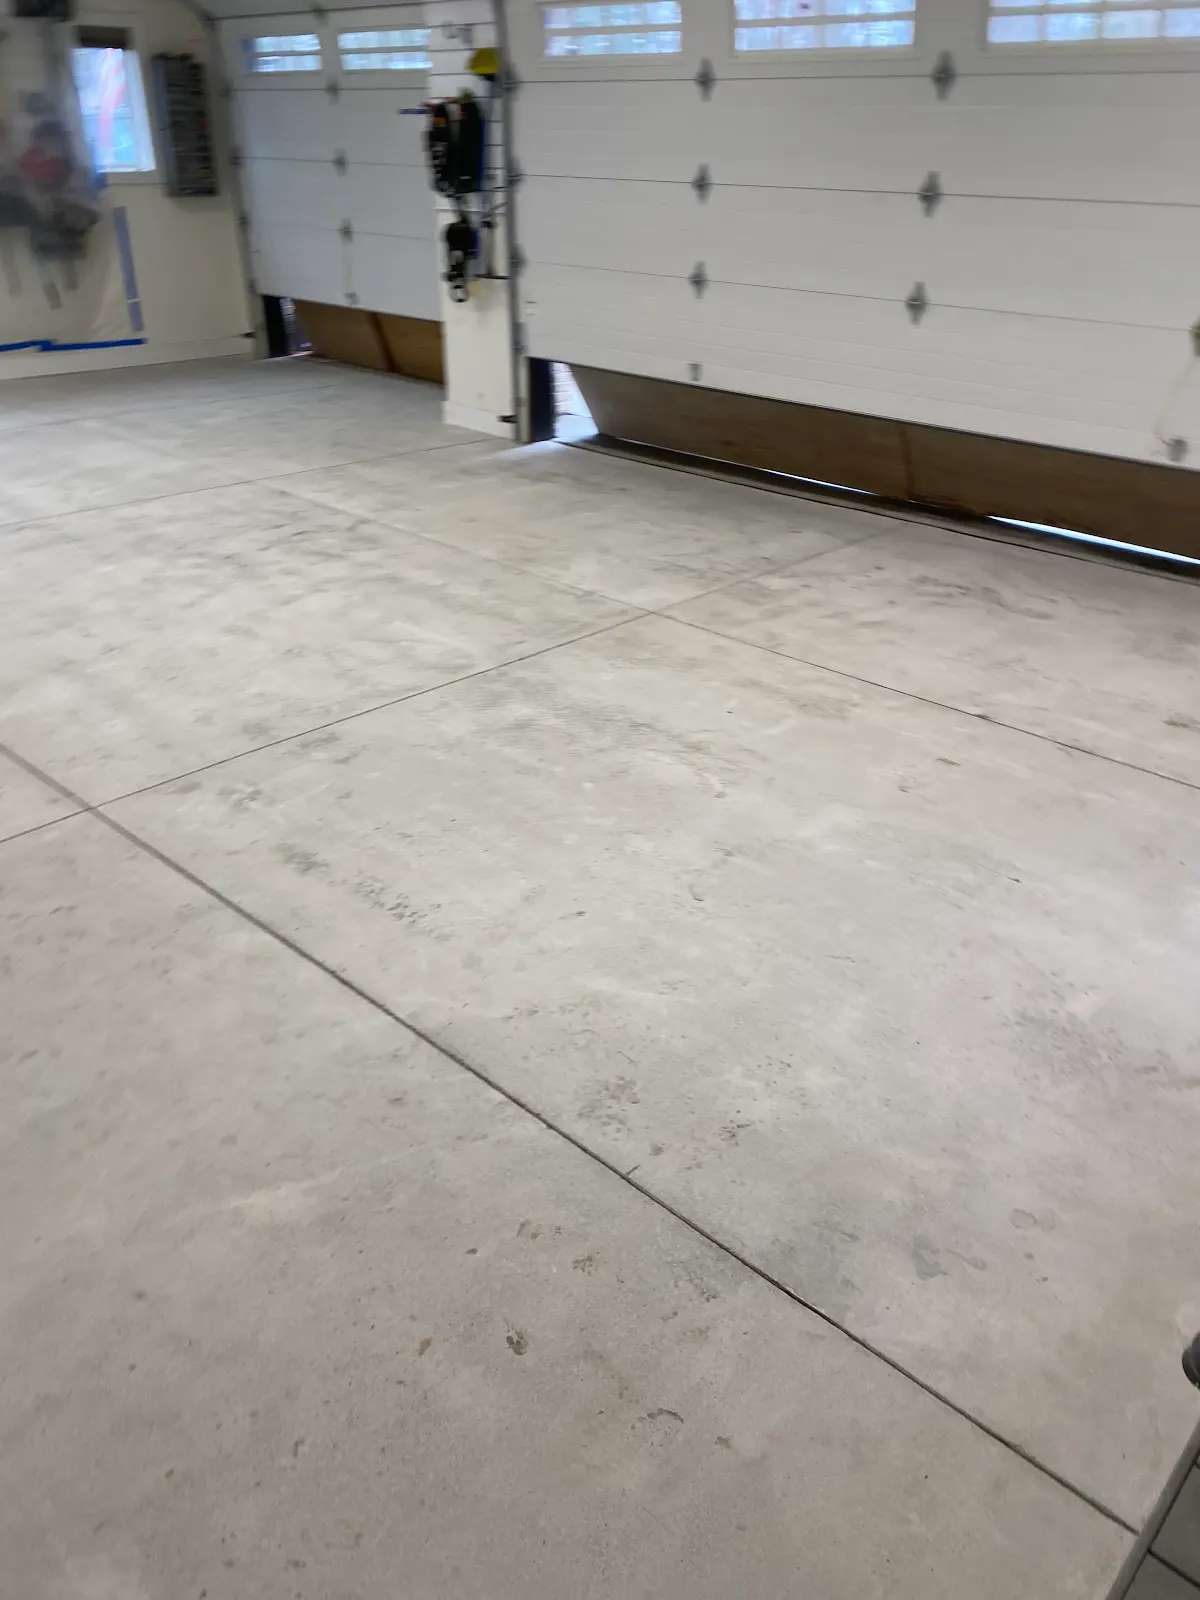
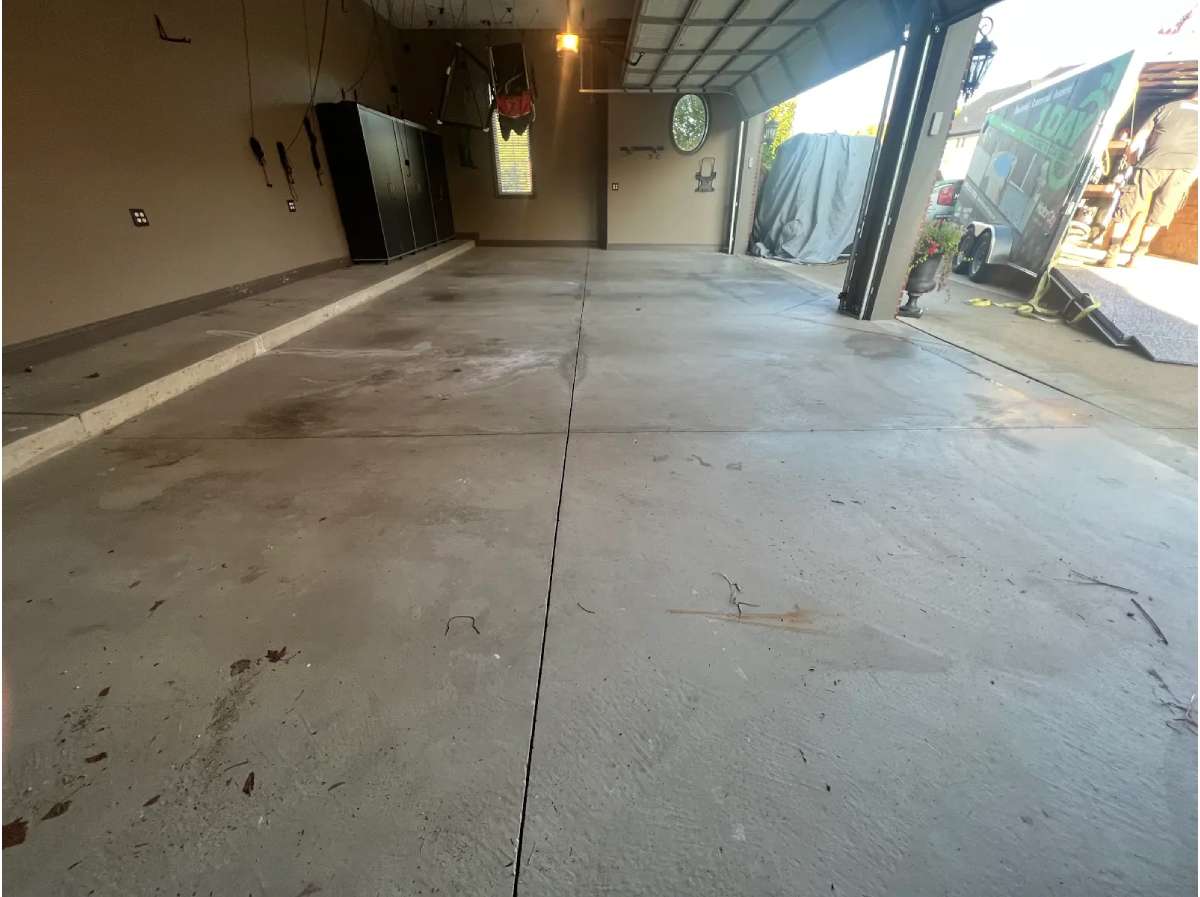
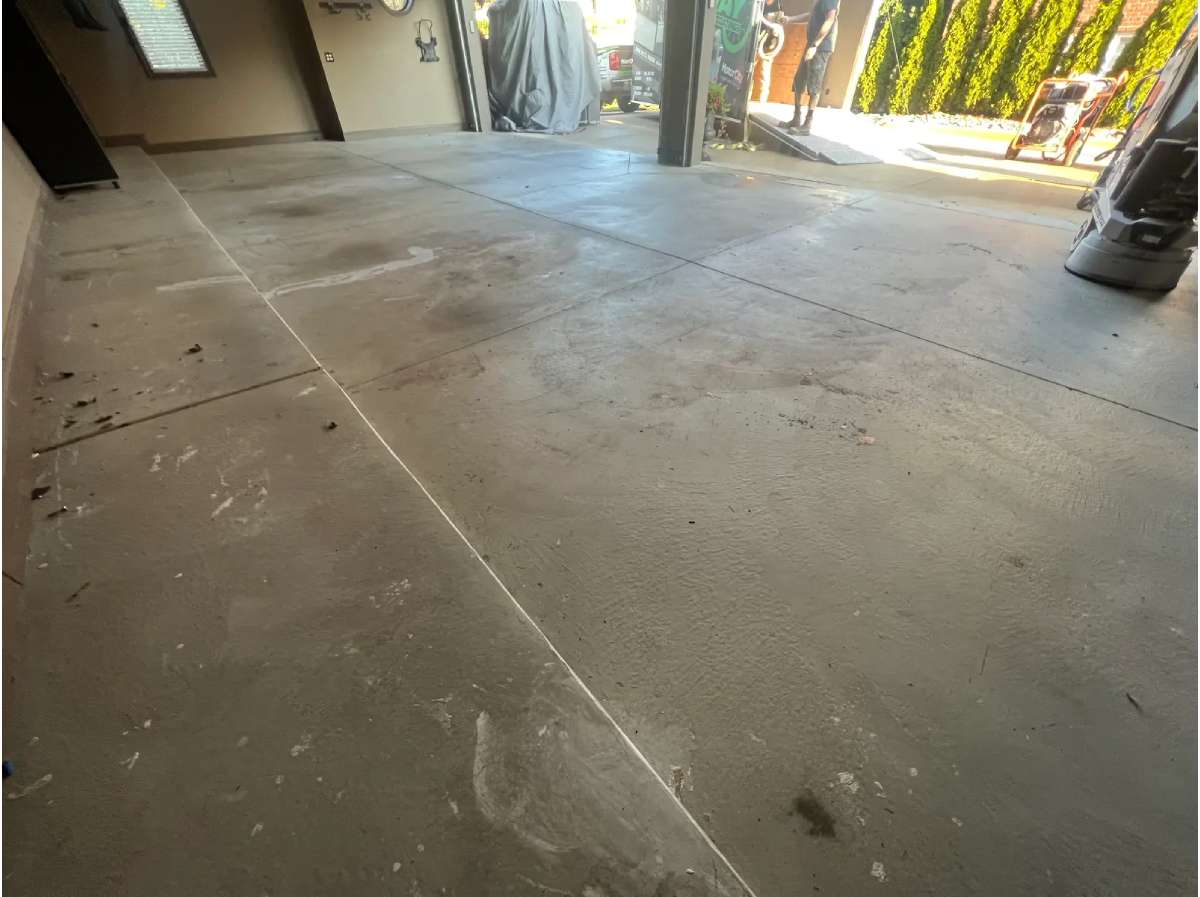
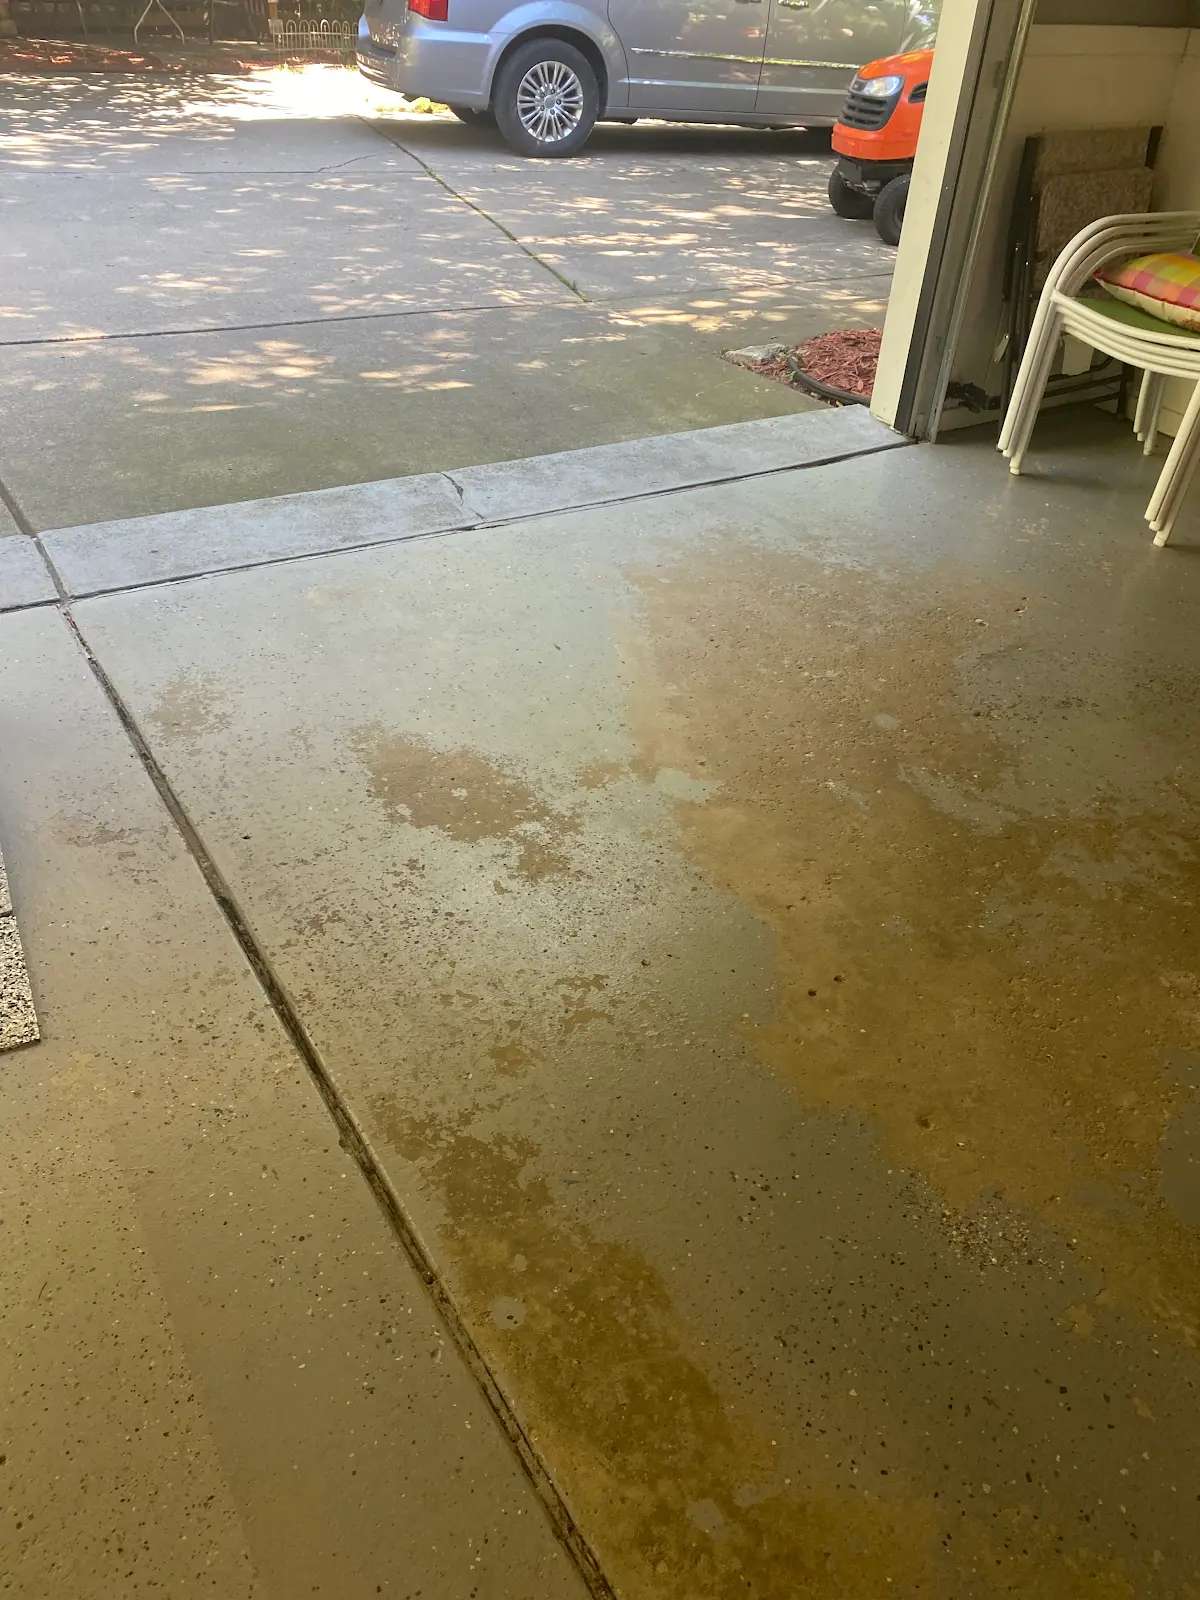
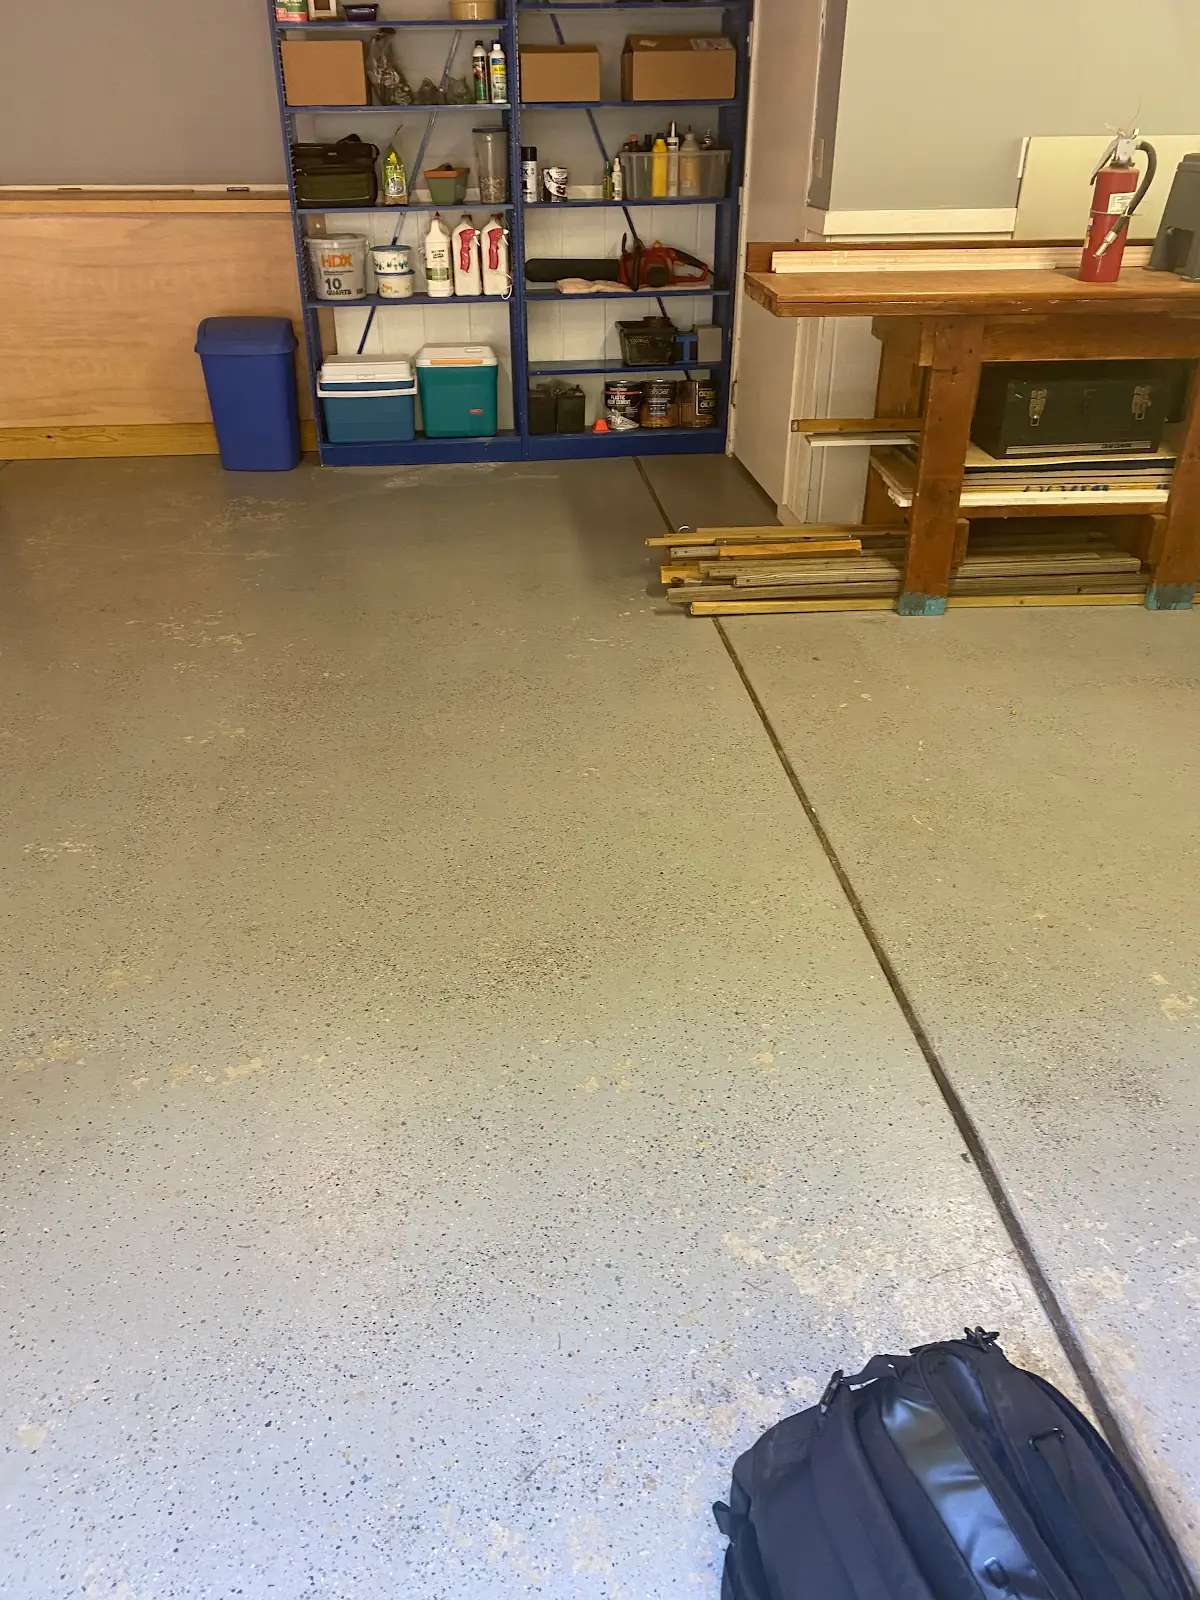
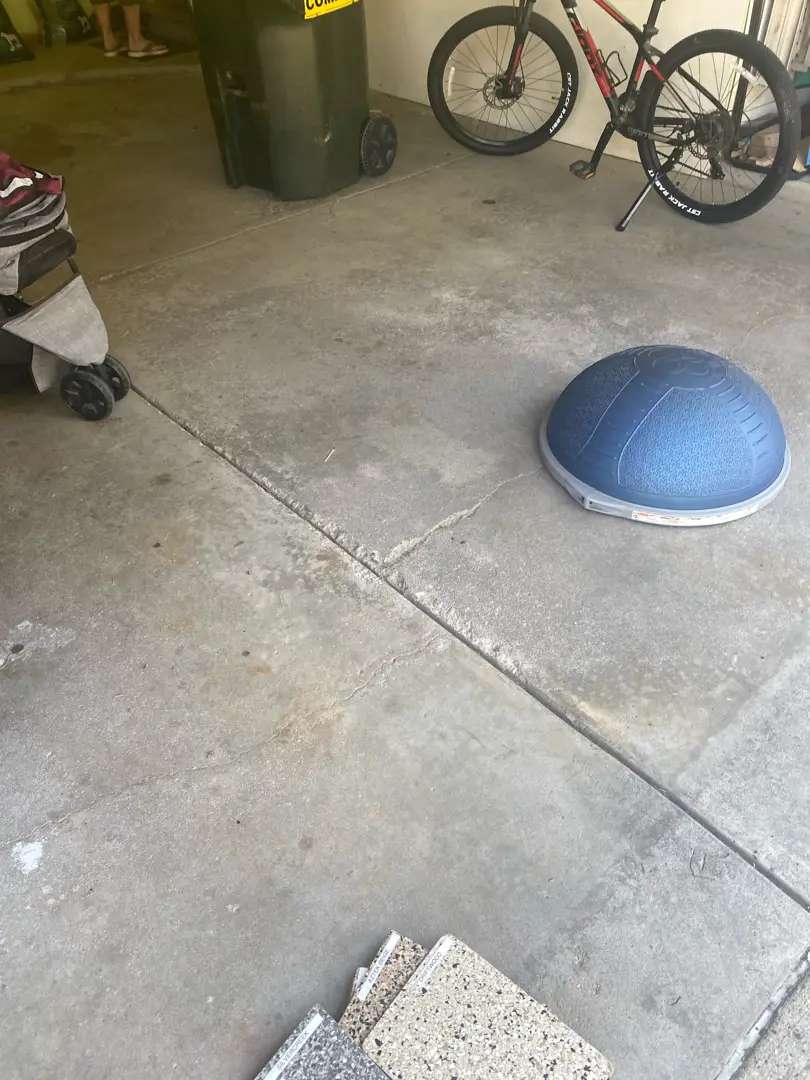
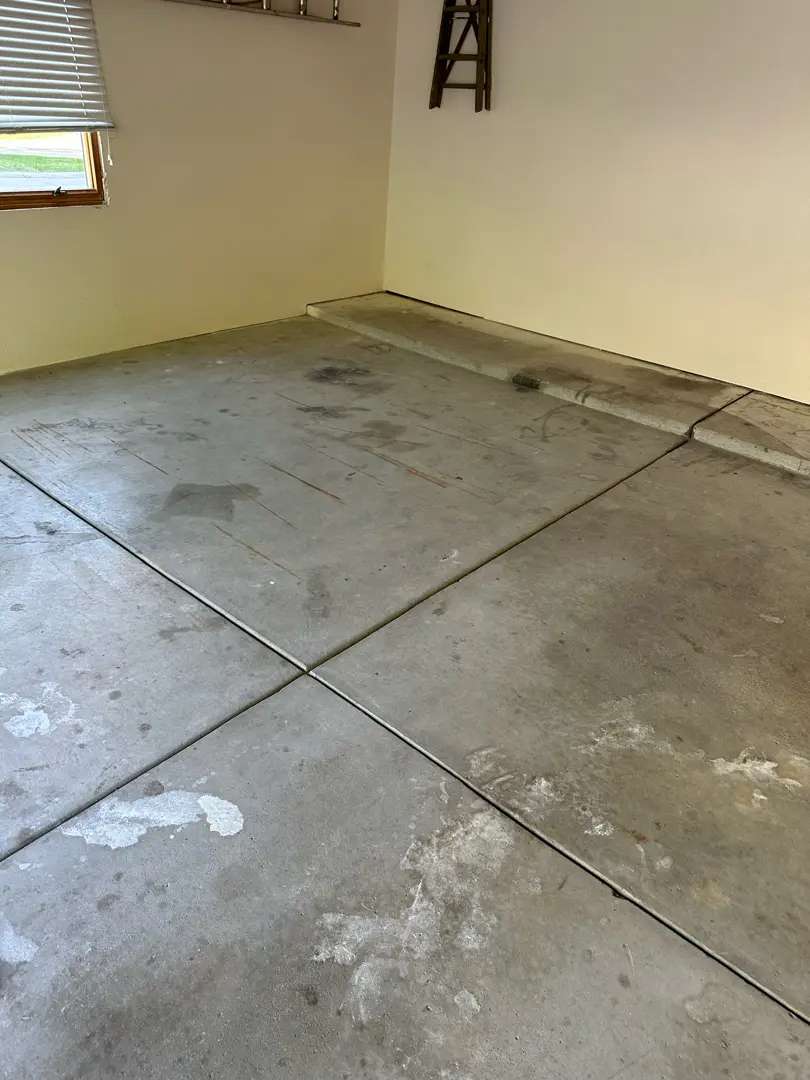
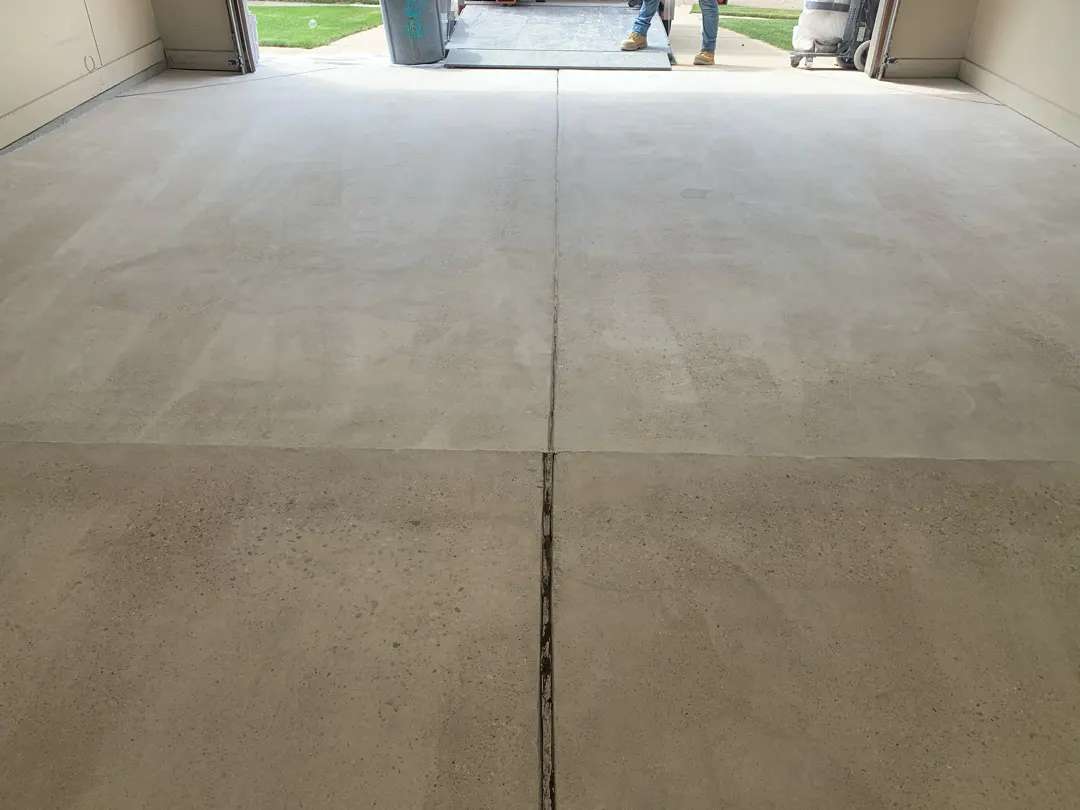
When the homeowners on Maplehill Road reached out to MotorCity Flooring and Coatings, they had a 757-square-foot garage floor in remarkably good condition. Unlike many Michigan garages showing years of harsh winter damage, this concrete exhibited only minimal pitting—an ideal canvas for a polyurea garage floor coating system.
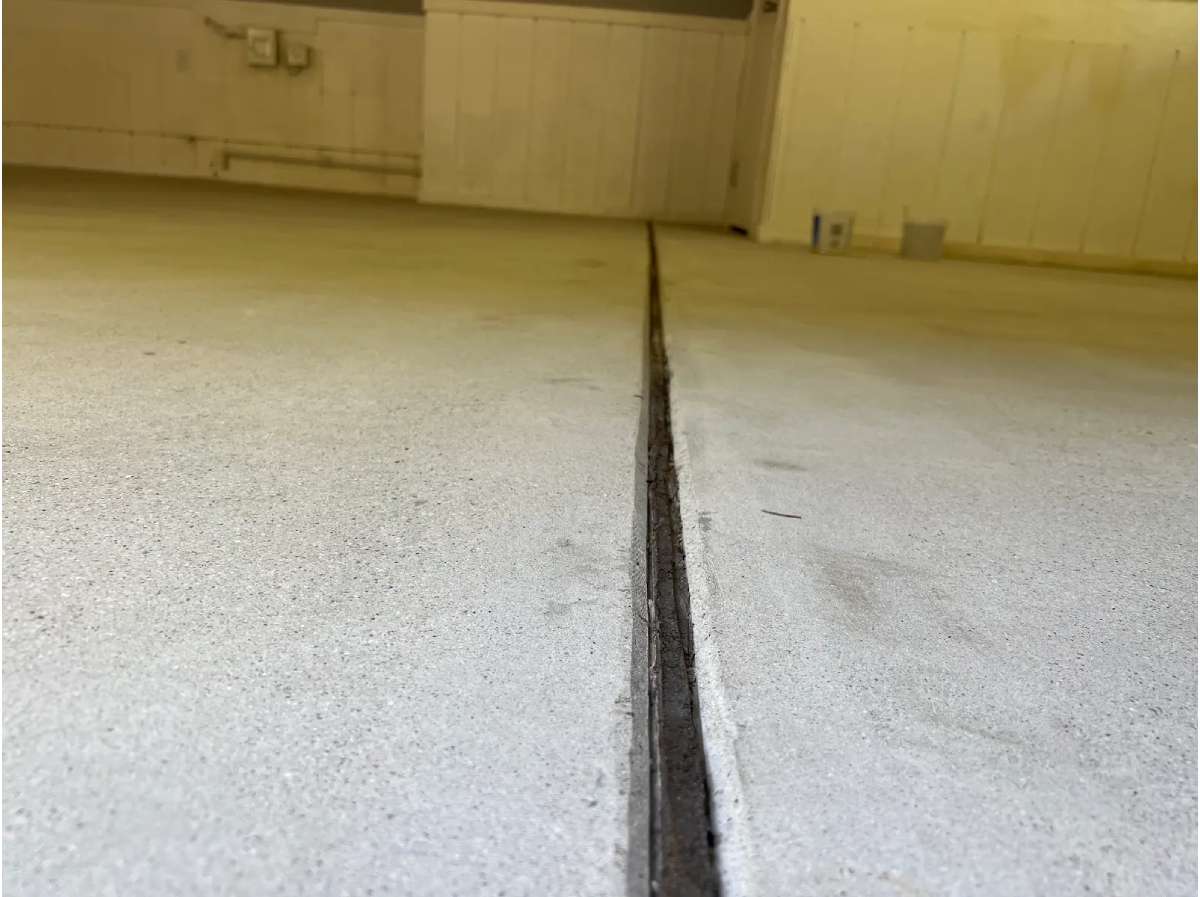
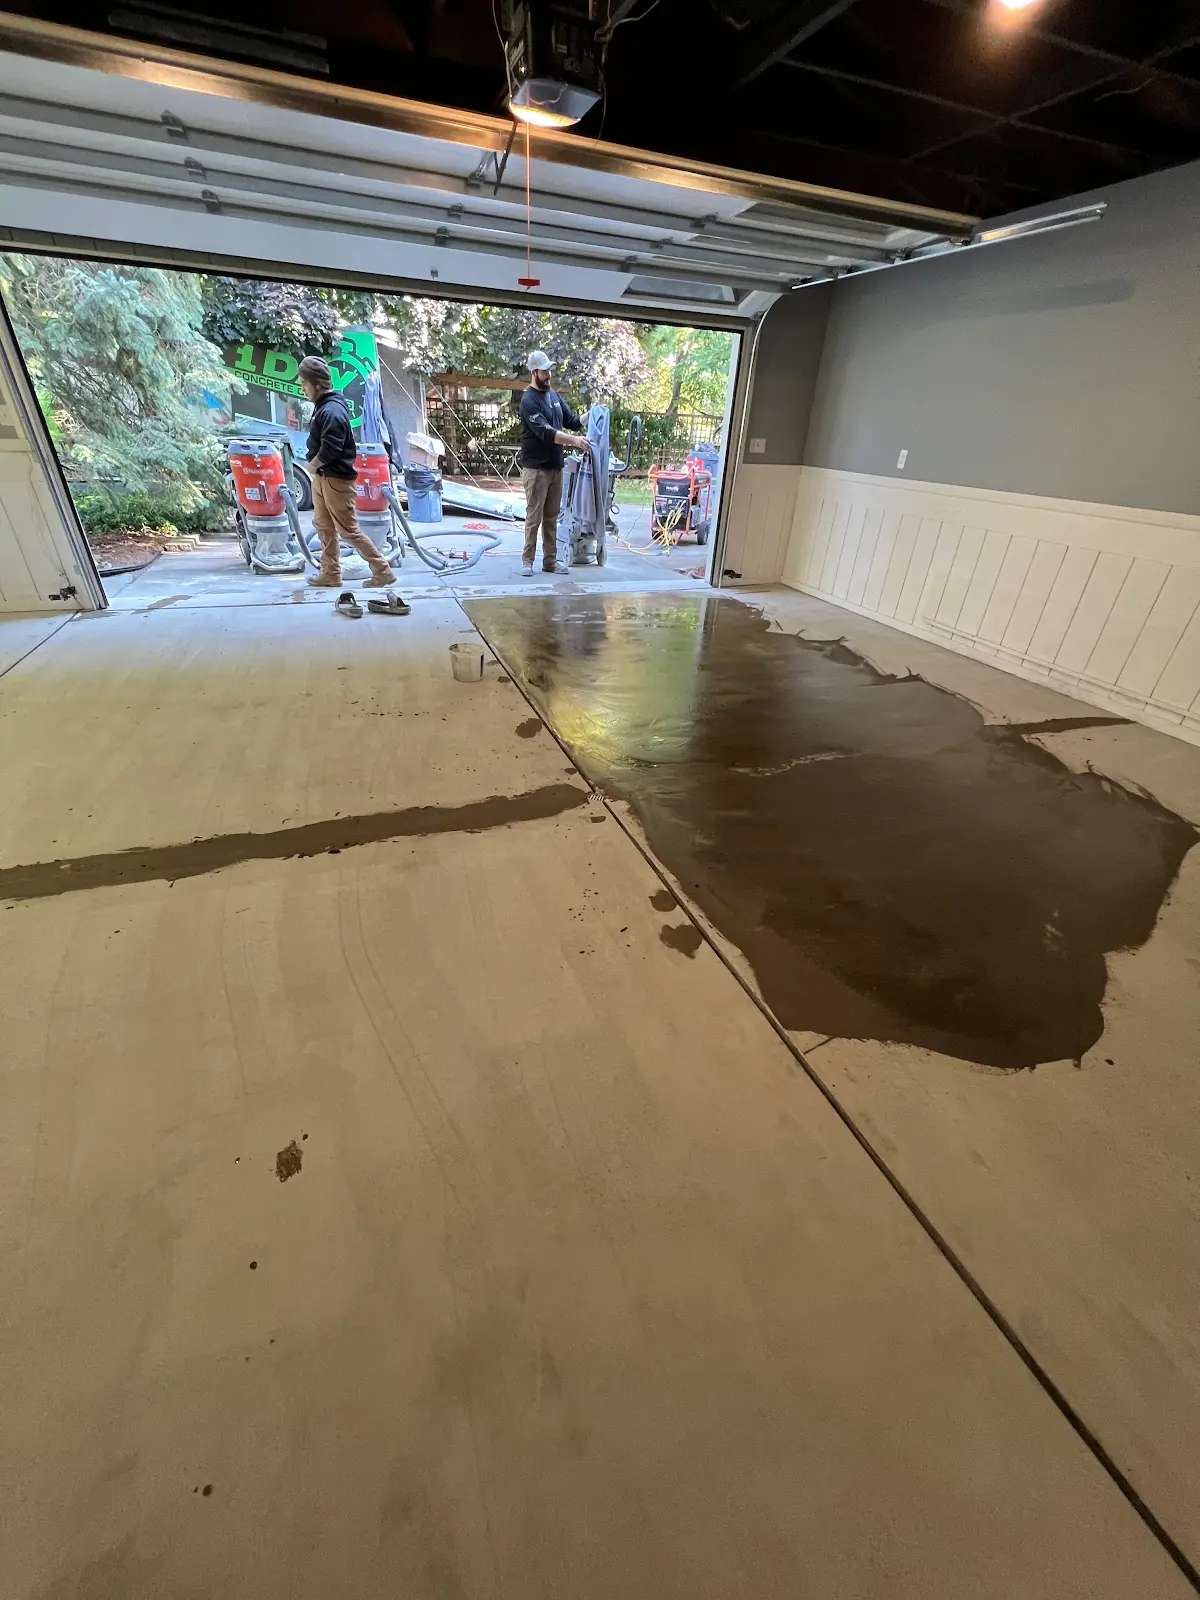
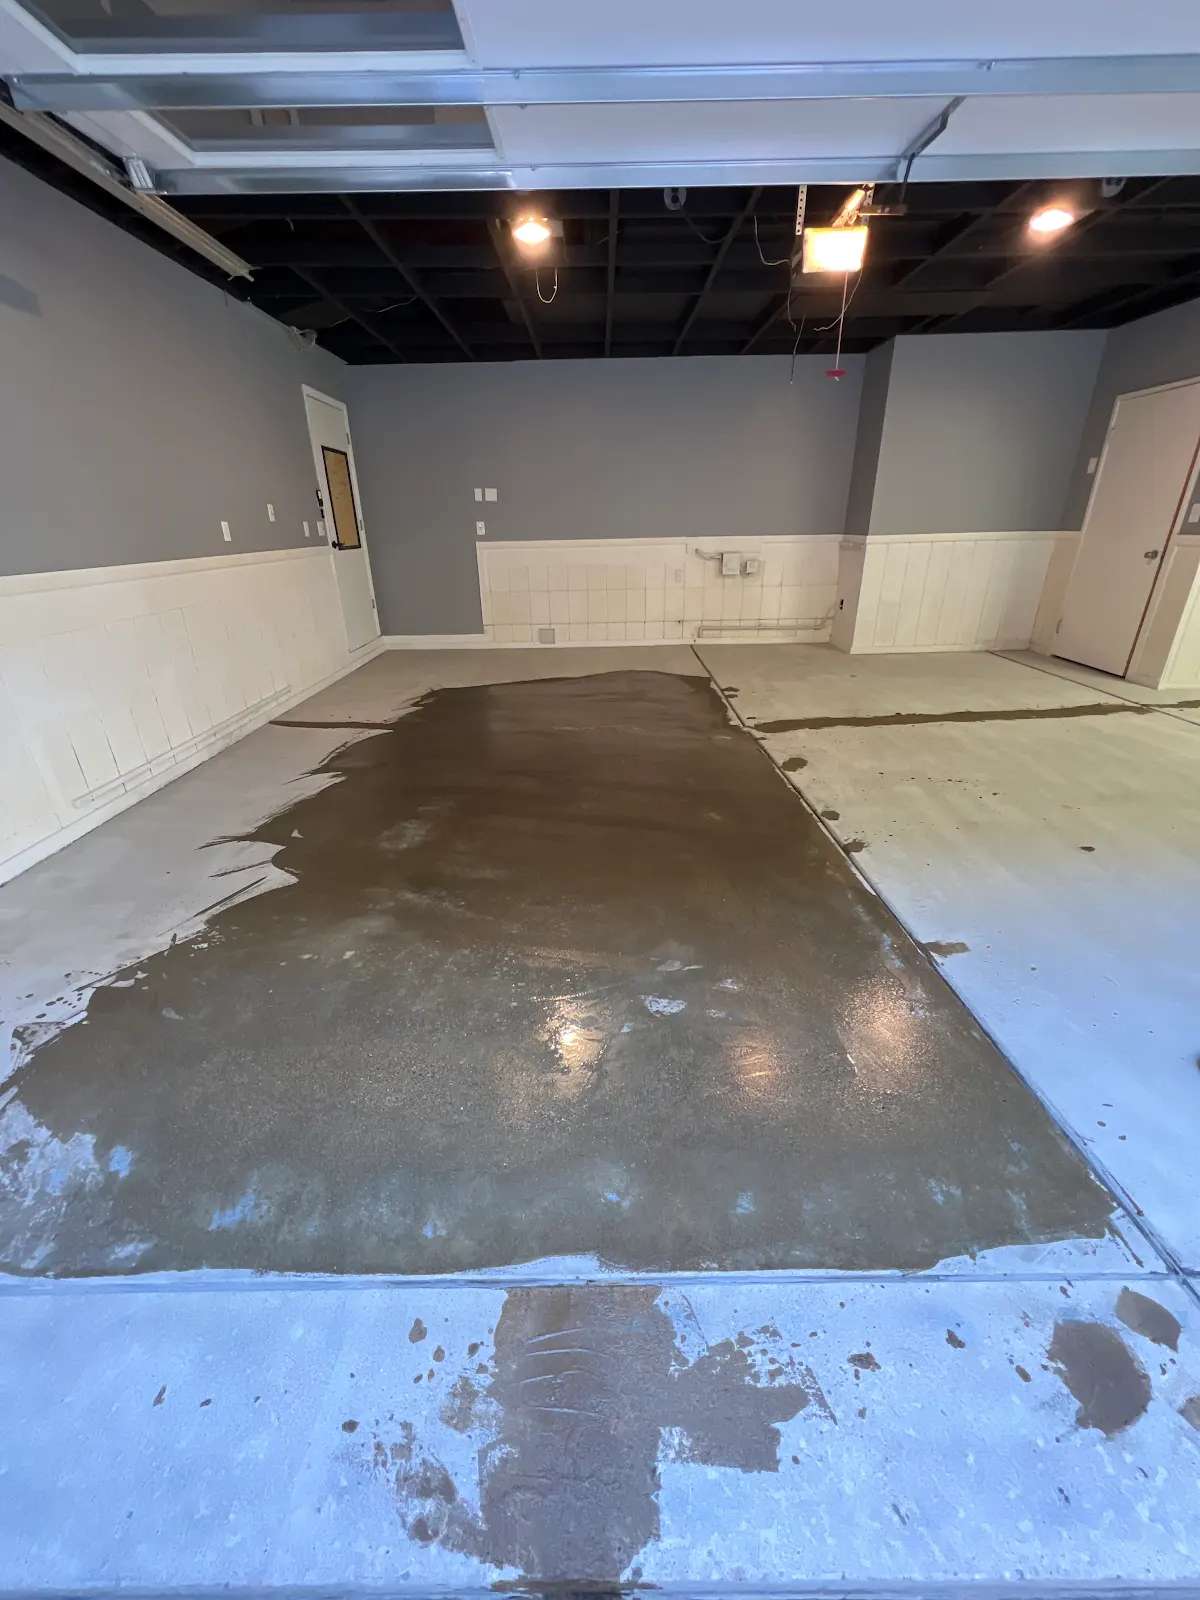
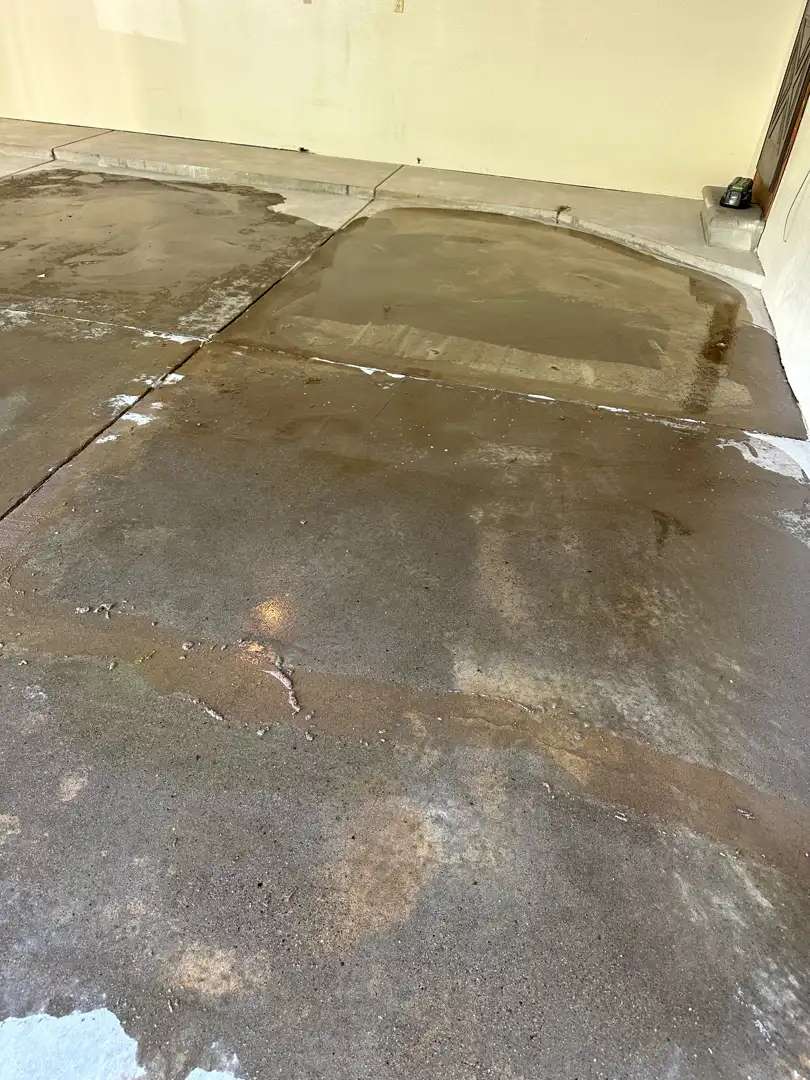
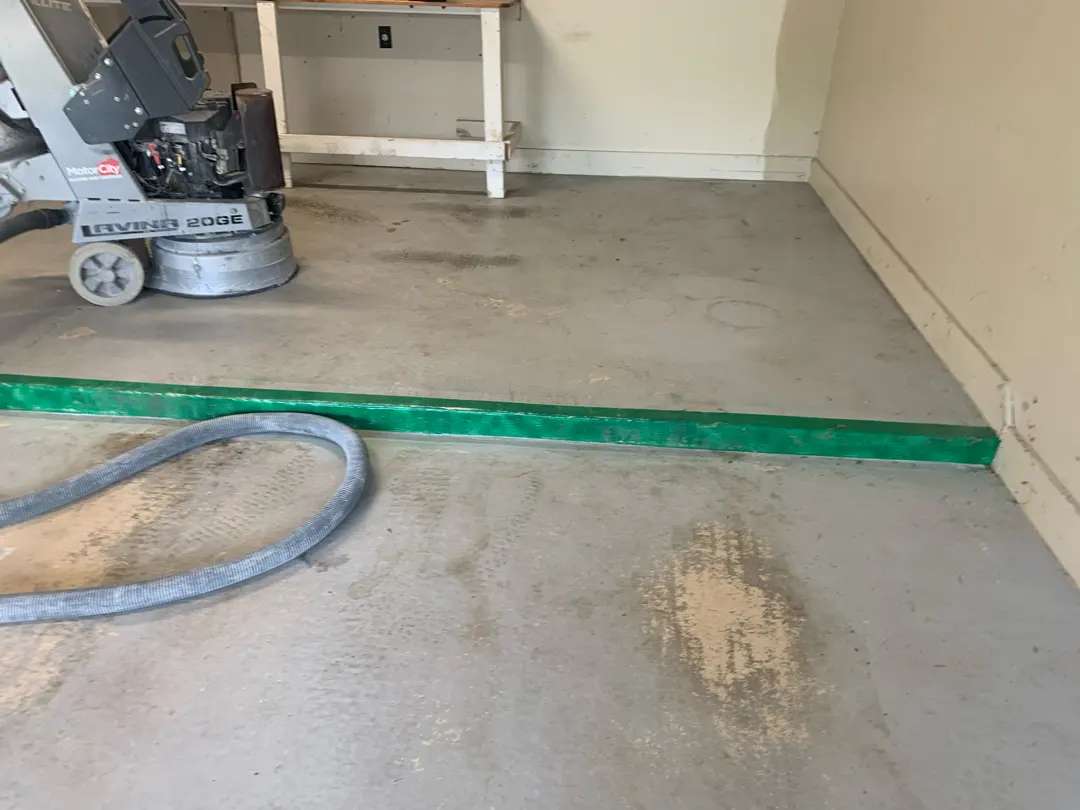
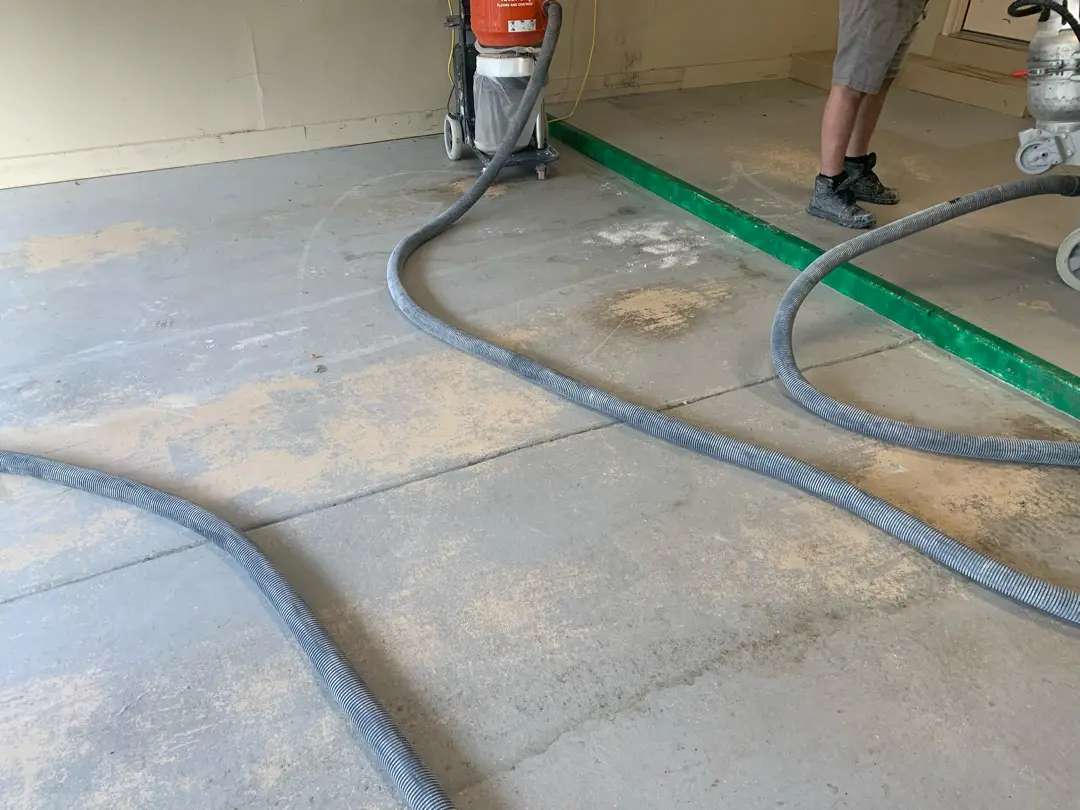
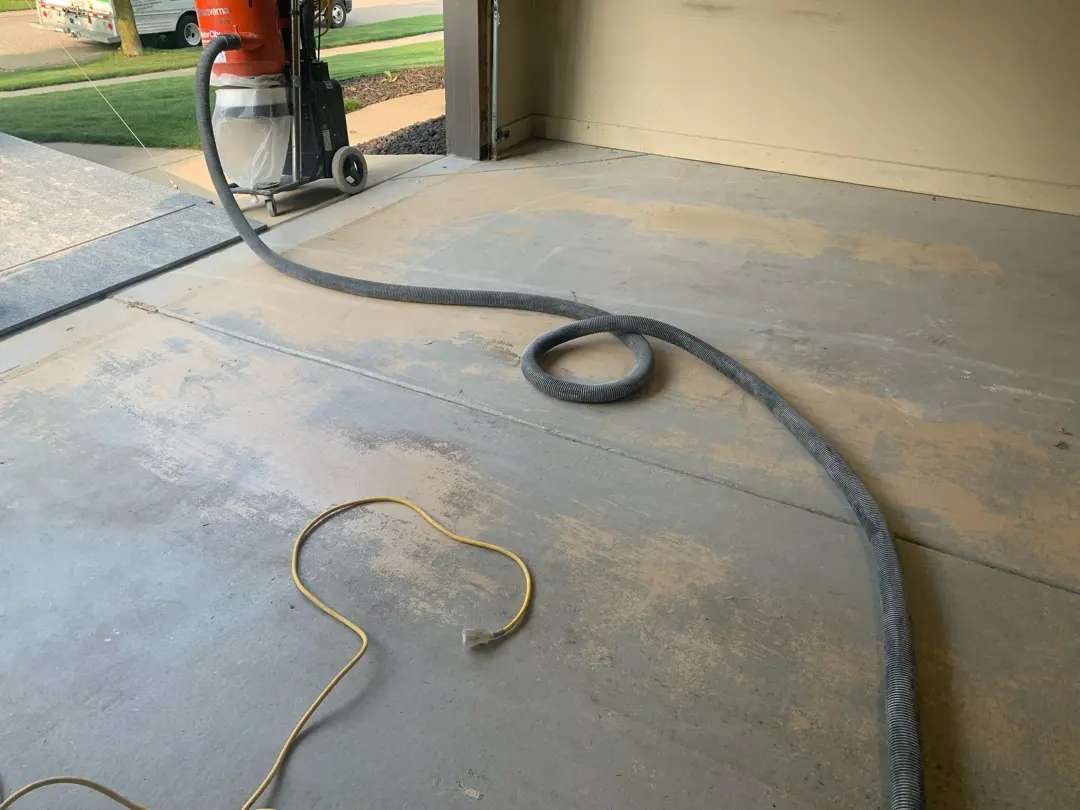
Surface Preparation
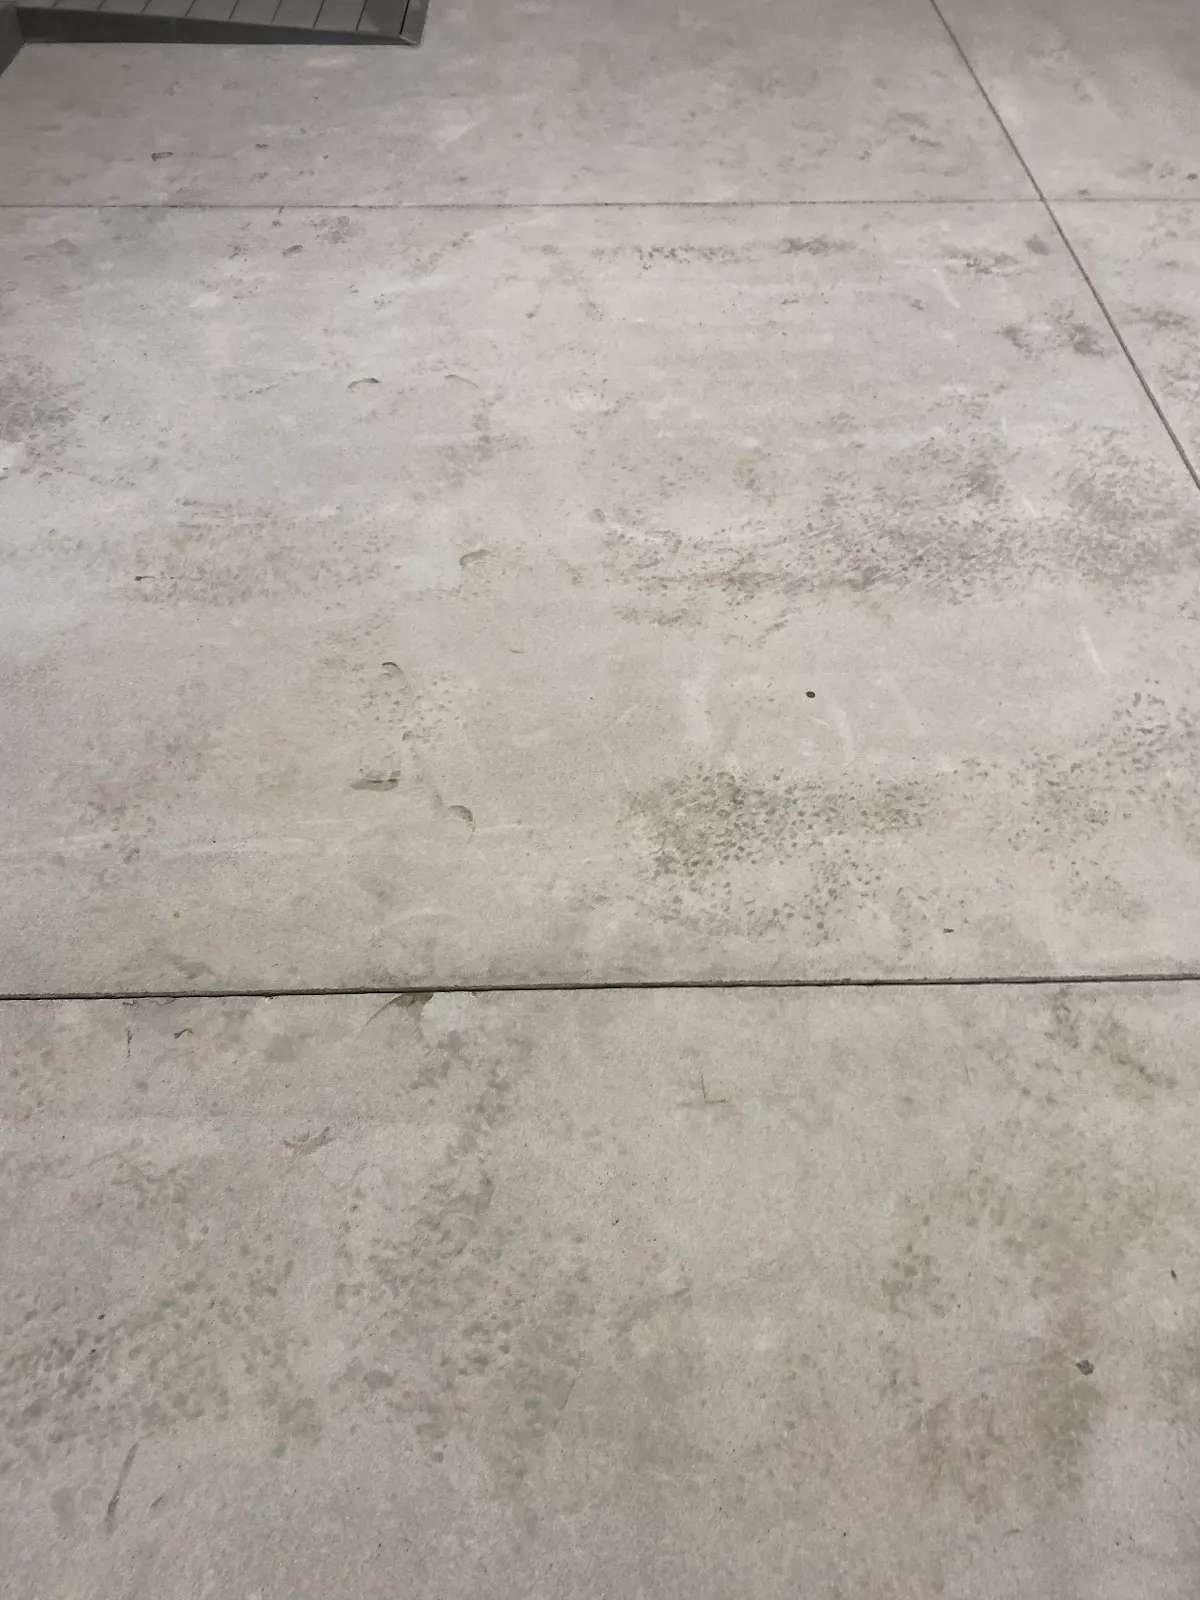
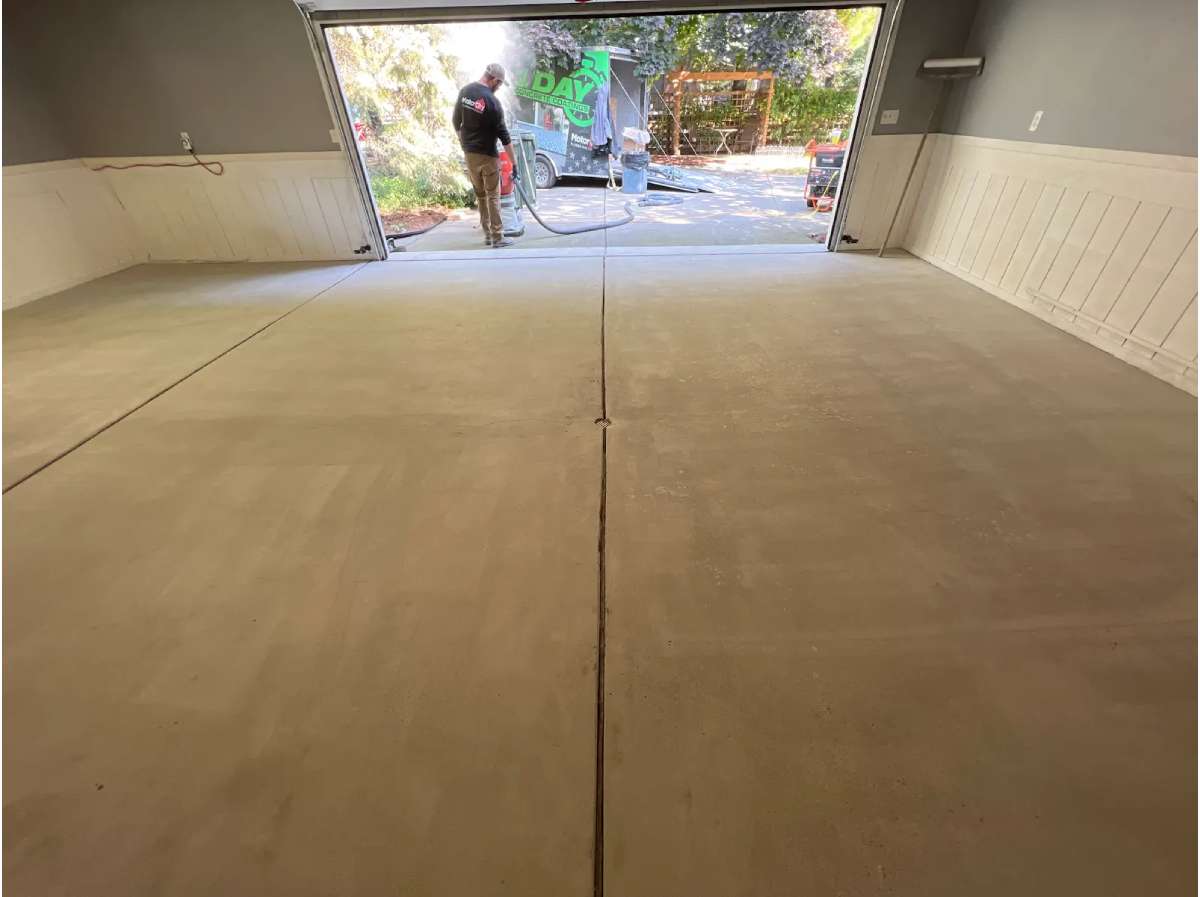
The MotorCity team began with thorough diamond grinding across the entire garage floor. This critical step opened the concrete pores and created the mechanical profile necessary for optimal coating adhesion. The grinding revealed clean, light grey concrete beneath any surface contaminants, with uniform texture and consistent scratch patterns that would ensure maximum bond strength. Our crew paid special attention to perimeter areas and the garage door threshold, to ensure complete edge preparation.
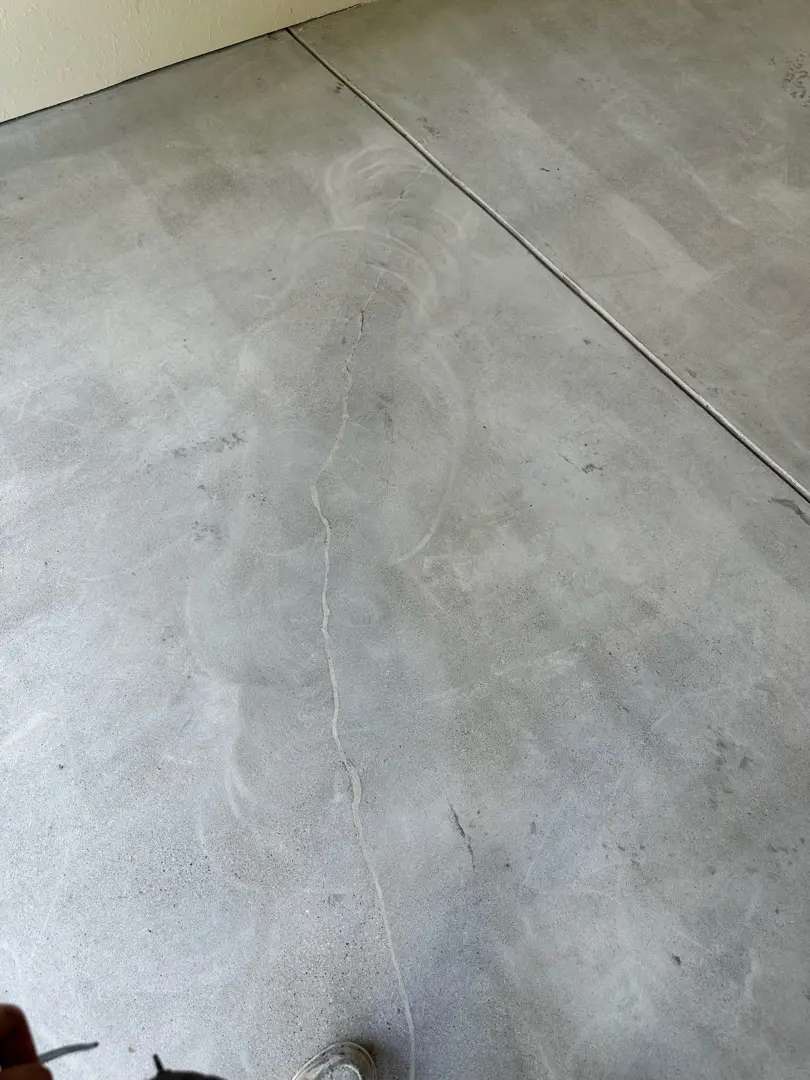
Minimal Repairs
Given the excellent condition of the concrete, repairs were minimal. Our team mixed a small batch of two-part mender (0.25 liters each of Part A and Part B) with 0.1 bag of sand, carefully filling the few minor pits and surface irregularities. The small quantities confirmed what the initial inspection revealed—this was an exceptionally sound concrete slab.
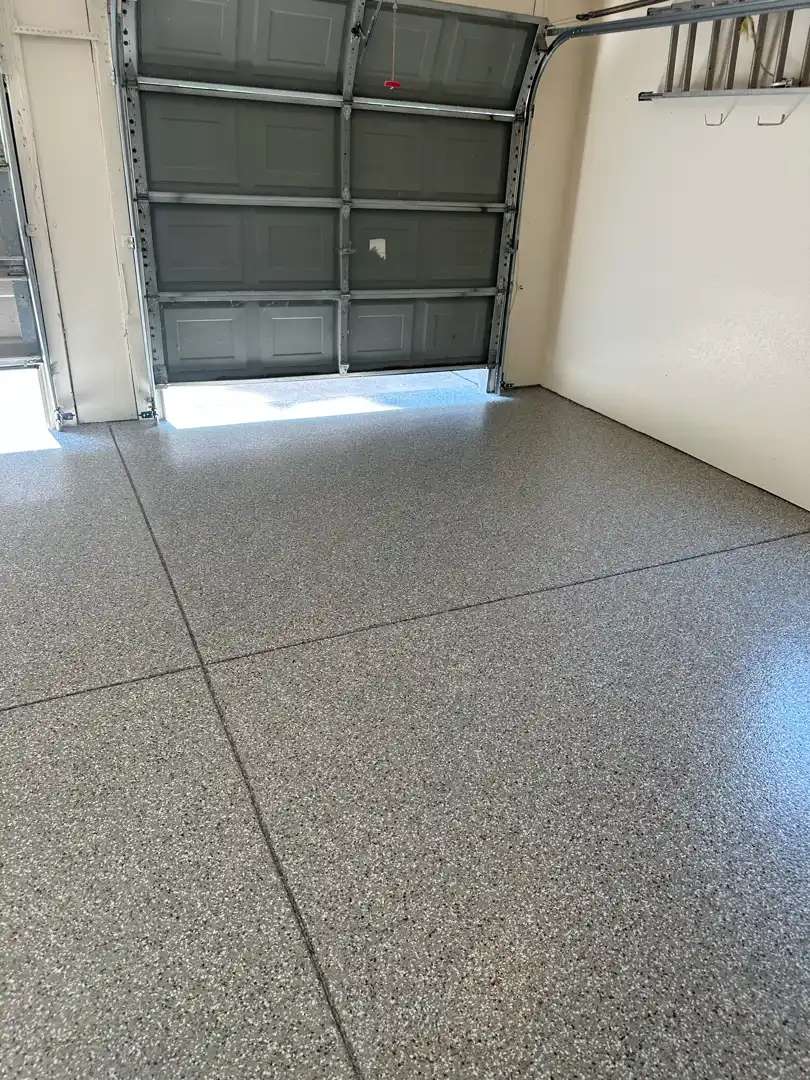
Base Coat and Decorative Flakes
Once repairs cured, our crew applied the grey base coat using 6 liters of base paint and 3 liters of hardener. The two-part polyurea/polyaspartic system was precisely measured and mixed, creating a durable, fast-curing foundation. Working from back to front, they rolled the coating in overlapping passes, watching the transformation as bare concrete disappeared beneath the smooth grey finish.
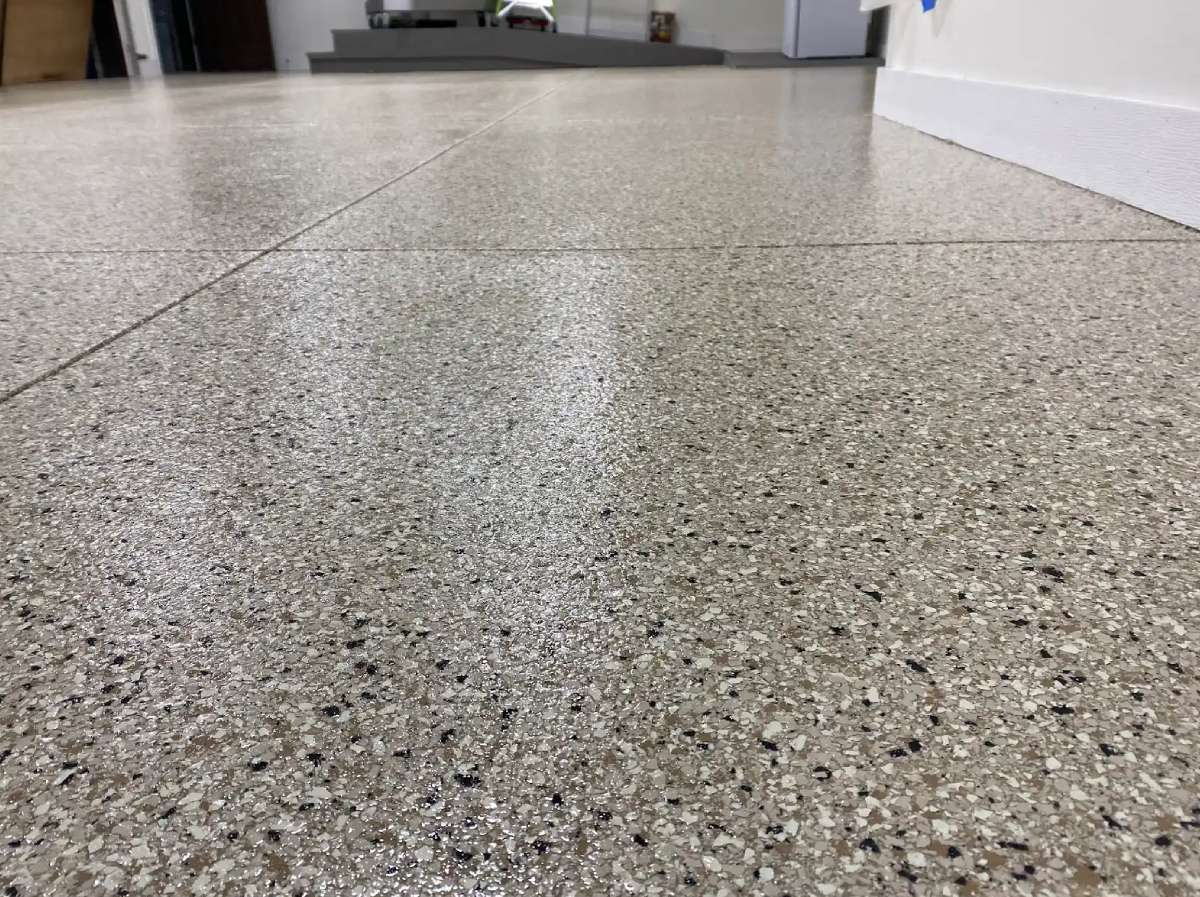
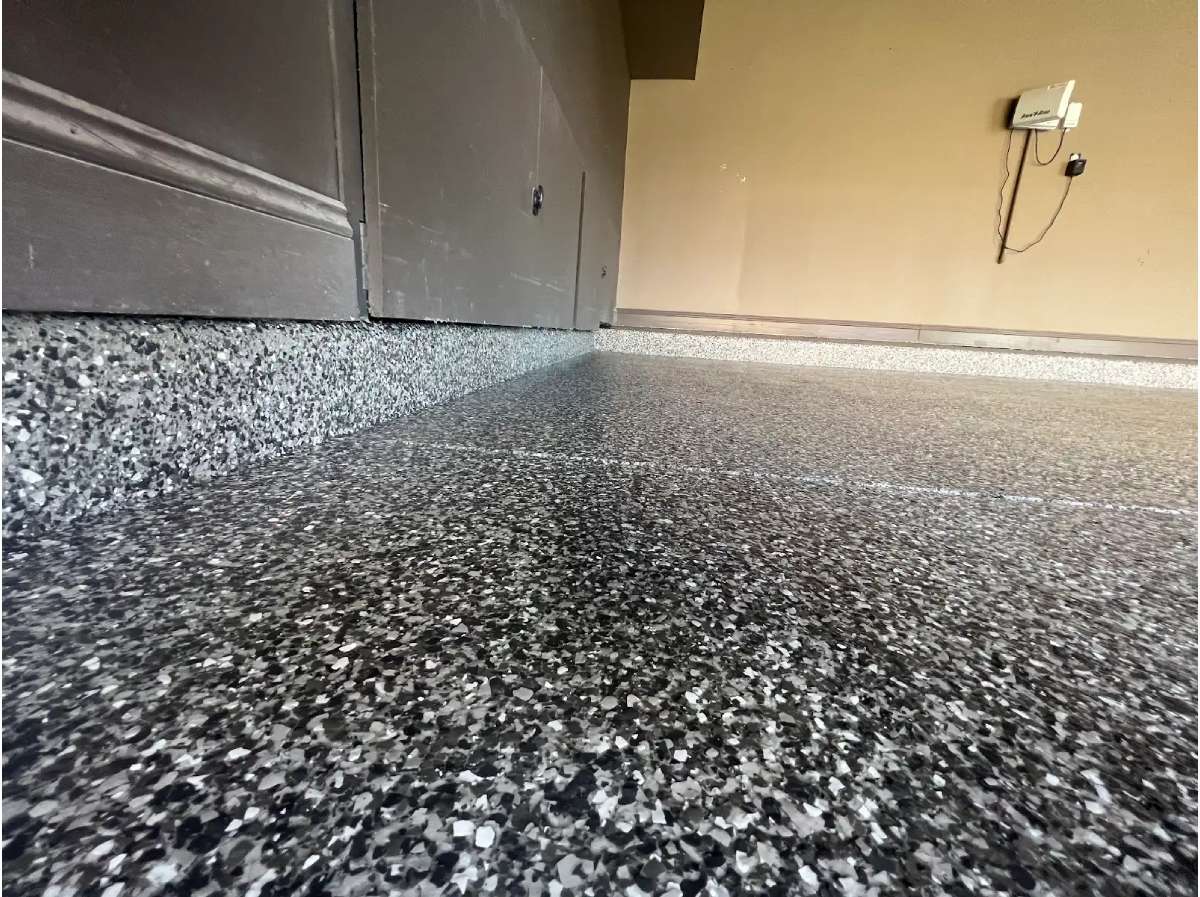
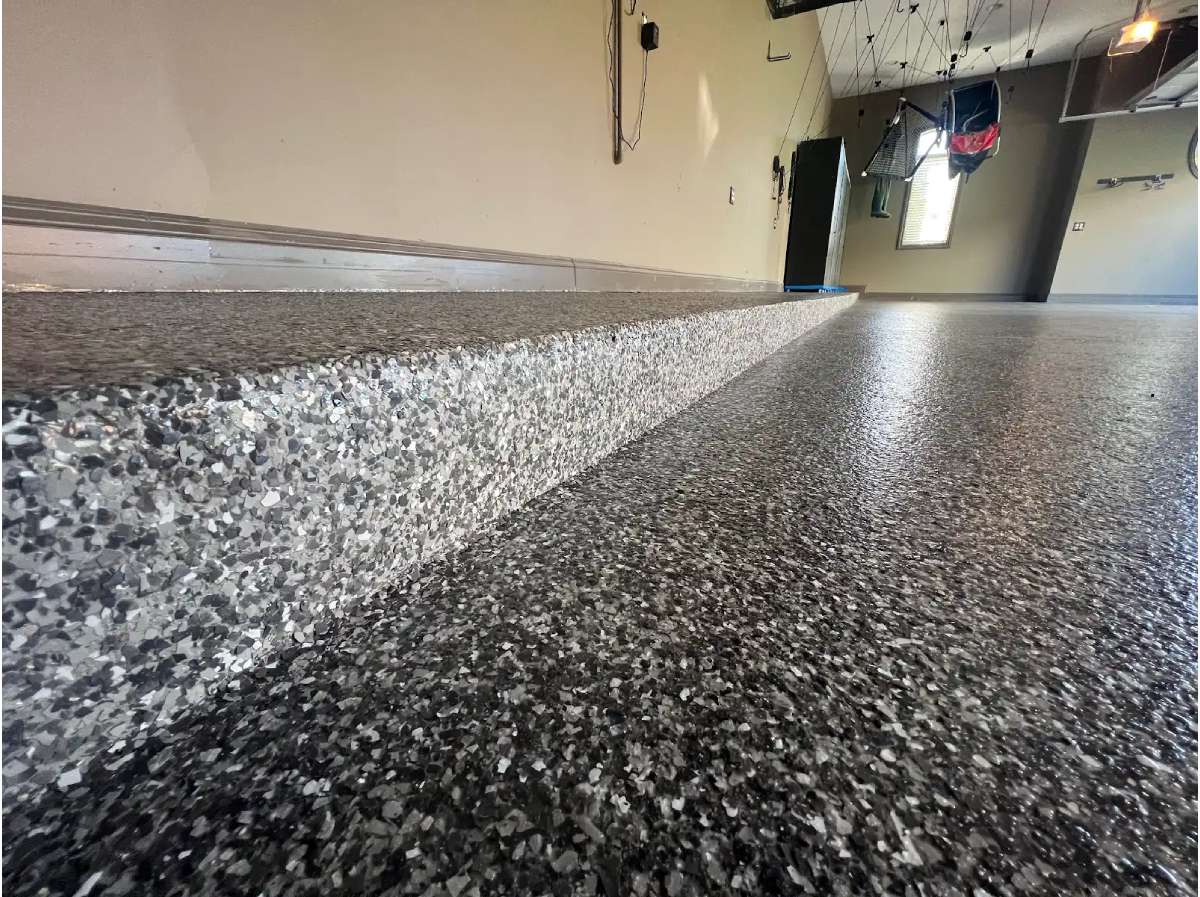
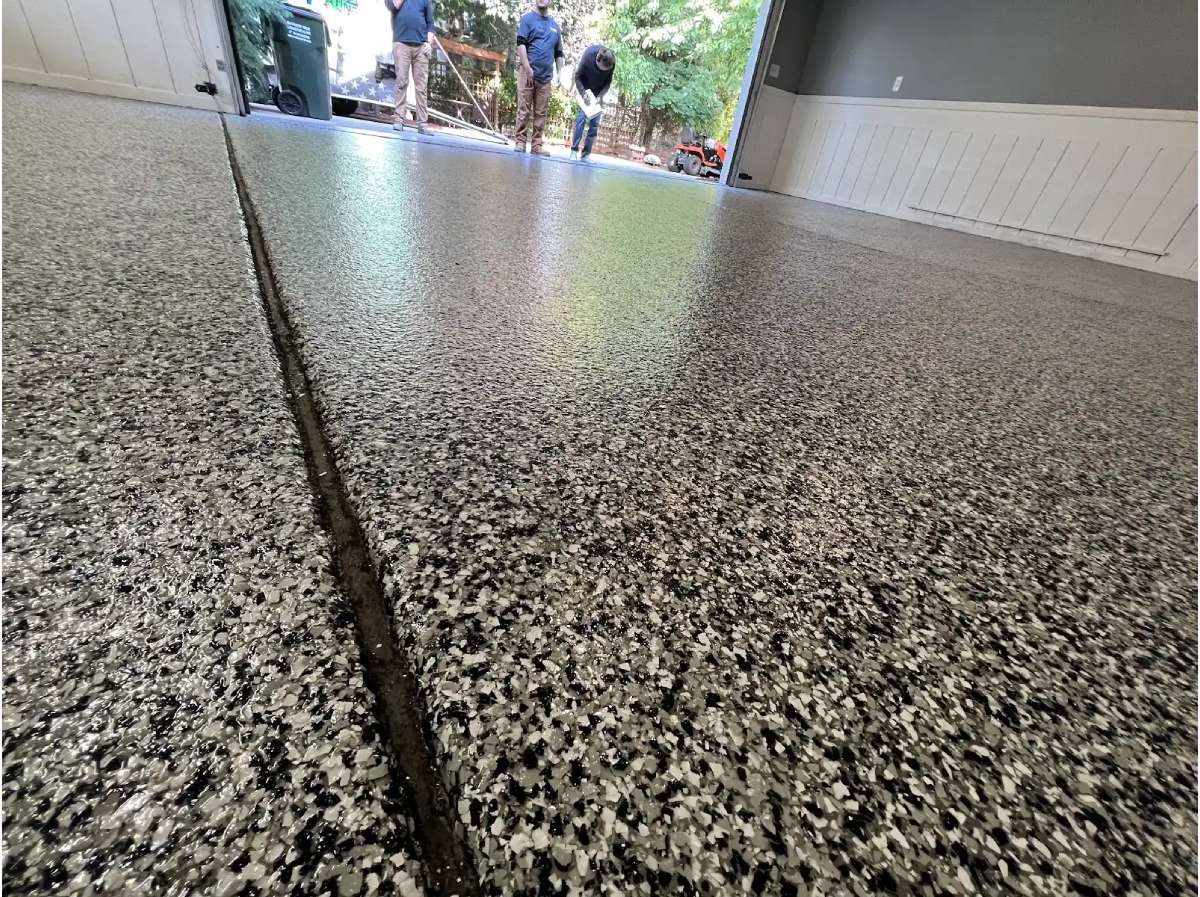
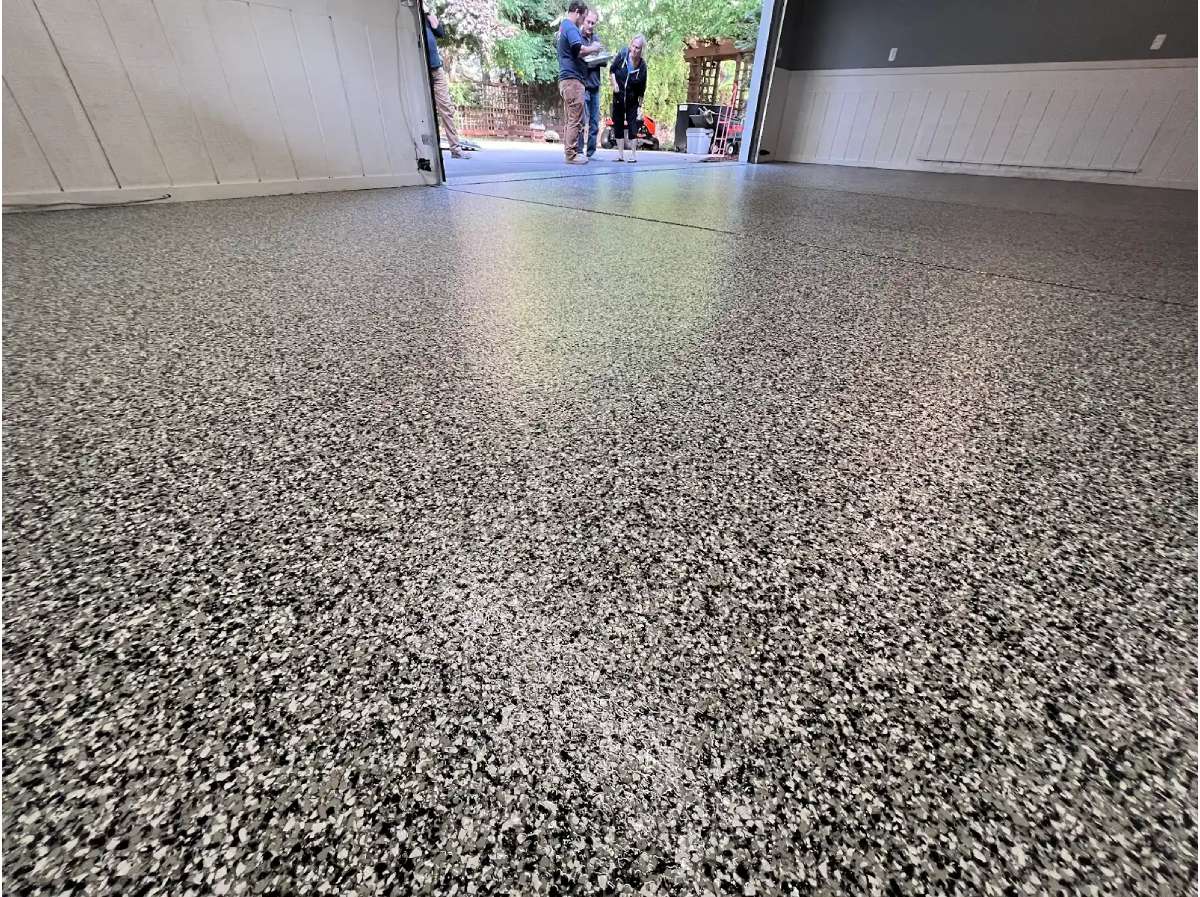
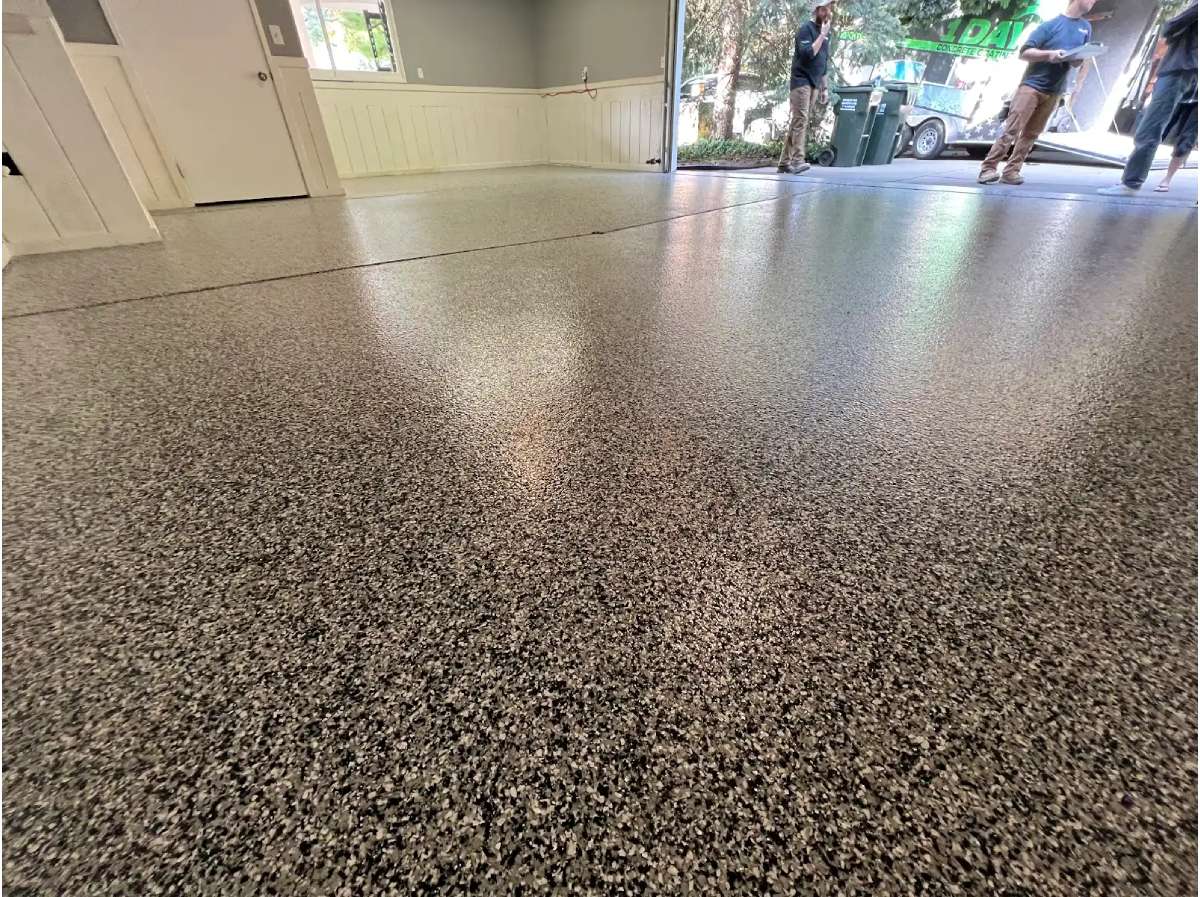
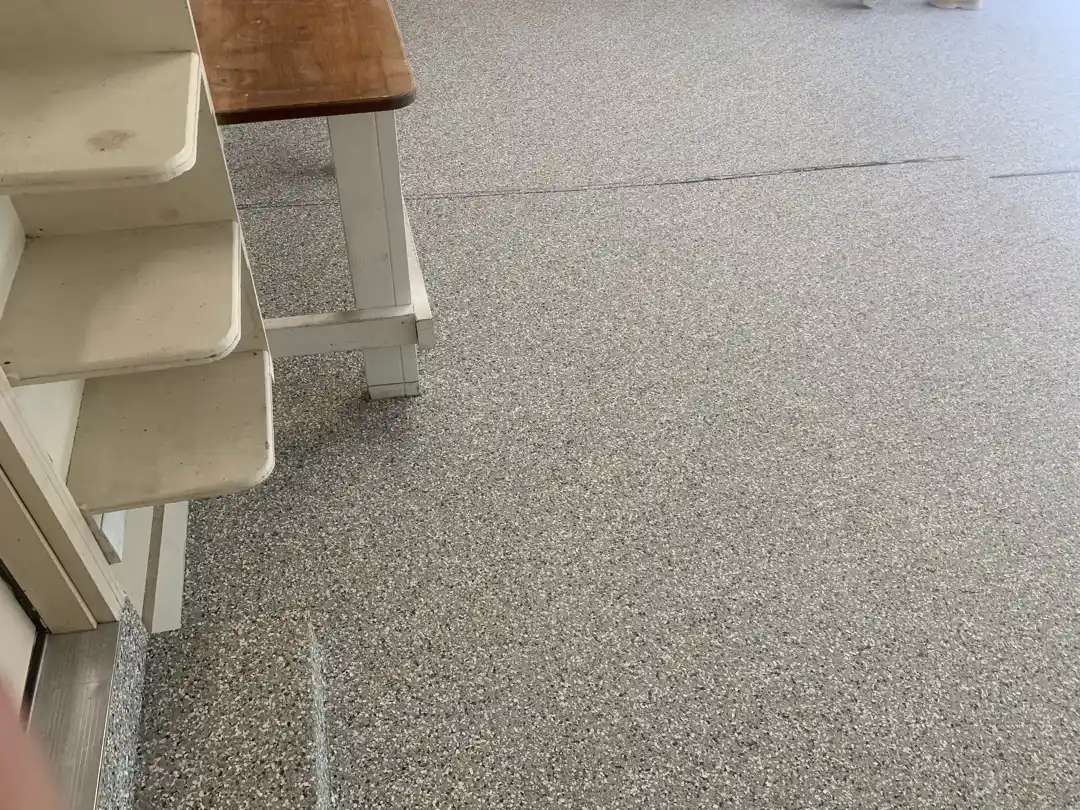
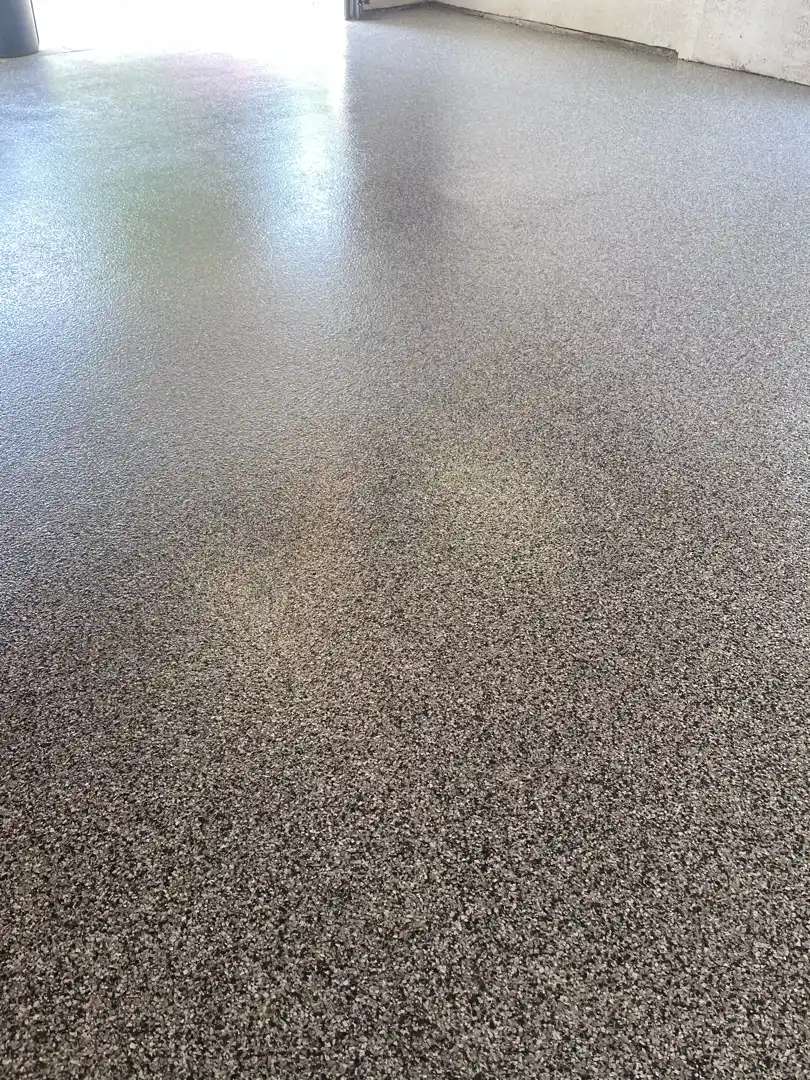
While the base coat remained wet, our team immediately broadcast the decorative flake blend across the entire surface. The multi-tonal flake system—featuring tan and beige tones with black and white accents—created substantial coverage that added visual depth and texture while still allowing hints of the grey base to show through.
Clear Coat Protection
The final phase involved applying the protective clear coat system: 10 liters of clear coat base, 5 liters of activator, and 7.5 caps of Shark Grip slip-resistant additive. Our crew applied generous, even passes, encapsulating the decorative flakes and creating a smooth, sealed surface. As the clear coat was applied, the floor transformed from matte to glossy, with the flake colors becoming vibrant and pronounced beneath the protective layer. The team used 1.5 liters of xylene for cleanup.
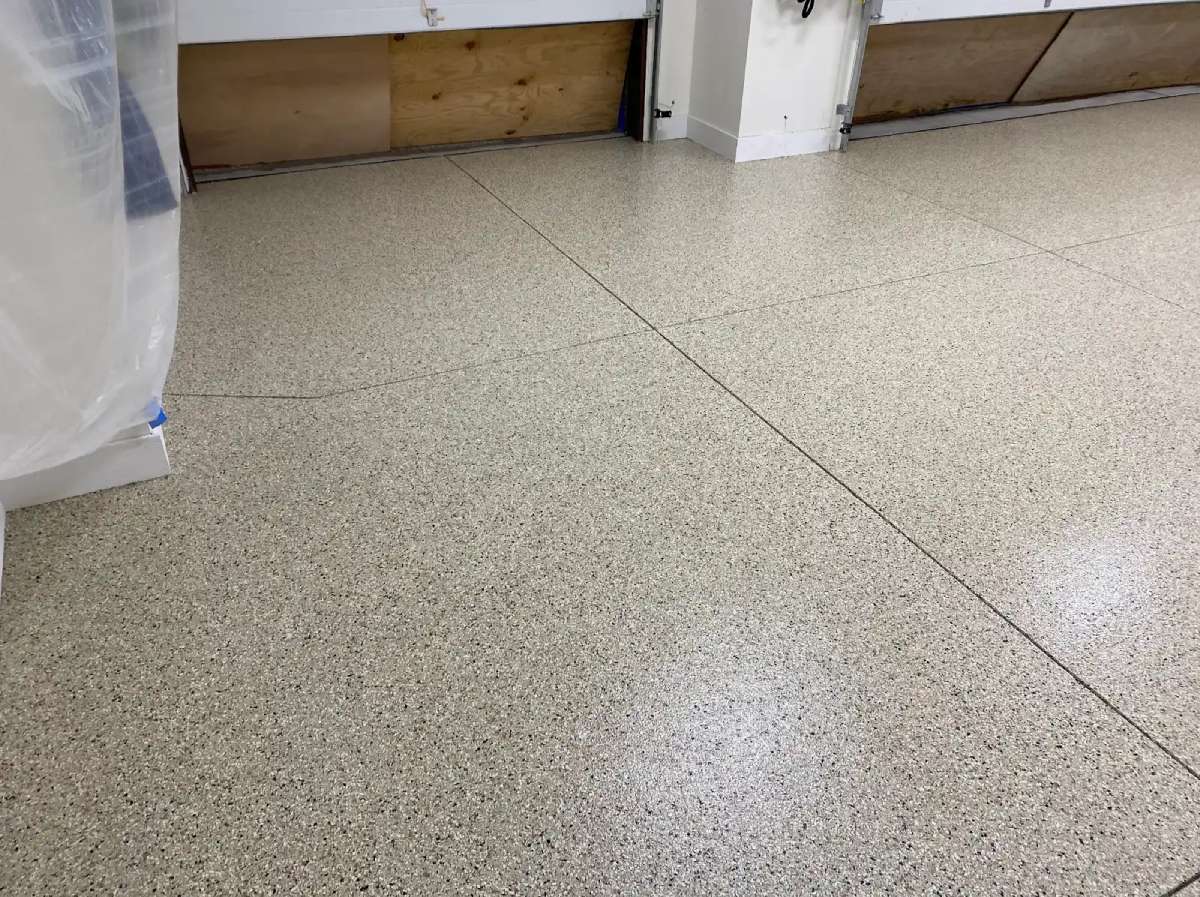
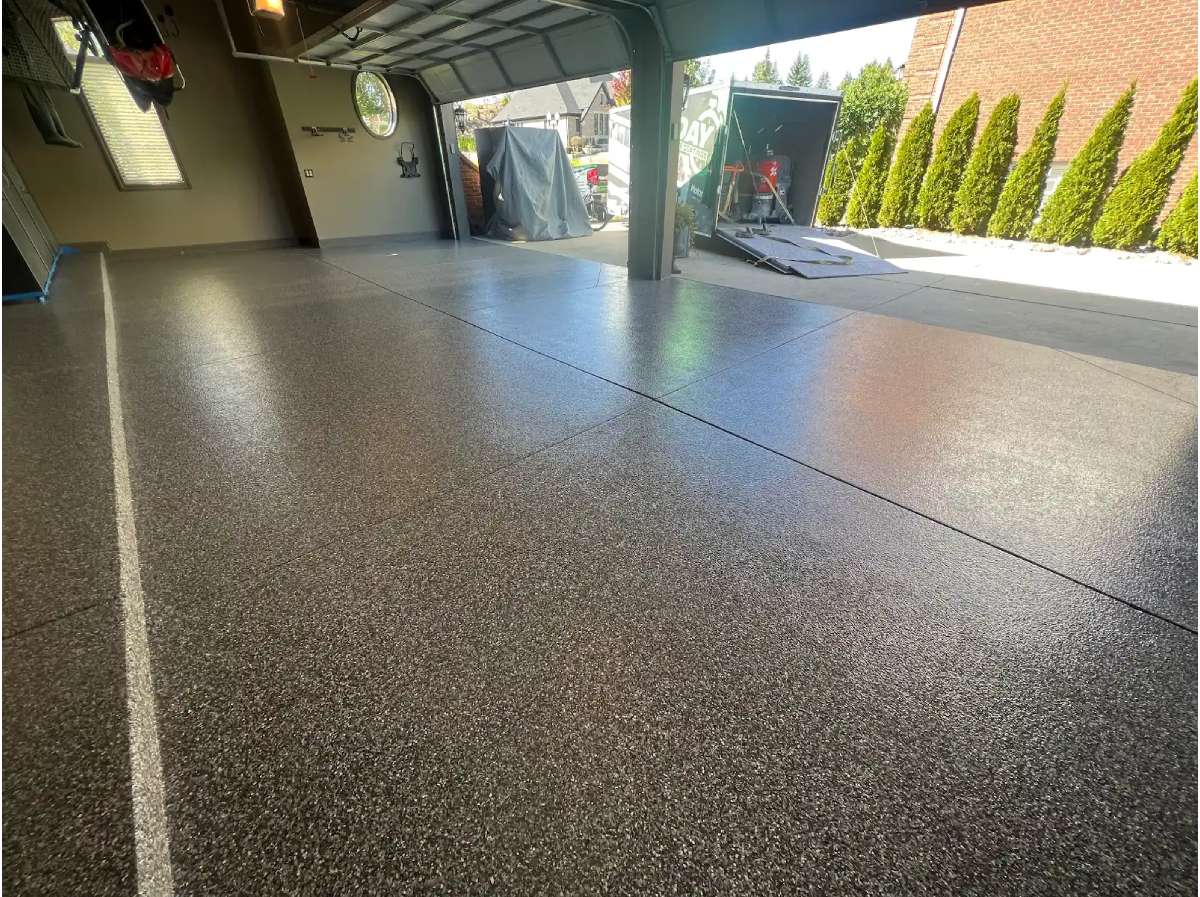
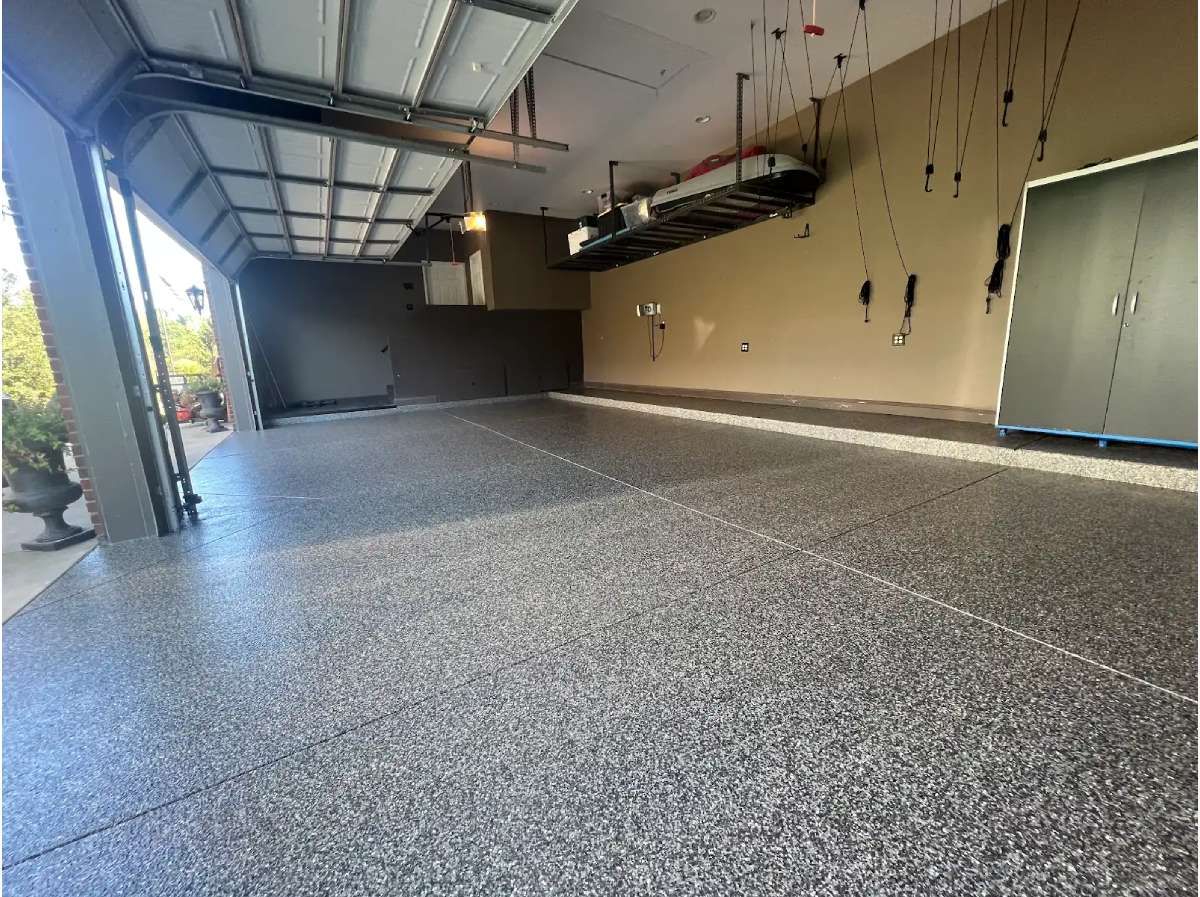
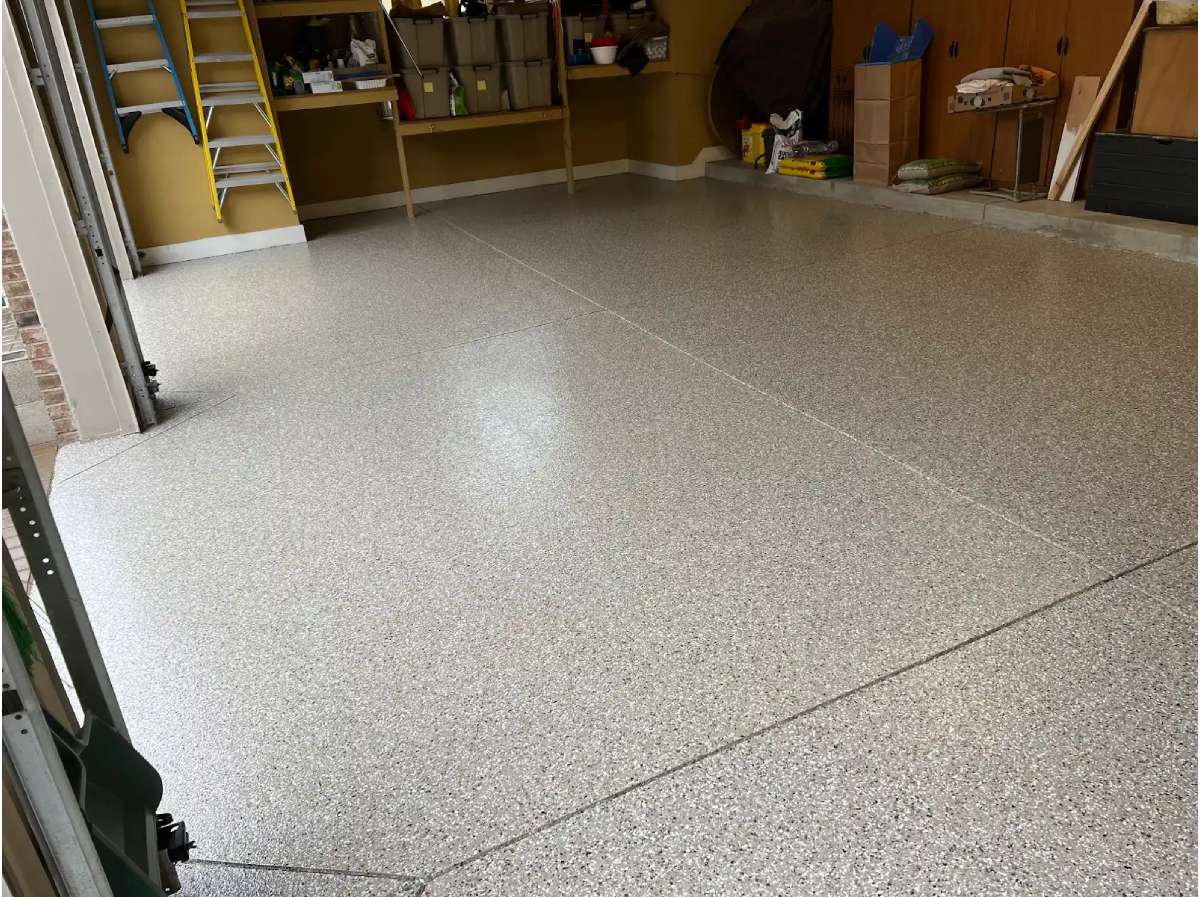
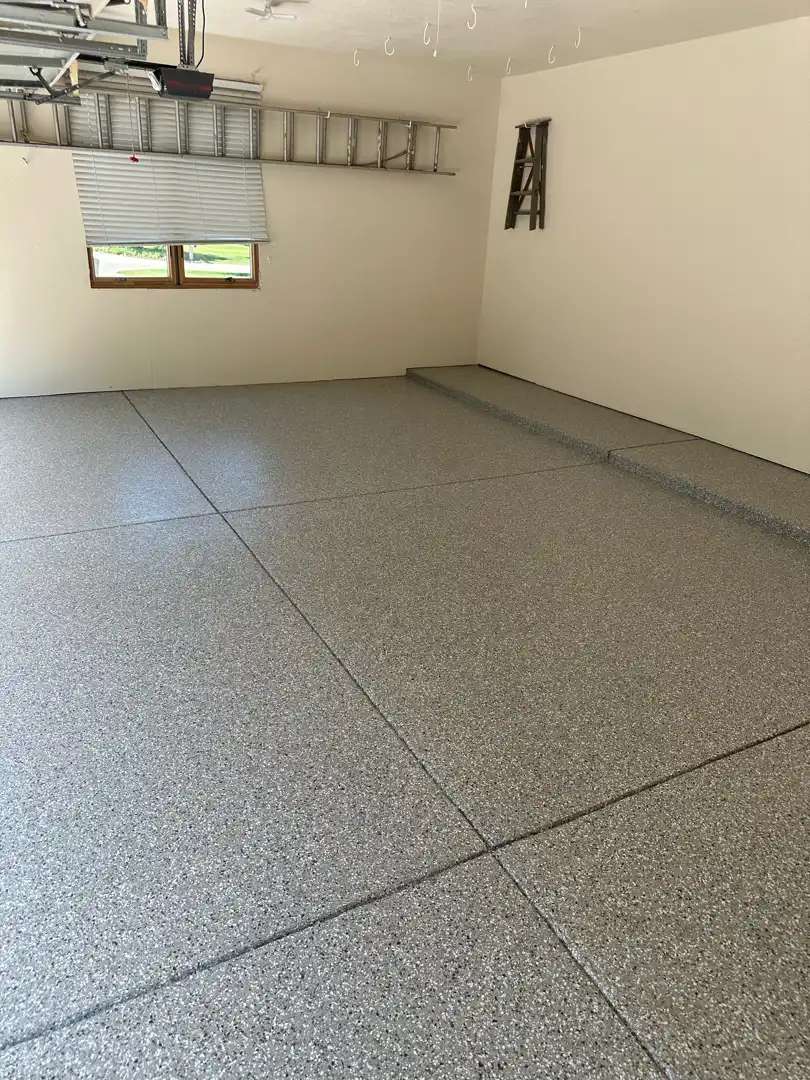
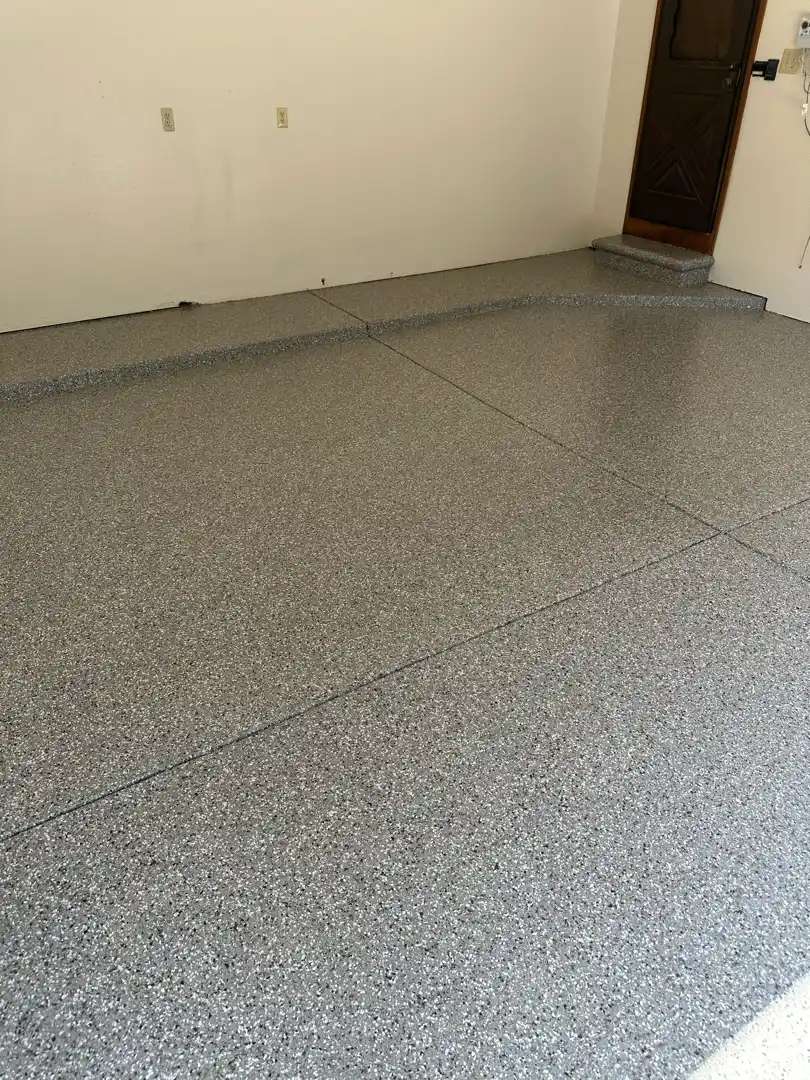
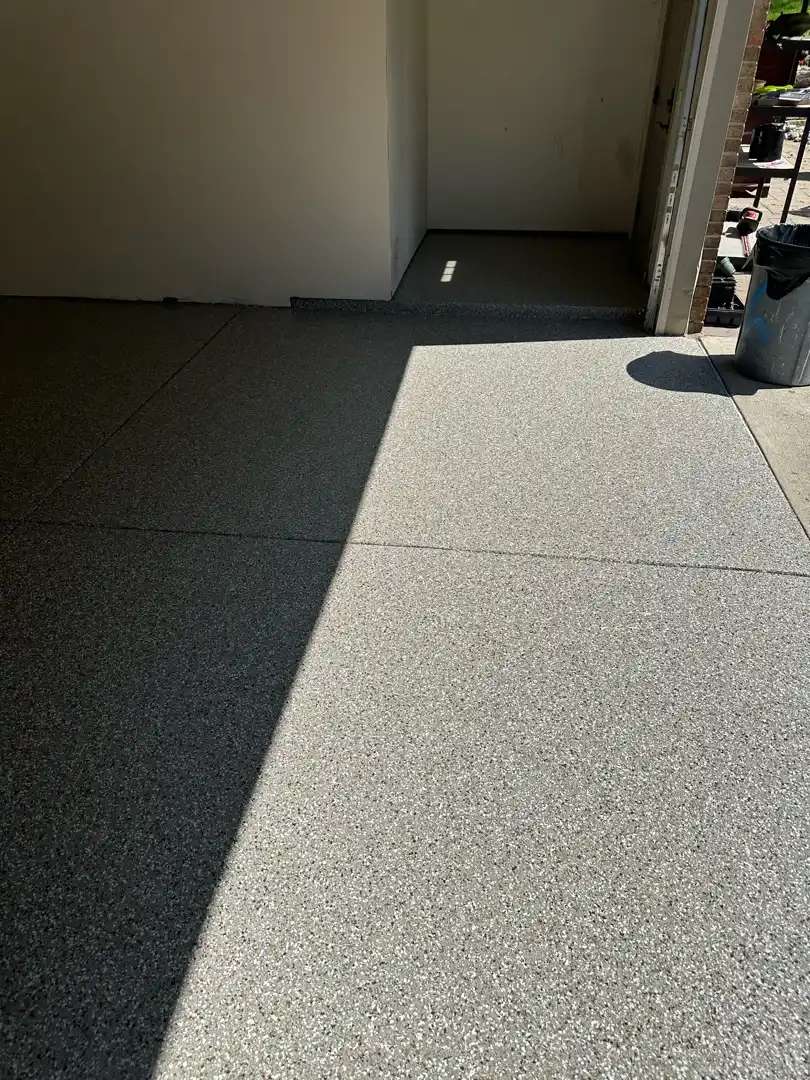
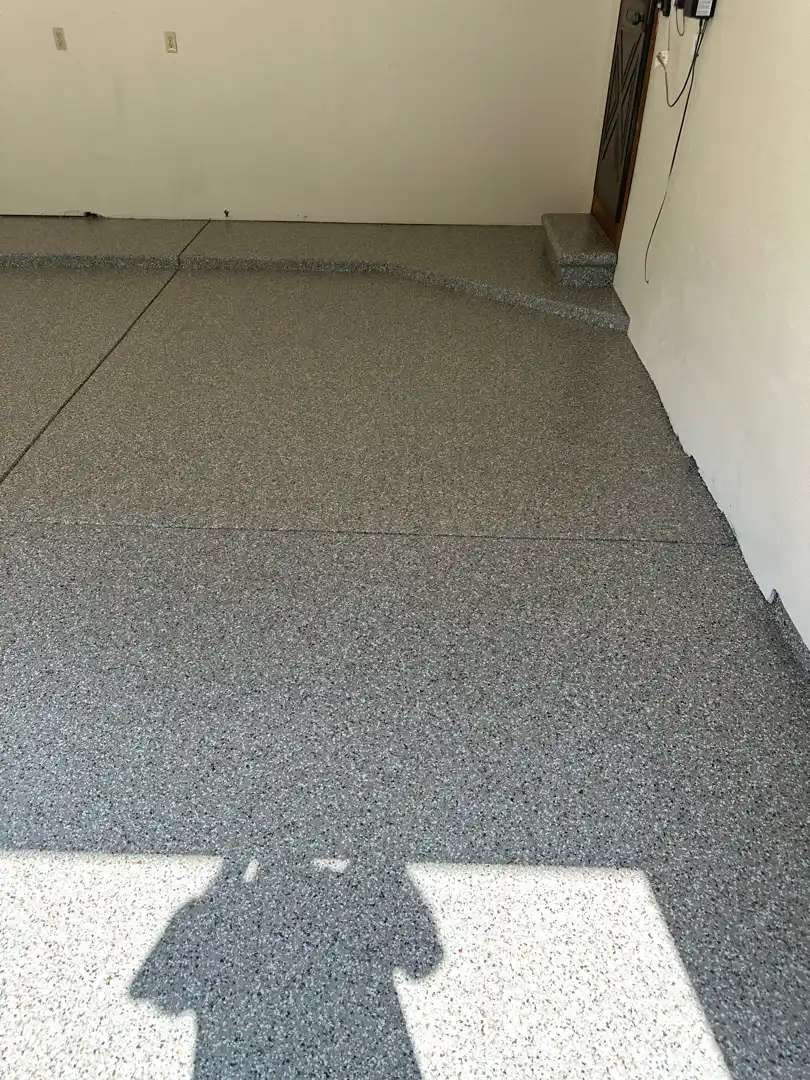
The Result
The finished floor represents professional coating installation at its finest. The 757 square feet now showcase a stunning, multi-dimensional finish that is both beautiful and durable. The grey base provides a sophisticated foundation, the decorative flakes add visual interest, and the glossy clear coat delivers a brilliant, easy-to-clean surface. Most importantly, the floor is now protected against the harsh climate of Michigan—road salt, motor oil, hot tire pickup, and other contaminants won’t penetrate this professionally coated surface. The homeowners can maintain their floor’s like-new appearance with simple sweeping and occasional mopping for years to come.
Click on the photos to enlarge them
Concrete COATING ON STONINGTON LN:
Garage, Porch & Walkway
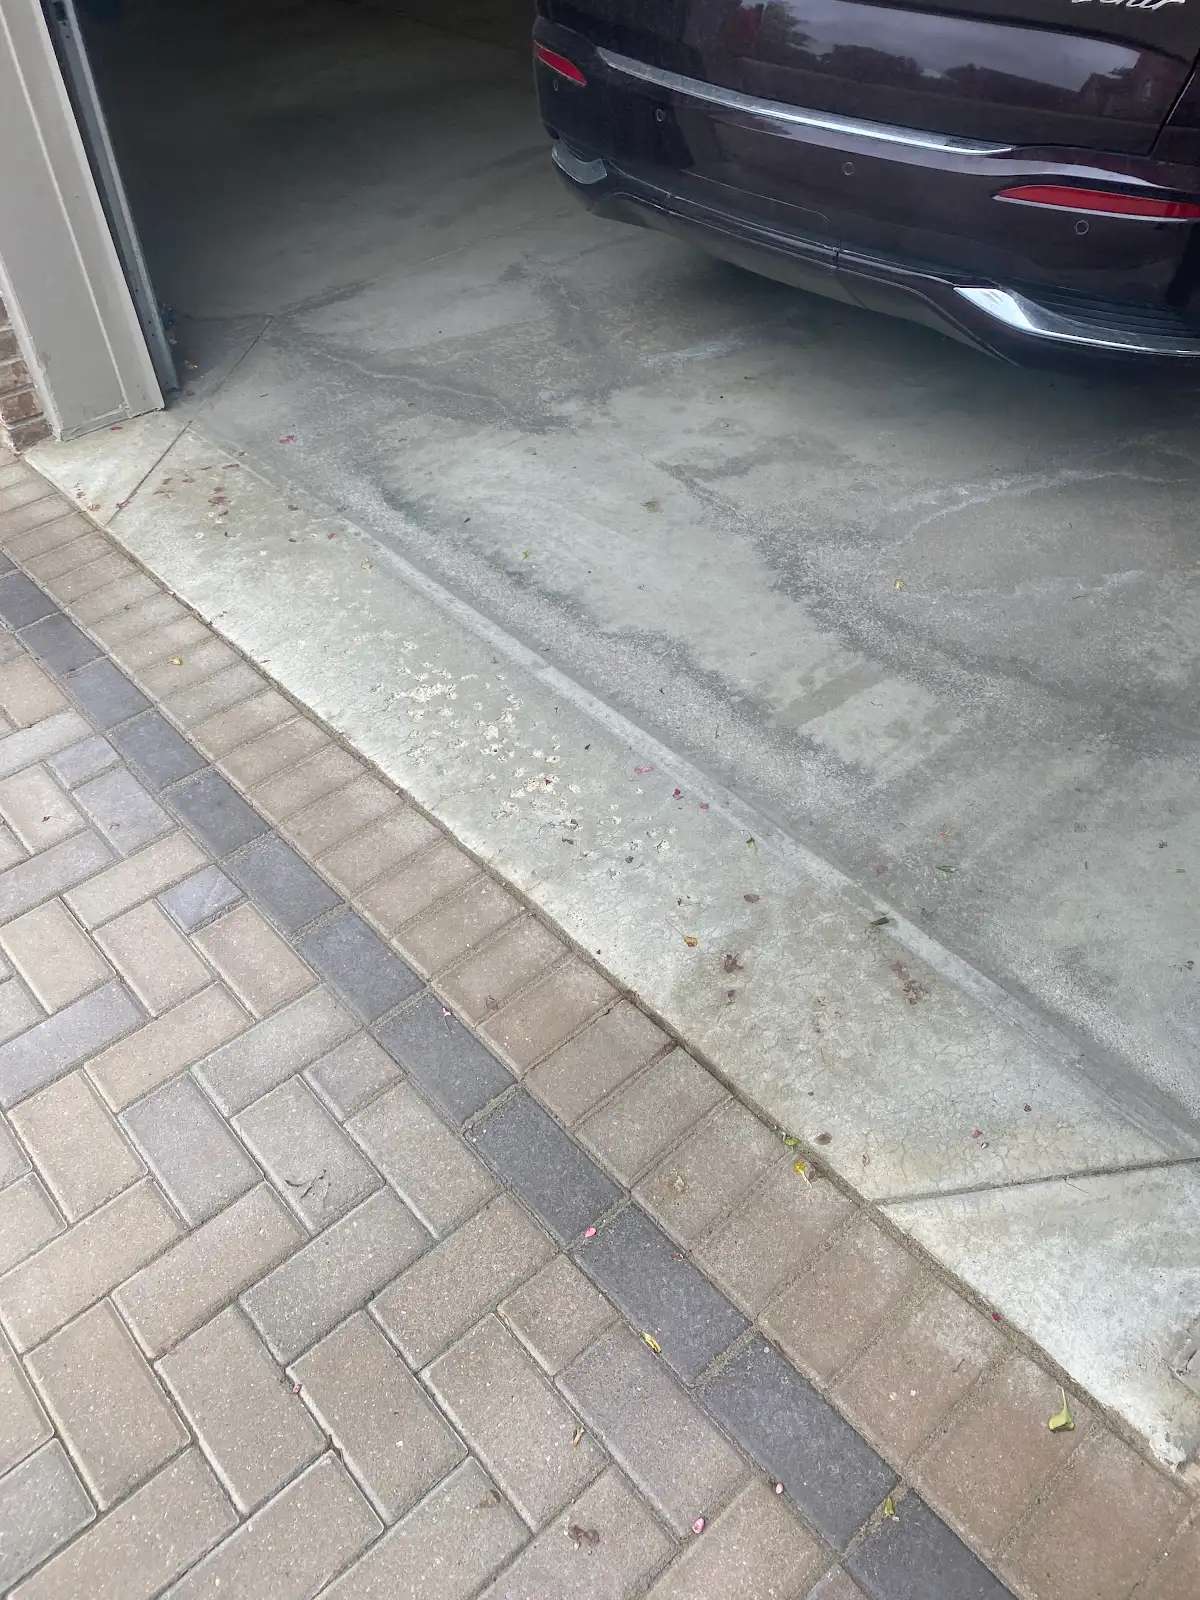
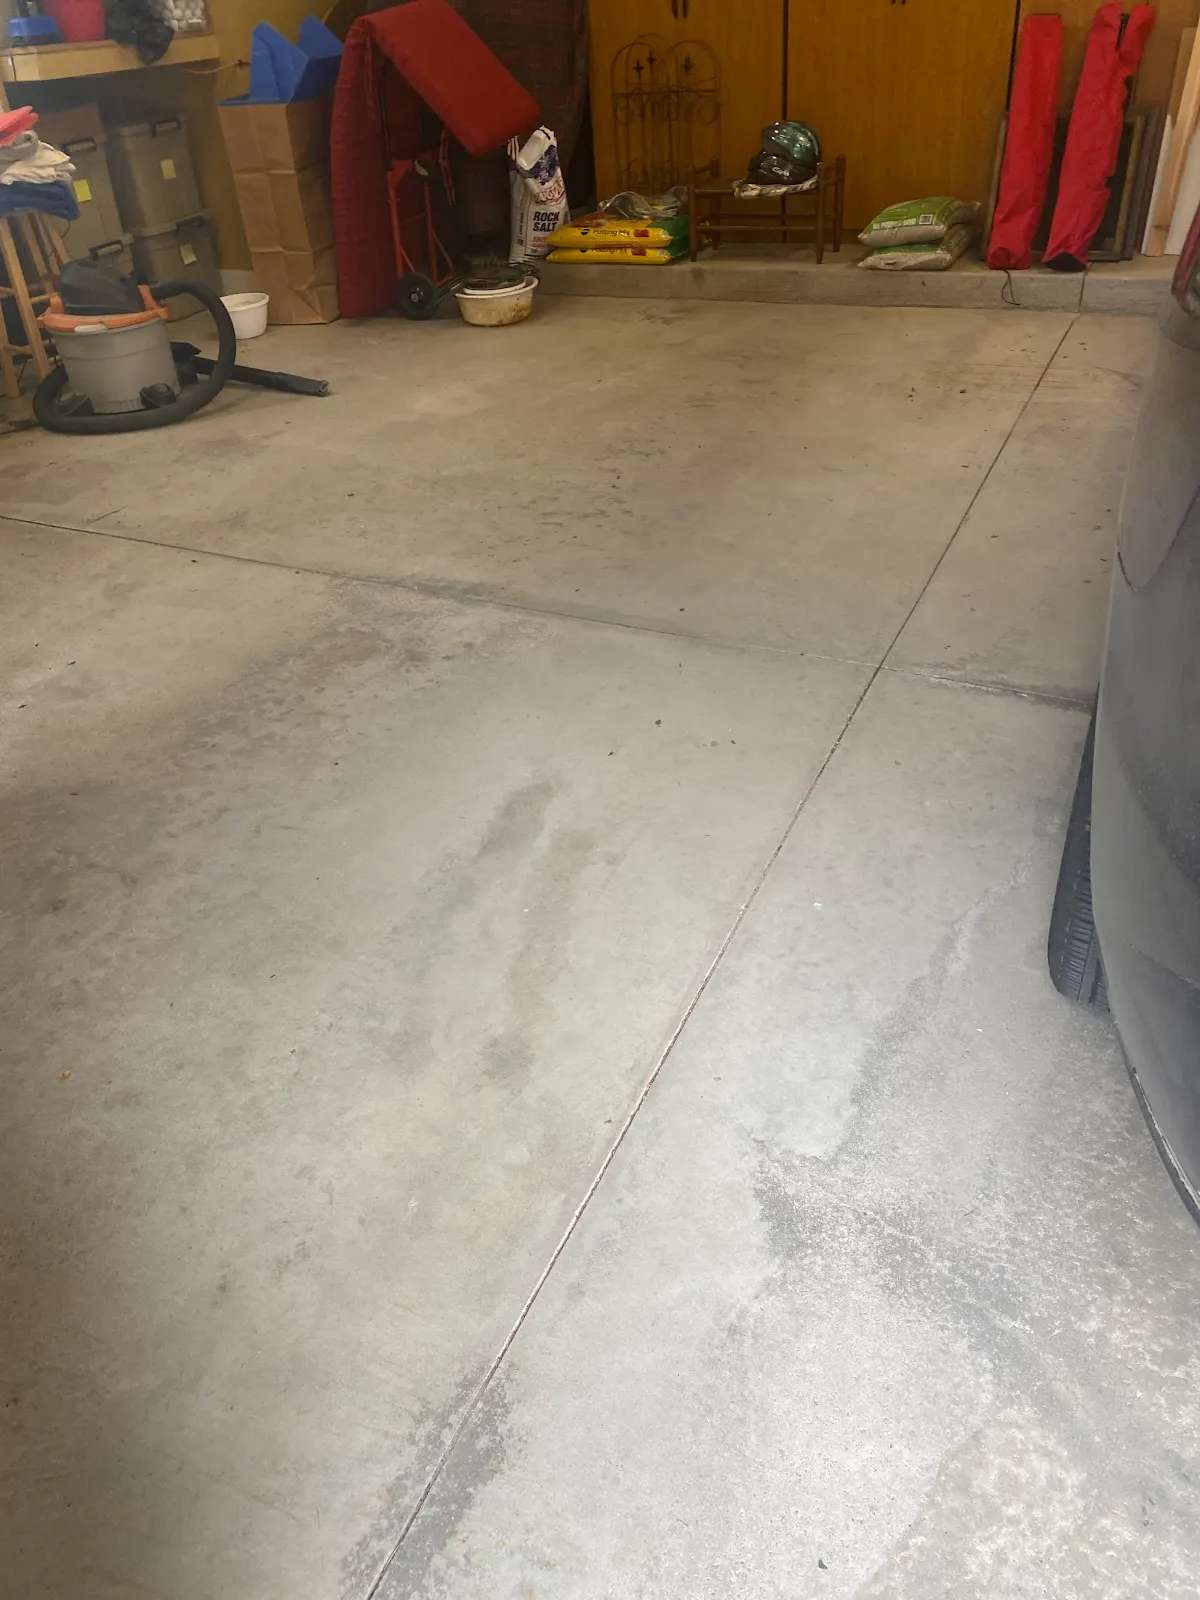
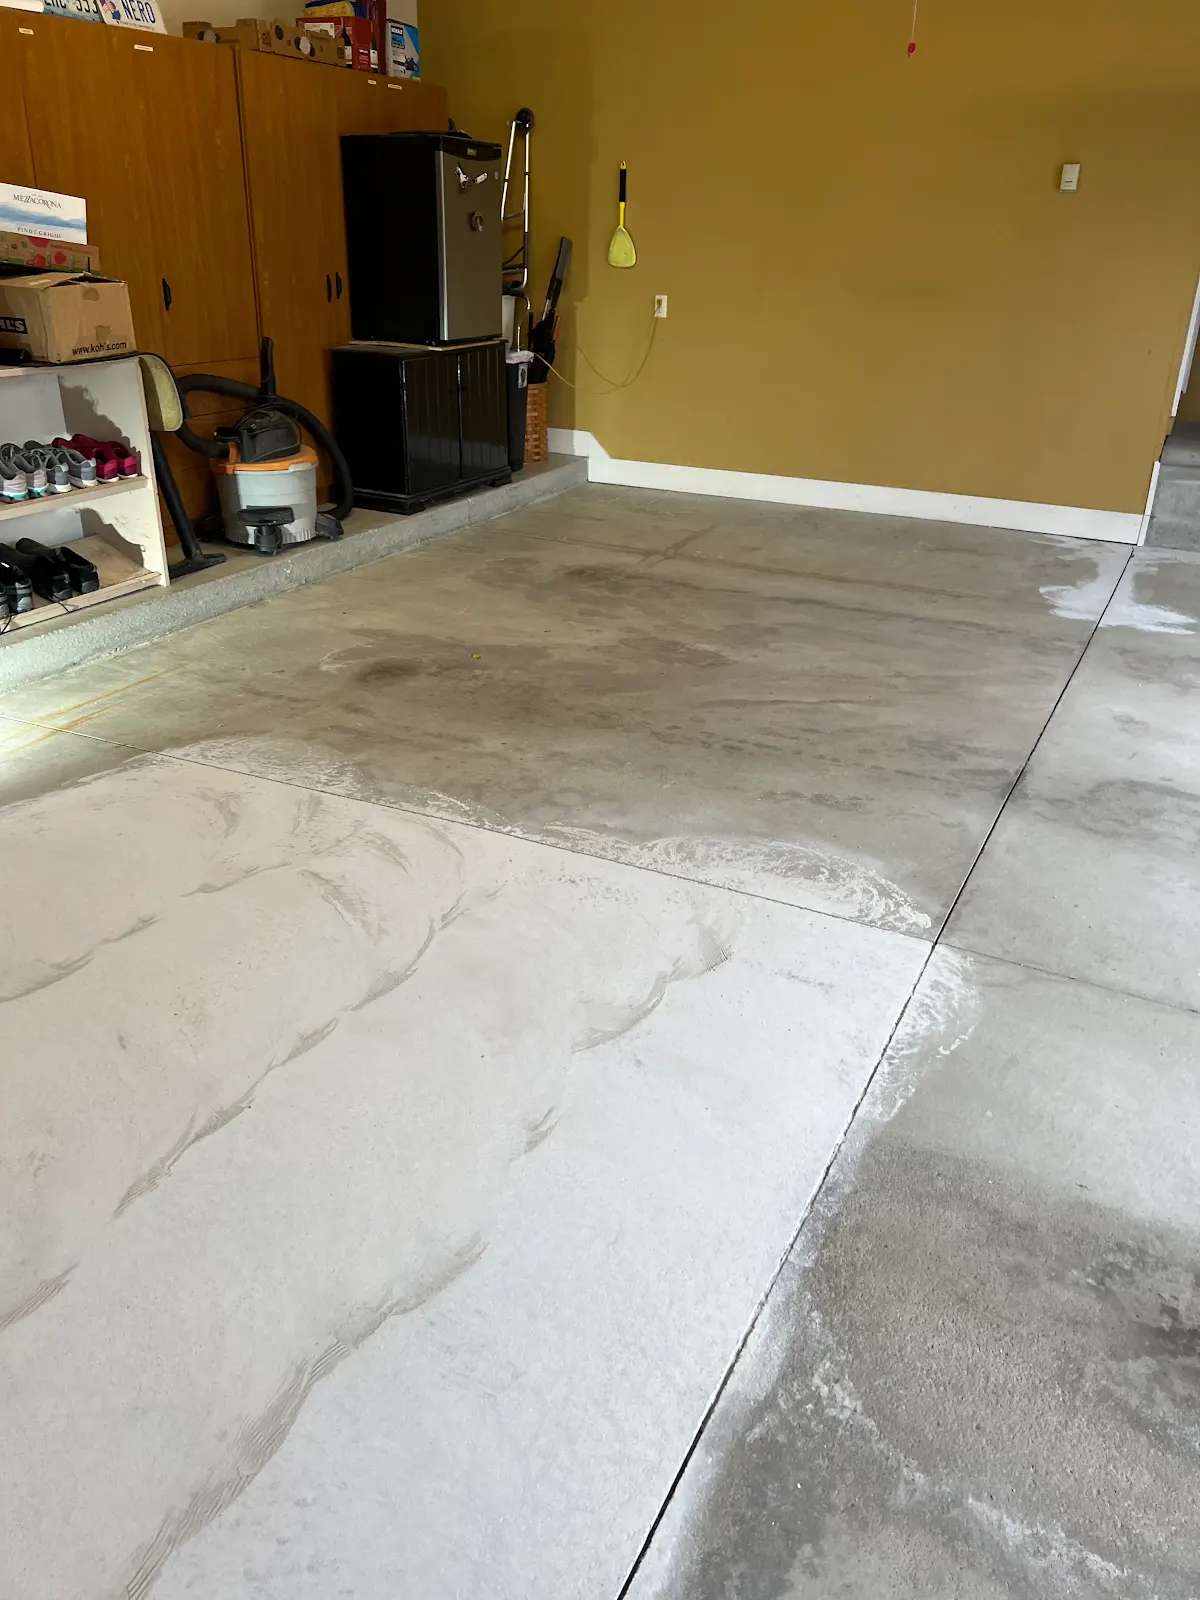
Assessment and Moisture Testing
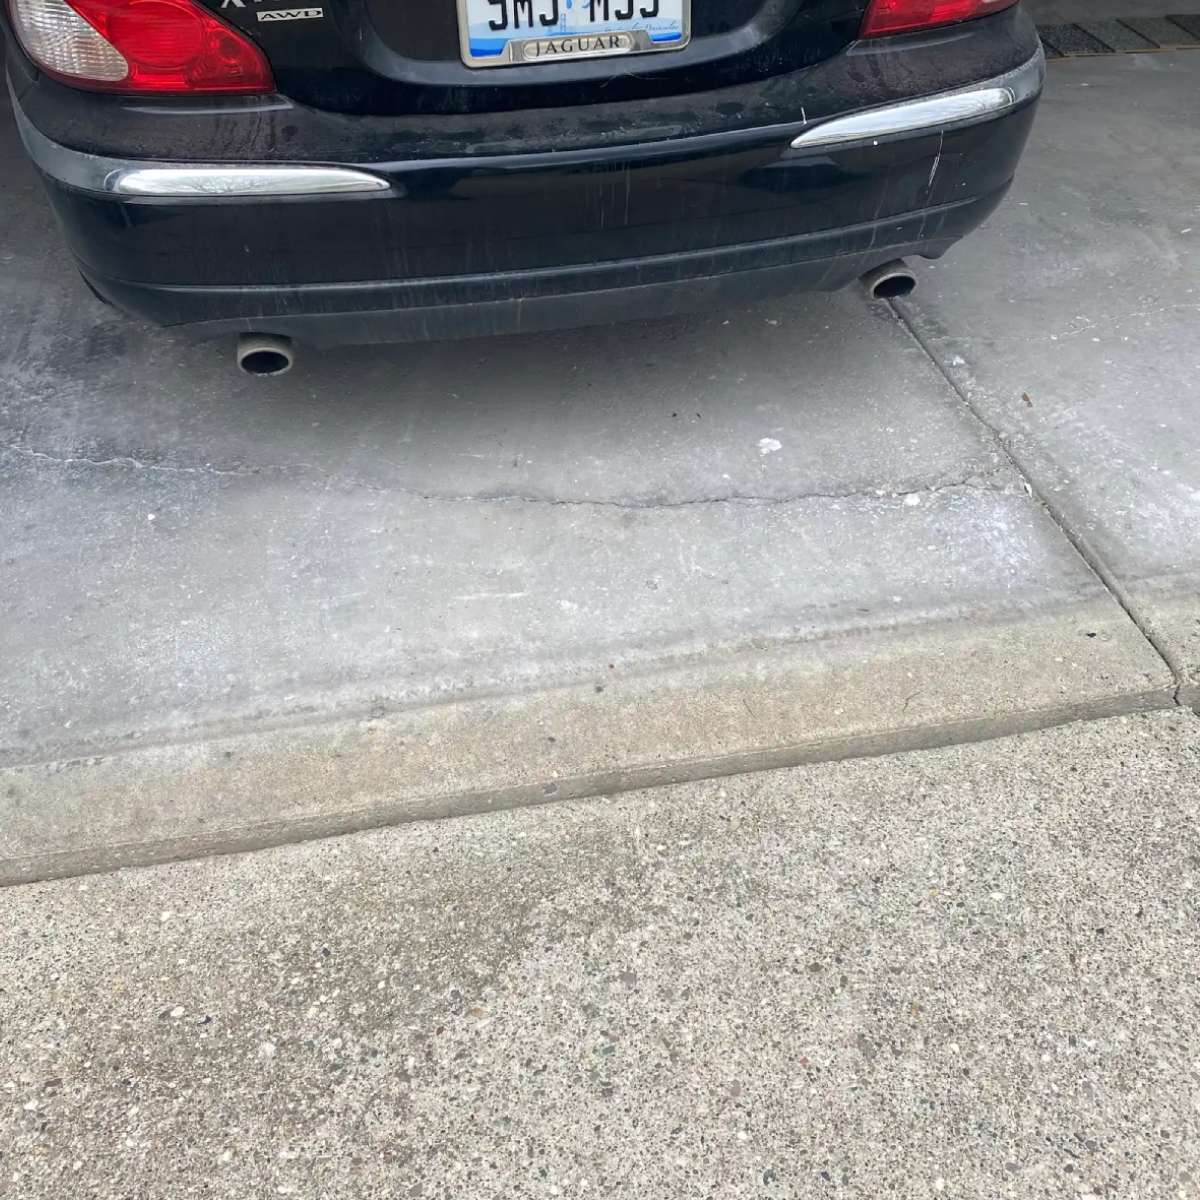
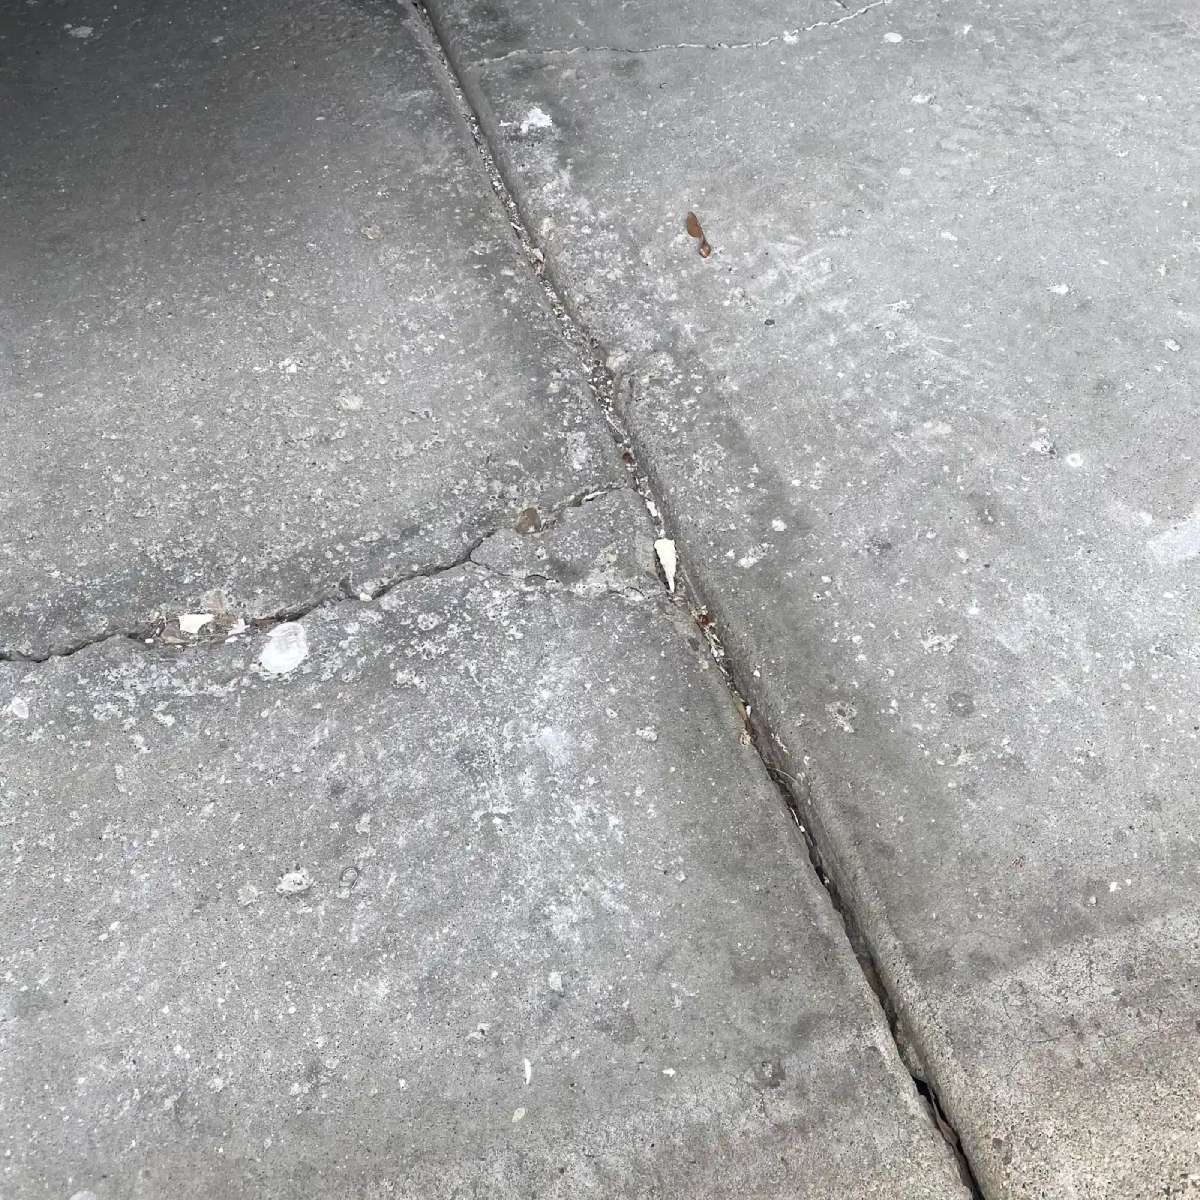
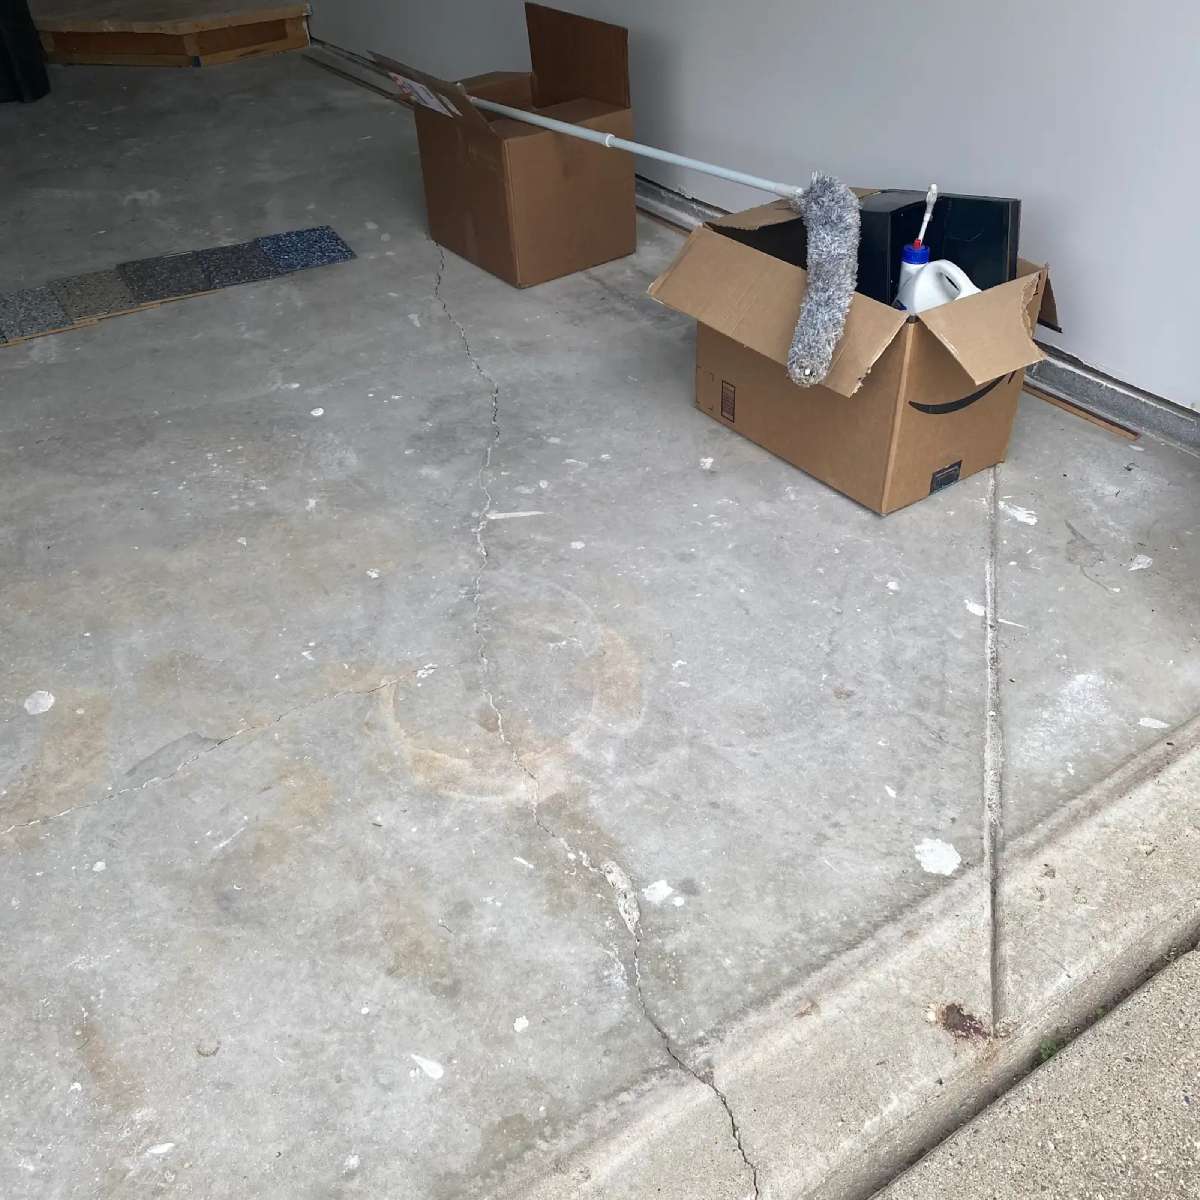
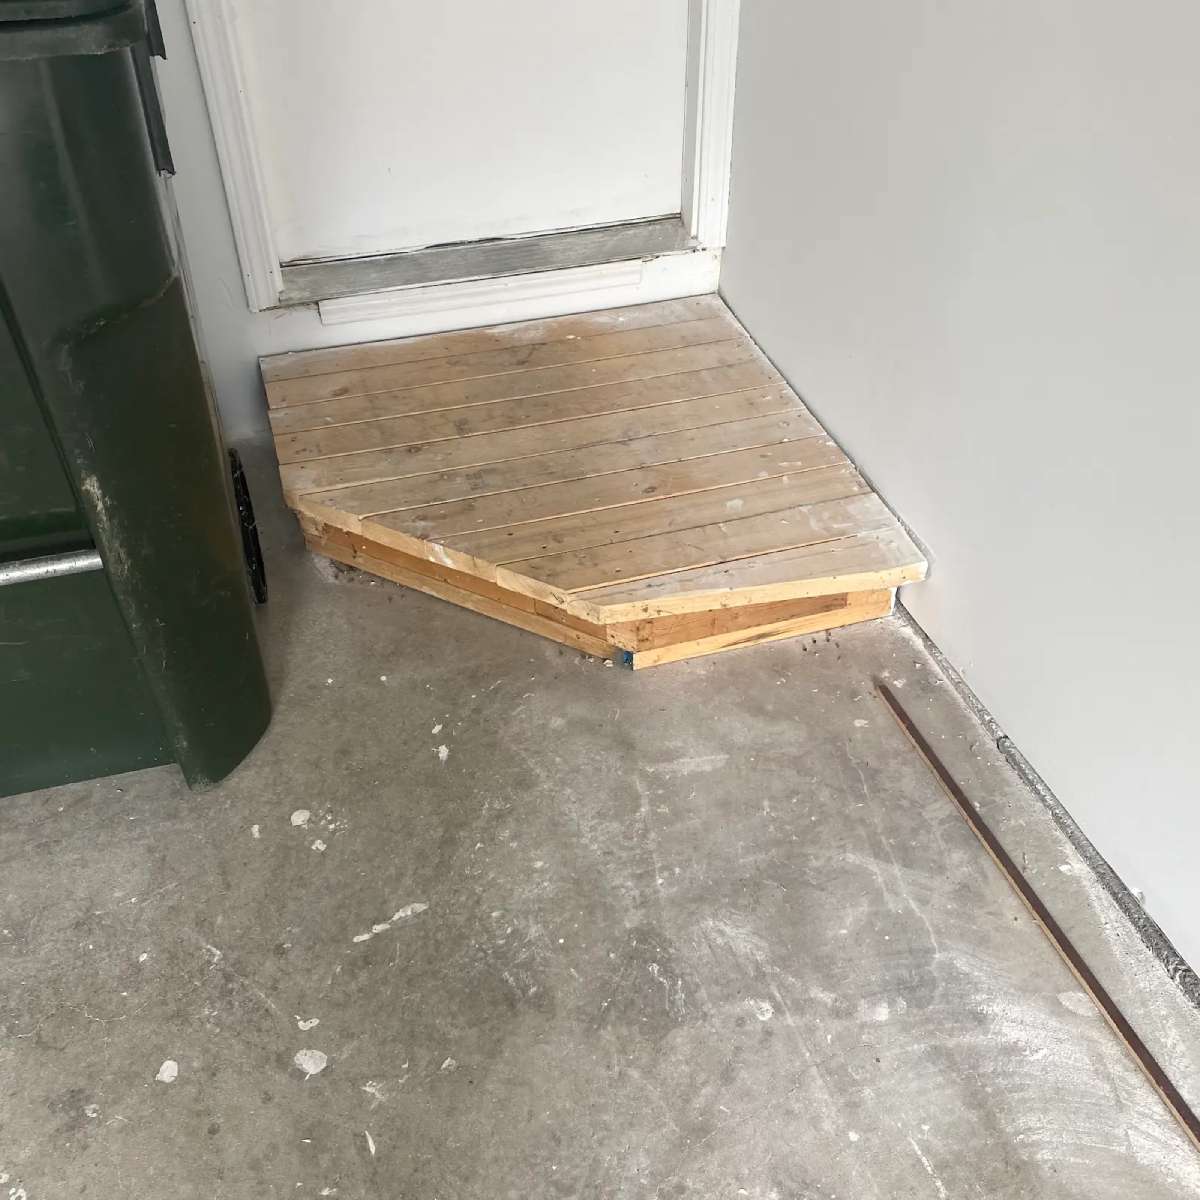
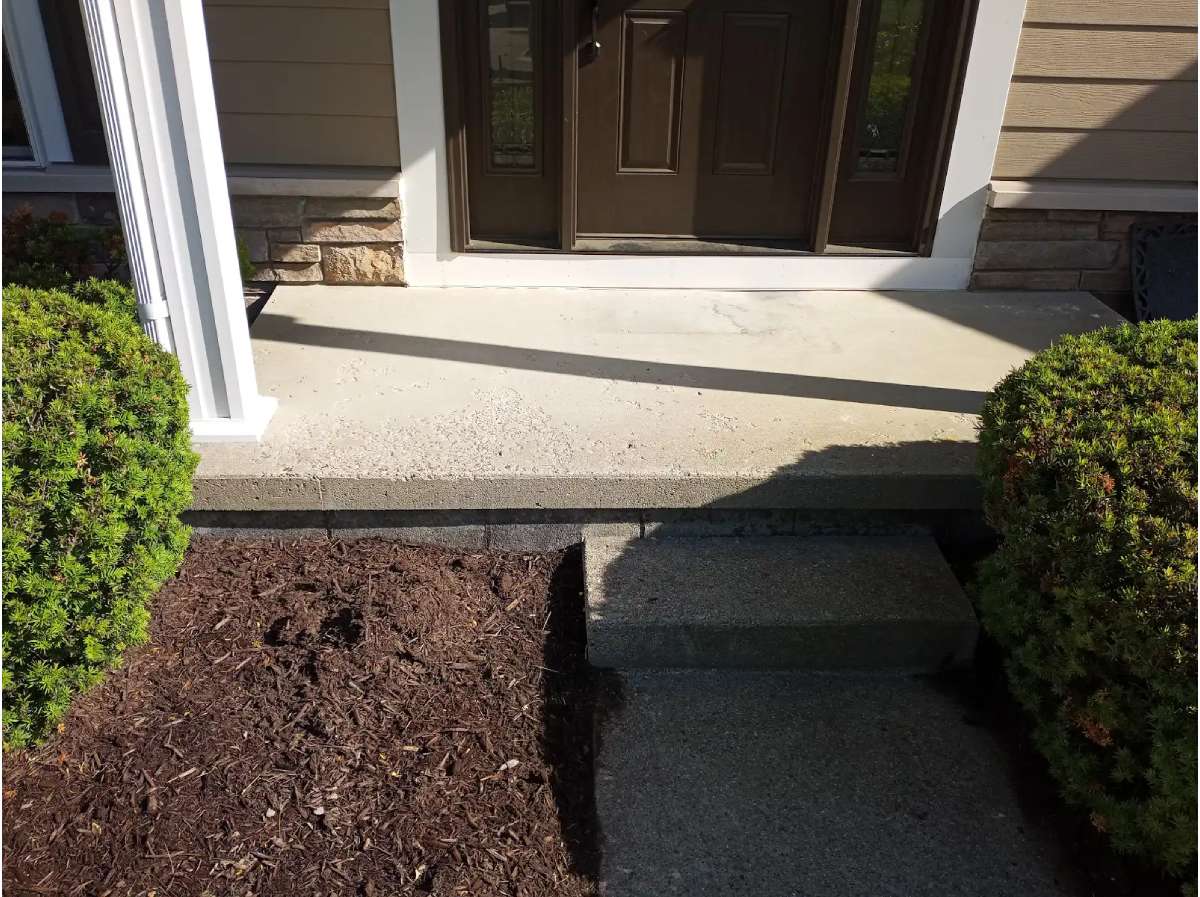
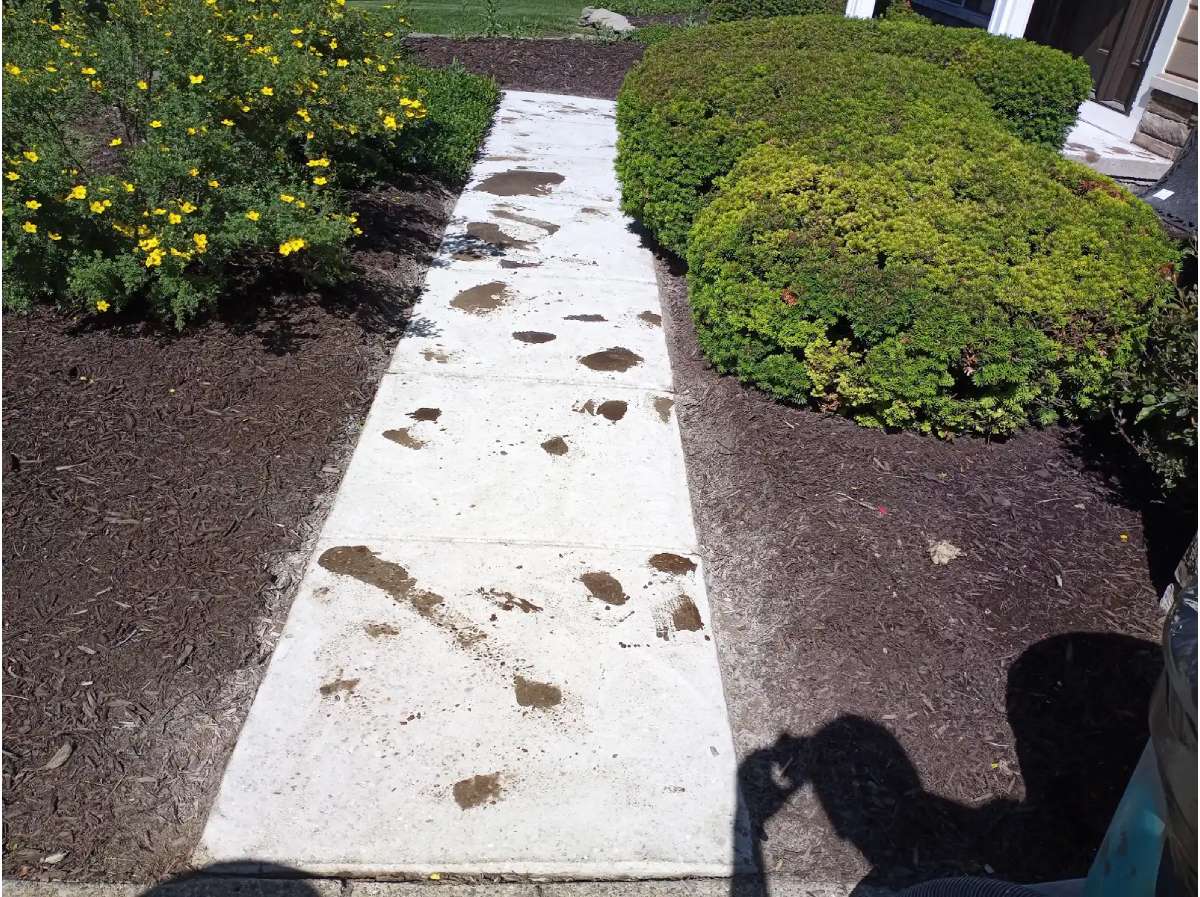
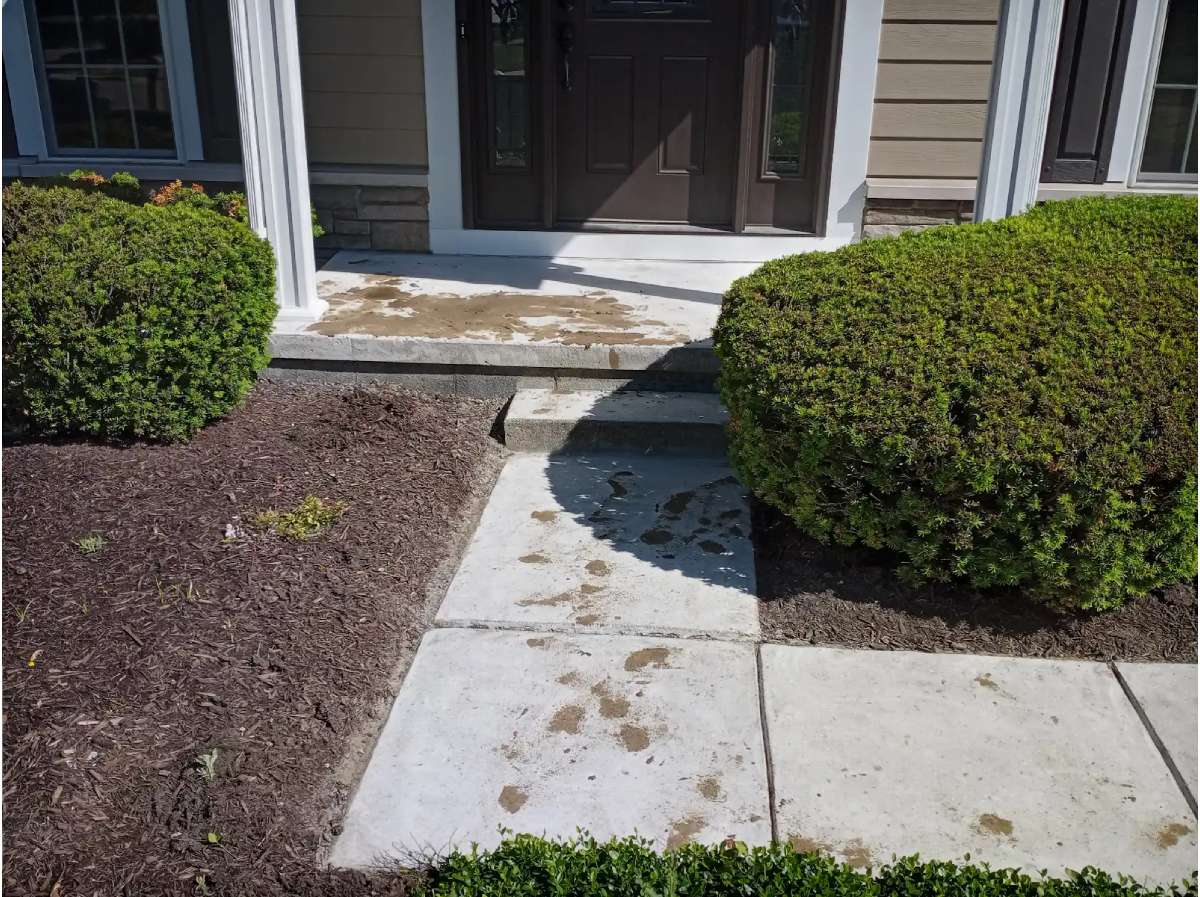
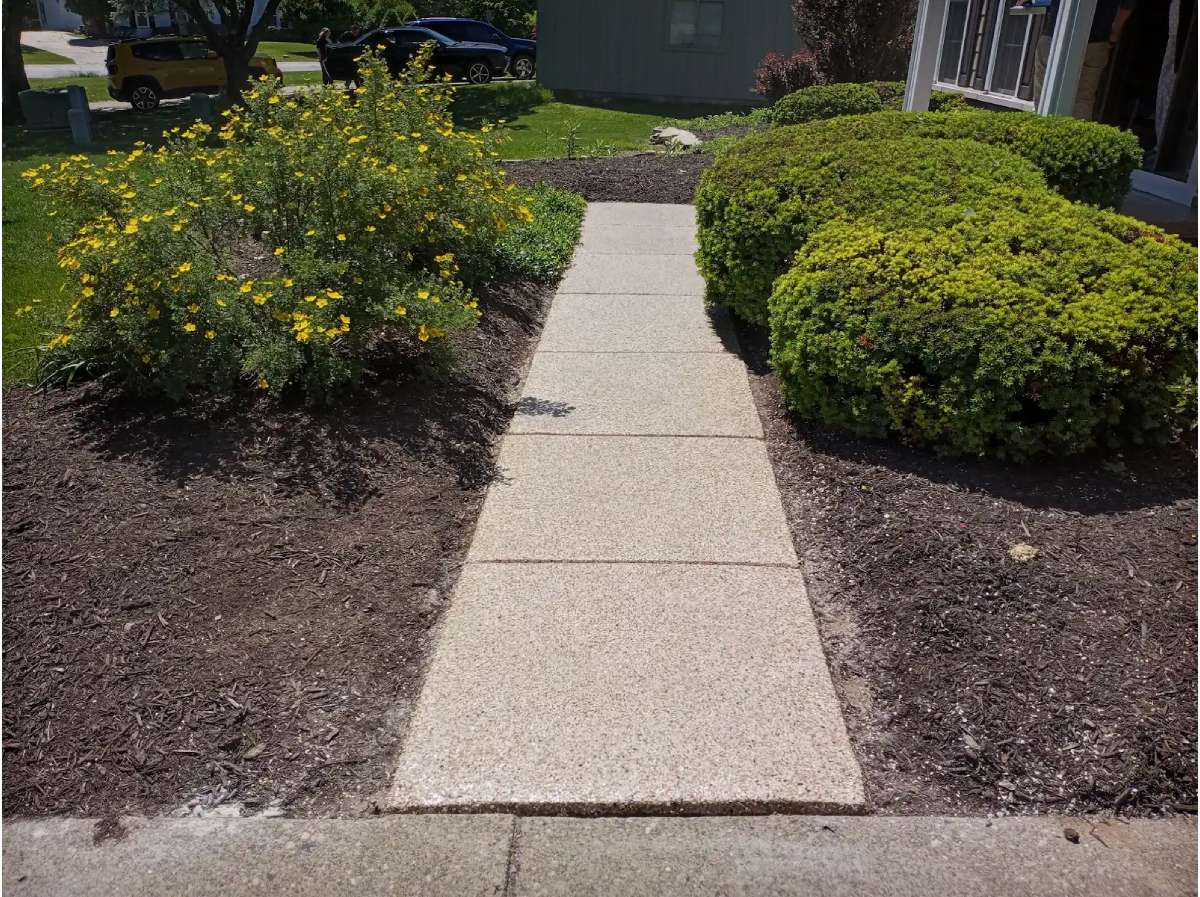
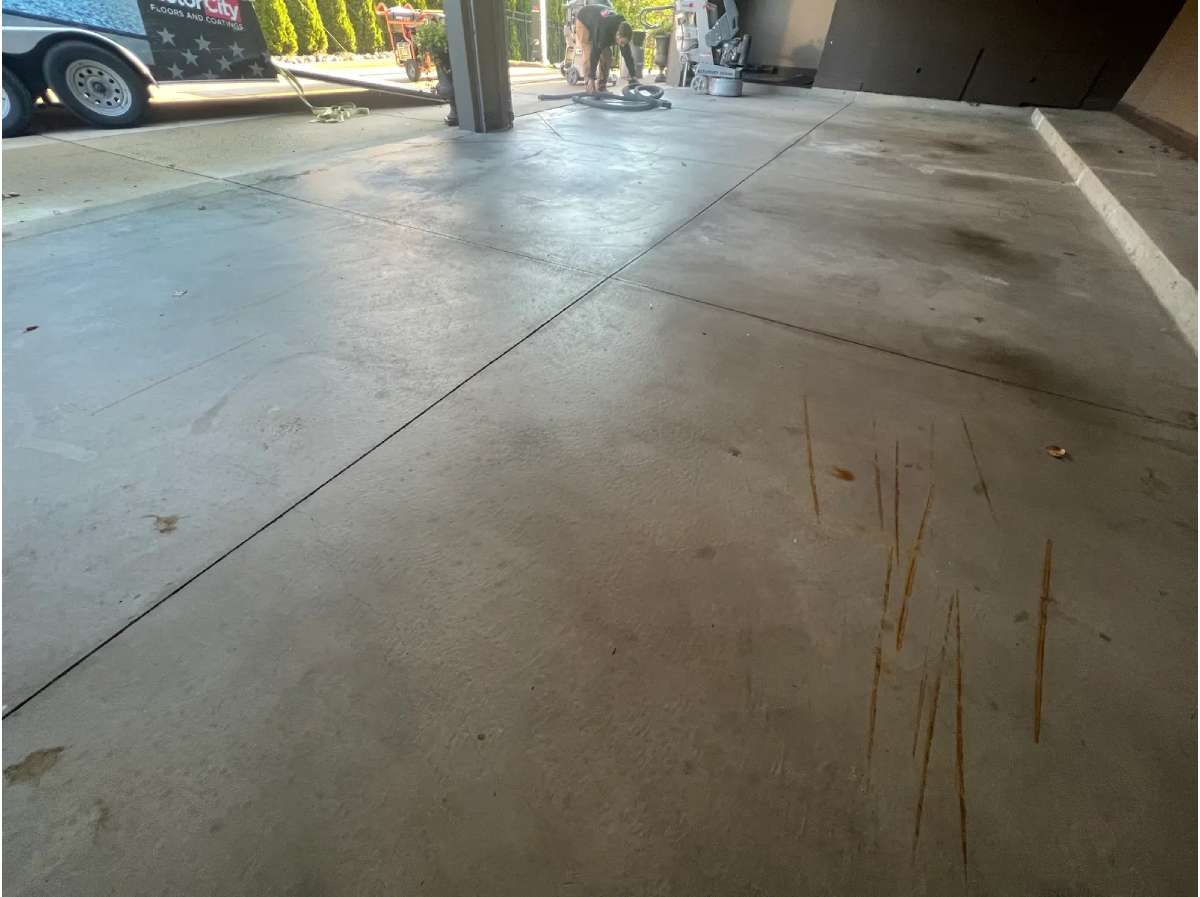
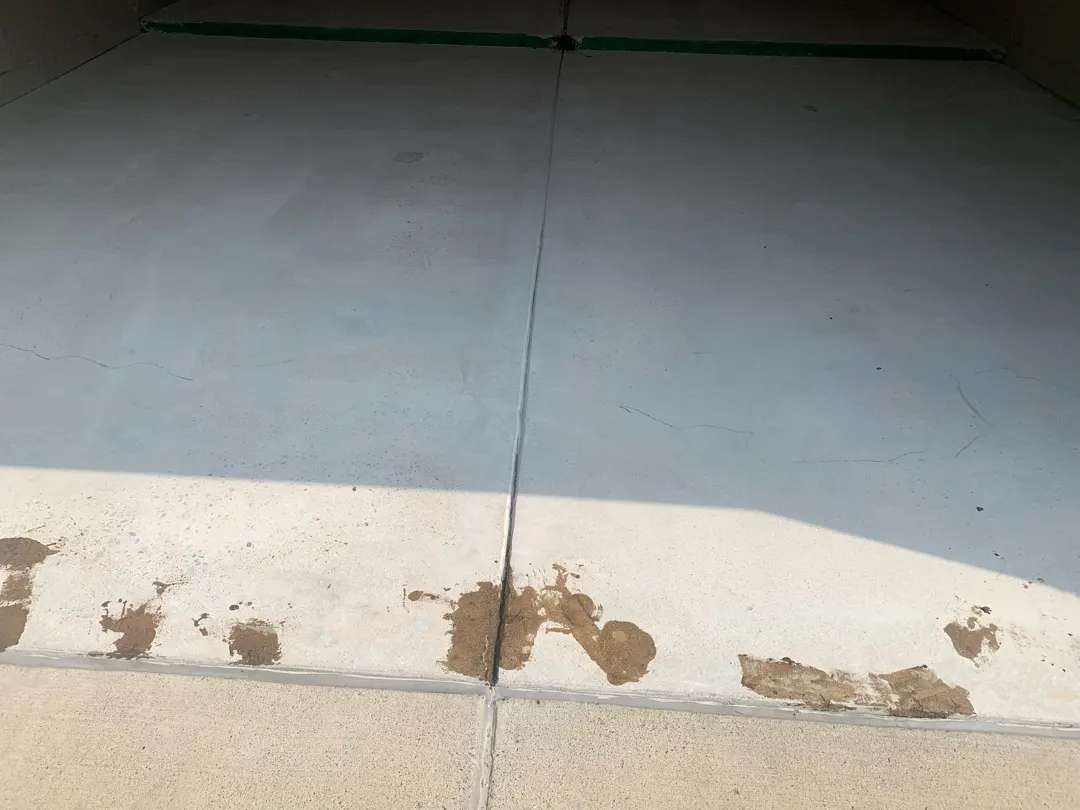
The MotorCity team conducted thorough moisture testing on all surfaces, recording 4% moisture content—within acceptable limits but requiring careful monitoring. The garage floor showed multiple cracks and light pitting across both concrete slabs, with some old oil staining typical of garages in Michigan. The front porch and walkway told a more dramatic story: significant pitting throughout, with the concrete surface showing clear signs of freeze-thaw damage and years of water infiltration. Traction was a major concern for the homeowners, particularly on the walkway and porch steps, making slip-resistant additives essential.
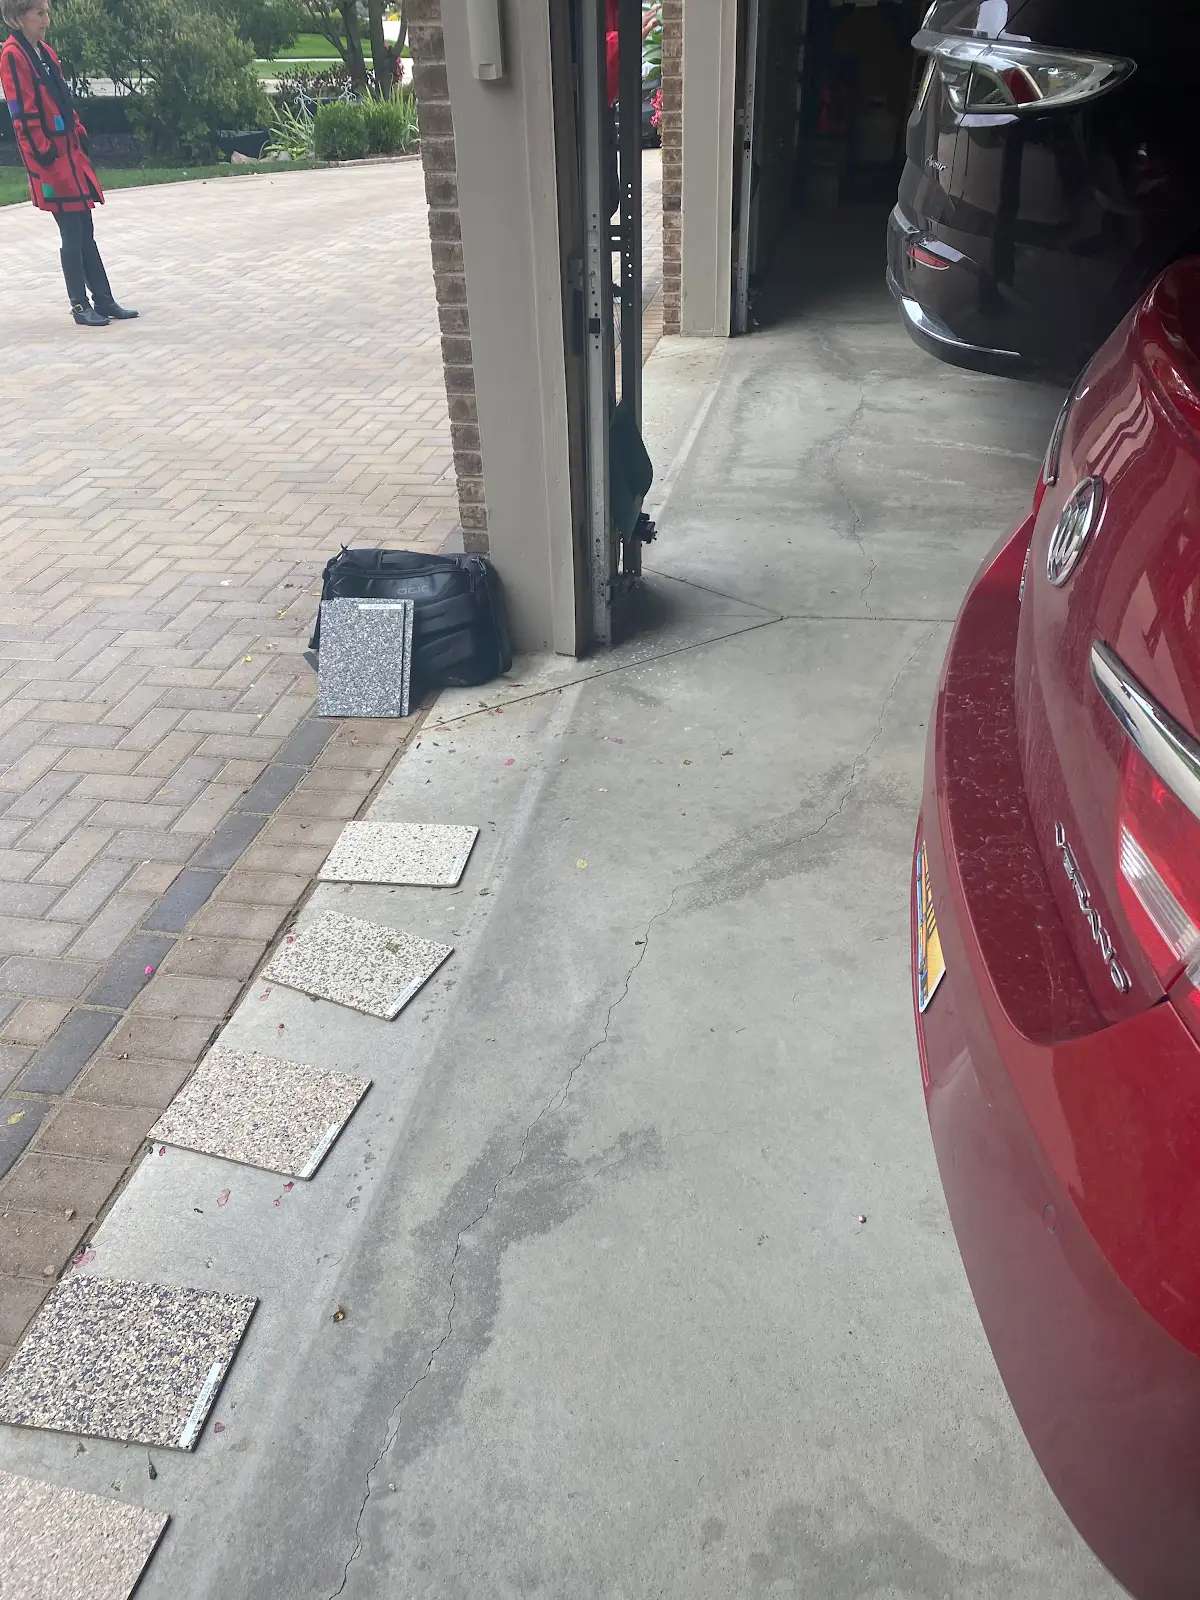
Extensive Repairs
Unlike typical coating projects, this job demanded substantial concrete rehabilitation. Our crew mixed generous quantities of two-part mender—4 liters each of Part A and Part B—addressing the widespread pitting across the walkway and porch surfaces. The images captured during this phase show the systematic application of white mender patches across the deteriorated concrete, carefully filling each void and creating a sound, level substrate for coating adhesion.
The garage floor received similar attention, with the crew addressing cracks and ensuring both concrete slabs were properly prepared. Given the extent of damage, the garage required a full flood coat application on both slabs—essentially an extra protective layer to ensure long-term performance.
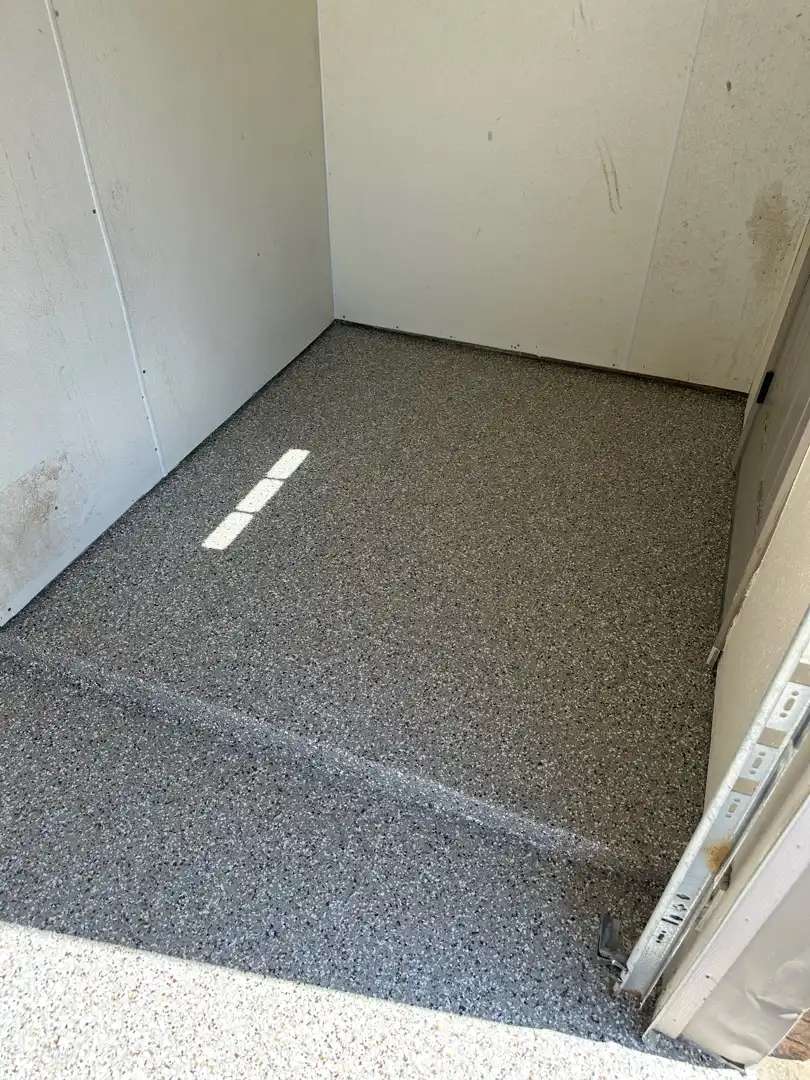
Garage Transformation: Silvercreek Elegance
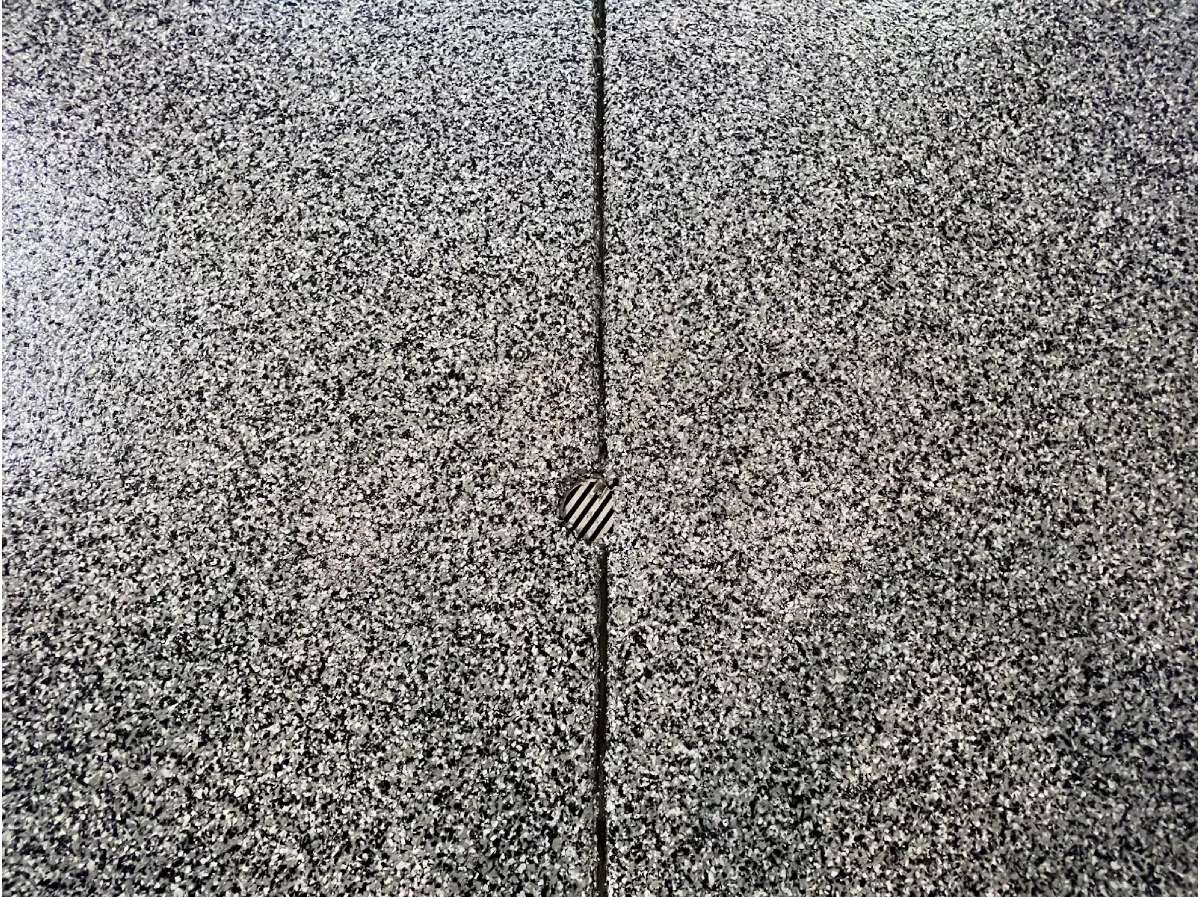
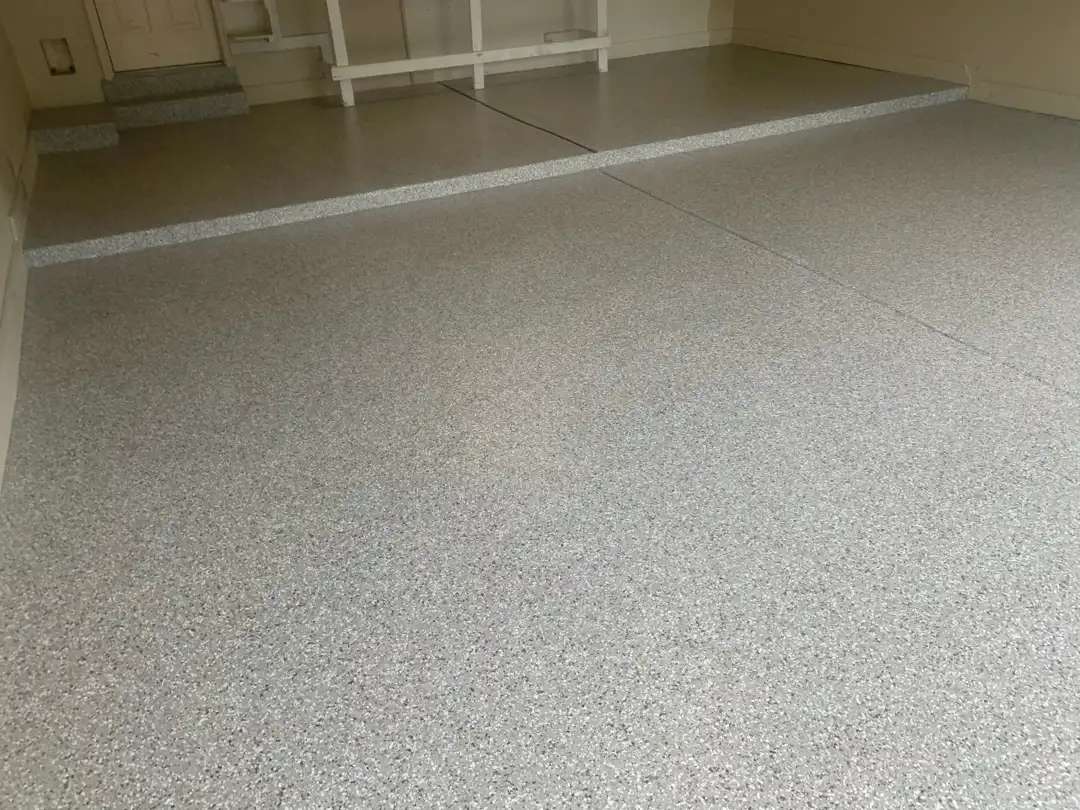
Once repairs cured, our team applied the Silvercreek color system to the 356-square-foot garage. Using 4 liters of grey base paint and 2 liters of activator, they created a sophisticated foundation. The crew broadcast 2 full boxes of decorative flakes across the wet base coat, recovering 1 box worth—indicating substantial, nearly full-coverage flake application. The Silvercreek color palette created a refined, multi-tonal finish that would hide dirt and minor debris while adding visual depth. Shark Grip was incorporated into the clear coat system, addressing the homeowners’ traction concerns without compromising the easy-clean surface.
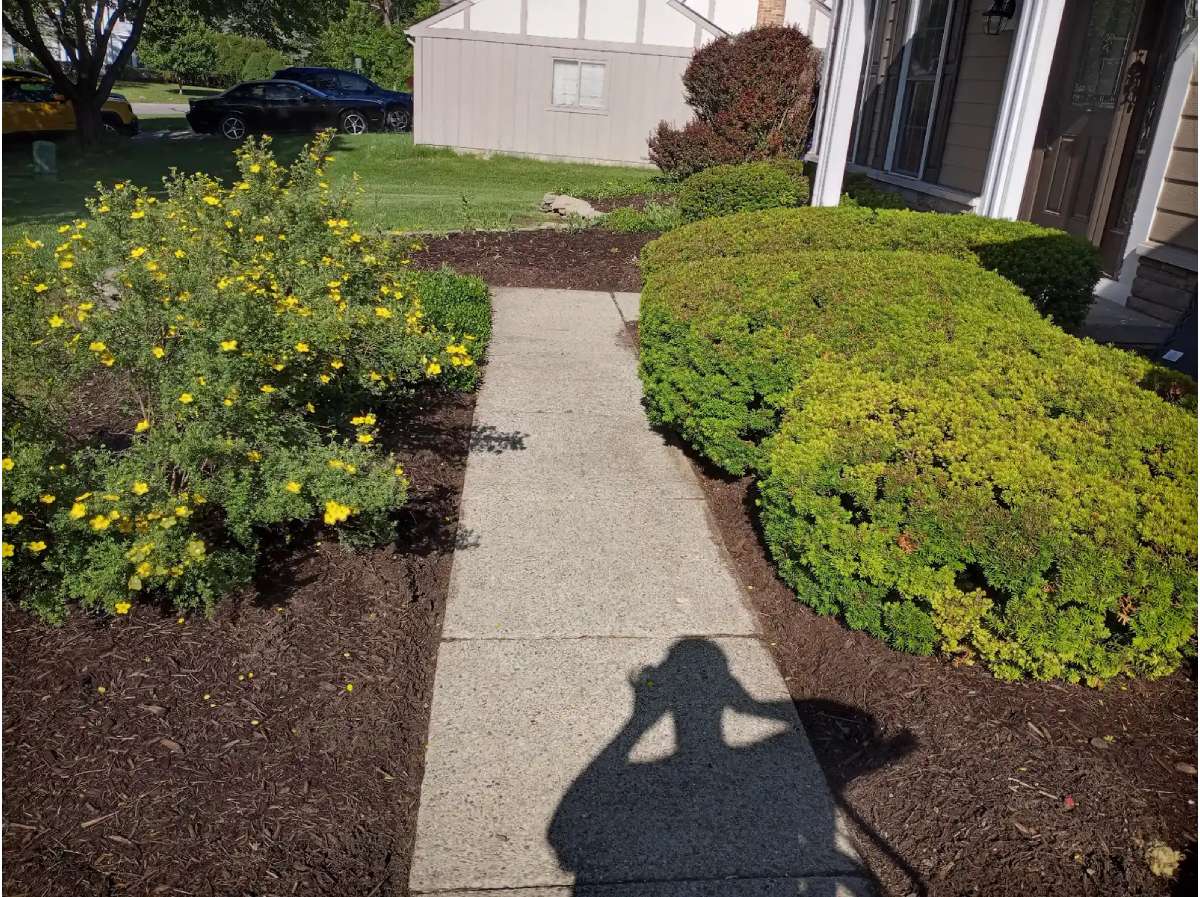
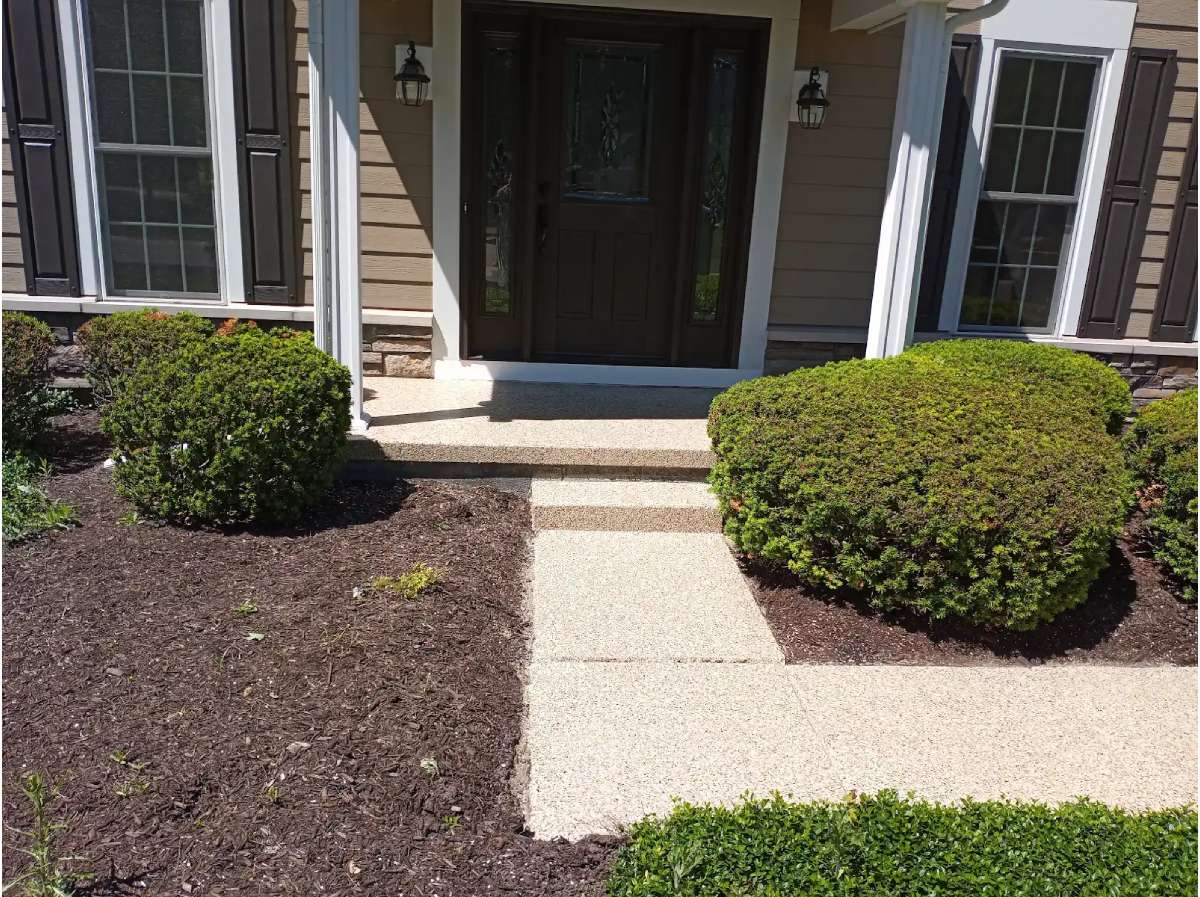
Porch and Walkway: Pecan Warmth
The front porch and walkway received the warm Pecan color system—2 liters of tan base paint with 1 liter of activator. Our crew broadcast 2 buckets of decorative flakes, creating a welcoming entrance that complemented the home’s exterior. The Pecan finish provided a natural, earthy aesthetic while the Shark Grip additive ensured safe footing on steps and sloped walkway sections.
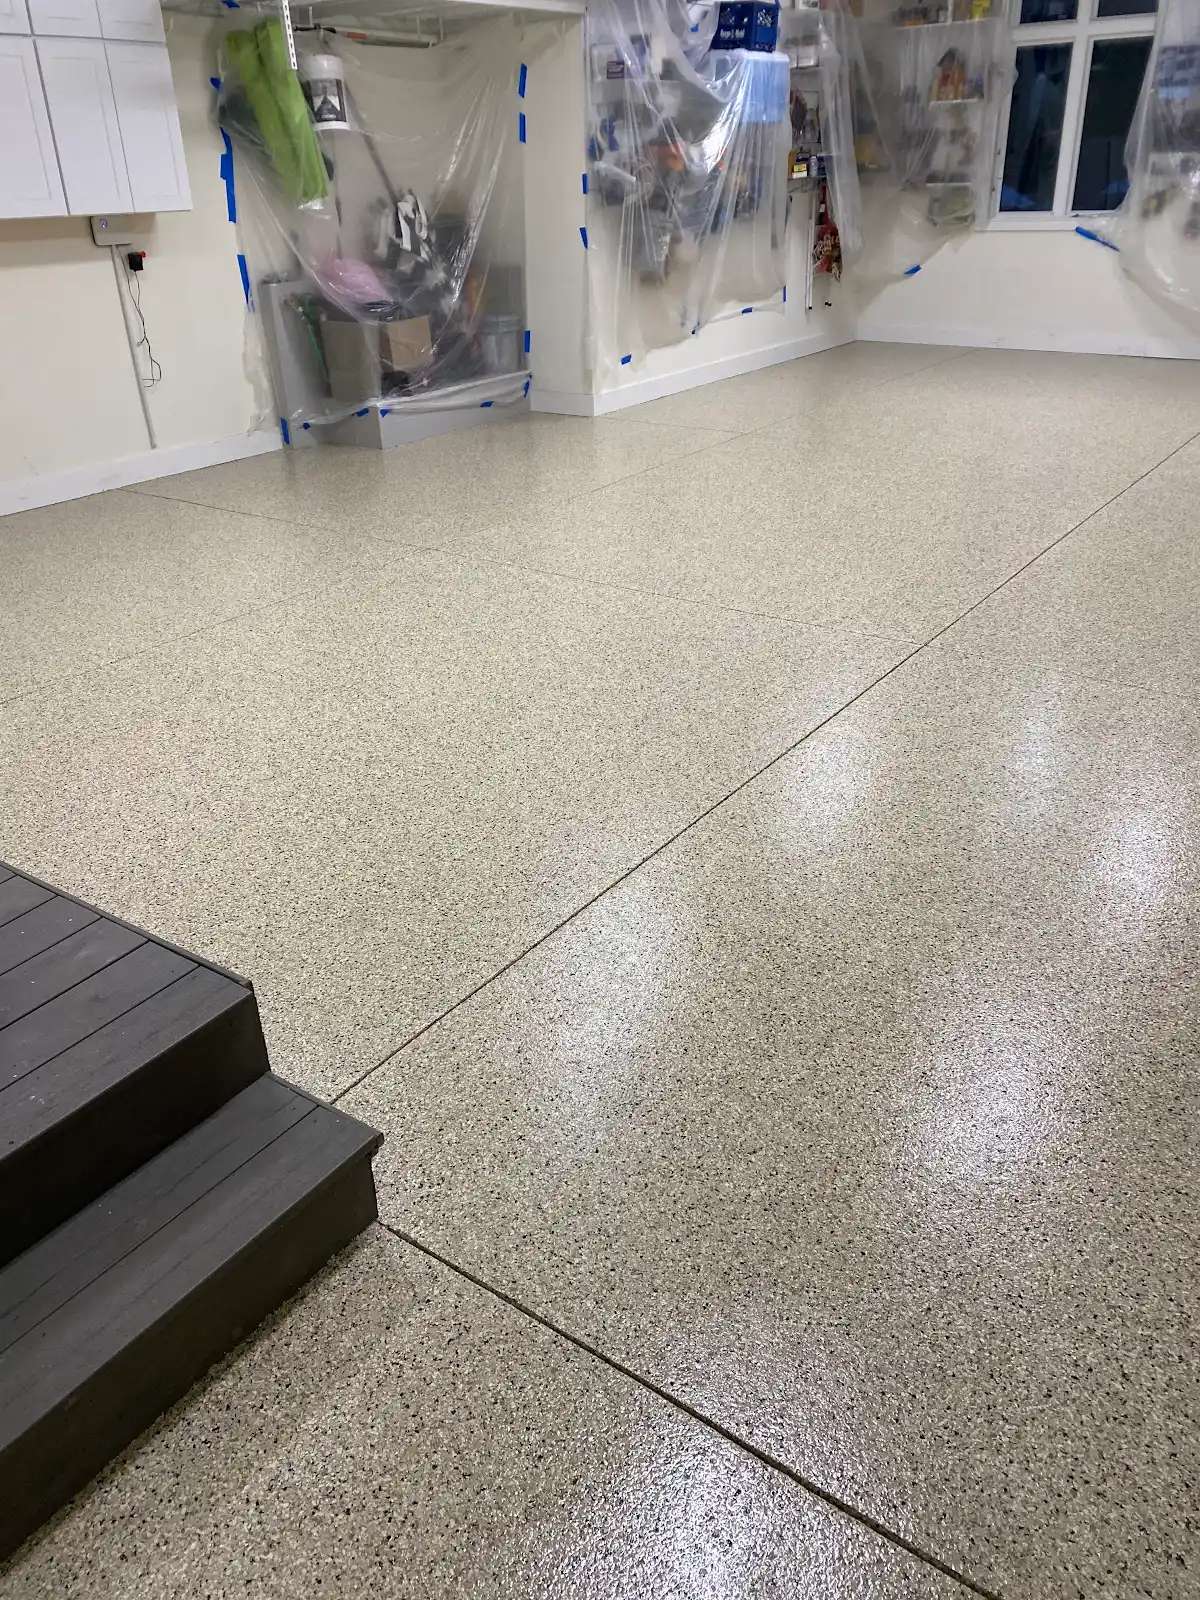
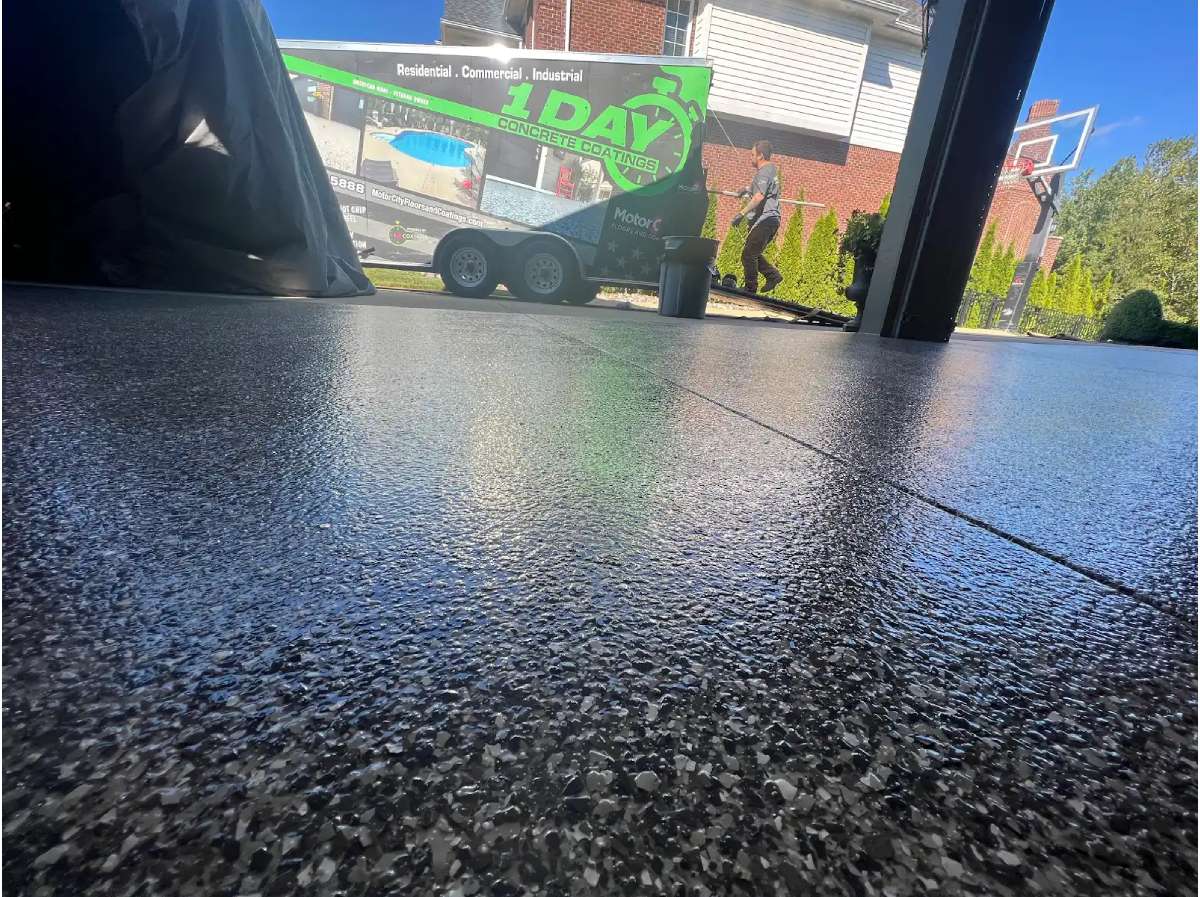
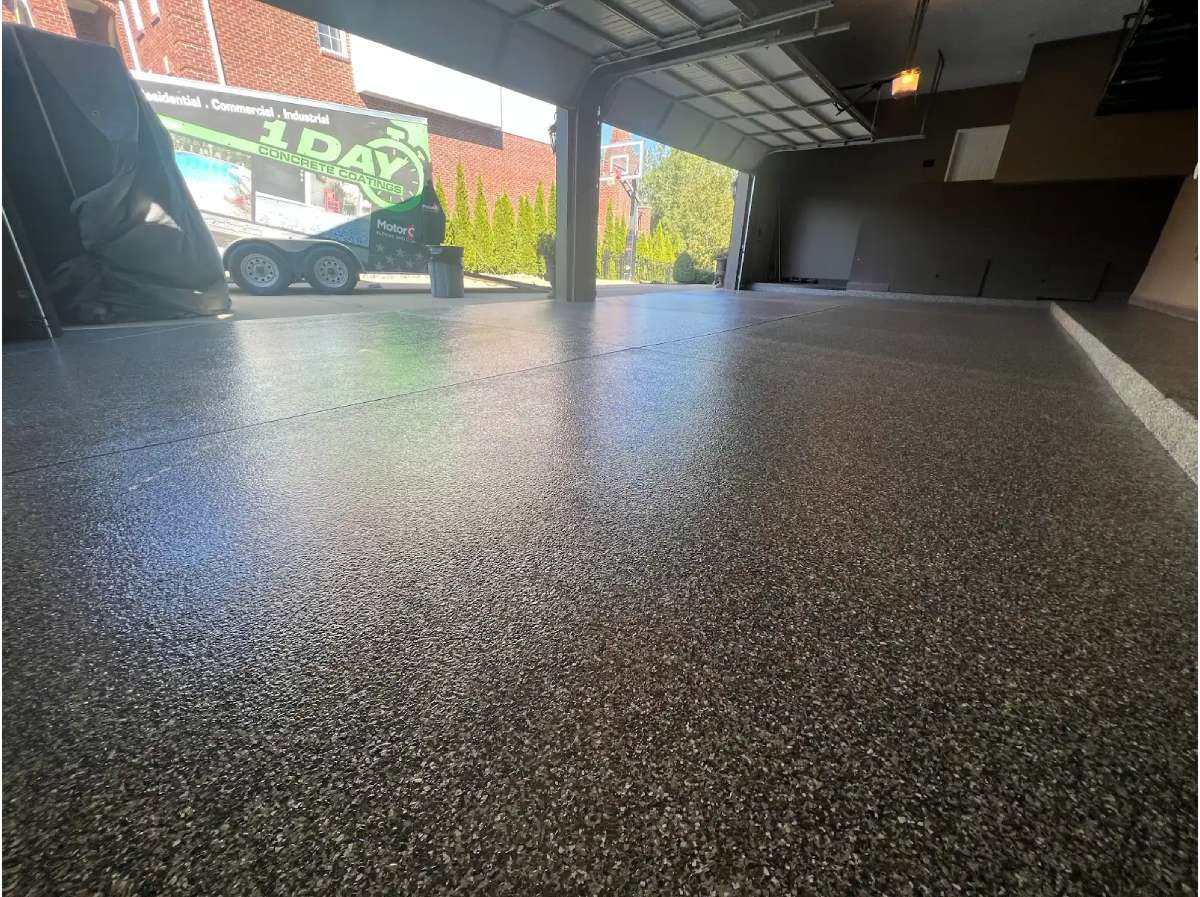
The Complete Transformation
The finished project represents a total property enhancement. The garage floor coating in its sophisticated Silvercreek finish is smooth, glossy, and protected against hot tire pickup, oil, and road salt. The front entrance showcases the inviting Pecan system, with consistent color and texture from walkway to porch to steps. Both surfaces provide the slip resistance the homeowners needed, with easy maintenance requiring only occasional sweeping and mopping. What began as seriously deteriorated concrete is now a cohesive, beautiful, and functional outdoor living space that will serve the family for decades to come.
Click on the photos to enlarge them
Garage Floor Coating
ON CLEAR CREEK DRIVE
Clear Creek Drive, Rochester Hills, Michigan
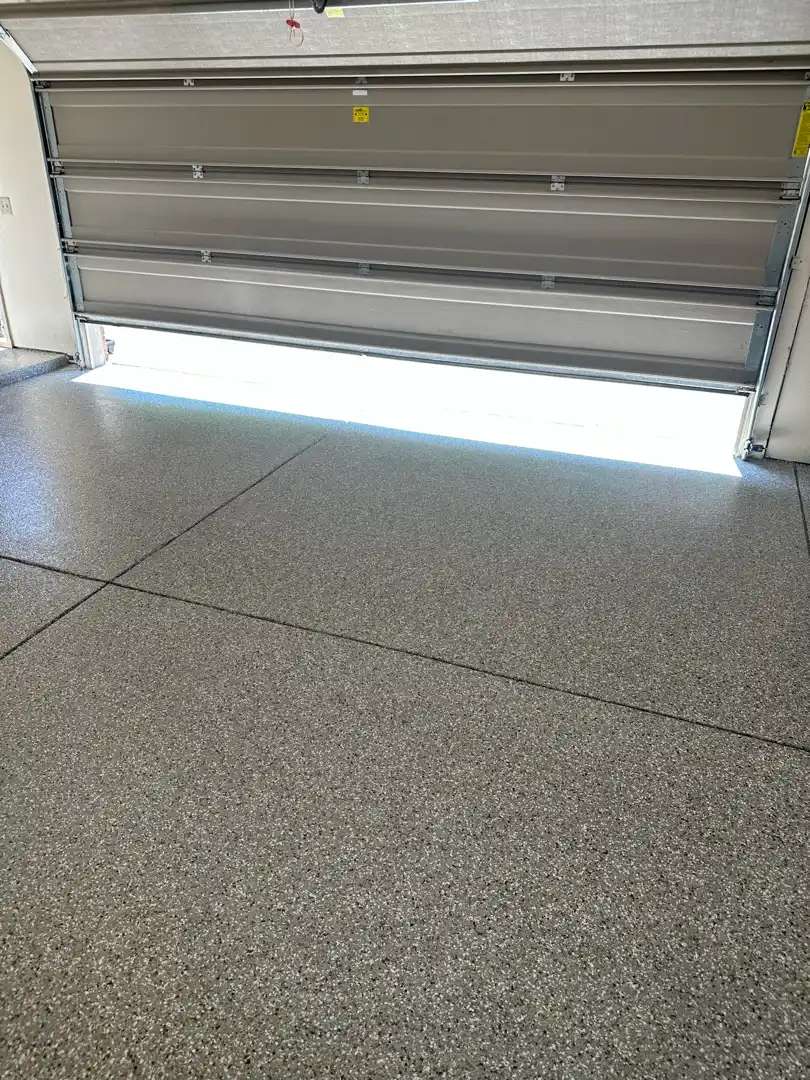
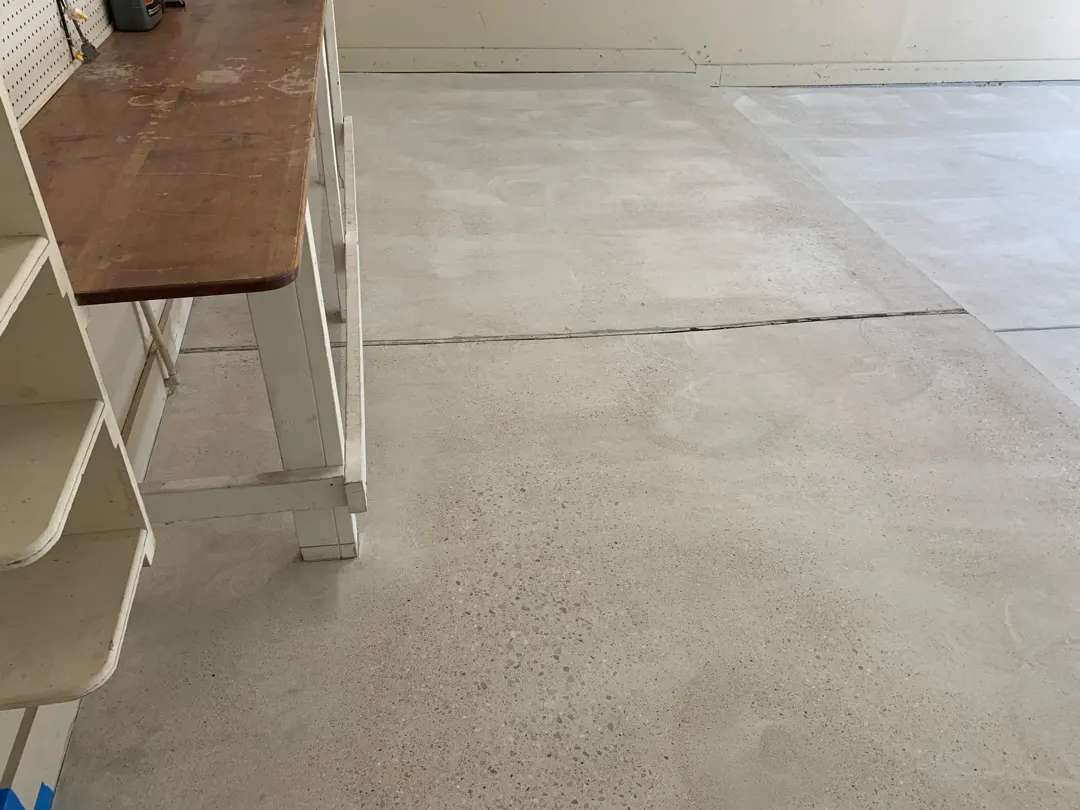
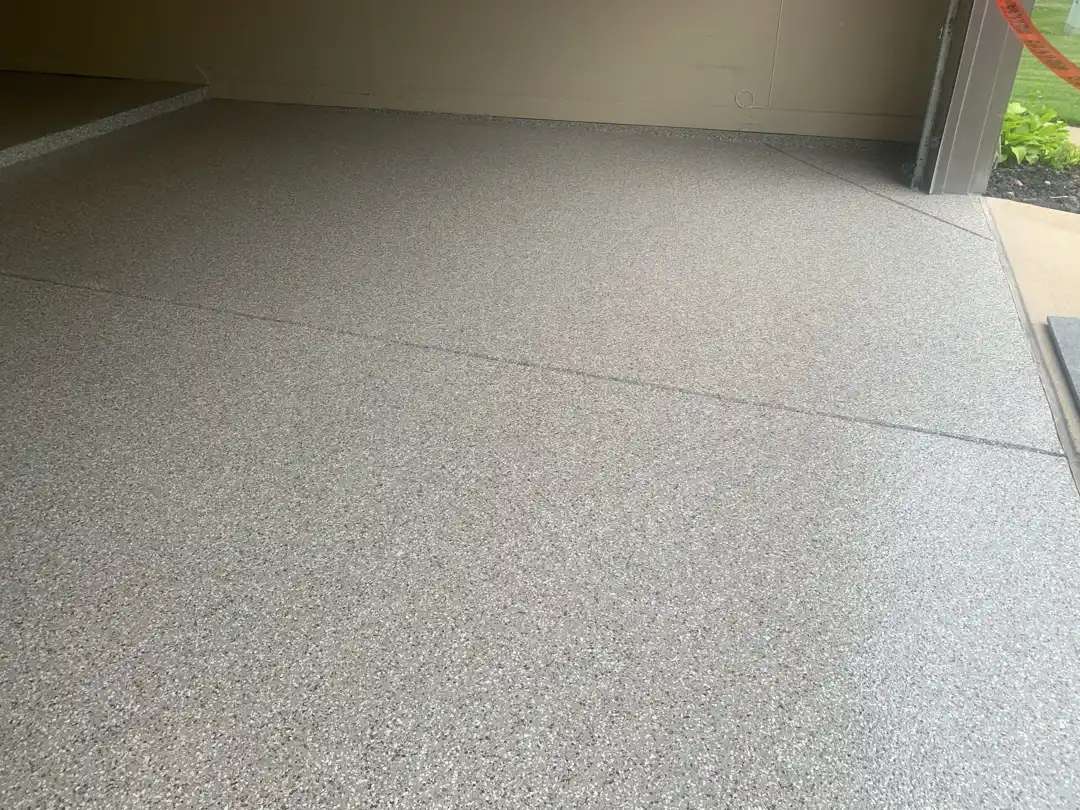
When the homeowners on Clear Creek Drive decided to upgrade their 745-square-foot garage, they chose MotorCity Flooring and Coatings to transform their space with the sophisticated polyurea/polyaspartic coating system in Silvercreek color. While their concrete was in relatively good shape with only a few minor cracks, years of use had left oil stains and surface discoloration that ruined the appearance of the garage.
Assessment and Preparation
Concrete Repairs
Although the floor was in good condition, the team addressed minor imperfections to ensure a flawless finish. They mixed substantial quantities of two-part mender—4 liters each of Part A and Part B—with 2 cups of sand for proper consistency. This repair work filled the few small cracks and surface irregularities, creating a perfectly smooth substrate for the polyurea/polyaspartic coating system.
Base Coat and Flake Application
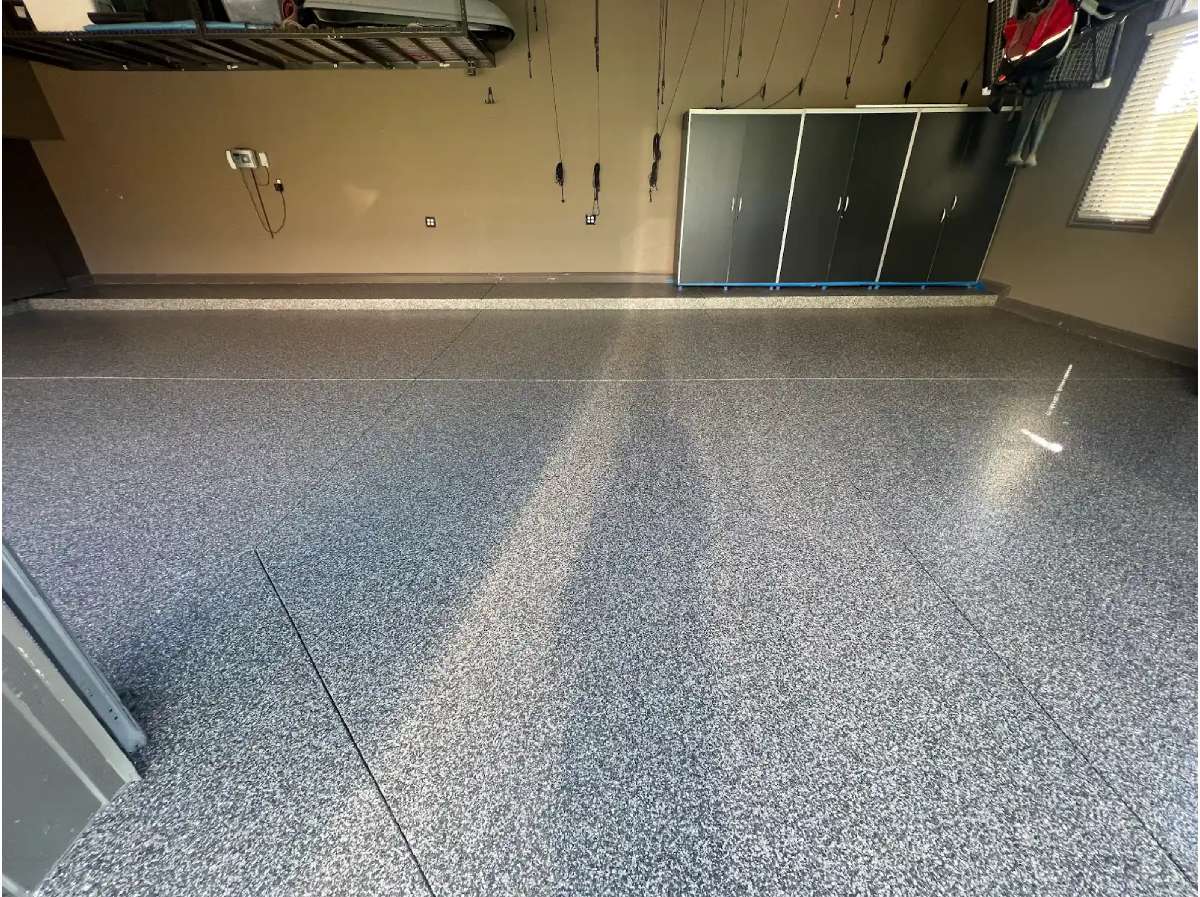
The crew mixed the grey base coat using 6 liters of base paint and 3 liters of activator, creating the foundation for the garage floor coating system. Working systematically across the garage, they rolled the two-part polyurea/polyaspartic coating in overlapping passes, ensuring uniform coverage and proper film thickness.
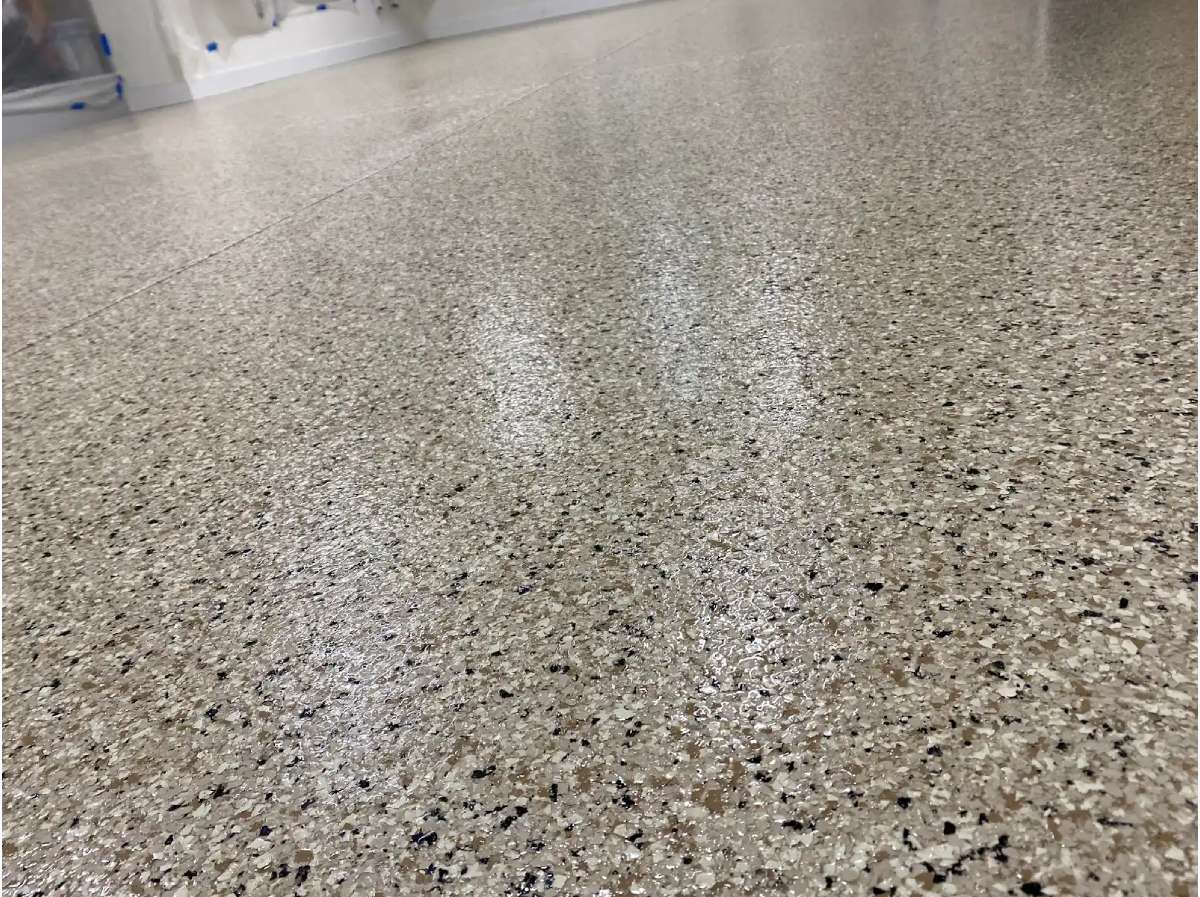
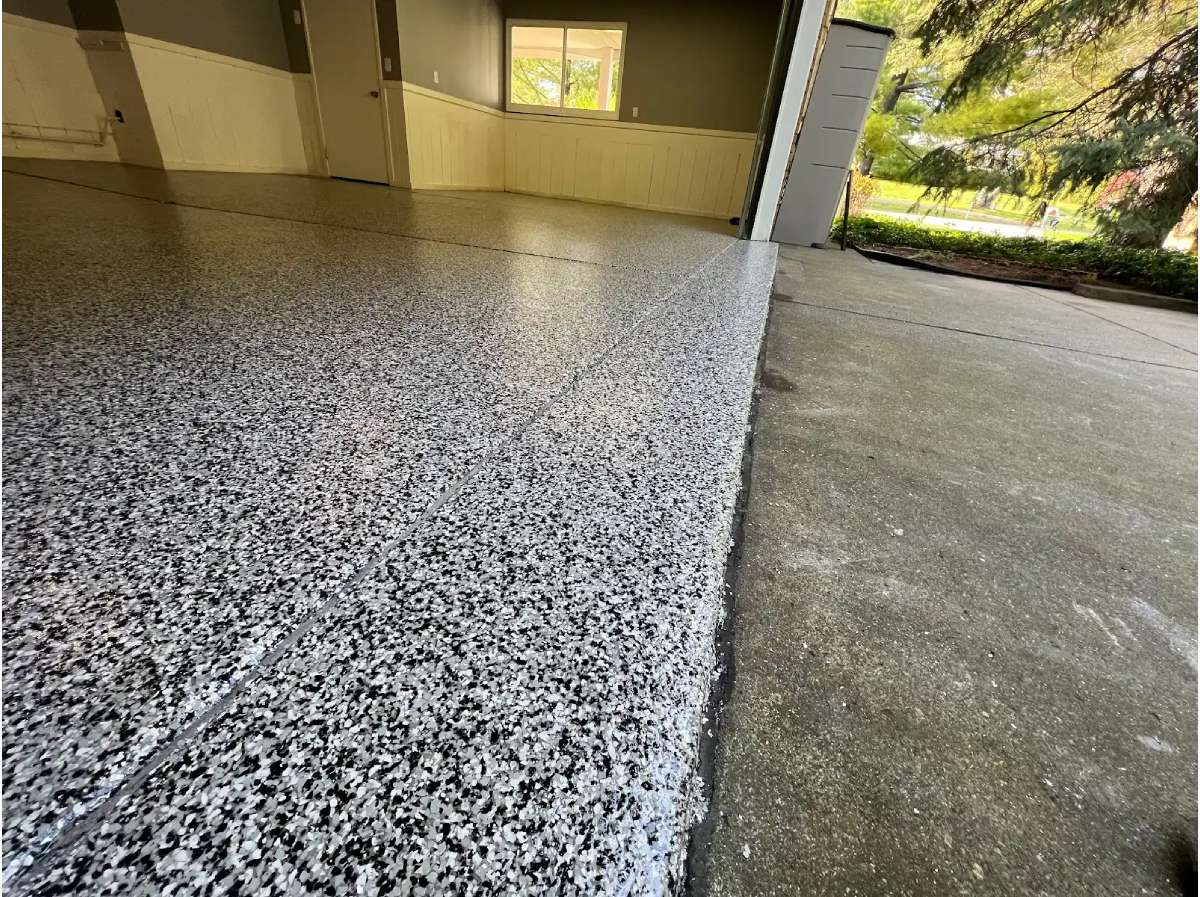
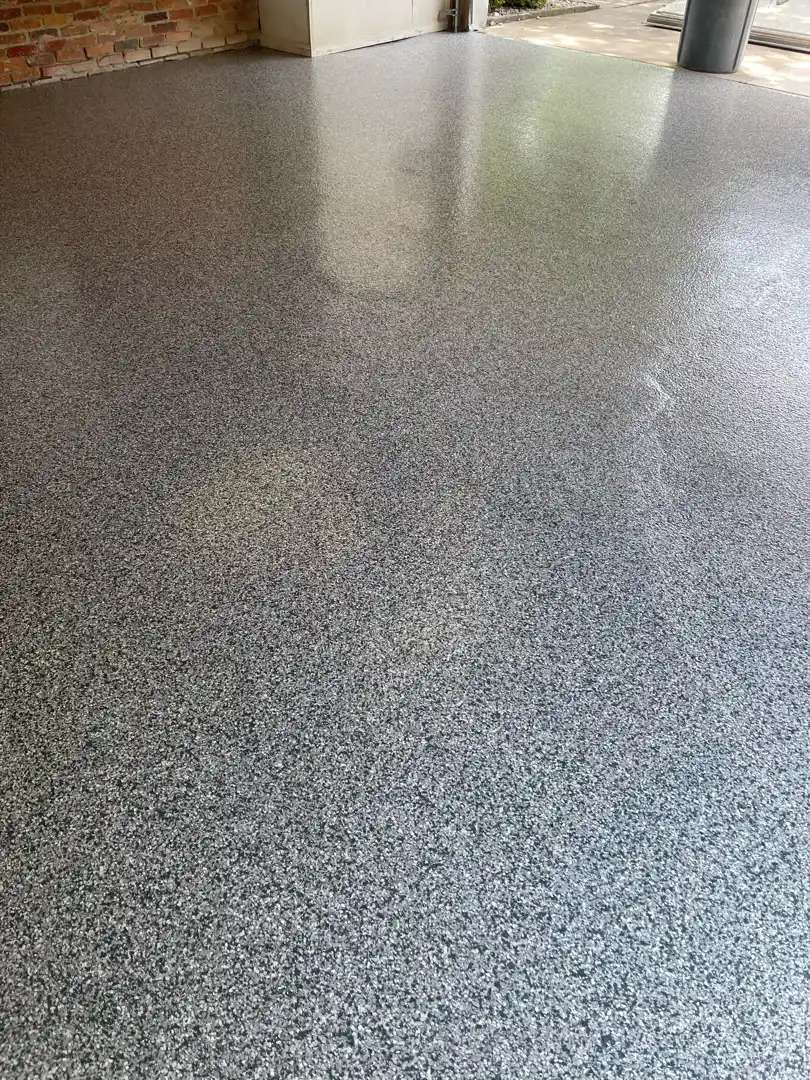
While the base coat remained wet, the team immediately broadcast the Silvercreek decorative flake blend—throwing 4 full boxes across the surface and recovering 1 box. This indicated heavy, near-full-coverage flake application. The Silvercreek palette features a sophisticated mix of black, white, and grey flakes that create a high-end, multi-dimensional appearance. The flakes fell randomly across the grey base, creating organic patterns and adding substantial visual interest.
Clear Coat Protection
The Finished Transformation
Click on the photos to enlarge them
Garage Floor Restoration
ON LONGFORD DRIVE
The homeowners on Longford Drive contacted MotorCity Flooring and Coatings facing a common but frustrating problem: their 556-square-foot garage had a failing epoxy coating that was peeling and delaminating. Rather than continue watching their floor deteriorate, they decided to invest in a professional polyurea/polyaspartic flooring system that would deliver lasting performance.
Initial Assessment and Challenges
Epoxy Removal and Surface Preparation
The crew’s first task was removing the failing epoxy coating. Using professional equipment, they systematically stripped away the peeling material, ensuring complete removal to prevent any future adhesion issues. This critical step revealed the bare concrete beneath—stained and pitted but structurally sound.
Once the old coating was removed, the team deployed their diamond grinding equipment across all 556 square feet. The grinding process served dual purposes: removing any remaining epoxy residue while opening the concrete’s pores to create the mechanical profile necessary for optimal adhesion. The crew paid special attention to the expansion joints, cleaning them thoroughly and preparing the edges for the customer’s caulking work.
Concrete Repairs
The Domino System Application
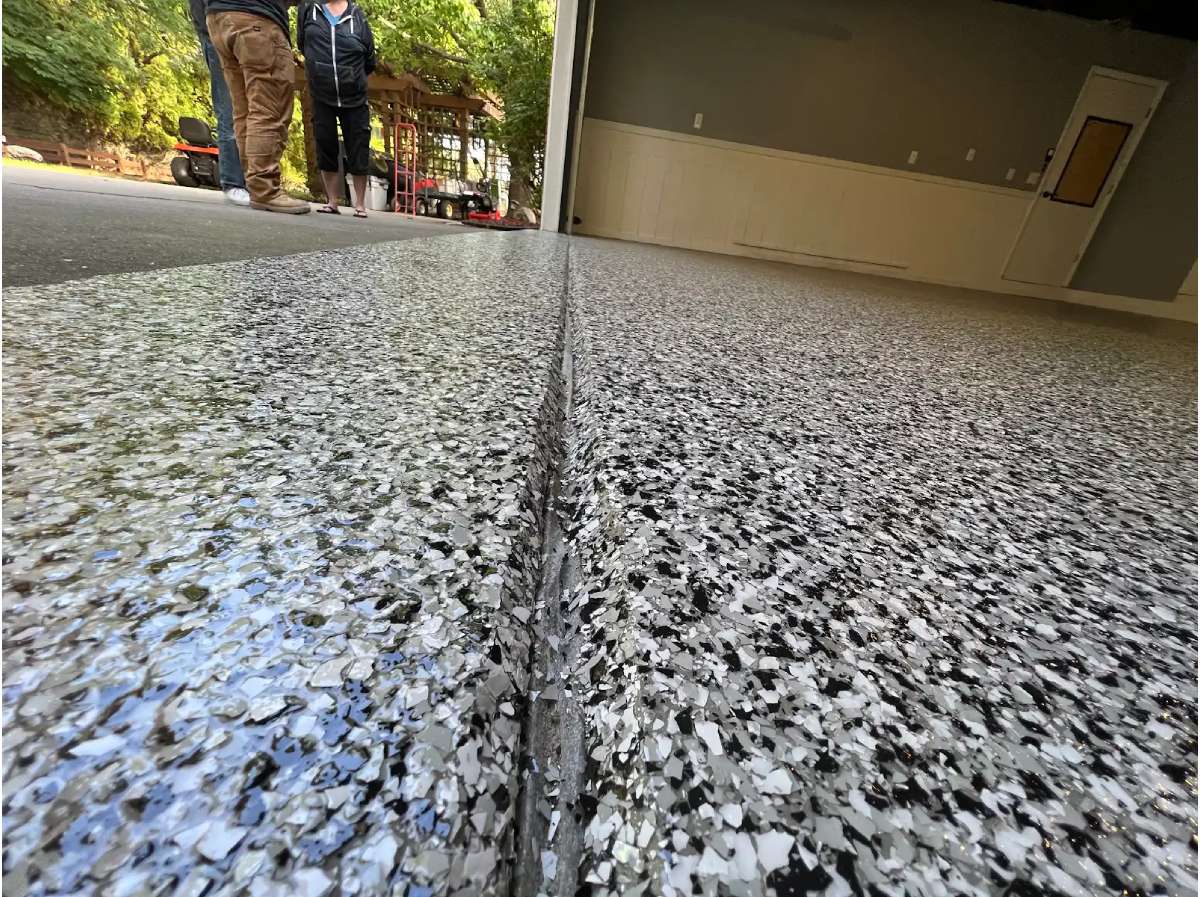
The crew mixed the base coat for the Domino color system—a striking black and white palette that creates dramatic visual impact. Working methodically across the garage, they rolled the two-part polyurea/polyaspartic coating in overlapping passes, building a strong foundation layer.
While the base coat remained wet, the team broadcast the Domino decorative flake blend. The black and white flake combination creates a bold, high-contrast appearance that’s both modern and timeless. The flakes fell randomly across the surface, creating organic patterns with substantial coverage that would add texture and visual interest while helping disguise minor dirt and debris.
Clear Coat Protection
The Complete Transformation
Click on the photos to enlarge them
CONCRETE FLOOR COATING
ON LINCOLNSHIRE DRIVE
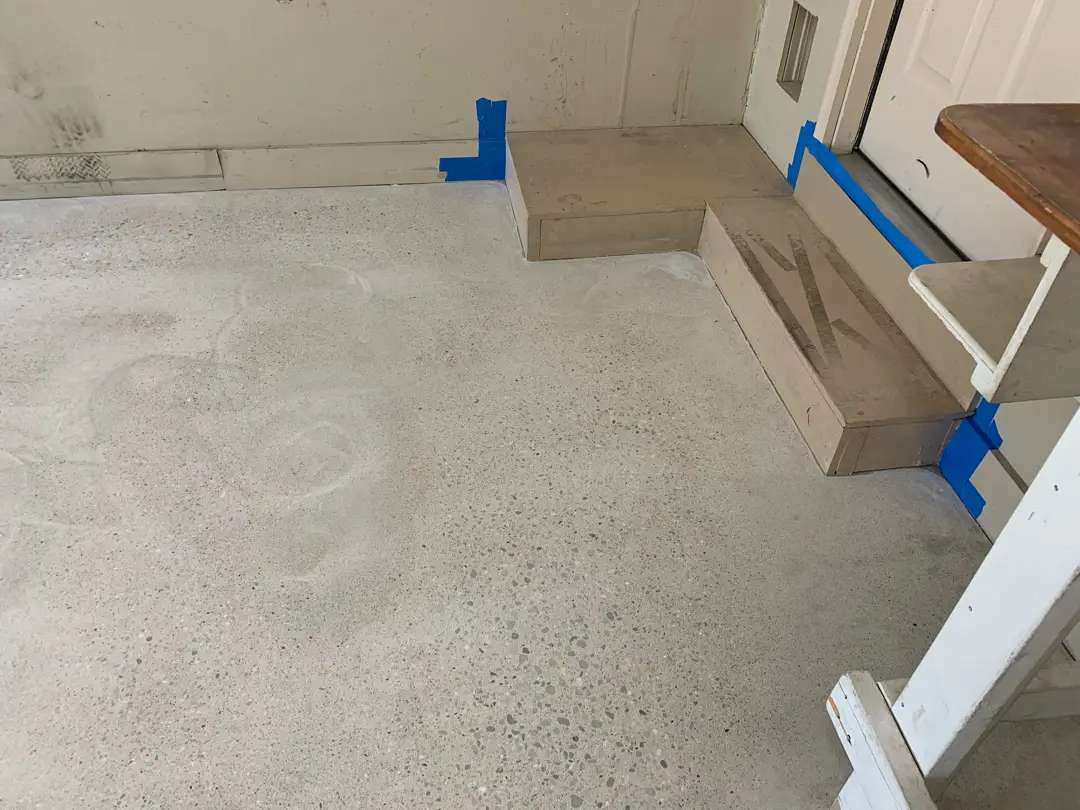
The homeowners on Lincolnshire Drive reached out to MotorCity Flooring and Coatings with plans to transform their 697-square-foot garage with the warm, inviting polyurea/polyaspartic coating system. The concrete showed typical garage wear—a few small cracks and some scattered pitting—but maintained good overall condition. The project would exclude the step-up area at the back of the garage, focusing instead on the main floor and the 7-foot step-up area along the side with its two concrete steps.
Perfect Conditions and Preparation
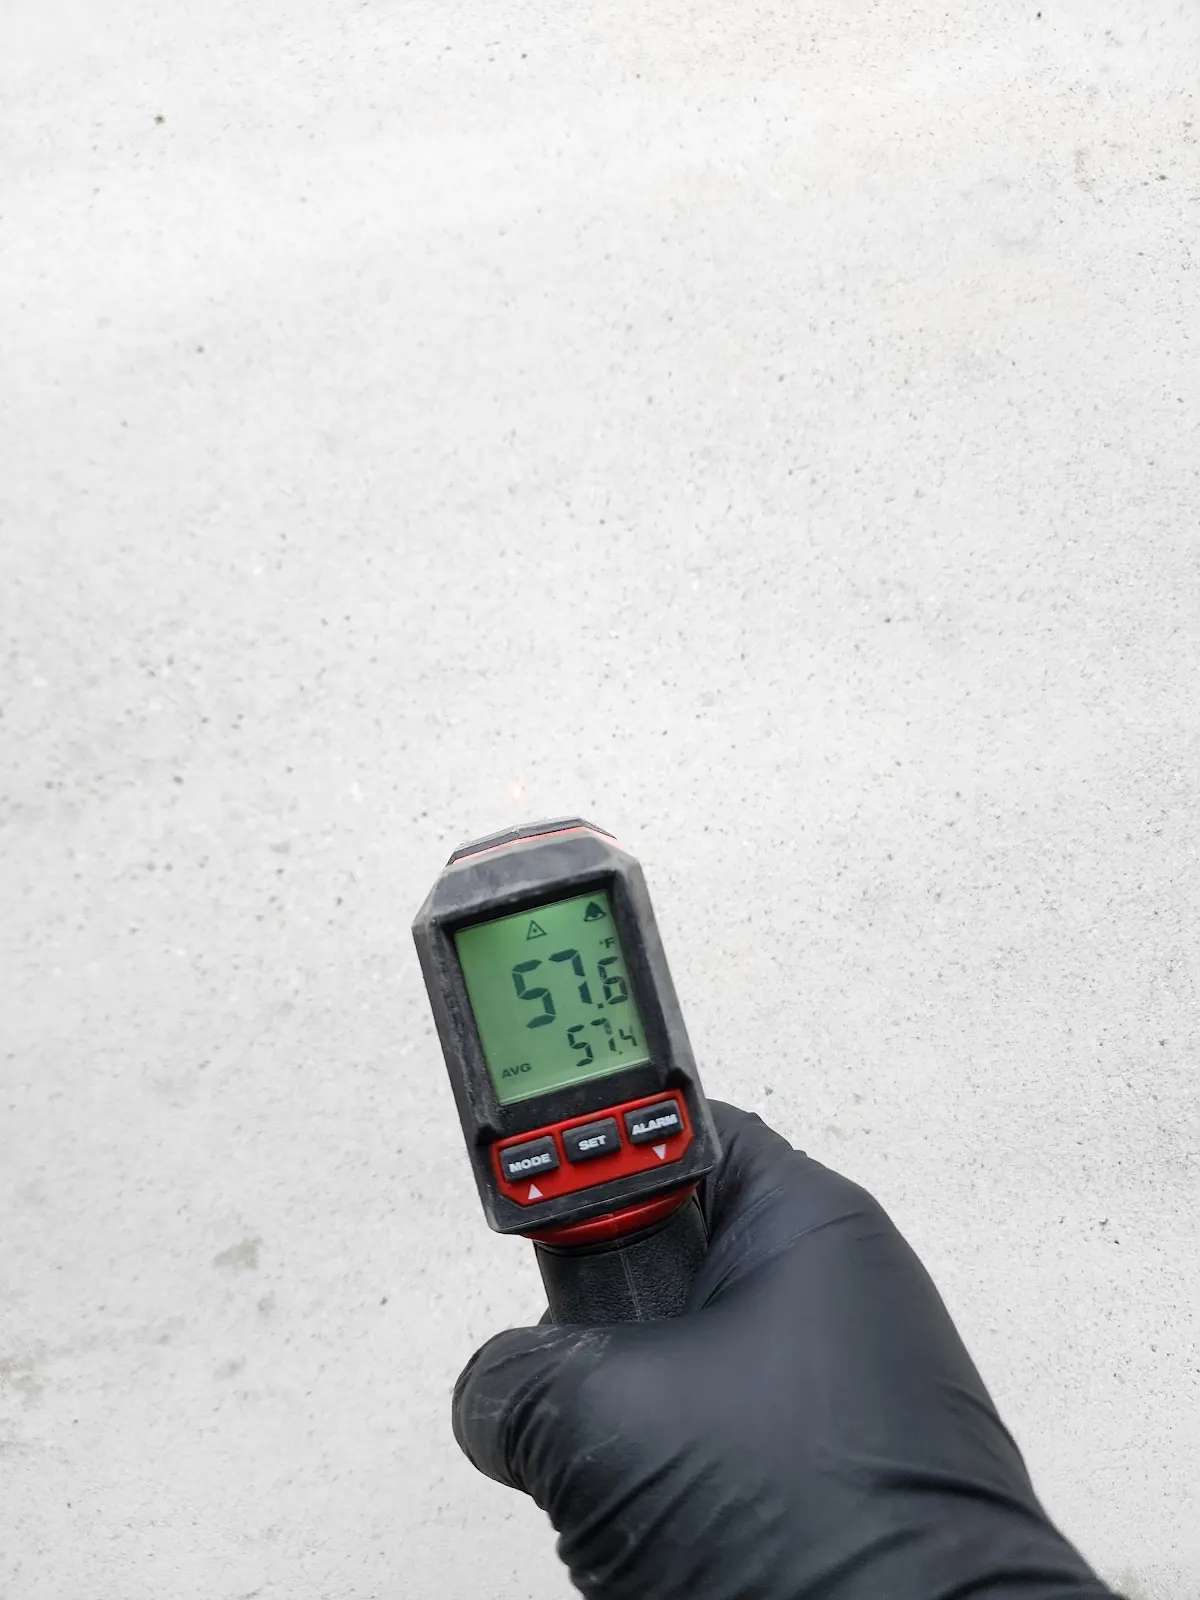
The MotorCity team arrived to find ideal working conditions. Temperature monitoring showed the concrete at 57.6 degrees—within the optimal range for coating application. Moisture testing recorded 4% content, confirming the floor was ready for coating. Our crew deployed their diamond grinding equipment, and the concrete responded beautifully—the grind went smoothly with no complications or hard spots that sometimes slow the process.
Following proper industry practice, the team used V-blading to prepare all control joints and joint seams. This technique creates clean, angled edges that allow the coating to flow into joints properly while preventing future edge lifting—a common failure point in less carefully executed installations.
Concrete Repairs and Surface Refinement
Our crew mixed their two-part mender system—1.5 liters each of Part A and Part B with 8 cups of sand—addressing the scattered pitting and small cracks throughout the garage. The substantial sand addition provided proper body and texture, ensuring repairs would cure with similar properties to the surrounding concrete. Each imperfection was carefully filled and troweled smooth, creating the perfect canvas for the polyurea/polyaspartic floor coating system.
The Pebble Beach Application
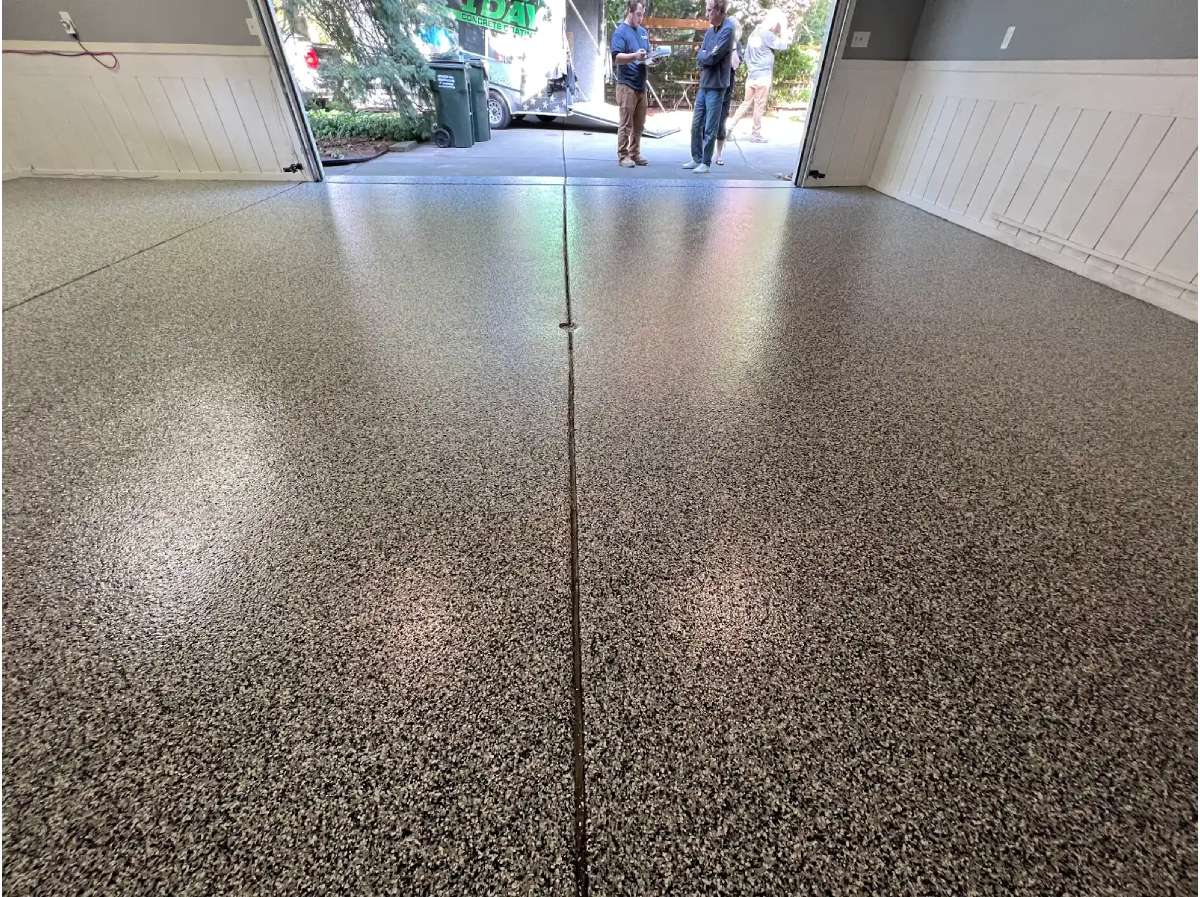
Our team mixed the tan base coat using 6 liters of base paint and 3 liters of hardener, creating the warm foundation that characterizes the Pebble Beach palette. Working systematically across all 697 square feet, they rolled the coating in overlapping passes, building a uniform layer with proper film thickness.
While the base remained wet, our crew broadcast the Pebble Beach decorative flake blend—throwing 5 full boxes and recovering 3, indicating moderate to heavy coverage. The Pebble Beach coating features warm tan, beige, and cream flakes that create a sophisticated, natural appearance reminiscent of sandy beaches. The coating conditions proved ideal—the base coat and flakes cured in just 1 hour and 20 minutes, allowing our team to proceed efficiently to the clear coat phase.
Clear Coat Protection
The final phase involved mixing and applying the clear coat system—9 liters each of Part A and Part B—with 36-grit traction additive thoroughly incorporated. This coarser grit provides substantial slip resistance, particularly important on the side step-up area and two concrete steps where safe footing is essential. The clear coat flowed beautifully over the flakes, encapsulating them completely and creating the smooth, sealed surface with brilliant shine.
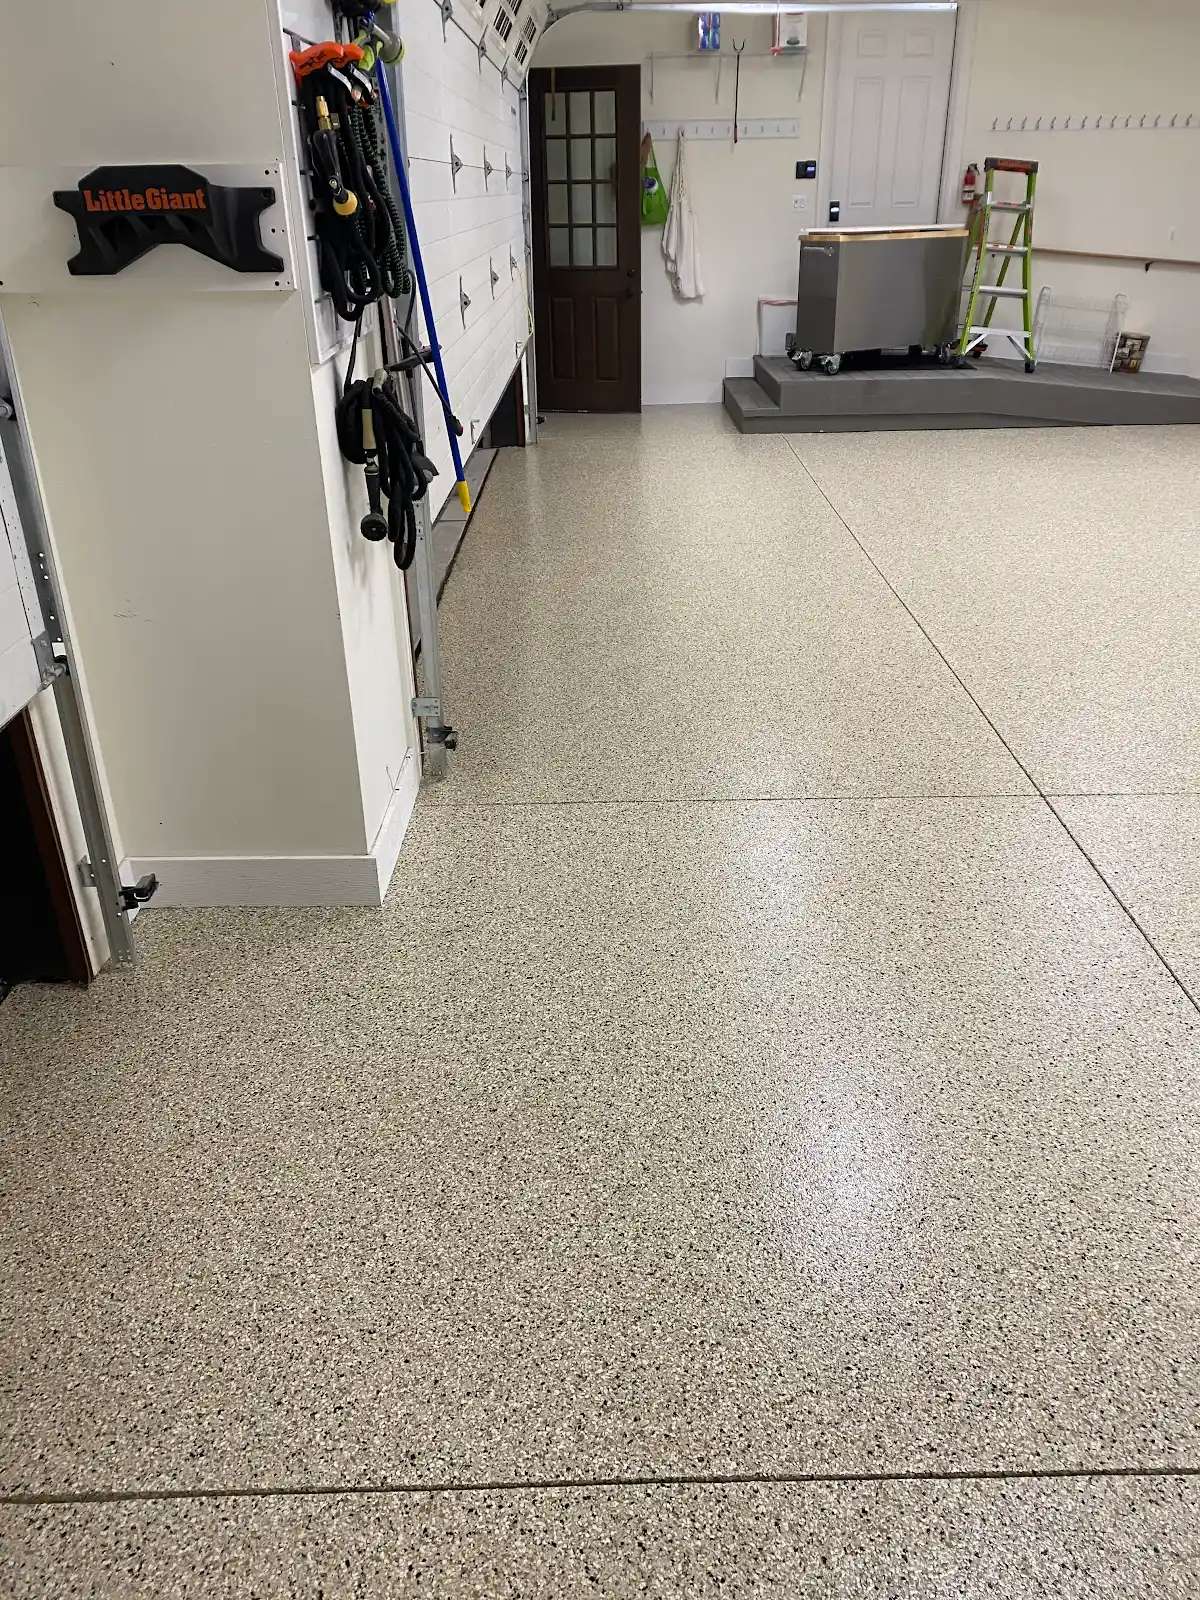
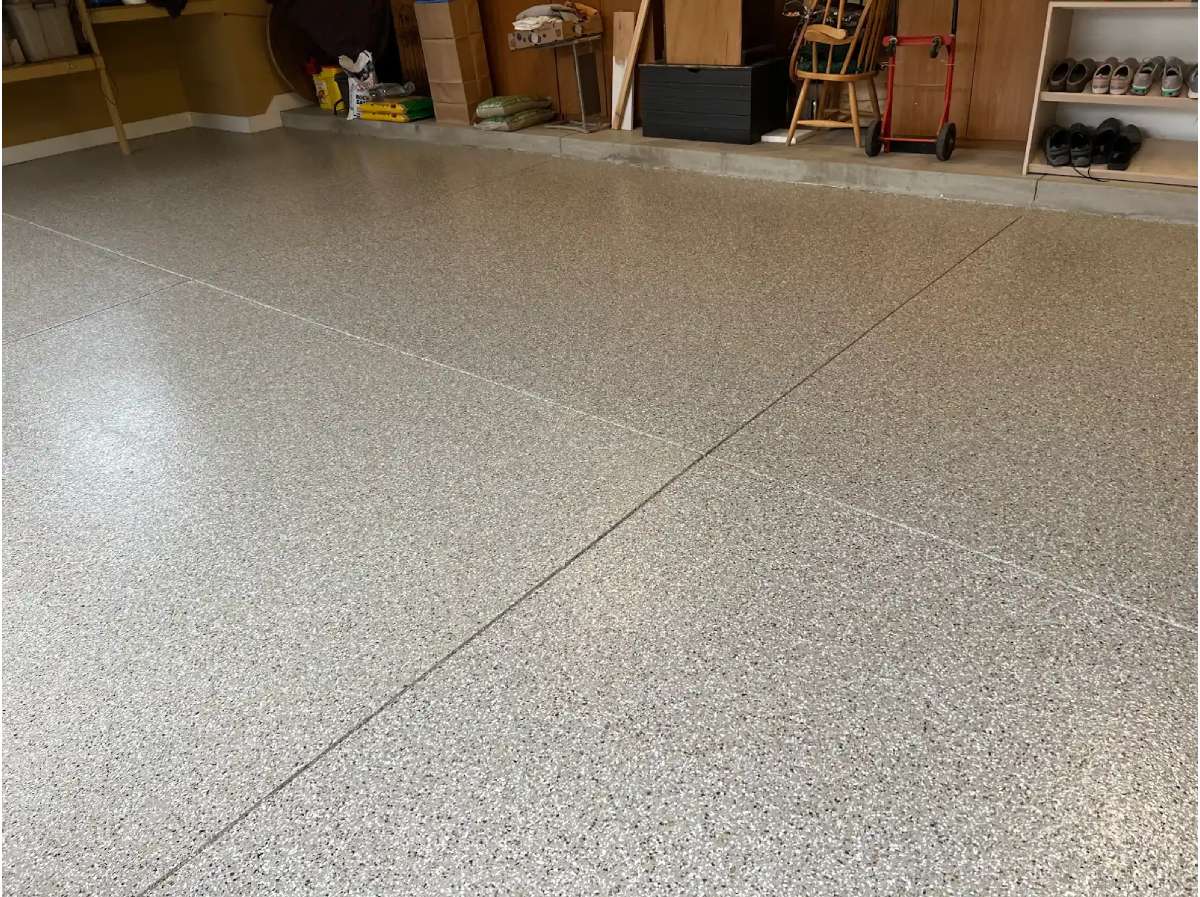
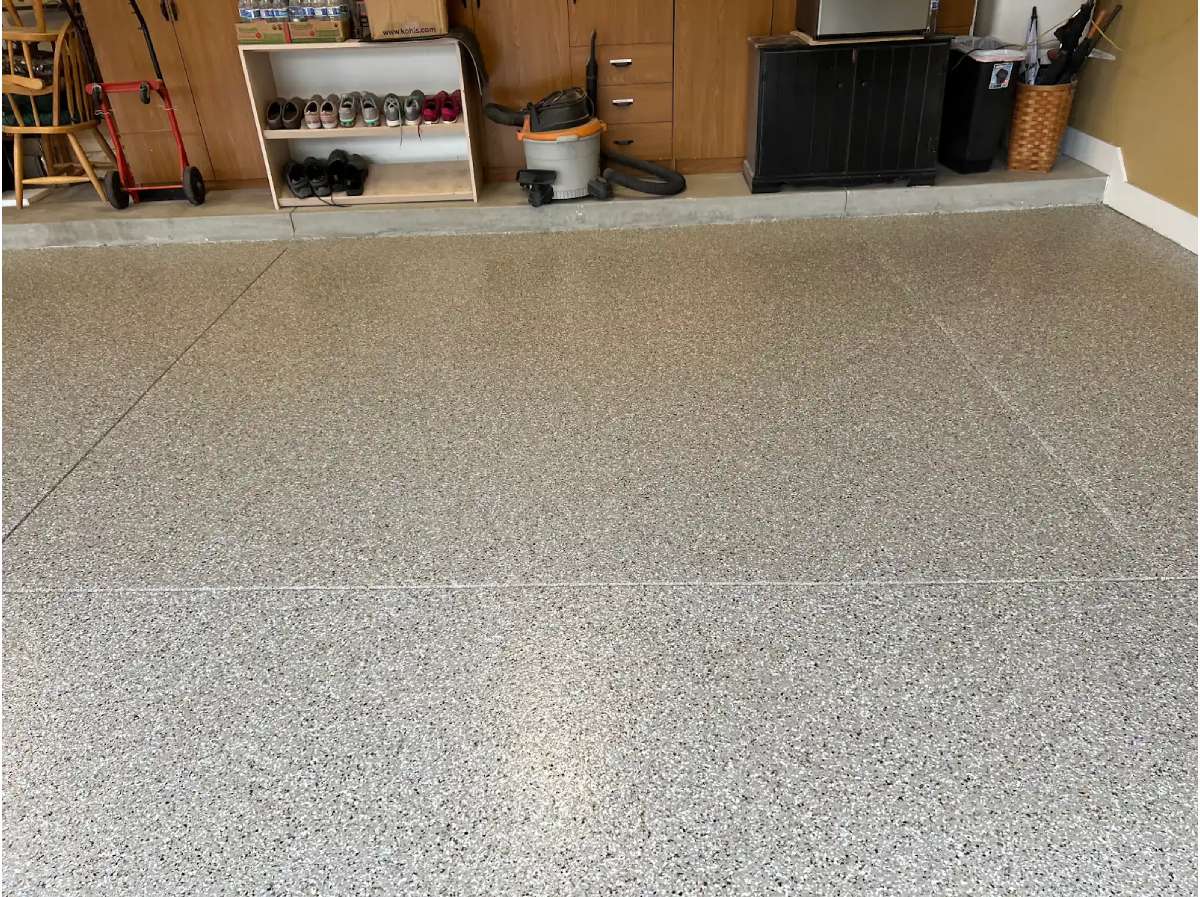
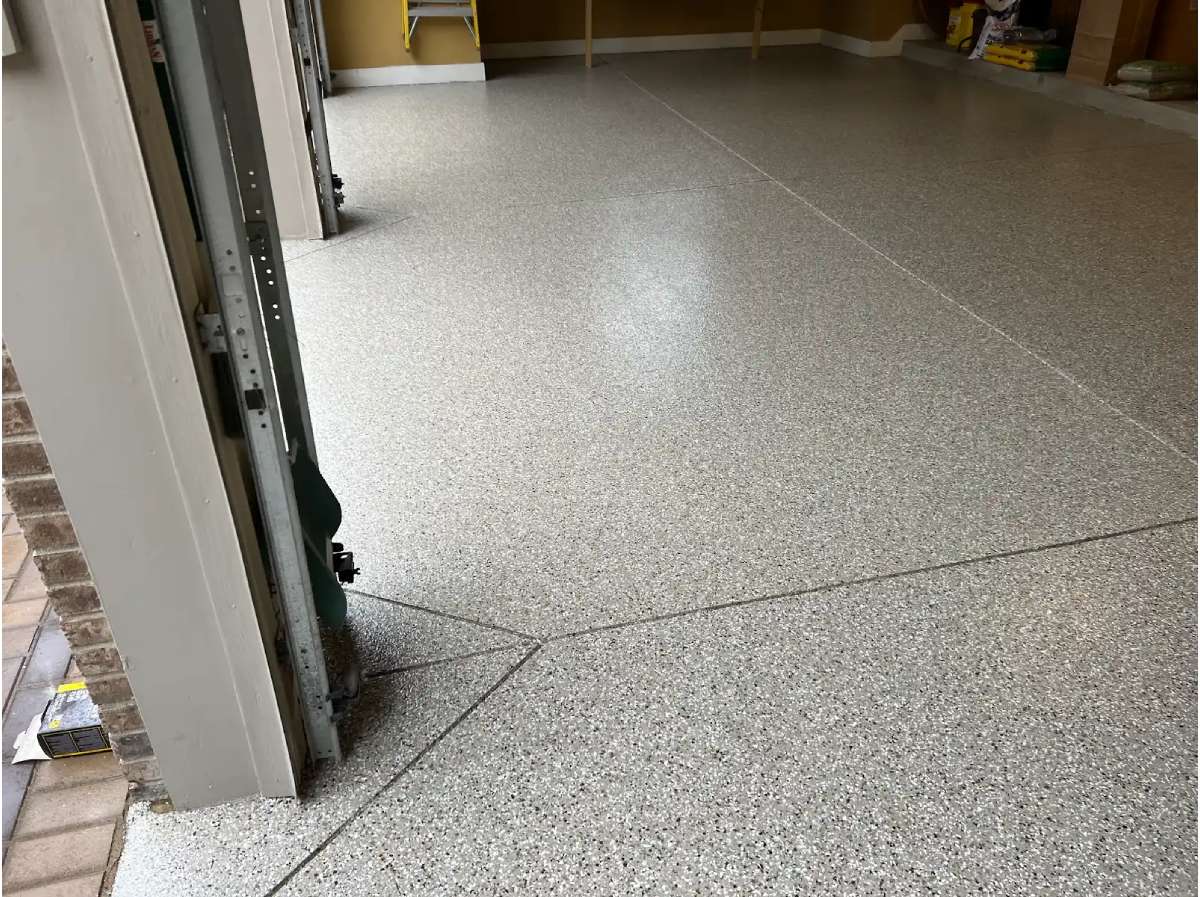
The Finished Transformation
The completed Lincolnshire Drive garage showcases the warm elegance of the Pebble Beach finish. The 697 square feet now feature a sophisticated tan and cream finish that elevates the entire space while providing decades of protection against Michigan’s harsh conditions—oil, chemicals, road salt, and hot tire pickup all repelled by the professional-grade polyurea/polyaspartic garage floor coating system.
Click on the photos to enlarge them
Garage FLOOR COATING
ON BEACON HILL COURT
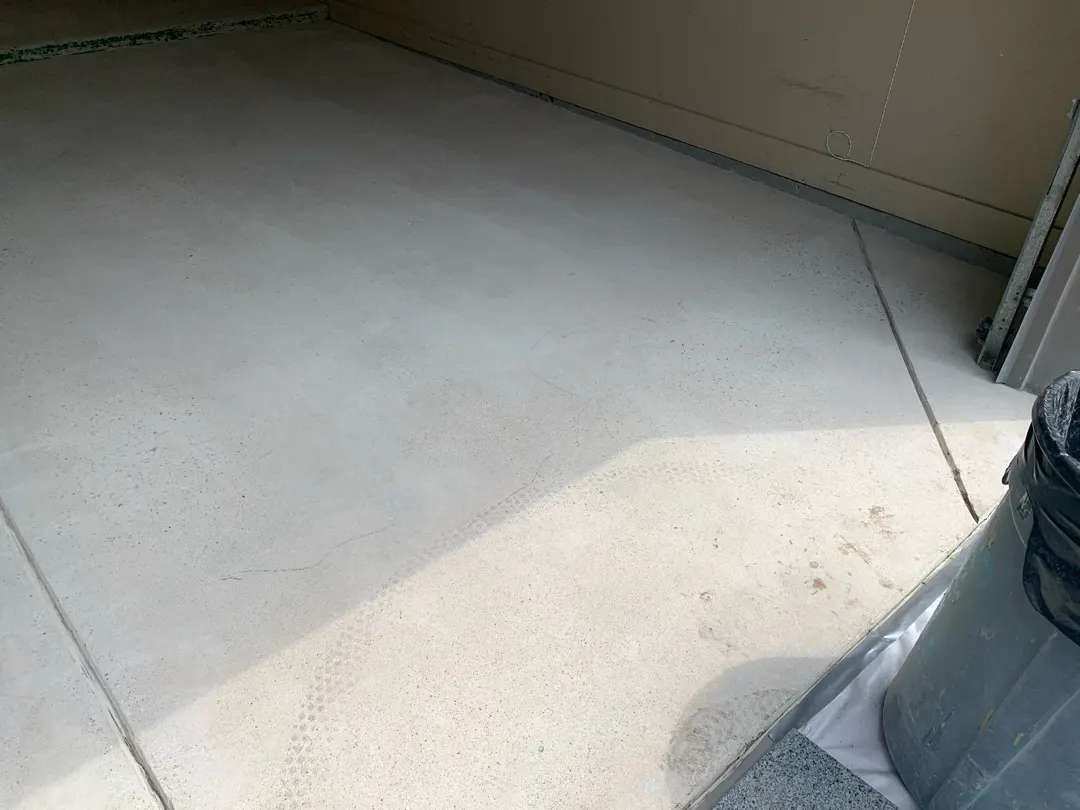
Preparation and Coordination
The MotorCity team arrived after the homeowners had removed the trim boards, exposing the wall edges and allowing for complete coverage. Moisture testing confirmed 4% content—within acceptable parameters. Our crew deployed their diamond grinding equipment across all 639 square feet plus the single step and 20 feet of vertical surface along the walls, creating the mechanical profile necessary for optimal adhesion while taking care to contain dust and protect the walls the homeowners planned to paint.
Concrete Repairs
The before photos show a floor marked by years of use—oil stains, multiple cracks, and pitting throughout the surface. The crew mixed their two-part mender system, methodically addressing each crack and pit. The process photos capture the systematic repair work, with fresh mender clearly visible across multiple areas. Each repair was carefully troweled smooth and allowed to cure, creating a sound, level substrate. Our team paid special attention to the single step and the wall edges where the trim had been removed, ensuring proper preparation and smooth transitions.
The Pebble Beach Application
With all repairs complete, our crew applied the warm tan base coat for the polyurea/polyaspartic coating system, working carefully to avoid splatter on the freshly prepared walls. They rolled the coating across the main floor, up the 20 feet of vertical surface, and over the step, ensuring complete coverage and uniform thickness throughout.
While the base remained wet, the team broadcast the Pebble Beach decorative flake blend—featuring warm tan, beige, and cream flakes that create the system’s signature natural appearance. The flakes provided substantial coverage across the entire surface, adding both visual depth and texture.
Clear Coat and Final Protection
The Complete Transformation
The finished Beacon Hill Court garage represents a dramatic upgrade that perfectly complements the homeowners’ renovation project. The 639 square feet now showcase the sophisticated Pebble Beach finish—warm, inviting, and professional. The coating extends cleanly to all wall edges where the trim will be reinstalled, the step is beautifully integrated, and the vertical surfaces tie everything together. Most importantly, the floor is now protected by a professional-grade polyurea/polyaspartic garage floor coating system that will handle decades of use while the homeowners complete their painting and trim reinstallation to finish their renovation vision.
Click on the photos to enlarge them
Garage Floor Coating
ON SNOWY OWL COURT
Snowy Owl Court, Rochester, Michigan
Logistical Challenges and Site Assessment
The MotorCity team arrived to find the steep driveway living up to its description. Rather than risk equipment damage or safety issues, they strategically parked their trailer at the bottom of the hill and carried materials up—adding physical challenge to an already demanding project. Moisture testing recorded 4% content, confirming the floor was ready for coating once the old epoxy was removed.
Our crew also assessed the garage apron where it met the driveway. Old caulking had deteriorated and would prevent clean coating edges, so the team carefully cut and removed it, creating a pristine line that the homeowner would recaulk after the coating cured.
Epoxy Removal and Surface Preparation
Using professional equipment, our crew systematically stripped away the failing epoxy coating. The removal process revealed the concrete beneath—stained and showing typical garage wear but structurally sound. Once the old coating was completely removed, diamond grinding equipment was deployed across all 528 square feet, the 20-foot step-up area, 10 feet of vertical surface on one side, and the single wood step.
The grinding process served dual purposes: removing any residual epoxy while opening the concrete’s pores to create optimal adhesion profile. Our crew paid particular attention to preparing the wood step with appropriate surface profile for proper coating adhesion.
Concrete Repairs
Ourteam mixed the two-part mender system—0.25 liters each of Part A and Part B with 4 cups of sand—addressing scattered imperfections throughout the garage. The process photos capture the careful mender application, with fresh repair material visible in multiple areas. Each repair was troweled smooth and allowed to cure completely.
The Pebble Beach Application
Our crew mixed the tan base coat using 5 liters of base paint and 2.5 liters of hardener, creating the warm foundation characteristic of the Pebble Beach color flake blend. Working methodically across the main floor, up the step, across the vertical surfaces, and over the wood step, they rolled the coating in overlapping passes.
While the base remained wet, our team broadcast the Pebble Beach decorative flake blend—throwing 4.5 boxes and recovering 4.0 boxes, indicating light to moderate coverage. The warm tan, beige, and cream flakes created the natural, sophisticated appearance that defines the Pebble Beach palette. The long installation time—from 8:15am to 4:55pm—reflected the complexity of the epoxy removal, apron edge work, and multi-surface coating application.
Clear Coat Protection and Edge Work
The final phase involved mixing and applying the clear coat system—8 liters each of Part A and Part B—with 14.5 caps of 16-grit traction additive (noted as “14grit+” on the job sheet) providing enhanced slip resistance. The clear coat flowed beautifully over the flakes, encapsulating them and creating the smooth, sealed surface with brilliant shine.
Our crew paid meticulous attention to the garage apron edge, creating a clean, professional line ready for the homeowner’s recaulking work.
The Complete Transformation
The finished Snowy Owl Court garage represents professional problem-solving and quality craftsmanship. Despite the logistical challenges of the steep driveway and the complexity of epoxy removal, the result is a stunning Pebble Beach garage floor coating that flows seamlessly across all 528 square feet, up the step-up area, across the vertical surfaces, and over the wood step. The clean edge at the apron awaits the homeowner’s caulking, while the warm, natural finish provides decades of protection against everything Michigan garages face—all installed in a single, intensive workday.
Click on the photos to enlarge them
POLYUREA FLOOR COATING
ON DONLEY AVE
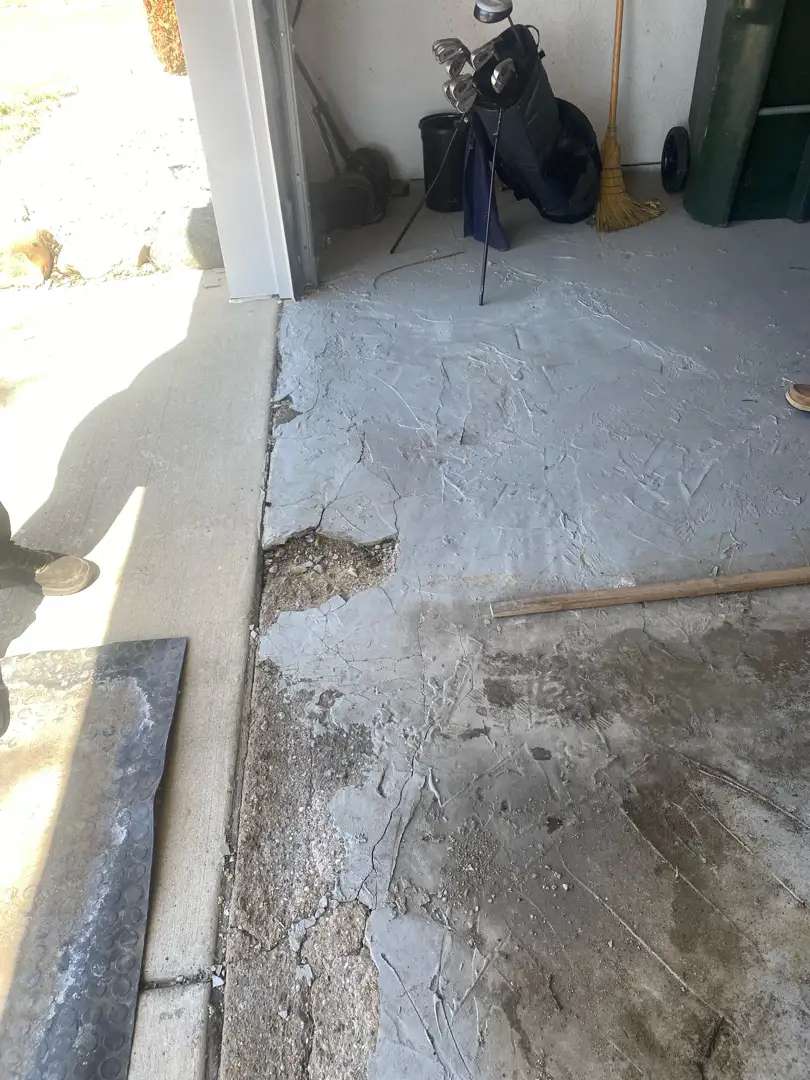
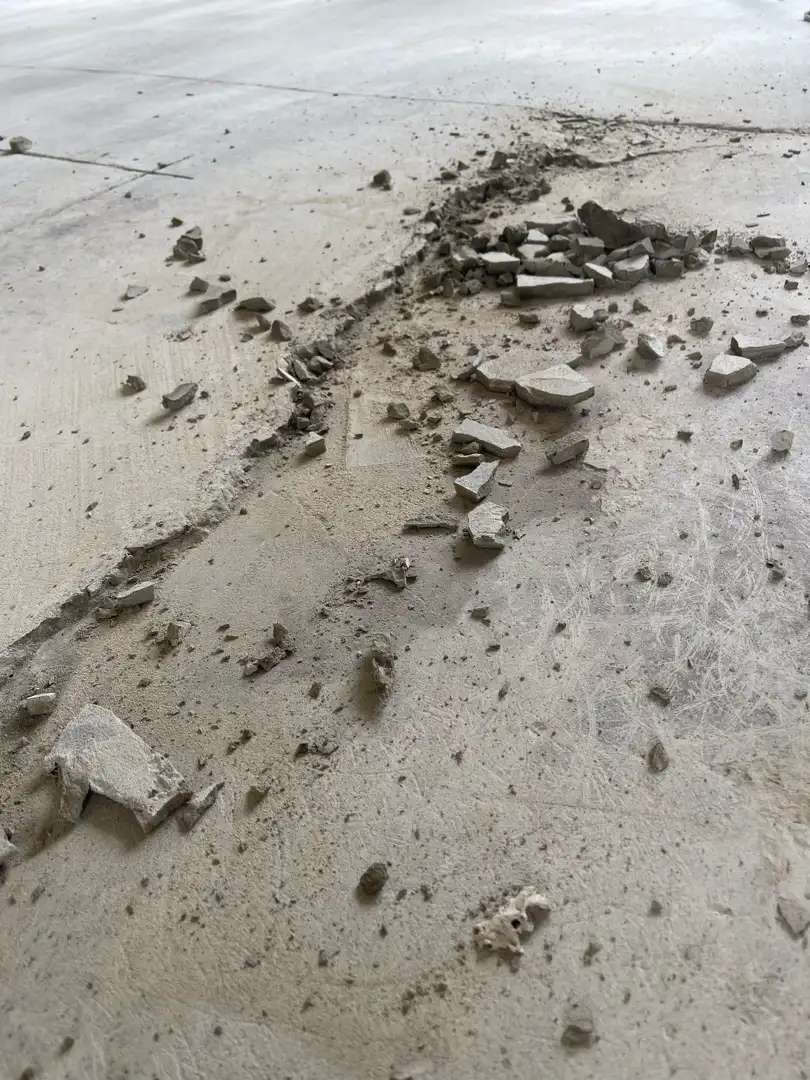
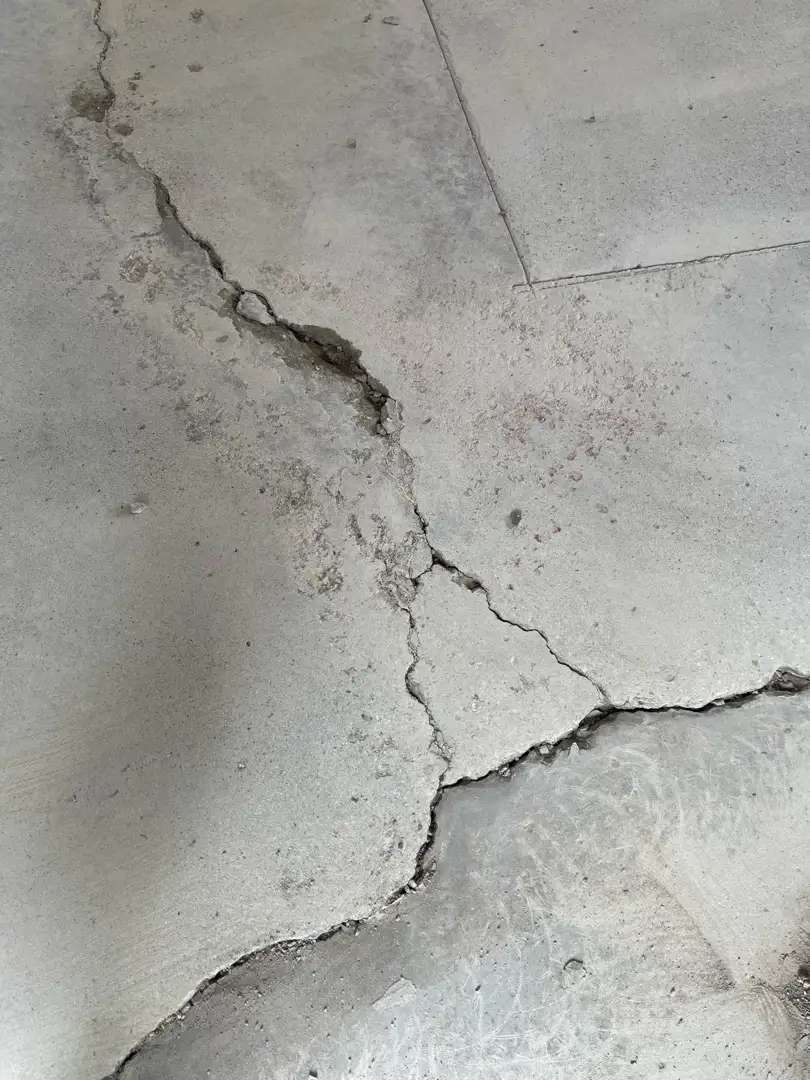
The homeowners on Donley Avenue faced a garage floor crisis. The front half of their 504-square-foot garage had deteriorated beyond simple coating repair—the concrete itself had failed, with severe cracking, spalling, and sections that had completely broken apart. Rather than attempt a patch-and-coat approach that would inevitably fail, they made the wise decision to address the problem properly: complete concrete replacement for the front section, followed by professional MotorCity Flooring and Coatings garage floor coating across the entire restored surface.
The Challenge: Coordinated Restoration
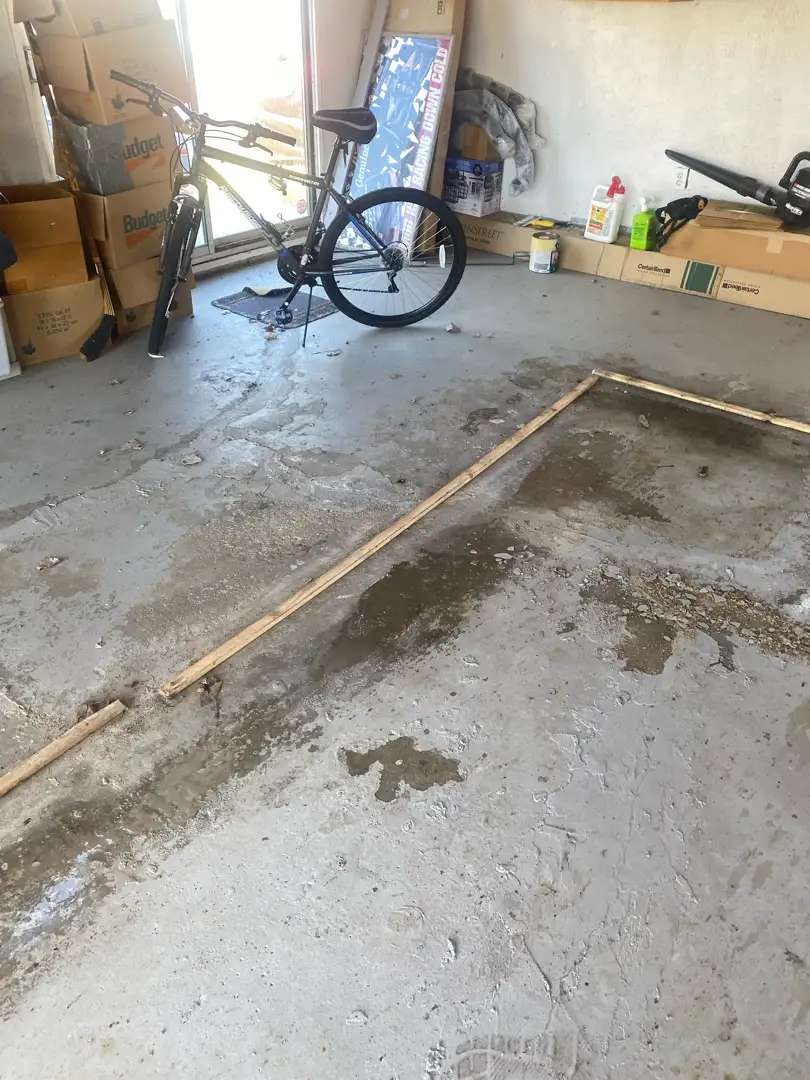
The before photos tell a dramatic story. The front half showed catastrophic concrete failure—chunks of broken concrete, severe cracking, and a surface that had deteriorated beyond salvage. Previous DIY coating attempts were peeling away in sheets, revealing the extent of the underlying damage. The homeowners had also attempted paint removal on the back section, with most of the old coating already lifting.
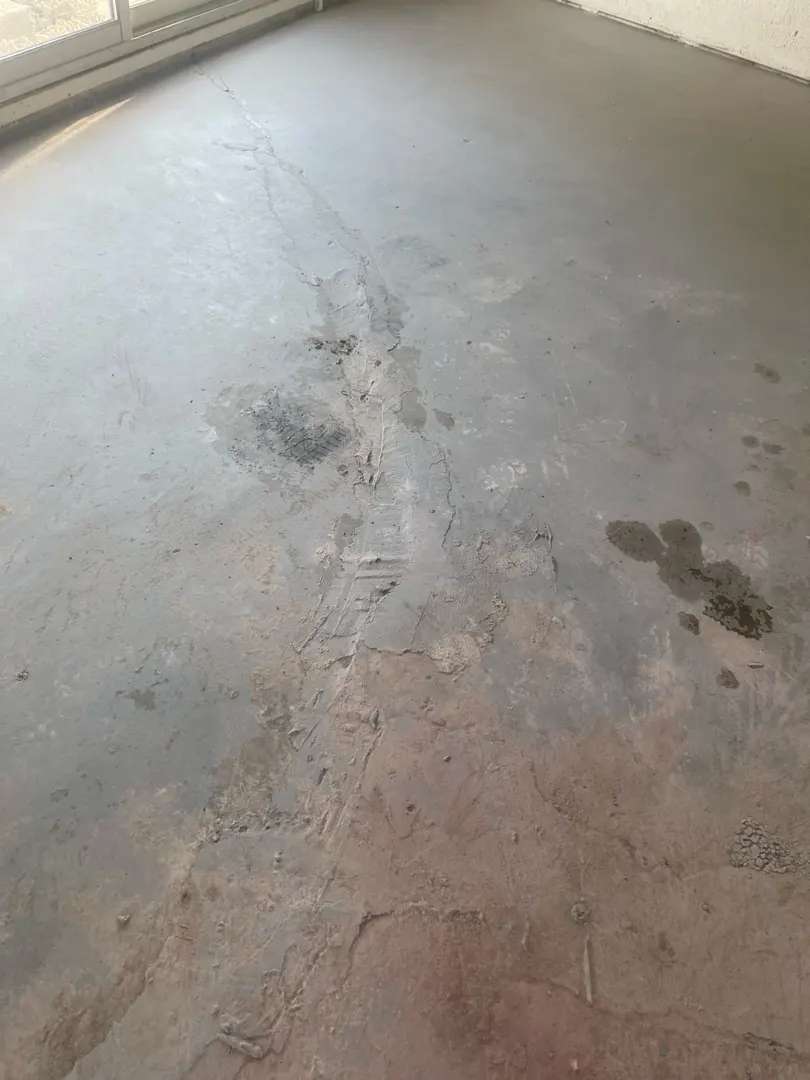
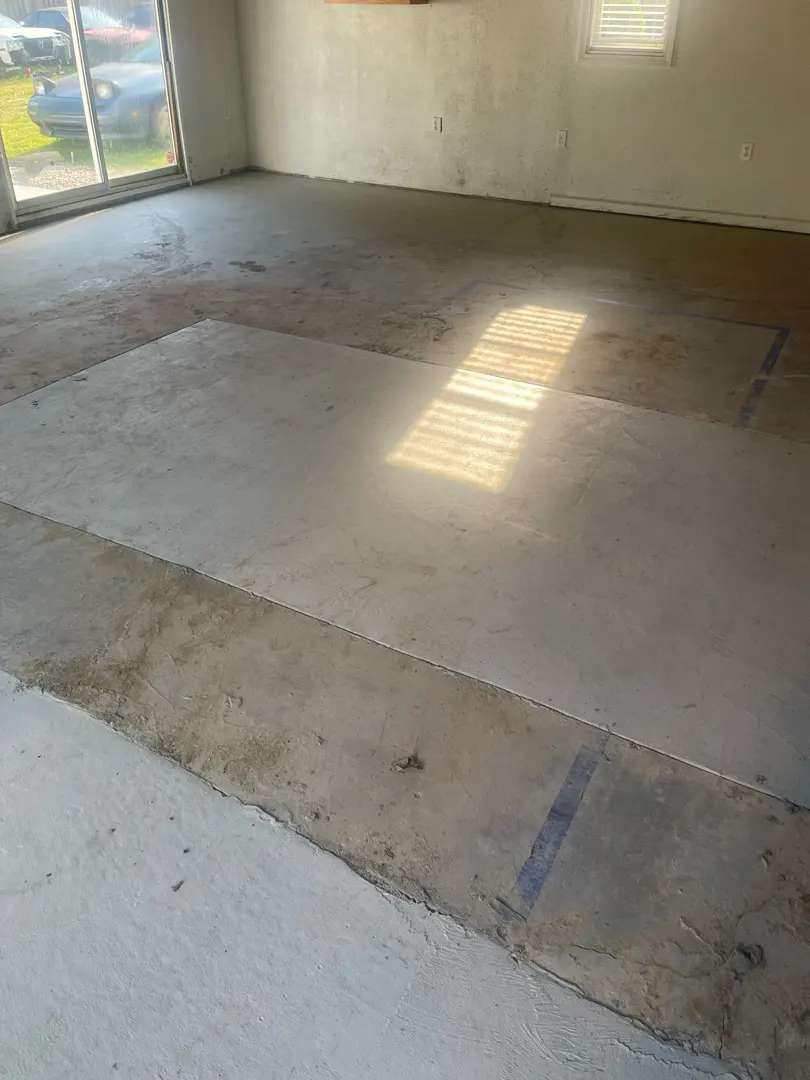
Working with a concrete contractor, the homeowners had the failed front section completely removed and replaced with fresh concrete. They also had two equipment pads installed for a future vehicle lift—a smart upgrade that would turn the garage into a true automotive workspace.
MotorCity's Turn: Professional Coating Installation
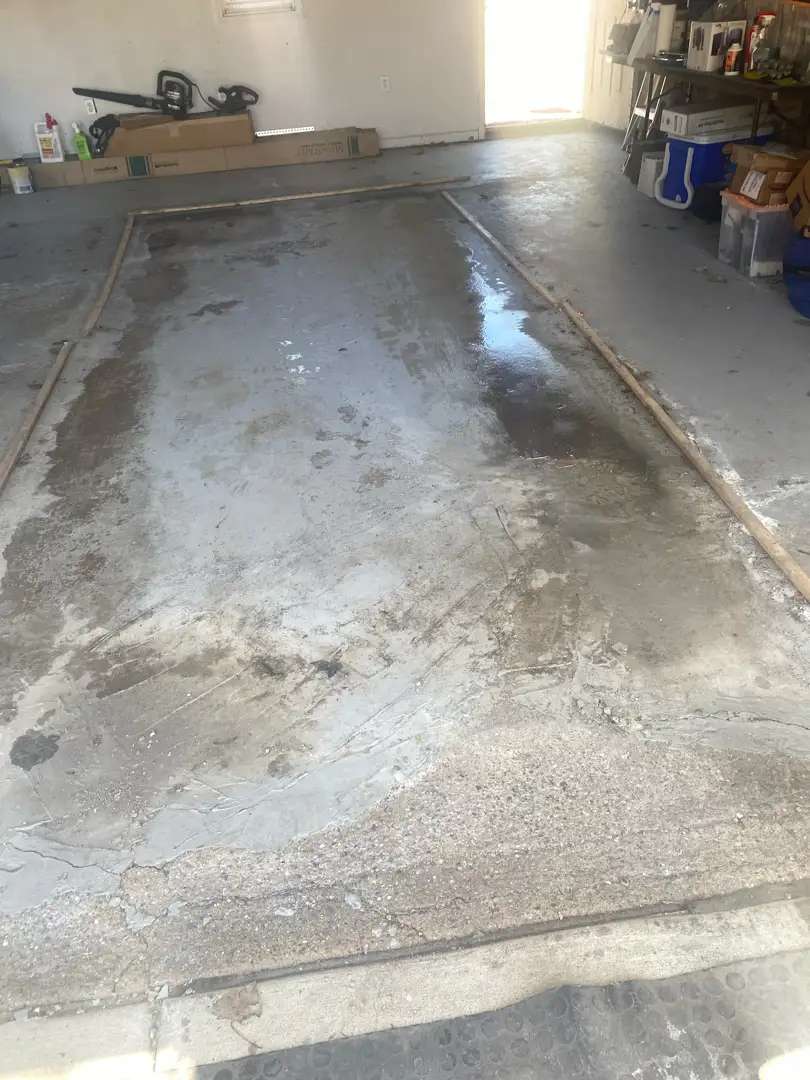
Once the concrete work cured properly, the MotorCity team arrived to complete the transformation. The newly poured front section provided a perfect surface, while the back half—though structurally sound—showed typical aging issues with cracks and scattered pitting throughout.
Our crew deployed their diamond grinding equipment across the entire 504 square feet, creating uniform surface profile across both old and new concrete sections. This step was critical for ensuring the polyurea/polyaspartic garage floor coating would perform consistently across the entire floor, with no visible distinction between the sections.
Extensive Repairs and Surface Preparation
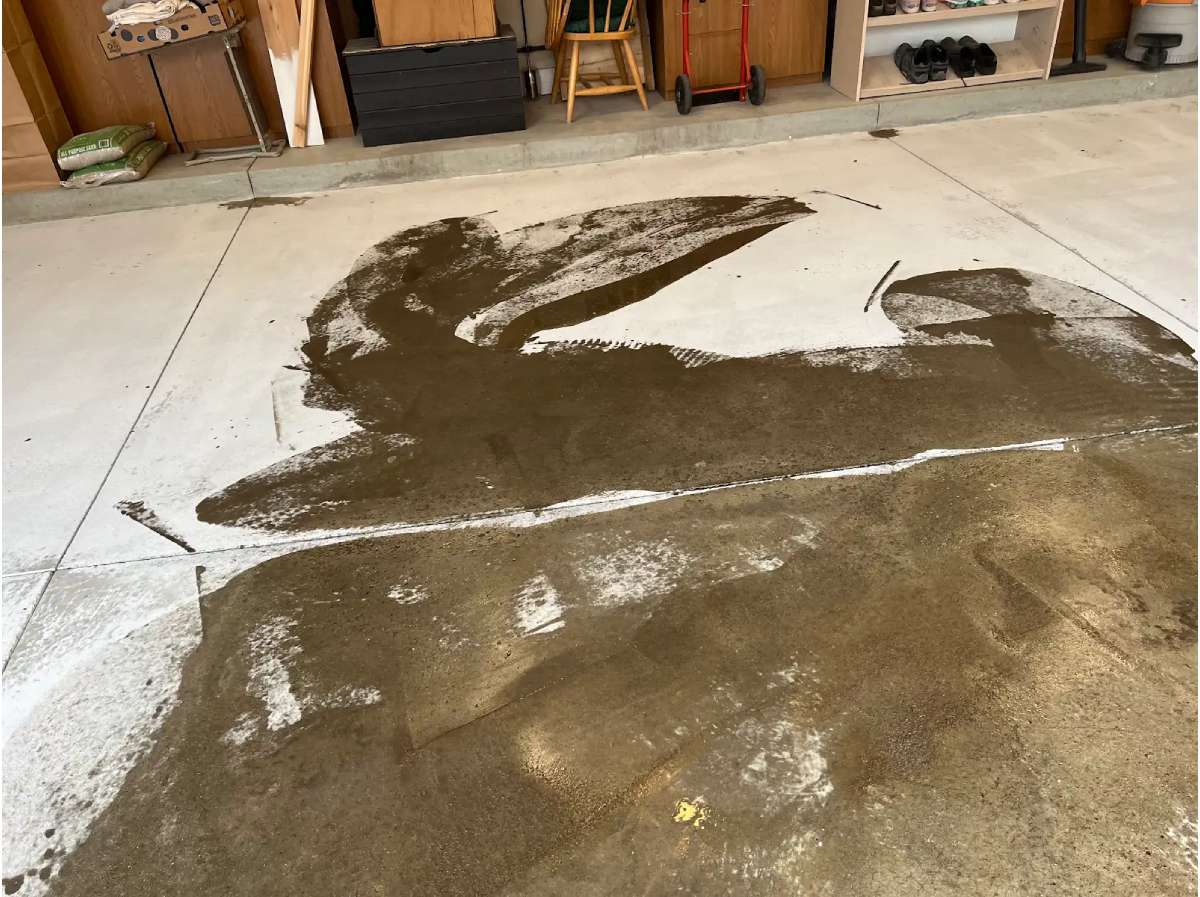
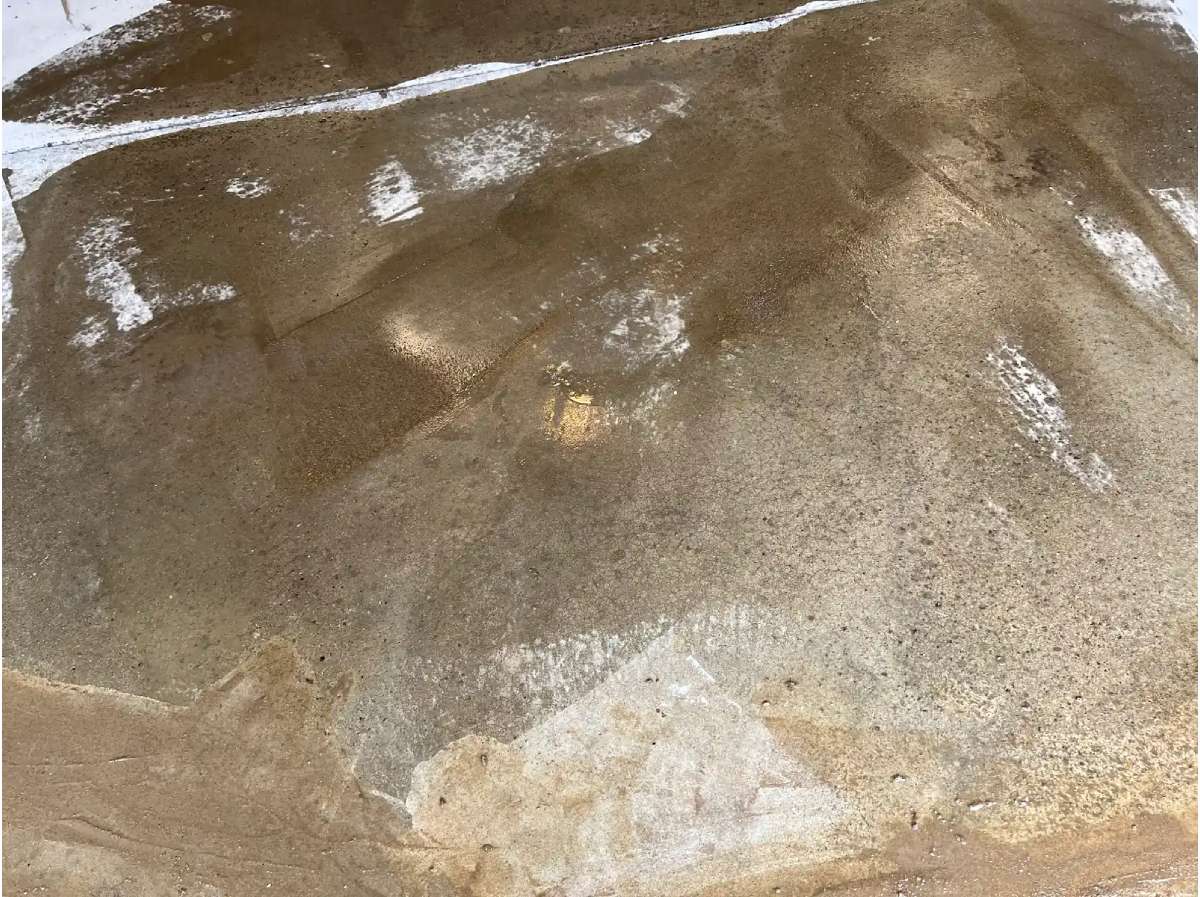
The back section required substantial attention. Our team mixed generous quantities of their two-part mender system, methodically filling every crack and pit. The images captured during this phase show the systematic application of repair material—brown mender clearly visible across multiple areas, creating a sound, level substrate. Each repair was carefully trowelled smooth and allowed to cure completely.
Our team paid special attention to the areas around the new lift pads, ensuring proper edge preparation and coating transitions that would handle the weight and movement of our equipment without edge lifting or failure.
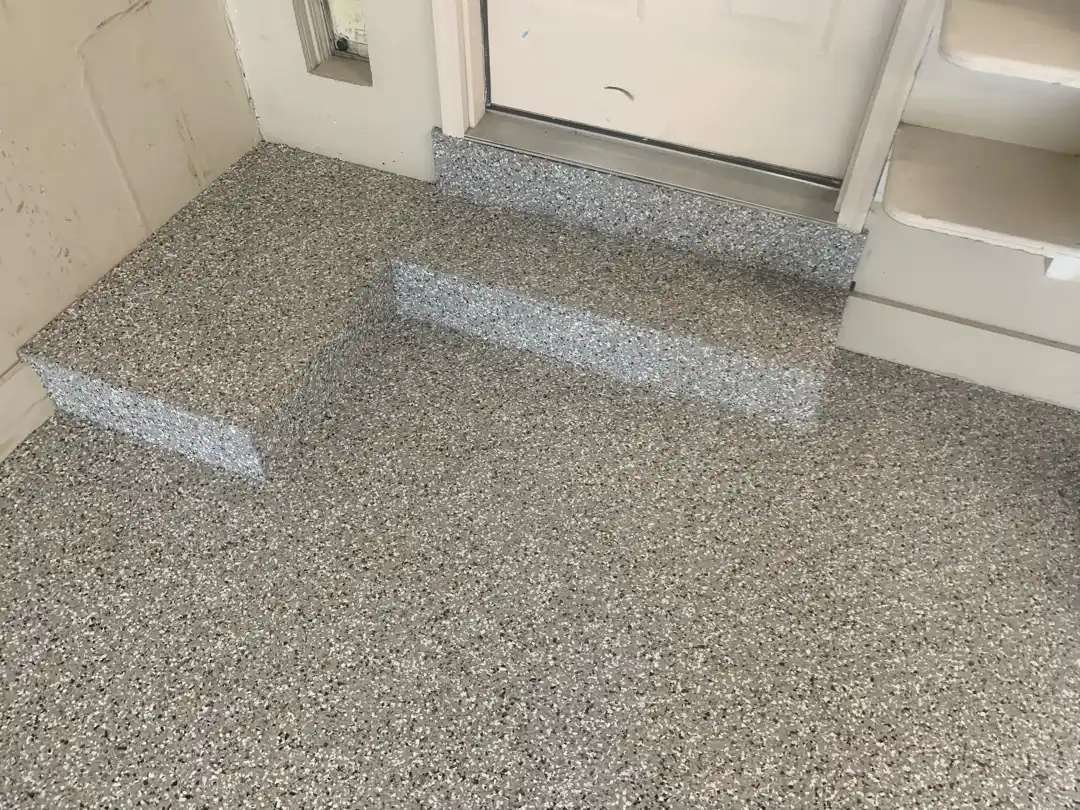
The Slatestone System
With all repairs complete, Our crew applied the polyurea/polyaspartic dual-coating system in the Slatestone version, a sophisticated grey and tan palette that would complement the new automotive focus of this garage. The base coat was rolled in uniform passes across all 504 square feet, and while still wet, Our team broadcast the Slatestone decorative flake blend. The multi-tonal grey and tan flakes created substantial coverage, adding both visual interest and texture.
The final clear coat system incorporated 16-grit traction additive, providing safe footing throughout the garage—particularly important in an automotive workspace where oil and fluid spills are inevitable.
The Complete Transformation
The finished garage floor coating on Donley Ave represents one of MotorCity’s most dramatic transformations. What began as a catastrophically failed floor—front section destroyed, back section deteriorating—is now a stunning, functional automotive workspace. The Slatestone finish flows seamlessly across the entire 504 square feet, with no visible distinction between old and new concrete sections. The lift pads are properly integrated, ready for equipment installation. Most importantly, the floor is now protected by a professional-grade polyurea/polyaspartic system that will handle decades of automotive use, chemical exposure, and the harsh climate of Michigan—a far cry from the disaster that existed before.
Click on the photos to enlarge them
