 Skip to content
Garage Floor Coating in Sterling Heights, MI
QUESTIONS? NEED A QUOTE?
Why Sterling Heights Homeowners Choose MotorCity
★ 4.9 rating · 488 Google reviews
- ✓ Lifetime warranty
- ✓ One-day installation
- ✓ BBB accredited (since 2020)
- ✓ Licensed & insured
Upgrading Garage Floor Coating in Sterling Heights with Polyurea-Polyaspartic Coatings
Last updated: July 29, 2026
On this page, we document 8 garage floor coating projects in Sterling Heights, MI. Our dual-coating systems have converted worn concrete slabs into durable, attractive garage floors. Sterling Heights is a Macomb County city — one of Michigan’s largest municipalities — with a wide range of residential housing from older established subdivisions to newer construction. Attached two-car garages are common throughout the city, and the concrete in those garages reflects decades of Michigan winters, road salt, vehicle use, and the repeated stress of freeze-thaw cycles on aging slabs. Beyond Sterling Heights, we install garage floor coatings across Michigan, including nearby Utica.
Many of the properties where we apply our polyurea-polyaspartic floor coating systems had accumulated the wear and tear of the harsh Michigan climate. As you will see in these case studies, our garage floor coating specialists work with concrete slabs in a wide variety of conditions: some needed only standard surface preparation. Others required extensive multi-stage remediation — deep crack filling, full-slab flood coating, and double grinding passes — before the polyurea and polyaspartic coats could go down. We describe the process and results, and include the before-and-after photos for each job.
Sterling Heights Garage Floor Coating Case Studies
Quality Garage Floor Coatings
Winter road salt, freeze-thaw cycles, automotive fluids, and daily vehicle traffic degrade unprotected garage concrete over time. The damage typically appears as oil staining, cracking, surface pitting, and structural crack networks that run diagonally across control joint panels.
Several of our jobs of garage floor coating in Sterling Heights involved prominent diagonal cracking that had progressed well beyond hairline surface damage. At the Halleck Drive property, a diagonal crack ran across the front panels and continued into the mid-section of the slab, with branching secondary cracks throughout. This type of cracking requires thorough repair — grinding, filling, flood coating, and a second grind pass — before any coating system can be applied correctly. Polyurea-polyaspartic systems provide reliable protection against these conditions and deliver a finished appearance that bare concrete or epoxy products cannot match.
Garage Floor Coating
on Halleck Drive
Halleck Drive, Sterling Heights, MI
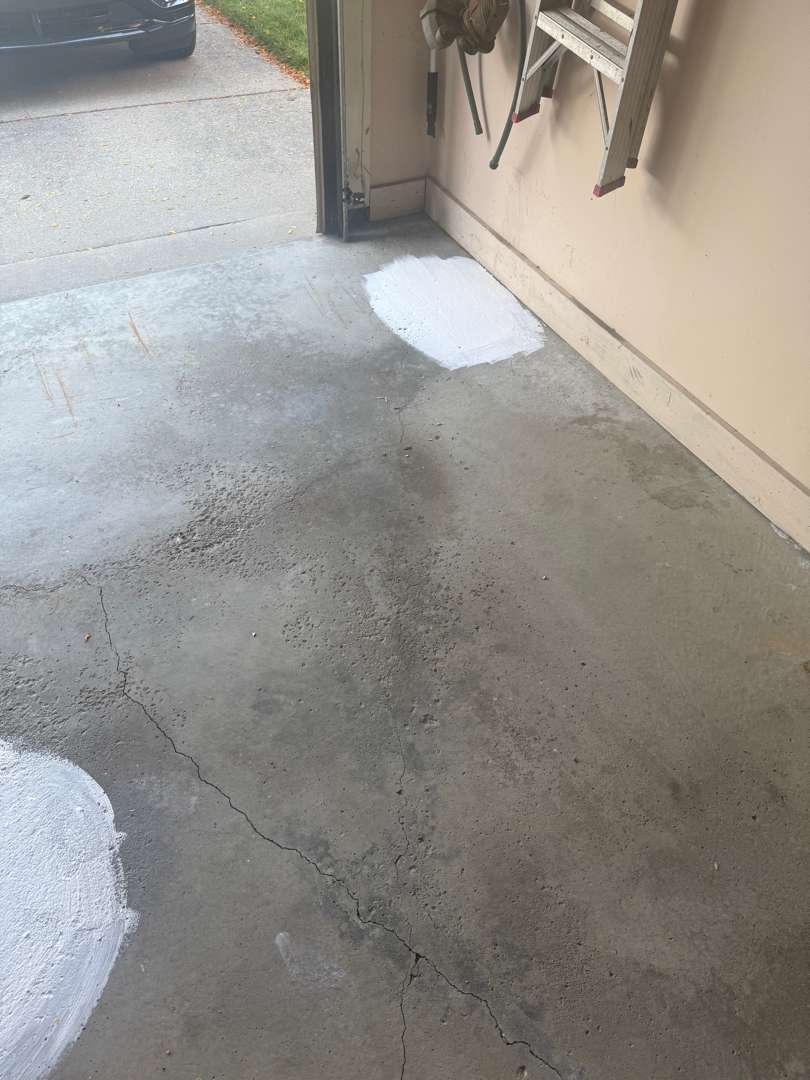
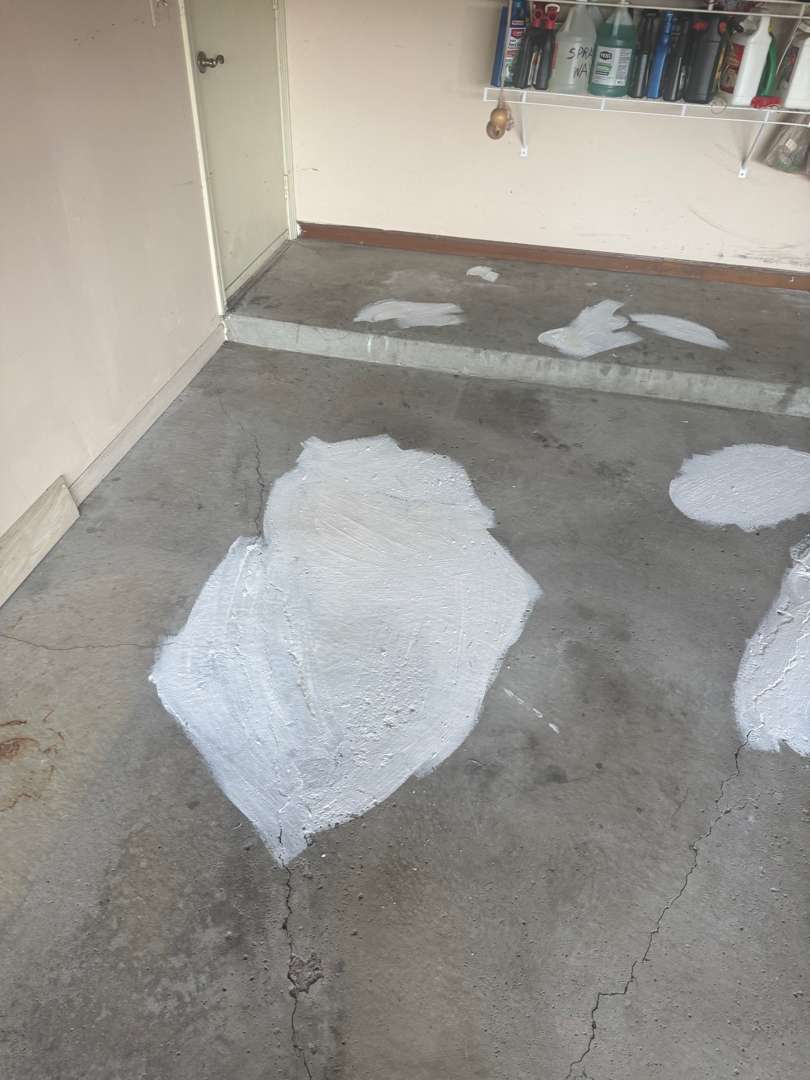
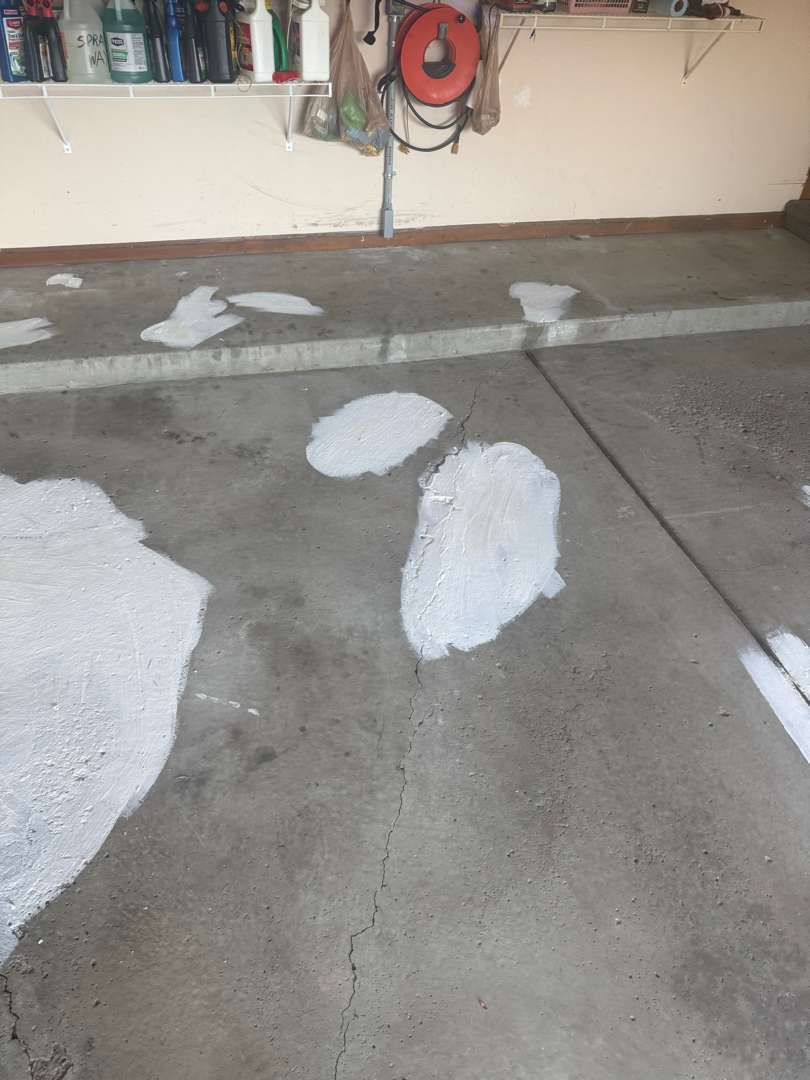
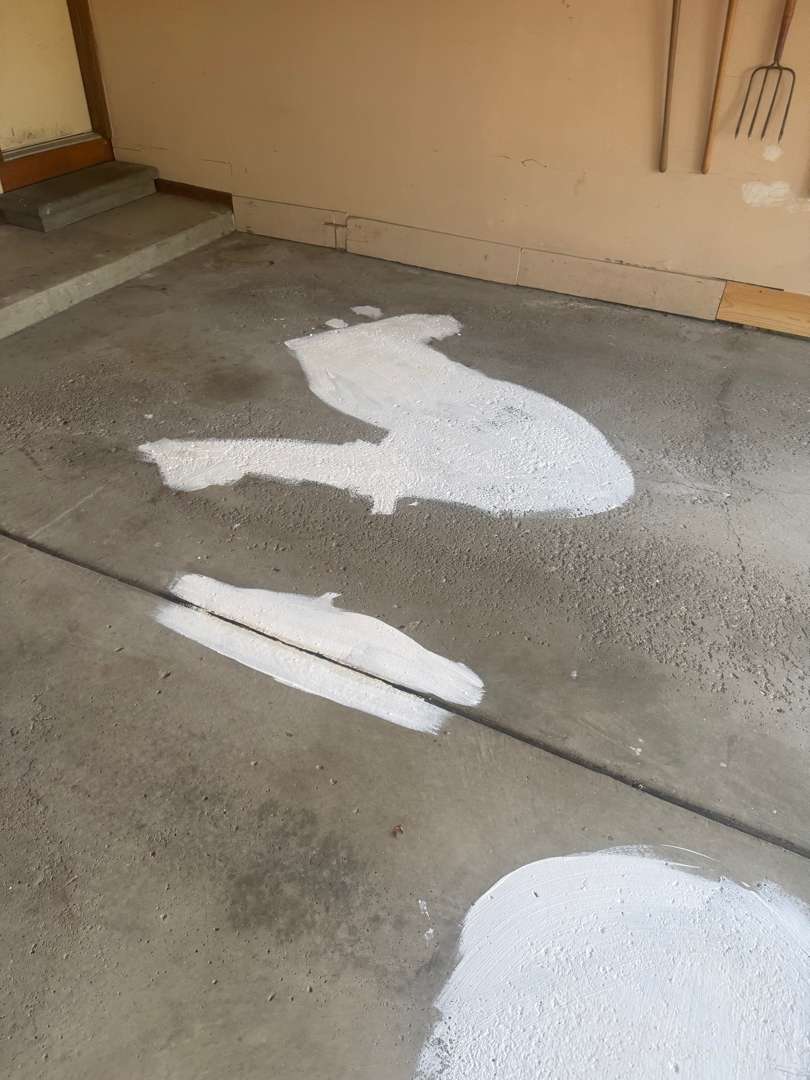
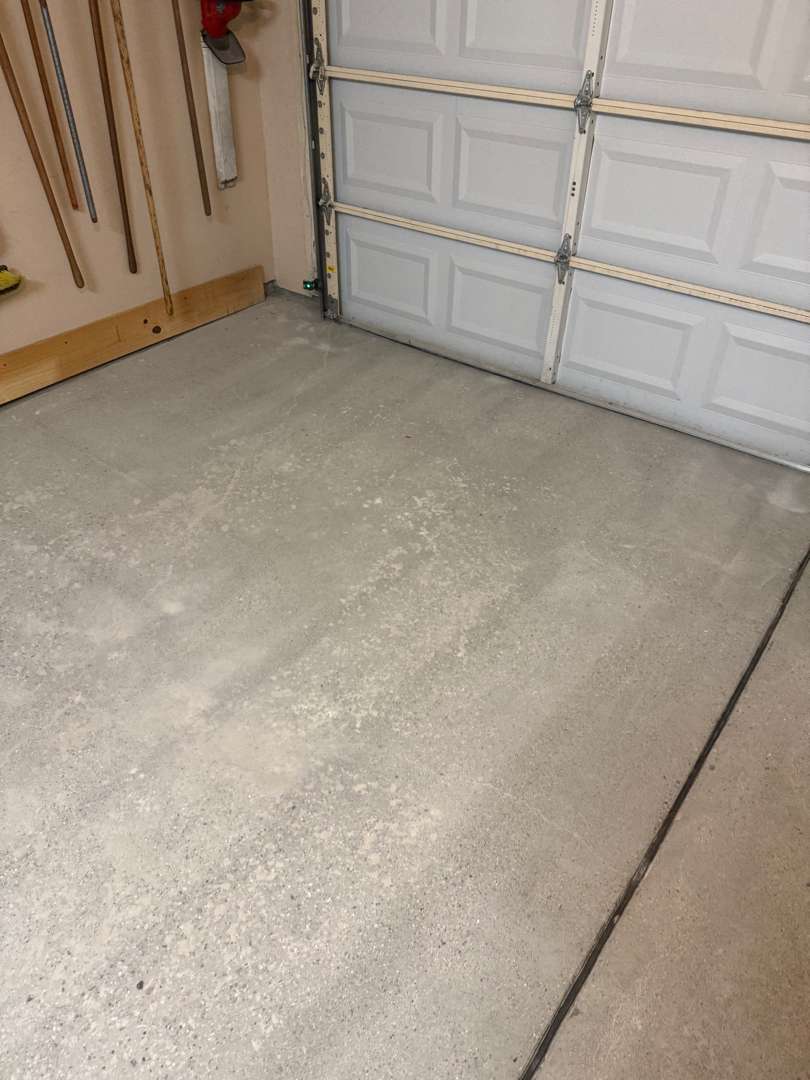
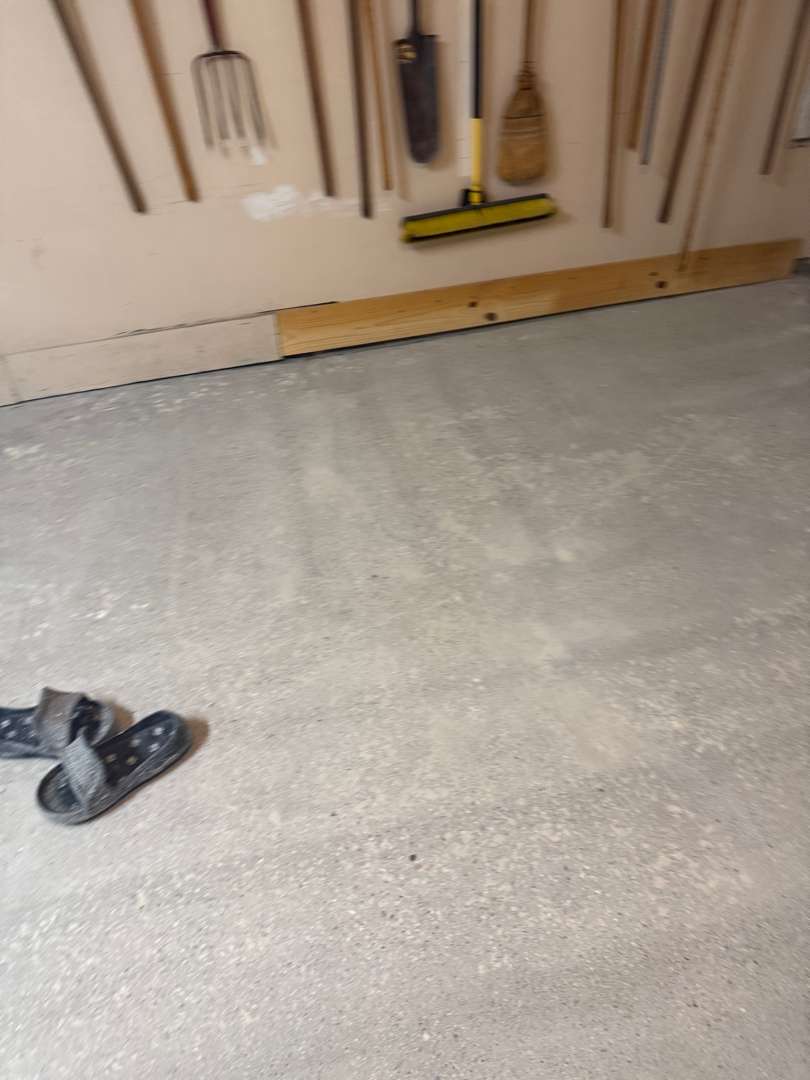
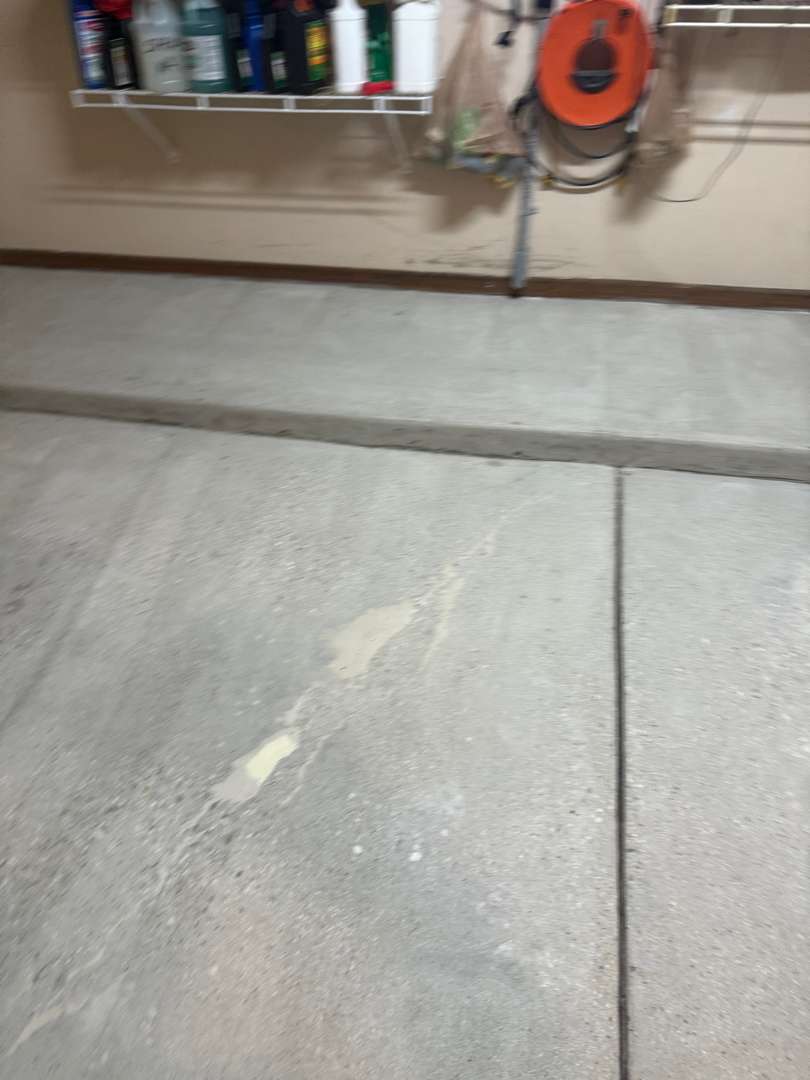
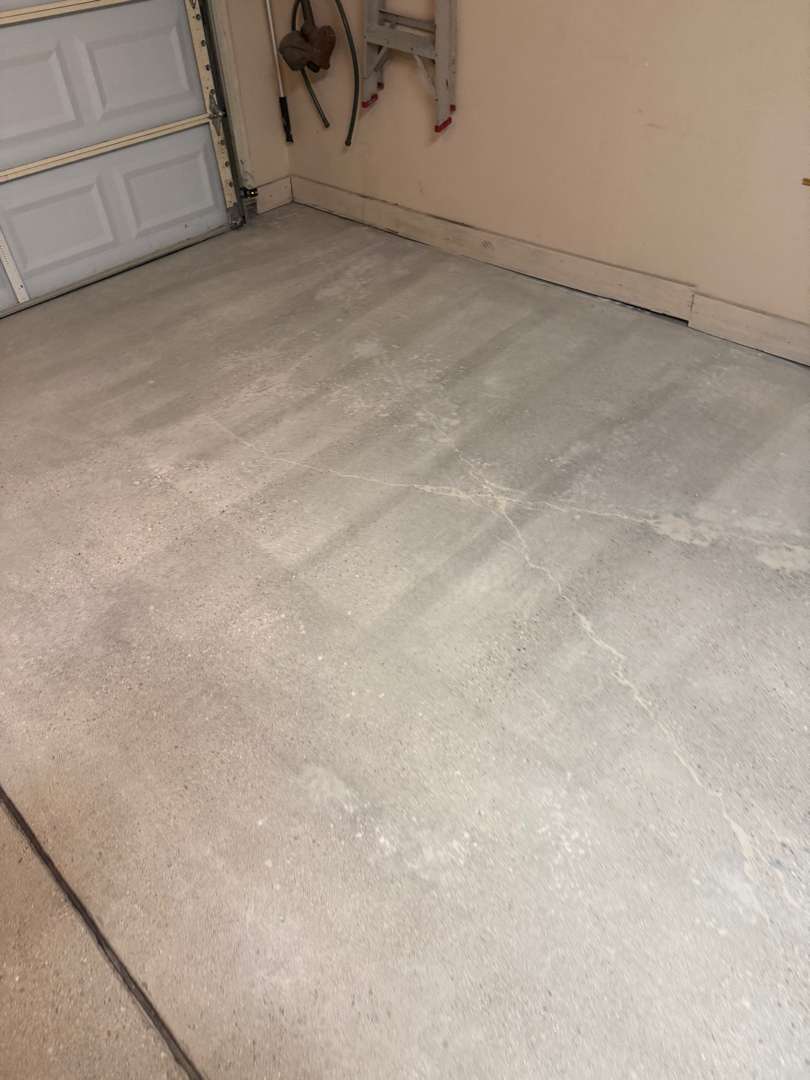
The two-car garage on Halleck Drive didn’t have a routine concrete problem. A prominent diagonal crack ran across the front panels and continued into the mid-section of the slab. Secondary cracks branched off it throughout. Pitting across the surface. One oil zone in the front panel area. Warm beige drywall on the walls. Cabinets, shelving, and tool storage along the perimeter. A step-up at the rear to the interior door. Under 500 square feet. Rain was forecast for the installation date. Our crew confirmed the schedule with the homeowner directly and proceeded on plan.
Crack Repair and Surface Preparation
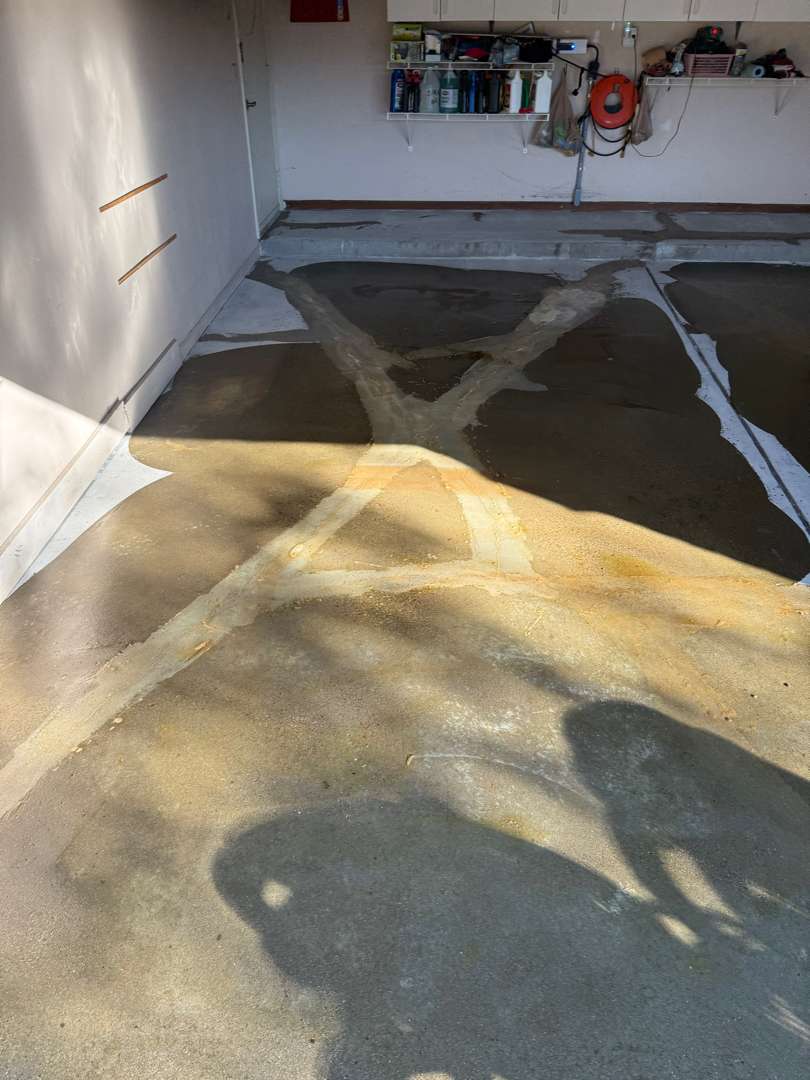
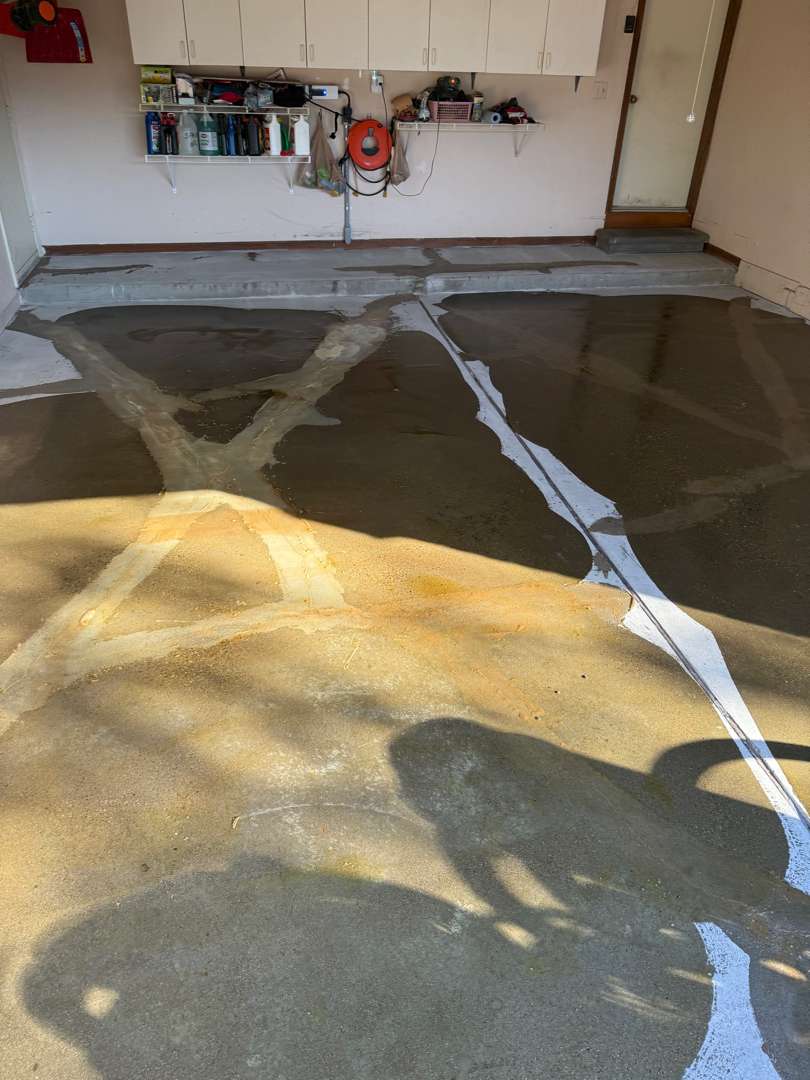
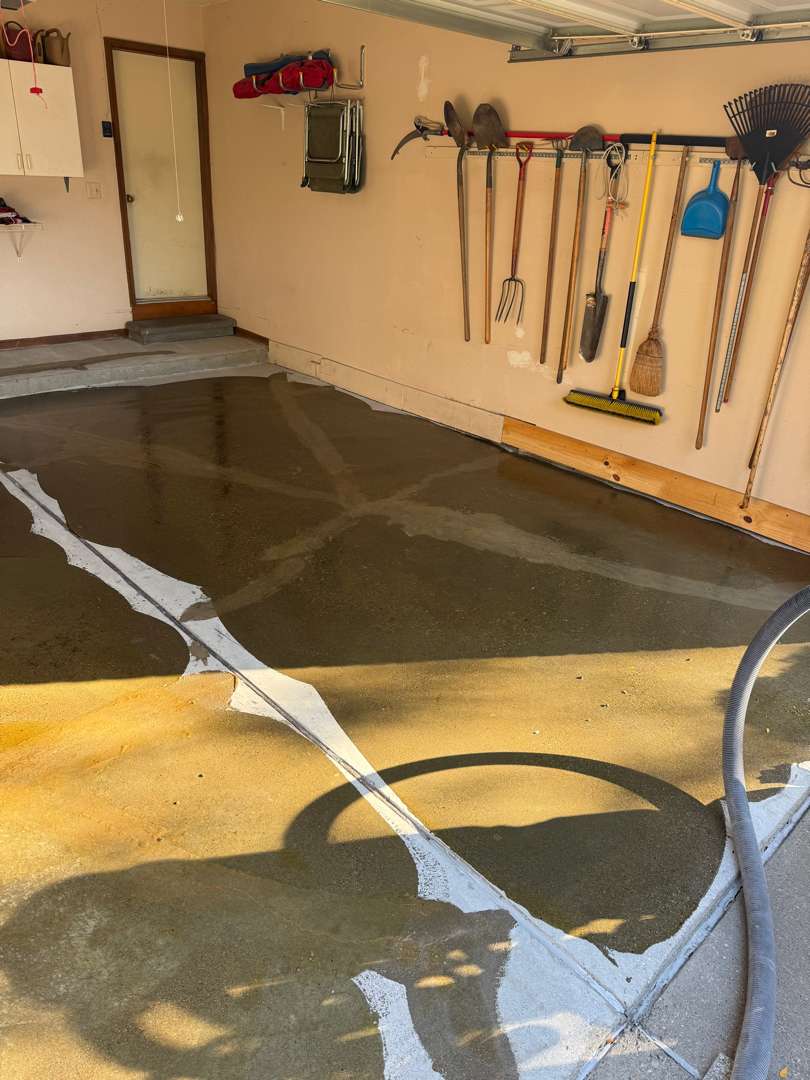
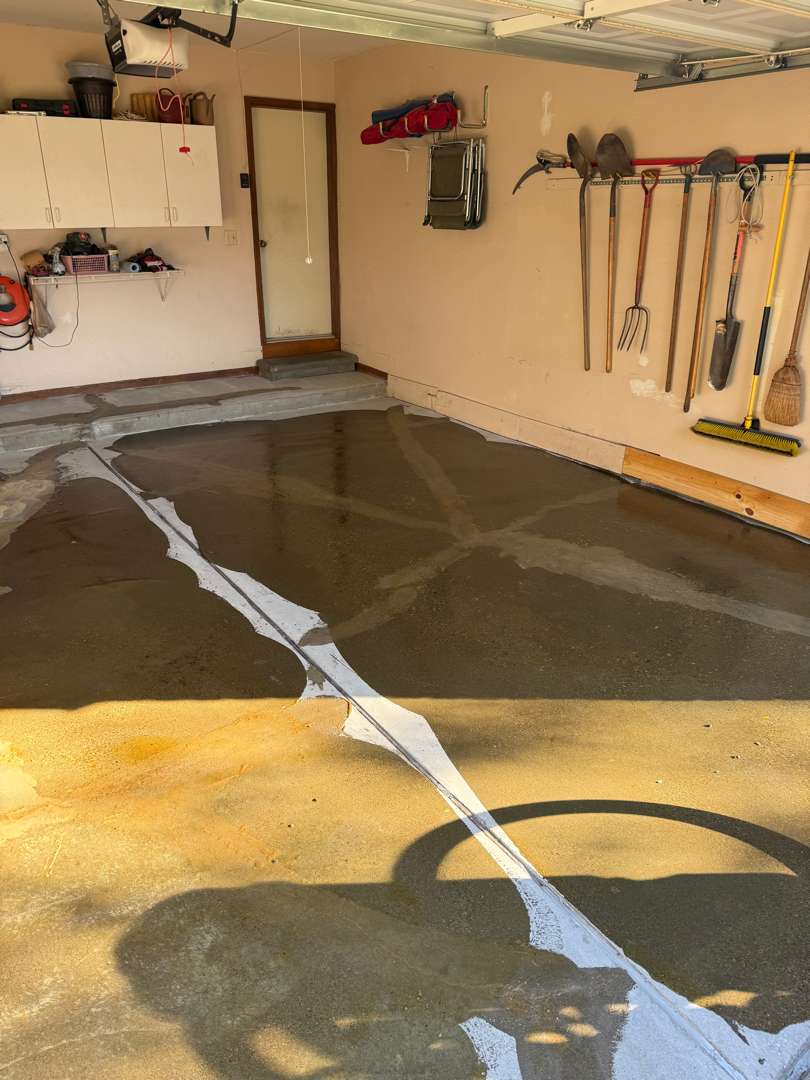
Our crew diamond-ground the full slab to open the surface and expose the complete crack network. The grind confirmed the diagonal ran deeper than surface wear. Our team packed the primary crack and every branching section with cementitious patching compound. Our crew filled the pitting zones at the same time.
Our team then applied a flood coat across the full prepared surface. The flood coat encapsulated the patched cracks and leveled the surface across all panels. After cure, our crew vacuumed the floor and ran a second diamond grind pass to knock the patch material flush and bring the surface to a consistent profile throughout. The crack network was sealed. The surface was flat, open, and ready.
Cabin Fever Installation
Two Panels, Done Right
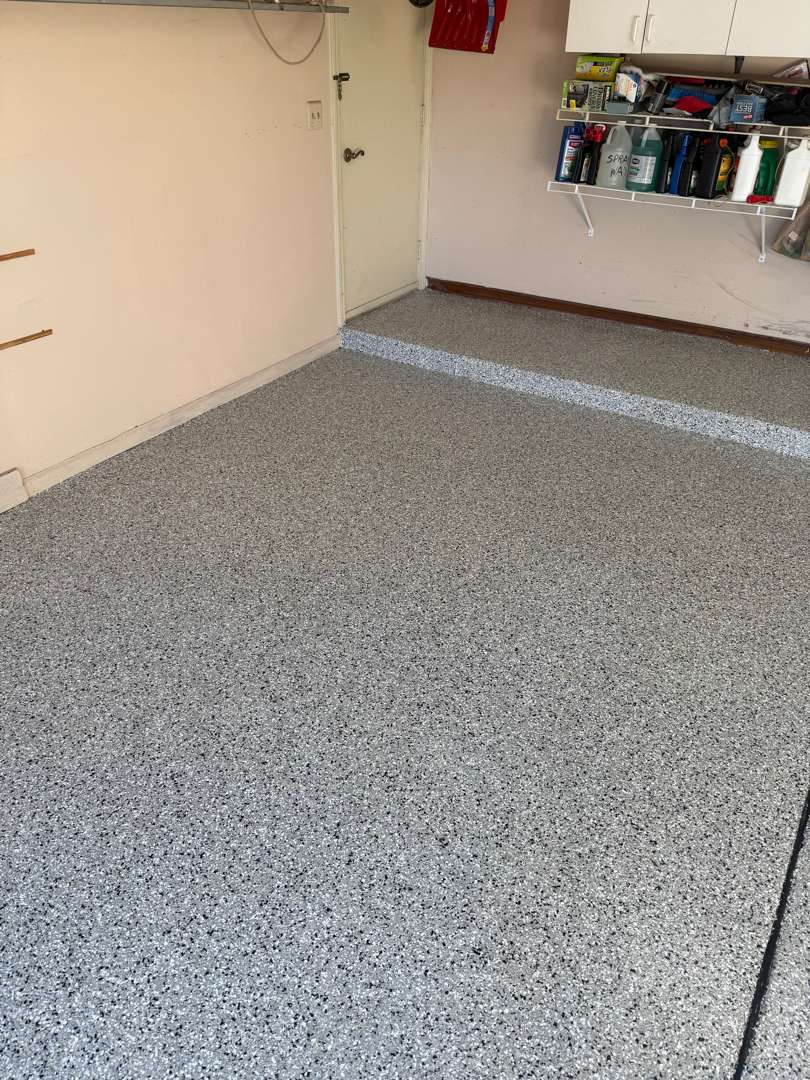
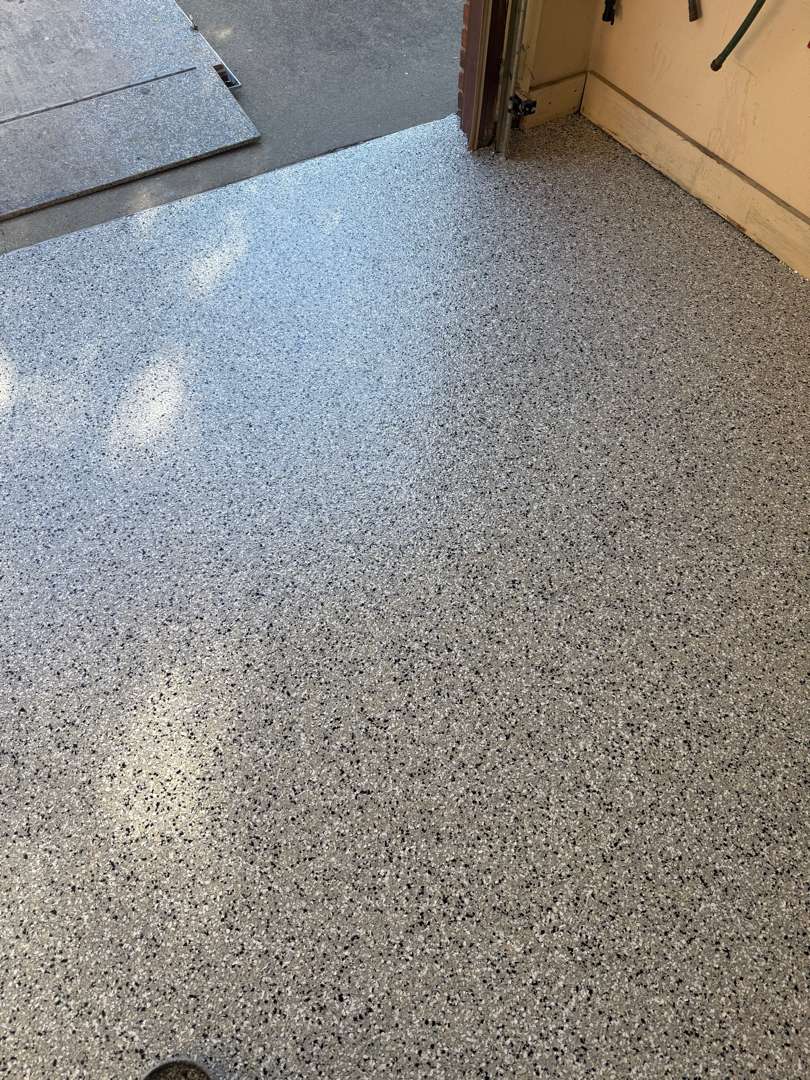
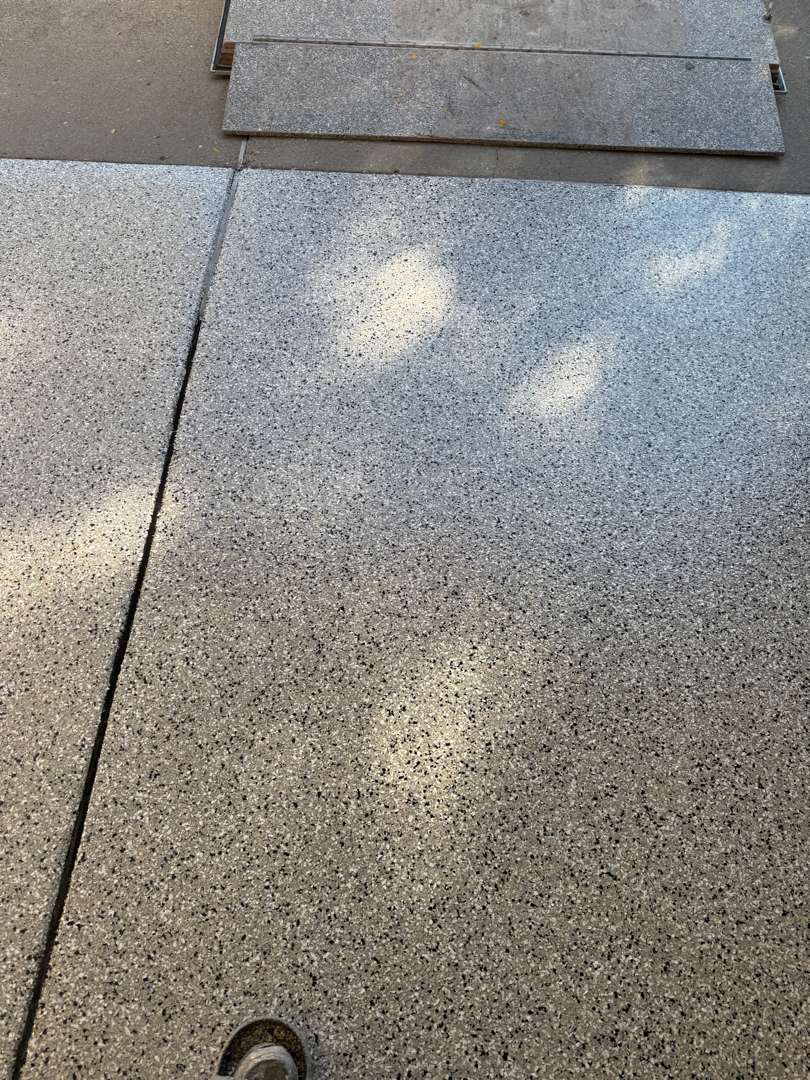
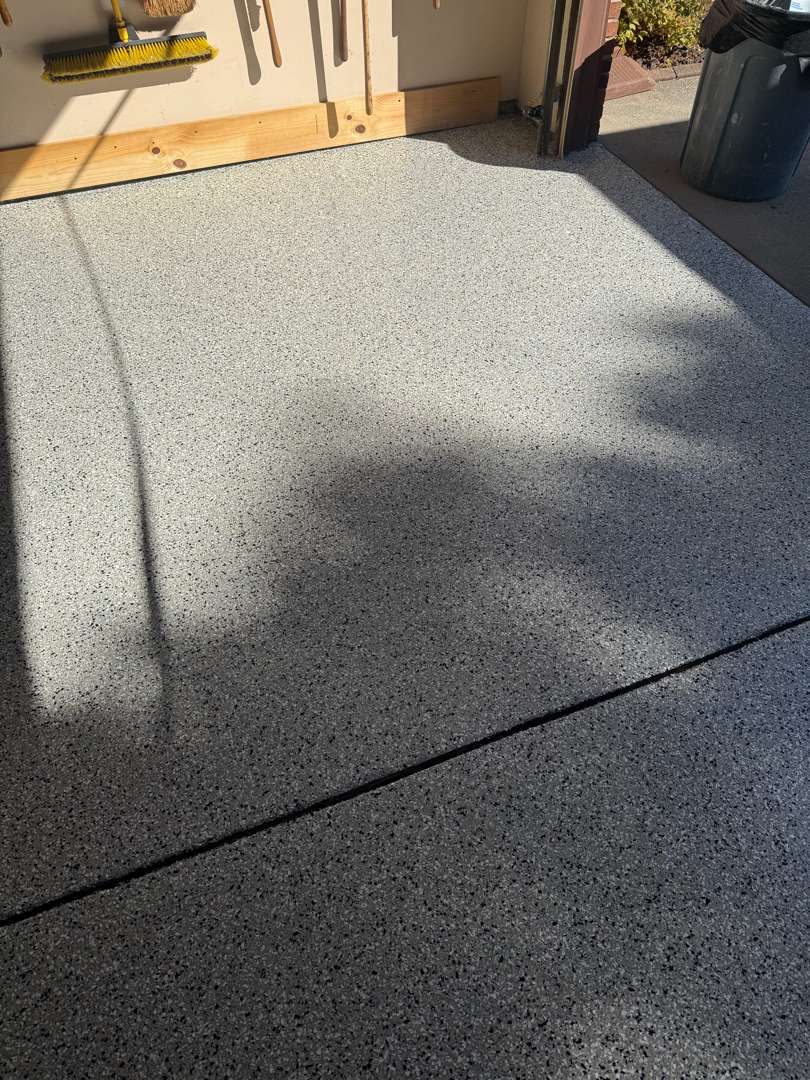
Cabin Fever reads well against the warm beige walls — neither surface competes with the other. Both panels finish at the same flake density from wall to wall. The rear step is coated continuously with the main field. The diagonal crack and its branches are sealed and flat. The pitting is filled. The oil zone is gone. A slab that required a flood coat and two grind passes to prepare is now protected under a complete polyurea-polyaspartic system.
Testimonials
Greg Miron
Absolutely satisfied with the service provided and the end result, my garage looks new again. I held off 5 years ago cause didn’t want to spend the money, after my concrete really started to deteriorate I pulled the trigger. All I can say after they were done I said to myself why did I wait to do this? Well worth the time and money. And the crew that did the work outstanding!
Rob Askew
Garage Floor Coating
on Jason Court
Jason Court, Sterling Heights, MI
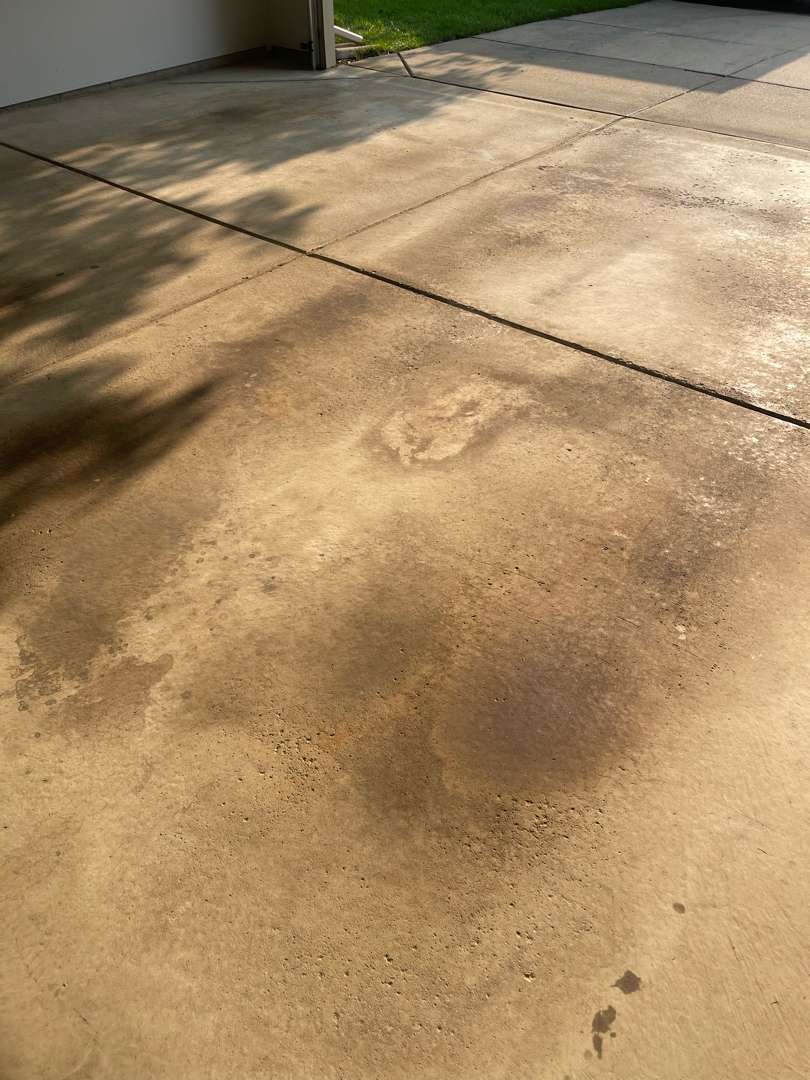
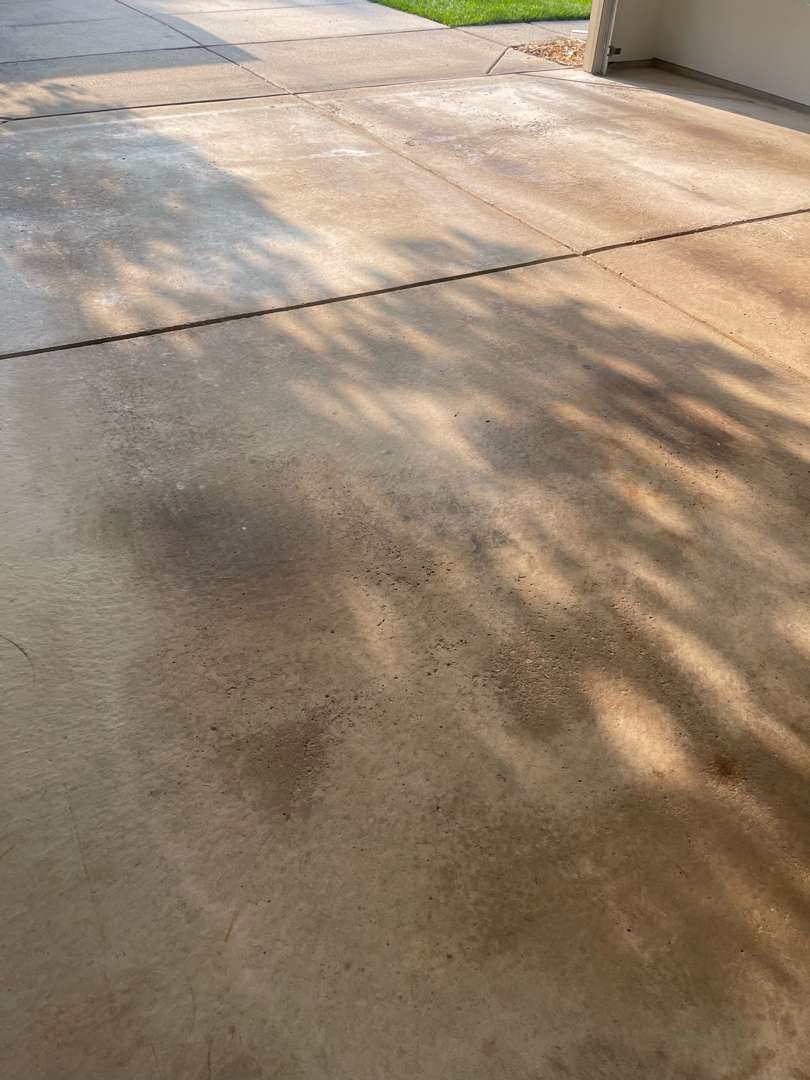
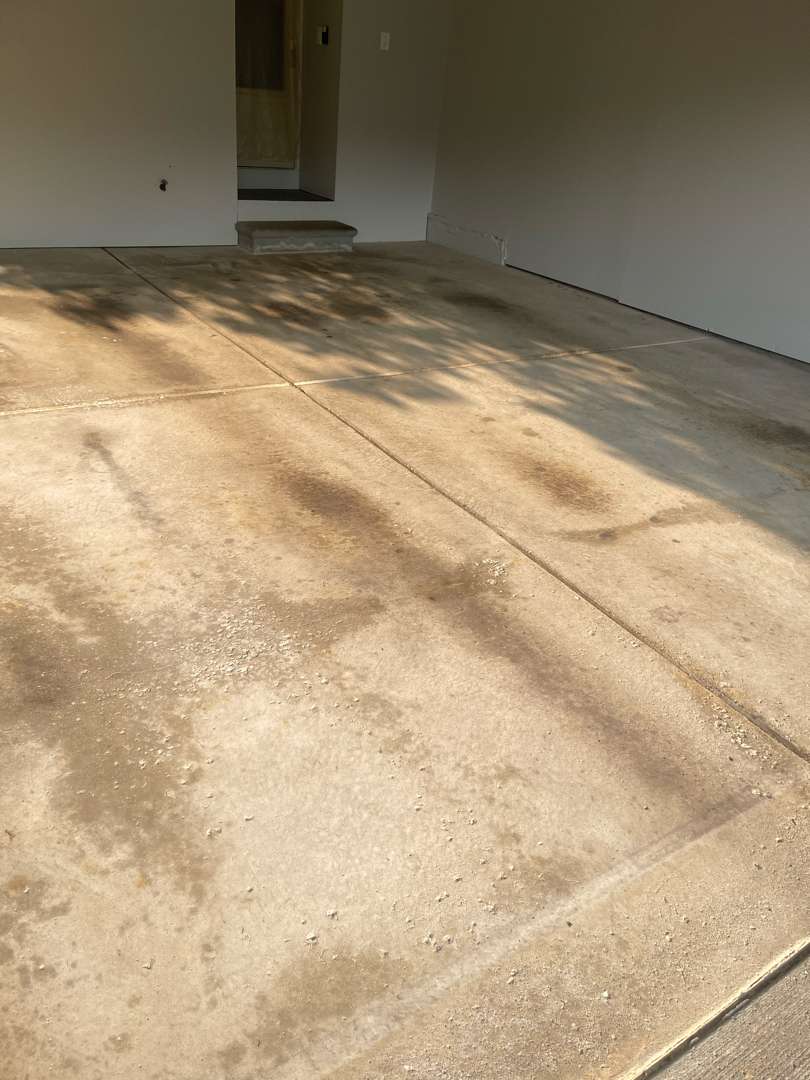
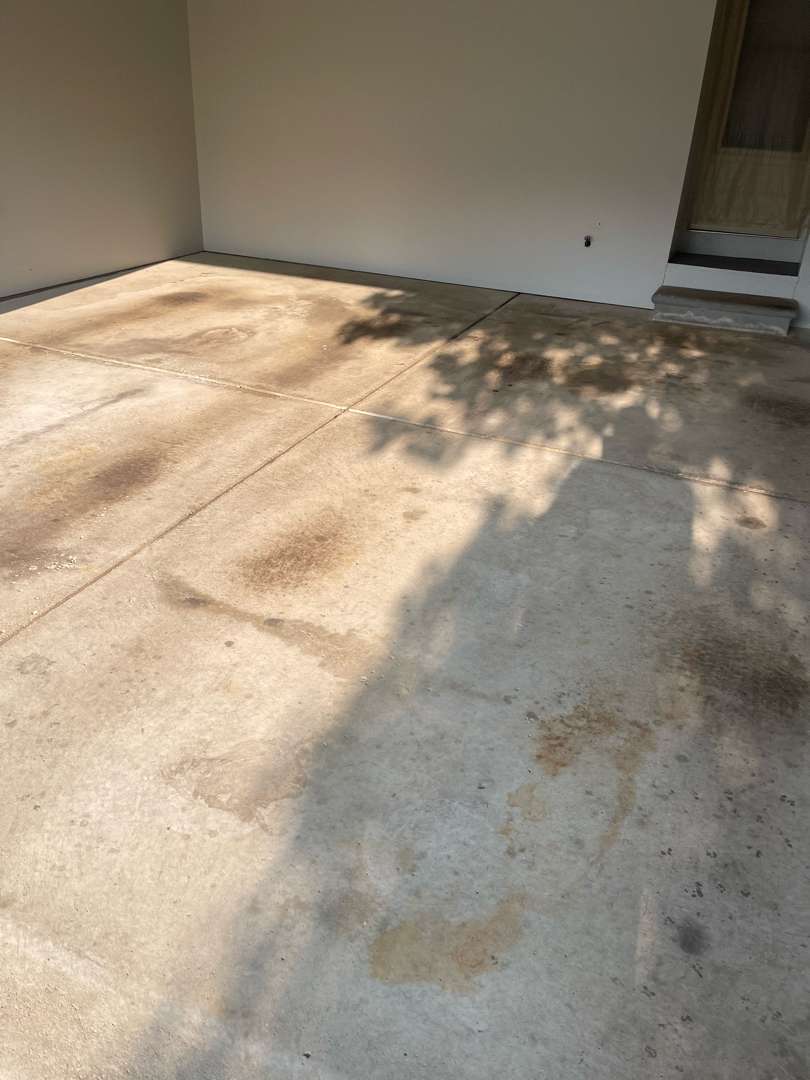
The garage on Jason Court was structurally sound and ready to work with. One oil stain occupied the center zone of the front panels. Lighter oil marks were distributed across the mid-section. Light pitting throughout the surface. One small crack. No vertical surfaces in scope. One concrete step at the rear provided access to the interior door. At 397 square feet, this was a focused single-surface job. The walls were clean drywall. The garage was empty on arrival. Our crew took a moisture reading before beginning — within range for the M-4 system. Work proceeded directly to preparation.
Oil Extraction and Surface Prep
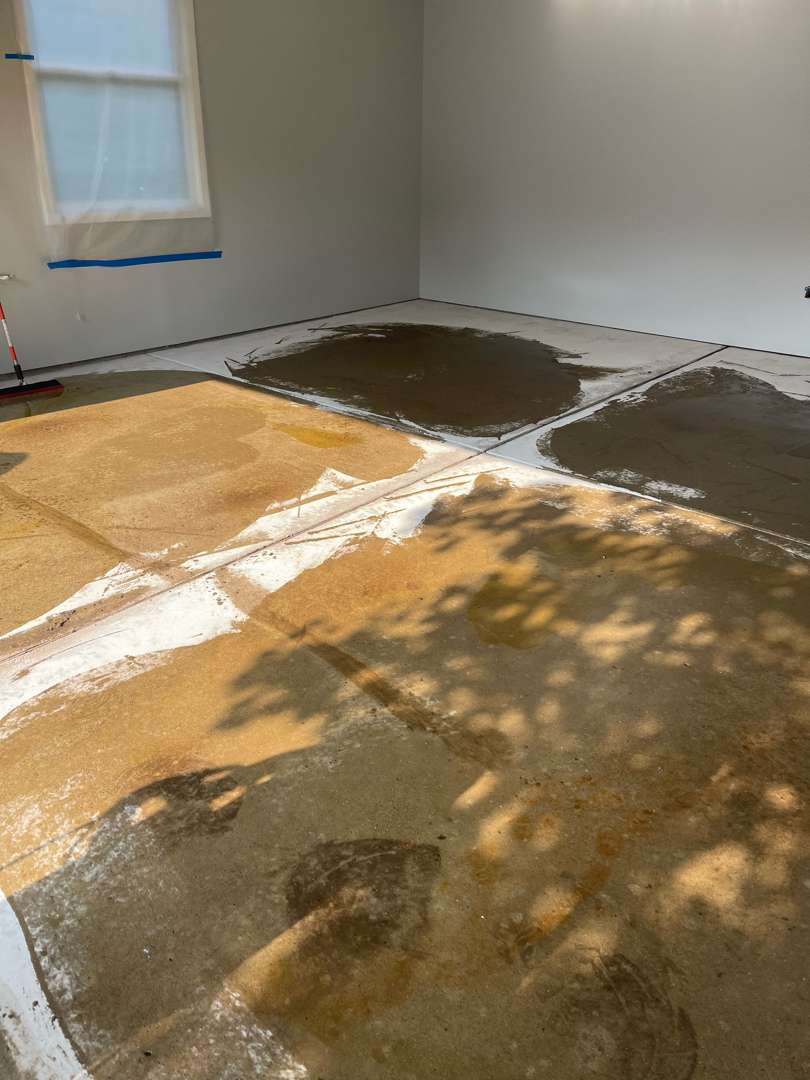
Our crew diamond-ground the full 397 square feet to remove the laitance layer and open the surface. The grind exposed the small crack and confirmed the depth of the pitting across the panels. Our team filled the crack and addressed the pits with cementitious patching compound after the grind pass.
The oil staining required additional treatment. Our crew applied MR-50 oil extraction solution to the contaminated zones in the center and mid-section. The MR-50 drew the oil out of the pore structure of the concrete. Our team allowed the solution to dwell, then vacuumed the floor and confirmed the affected zones were clear before any coating went down.
Slatestone on 397 Square Feet
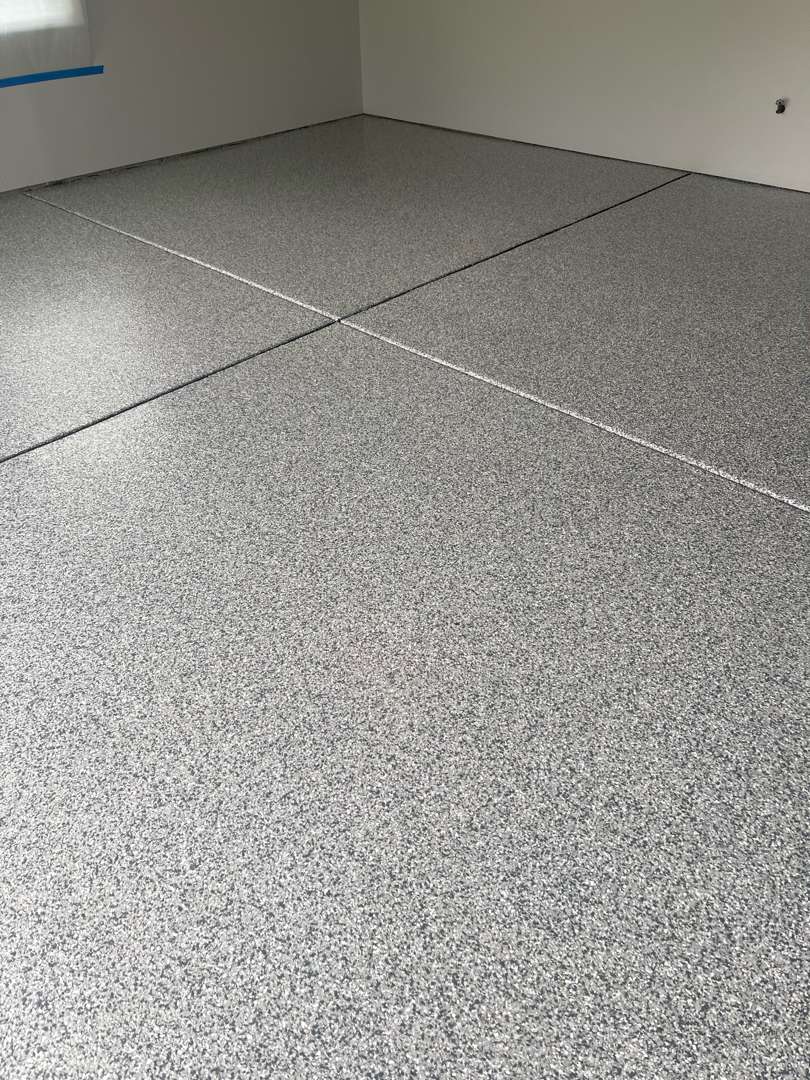
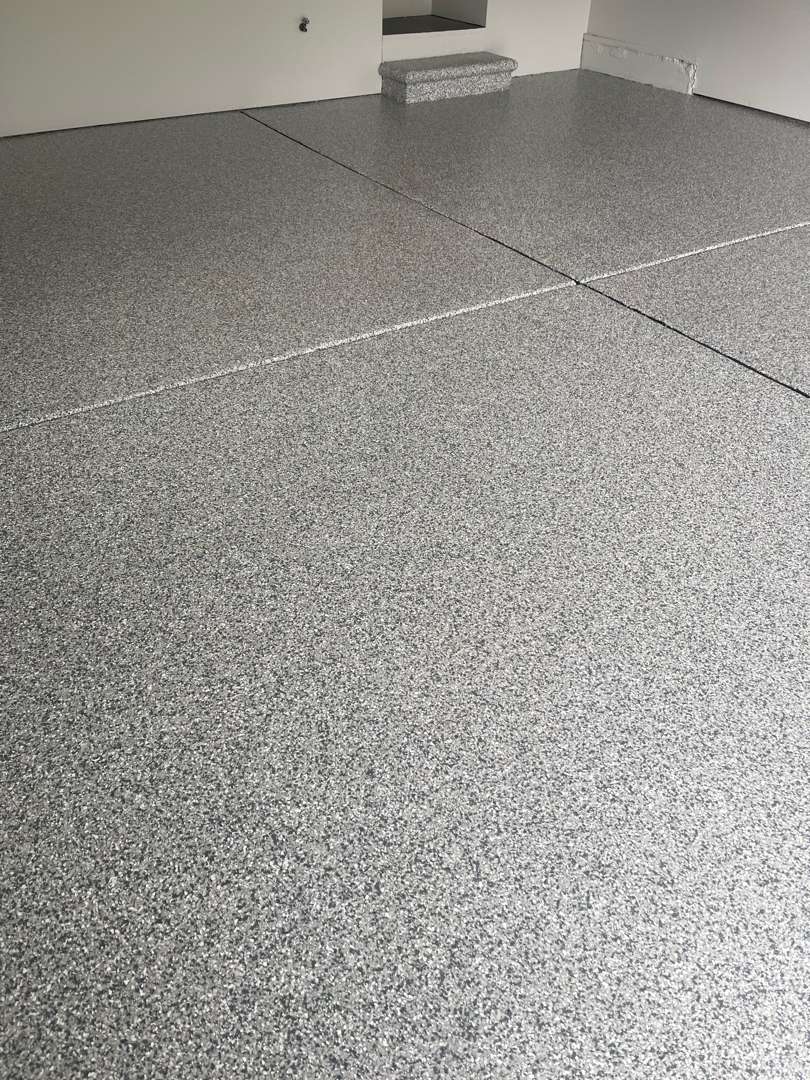
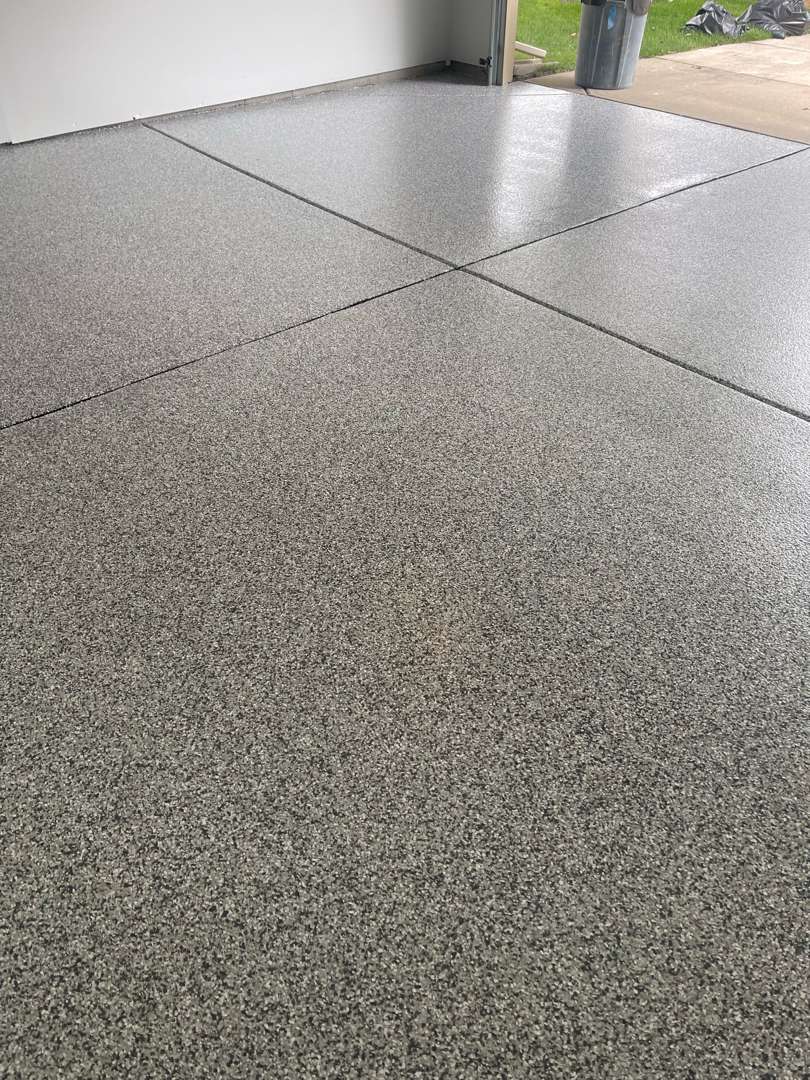
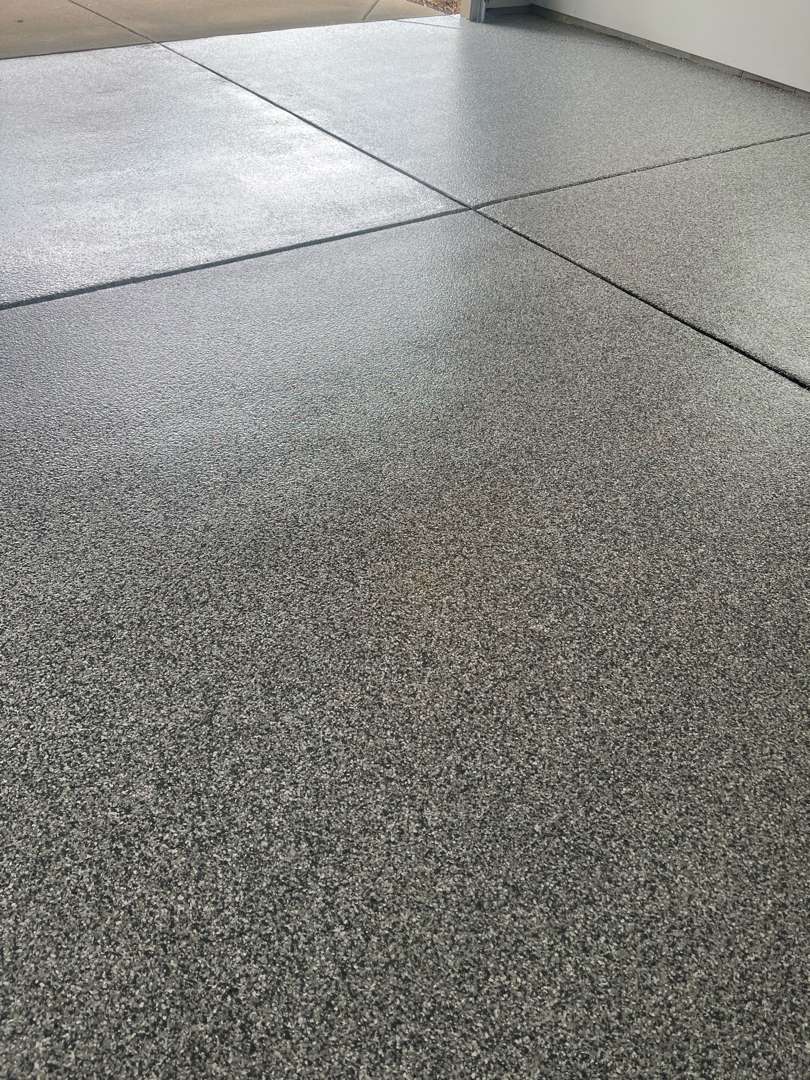
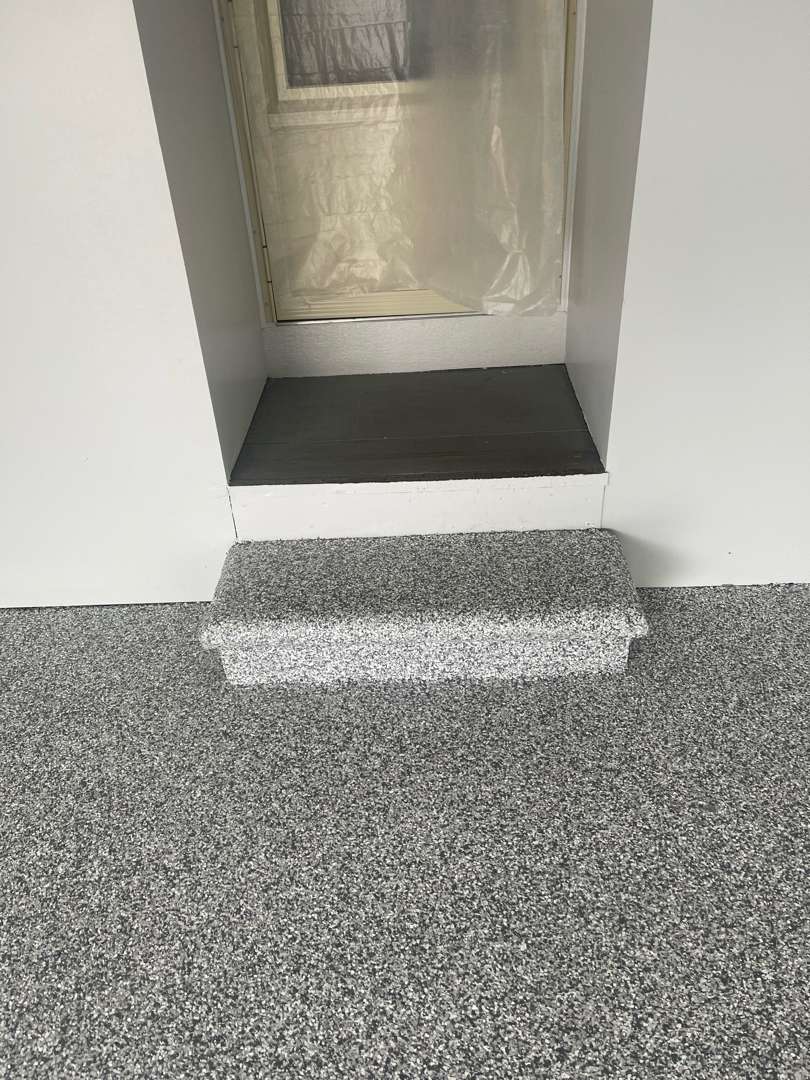
Our crew applied the M-4 polyurea base coat with the H-6 formulation across all four panels. Our team broadcast Slatestone flake into the wet base coat in full coverage throughout. Slatestone carries cool mid-grey, white, and black flecks — a blend that reads clearly in both natural light from the open garage door and the enclosed interior. Our crew coated the tread of the concrete step at the rear with the same Slatestone coverage as the main floor. Our team applied the clear polyaspartic topcoat with 16-grit traction additive across the horizontal field. The coating stops at the garage door threshold.
All four panels finish at even flake density from wall to wall. The control joints form a clean cross pattern through the finished surface. The rear step tread matches the main floor — the transition reads as one continuous surface. The oil stain in the center zone is gone. The scattered marks across the mid-panels are gone. The crack is sealed. The pitting is filled.
Testimonials
Steve Ray
Raquel Orduna-Rios
Garage Floor Coating
on Ashton Drive
Ashton Drive, Sterling Heights, MI
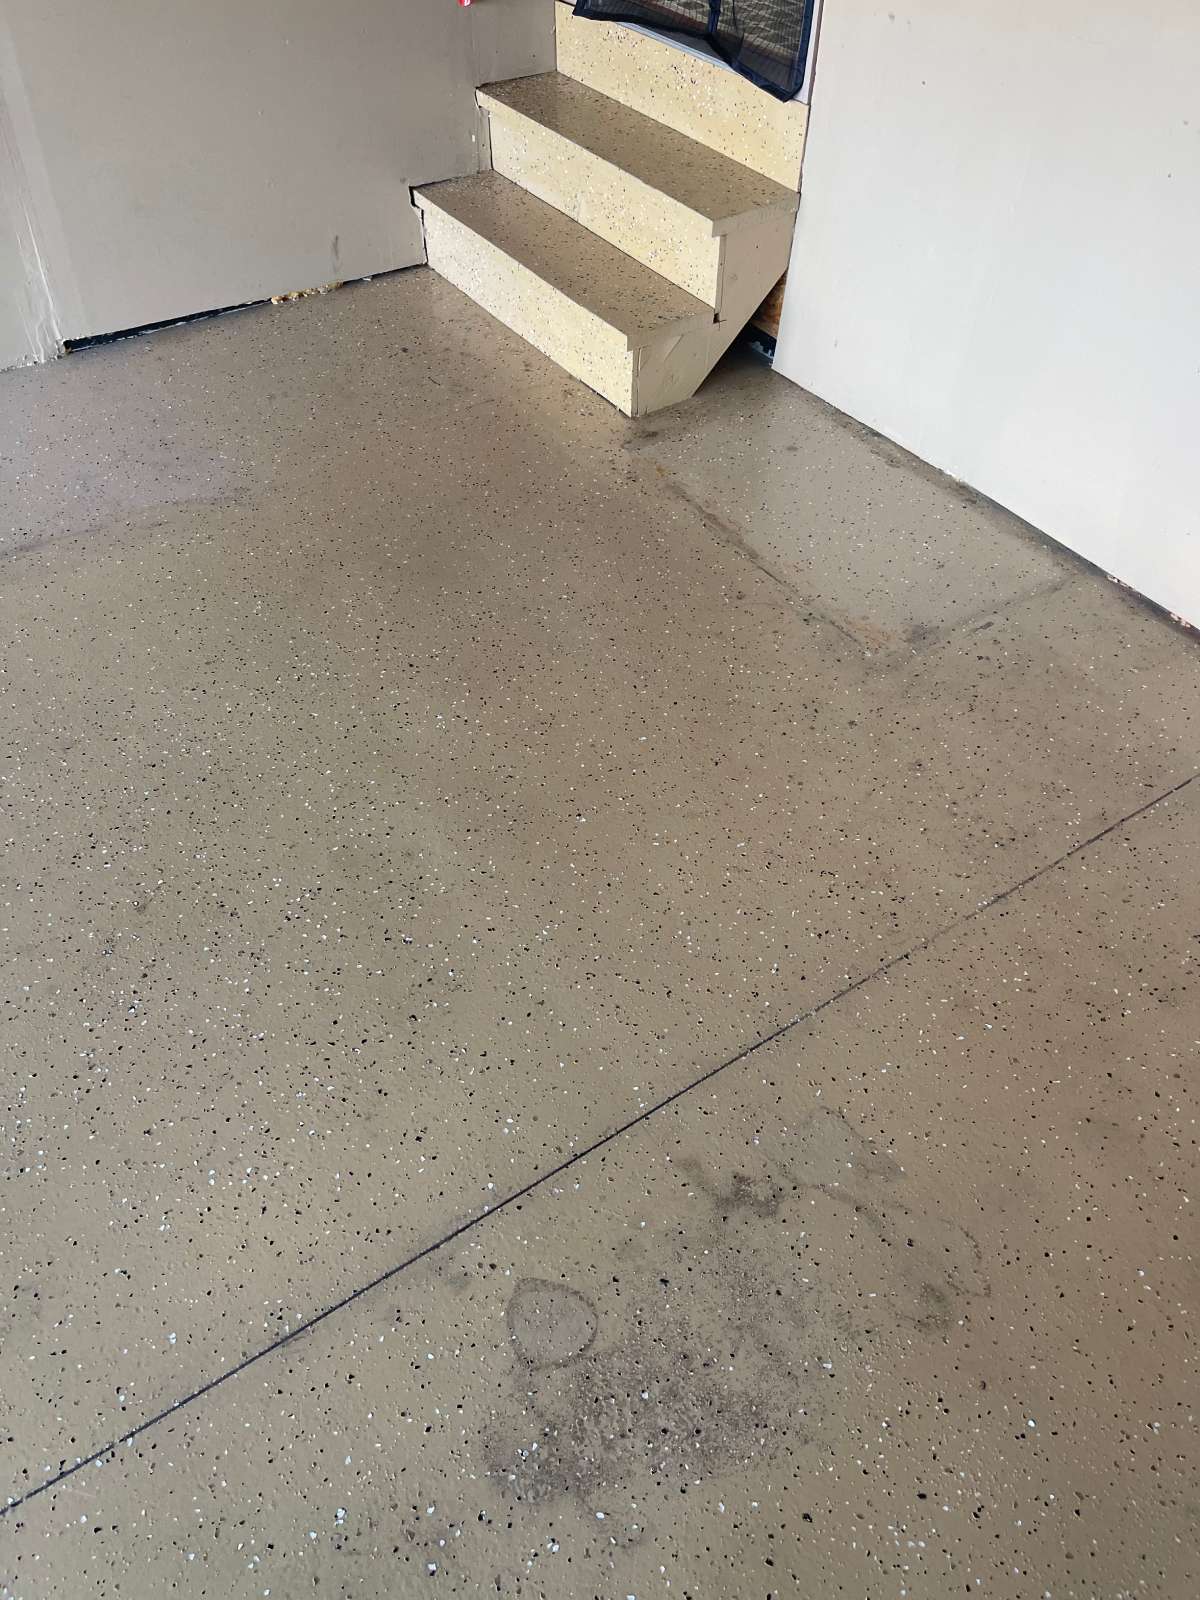
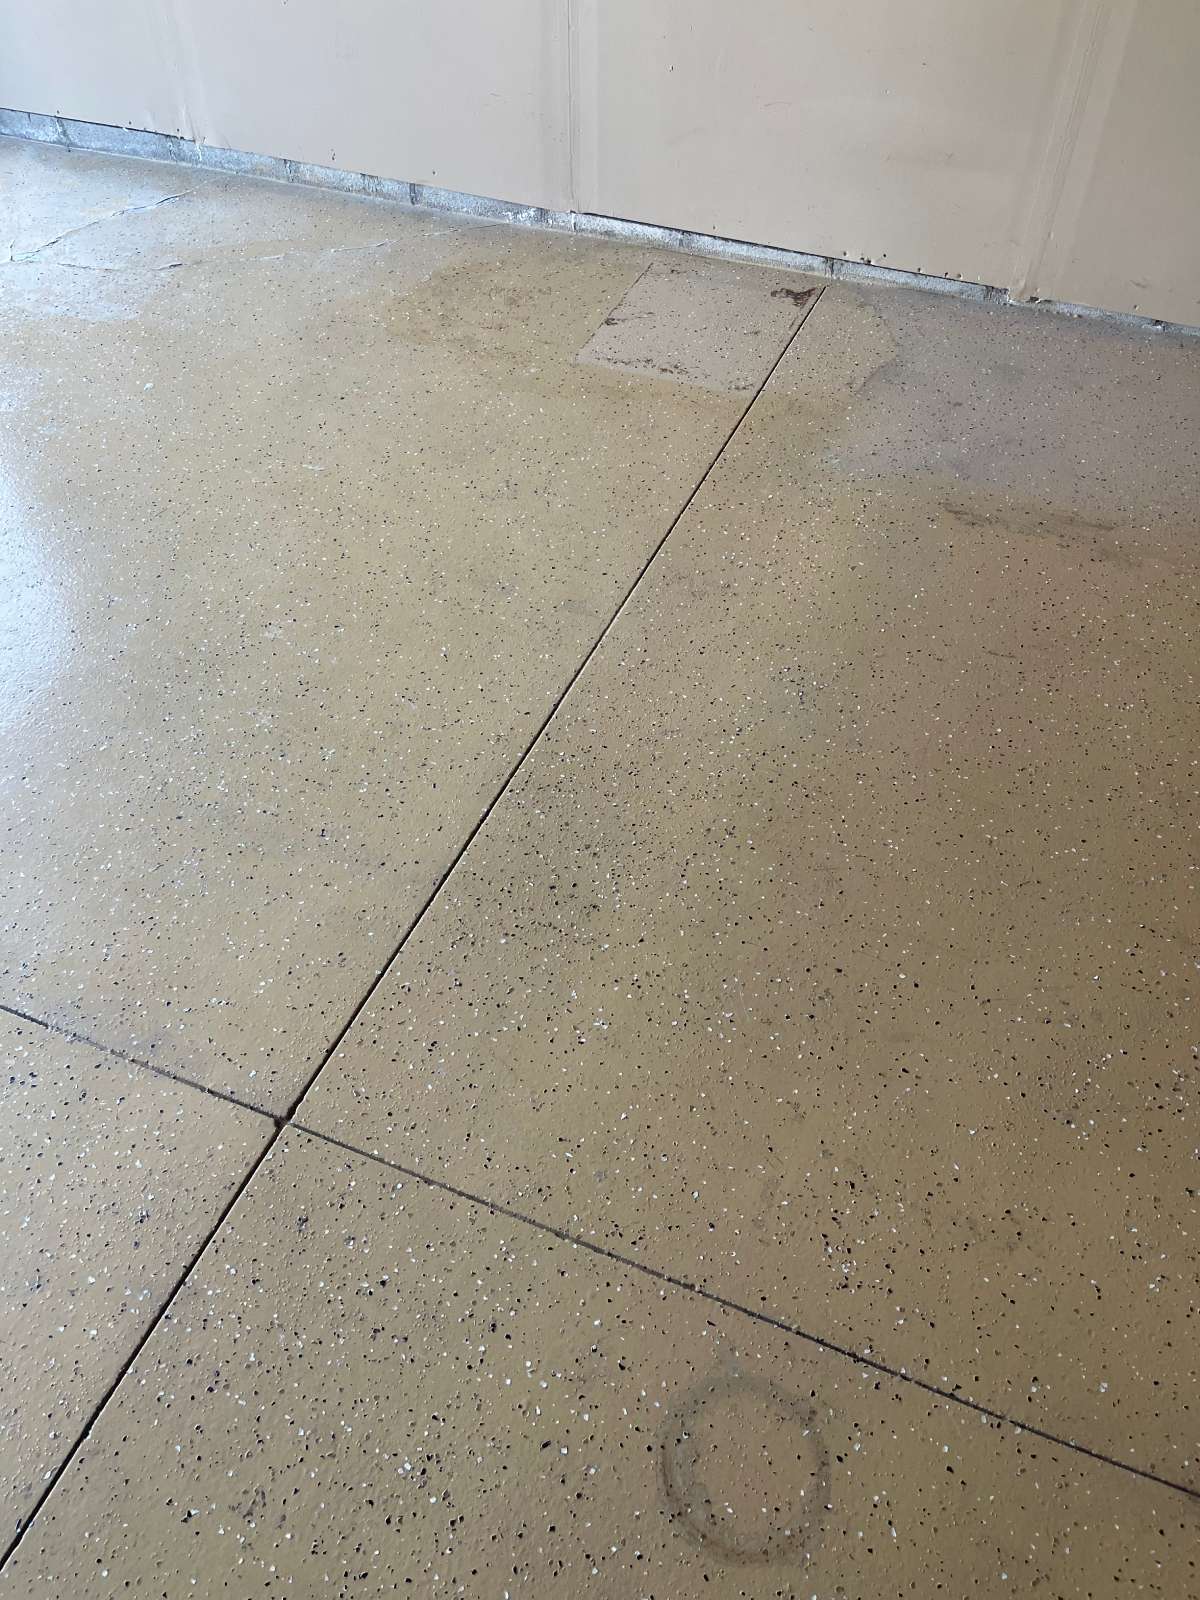
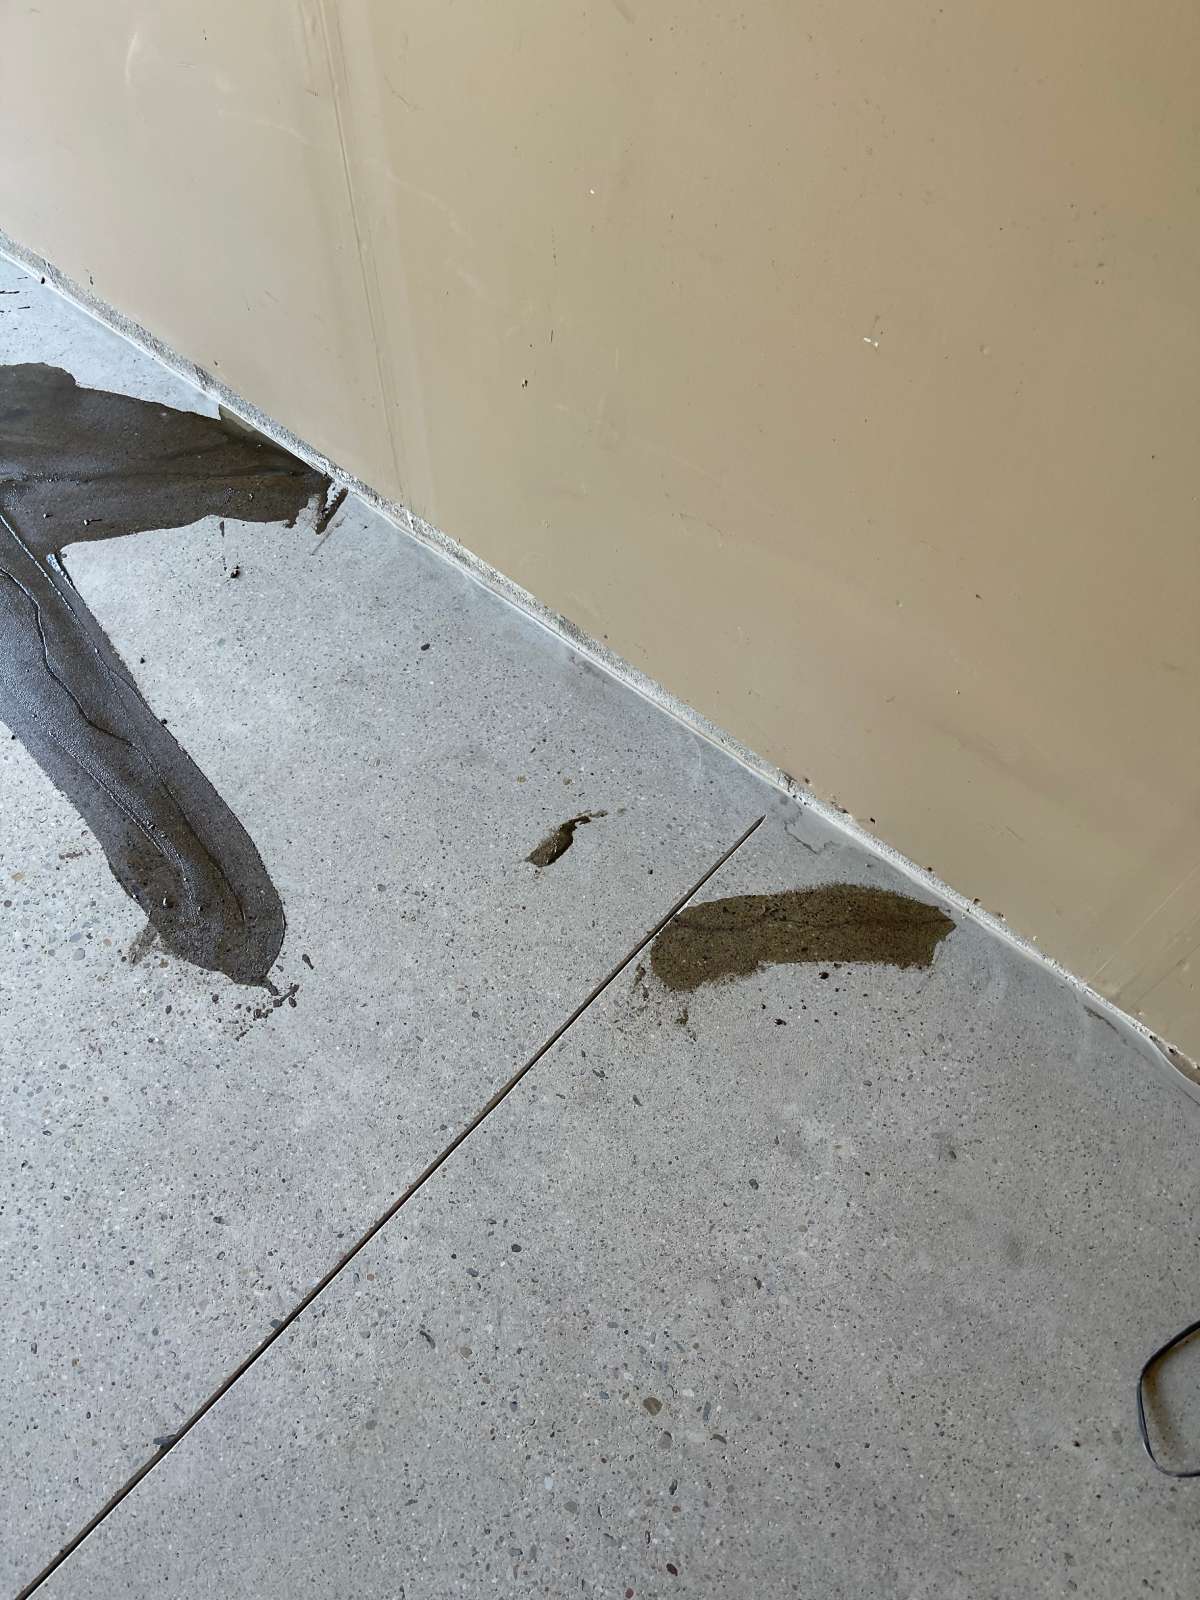
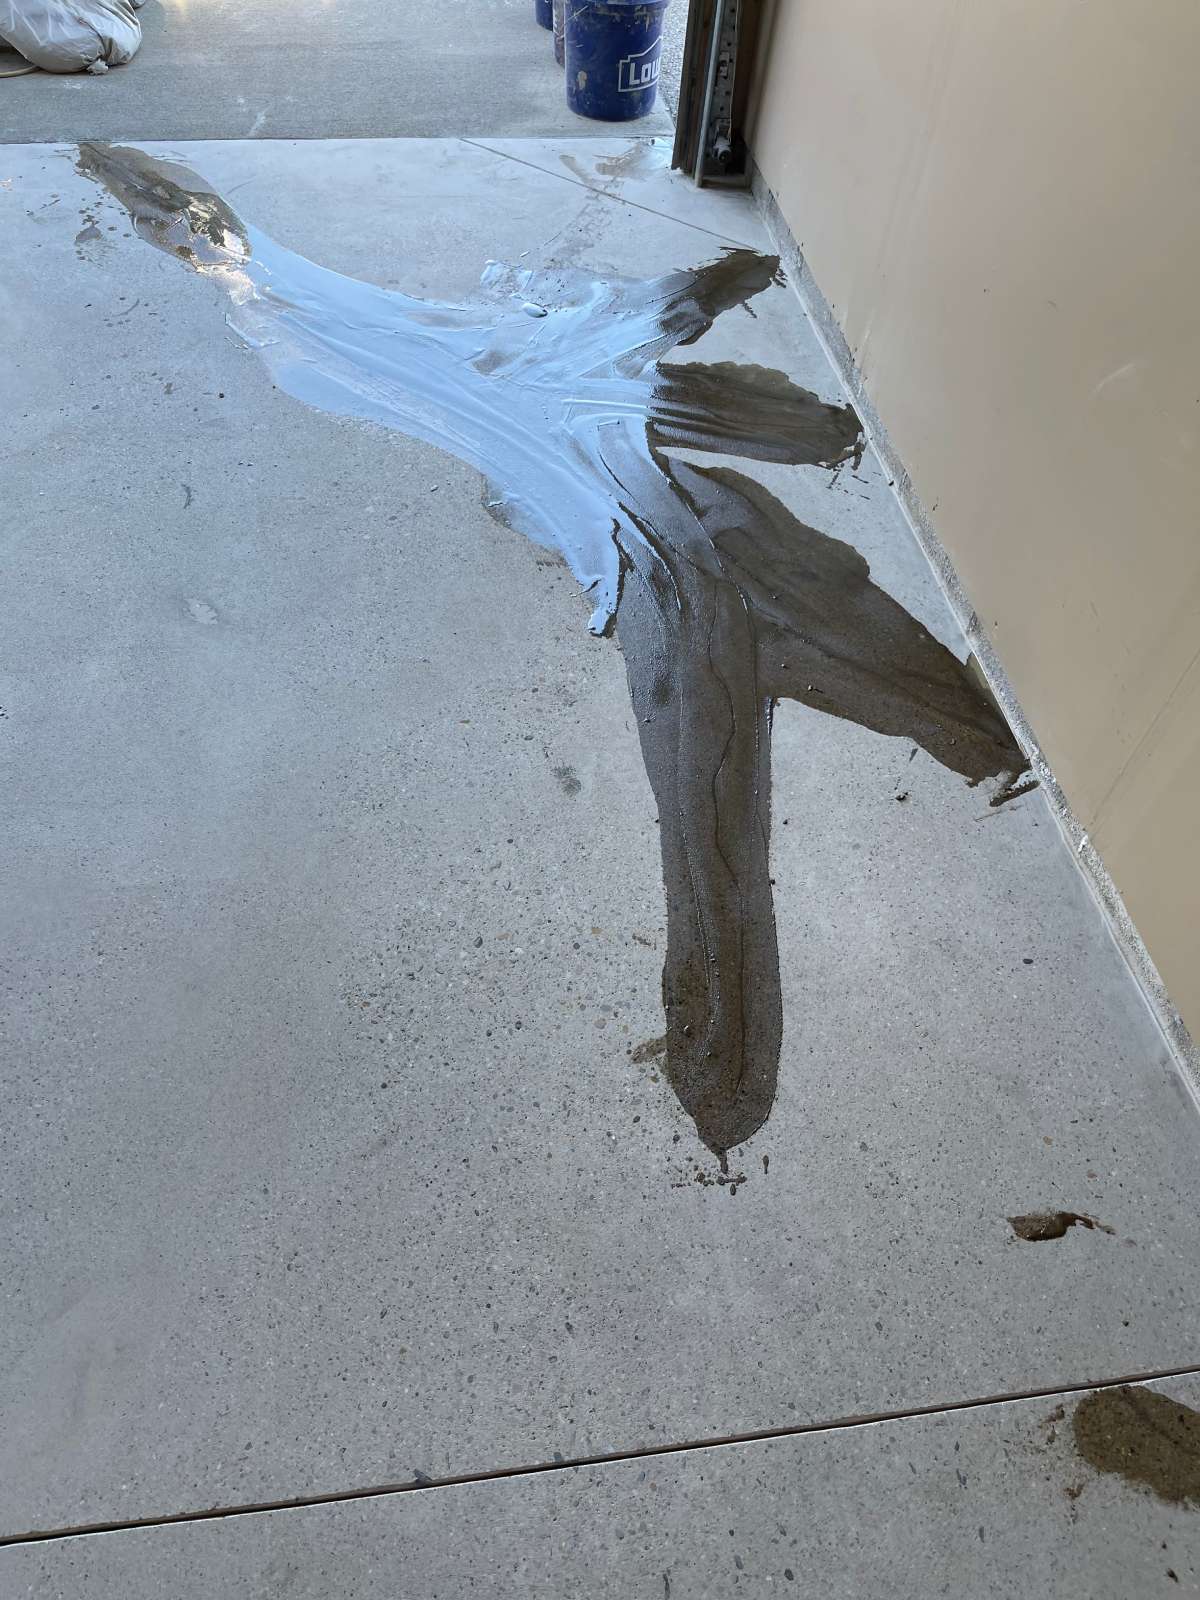
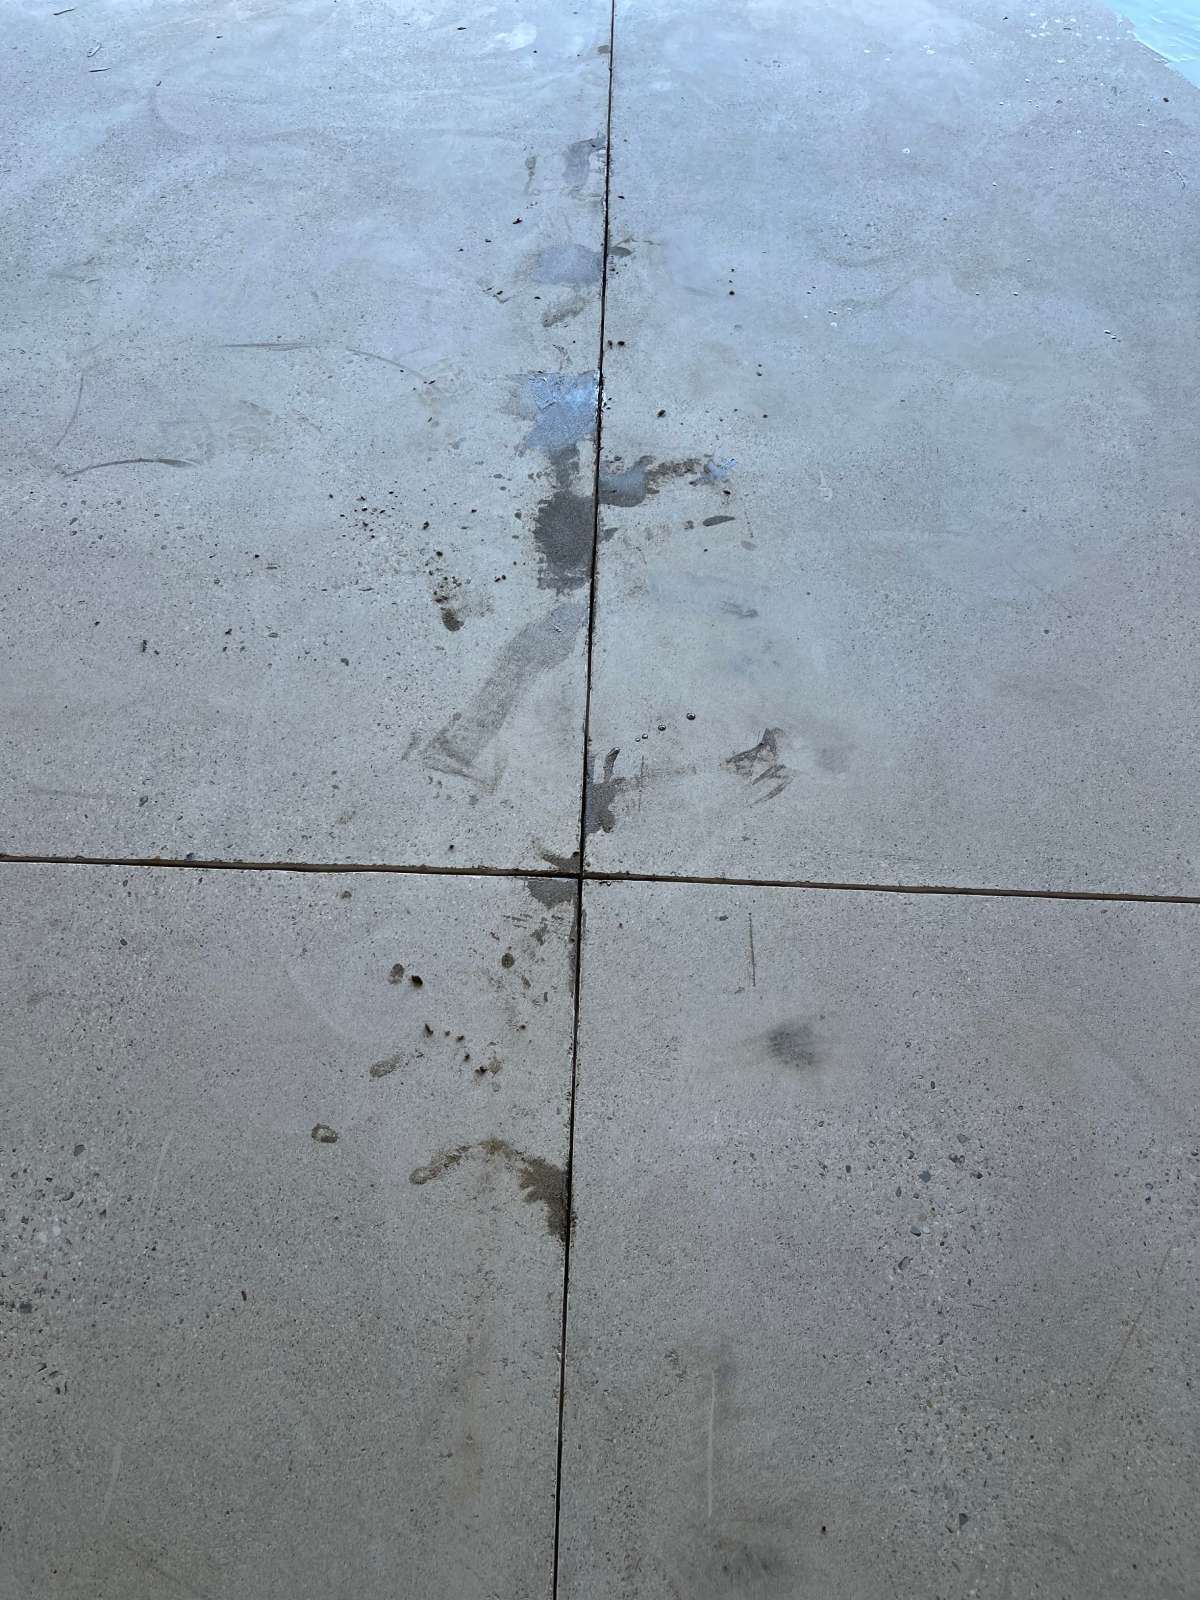
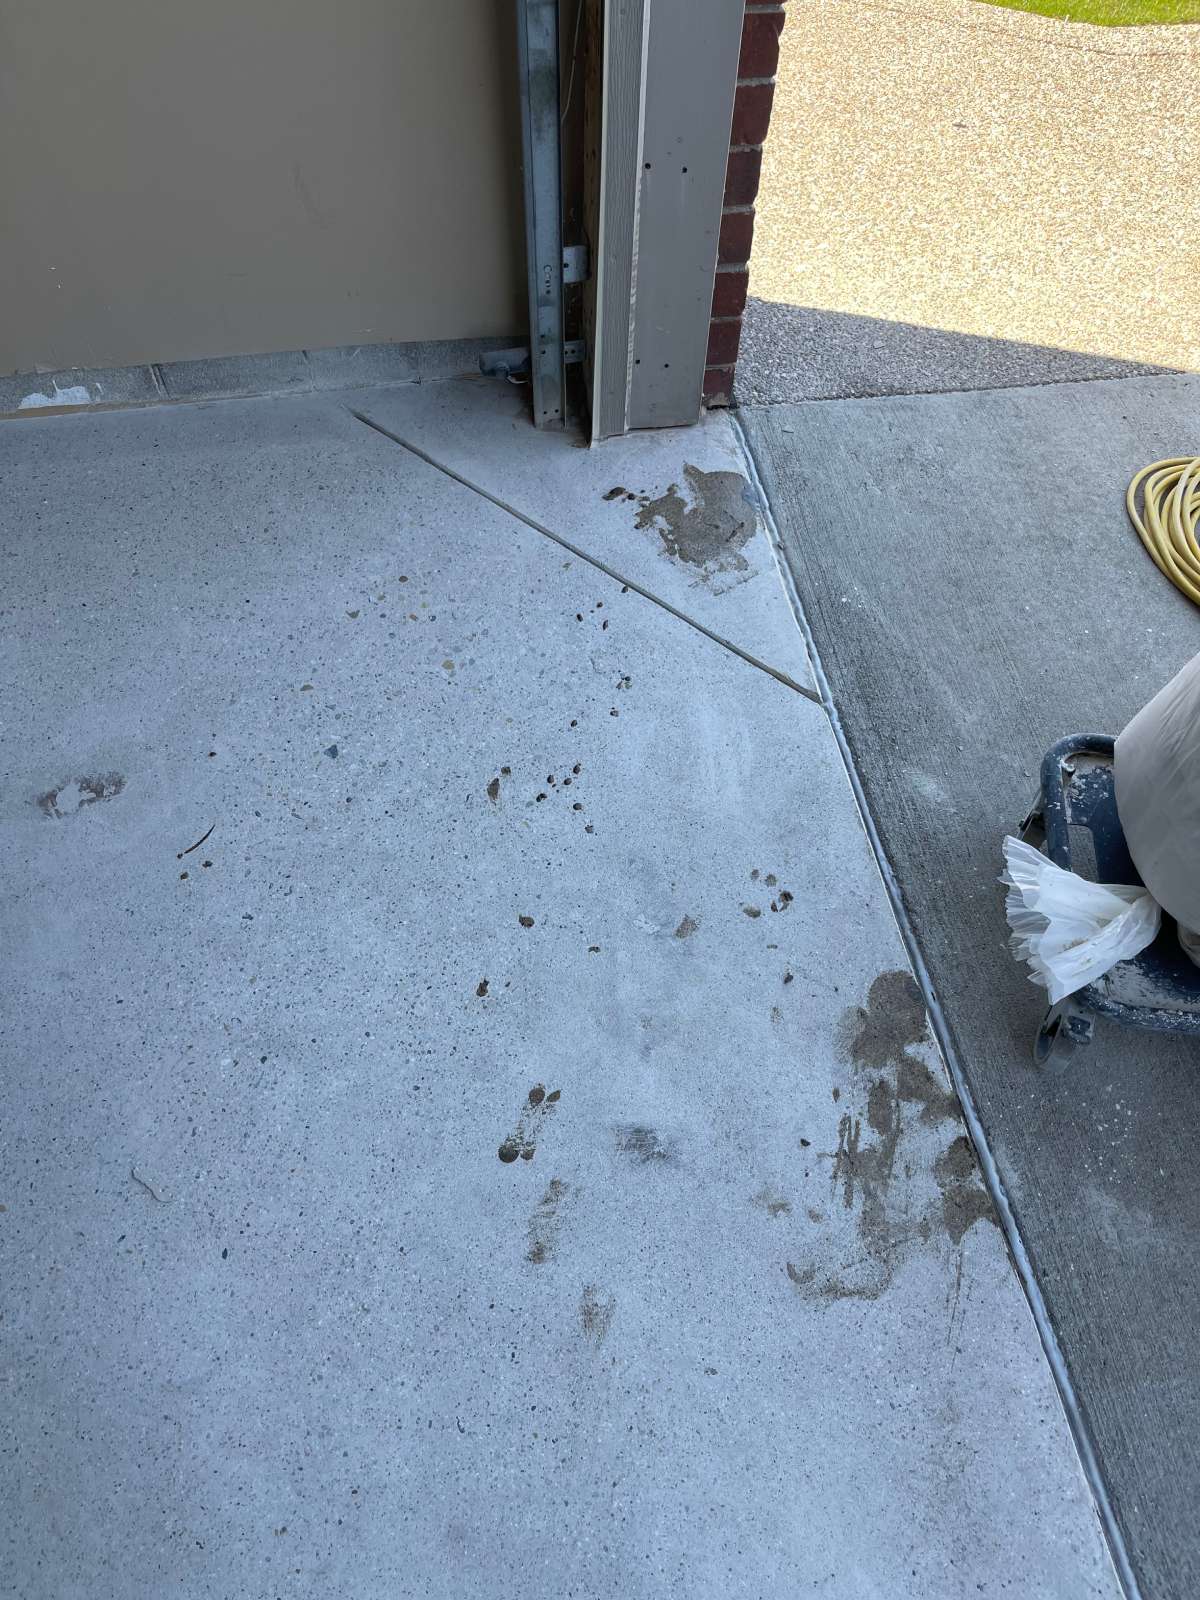
Epoxy Removal and Crack Repair
Domino — Floor, Steps, and Walls
What Removal Makes Possible
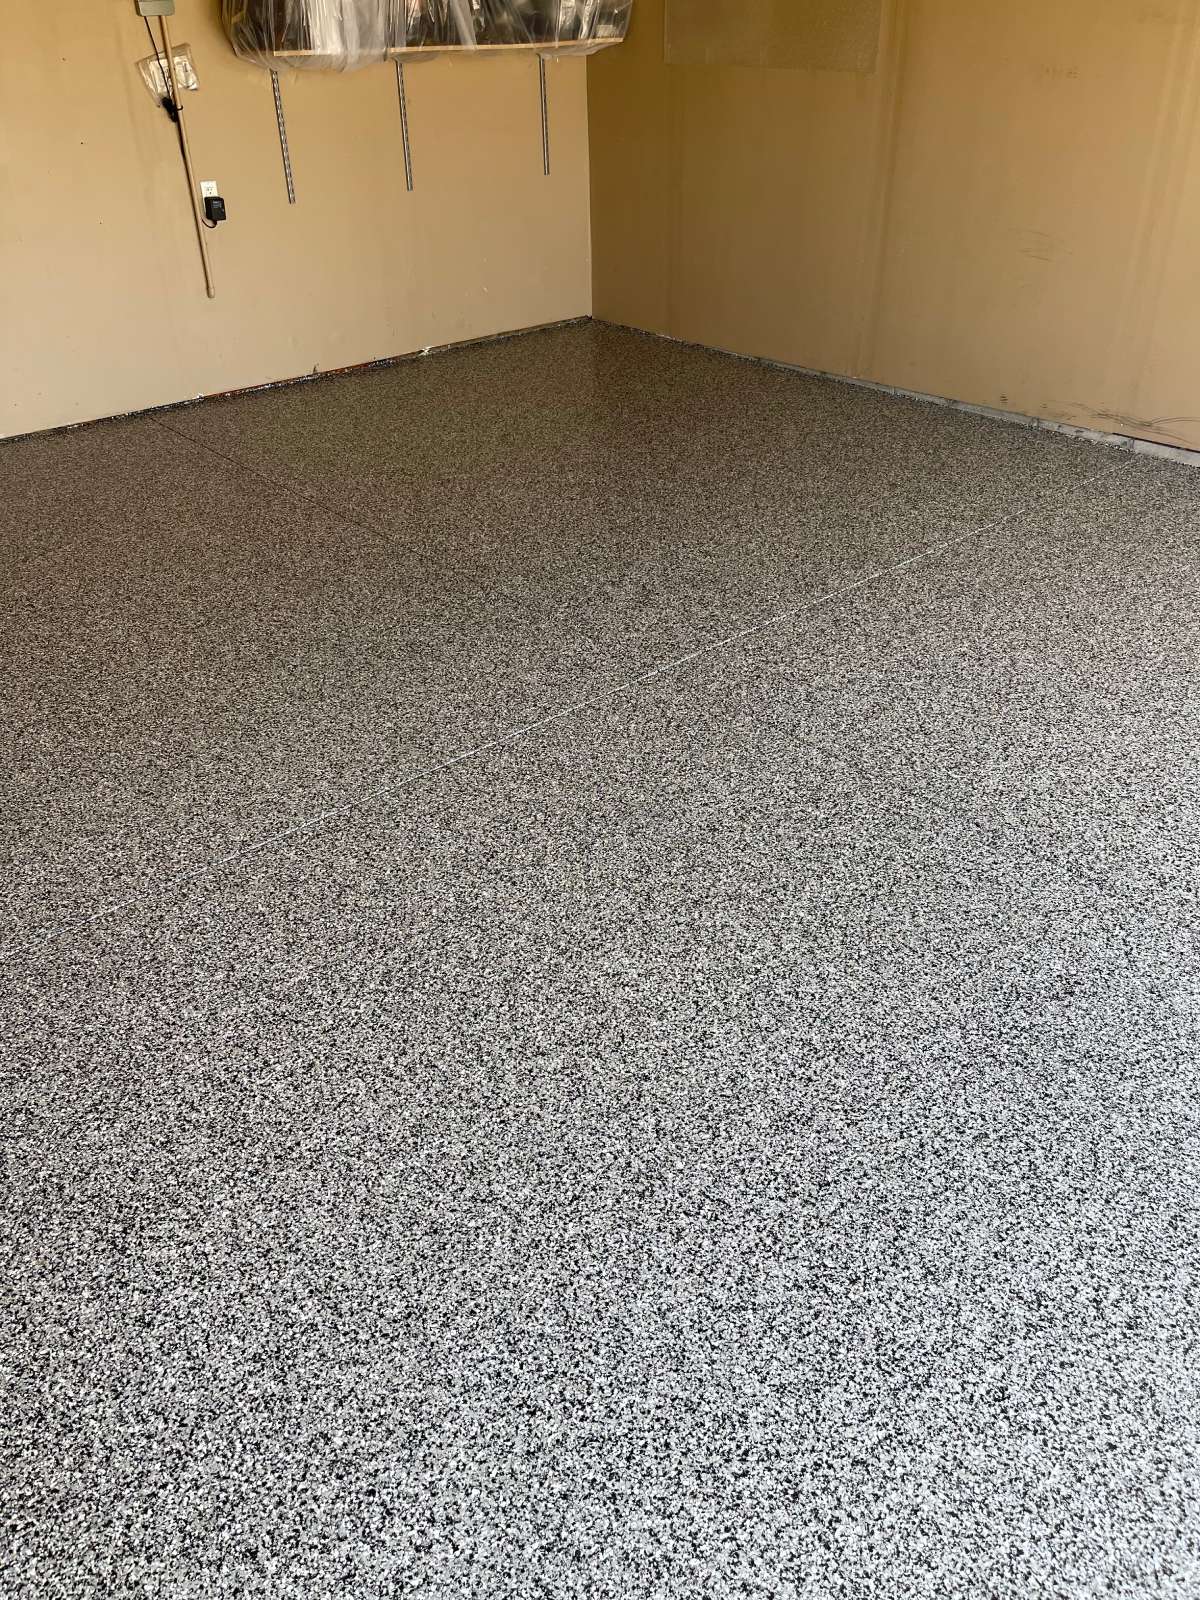
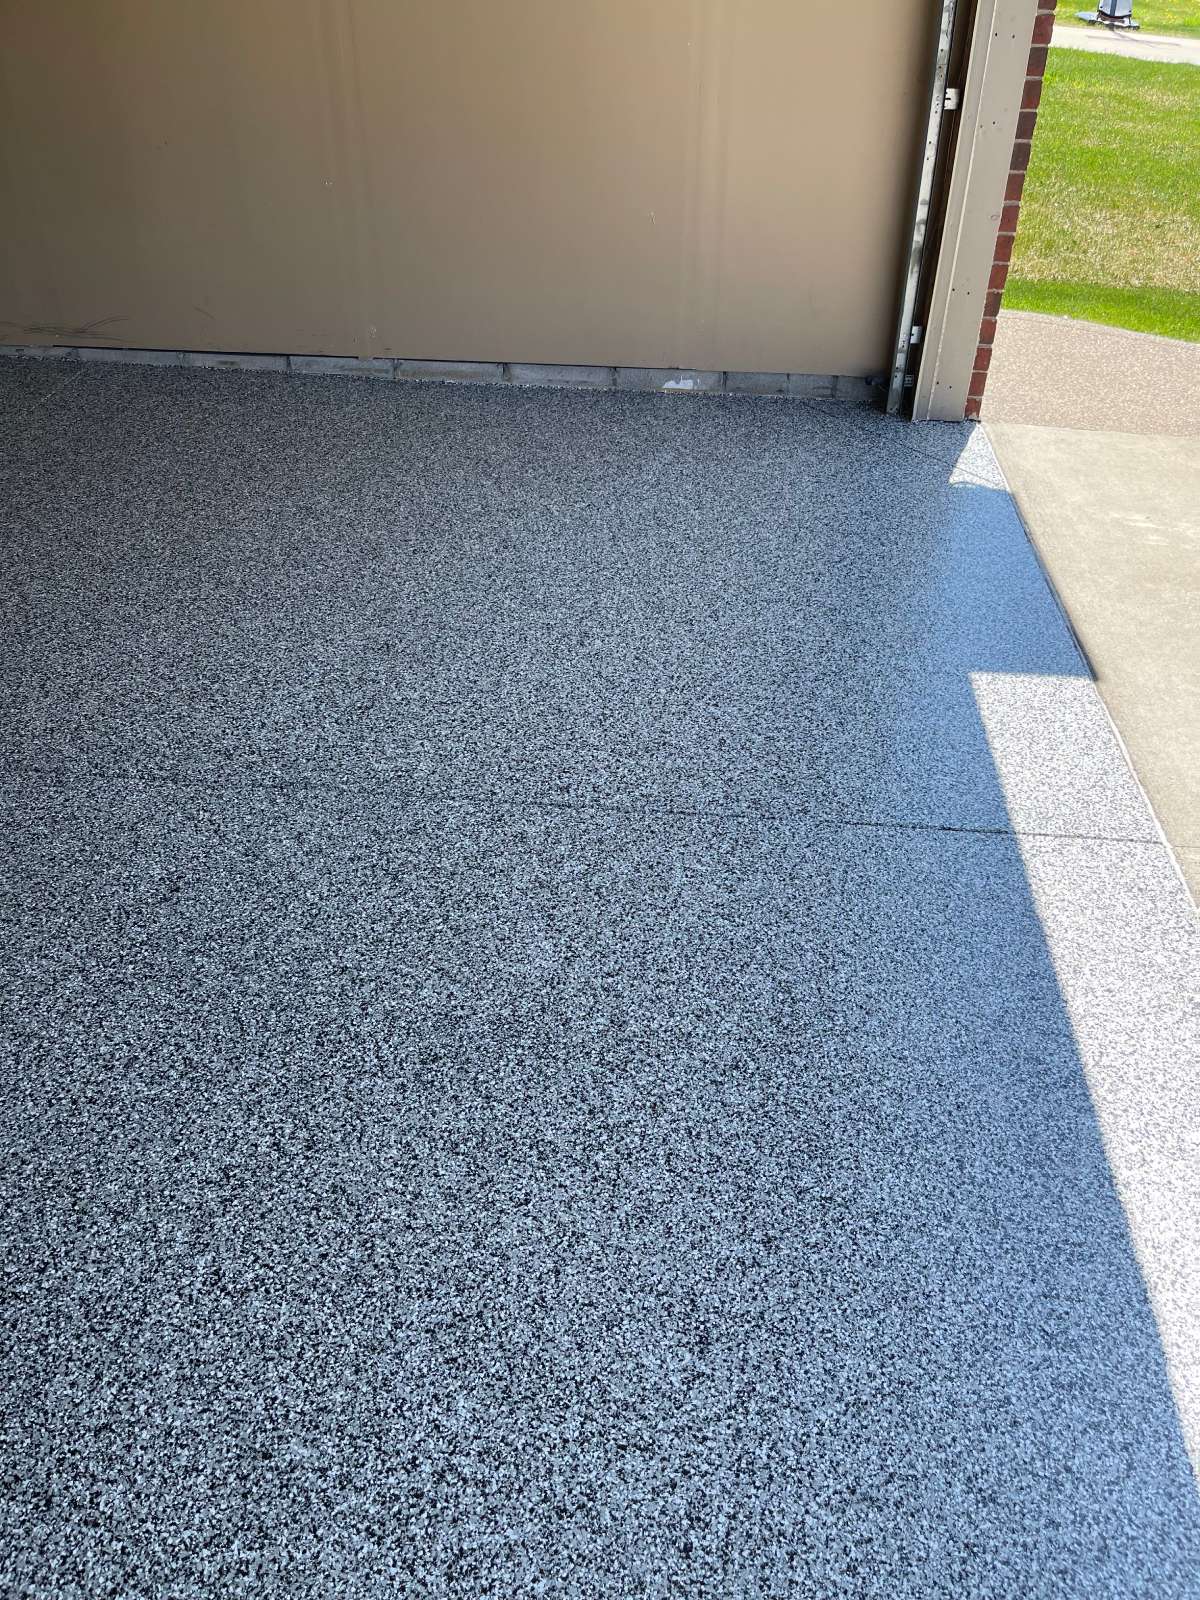
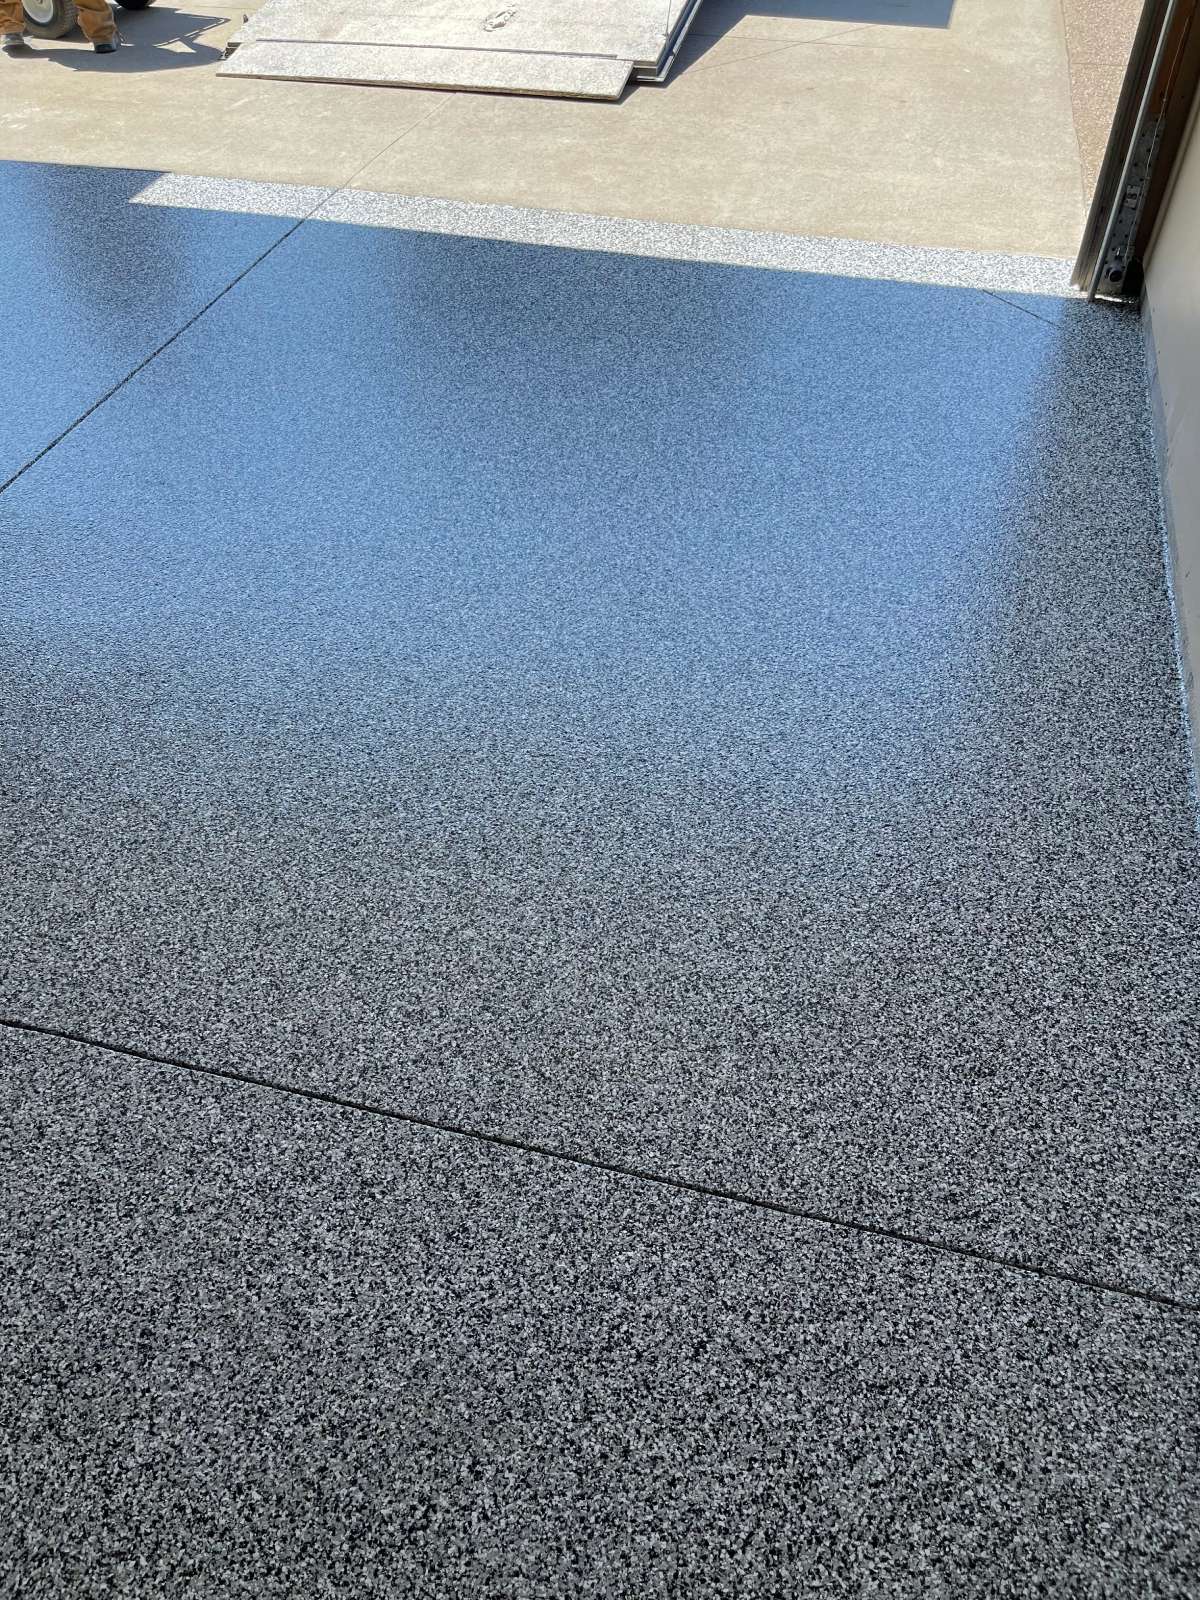
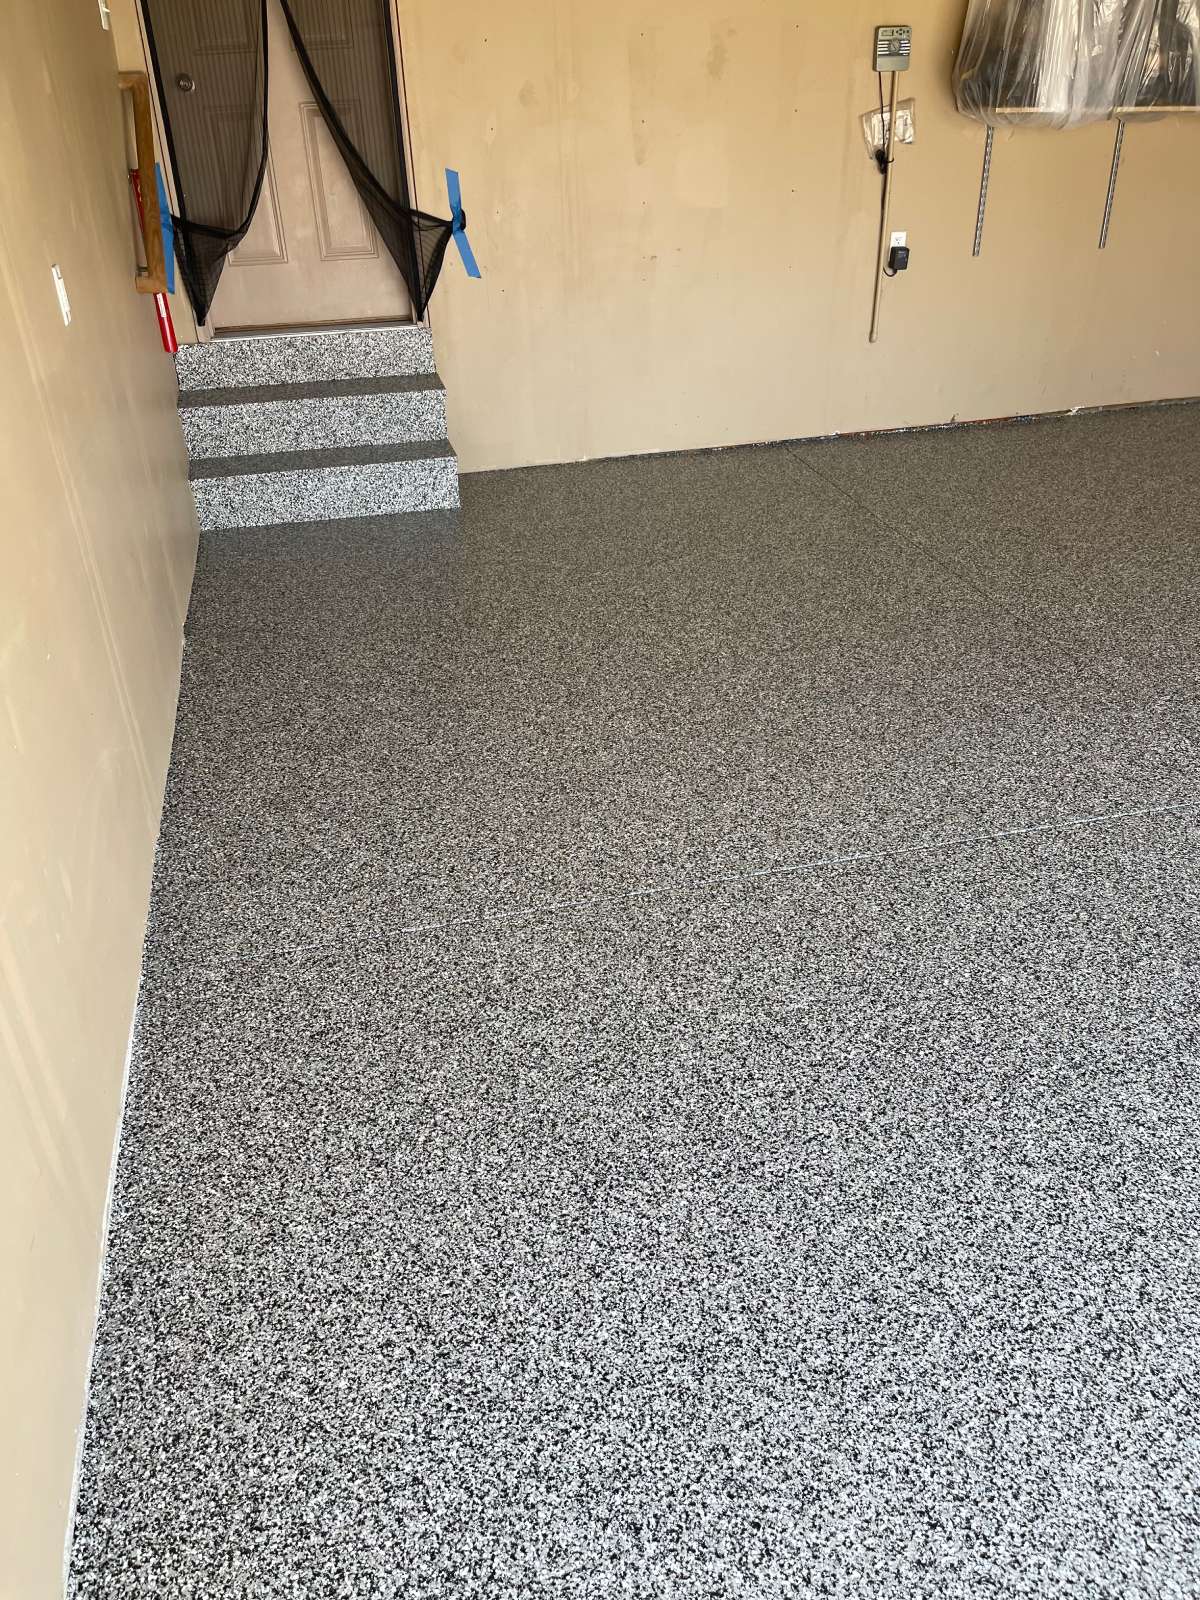
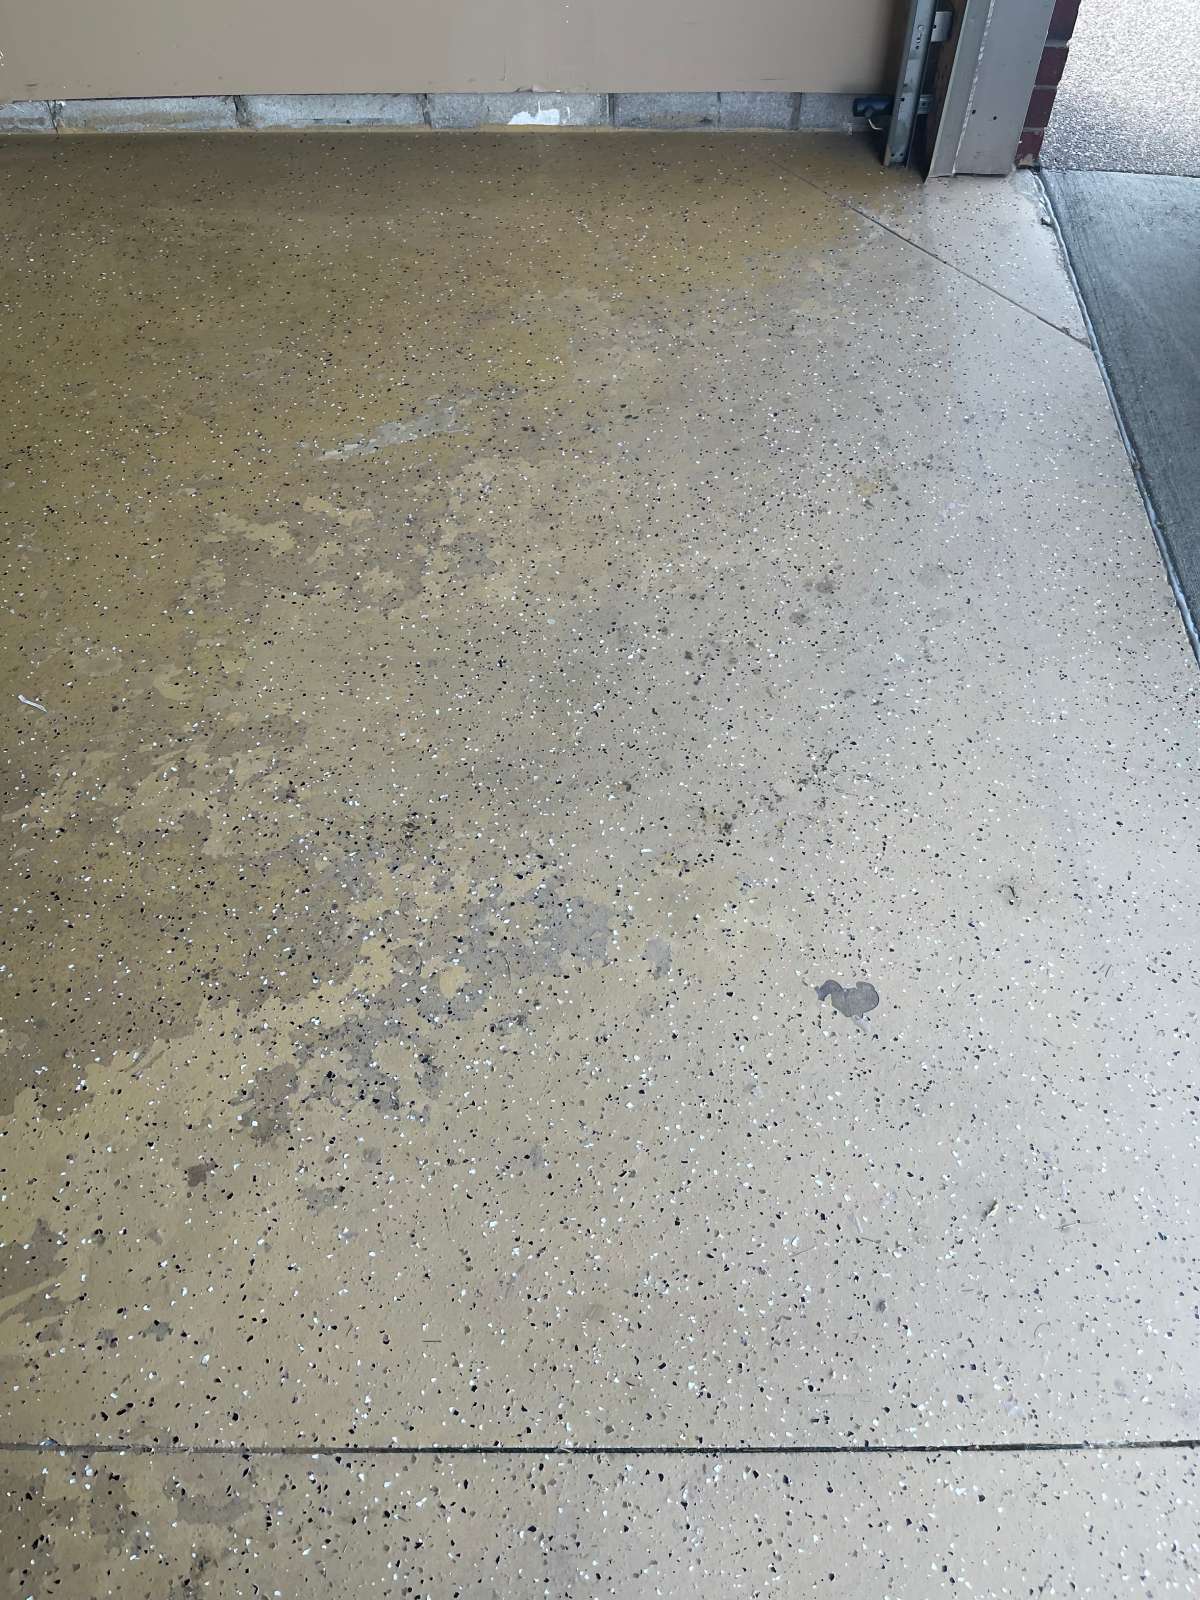
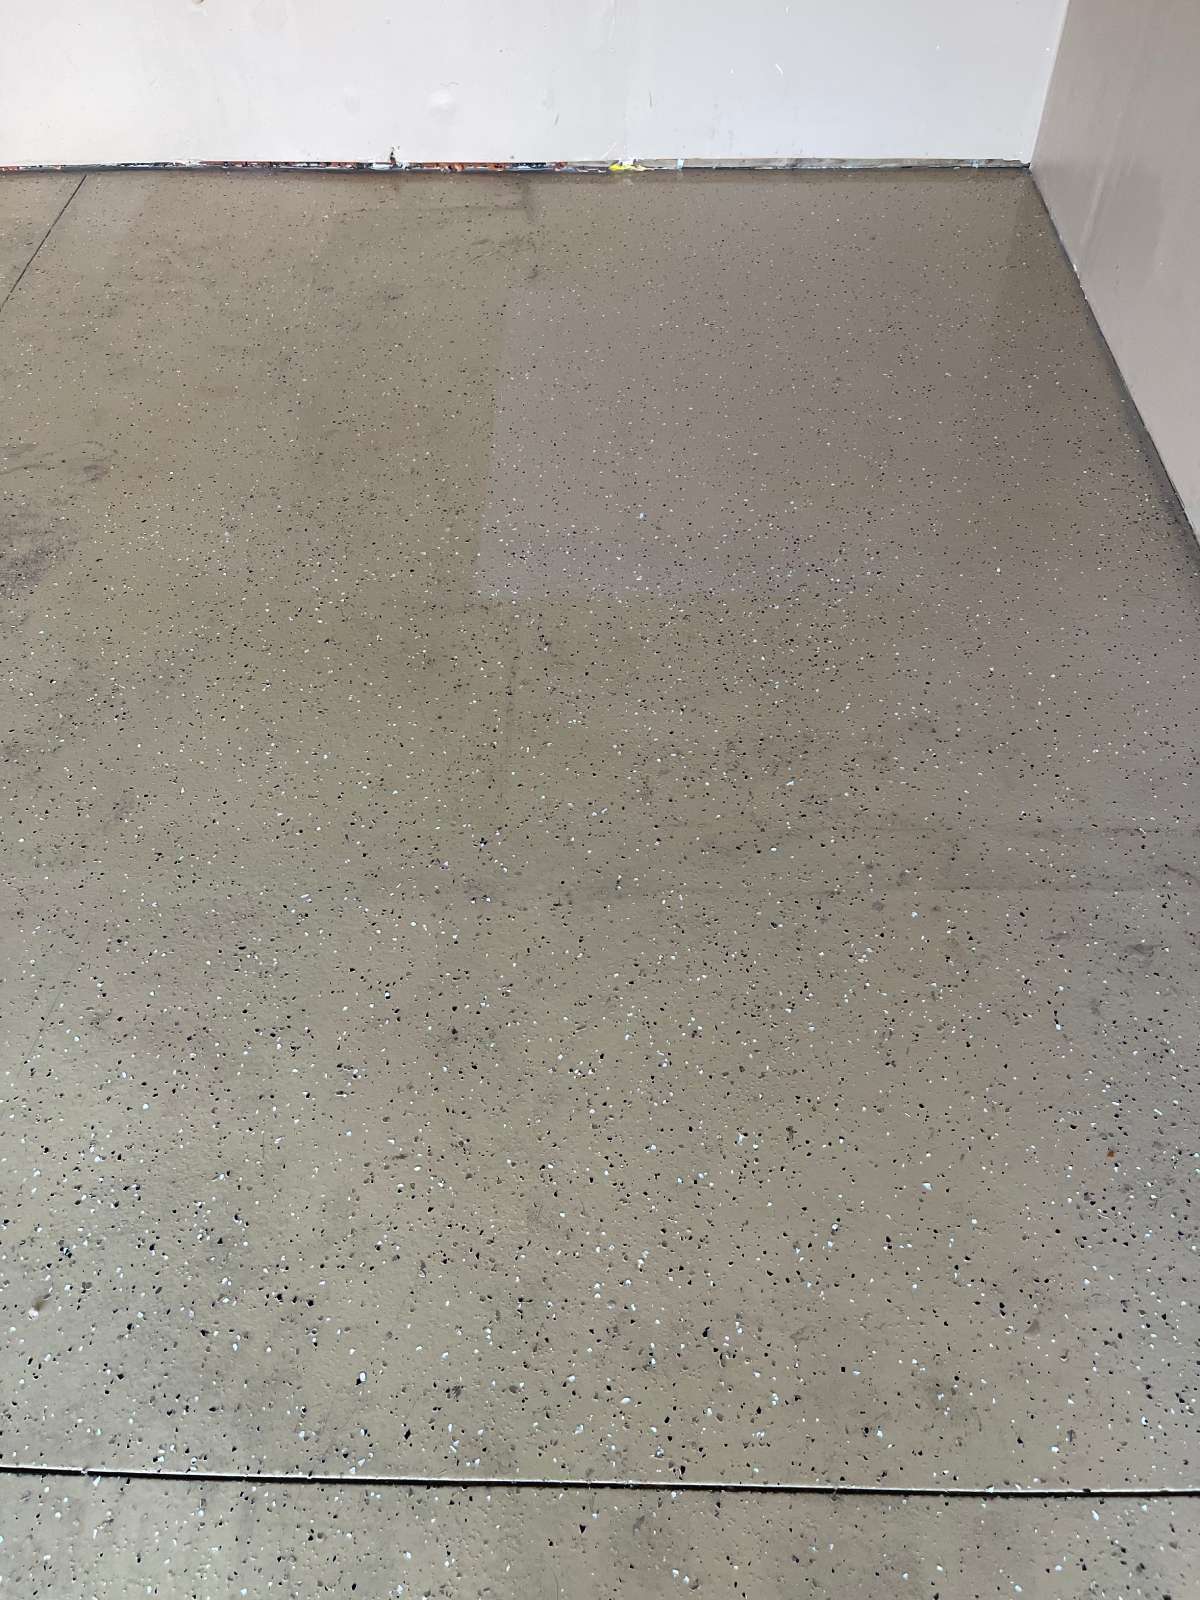
The near-black finish against warm tan walls creates a strong contrast — the floor commands the space. All four panels read at the same flake density from wall to wall. The three steps carry the same system as the main floor — treads and risers coated continuously. The failed epoxy is gone. The cracks the old coating had been sitting over are sealed. The pitting is filled. 352 square feet that required full coating removal before any new system could bond are finished.
Testimonials
Brad Greenfield
Walter Barkey
Garage Floor Coating
on Flagstaff Drive
Flagstaff Drive, Sterling Heights, MI
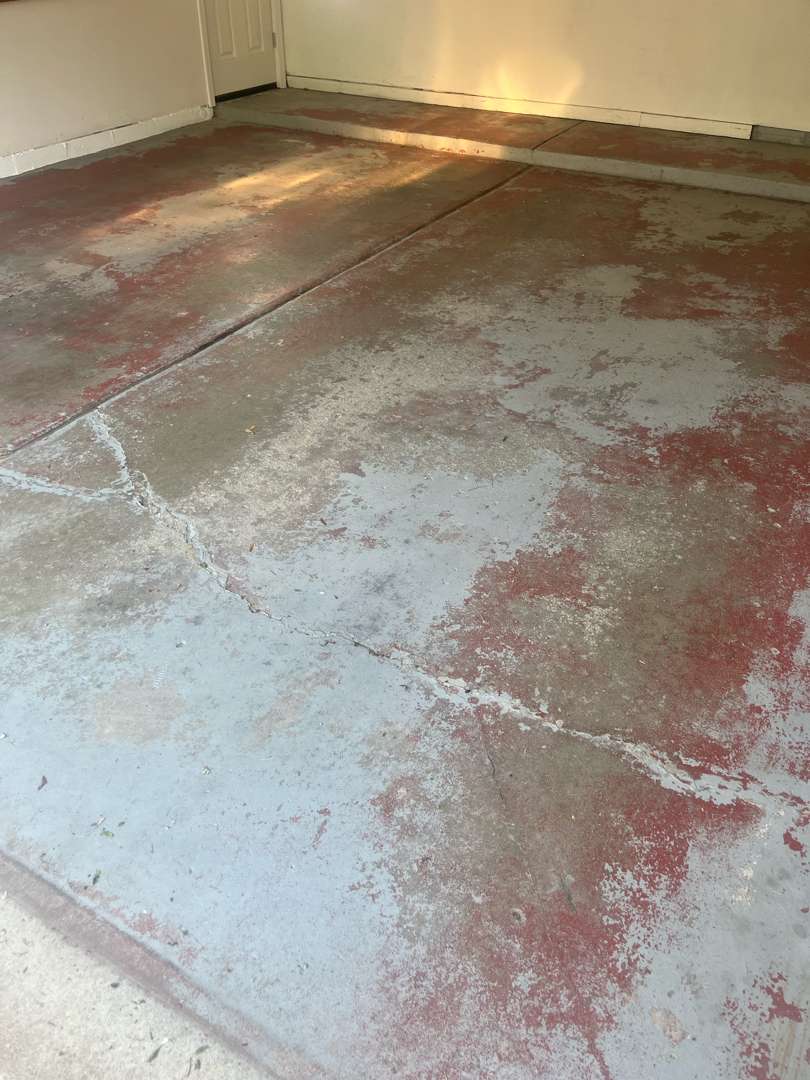
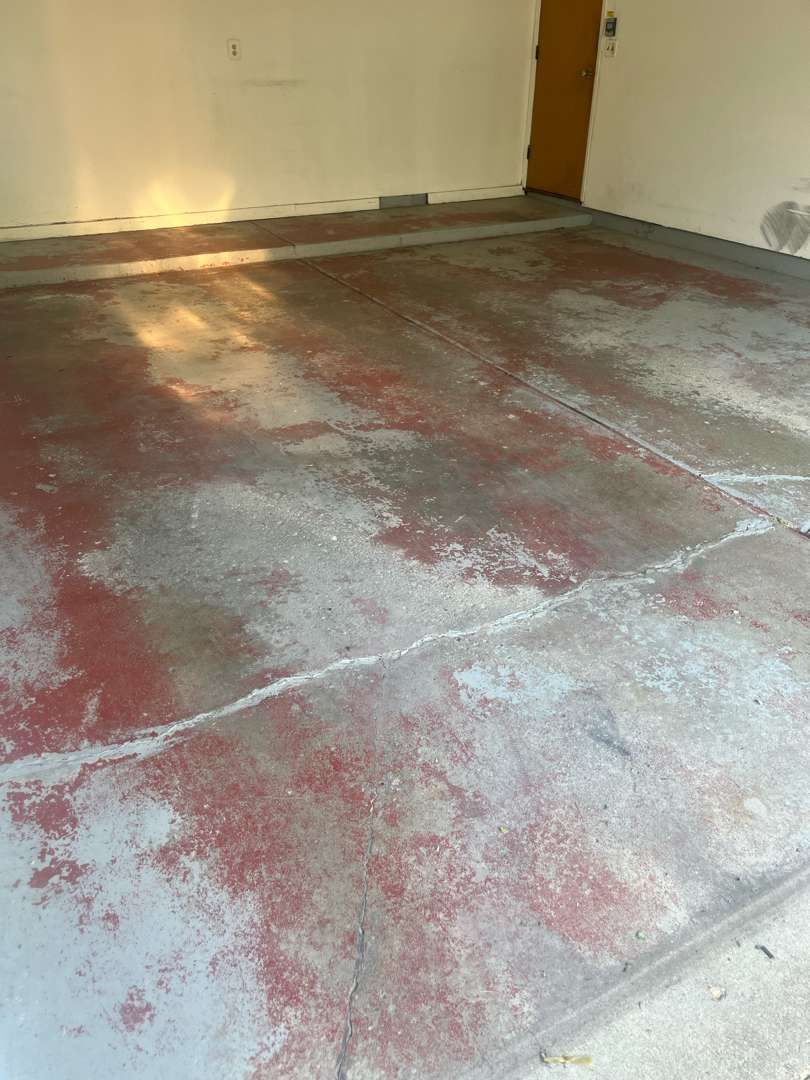
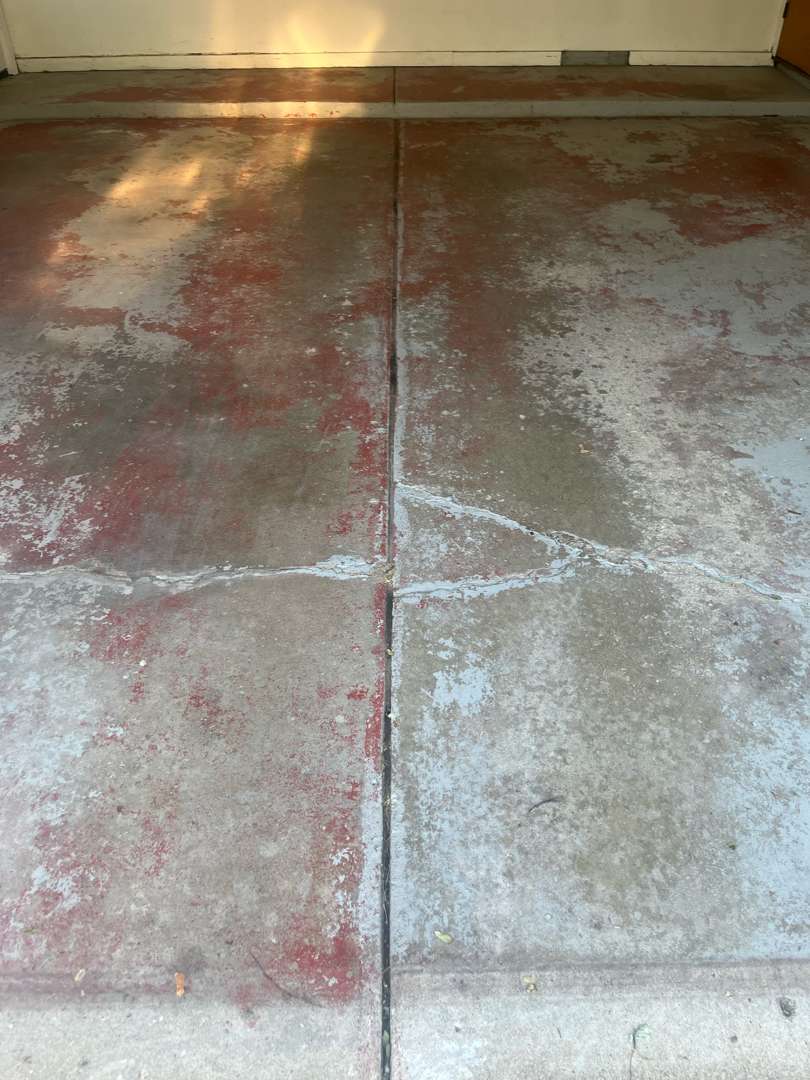
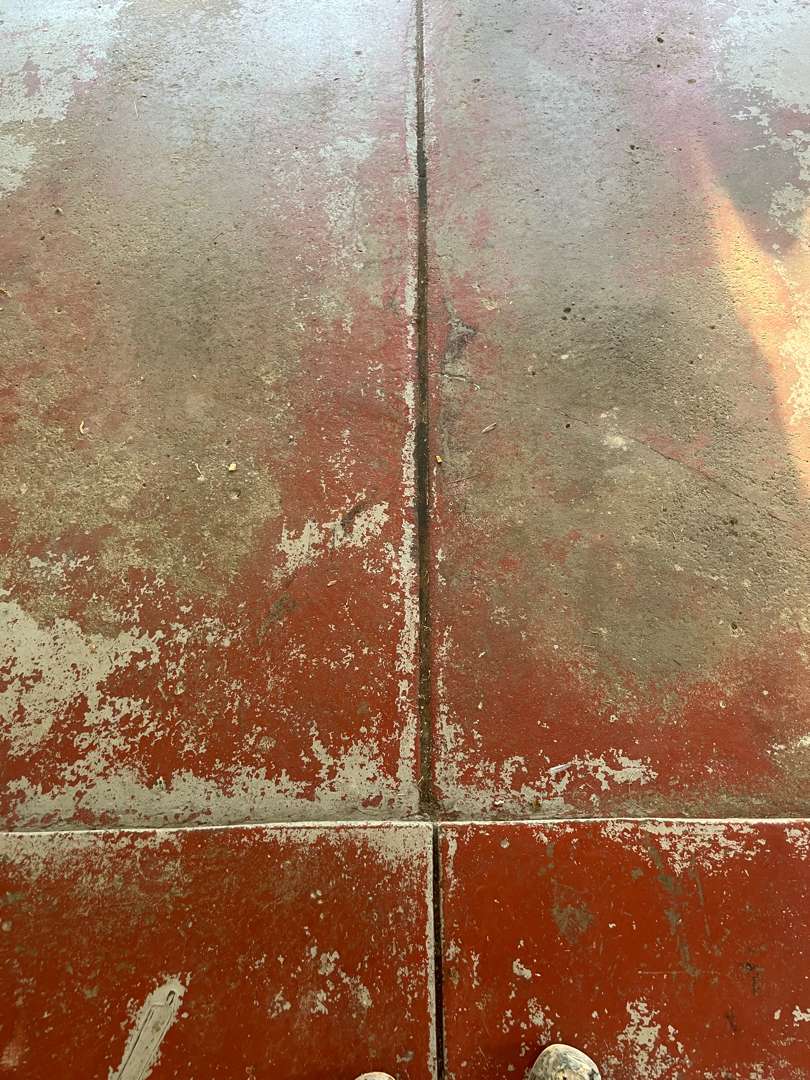
Paint Removal and Oil Extraction
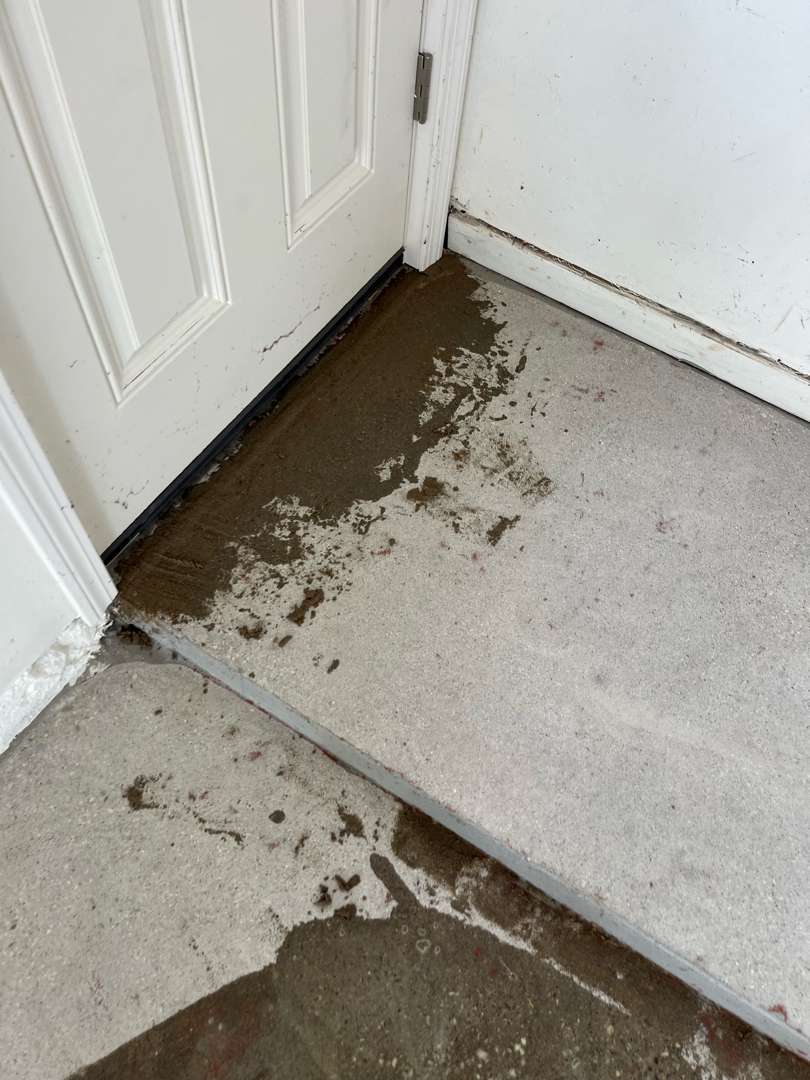
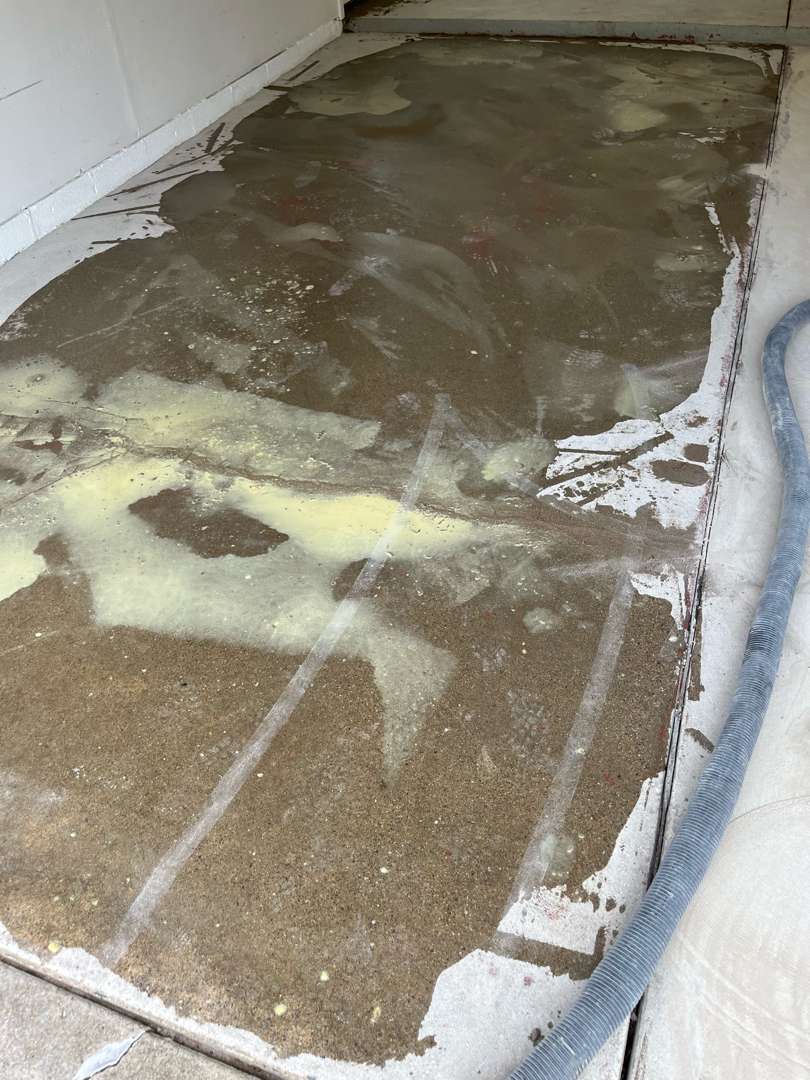
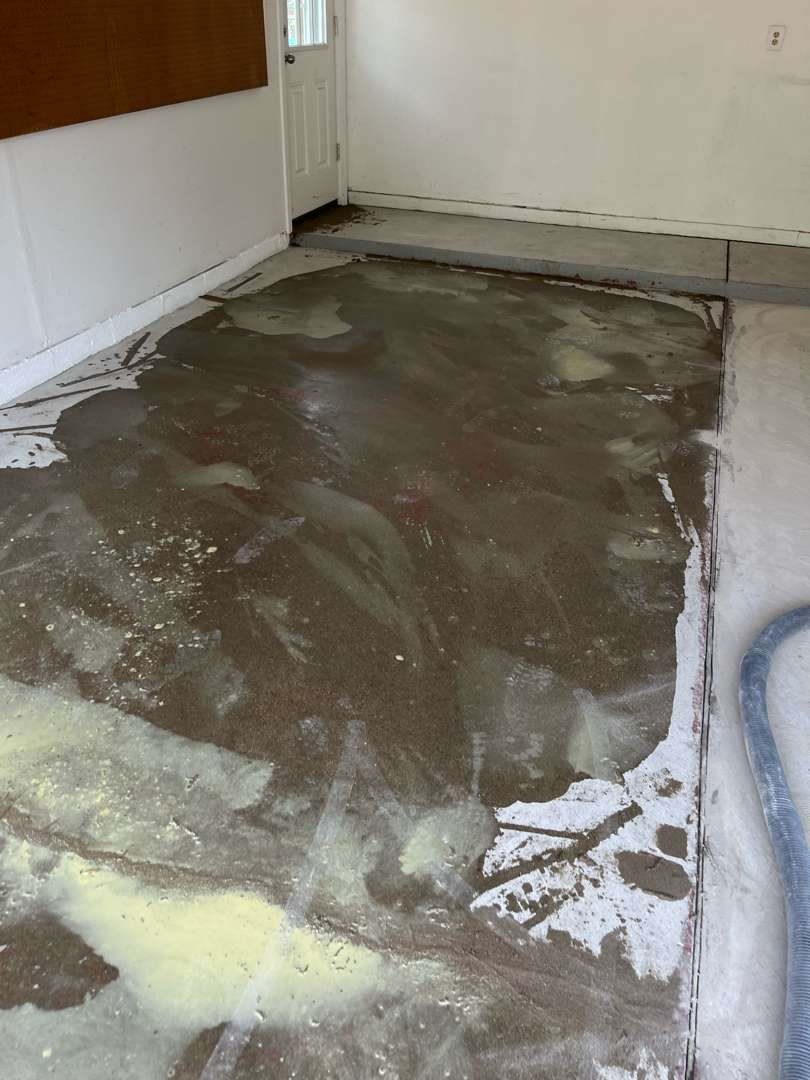
Our crew diamond-ground the full 353-square-foot garage slab to cut through both paint layers and expose clean concrete below. The same grind sequence covered the 33 linear feet of vertical surfaces. Our team filled the diagonal crack and addressed the pitting zones with cementitious patching compound after the paint was cleared.
Oil contamination was present beneath the failed paint. Our crew applied MR-50 oil extraction solution to the affected zones. The MR-50 drew the remaining oil out of the pore structure of the concrete. Our team vacuumed the floor when the treatment was complete and confirmed the surface was free of both paint residue and oil contamination before proceeding. Our crew then carried the same preparation sequence across the 191-square-foot front porch — paint removal, grind, and surface cleaning — so both slabs were ready for coating in sequence.
Pebble Beach — Garage, Porch, and Vertical Surfaces
Garage and Porch, One Finish
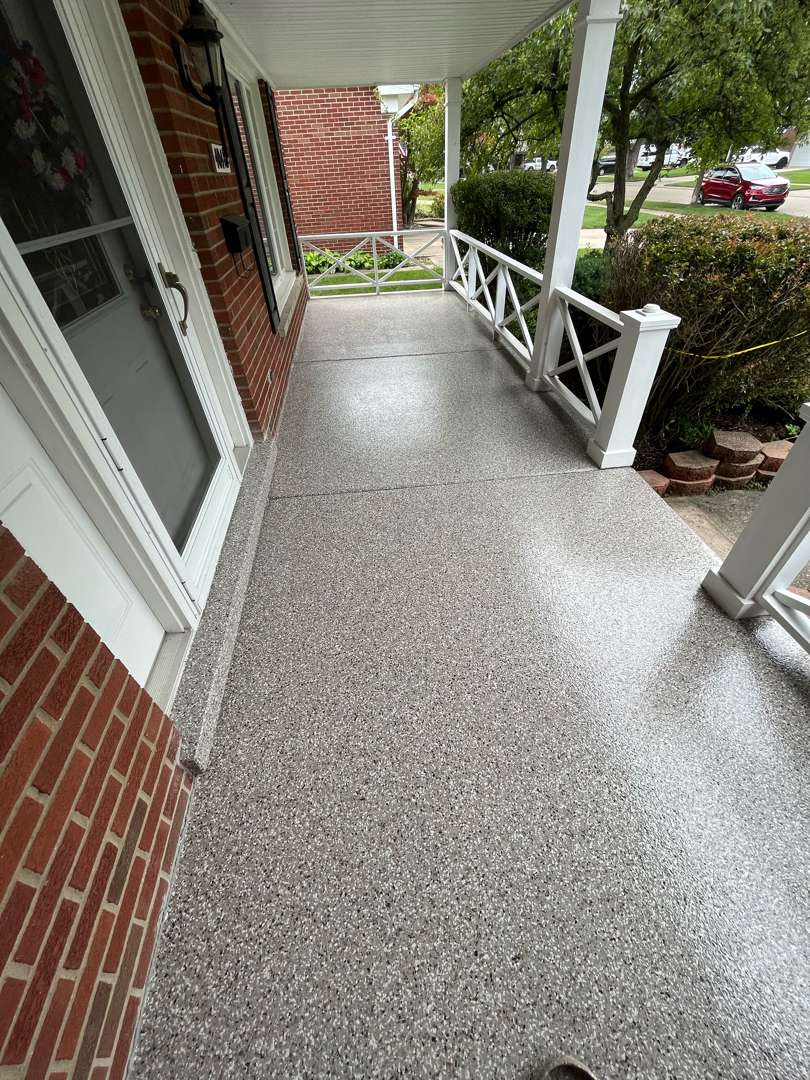
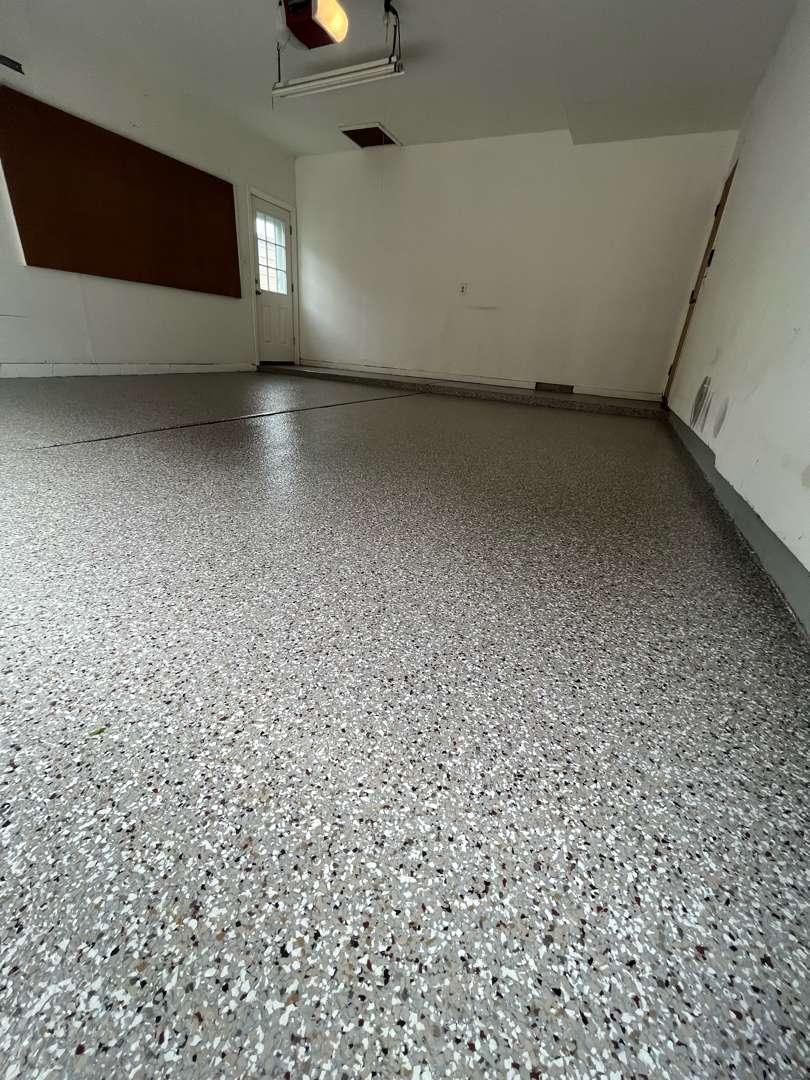
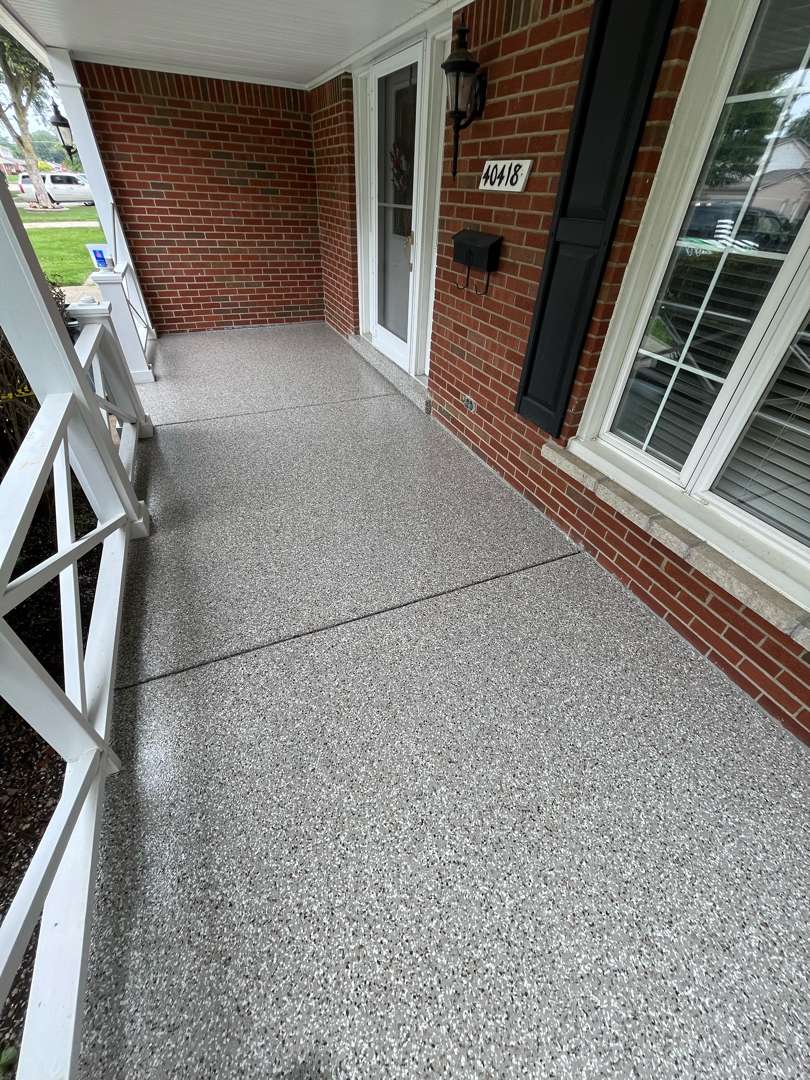
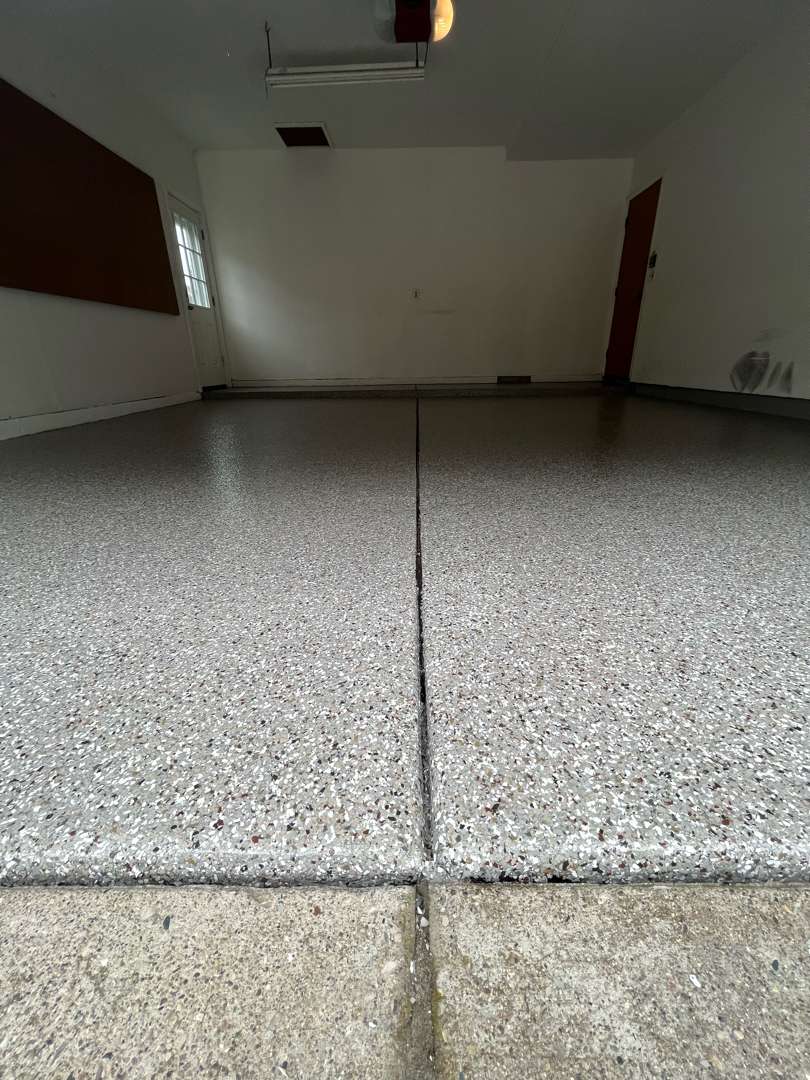
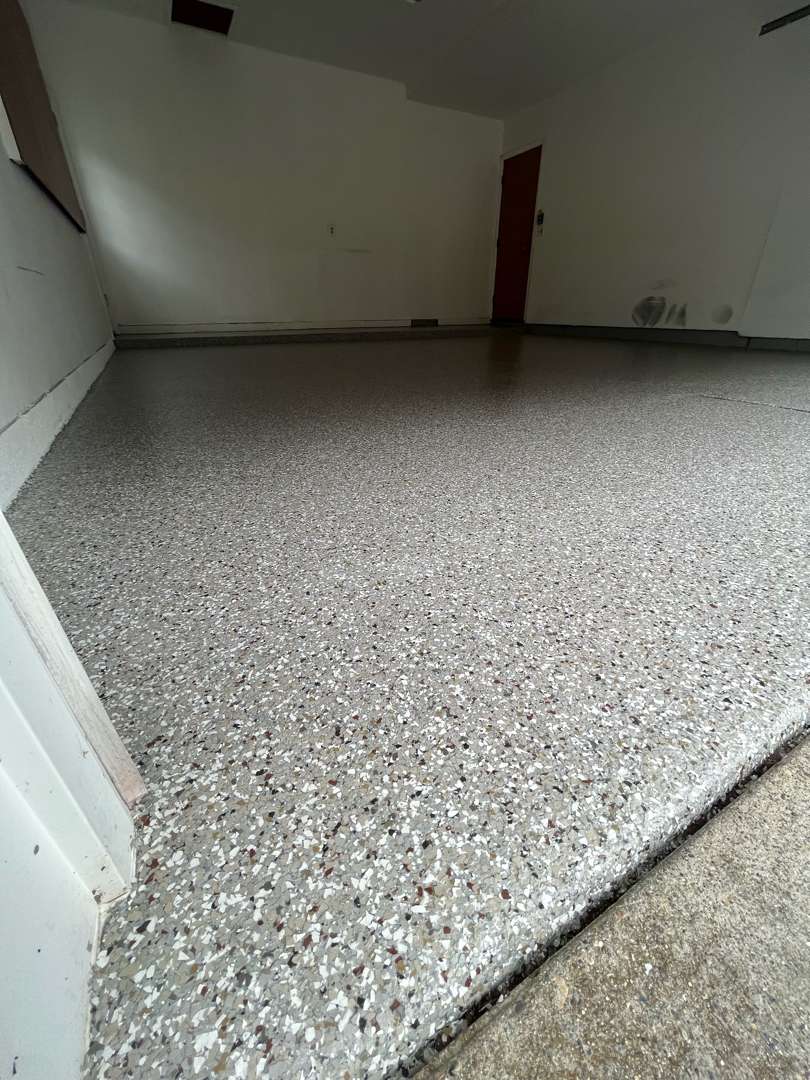
Pebble Beach reads consistently whether seen in the enclosed garage under artificial light or on the covered porch in natural daylight. The 353-square-foot garage and the 191-square-foot porch finish at the same flake density and color. The two layers of red paint are gone. The diagonal crack is sealed. The oil contamination beneath the failed paint is gone. The pitting is filled. The 33 linear feet of vertical surfaces are coated. Two surfaces that each needed full paint removal before any new system could bond are now protected under the same M-4 polyurea-polyaspartic system.
Testimonials
Mike Bartlett
David Rolling
Garage Floor Coating
on Curry Drive
Curry Drive, Sterling Heights, MI
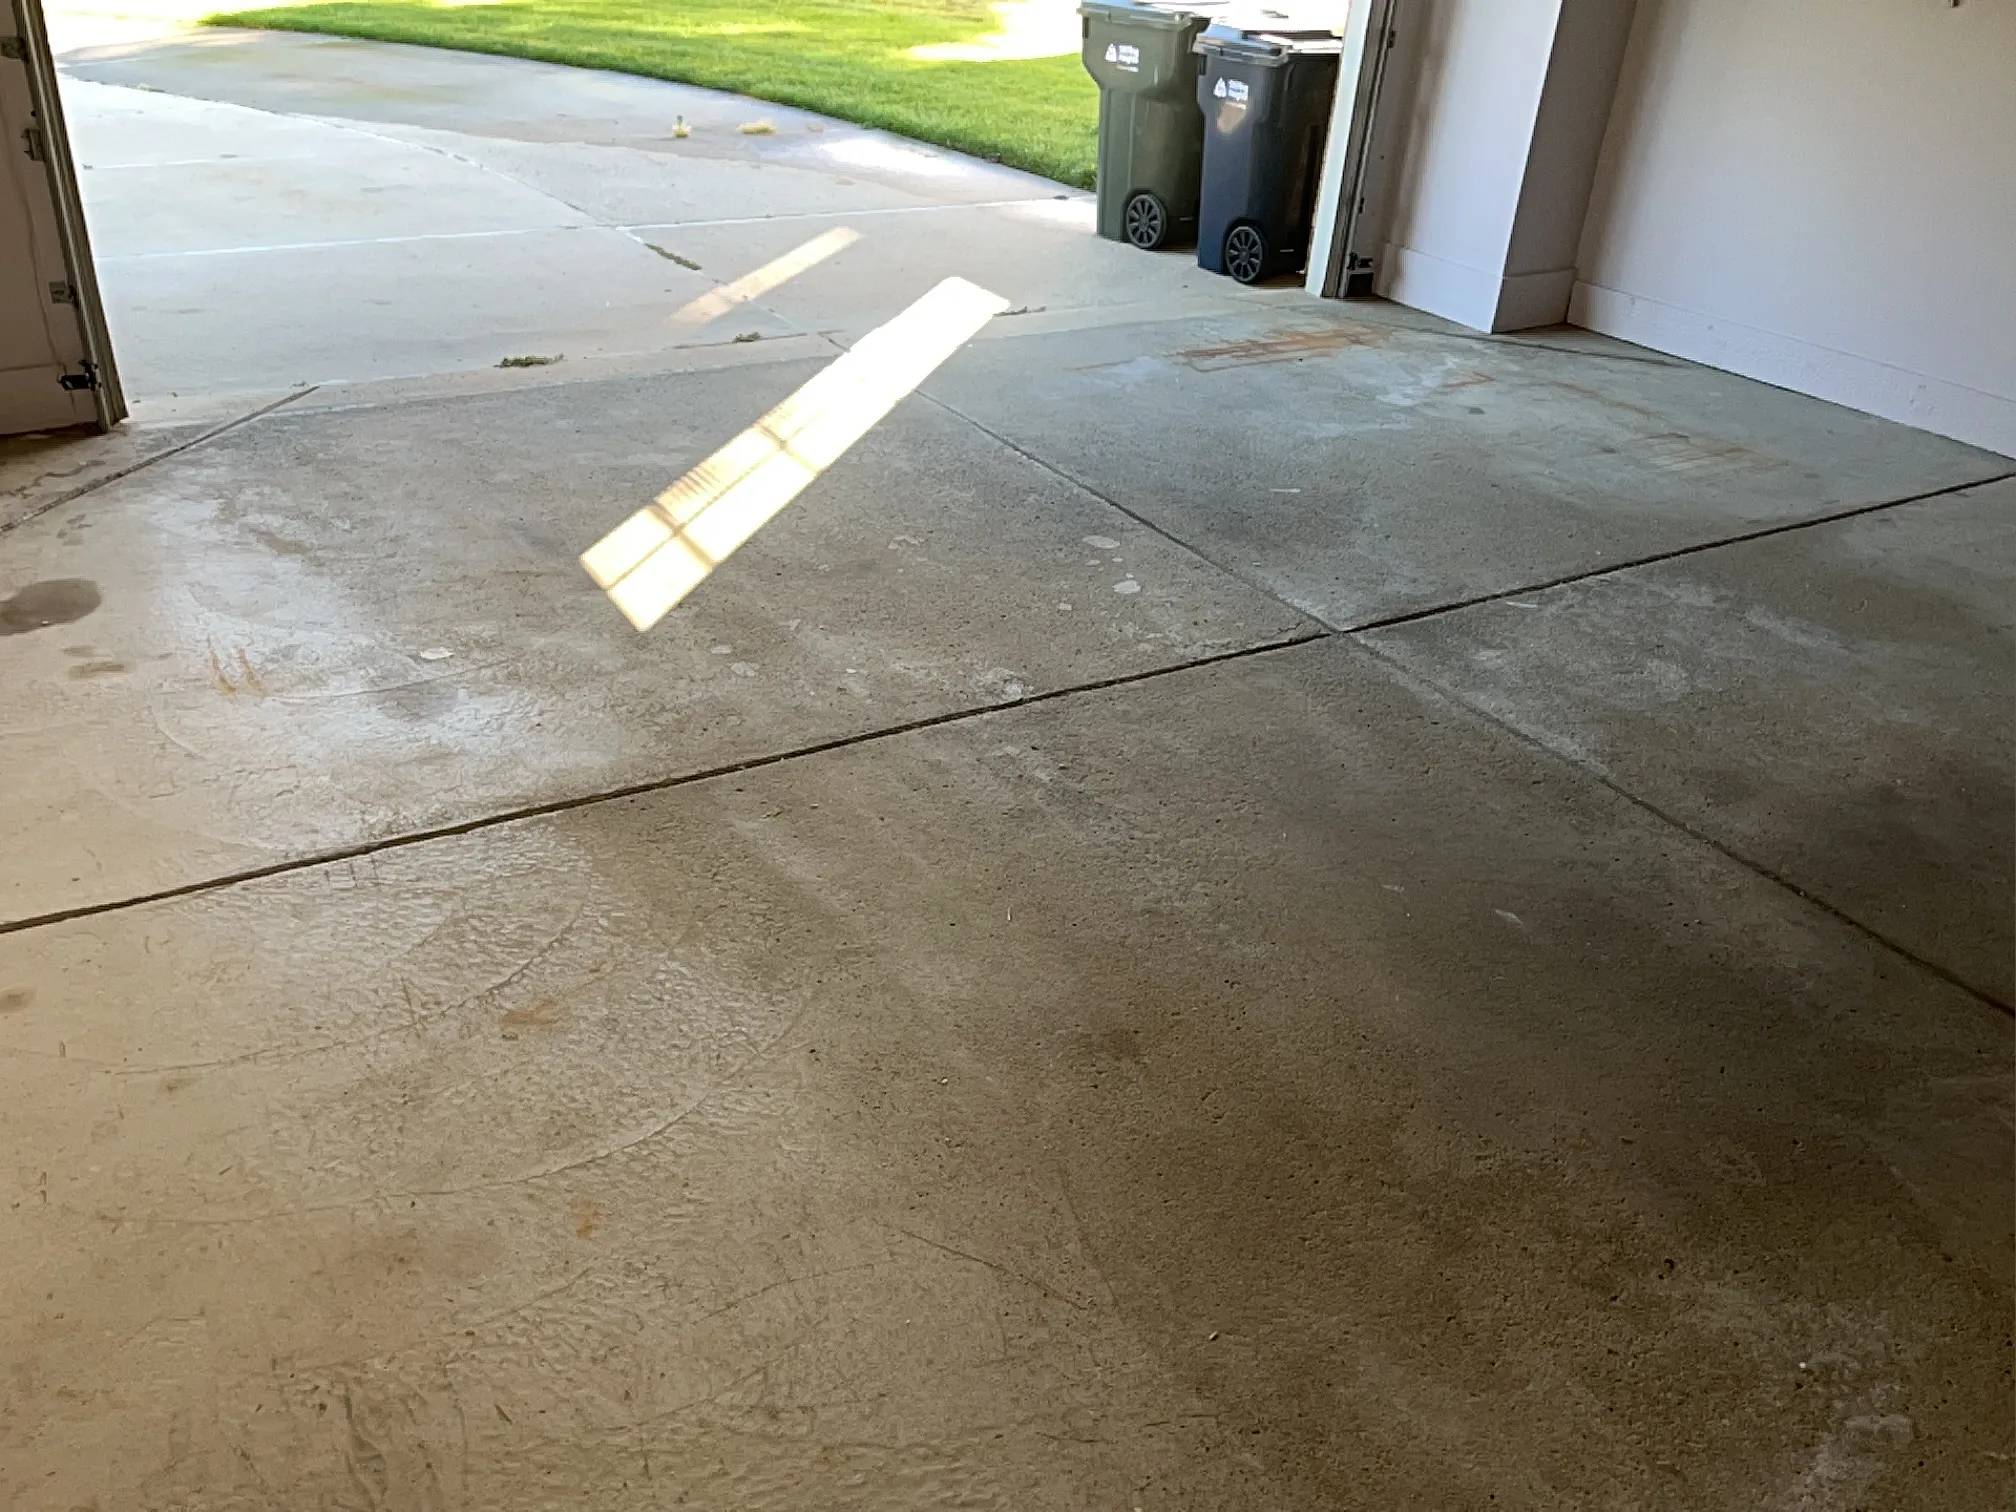
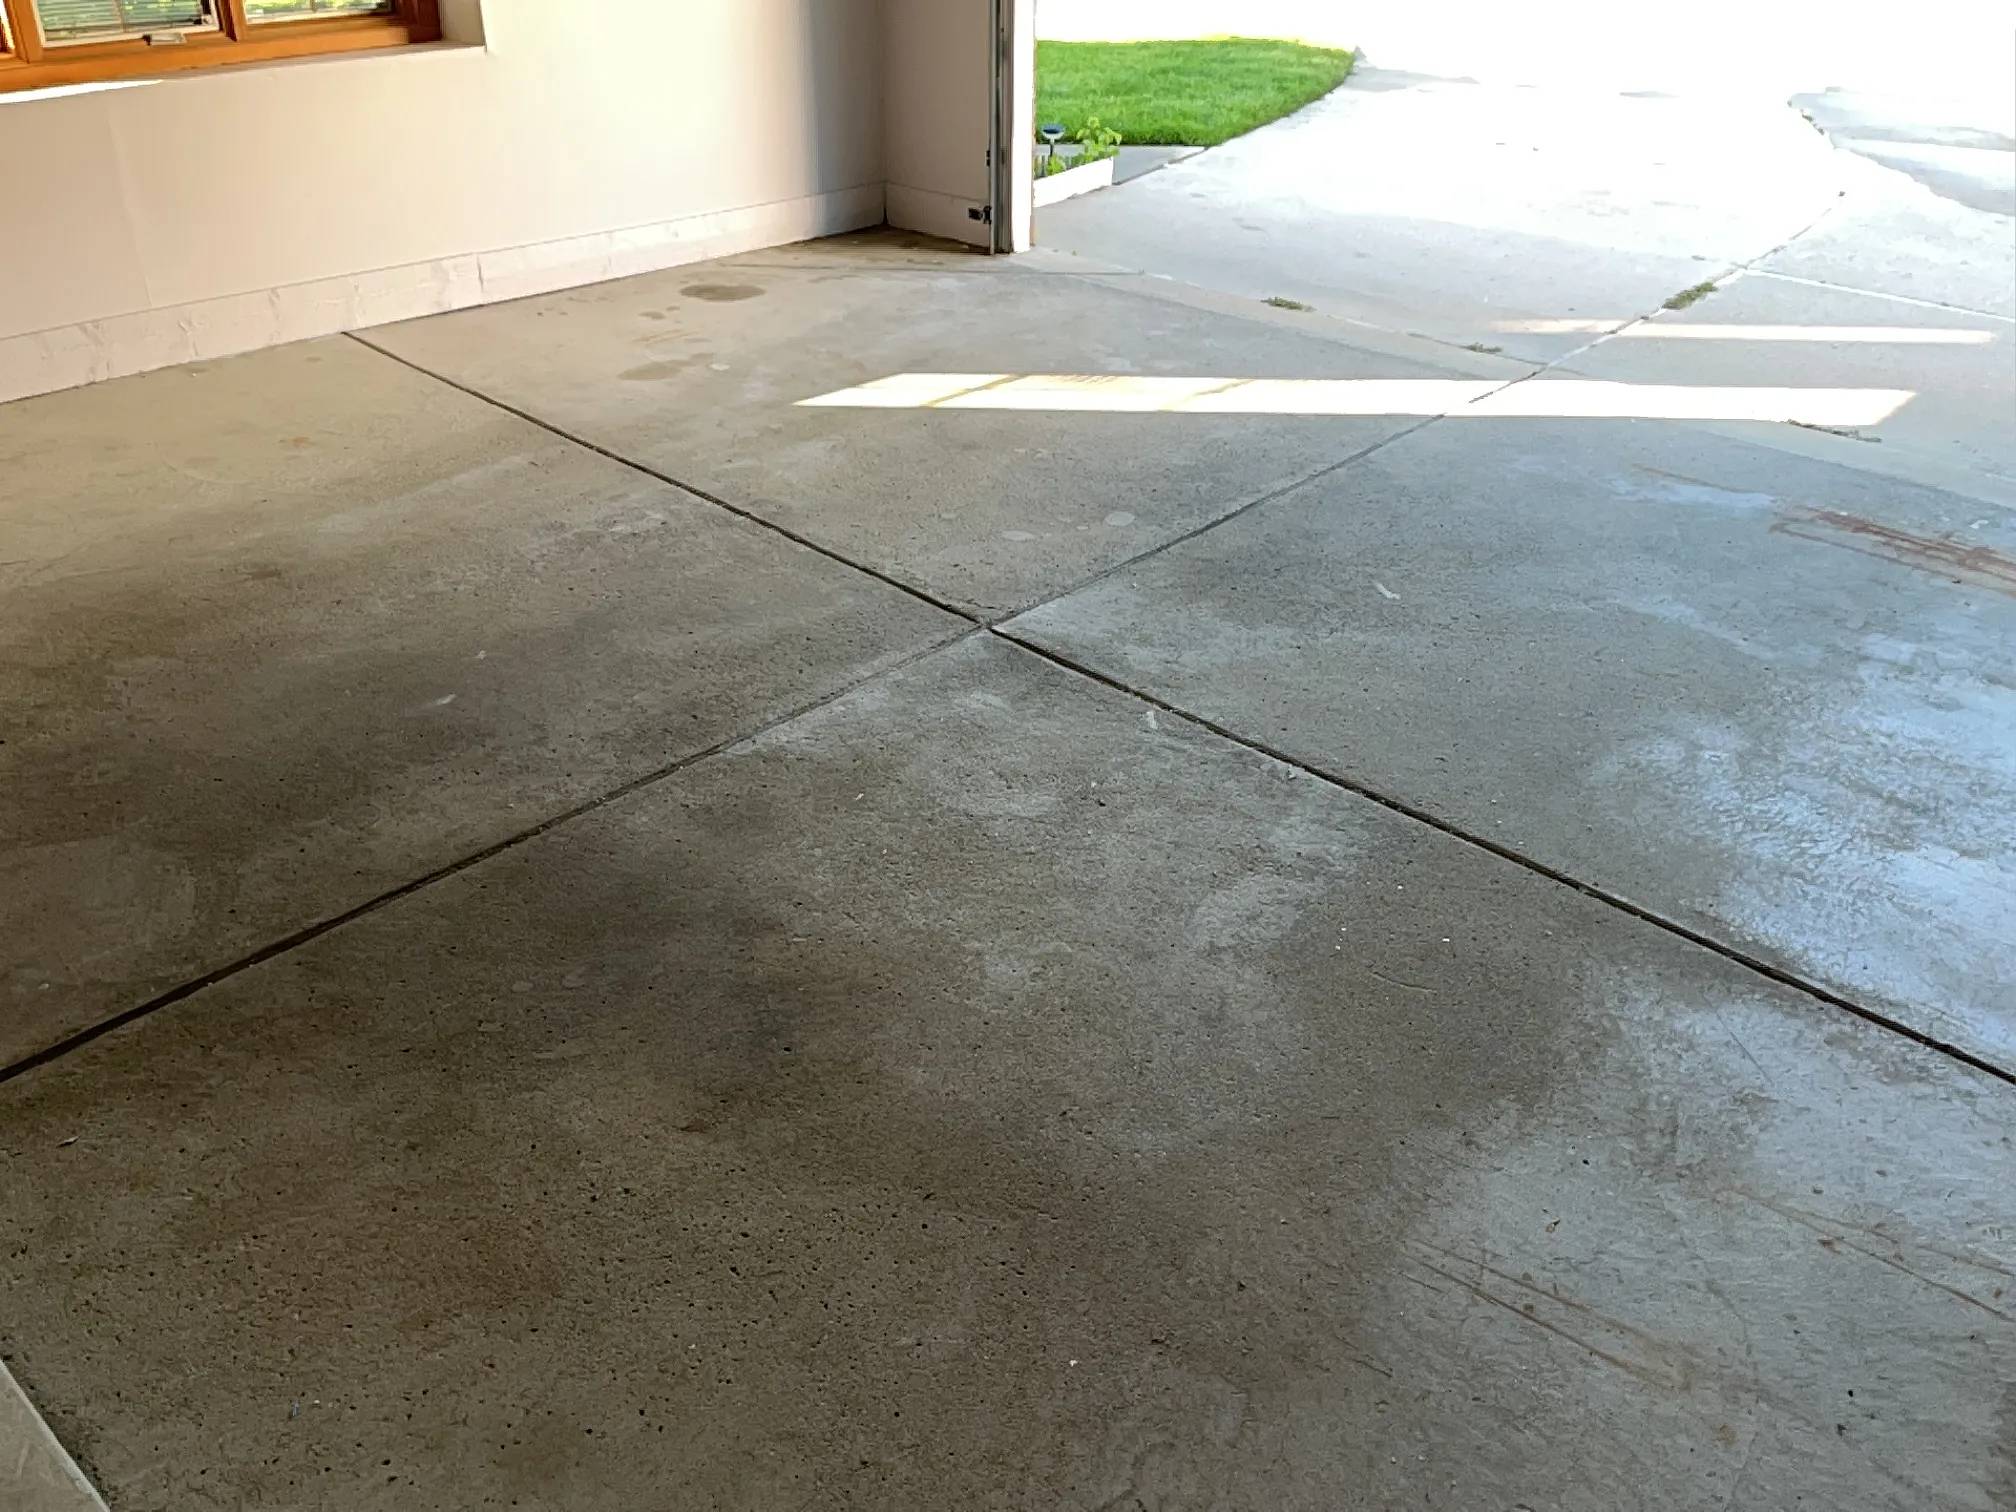
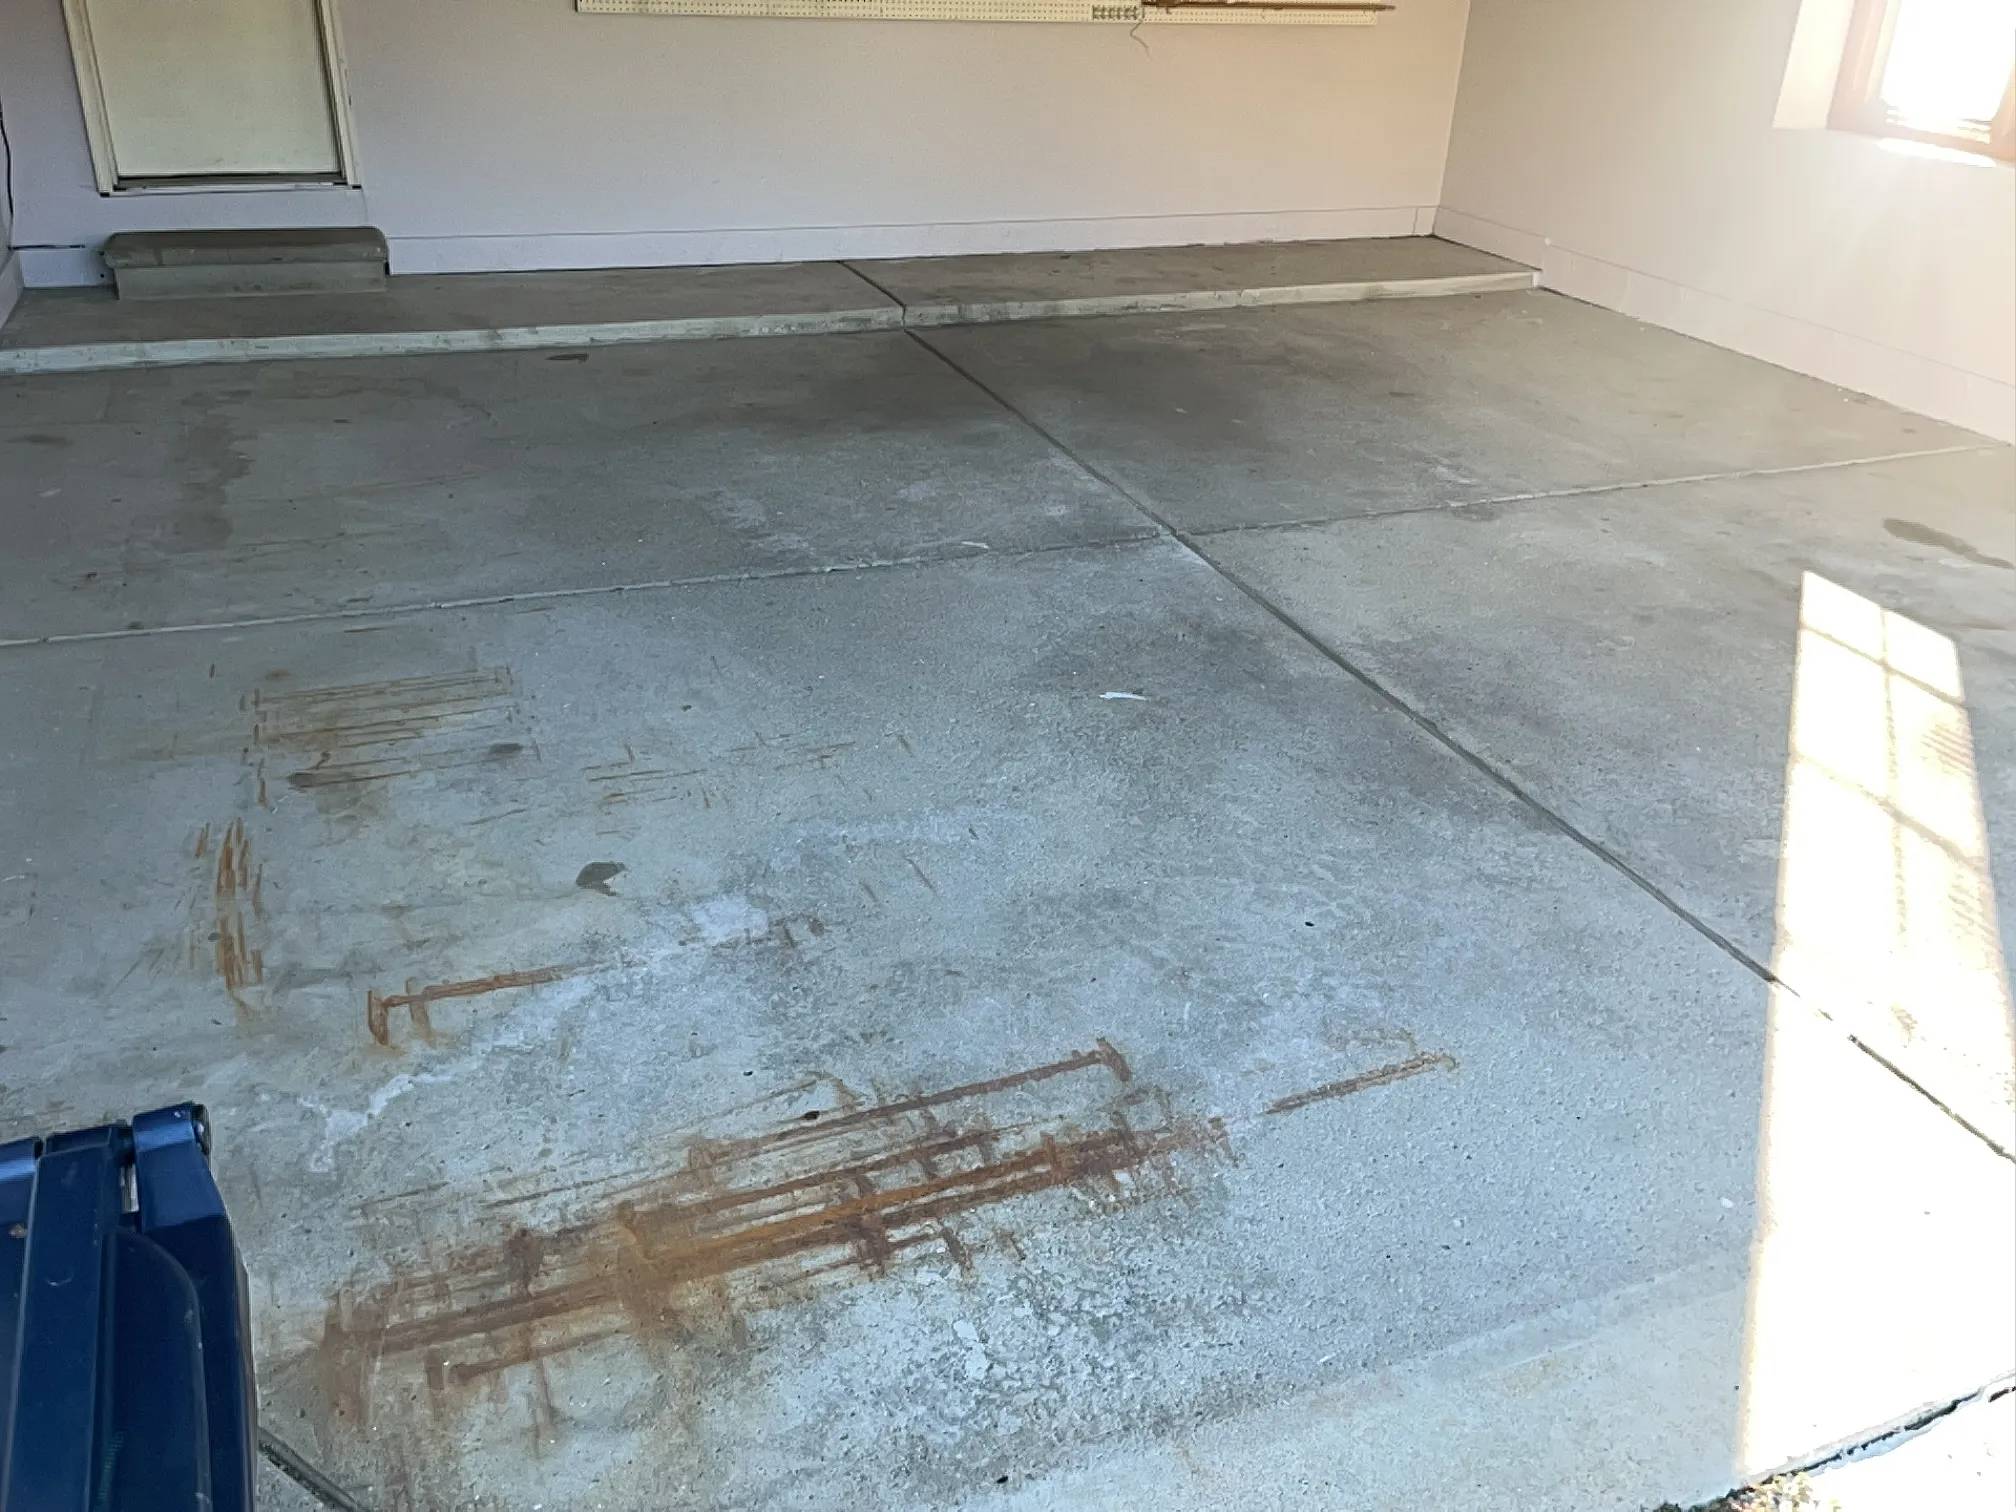
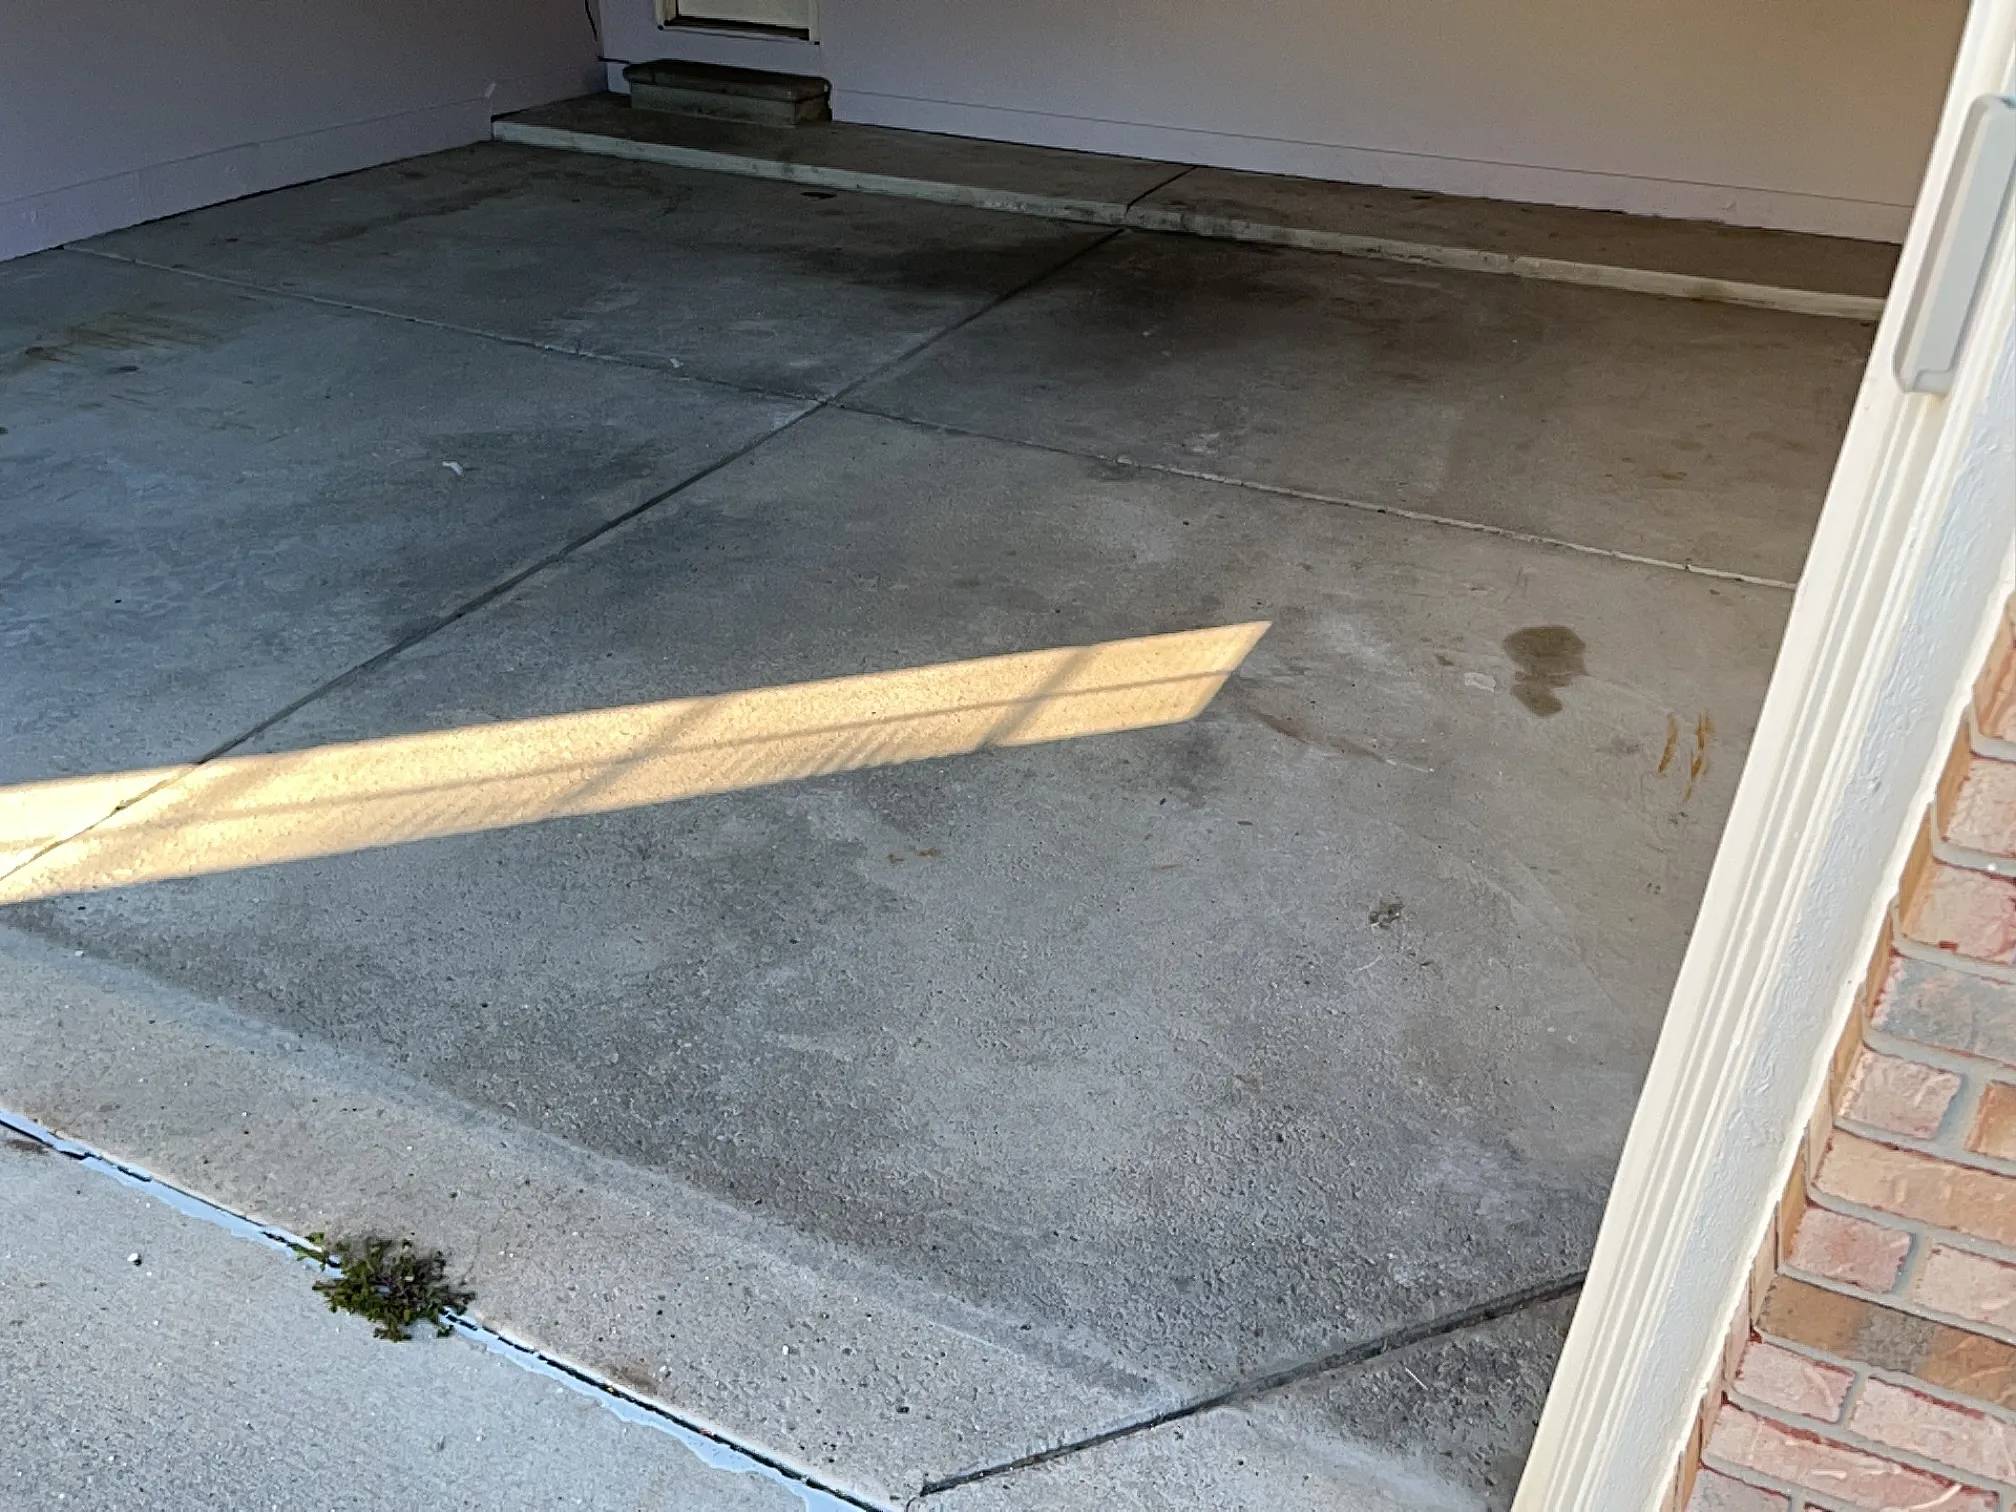
Grinding and Pitting Repair
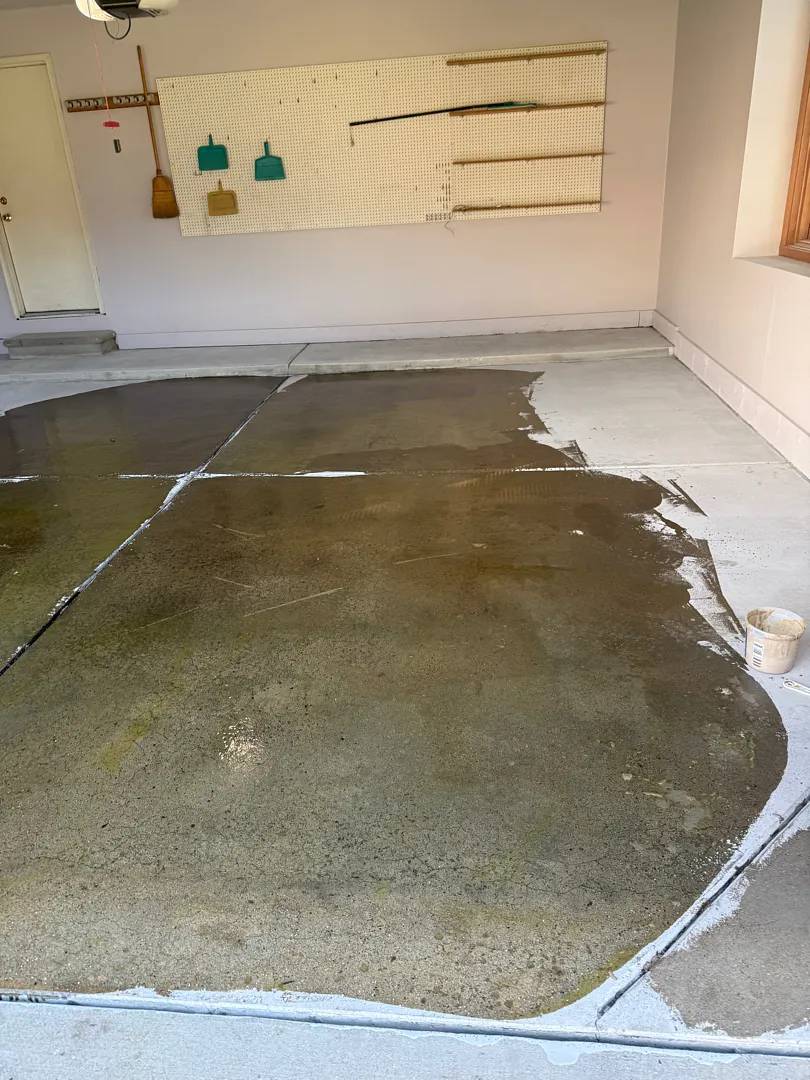
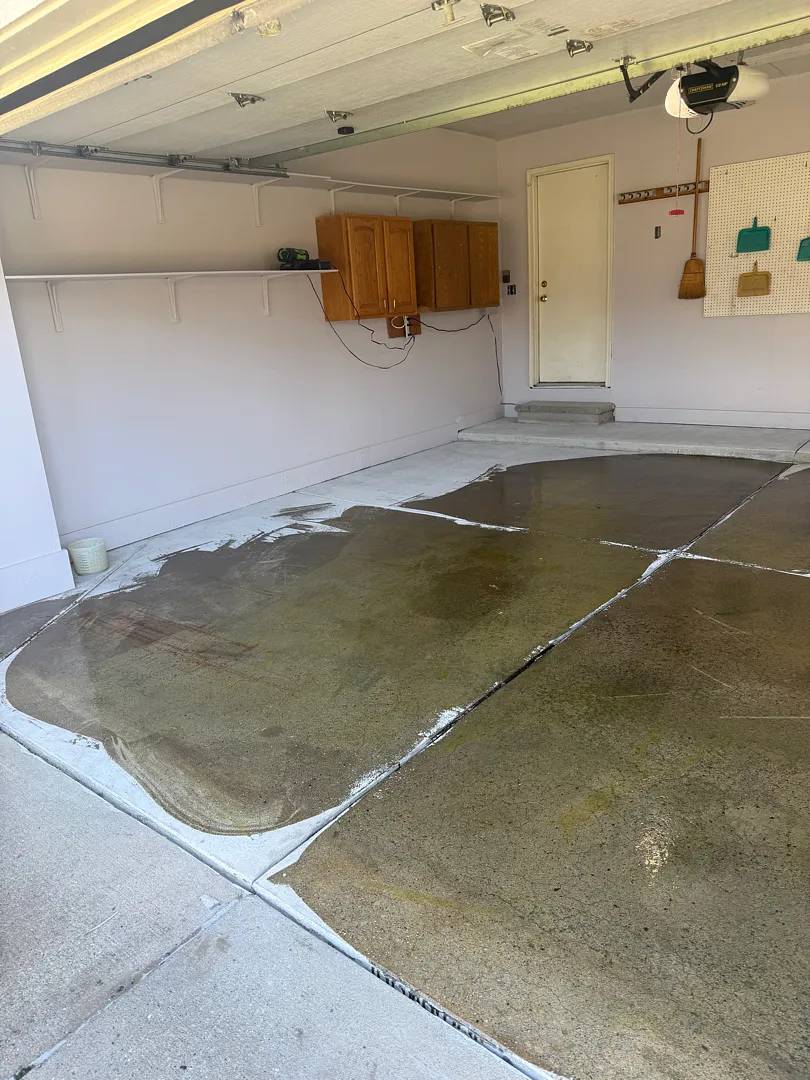
Our crew diamond-ground the full 428 square feet to remove the laitance layer and open the surface of the concrete. The grind confirmed the pitting — light and scattered across the panels, not concentrated in any single zone.
Our team addressed each pit after the grind. We troweled repair compound into every void and brought each one flush with the surrounding concrete. Our crew vacuumed the floor and confirmed the surface was clean before any coating went down.
The concrete step at the rear received the same grind treatment as the main floor. Our crew worked the tread and riser by hand for full coverage.
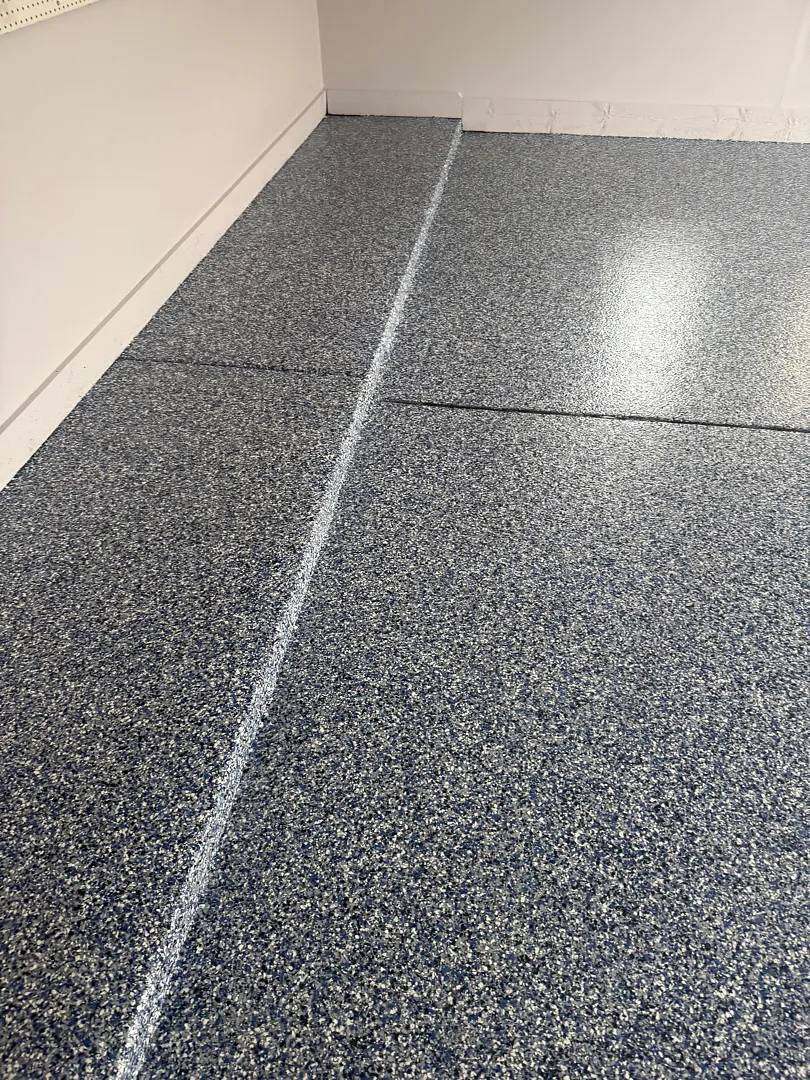
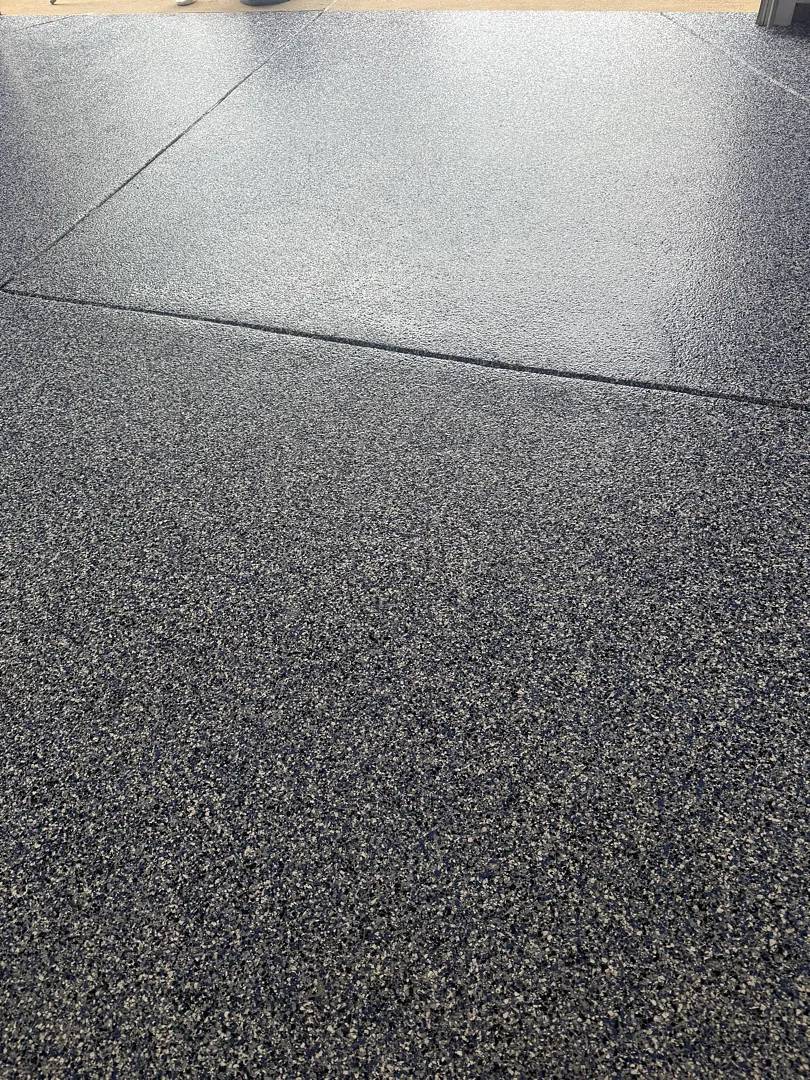
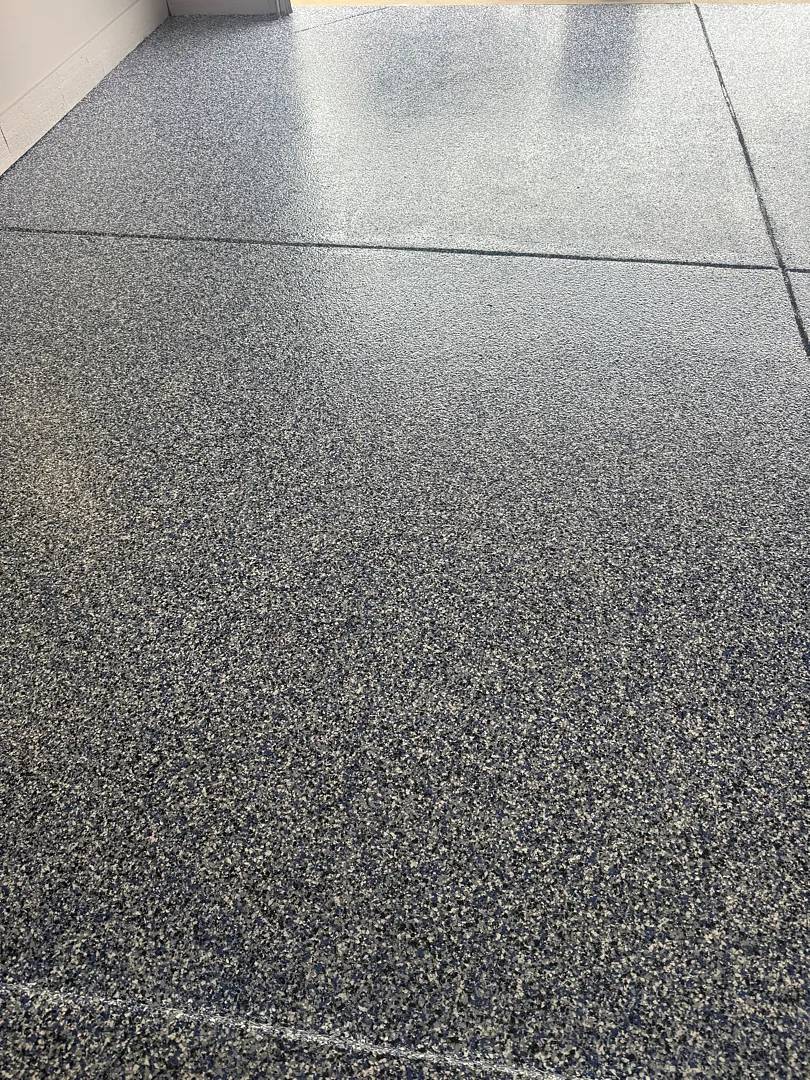
Orbit on 428 Square Feet
Our crew applied the polyurea base coat across the prepared slab. Our team broadcast Orbit flakes into the wet base coat in full coverage across both panels and over the step.
Orbit carries grey, white, and charcoal chips. The blend shifts in tone depending on the light source and the viewing angle — cooler in the enclosed interior, sharper in natural daylight through the garage door opening. Our clients chose a color that holds its character in both conditions.
Our crew applied the clear polyaspartic top coat with 24-grit traction additive throughout the horizontal field and over the step surface. 24-grit adds grip without the pronounced texture of a heavier profile.
Orbit, Done

Testimonials
Duane Smith
Great job, very professional
Mike Vogel
Garage Floor Coating
on Heatherwood Drive
Heatherwood Drive, Sterling Heights, MI
The Heatherwood Drive garage arrived with its own constraints. Dark red wainscot panelling ran the full perimeter — the kind of interior that makes colour selection matter. Tools, bikes, ladders, and seasonal equipment lined every wall. Closets flanked the rear step-up. That step carried peeling paint over its tread and riser. Light pitting spread across the slab. Oil staining occupied two zones in the front panels.
372 square feet of floor. 21 linear feet of vertical surfaces. One step. Work to do around the closets at the rear without disturbing them.
What the Slab Showed
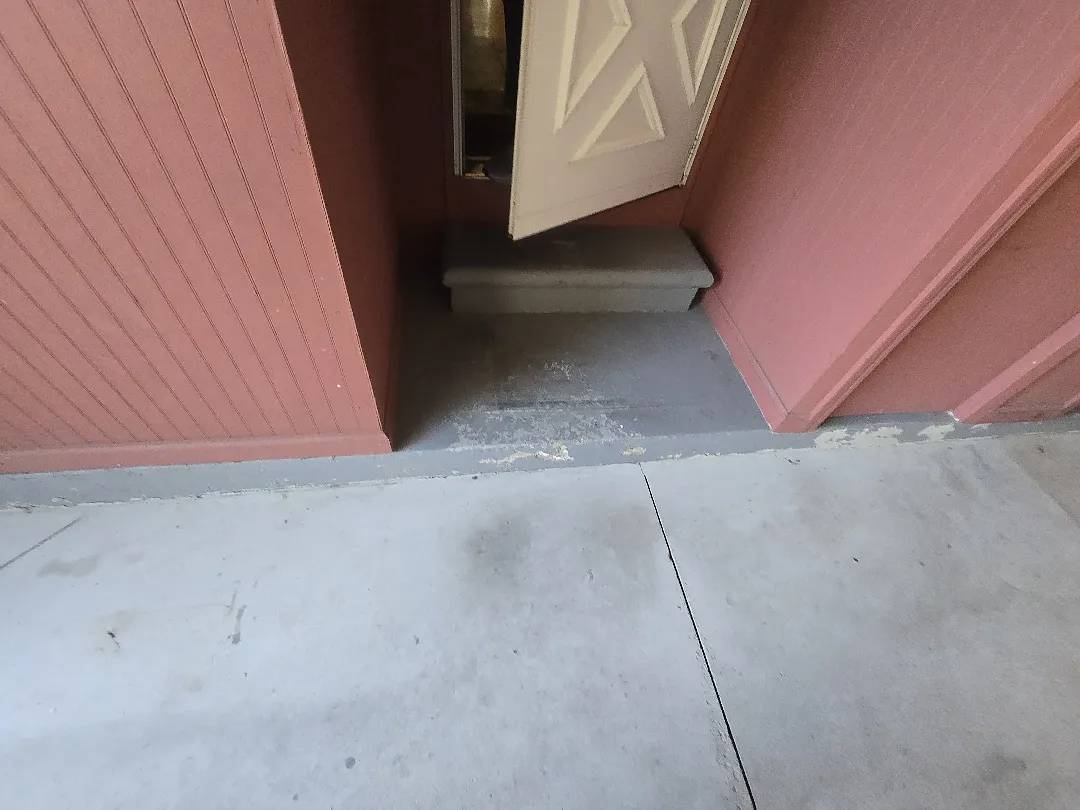
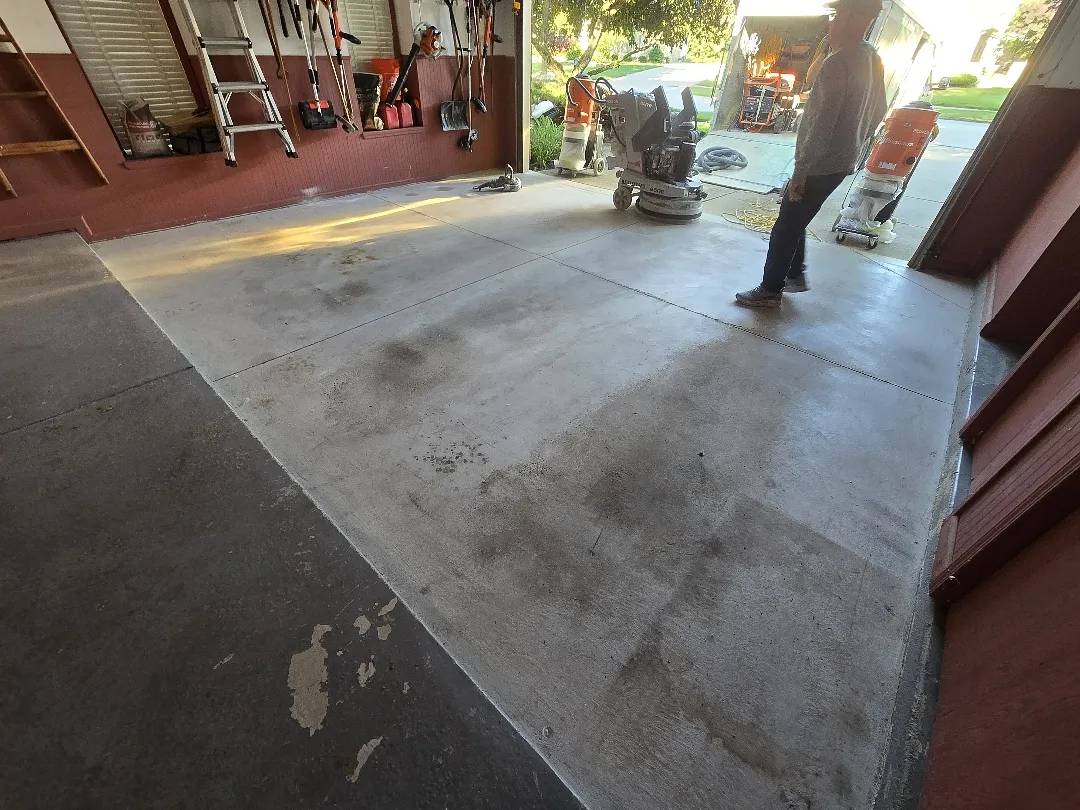
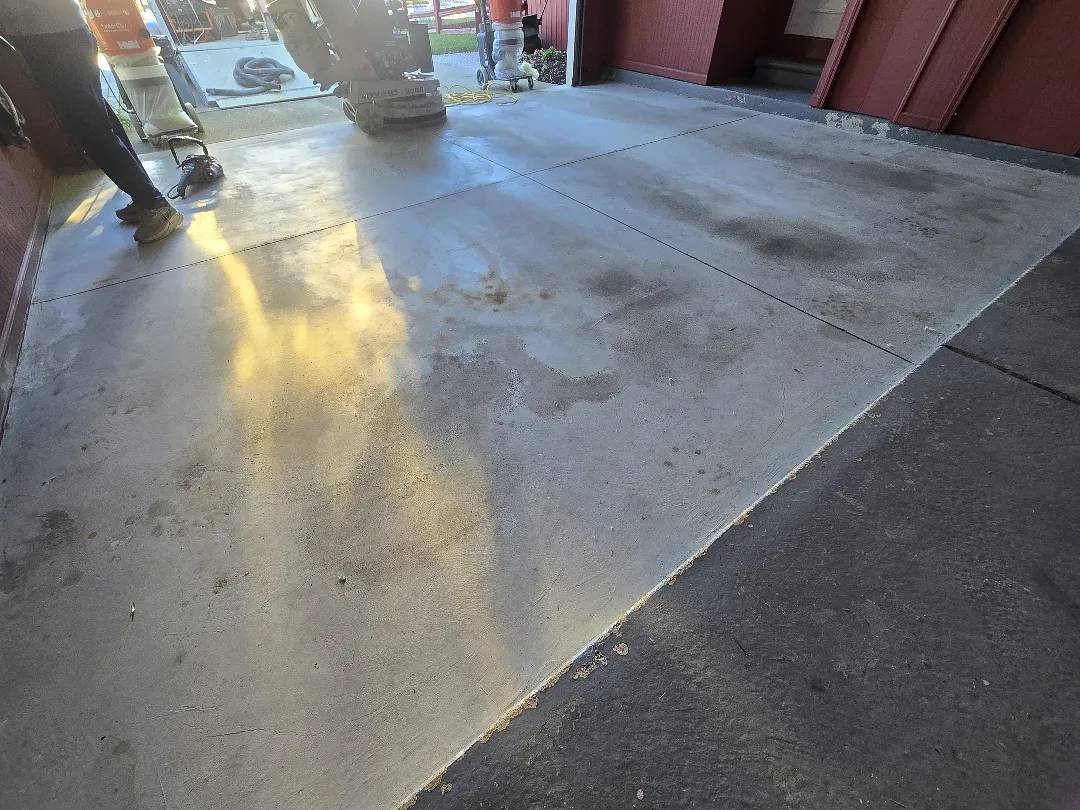
The concrete was structurally sound. No cracking, no displacement. The pitting was light — shallow surface voids distributed across the panels, not concentrated in any single zone. Two oil patches had worked into the concrete in the parking area.
The step-up at the rear had been painted at some point. That paint was peeling and had to come off before the step could receive the same system as the floor.
The Step and the Closets
The painted step required hand-grinding to strip the old paint and open the surface. Our crew worked the tread and riser by hand, careful not to disturb the door frames and trim flanking the closets on either side.
Working around closets on a rear step means tight access on both sides. Our team managed the edge work without contacting the door trim or the panels.
Grinding and Mender
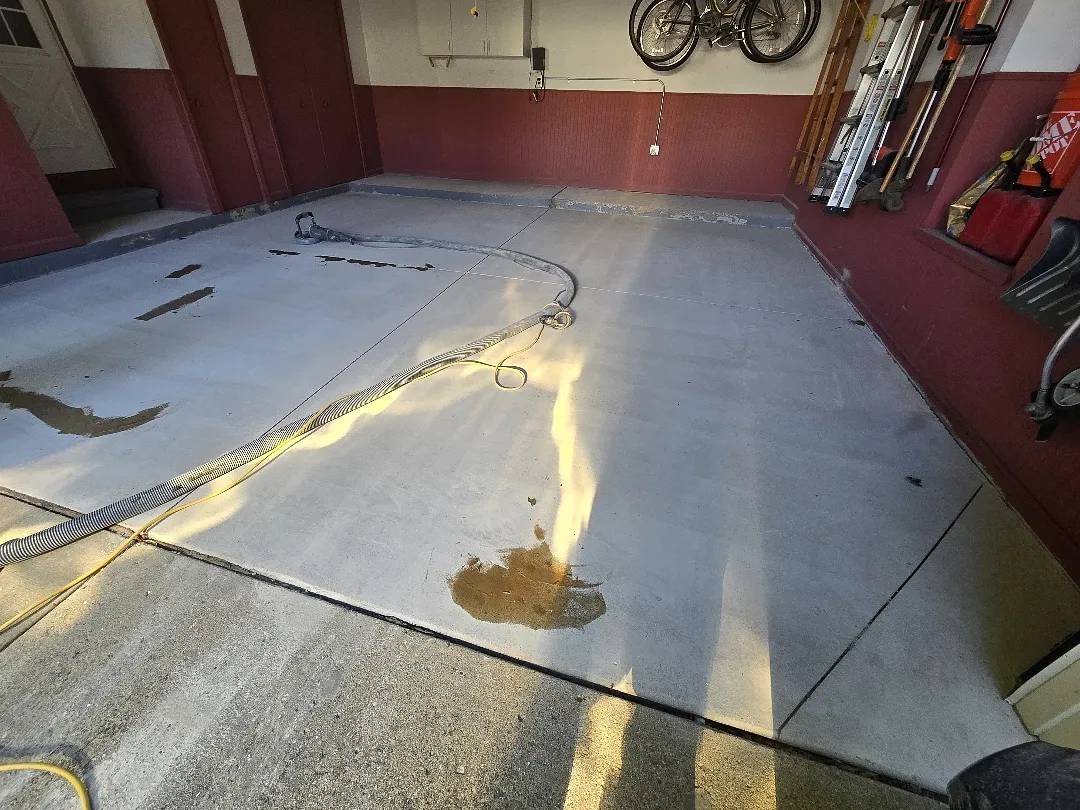
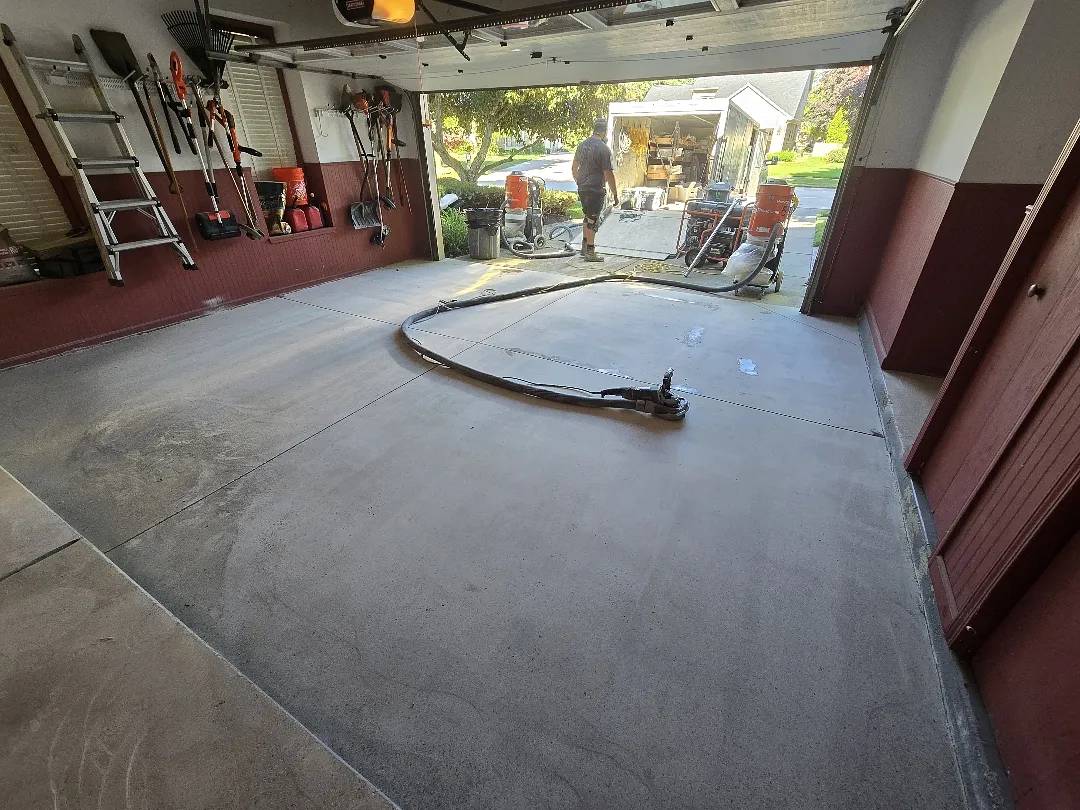
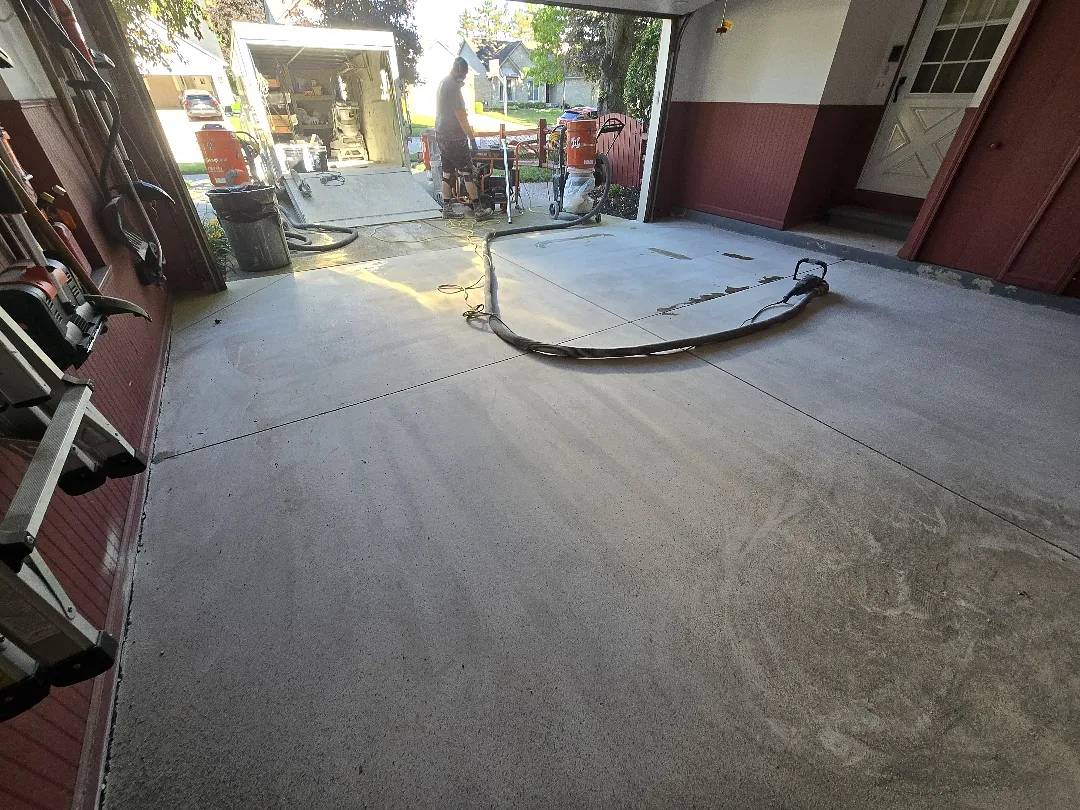
Our crew diamond-ground the full 372 square feet. The grind removed laitance and opened the oil zones across both front panels. Our team vacuumed between passes and confirmed the surface was clear before any repair material went down.
The light pitting across the slab received Mender epoxy. Our crew applied it across the affected zones and troweled each void flush with the surrounding concrete. The Mender cured fully before the coating sequence began.
Pebble Beach Against Dark Red
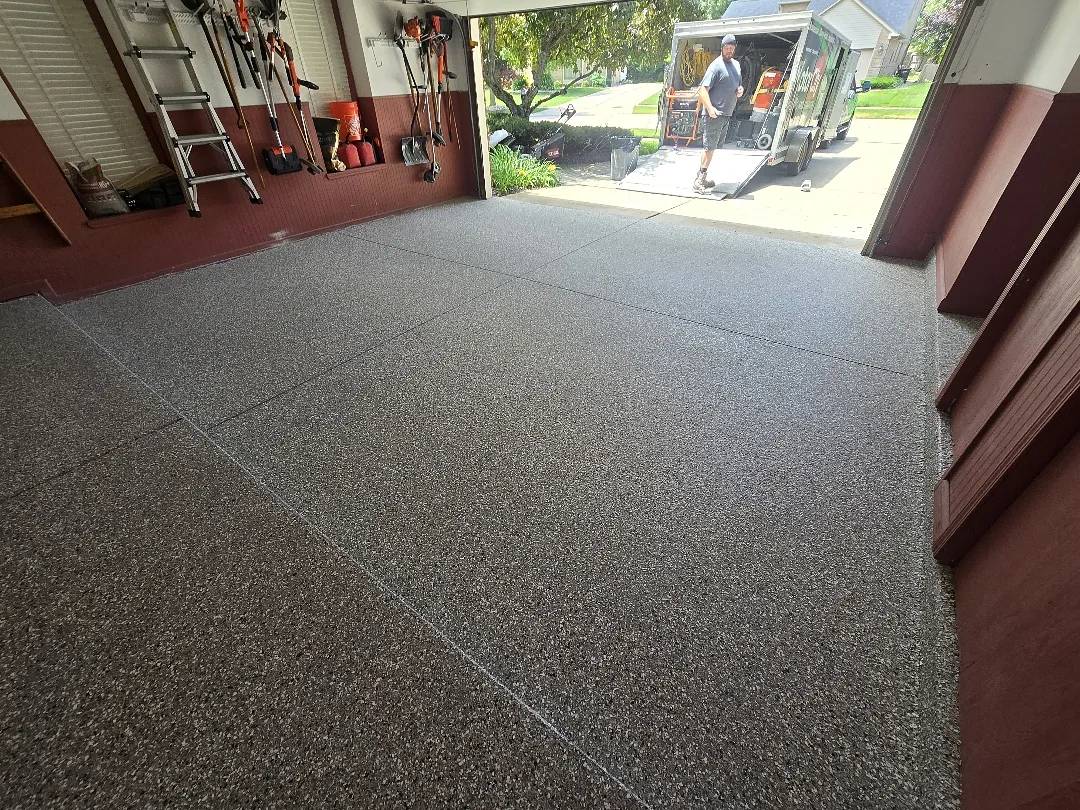
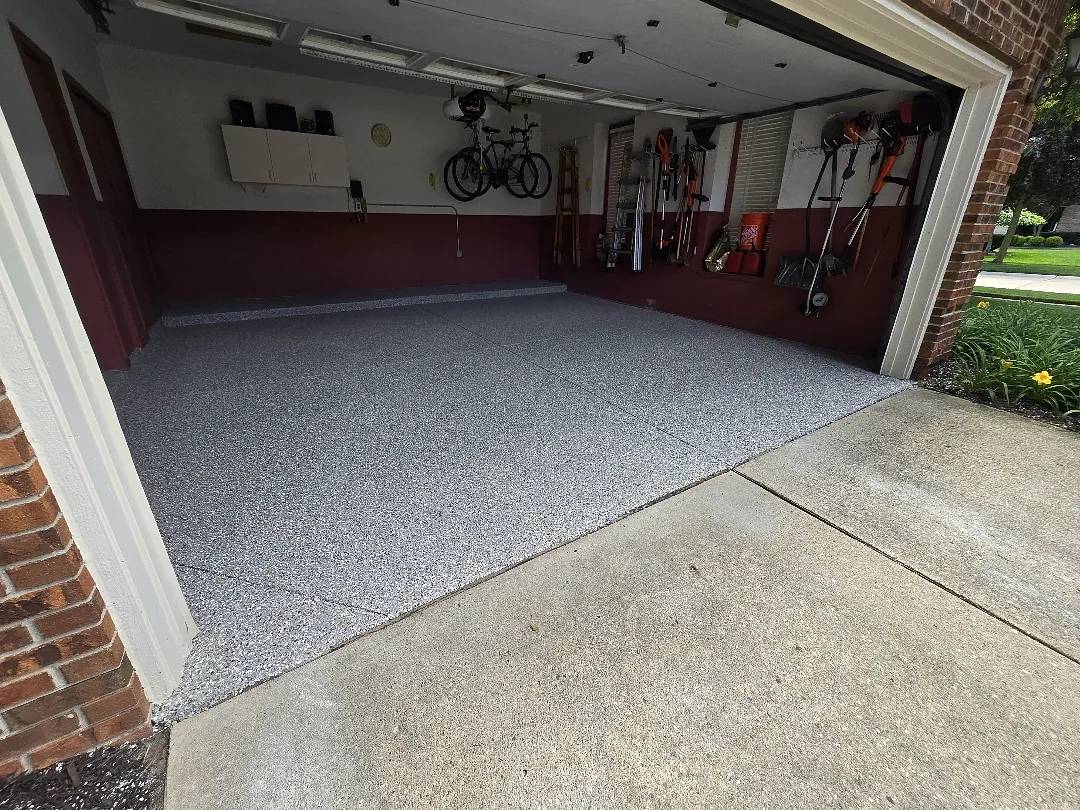
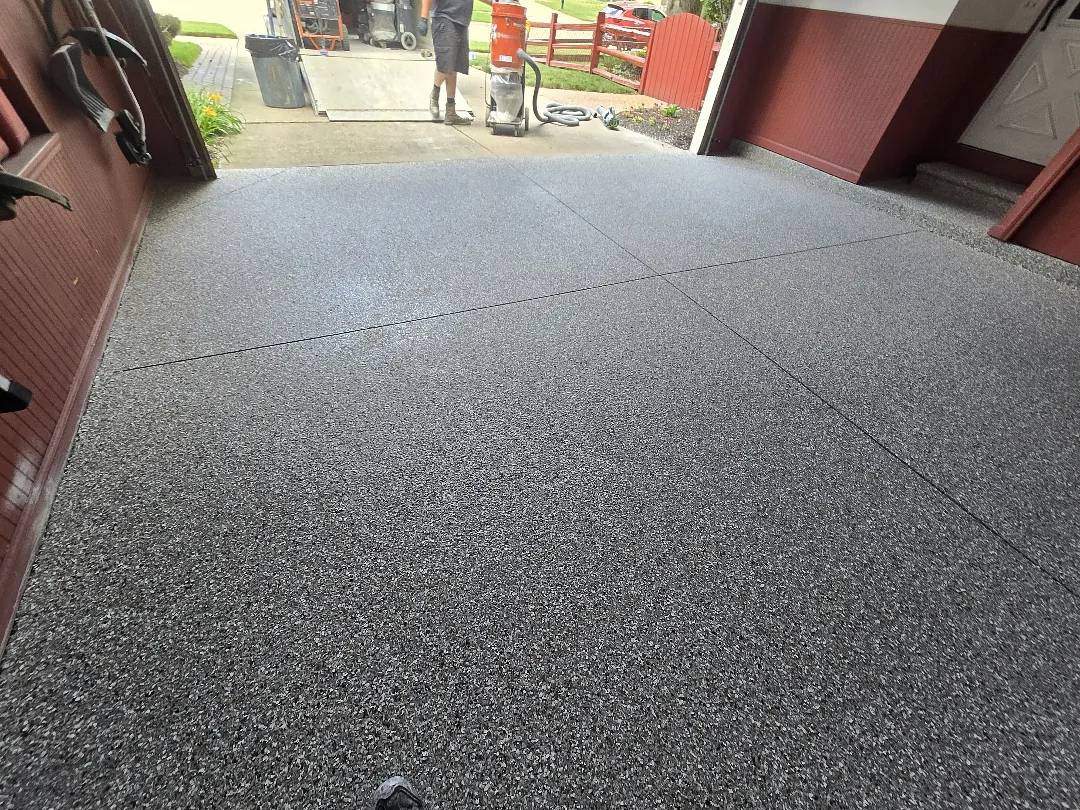
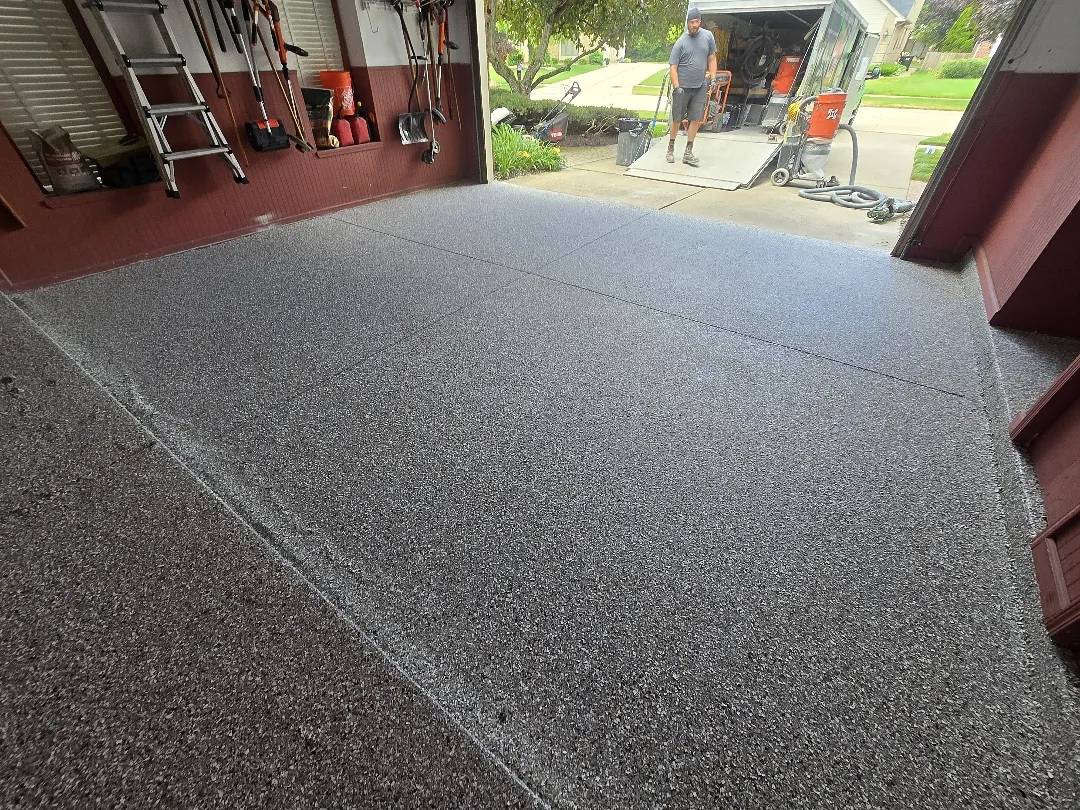
Pebble Beach carries warm tan, soft grey, and off-white chips. Against the dark red wainscot panelling, it reads as a deliberate contrast — light surface, dark walls. The combination gives the space definition that a darker flake blend would not.
Our crew applied the clear polyaspartic top coat with 36-grit traction additive throughout the horizontal field and over the step surface. 36-grit is the coarsest profile in the range. It provides firm footing whether the floor is wet, dry, or carrying foot traffic in work boots.
The Finished Floor
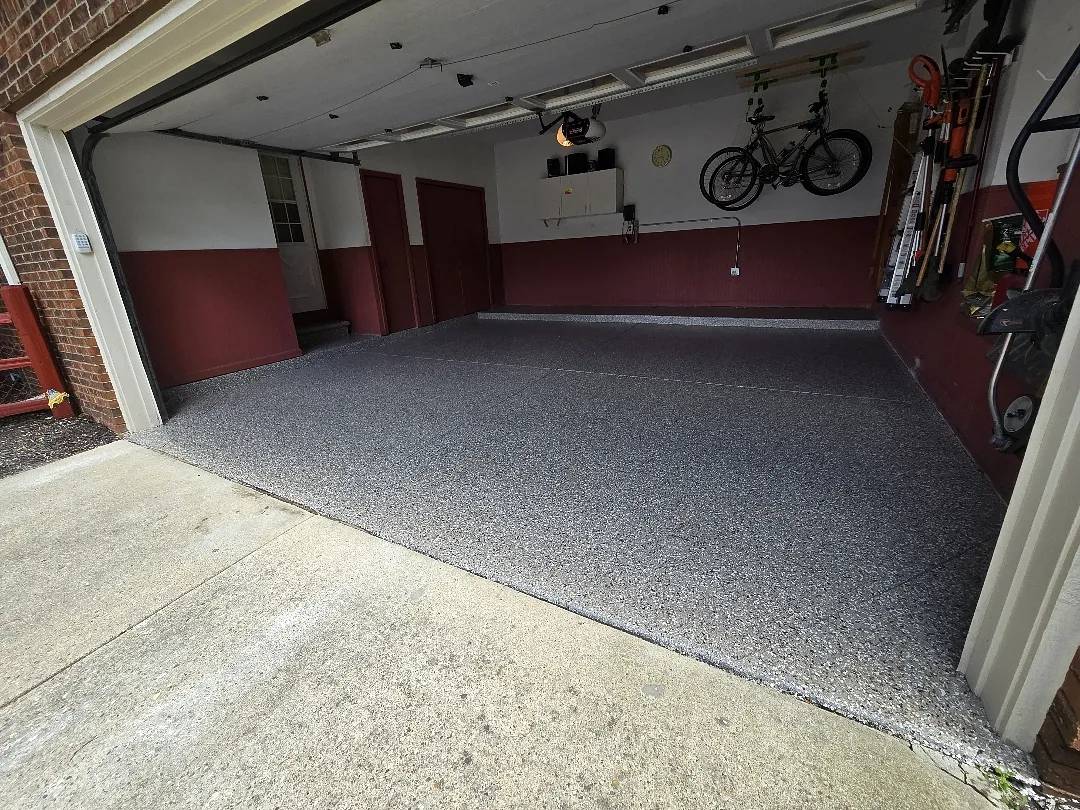
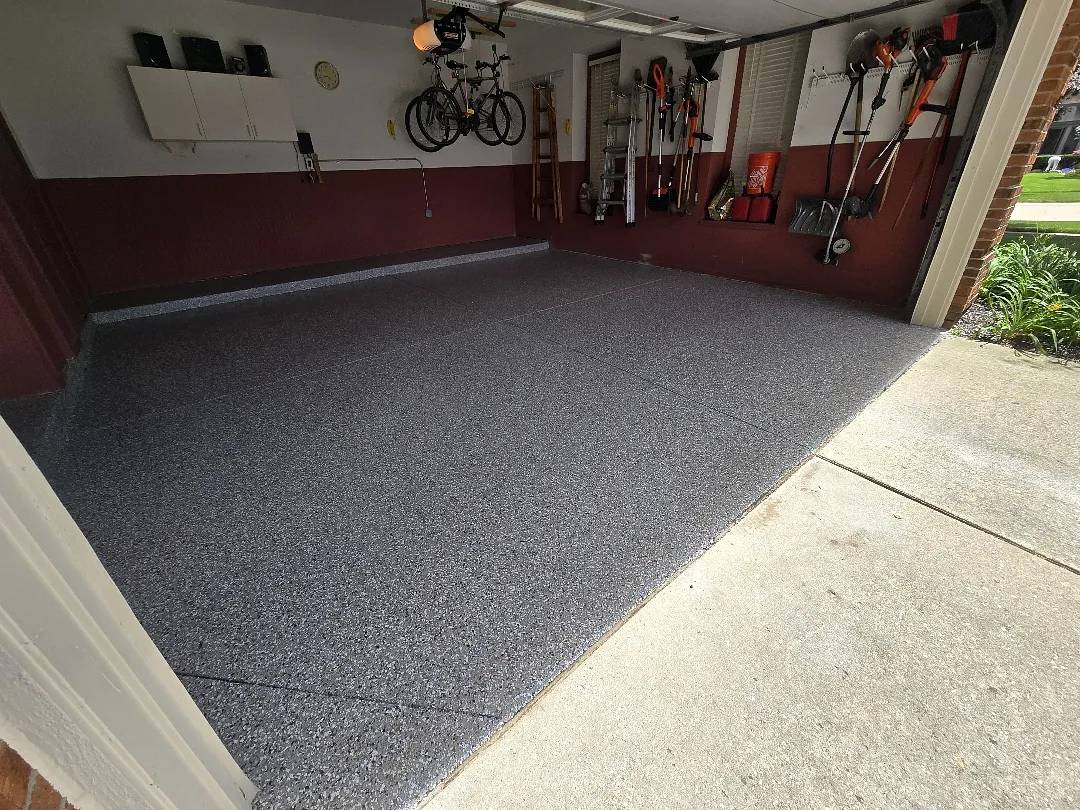
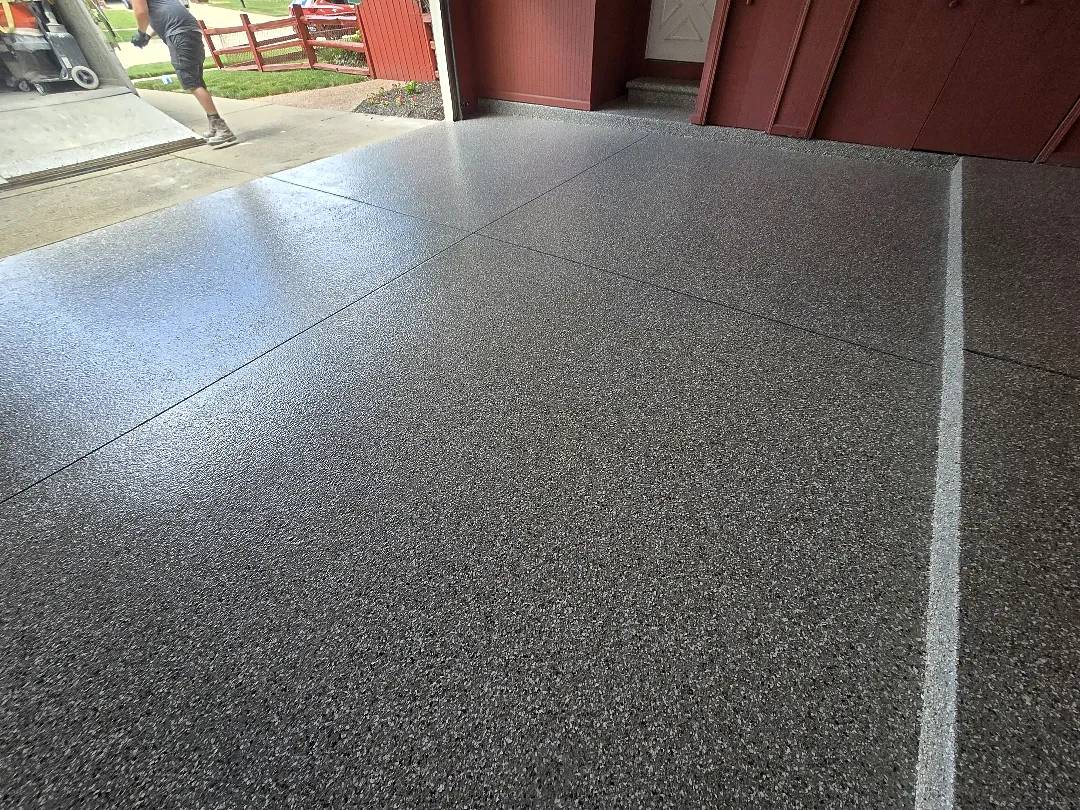
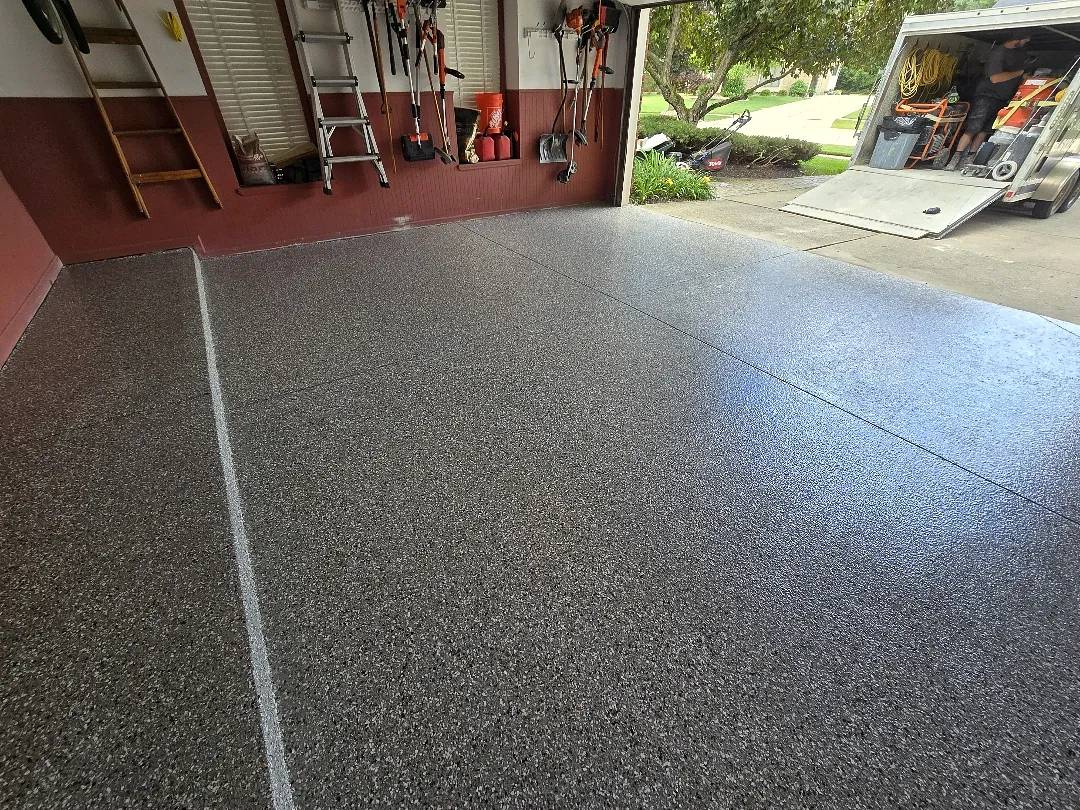
Pebble Beach reads consistently from the garage door threshold to the rear closets. All four panels finish at the same flake density. The step carries the same finish as the main floor — tread and riser coated without a break. The oil staining is gone. The pitting is sealed. The painted step surface is gone. The 21 linear feet of vertical surfaces tie into the floor without a visible seam.
The dark red wainscot that once competed with a bare, stained slab now frames a finished floor.
Testimonials
Justin Ikewood
Daniel Aleman
Garage Floor Coating
on Ashland Meadows Court
Ashland Meadows Court, Sterling Heights, MI
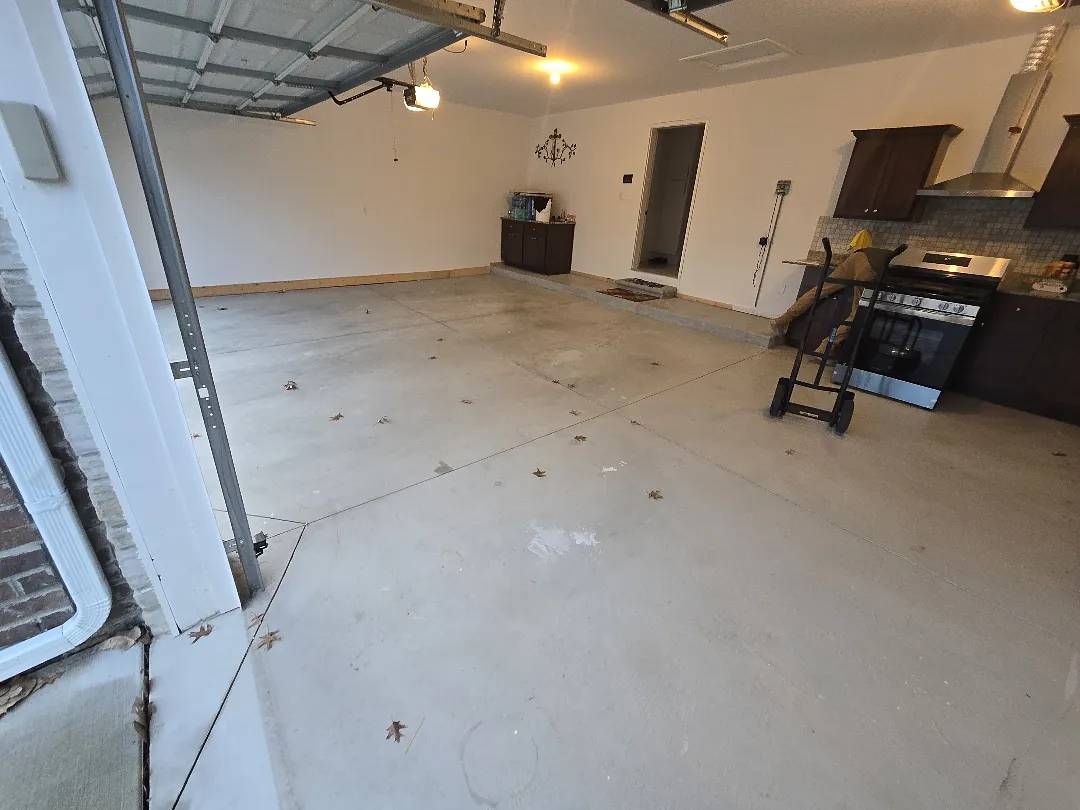
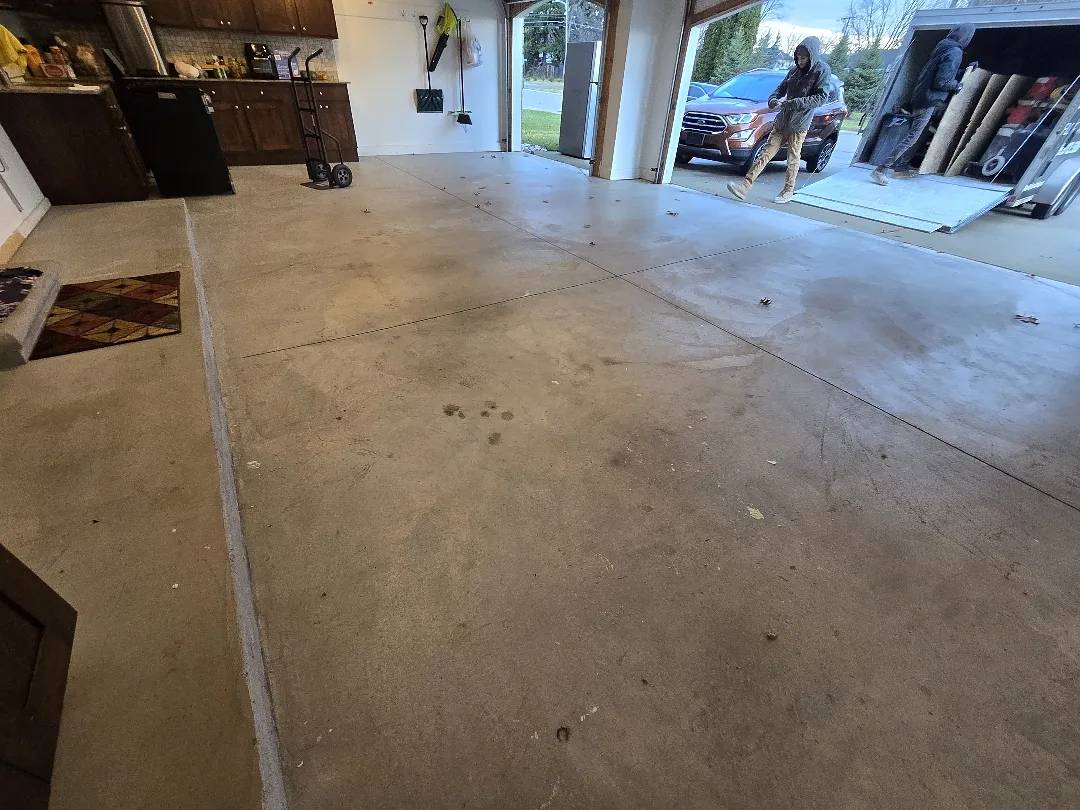
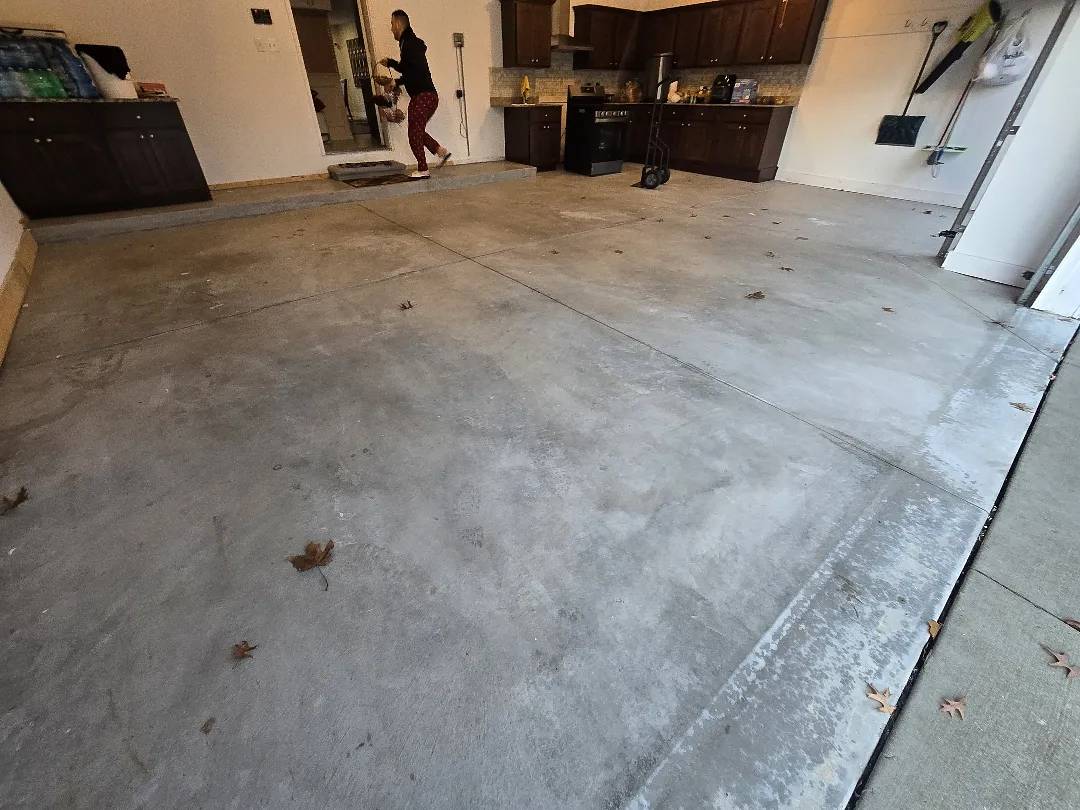
This garage had been converted into a living space. Full kitchen cabinetry and appliances ran the right wall — range hood, stove, dark walnut uppers and lowers, tile backsplash. A raised platform at the rear served as a step-up to the interior door. The slab itself was new concrete. No prior coating, no failed epoxy, no accumulated staining from vehicle use.
606 square feet. 21 linear feet of vertical surfaces. One step. A kitchen that stayed in place throughout the installation.
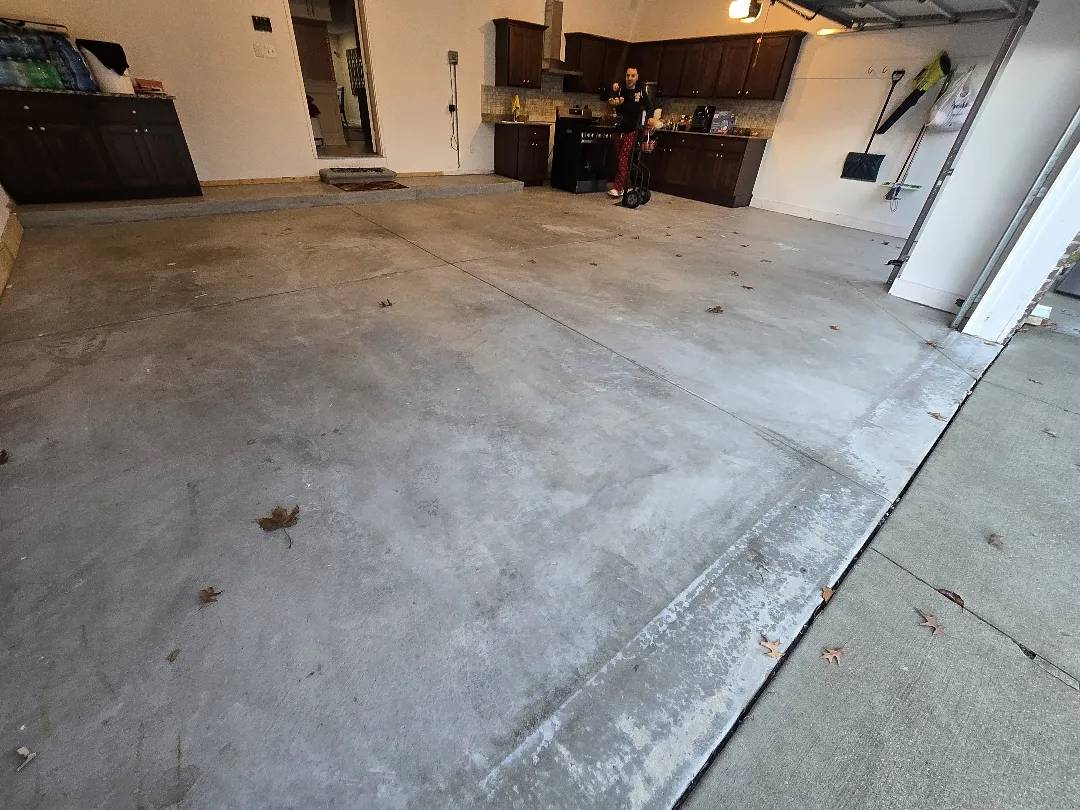
New Concrete Is Not Ready Concrete
A new slab carries a curing compound on its surface. That compound seals the concrete during the curing process — which is exactly what blocks a coating from bonding.
Our crew diamond-ground the full 606 square feet to cut through the curing layer and expose a clean, open surface below. The grind removed laitance across all panels and opened the pore structure of the concrete throughout. Our team worked the 21 linear feet of vertical surfaces with a hand grinder for full edge coverage.
No cracking, no pitting, no repairs were needed. The slab went straight from grinding to the coating sequence.
Grinding and Prep
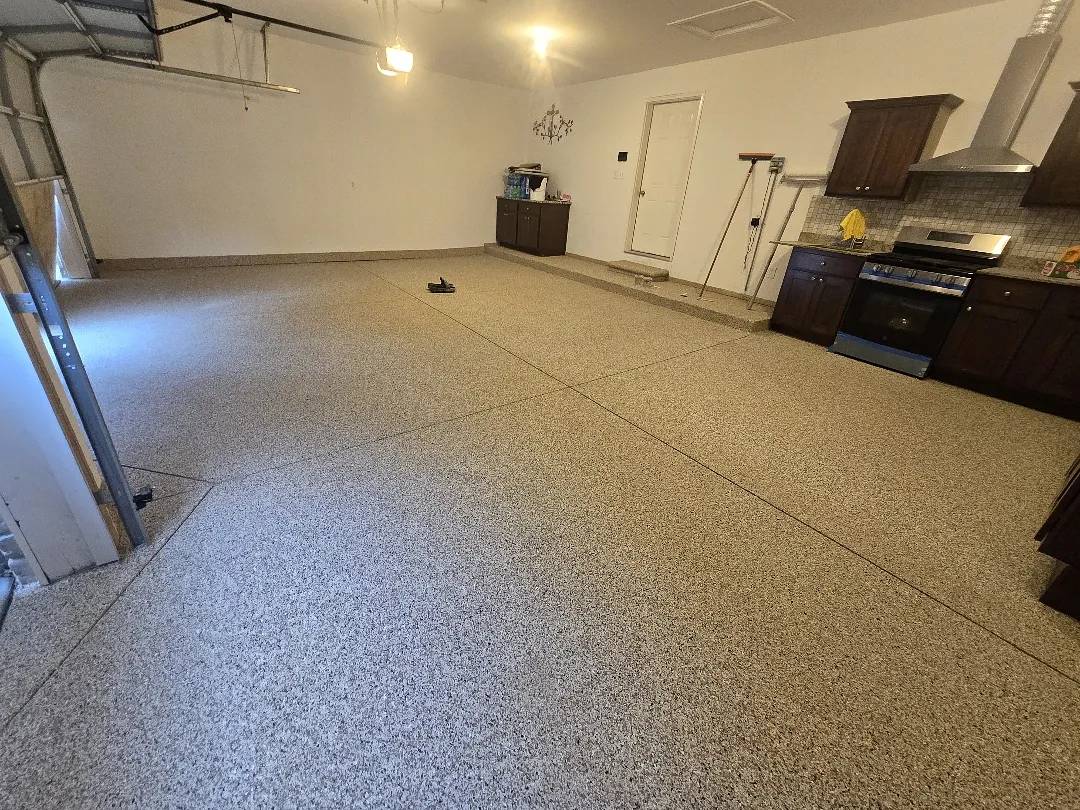
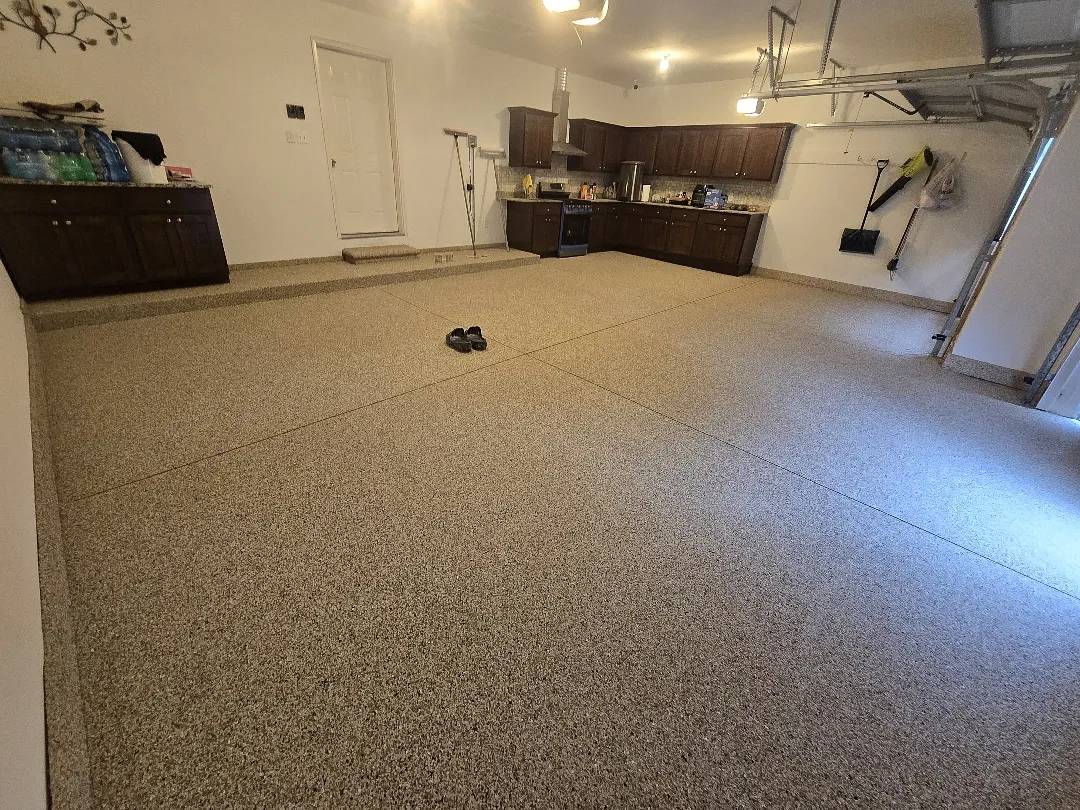
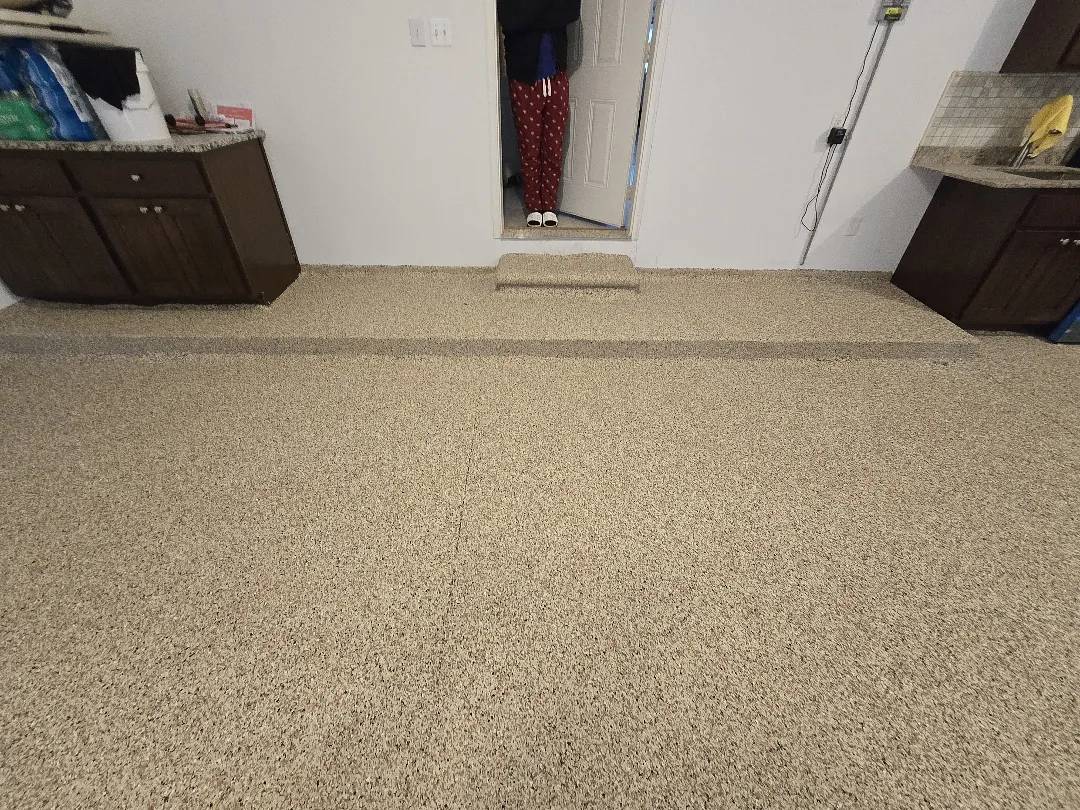
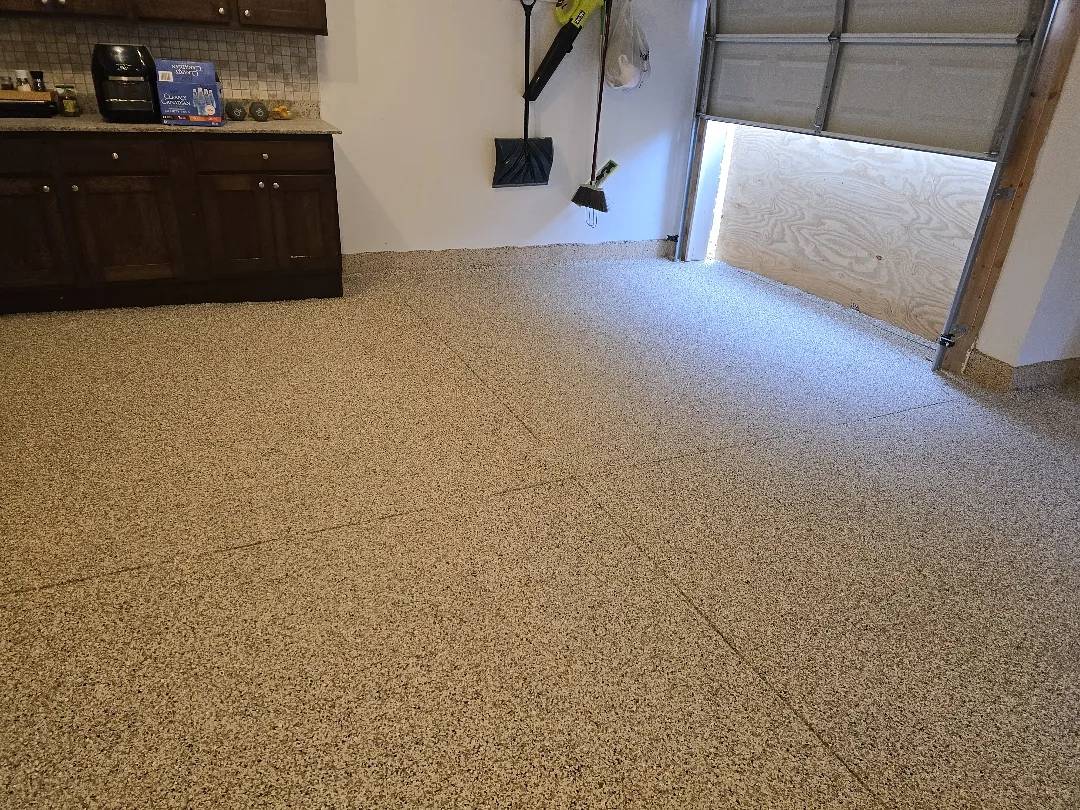
Our crew diamond-ground the full 606 square feet to cut through the curing layer and expose a clean surface below. The grind removed laitance across all panels and opened the pore structure of the concrete throughout. Our team worked the 21 linear feet of vertical surfaces with a hand grinder for full edge coverage.
The rear step-up received the same grind treatment as the main floor. Cabinetry and appliances along the right wall stayed in position throughout. Our crew cut in along the base of the cabinets and appliances by hand before rolling the main field.
No cracking, no pitting, no repairs were needed. The slab went straight from grinding to the coating sequence.
MAC-3.4 Across 606 Square Feet
Our crew applied the polyurea base coat across the prepared slab using the MAC-3.4 system. Our team broadcast flakes into the wet base coat at H-4/5 density — covering the full floor, the vertical surfaces, and the step in one continuous sequence.
H-4/5 sits between an open and a full broadcast. The chip pattern delivers consistent coverage without flooding the surface completely. The warm tone of the selected blend reads well under the overhead lighting this interior relies on — no natural daylight from a side window, just the garage door opening and ceiling fixtures.
Our crew applied the clear polyaspartic top coat with traction additive throughout the horizontal field and over the step surface.
606 Square Feet, Finished
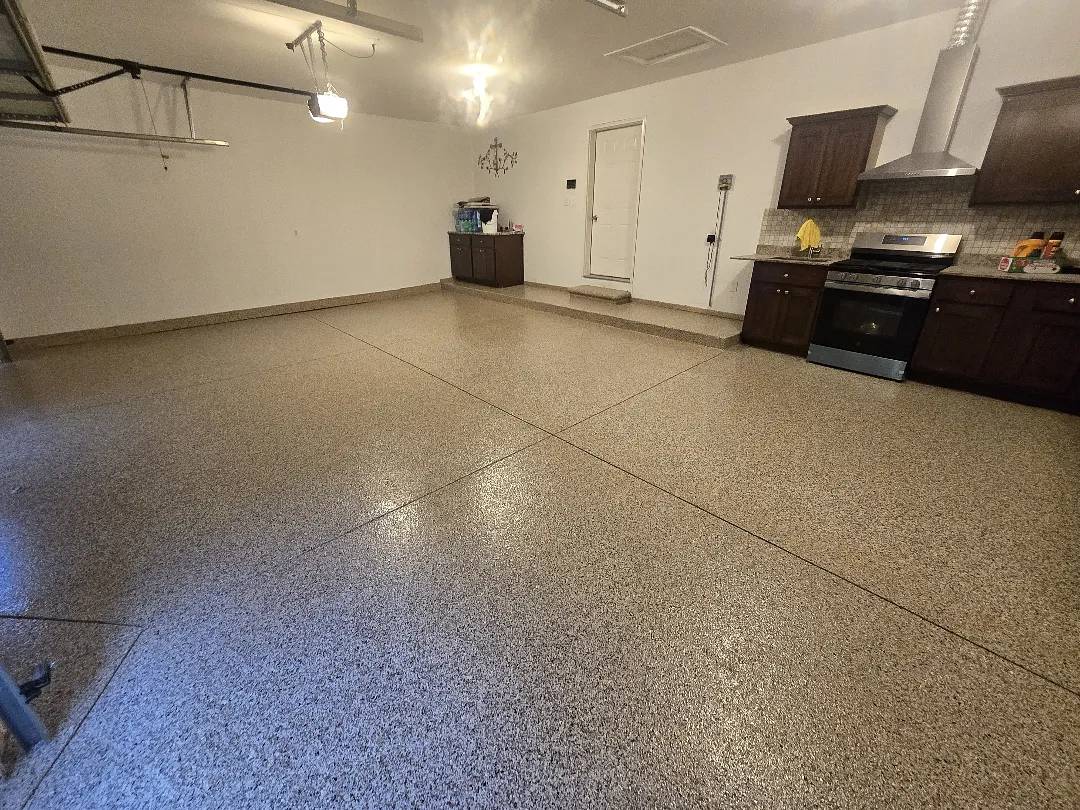
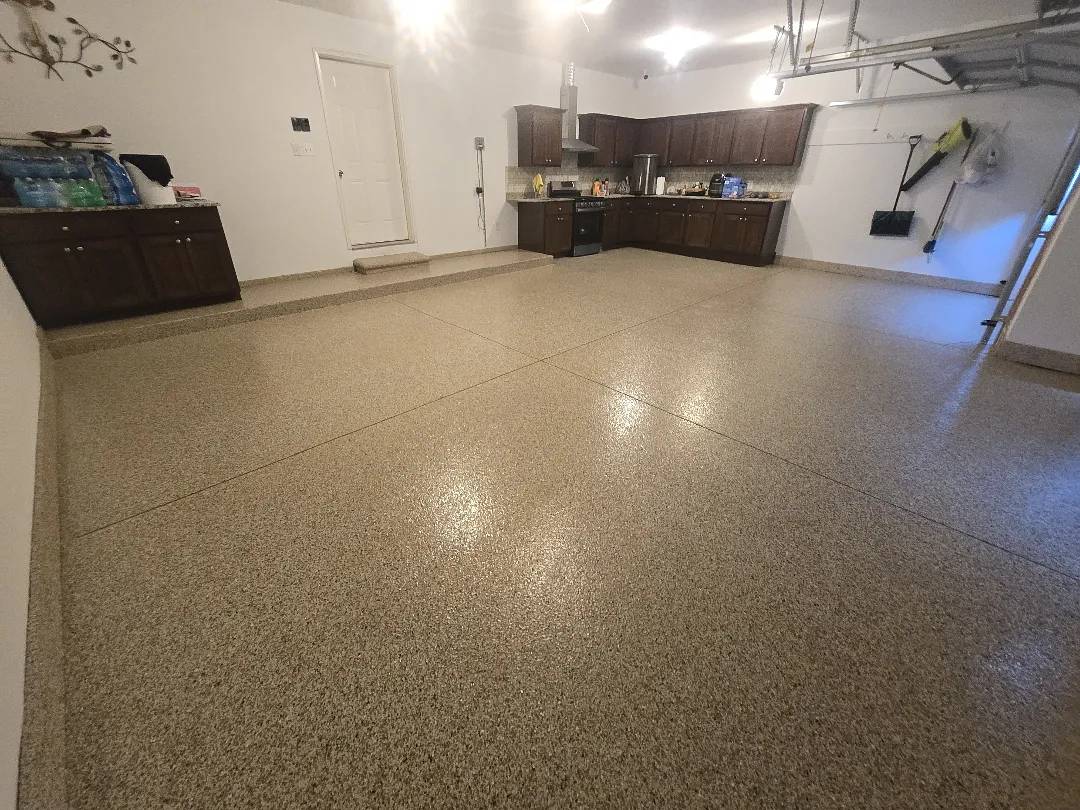
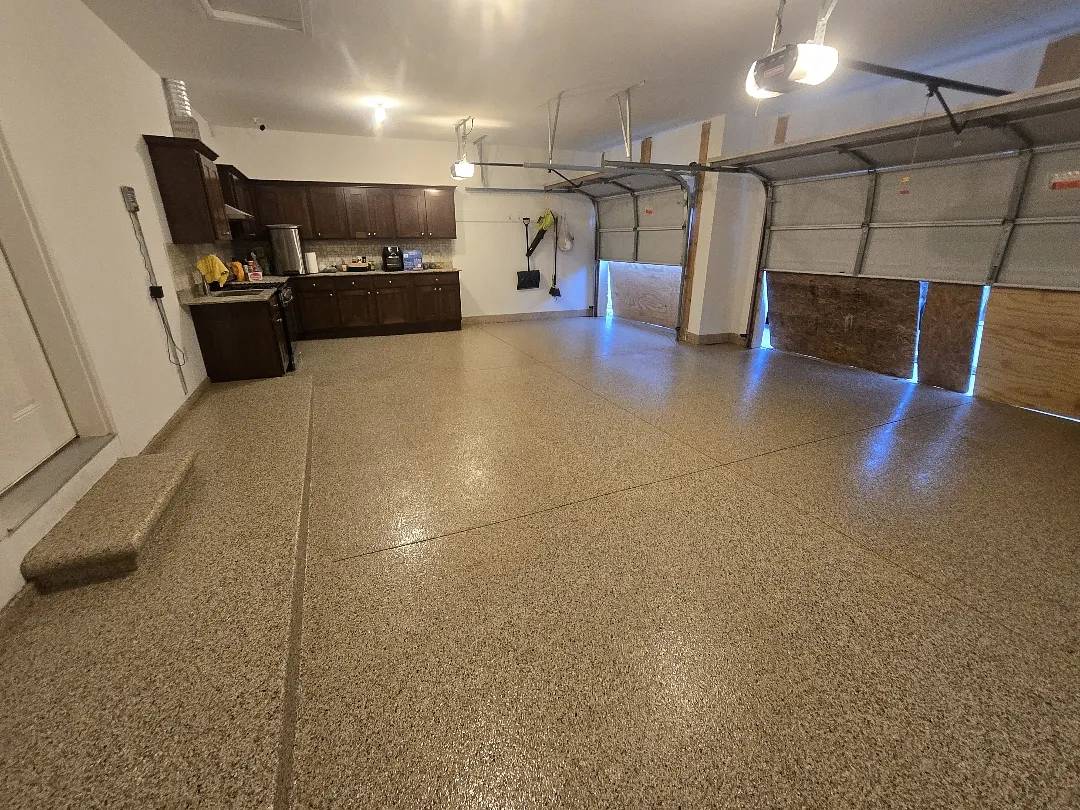
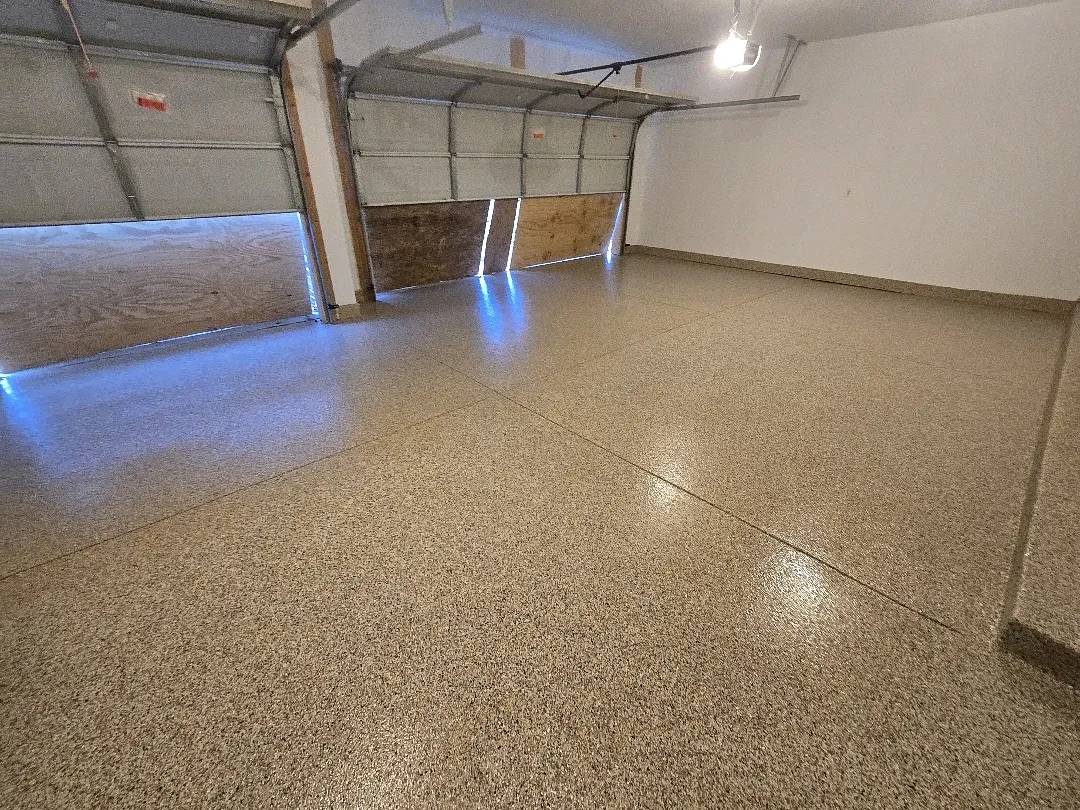
All panels finish at the same flake density from the garage door threshold to the rear step-up. The step carries the same system as the main floor without a visible break. The vertical surfaces run continuously around the perimeter without gaps at the cabinet base or the platform edge.
A brand new slab — no cracks, no staining, no prior coating failures — sealed from day one under a complete MAC-3.4 polyurea-polyaspartic system.
Testimonials
John Paquette
Gary Bauer
Garage Floor Coating
on Park View Court
Park View Court, Sterling Heights, MI
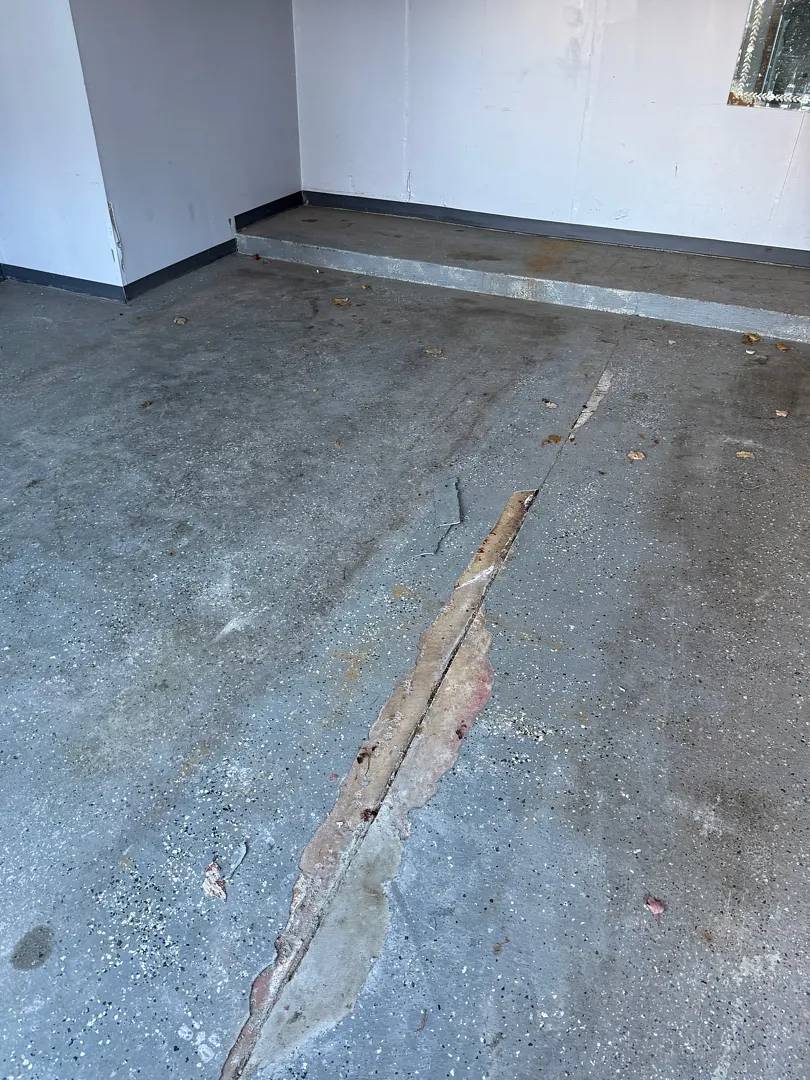
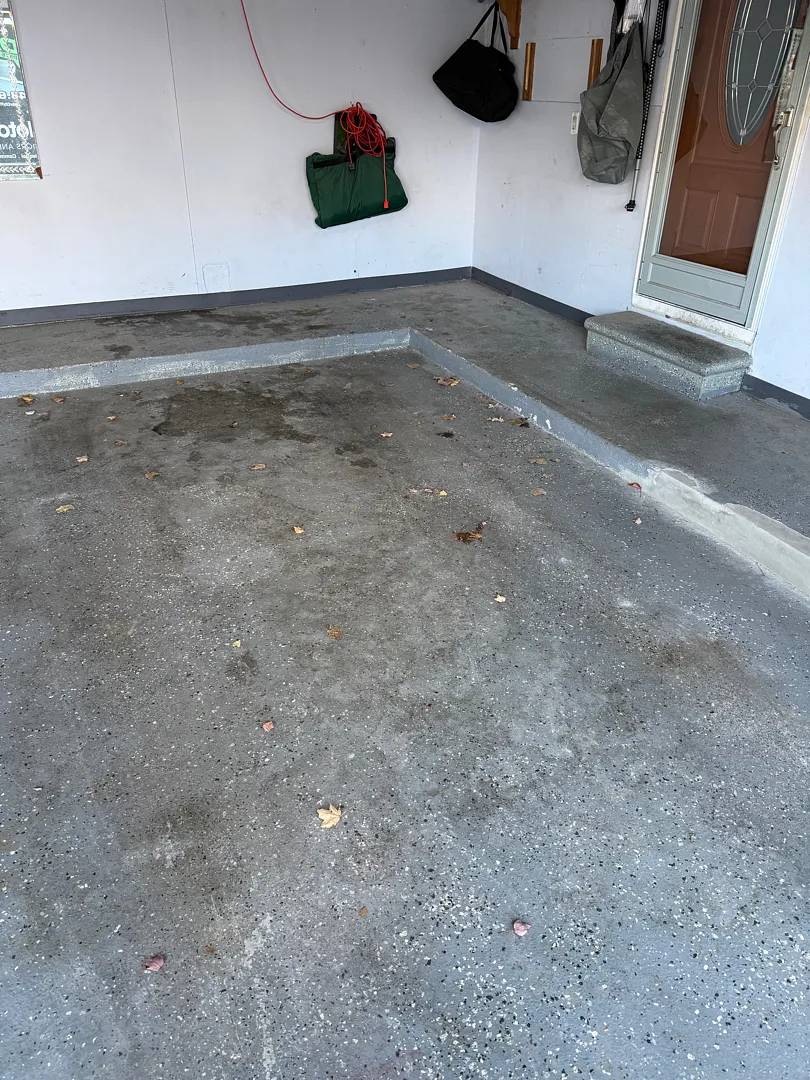
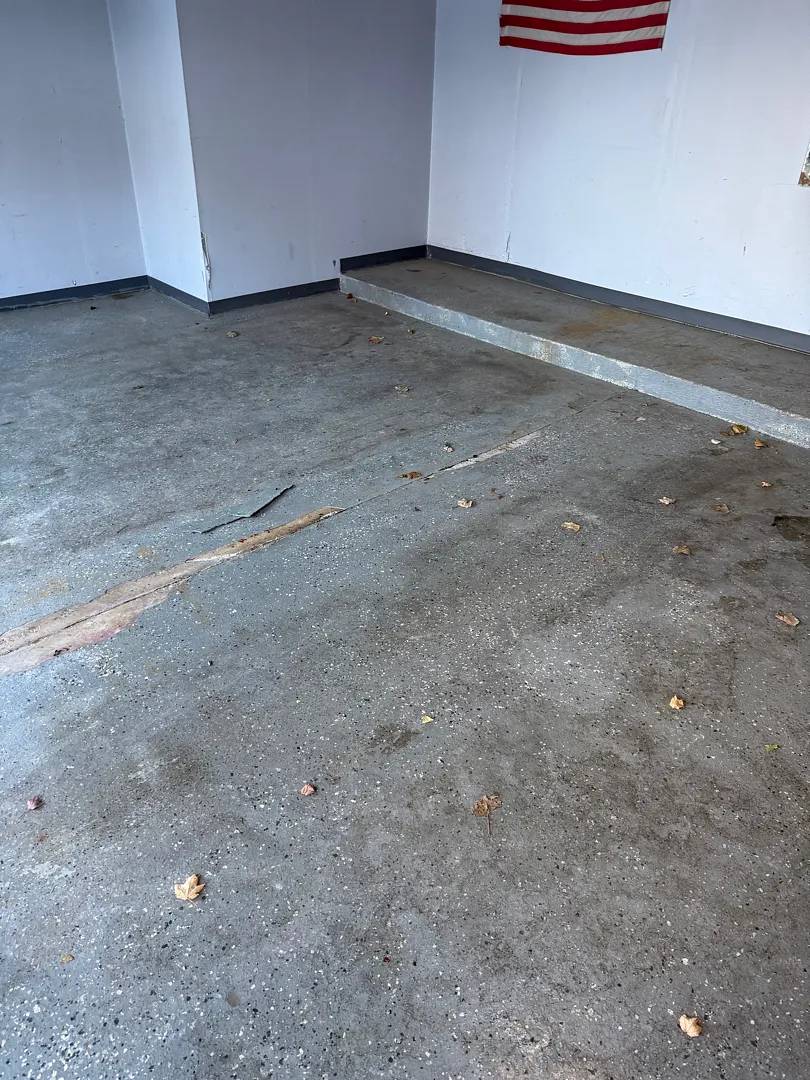

The Park View Court slab had two problems stacked on top of each other. A DIY epoxy coating had been applied at some point and had failed across the full floor — worn through, delaminating, and providing no meaningful protection to the concrete below. Beneath it, the slab showed heavy pitting throughout. A large diagonal crack with an old filler repair ran across the mid-section, the filler buckling and separating from both sides of the seam.
503 square feet. 40 linear feet of vertical surfaces. One concrete step. A slab that needed full DIY coating removal, structural repair, and two grinding passes before any new system could go down.
What the DIY Epoxy Left Behind
DIY epoxy products fail for a predictable reason. They rely on acid-etching instead of mechanical grinding for surface preparation. Acid-etching does not open the pore structure of the concrete the way diamond grinding does. The bond is shallow, and vehicle traffic, Michigan freeze-thaw cycles, and fluid exposure break it down over time.
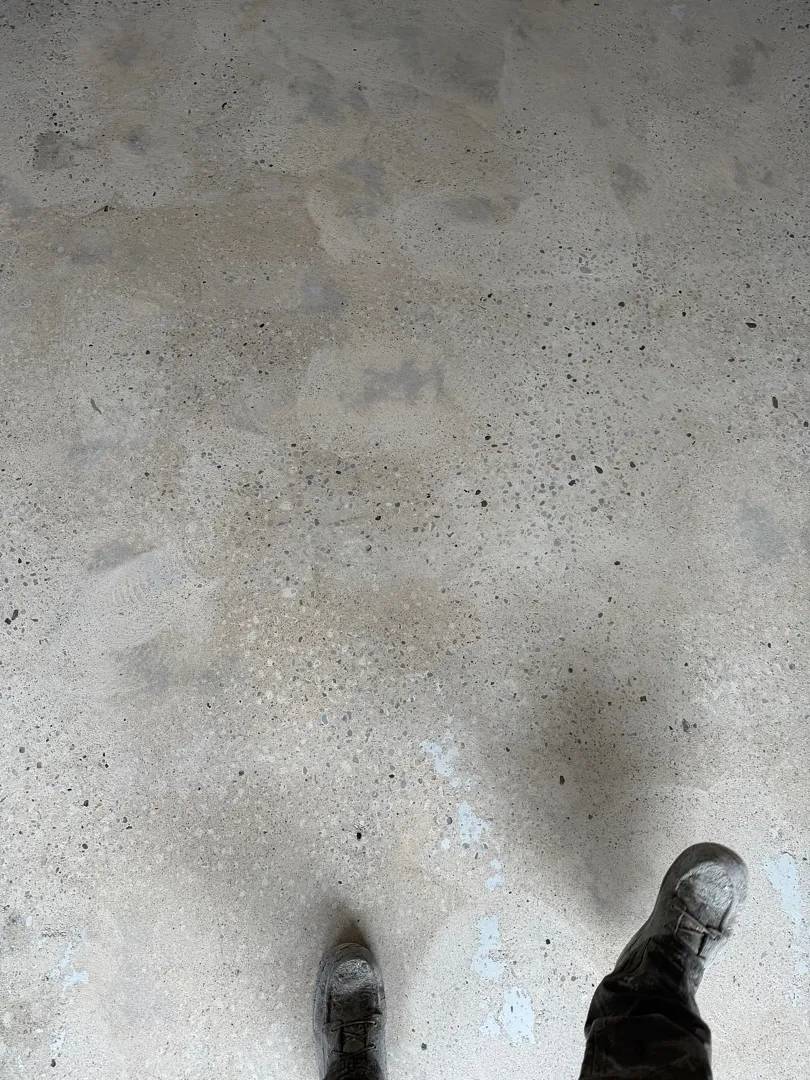
When the epoxy fails, it doesn’t fail cleanly. It leaves residue across the surface that must come off completely before any new coating can bond. At Park View Court, that residue covered all panels — patchy, worn through in the vehicle tracks, and bonded just enough to require full mechanical removal.
First Grind — Removal and Exposure

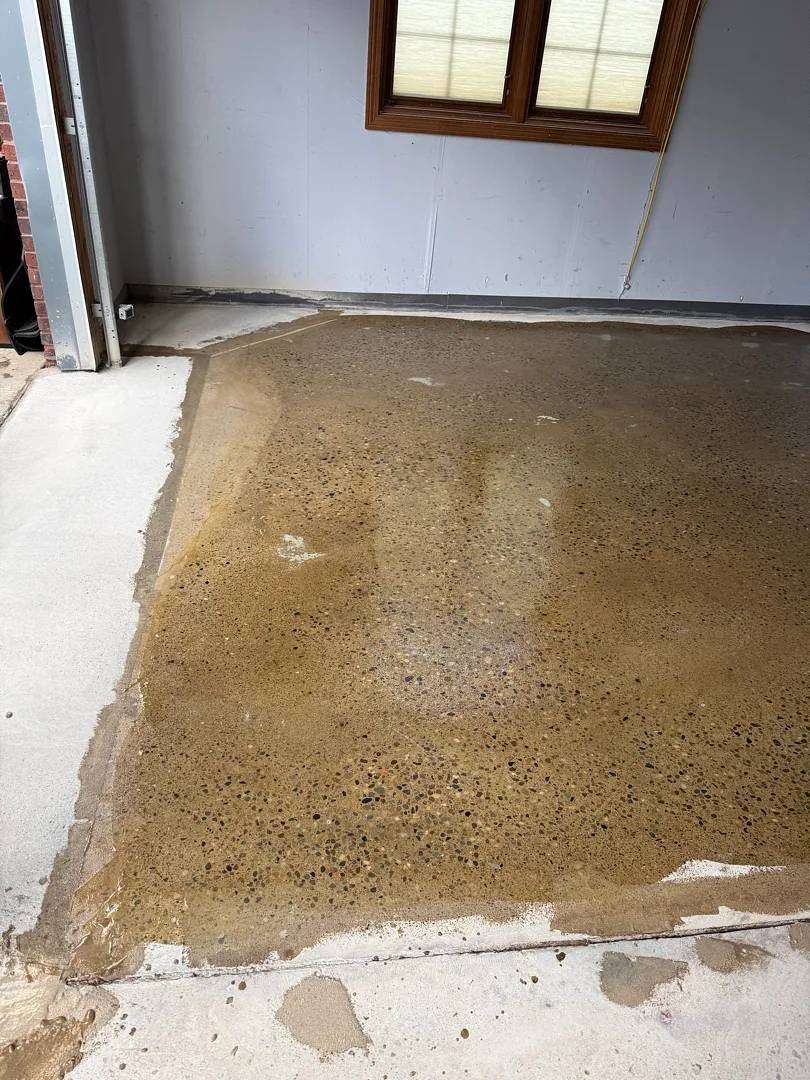
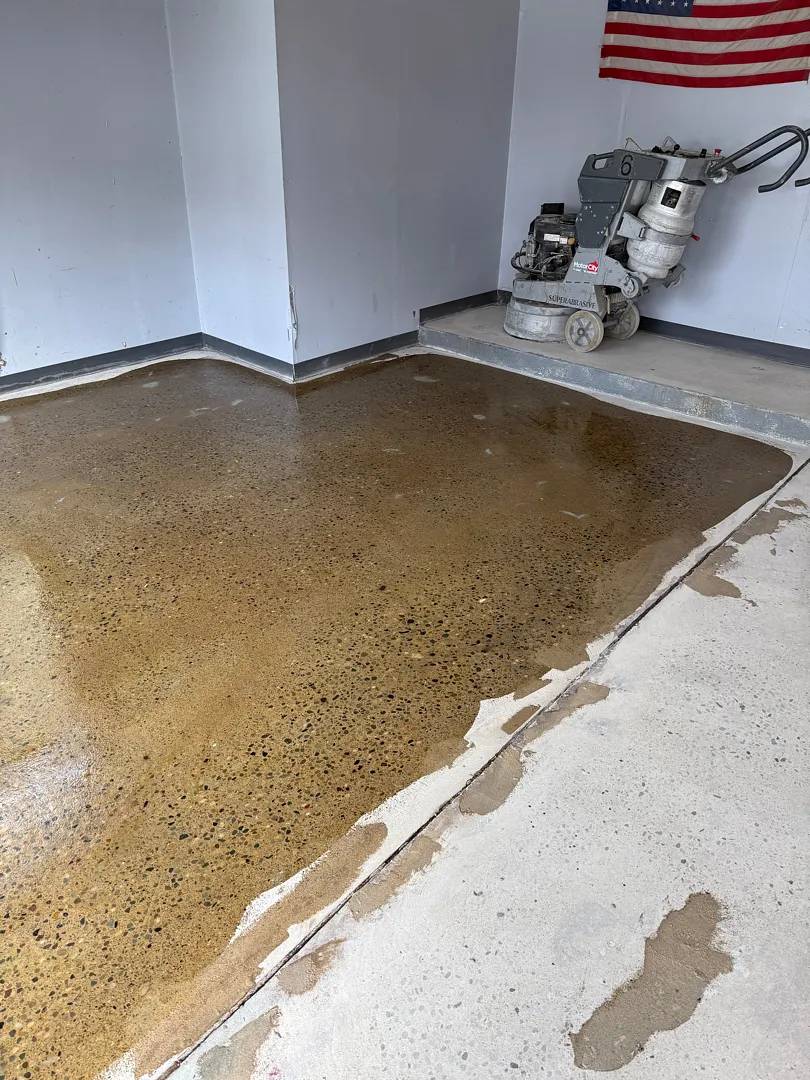

Our crew diamond-ground the full 503 square feet to strip the DIY epoxy and expose raw concrete below. The grind cleared the coating residue across all panels and revealed the full extent of the damage underneath.
Heavy pitting spread across both slab sections. The diagonal crack confirmed the old filler repair had failed along its entire length. The 40 linear feet of vertical surfaces received hand grinding for full edge coverage. Our team vacuumed the floor after the first pass and assessed every zone before repair material went down.
Crack Repair and Full-Slab Mender Flood
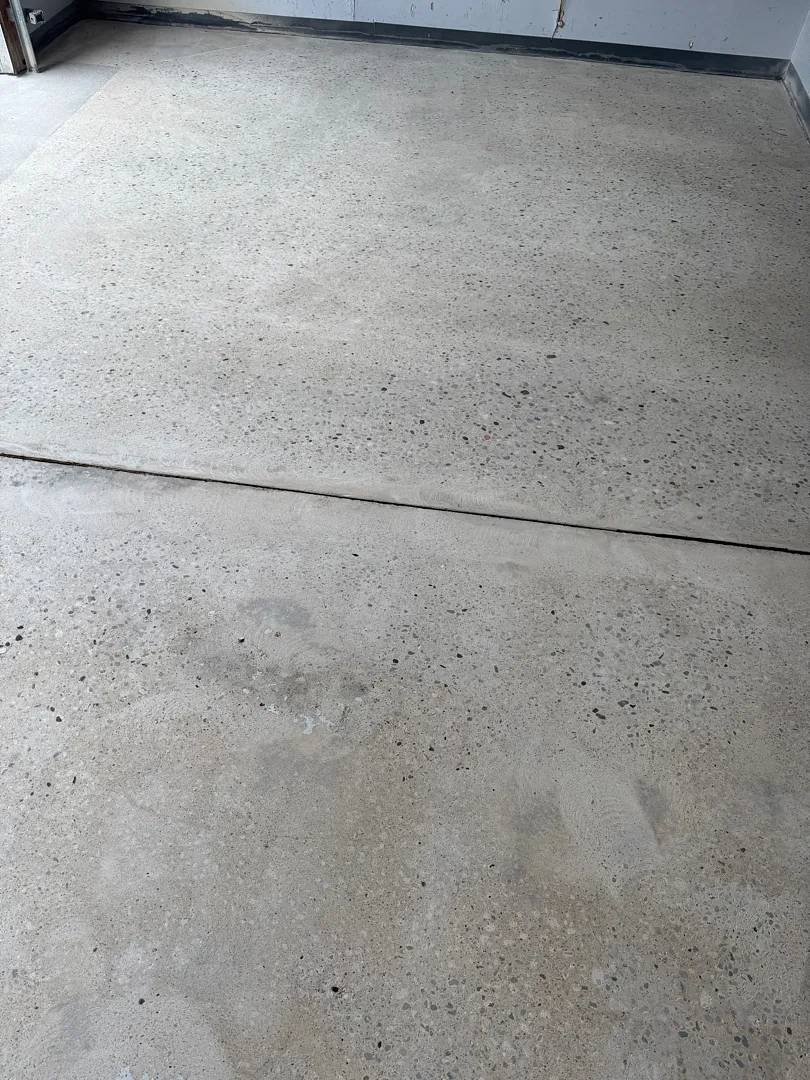
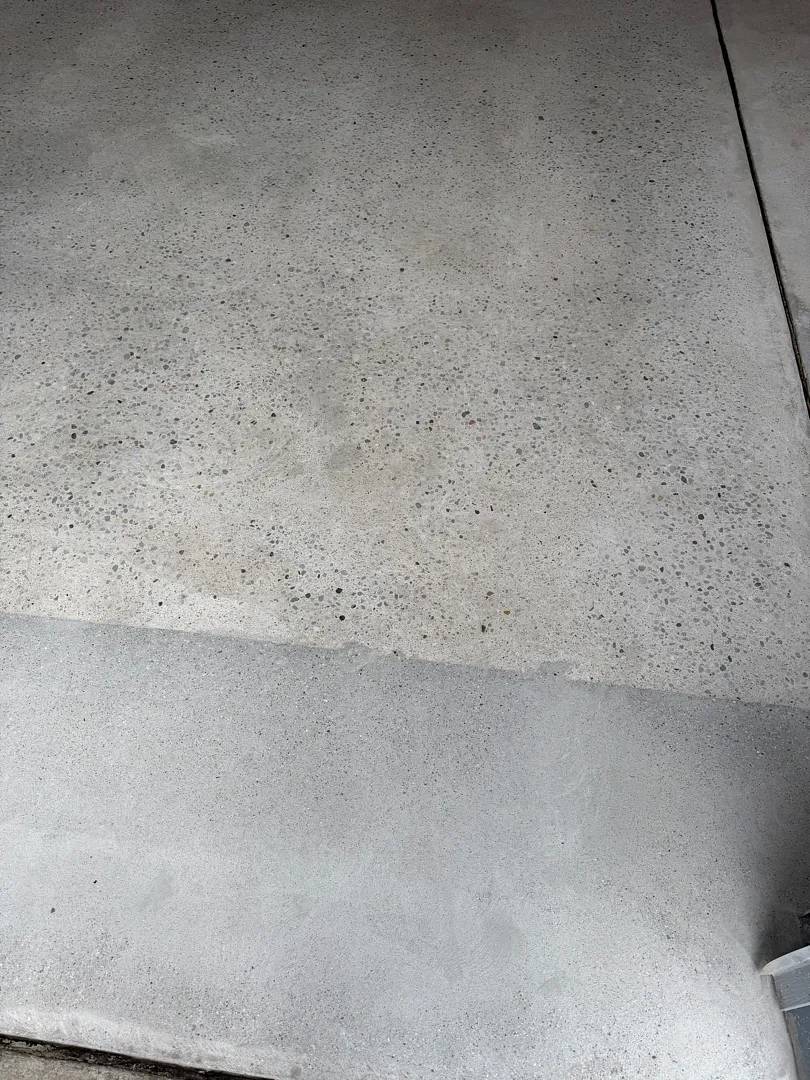
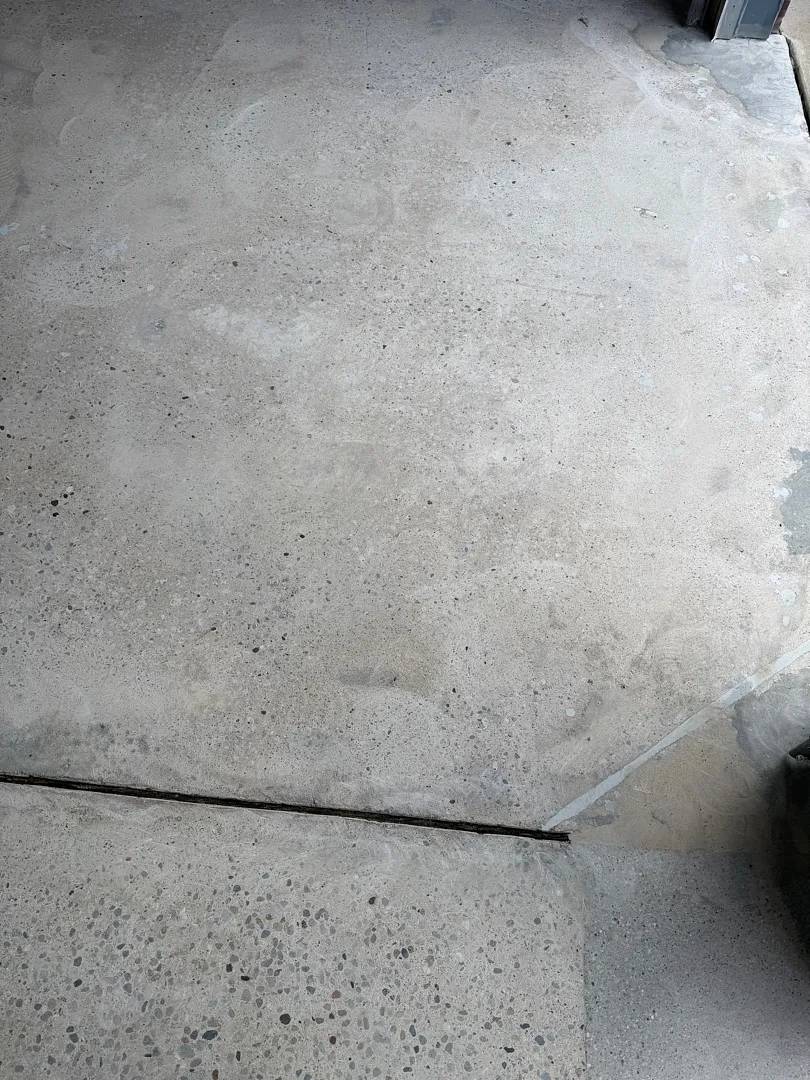
The diagonal crack required the old filler to be fully removed before new material could seat. Our crew cleared the seam and packed it with flexible polyurea filler to bridge the joint properly.
The pitting across the slab was too widespread for spot treatment. Our crew flooded the full 503 square feet with Mender epoxy. The compound flowed into every void and pit across both panels, filling each one from the surface down. Our team spread and leveled the Mender and allowed it to cure fully before any further work.
Second Grind — Leveling and Profile
After the Mender cured, our crew made a second pass with the diamond grinder across the full slab. This pass knocked the cured repair material flush with the surrounding concrete and brought both panels to a consistent surface profile.
Our team vacuumed the floor a second time and confirmed the surface was flat, clean, and coat-ready throughout. The step received the same two-grind sequence on the tread and riser.
Stoney Creek on 503 Square Feet
Our crew applied the MC-2.9 polyurea base coat across the prepared slab. Our team broadcast Stoney Creek flakes at H-4 density into the wet base coat in full coverage across the floor, the 40 linear feet of vertical surfaces, and the step.
Stoney Creek carries cool charcoal, mid-grey, and white chips. Against the white drywall walls of this garage, the contrast is clean and direct. H-4 density lets the chip pattern breathe — coverage is consistent but not completely closed across the surface.
Our crew applied the clear polyaspartic top coat with 36-grit traction additive throughout the horizontal field and over the step. 36-grit is the coarsest profile in the range — appropriate for a floor that will see regular vehicle and foot traffic year-round.
Two Grinds, One Flood, One Finished Floor

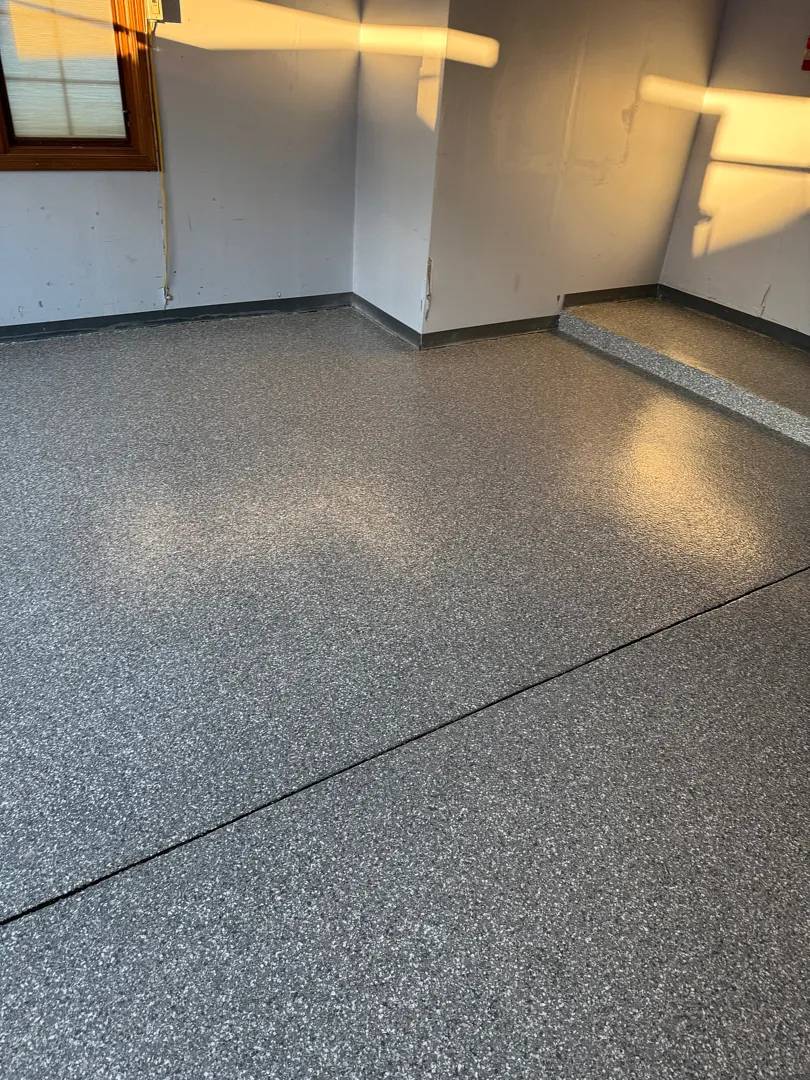
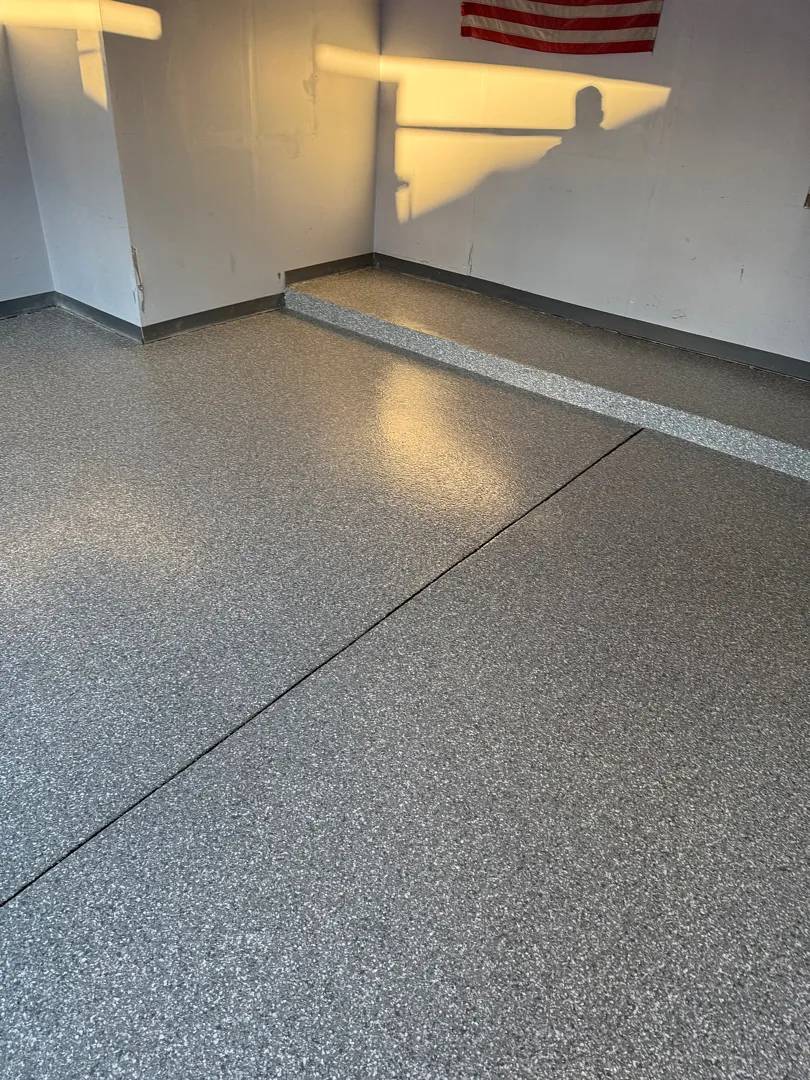
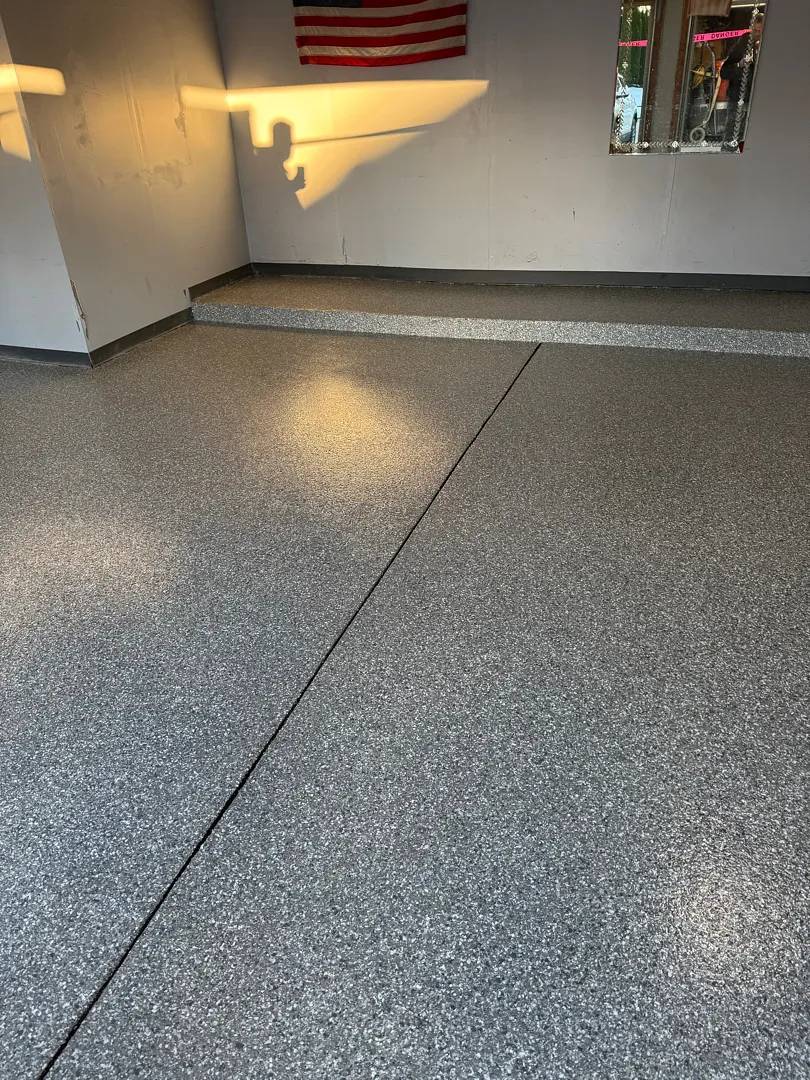
The diagonal crack is sealed. The pitting that covered both panels is gone. The DIY epoxy residue is gone. The step carries the same Stoney Creek finish as the main floor from tread to riser without a break.
All panels read at the same flake density from the garage door threshold to the rear wall. A slab that required more prep work than most — full coating removal, crack repair, full-slab Mender flooding, and two grinding passes — is now protected under a complete MC-2.9 polyurea-polyaspartic system.
Testimonials
Jay Hawreluk
Rob Nash
What These Sterling Heights Slabs Actually Needed
Diagonal cracking that needed two grinding passes, a fully failed epoxy coating, two layers of peeling paint, and an oil stain that had soaked into the slab — the case studies on this page trace back to garages that had gone years without attention, typical of Sterling Heights’ mix of established subdivisions and newer construction. Here’s what that kind of slab requires, from diagnosis through the finished coat:
If you want the details before deciding, these guides below break it down:
Why the old epoxy was failing in the first place — at the Ashton Drive property, a full-slab epoxy coating had failed everywhere, chipping and lifting across all four panels and the rear steps; this breaks down the prep shortcuts and product limits that cause that kind of failure.
Why the prep work matters more than the coating itself — our CFO Jake Lowry walks through the diamond-grinding and crack-repair process behind every job on this page, from the double grind pass at Halleck Drive to the MR-50 oil extraction at Jason Court.
Recognizing when a slab needs recoating — failing paint and oil staining are two of the signs covered here, both present at Flagstaff Drive before our crew got to it.
For the full side-by-side breakdown using these Sterling Heights projects as evidence, see our epoxy garage floor coating in Sterling Heights vs polyurea comparison.
Serving Sterling Heights & Macomb County
We install polyurea-polyaspartic garage floor coatings across Sterling Heights and throughout Macomb County — including Warren, Utica, Fraser, and Troy. No matter where your garage sits, you get the same durable dual-coat system, one-day installation, and lifetime warranty.
FAQ
Find answers to your technical questions about polyurea-polyaspartic garage floor coatings.
Extensive diagonal cracking requires two grinding passes and a flood coat because individually packed cracks still leave an uneven surface that a finish coating would telegraph. At the Halleck Drive property in Sterling Heights, a diagonal crack ran across the front panels into the mid-section with branching secondary cracks throughout. Our crew ground the slab once to open the surface and expose the full crack network, packed the cracks with cementitious patching compound, then applied a flood coat to level every panel. A second grind pass knocked the patch material flush.
A failed epoxy coating needs full removal because residual epoxy left on the surface prevents the new system from bonding. At the Ashton Drive property in Sterling Heights, a previous epoxy coating covered the full slab and had failed throughout, chipping, delaminating, and lifting across all four panels and the rear steps. Our crew ground the entire slab to strip the coating and expose the concrete beneath, then filled the cracks the grind revealed.
Two layers of failing paint require more grinding passes because each layer must be cut through completely before clean concrete is exposed. At the Flagstaff Drive property in Sterling Heights, the garage slab carried two layers of red paint, both chipping and lifting across all four panels. Our crew diamond-ground the full slab and the 33 linear feet of vertical surfaces to cut through both layers down to bare concrete, and oil contamination found beneath the paint was drawn out with MR-50 extraction solution.
Oil-stained concrete needs MR-50 extraction because oil penetrates the pore structure of the slab, and grinding alone passes over surface oil without removing what has soaked in. At the Jason Court property in Sterling Heights, an oil stain occupied the center of the front panels. Our crew applied MR-50 oil extraction solution to the contaminated zones, allowed it to dwell, then vacuumed the floor and confirmed the zones were clear.
For deeper technical questions about our surface preparation methods, moisture diagnostics, and material science, visit our Garage Floor Coating Technical Guide
The MotorCity Advantage
MotorCity Floors and Coatings specializes in professional-grade polyurea-polyaspartic systems. These dual-coating systems are replacing epoxy products constrained by older chemistry. Our systems deliver strong chemical resistance, superior durability, greater flexibility, shorter cure times, and proven UV stability that maintains color for decades. We back every installation with an industry-leading warranty.
Each project includes thorough diamond grinding preparation, flexible polyurea crack repair, and careful application to ensure consistent coverage across the full slab. When cracking is extensive — as our crew found at the Halleck Drive property in Sterling Heights — we grind twice: once to open the surface and expose the full crack network, and again after repairs cure to bring the patched zones flush with the surrounding concrete. Every repair is addressed at the root before any coating goes down.